The Wind Armor set in Zelda: Tears of the Kingdom lets you glide farther and move faster through the skies, but finding each piece takes some work. Here’s where to locate the armor and how to claim its powerful bonus.
You can technically get the Wind Armor in Tears of the Kingdom via amiibo, but if you don’t have the right figurine(s), you can find it the old-school way. Our Tears of the Kingdom Wind Armor guide will help you find all three pieces of the Wind armor set: the Cap of the Wind, the Tunic of the Wind, and the Trousers of the Wind.
The location of each of these pieces of armor can be found in Old Maps, found in chests across the Sky Islands above Hyrule. These are helpful if you’re playing the game without a guide, but are by no means essential if you just want to beeline it over to the Wind Armor and skip the busywork.
Cap of the Wind location
The Cap of the Wind can be found inside a chest hidden within the Coliseum Ruins in the Hyrule Field region. To access it, defeat the Lynel that guards the arena, then open the chest that appears afterward. The item may also be obtained through an Amiibo related to The Wind Waker, offering the same piece of armor as a random drop. Once collected, the cap provides the first part of the Wind Armor set, known for boosting movement in windy areas.
The first such piece can be found under Davdi Island on the far east of Hyrule. We got there via the Tingel Island Chasm, shown below.
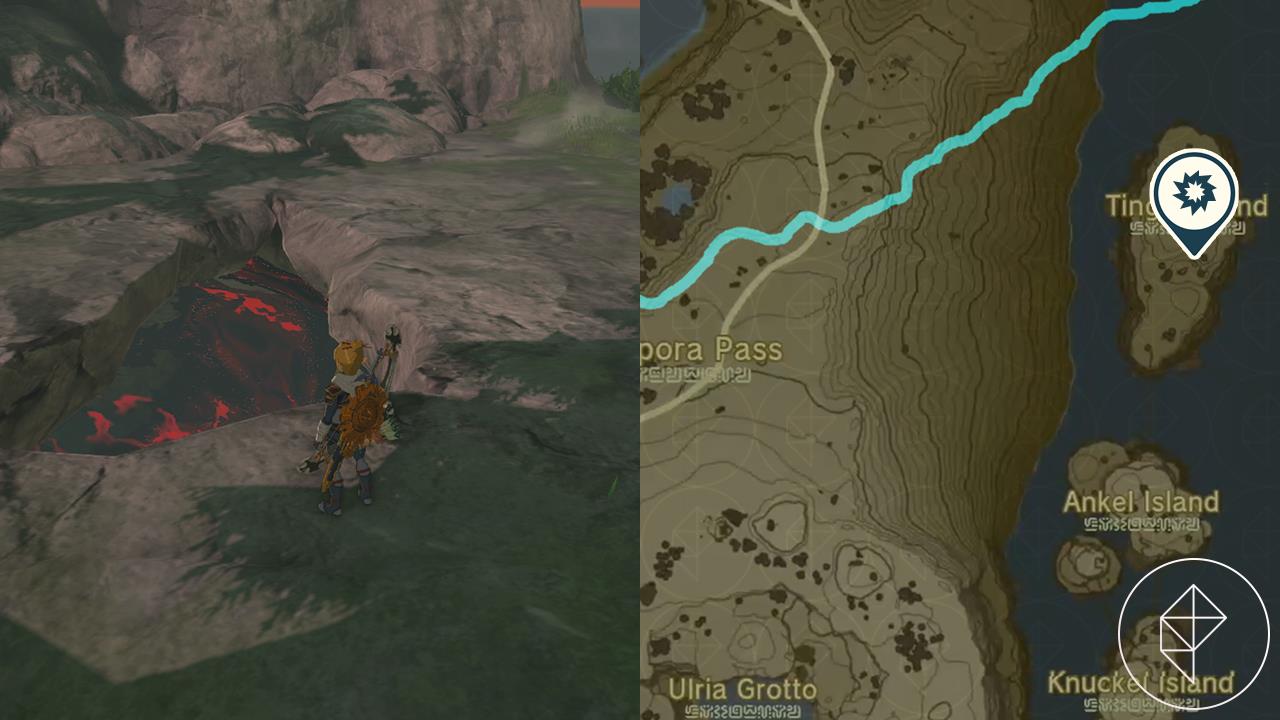
This cluster of islands is broken off from the mainland of the Hyrule Depths, and there’s no lightroots on this side. The closest lightroot is Sisinatag Lightroot on the mainland, but teleporting there will not help you access the Tingel Island Depths.
If you didn’t light up Sisinatag Lightroot, there is a trick that allows you to see where you’re going. If you open your map, you’ll be staring at the graph-paper background of the missing map. Tap the up button on the D-pad to see the ground-level map. If you now back out, you will see the Hyrule map in your mini map like so:
We used this to both orientate ourselves and find the bridges between islands – bizarrely, you have to follow the same path to get to Davdi Island underground!
Head to the southernmost point of this chamber and you’ll see a destructible wall. Either go to town on it with a hammer or use Yunobo to smash it down.
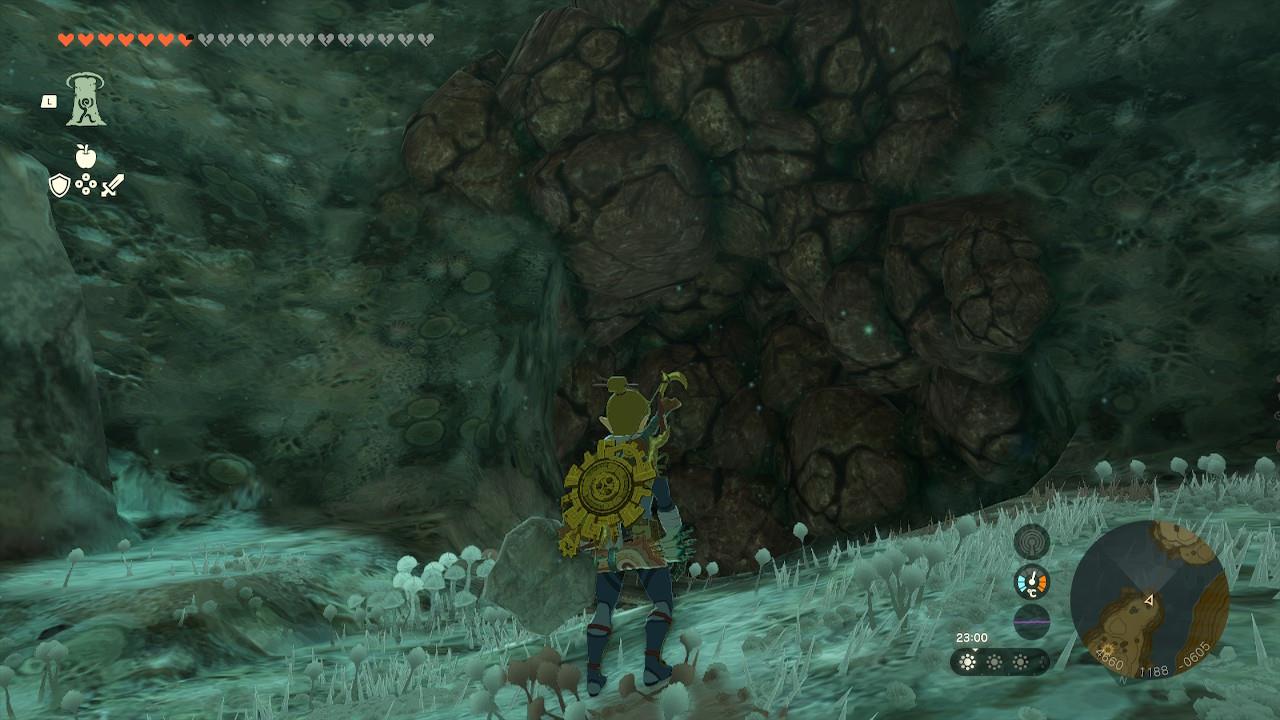
Once it’s destroyed, go through the corridor that mirrors the bridge above.
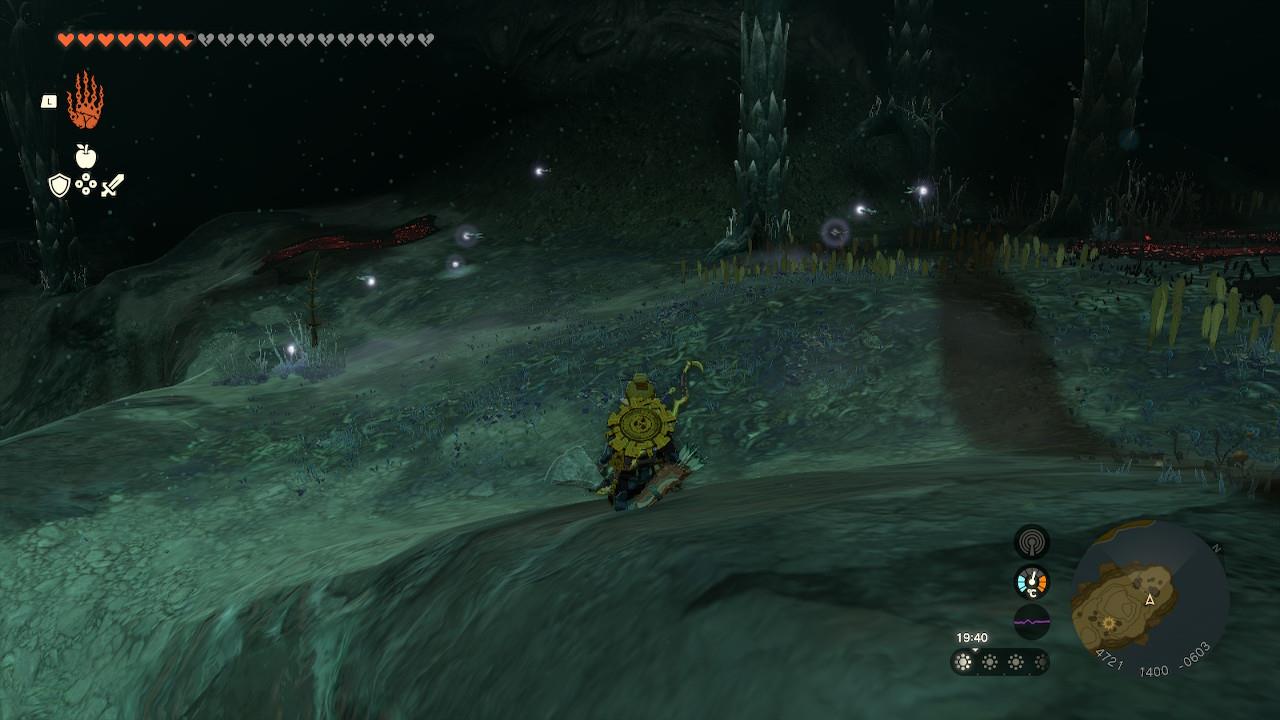
When you see the large poe, you’ll be at the end of the corridor – stop and fire off some seeds to light the way. The chamber below (and below Ankel Island) has a couple of low-level enemies (Keese, etc.) that are more of a nuisance than a threat. Get past them and look for the next wall at the coordinates (4669, 0989, -0670).
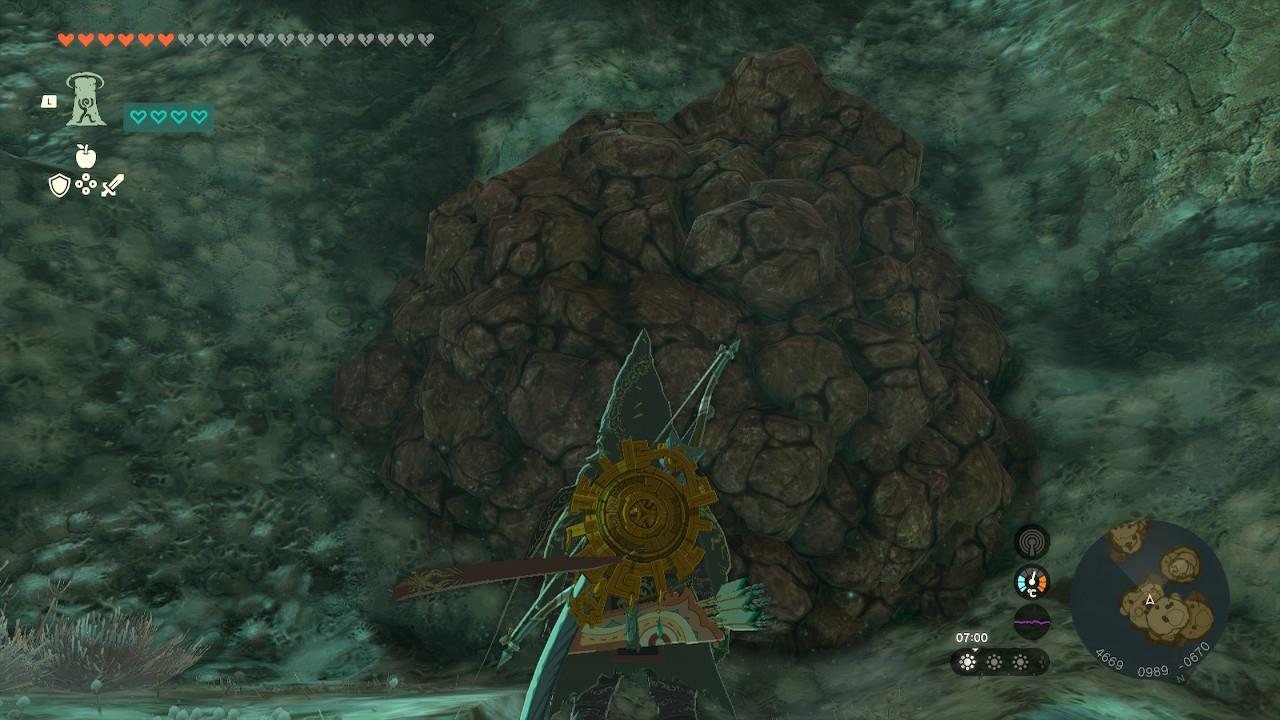
Do your thing, get through the corridor, and make your way to chamber three: Knuckel Island. This contains the last wall you need to break to reach the goal. Stop at the edge of the cliff, fire off some seeds, and look to the right – you should see a similar wall, except this time it’s blue, signifying that you need to hit it that little bit harder. Rather than using all your bomb flowers, just tell Yunobo to wreck it. You’ll need those in a minute.
At last, you should be under Davdi Island. It’s really difficult to miss the chest – something seems amiss.
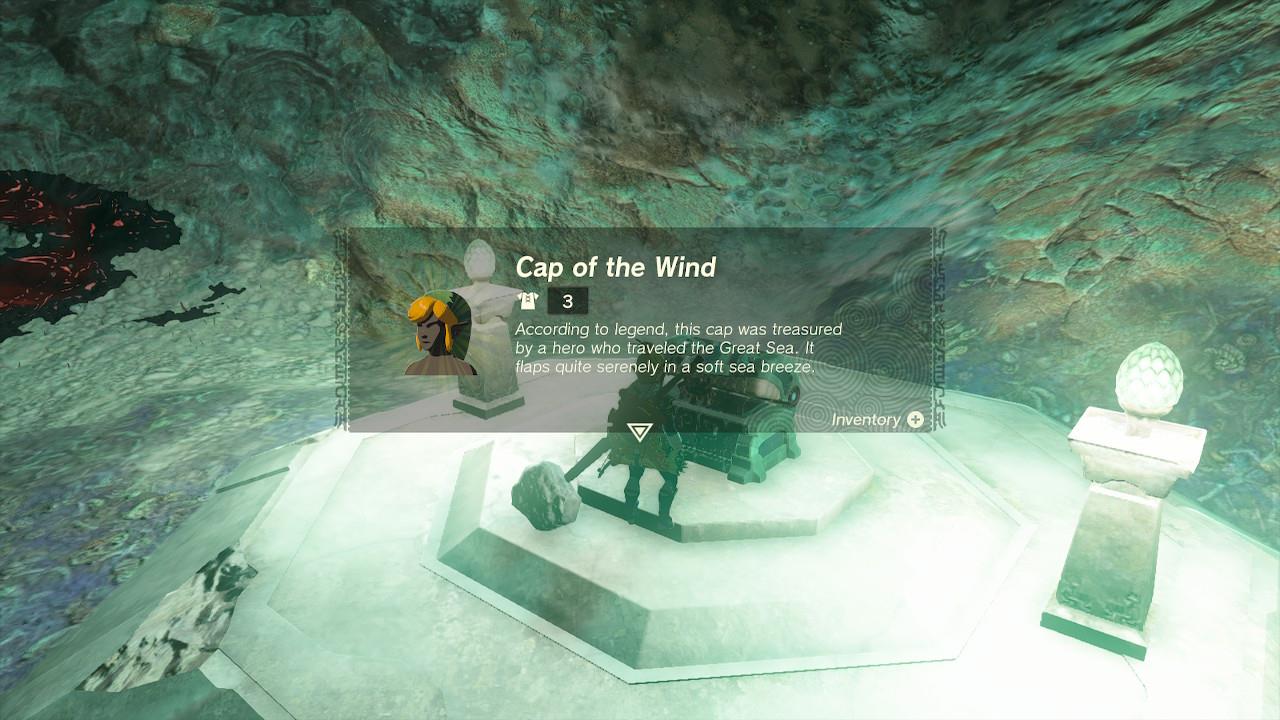
Oh, wait, there it is: Gloom Hands. Bomb flowers and your Sage of Lightning will make short work of this final enemy. Then on down and take your hard-earned loot – the Cap of the Wind, which grants 3 defense.
Tunic of the Wind location
The Tunic of the Wind sits inside a chest on the southernmost floating island in the Hebra Sky region, northwest of the North Necluda Sky Archipelago. Fast-travel to the Pikida Stonegrove Skyview Tower, launch upward, and glide northwest toward the large stone platforms hovering above Hebra Peak. Land on the lowest one with a Zonai Wing shrine, then paraglide south to the distant isolated rock topped by a small tree; smash any breakable stone barriers blocking the chest.
Enter the Hyrule Ridge Chasm west of Lindor’s Brow Skyview Tower (north of Mount Rhoam). The closest lightroot is Kataki Lightroot. You will likely run into Koro-nui Lightroot and maybe Sikurukam Lightroot on the way to the armor.
Be aware that there will be a Blue Hinox on your way. You don’t have to fight it, but just know it’s there.
The armor is in Cuho Canyon Mine. You will spot the glow of the dual lamps in the distance, to the right. That’s the chest; aim for that.
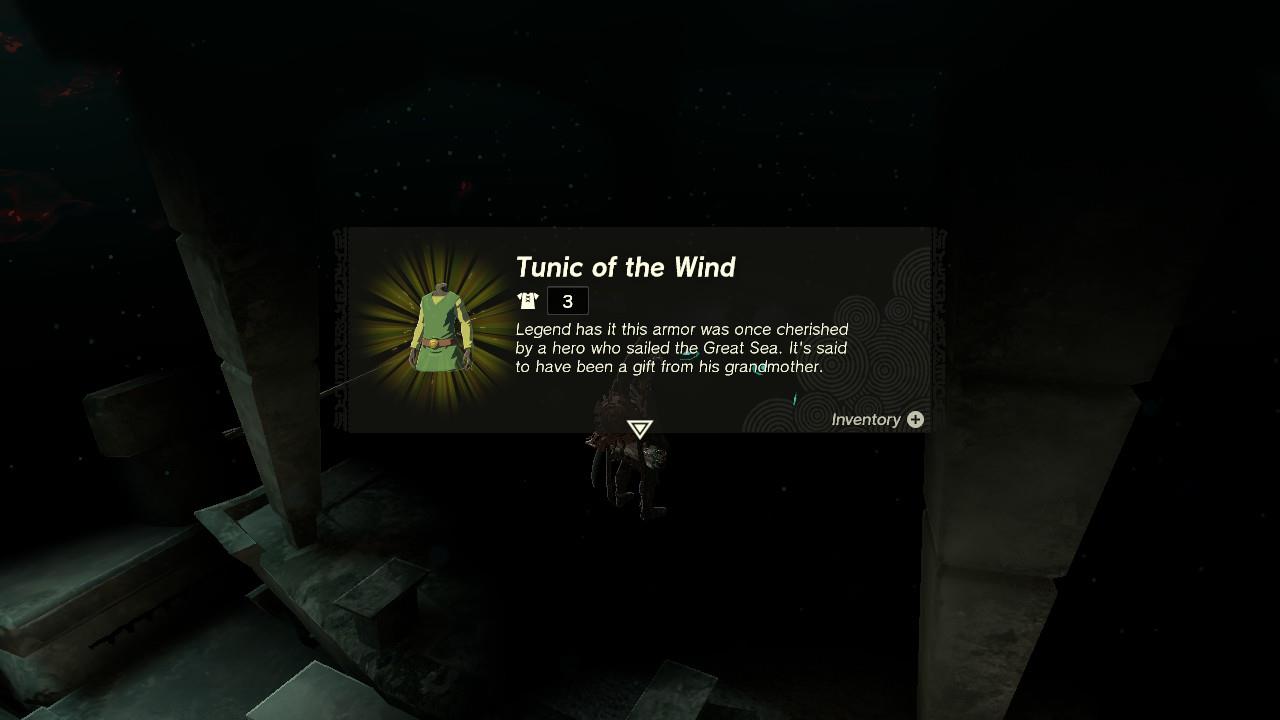
Fortunately, the chests glow faintly in the dark. The Tunic of the Wind grants 3 defense.
Trousers of the Wind location
The Trousers of the Wind can be found inside the Mount Daphnes Well, located west of Hyrule Field. To access the area, enter the well and follow the tunnel until you reach a small chamber with a treasure chest. Open it to obtain the trousers, completing one piece of the Wind Armor set. Having the full set enhances your air mobility and adds the signature Wind Waker aesthetic to Link’s appearance.
The Trousers of the Wind is probably the most complex of the three to get to, so make sure you go into this one prepared. Start at the Rabella Wetlands Skyview Tower and jump into Meda Mountain Chasm to the north. You can descend almost directly on Yikot Lightroot to illuminate the area.
The closest lightroot to the trousers is Kotimab Lightroot.
At this point, it’s good to check where you’re eventually going – the tip of Soka Point underground, which is called the Cresia Pit Mine. If you haven’t hit the lightroot under Eventide Island, you’ll be doing the last bit in the dark, so remember the trick to see the above-ground map underground.
As you make your way to the Cresia Pit Mine, you’ll run into enemies like a Flux Construct 3. Fight them if you want, but they’re easy to avoid.
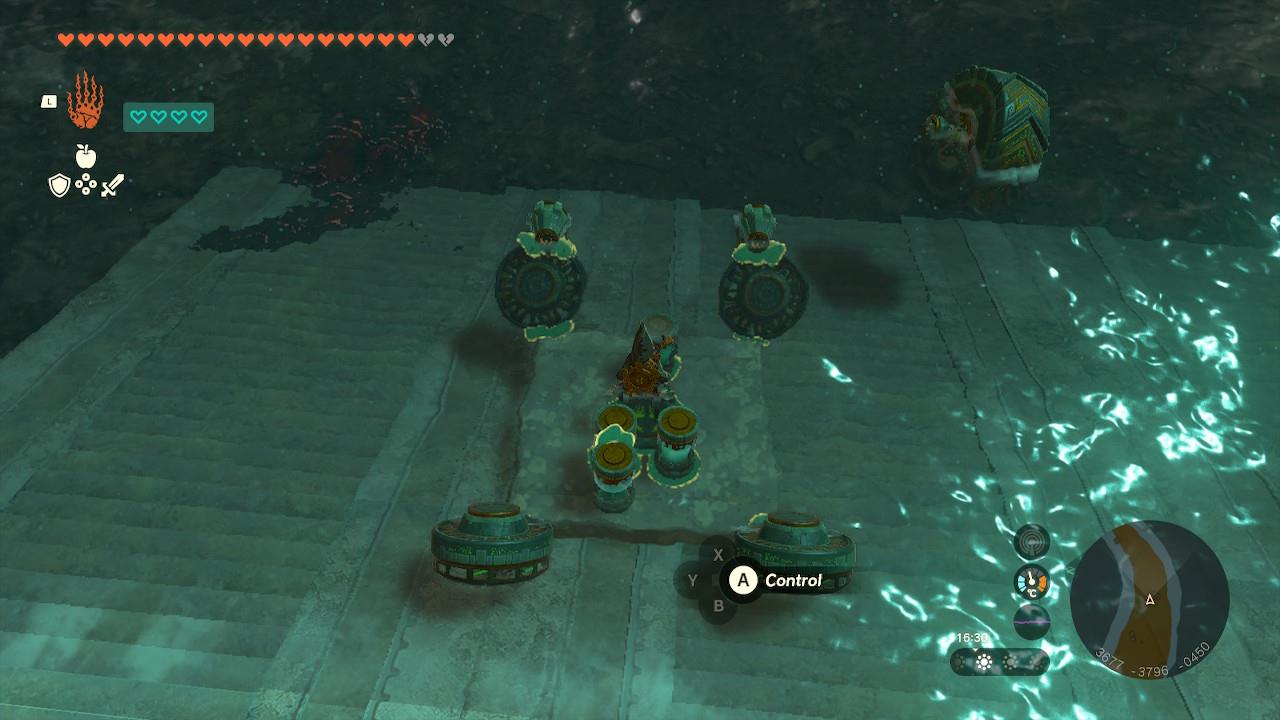
There will be a Zonai repository shortly before the water in Cresia Pit Mine. We made a hovercraft (shown below) to travel over the water. Note the headlights on the front – there’s an Octorok in the water, and you’ll want to see where you’re shooting Yunobo to kill it.
With that Octorok defeated, you can enjoy the leisurely ride over to the chest. When you see the dual lights, you know you’ve reached your goal.
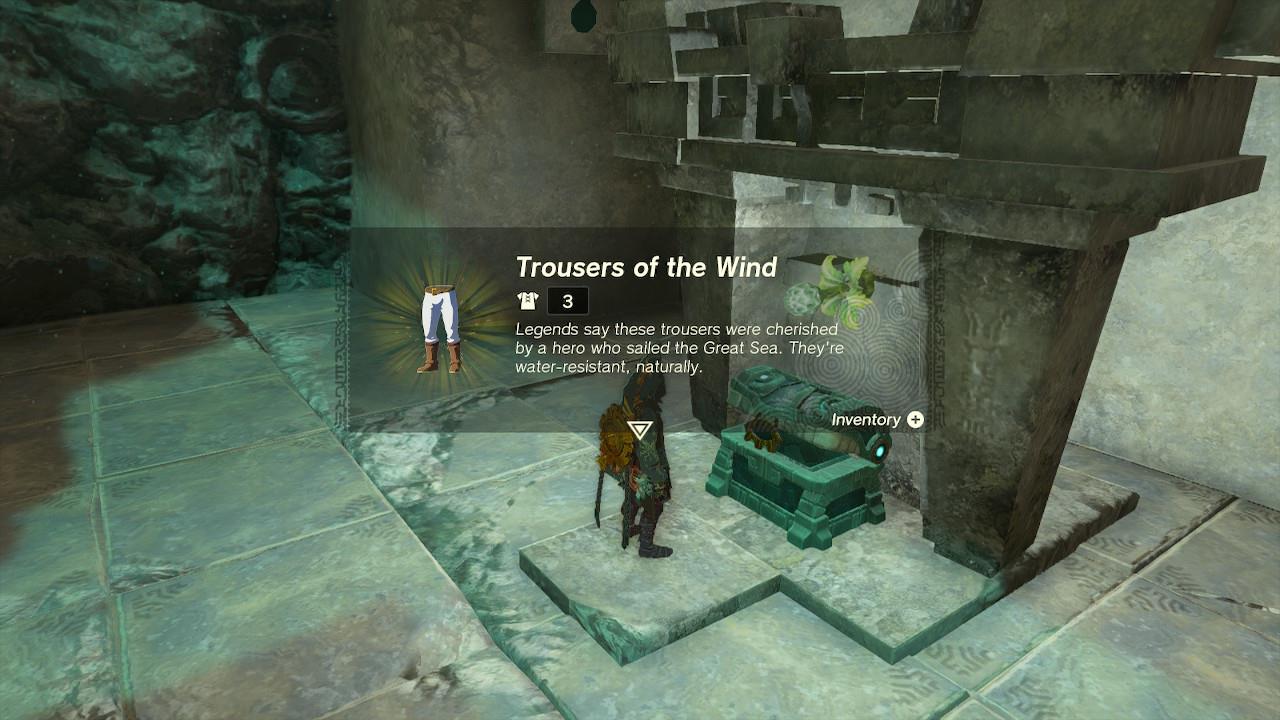
Hop off your hovercraft and nab your loot – the final piece of your outfit: the 3 defense Trousers of the Wind.
Wind Armor upgrade costs and set bonus
Upgrading each piece of the Wind Armor requires specific materials such as Keese Wings, Aerocuda Wings, and various gemstones, depending on the level. The costs increase with each enhancement, but the rewards make it worthwhile. When all three pieces-the Wind Helm, Wind Armor, and Wind Trousers-are worn together, they grant a powerful set bonus that improves aerial mobility and reduces stamina use while gliding, making it easier to stay airborne during exploration or combat.
With all three pieces nabbed, you’ll now have the full set of Wind Armor. At its base level (Level 0), they offer 3 defense each, for a total of 9 defense. The upgrades list for this armor is relatively simple, as each stage requires the same items, just in differing quantities. The Wind Armor grants the Attack Up set bonus when each piece is upgraded twice and equipped, which does exactly what it suggests.
You’ll be able to upgrade the pieces of the Wind Armor at a Great Fairy Fountain, in exchange for the following materials:
- 1-star (5 defense): 5 opal, 1 star fragment, 10 rupees
- 2-star (8 defense): 10 opal, 1 star fragment, 50 rupees
- 3-star (12 defense): 15 opal, 1 star fragment, 200 rupees
- 4-star (20 defense): 25 opal, 1 star fragment, 500 rupees
To upgrade this set fully, you’ll need 165 opal, 12 star fragments, and 2,280 rupees.
Once you’ve found all three pieces of the Wind Armor, consult our list of all armor sets and set bonuses to see what to find next, or check out our recommendations for the best armor.
Where to find each Wind Armor chest in the Depths coordinates
The Wind Armor set chests in The Legend of Zelda: Tears of the Kingdom are all located in the Depths, with precise coordinates for each piece detailed below.
Cap of the Wind
Access via Tingel Island Chasm (surface: 4707, 1307, 0104), then smash through southern tunnels of breakable boulders. The chest sits at 4653, 0622, -0723 (or nearby 4669, 0989, -0670) beneath Davdi Island, guarded by Gloom Hands and Phantom Ganon.
Tunic of the Wind
Drop through Hyrule Ridge Chasm or Gerudo Summit Chasm to reach Cuho Canyon Mine near Kataki Lightroot (-3961, 1117, -0552). The glowing chest is at -3791, 1343, -0682 (variations: -3789, 1344, -0682 or -3787, 1344, -0682), past a possible Blue Hinox.
Trousers of the Wind
Enter via Meda Mountain Chasm (surface: 2513, -2380, -0009), head southeast past Kotimab Lightroot to Cresia Pit Mine. Cross water to the chest at 3796, -3618, -0446 (or 3794, -3618, -0446), avoiding Octoroks.
Show map markers for each Wind Armor coordinate
The Wind Armor chests in The Legend of Zelda: Tears of the Kingdom are located in the Depths, with precise coordinates available from interactive maps and guides. Exact map markers aren’t directly embeddable here, but use tools like the Zelda Map website (mapgenie.io/zelda-tears-of-the-kingdom) or IGN’s interactive map by searching “Wind Armor” to pin these spots.
Cap of the Wind Marker
Pin 4653, 0622, -0723 (or precise variant 4669, 0989, -0670) near Davdi Island after Tingel Island Chasm descent. Look for a glowing chest post-boulder tunnels, near Gloom Hands.
Tunic of the Wind Marker
Mark -3791, 1343, -0682 (variants: -3789, 1344, -0682 or -3787, 1344, -0682) at Cuho Canyon Mine via Kataki Lightroot (-3961, 1117, -0552). Enter from Hyrule Ridge or Gerudo Summit Chasm.
Trousers of the Wind Marker
Set marker at 3796, -3618, -0446 (or 3794, -3618, -0446) in Cresia Pit Mine area after Meda Mountain Chasm (surface: 2513, -2380, -0009) and Kotimab Lightroot (3092, -3209, -0624). Cross water southeast.