Buried deep within Tears of the Kingdom lies a secret tool that rebuilds your creations in seconds. Here’s how players can access this hidden feature and make their Zonai engineering truly limitless.
How to unlock Autobuild in Zelda: Tears of the Kingdom
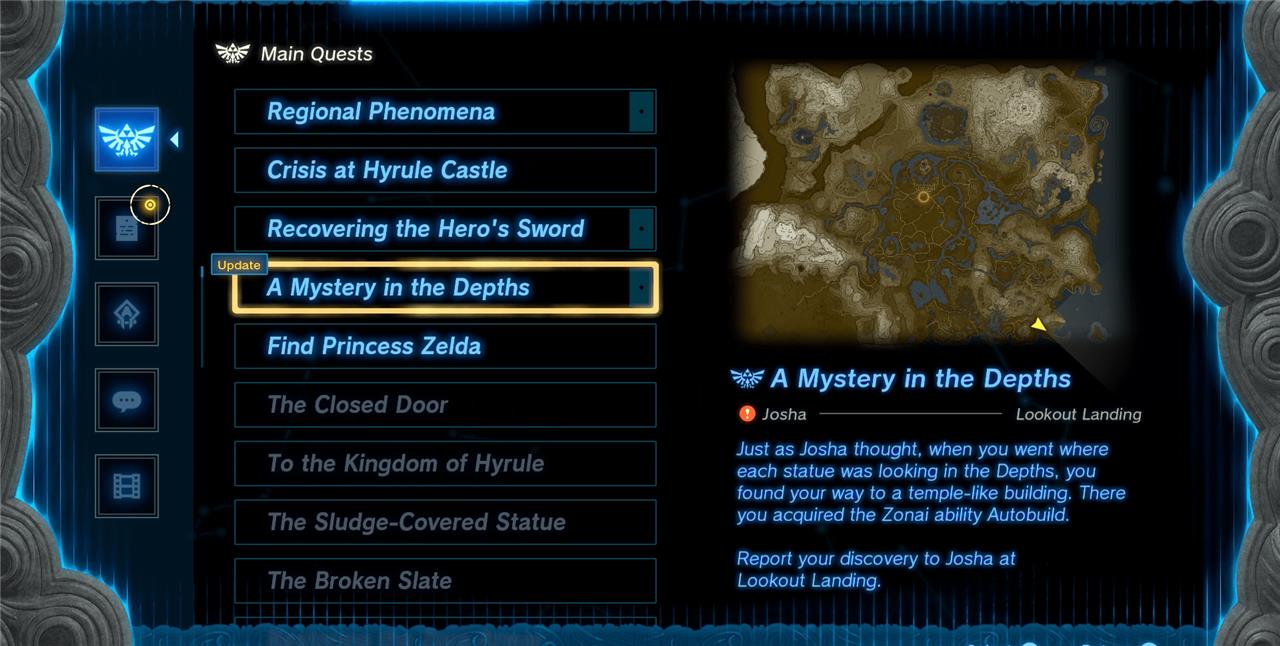
To get Autobuild, progress Josha and Robbie’s Depths questline at Lookout Landing until you receive “A Mystery in the Depths,” then follow the statues through the underground area to the Great Abandoned Central Mine and speak with the Steward Construct inside to gain the ability.
Finding Autobuild requires you to venture into the Depths – so if you haven’t already, we recommend you start the “Camera Work in the Depths” quest to become acquainted with the subterranean realm, which also teaches you how to light up the Depths so you can safely explore.
Continue playing Robbie and Josha’s questline and you’ll eventually unlock “A Mystery in the Depths.” If it doesn’t appear for you as you progress, try completing one of the Temples as part of the “Regional Phenomena” quest to see if that helps. Whenever you do get around to “A Mystery in the Depths”, it asks you to follow the direction of the statues are pointing in the Depths, taking you to where you find Autobuild.
However, it also appears possible you can go straight to the location the quest takes you to to unlock Autobuild without that quest – so if you’re keen, feel free to head straight there.
(Either way, if you want to explore the Depths with the utmost confidence, then it might be worth looking into the Miner’s Armor set at some point, granting Link a useful Glow when equipped.)
Where to find the Great Abandoned Central Mine location
The Great Abandoned Central Mine lies deep beneath Hyrule, directly below the Great Plateau. To reach it, travel to one of the chasms near the Plateau, such as the Great Plateau South Chasm or the Great Plateau East Chasm, and descend into the Depths. Once below, follow the lightroot markers heading toward the center area until you reach a large, dimly lit ruin surrounded by ancient machinery-this is the Great Abandoned Central Mine.
Wherever you start in the Depths, you must visit the Great Abandoned Central Mine, which is located within the Central Hyrule Depths at coordinates -0781, -1886, -0523.
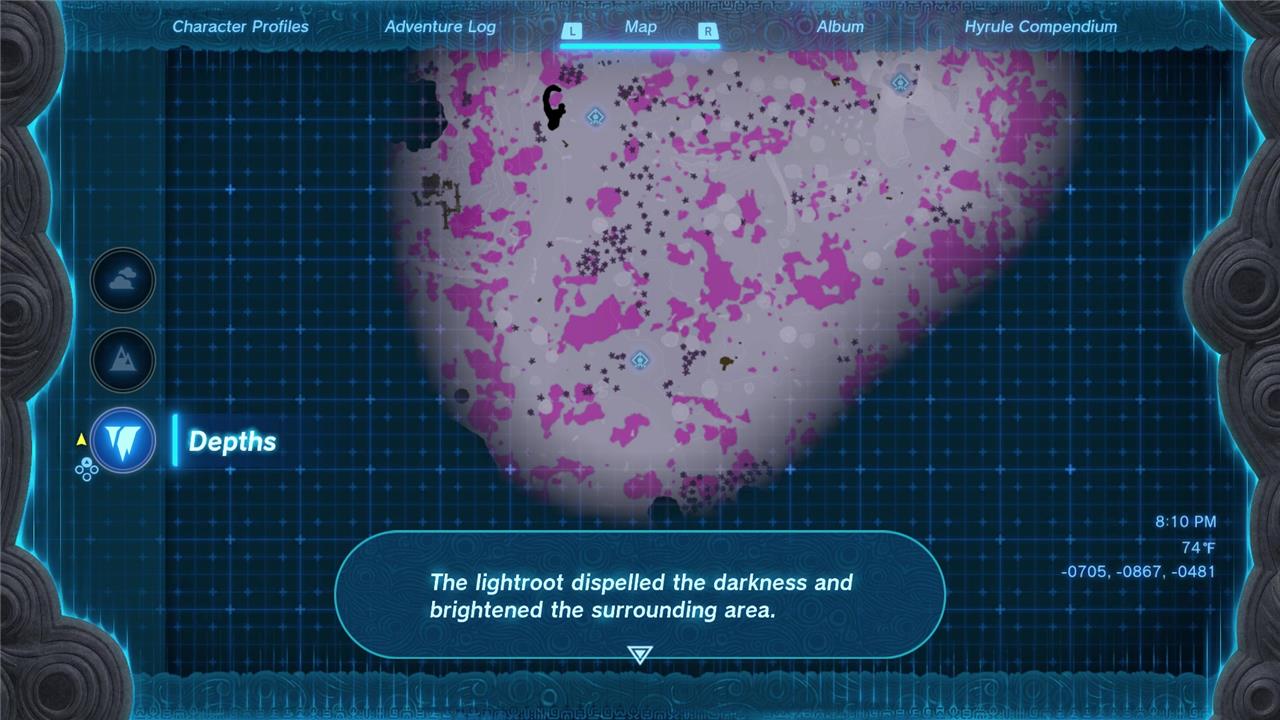
We recommend activating the Iayusus Lightroot in the Central Hyrule Depths – which is close to where you must find Robbie’s location as part of the “Camera Work in the Depths” quest.
After that, head south to the Nihcayam Lightroot next.
From there, continue south, past the Grove of Time (there are a few enemy camps along the way – whether you engage or not is up to you!) until you come across a great temple-like structure.
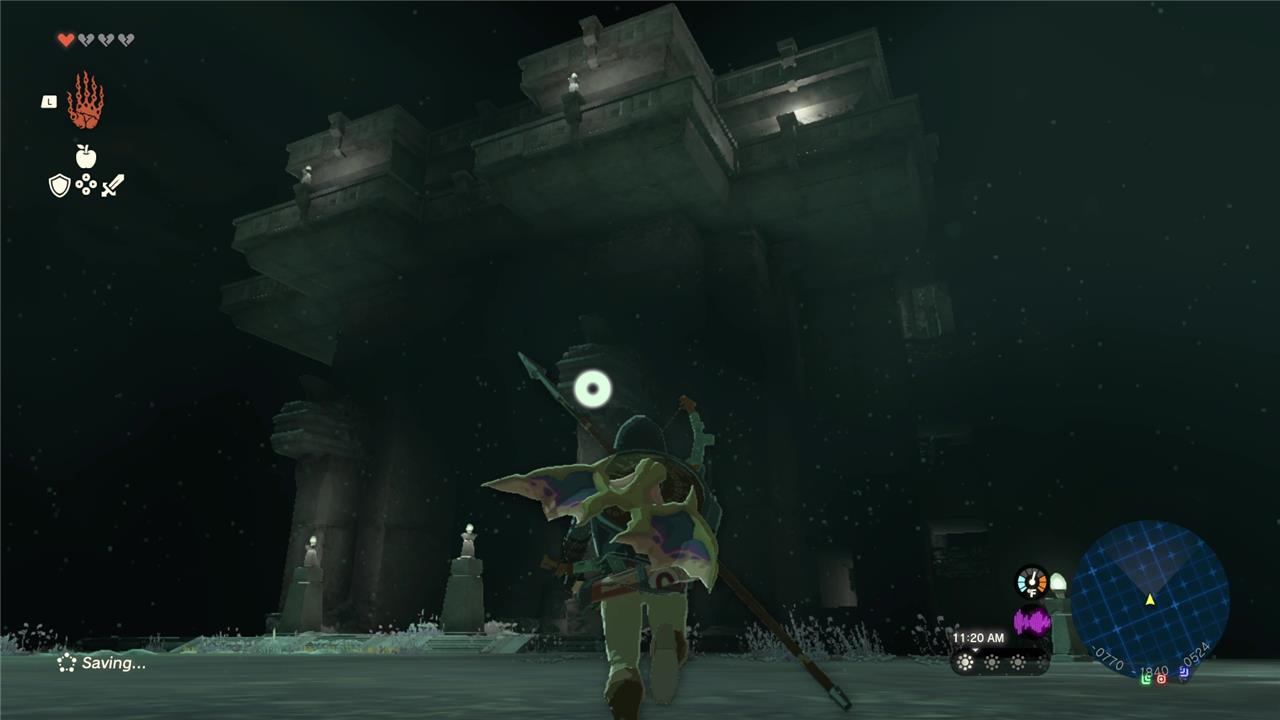
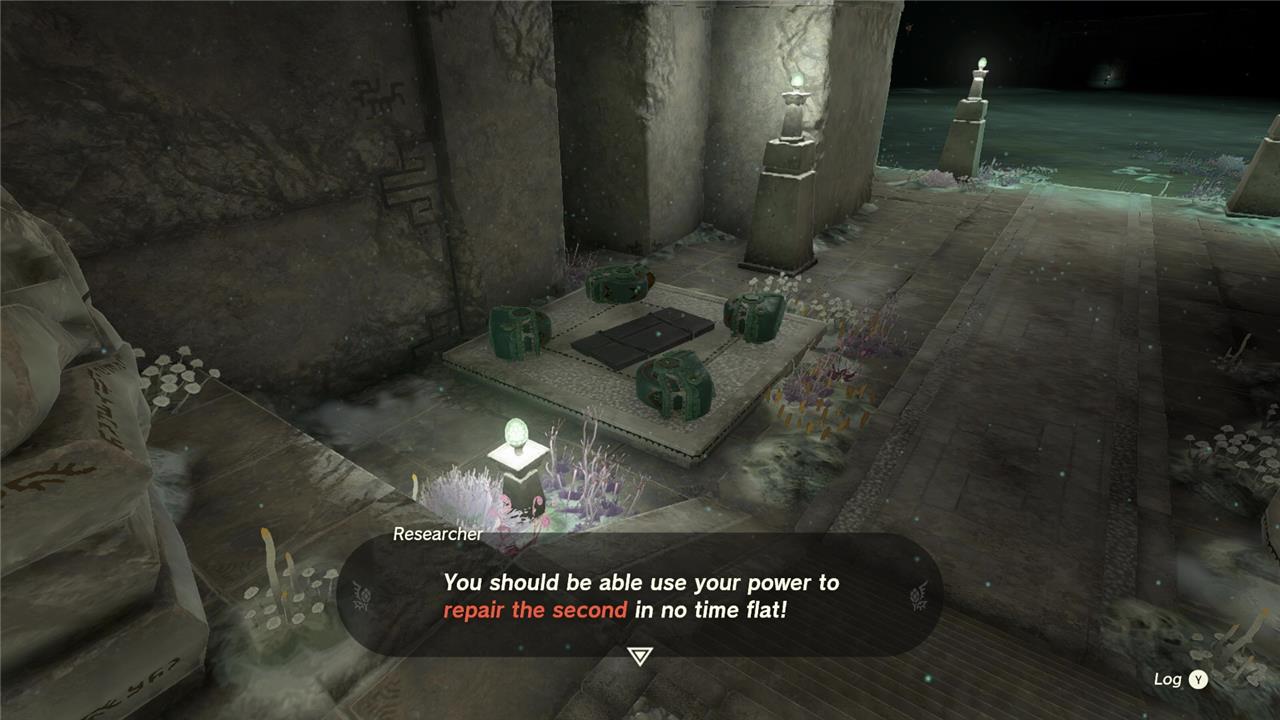
Proceed inside the Great Abandoned Central Mine, and you’ll find a Researcher and a Steward Construct. Doing so will grant you the Autobuild ability.
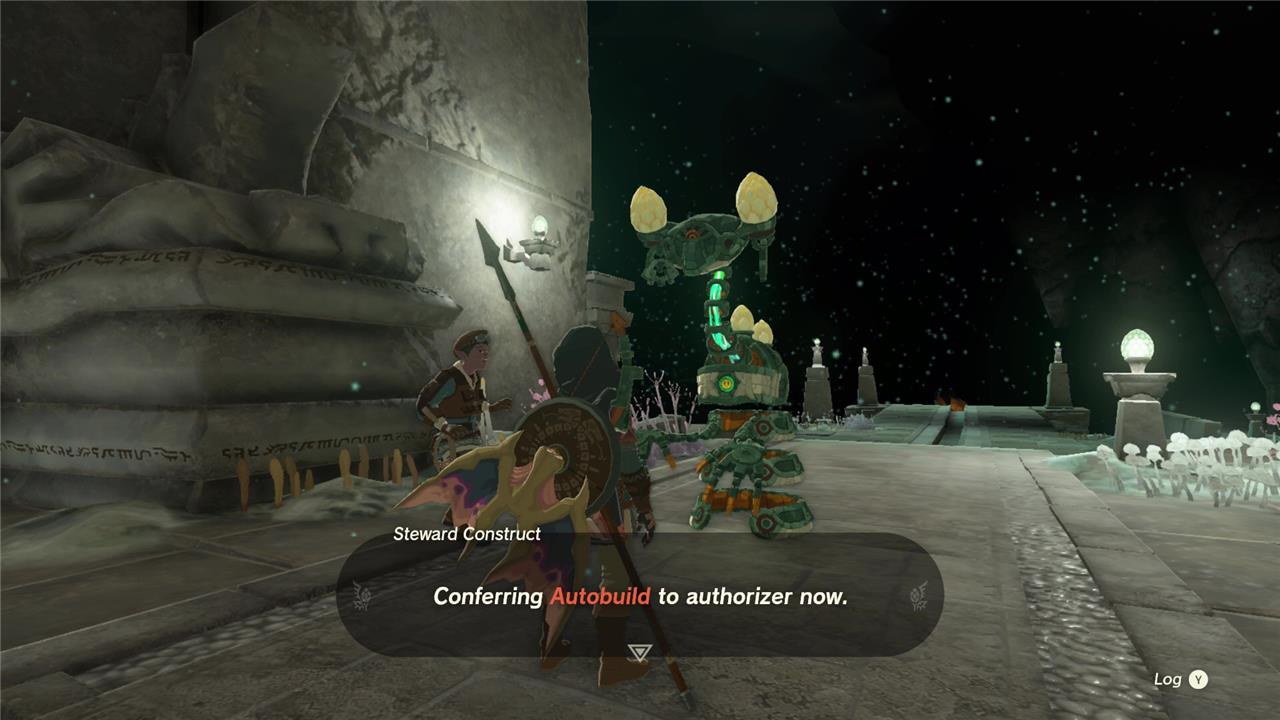
You’ll then be tasked with repairing two objects on two pedestals on either side of the stairs, a not-so-subtle tutorial on the advantages of using Autobuild.
Repair one manually using Ultrahand by fixing together the wheels to the body, and then using the Autobuild’s History feature, you can repair the other provided you are near the required components. (If you aren’t near the resources you need, you’ll then have to dip into your zonaite stores to finish the job.)
Once done, you’ll then be introduced to Master Kohga, Leader of the Yiga Clan, followed by a boss battle.
In this fight with Kohga, they will use a variety of vehicles in a small arena. Keep on the move as the vehicle drives around – it will move fairly slowly – and use projectiles such as arrows, spears or bomb flowers on Kohga to immobilize them. When stunned, use a sword or other melee weapon to knock down their health even further.
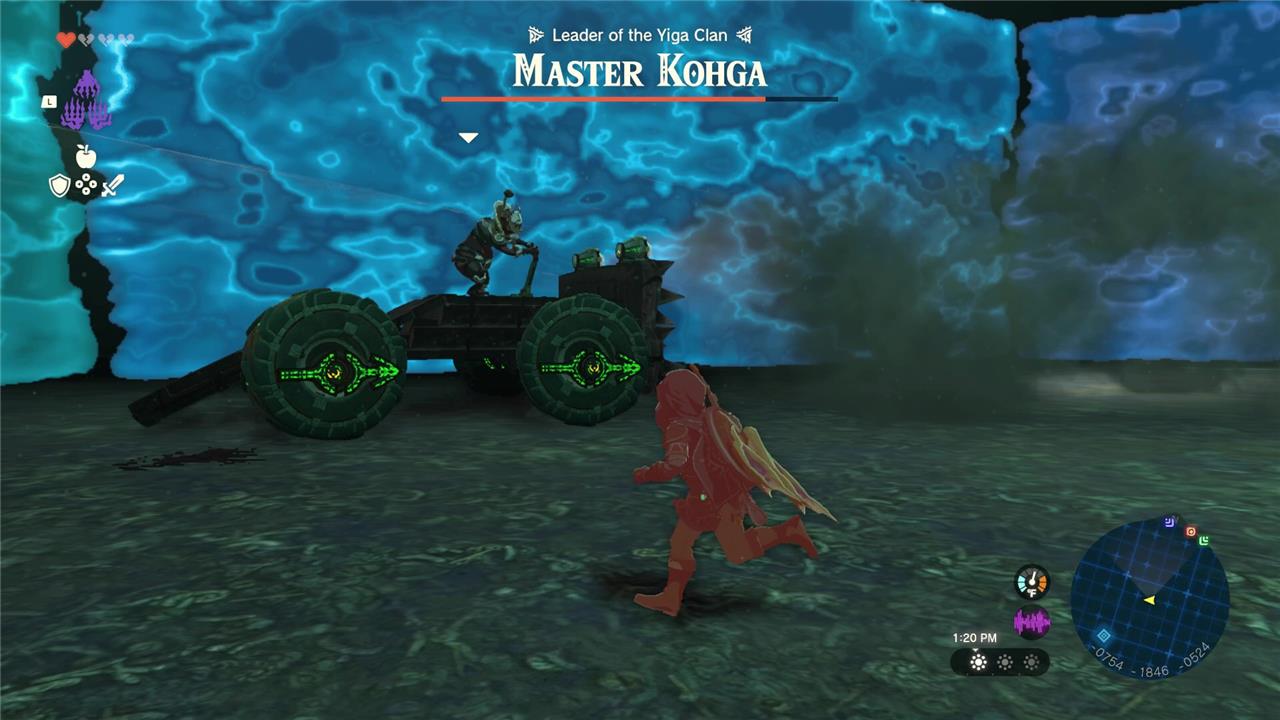
Repeat this through various types of vehicles until the battle is over. Master Kohga will then declare they are going to the Southwestern Abandoned Mine, starting the Master Kohga of the Yiga Clan quest, and you’ll receive a Huge Crystallized Charge as your reward.
How to use Autobuild schematics and history
Autobuild has two main sources: your build history (things you made with Ultrahand) and preset schematics (blueprints like Schema Stones/Yiga plans).
Opening Autobuild
-
Hold L to open the ability wheel, then select the purple three-hand Autobuild icon.
-
When it opens, you’ll see three sections: a blank slot (current build), History, and Schematics.
Using history builds
-
Anything you assemble with Ultrahand is automatically added to your Autobuild history, up to a limited number of recent designs.
-
To reuse one:
-
Open Autobuild, move to the History tab, highlight a design, and confirm with A to project it in front of you, then place it where you want.
-
-
If all needed parts are nearby on the ground, Autobuild uses them for free; if not, it spends Zonaite to fabricate missing parts.
Favoriting important builds
-
In the History list, move the cursor over a build you like and press Y to mark it as a Favorite.
-
Favorites get a small purple flag, are pinned near the top, and do not get pushed out of history as quickly, letting you keep up to about eight go-to vehicles or gadgets ready.
Using schematics (blueprints)
-
Schematics are learned from Schema Stones and Yiga schematics, found in Depths forges and Yiga hideouts.
-
Once you obtain one, a new design appears under the Schematics tab in Autobuild; select it, preview its Zonaite cost, and confirm to build it just like a history build.
-
These are perfect for complex builds (like hover bikes or combat vehicles) you might not remember how to recreate by hand.
Practical tips
-
Use history for quick one-off recreations (a cart you just made, a simple bridge), and schematics for “permanent” machines you rely on a lot.
-
Build a cheap, reliable vehicle (for example, a cart plus a steering stick) and favorite it so you always have a low-Zonaite travel option.
If you tell me what kind of contraptions you like (hover bike, balloon, combat car, etc.), I can suggest a specific setup to put in your favorites.
How to find Schema Stones and Yiga Schematics
Schema Stones and Yiga Schematics unlock powerful Autobuild blueprints in Zelda: Tears of the Kingdom, mainly found in the Depths after unlocking Autobuild.
Schema Stones Locations
Schema Stones (12 total) come from Steward Constructs in abandoned Zonai mines across the Depths.
-
Speak to the Steward Construct at each site after clearing any Yiga threats; one exception is on the surface in the Shrine of Resurrection cave west of Temple of Time.
-
Examples: Abandoned Central Mine (early unlock area), Abandoned Kakariko Mine (Launch Pad), Abandoned Kara Kara Mine (Instant Scaffold).
Yiga Schematics Locations
Yiga Schematics (34 total) hide in chests at Yiga Relay Bases/storehouses throughout the Depths.
-
Defeat the Yiga Blademaster/sorcerer with the red seal to unlock the door; expect combat, turrets, and climbs inside.
-
Regions include East Necluda Depths (Liftoff Glider, Tank), Gerudo Desert Depths (Raiding Plane, Beam Turret), Hebra Mountains Depths (Excavator, Whirling Basher).
| Type | Total Count | Best Prep |
|---|---|---|
| Schema Stones | Lightroots active, weapons for Yiga | |
| Yiga Schematics | Arrows for turrets, Ascend for platforms |
Use Purah Pad maps or lightroot networks to navigate Depths hideouts/mines efficiently.