Ellie’s story hides more than memories-every locker, shelf, and shadowed corner of “Left Behind” holds secrets waiting to be found. This guide pinpoints each collectible’s location so you won’t miss a single note, pendant, or conversation that brings her world to life.
In “Left Behind,” the sole major expansion for The Last of Us Part 1, you’ll need to find twelve artifacts and thirteen optional conversations. The collectibles are spread out across six sections: Back in a Flash, Mallrats, So Close, Fun and Games, The Enemy of My Enemy, and Escape from Liberty Gardens. The game does not indicate to you when you’re moving onto a new section, but you can select and begin playing any section from the Chapters option on the main menu.
Read on to find out when each section begins and ends, and where all of the collectibles can be found in “Left Behind.”
Back in a Flash Collectibles
Ellie’s arcade adventure with Riley offers several collectibles tucked between the flashing lights and broken machines. In this section, players can track down artifacts, notes, and optional conversations hidden around the mall’s arcade area. Keep an eye on shelves, counters, and nearby booths-many items are easy to miss amid the wreckage of the once-busy gaming spot. Completing this part fills in more details of Ellie’s memories and the bond she shares with Riley.
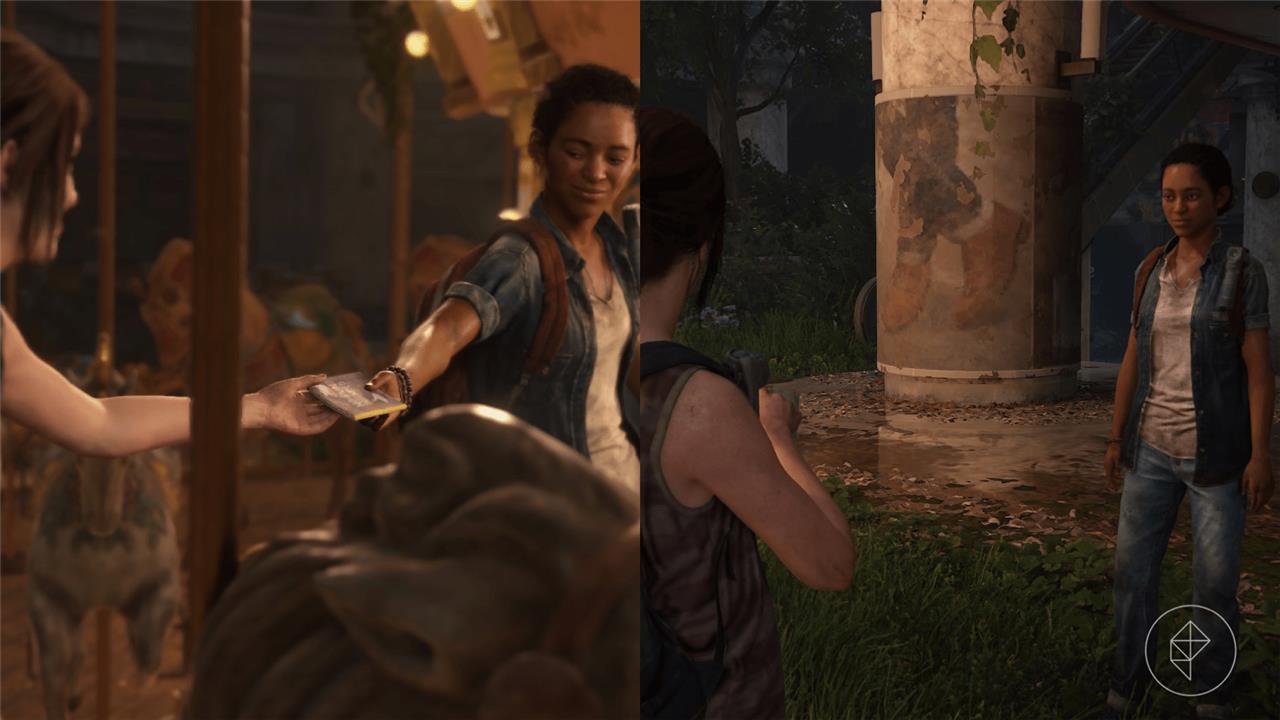
The “Back in a Flash” section begins after a few cutscenes where you meet Ellie’s late best friend, Riley. You gain control of Ellie after the events of the main game’s “The University” chapter concludes, but before the “Lakeside Resort” chapter begins. This section ends after you exit the nail salon and hop over the stair’s railing.
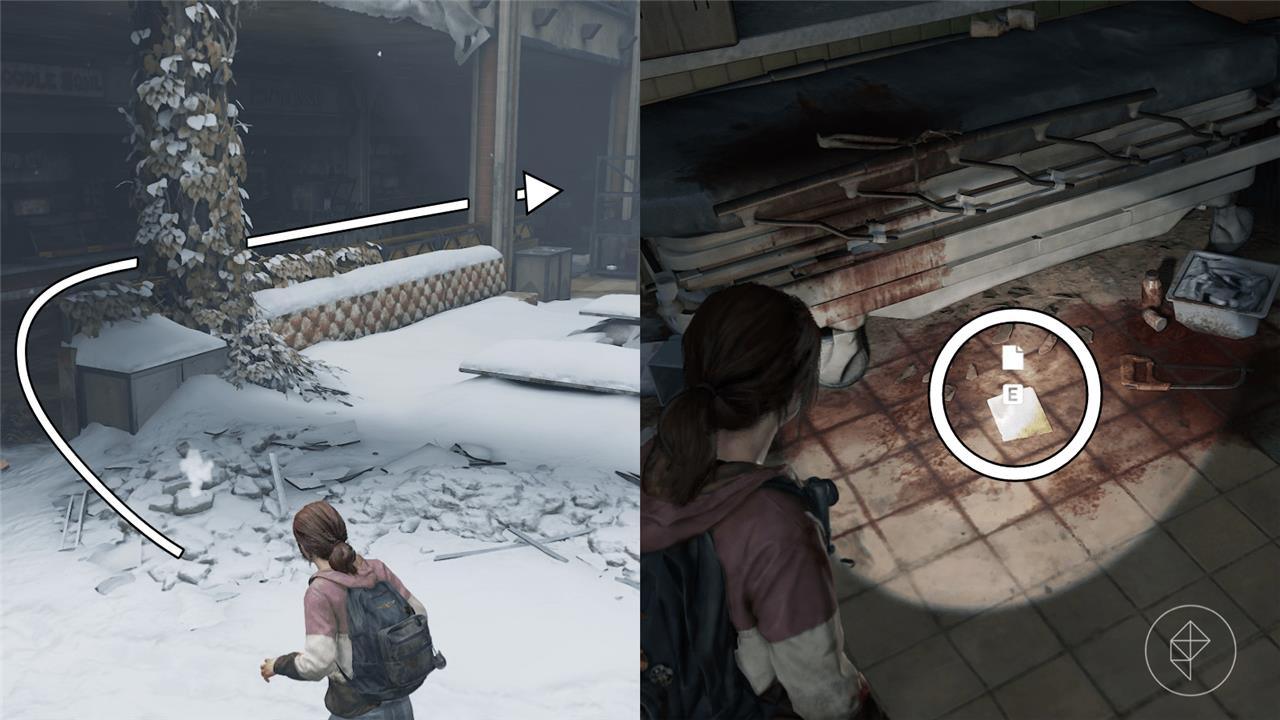
Combination Note Artifact Location
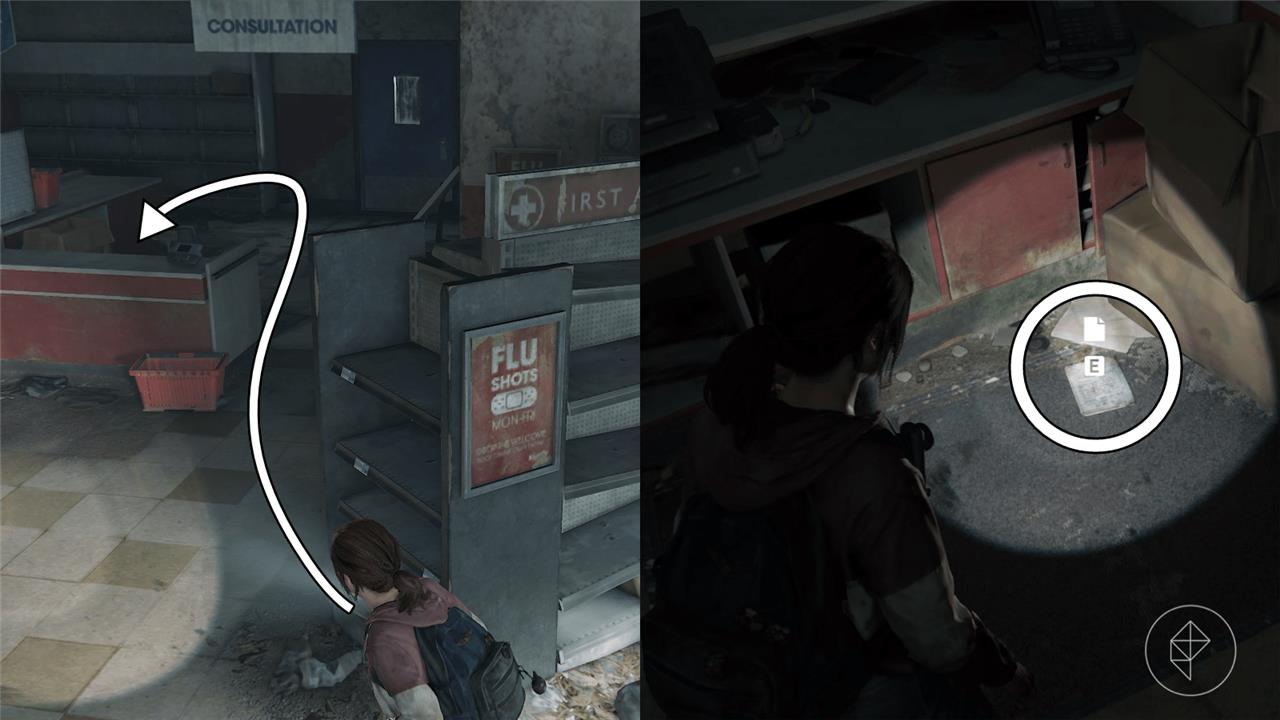
Once you crawl through the entrance of Weston’s Pharmacy, go behind the counter and immediately turn left to find the Combination Note on the floor.
Pharmacist’s Key Artifact Location
Head over to the American Princess store around the corner. Interact with the locked gate; Ellie will automatically punch in the combination found on the Combination Note of her own volition. Enter the store and head to the back left corner of the store to find a deceased clicker in a lab coat. Interact with it to receive the Pharmacist’s Key.
Pharmacist’s Note Artifact Location
After you interact with the deceased pharmacist, the body will slightly fall over, dropping the Pharmacist’s Note onto the floor in the process.
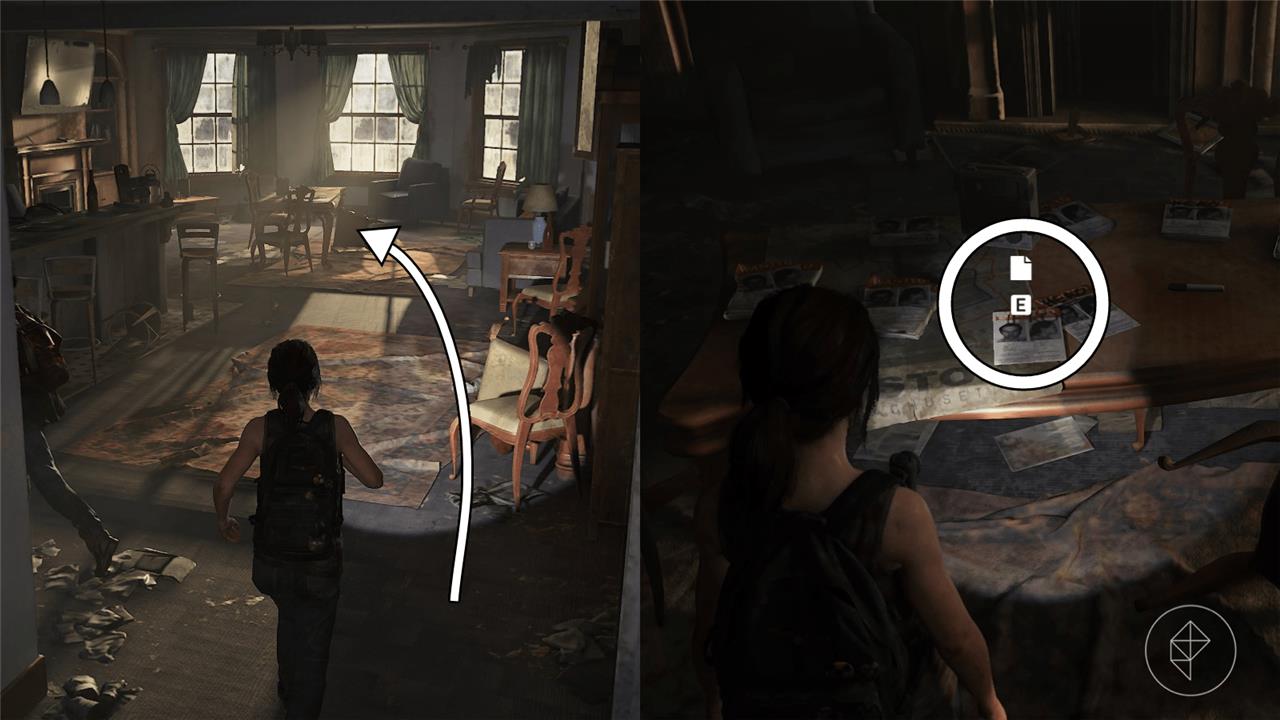
Salon Note Artifact Location
After you open the pharmacy’s back door only to find out that the medkit was empty, enter the camera store, Pixitek. Head to the back of the store to find yourself inside a nail salon. Turn the corner to discover the Salon Note beside a corpse with another medkit.
Mallrats Collectibles
Ellie and Riley’s time in the mall is packed with hidden items that reveal more about their friendship and the world around them. In this section, players can collect various artifacts, notes, and optional conversations scattered across stores and corridors. Pay attention to interactive prompts near stores like the Halloween shop or photo booth to gather every collectible. Finding them all not only adds depth to the story but also helps complete the Left Behind chapter’s 100% collectible progress.
The “Mallrats” section starts after a trip back in time to Ellie and Riley’s adventure, and ends after you turn on the mall’s power and follow Riley to set of double doors.
Wanted Poster Artifact Location
Once you gain control of Ellie, follow Riley until you crouch under a barred door into a large room. Instead of following Riley to the next room, walk over to the table by the window to find the Wanted Poster.
Optional Conversation 1 Location
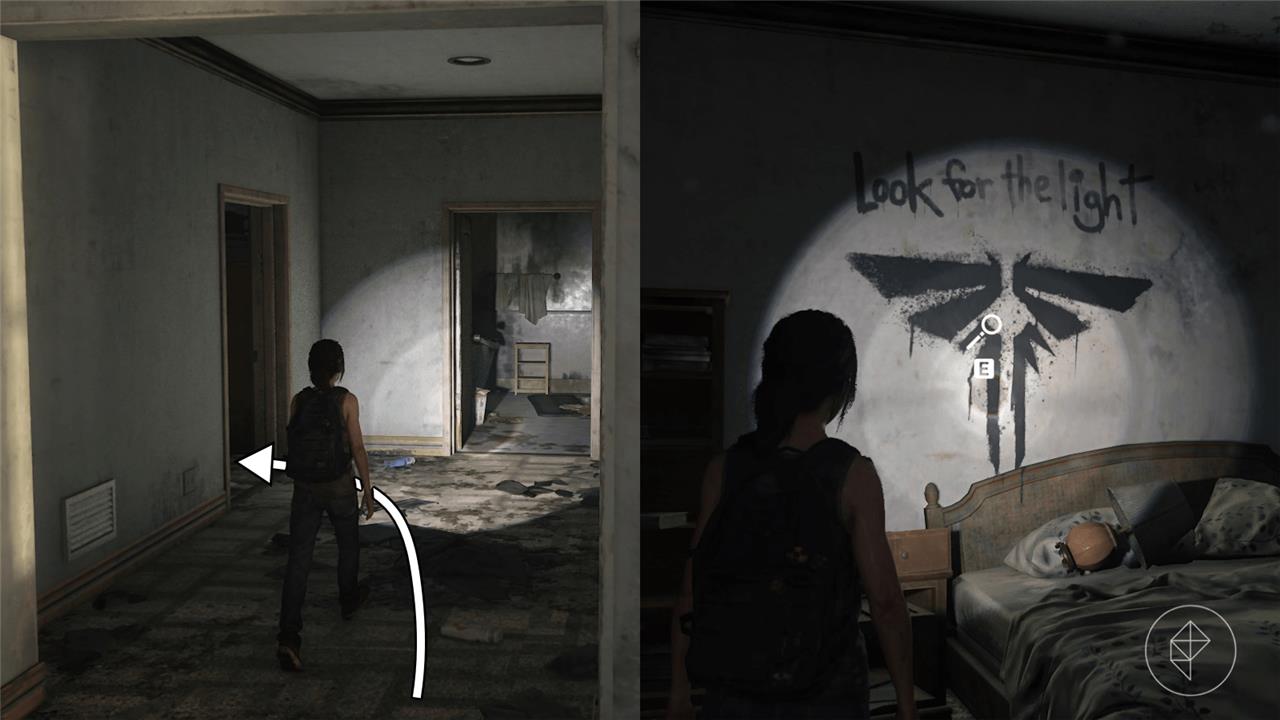
Continue to follow Riley as you shimmy across a ledge and jump through a hole in the wall into another apartment. Enter the bedroom to find a huge Firefly symbol painted onto the wall, and interact with it to start an optional conversation.
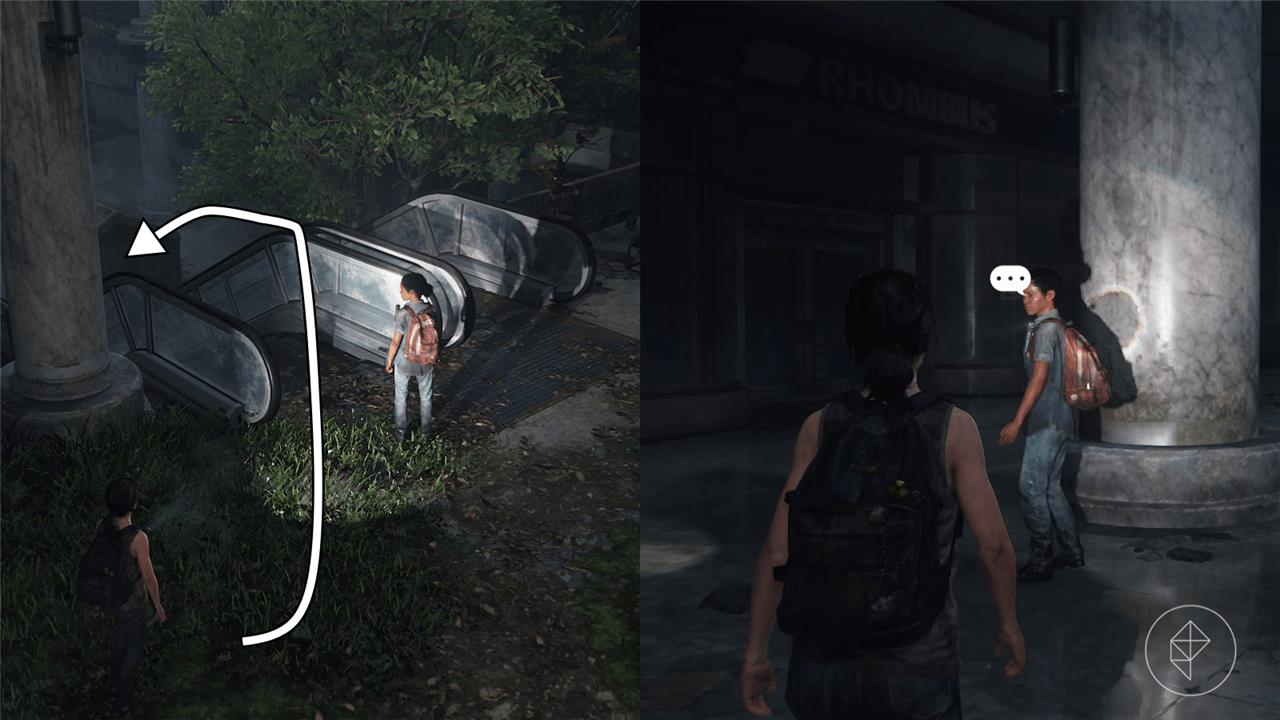
Optional Conversation 2 Location
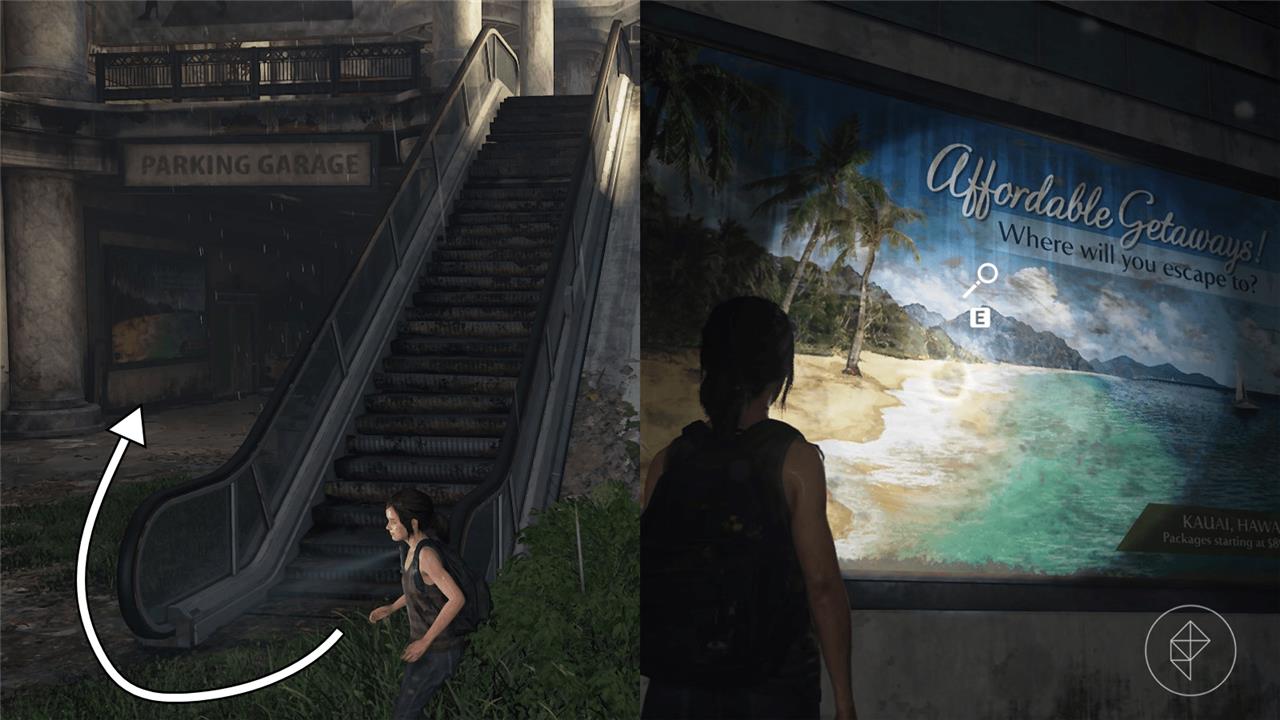
After you enter the mall, head down the escalator and immediately turn right. Continue under the “Parking Garage” sign to find an advertisement for an affordable getaway. Interact with the ad to start an optional conversation.
Optional Conversation 3 Location
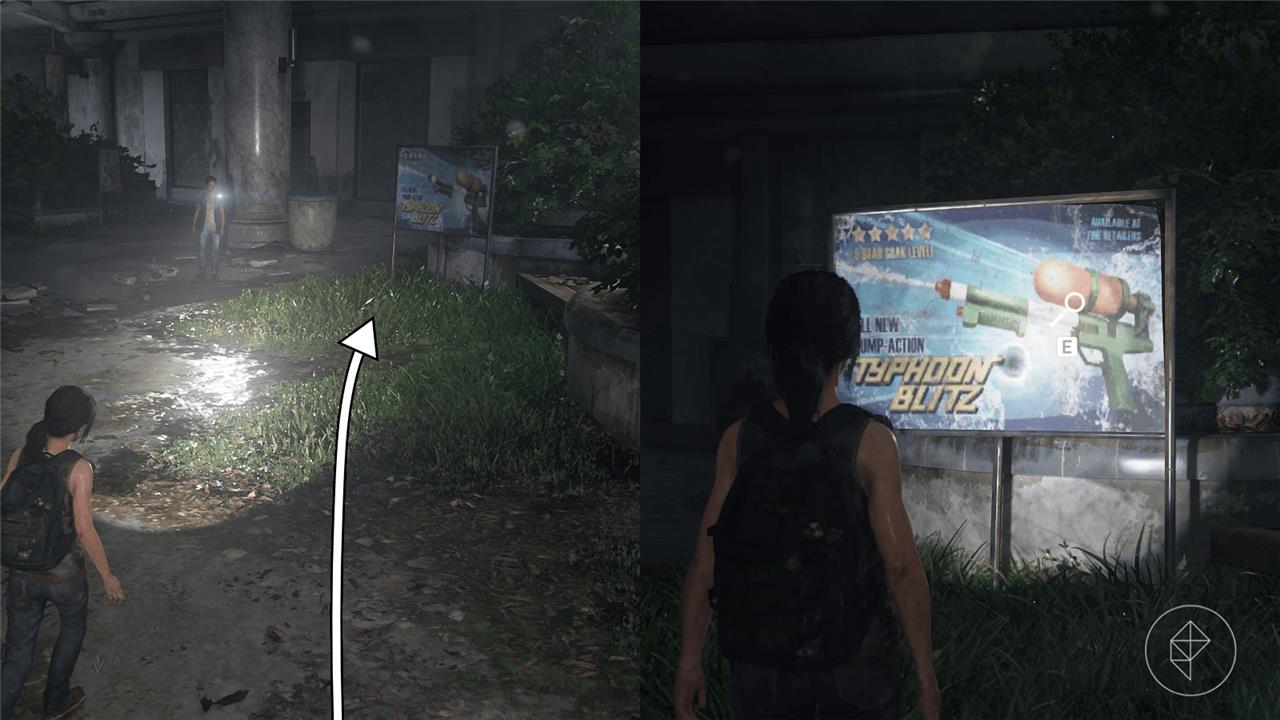
Continue forward from the escalator to find an advertisement for the “Typhoon Blitz” water gun on your right. Interact with the sign to start an optional conversation.
Optional Conversation 4 Location
Progress through the mall until you reach another set of escalators. Descend the escalators and listen to Riley talk about Winston. When you’re off the escalators, Riley will pull off to the side and have an optional conversation.
Optional Conversation 5 Location
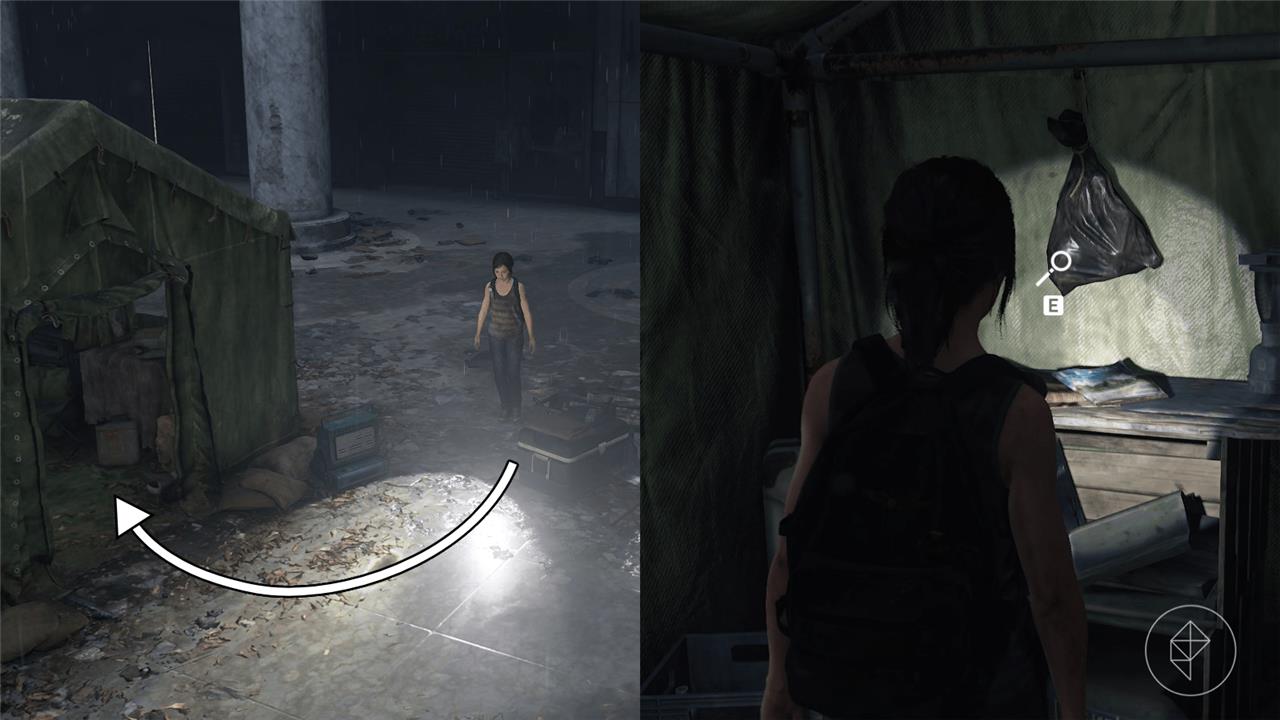
Once the optional conversation about Winston is over, Riley will check the tent to your right. Follow her inside and interact with the magazine and newspaper on top of the shelf in the corner to start an optional conversation.
Optional Conversation 6 Location
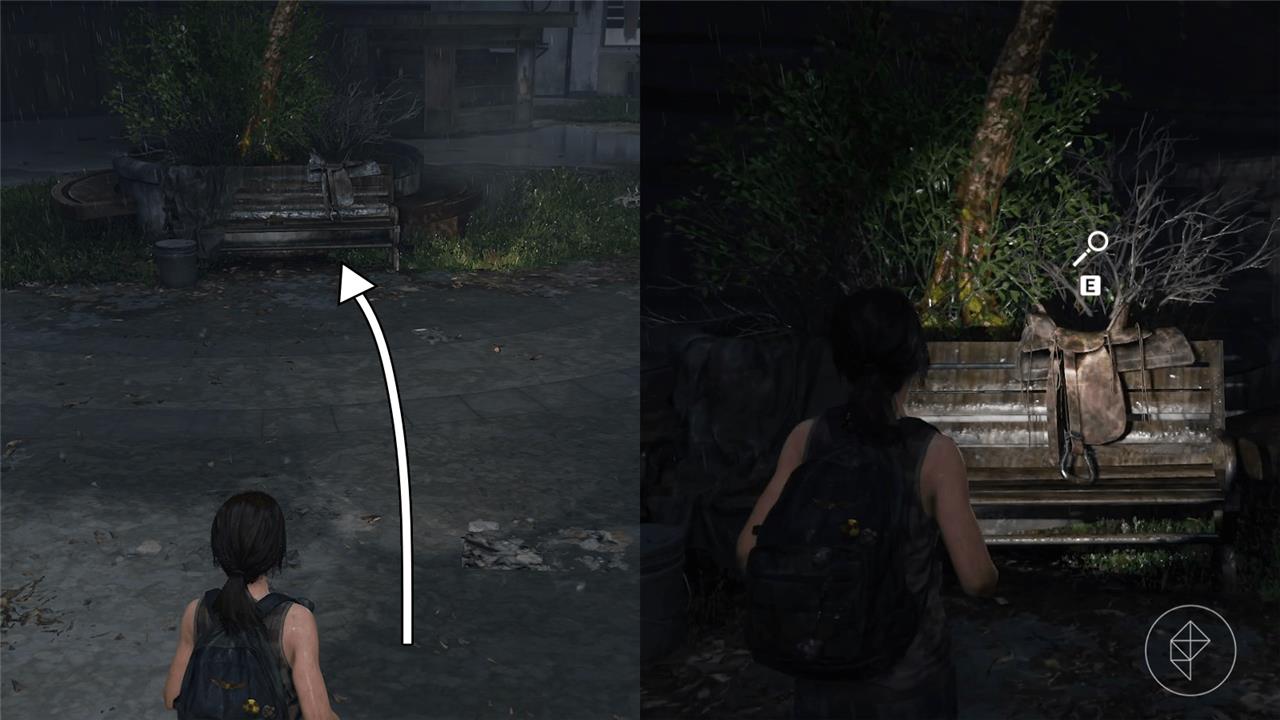
When you exit the tent, head straight ahead to find a saddle on a bench. Interact with it to start an optional conversation.
Optional Conversation 7 Location
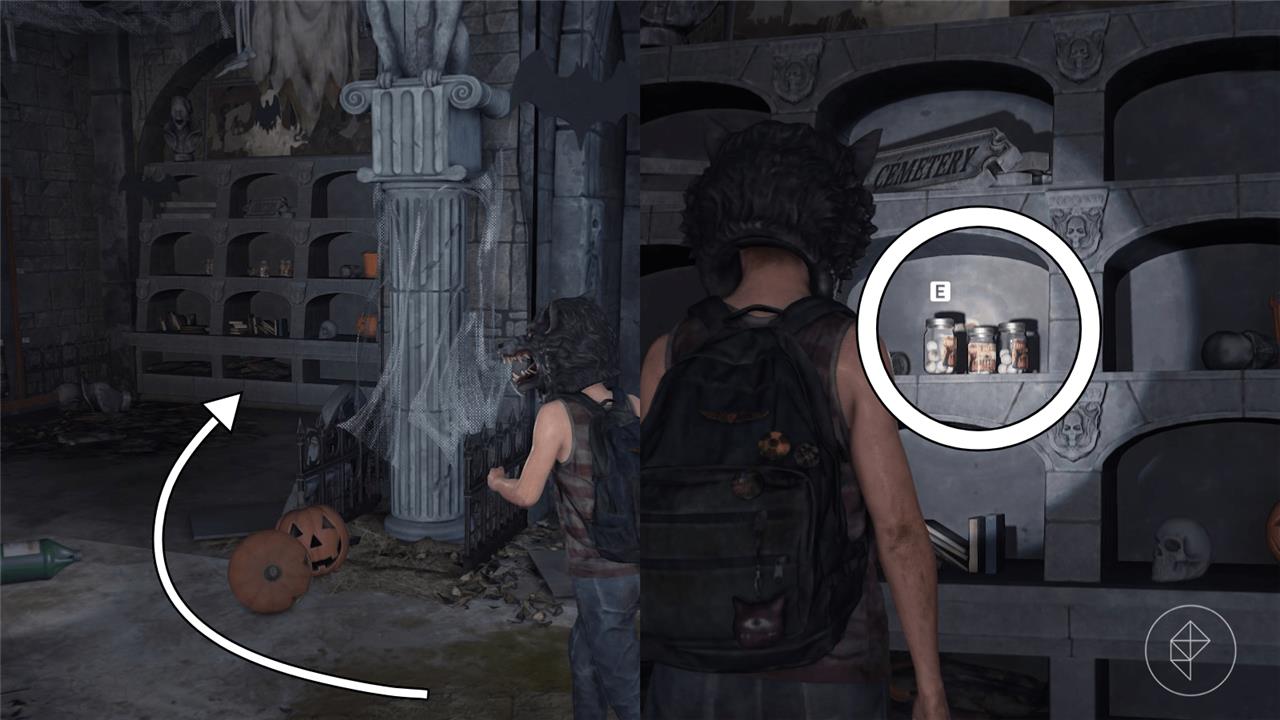
After you enter the Halloween costume store and roar in the werewolf mask, follow Riley to the back of the shop. Turn right towards the corner to find a few jars on a shelf. Interact with the jars to start an optional conversation.
Optional Conversation 8 Location
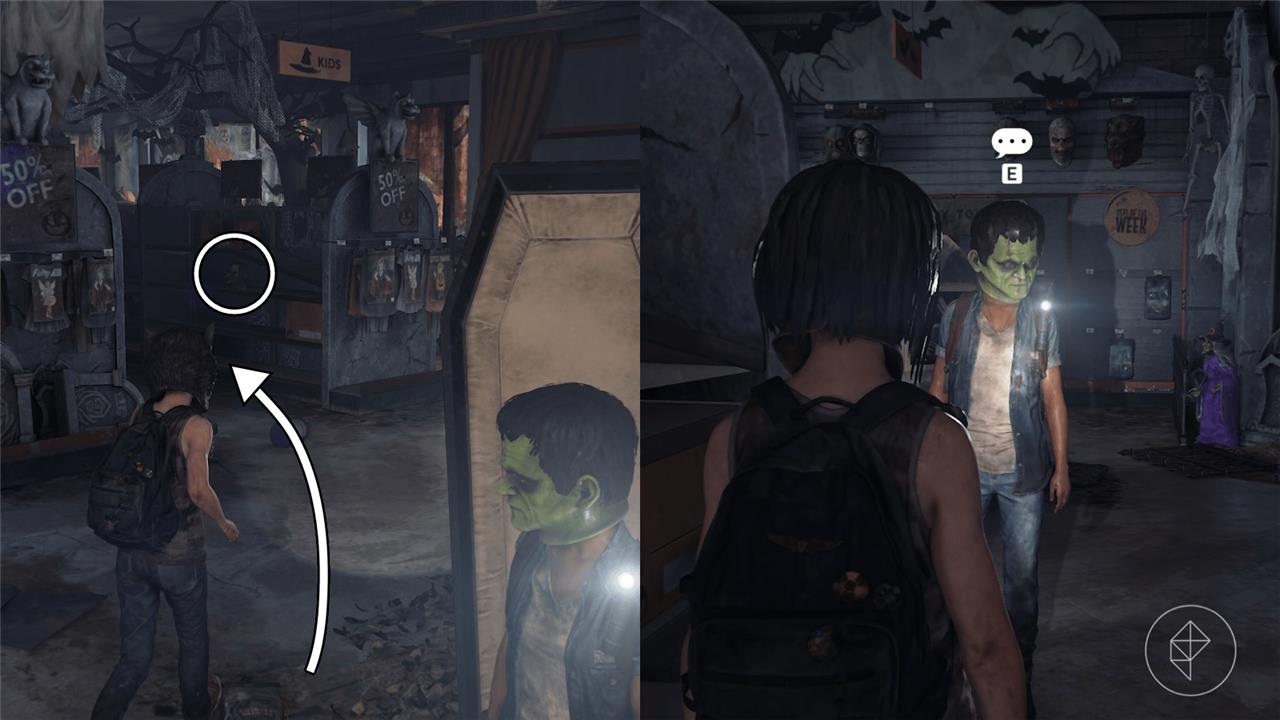
After you’ve interacted with the eyeball jar, turn around to get jumpscared by Riley as she jumps out of the coffin. Head into the middle aisle and interact with the witch mask to put it on. Turn back to Riley and interact with her to start an optional conversation.
Optional Conversation 9 Location
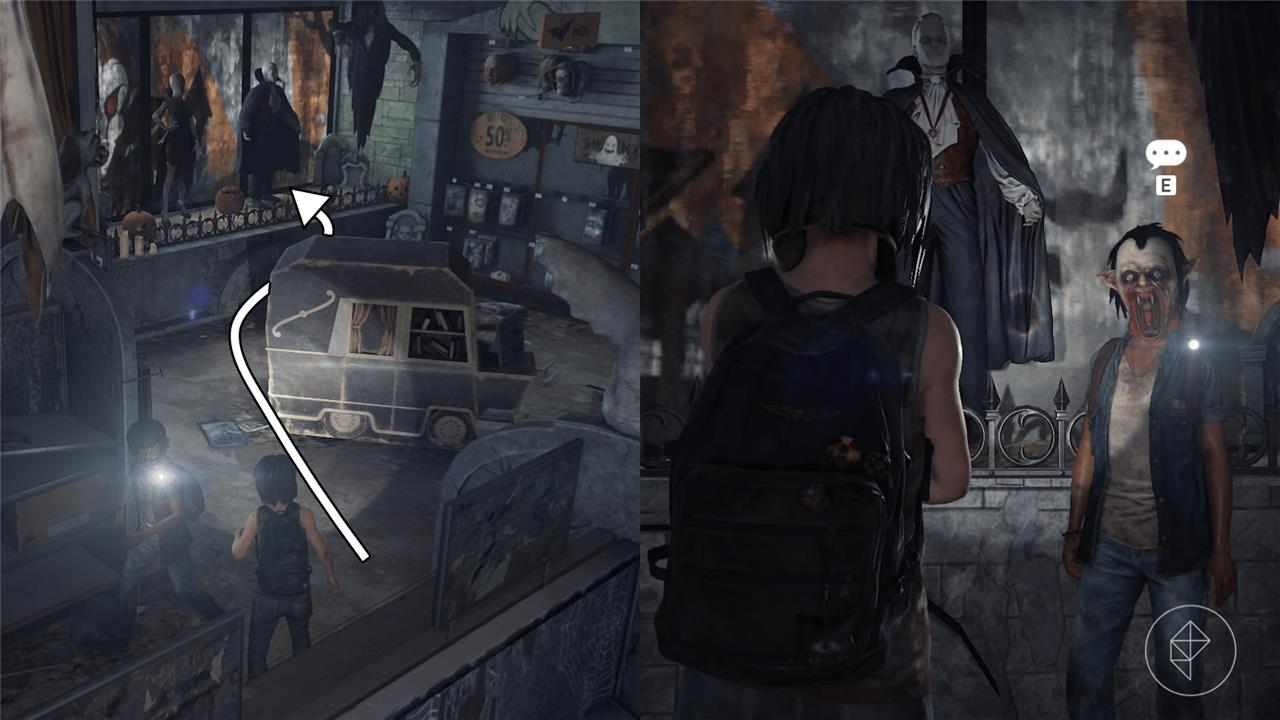
Head over to the vampire mannequins in the corner of the store. Wait for Riley to approach and change her mask to a Count Dracula mask, triggering an optional conversation.
Optional Conversation 10 Location
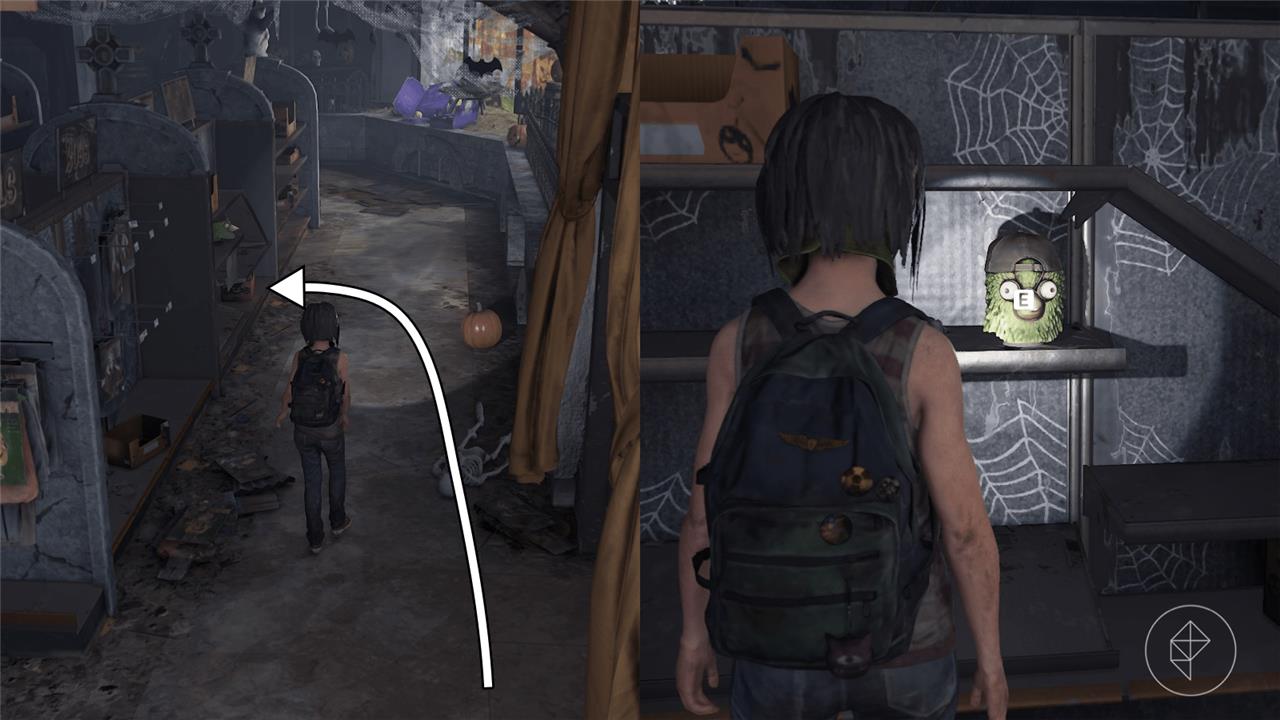
Make your way down the last aisle to find a green bird mask with a backwards baseball cap on. Interact with it to start an optional conversation.
Optional Conversation 11 Location

Continue down the aisle to the corner of the store to find a Skeleseer. Interact with the Skeleseer eight times to finish this optional conversation.
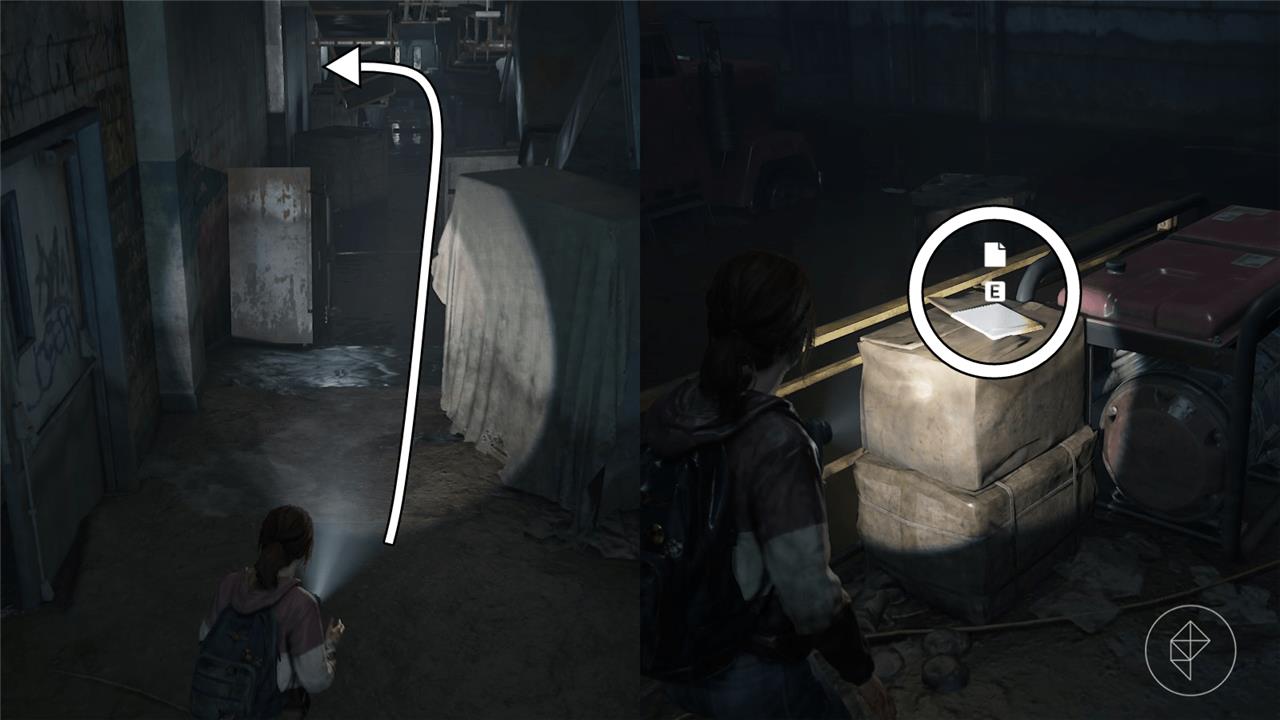
Warning Note Artifact Location
After the brick throwing competition, follow Riley until you descend the flight of stairs. Enter the open double doors to your left to find the Warning Note on a counter on the far side of the room.
So Close Collectibles
So Close Collectibles include the items Ellie can find as she explores the mall and the abandoned areas near the store. Players should check behind counters, on display shelves, and inside storage rooms for hidden notes, artifacts, and optional conversations. Many of these are easy to miss without carefully scanning corners or using flashlight beams to spot glints from distant objects. Collecting them all adds depth to the story and reveals extra details about the events before the main game.
The “So Close” section starts after the flashback ends and you return to the helicopter. This section ends after Ellie jumps into the helicopter.
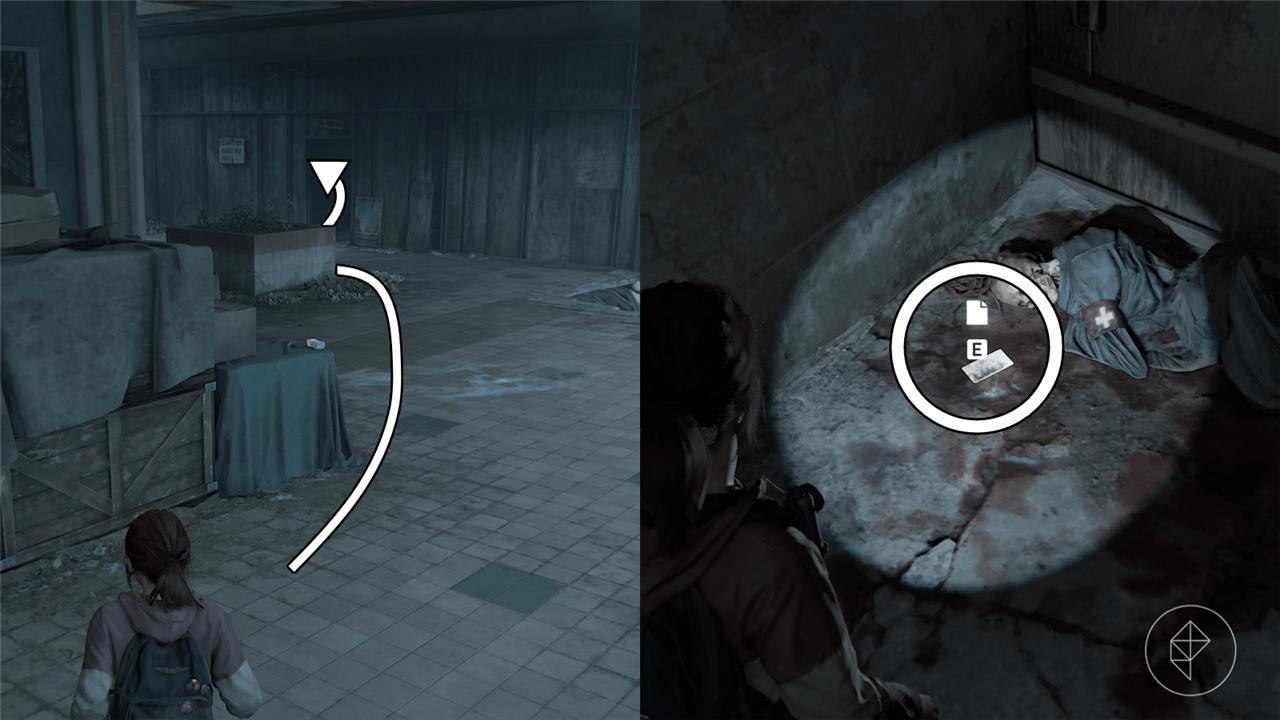
Atrium Note Artifact Location
As soon as you gain control of Ellie after the flashback, proceed forward under the helicopter and immediately turn right towards the food stalls. Continue down this path until you reach the end of the walkway to find the Atrium Note on the floor next to a stretcher.
Generator Note Artifact Location
Proceed through the sleeping quarters to find a generator with yellow wires leading into an open double door. Enter the open door to be jump-scared by a cat, and continue down the hallway to find a double door to your left and a submerged section of the hallway ahead of you. Go straight into the submerged section and enter the open door at the end of the hallway. Inside, you’ll find a generator with a Generators Note on top of it.
Atrium Recorder Artifact Location
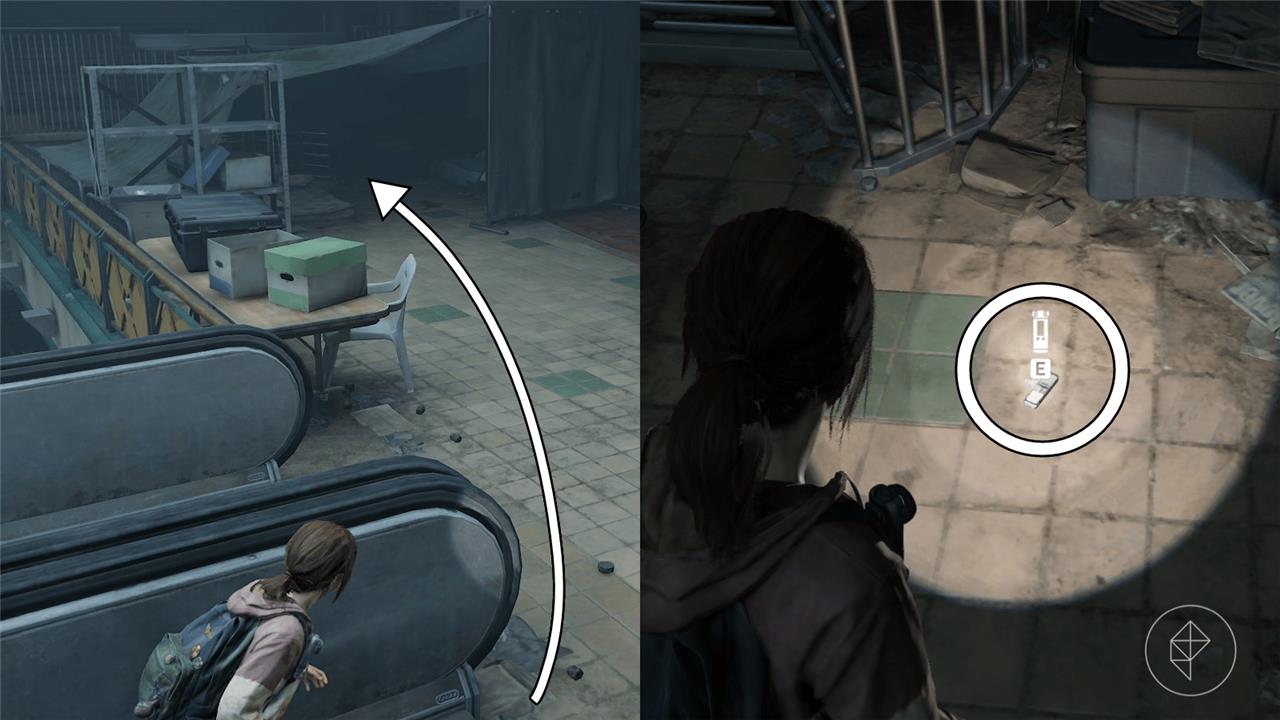
Once power is restored and you’ve made it across the electrified water, return to the lobby area to face off against a few clickers and runners. Once you’ve dealt with them, open the gate to the escalator and head up to the next floor. At the top of the escalator, turn to the left toward the tent to find an Atrium Recorder on the floor inside.
Fun and Games Collectibles
This section covers every collectible found during Ellie and Riley’s arcade adventure in Left Behind. From photo booths to racing machines, players can interact with playful relics of a long-gone time. Each item adds charm and character to their story, blending moments of nostalgia and friendship amid the tension of their surroundings.
The “Fun and Games” section begins when you return to the past with Riley, and ends after the water gun fight.
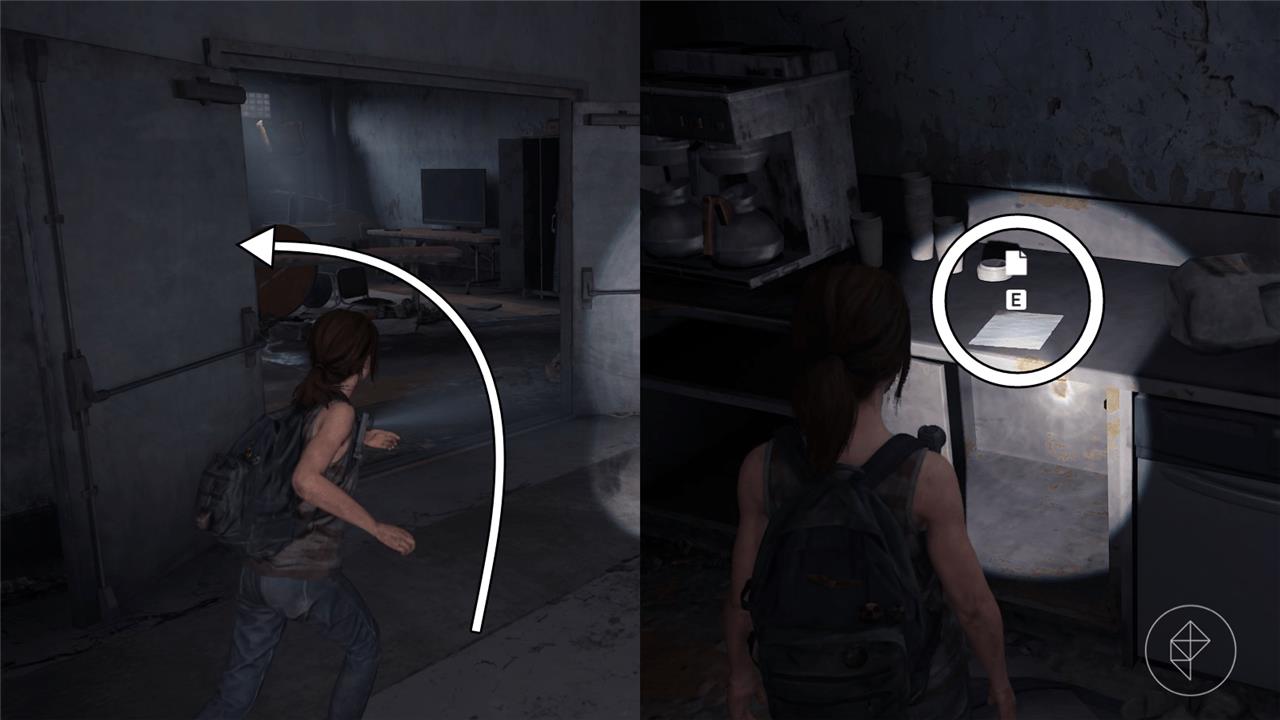
Kitchen Note Artifact Location
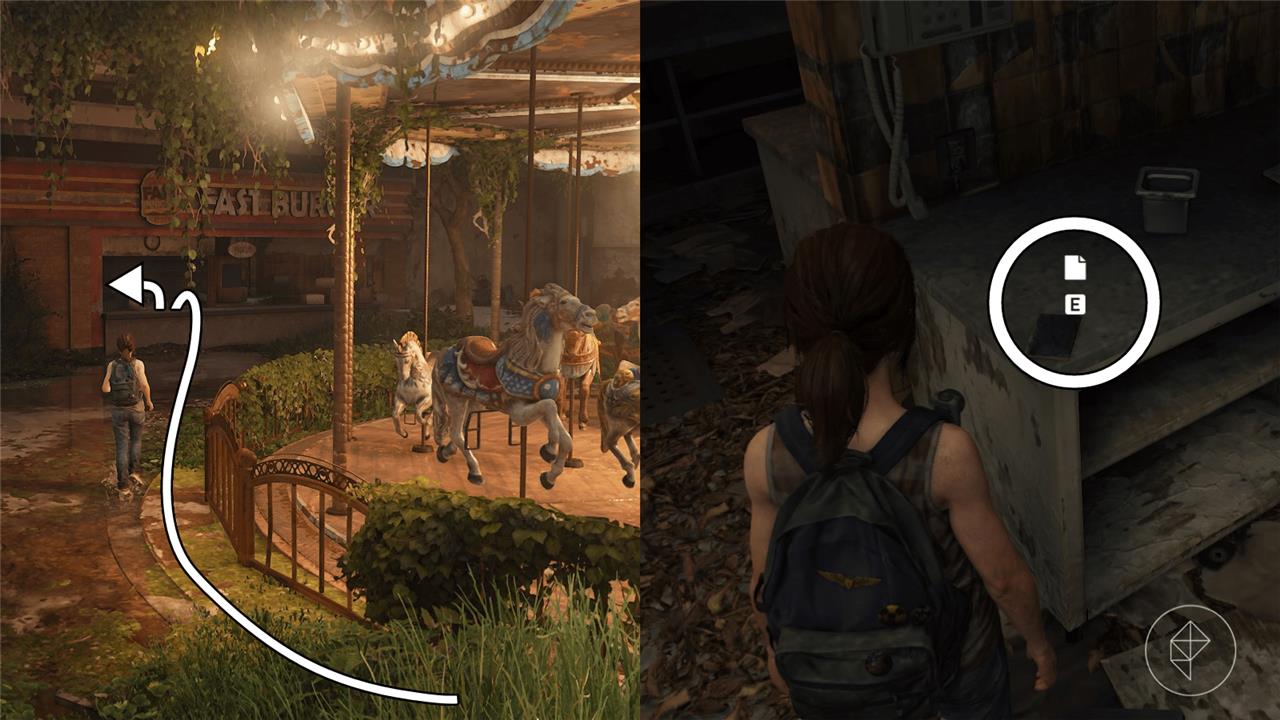
Once you gain control of Ellie, don’t immediately interact with Riley at the carousel. Instead, go behind the carousel into the “Fast Burger.” Vault over the counter to find the Kitchen Note on top of a shelf inside.
Optional Conversation 12 – Ellie’s Jokes Location
Interact with the carousel to start a cutscene where Riley gives Ellie a joke book full of puns. After you get off, keep telling jokes until there are none left to receive credit for this optional conversation. There are twenty in total, so prepare yourself to hear a lot of puns!
Optional Conversation 13 Location
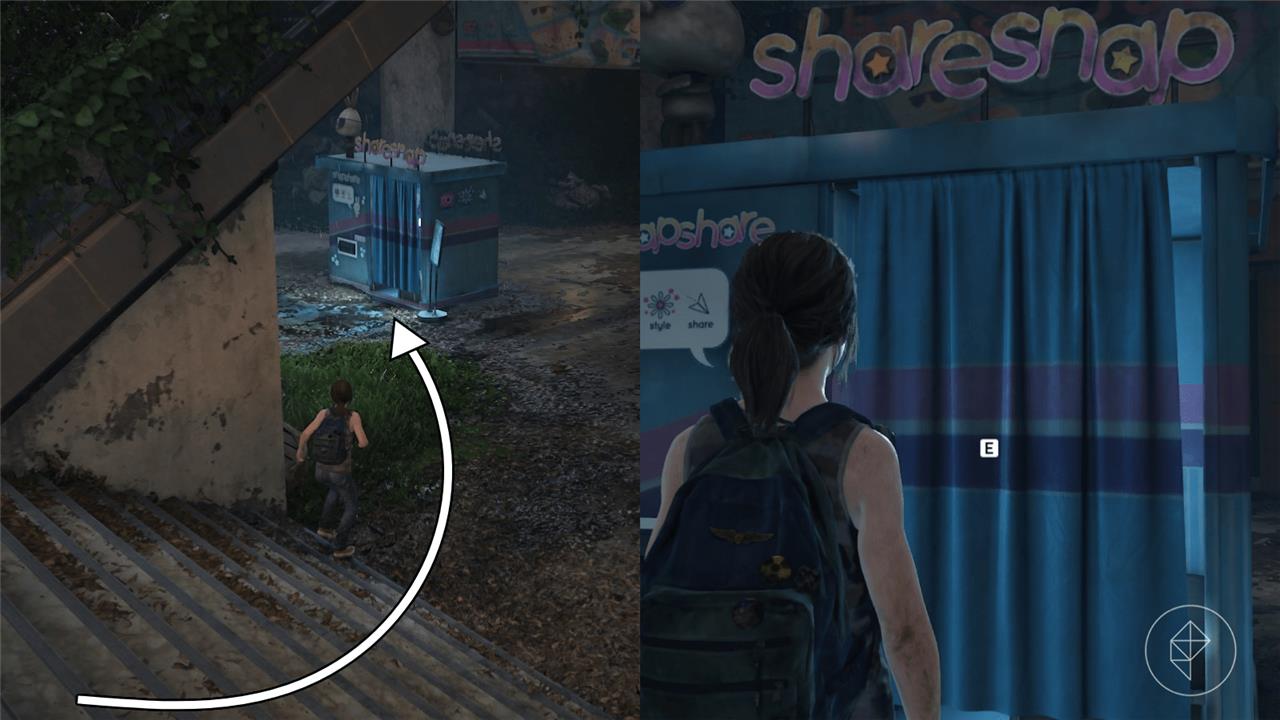
Head down the stairs to the lower level to find a photobooth. Interact with the photobooth to start an optional conversation.
The Enemy of My Enemy Collectibles
In “The Enemy of My Enemy,” players can find a mix of collectibles hidden throughout the abandoned mall as Ellie follows the trail of the infected. Keep an eye out for notes scattered near the escalators and the shopfronts-they add context to the Fireflies’ last stand. A pendant can also be found near a collapsed display case, and audio logs reveal more about the conflict between groups trapped inside. Carefully search each corner before moving on, as some items blend into the environment.
“The Enemy of My Enemy” starts after you return to Ellie clutching onto the medkit in the helicopter and ends after a long battle between Ellie, the hunters, and the infected.
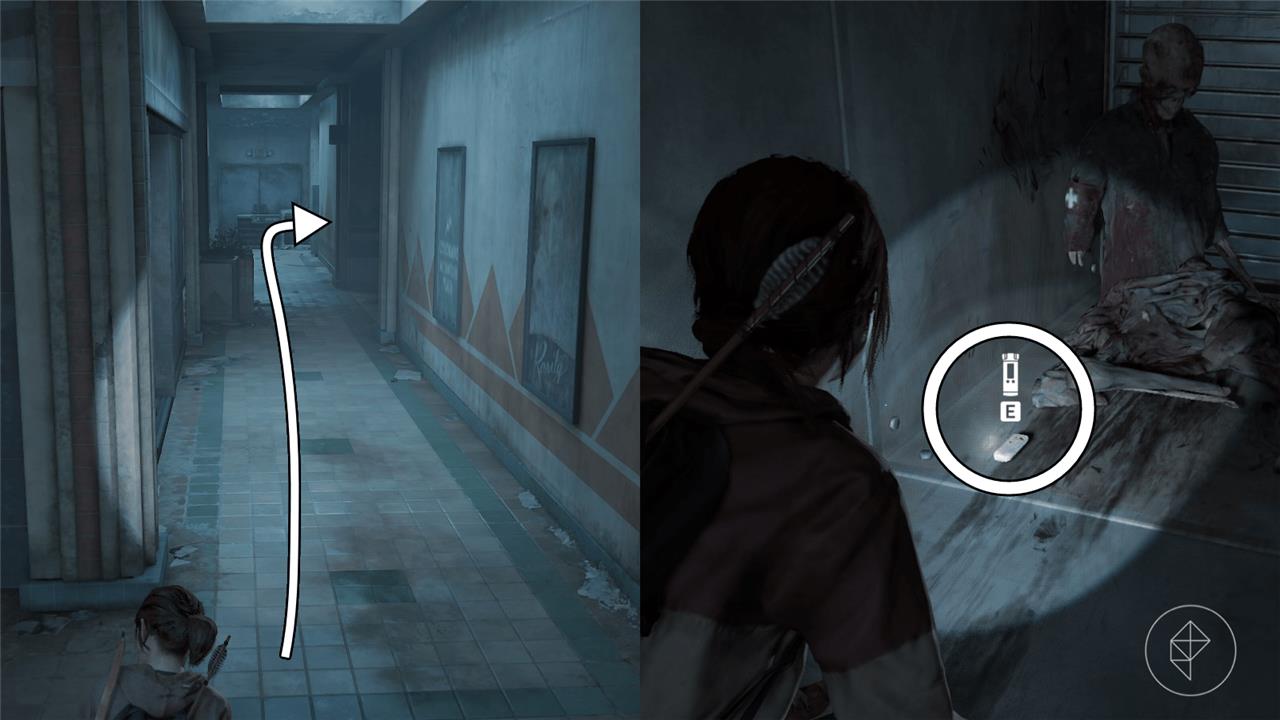
Crew Photo Artifact Location
Once you gain control of Ellie after the initial cutscene, continue along the path and enter the first open door on your right. Inside, head to the back left corner to find the Crew Photo beside a corpse.
Duct Recorder Artifact Location
After you vault over the barricade in the walkway, you’ll encounter a brief cutscene where some hunters are getting attacked by a clicker outside of a record store. Take ou thte hunters, and make your way to the right of the record store. Continue down the hallway to find an open air duct on the right. Follow the blood trail inside to find the Duct Recorder beside a corpse.
Escape from Liberty Gardens
Riley and Ellie leave the mall through Liberty Gardens, where several collectibles can be found before they part ways. Search the nearby benches and playground area for notes and optional conversations. Keep an eye on the wall art and destroyed structures-some hidden items are tucked behind debris near the exit gate.
The “Escape from Liberty Gardens” section begins after you return to the past one final time, but there are no collectibles in this section, so that marks the end of “Left Behind” – and all of the content in The Last of Us Part 1.
Left Behind optional conversations and jokes locations
Left Behind in The Last of Us Part 1 features 12 optional conversations, all with Riley, primarily in the Mallrats chapter, plus one in Fun and Games. These contribute to the BFF’s trophy (12 total) and require waiting for the triangle prompt after approaching specific spots or lingering near Riley.
Mallrats Conversations (1-11)
-
#1 Look For The Light: After shimmying across the broken walkway in the opening apartment, interact with the “Look For The Light” graffiti on the wall.
-
#2 Surfing in LA: At the bottom of the first escalator in the mall, turn around, go right into the dead-end hallway, and look at the beach vacation billboard.
-
#3 Typhoon Blitz: From the escalator bottom, head forward past planters; interact with the water gun advertisement on the left side of a central planter.
-
#4 Death by Natural Causes: Bottom of the second escalator, approach Riley near the tent and campfire to discuss Winston.
-
#5 Pour One Out For Winston: Inside Winston’s tent (right after #4), interact with the pile of magazines in the back corner by the cot.
-
#6 What Happened to Princess?: Exit the tent, approach the bench directly ahead with a saddle on it.
-
#7 Eyeball Jar: In the Halloween store (after rubble), go to the back right corner shelf in the women’s section for the jar of fake eyeballs.
-
#8 Shopfronts: As you explore the main mall concourse with Riley, approach various shuttered stores for prompts (e.g., near carousel or military posters).
-
#9 FEDRA Posters: Near the main entrance area, look at FEDRA/wanted posters on walls for Riley chat.
-
#10 Halloween Displays: Inside or near the Halloween store, interact with masks or props after initial jar.
-
#11 Brick Contest Area: Before or during the brick-throwing at the car, linger with Riley for final Mallrats talk.
Fun and Games Conversation (#12)
-
Photo Booth: After carousel and jokes, go down right-side steps to the photo booth; interact to take pictures (counts as conversation).
Jokes (That’s All I Got Trophy)
These overlap with some conversations but are distinct; Ellie pulls her pun book near Riley after prompts. Stay close without walking away to hear all six sequences fully.
-
Trigger by lingering in key spots like joke book areas in Fun and Games, arcade transitions, or water gun/duel setups.
Left Behind all collectibles locations and maps
Left Behind in The Last of Us Part 1 contains 14 artifacts, 12 optional conversations (mostly with Riley), 6 joke sequences, and various mini-game trophies across its five chapters. Use chapter select to revisit sections, as collectibles are tracked individually.
Back in a Flash (4 Artifacts)
-
Combination Note: Inside Weston’s Pharmacy entrance, behind the counter on the floor (right side of main corridor).
-
Pharmacist’s Note: Back room of pharmacy after grabbing the key from the clicker pharmacist’s body (note drops automatically).
-
Salon Note: From pharmacy, slip through broken wall to Rarity Nail Salon; on corpse by the wall.
-
No conversations or jokes here.
Mallrats (1 Artifact + 11 Conversations)
-
Wanted Poster: Early main concourse near FEDRA posters on the wall.
Conversations (wait for triangle prompt near Riley):
-
#1: “Look For The Light” graffiti after apartment walkway.
-
#2: Beach billboard in dead-end hallway at first escalator bottom.
-
#3: Water gun ad on central planter.
-
#4-5: Winston’s tent (campfire chat, then magazines on cot).
-
#6: Saddle bench outside tent.
-
#7: Eyeball jar in Halloween store back-right shelf.
-
#8-10: Shopfronts, FEDRA posters, Halloween props/displays.
-
#11: Brick-throwing car area.
No jokes yet. Brick Master trophy: Smash all opponent car windows first.
So Close (4 Artifacts)
-
Atrium Note: Under helicopter, right toward Luciano store entrance in blood pool.
-
Generator Note: Near generator powering shutters (on top after cat scare).
-
Atrium Recorder: Upper floor post-power restore, near escalator gate by helicopter view.
-
Medical Supplies: Auto-collected from helicopter med kit.
Fun and Games (2 Artifacts + 1 Conversation + 6 Jokes)
-
Kitchen Note: Food court kitchen counter behind serving area (opposite carousel).
-
No Pun Intended: Volume Too: Joke book area after Riley prompts puns.
Conversation #12: Photo booth after steps down from carousel.
Jokes (That’s All I Got trophy-stay near Riley, don’t walk away):
-
Trigger sequentially in joke book spots, arcade, water guns.
Trophies: Angel Knives (no hits), Skillz/Nobody’s Perfect (arcade/water duel wins).
The Enemy of My Enemy (2 Artifacts)
-
Crew Photo: Early path, back corner on corpse/crate.
-
Duct Recorder: Hallway blood trail post-record store cutscene, beside corpse.
Maps and Visuals
No interactive maps in core game, but guides use chapter screenshots/video timestamps (e.g., YouTube 100% runs show exact spots). Check Bonuses > Collectibles menu for progress.