Leon’s final push through the Summit, Stronghold, and Sanctuary tests every skill you’ve honed so far-relentless enemies, dwindling ammo, and choices that can mean life or death. This chapter marks the turning point where survival instincts meet sheer willpower, and every corner hides a new threat waiting for one last stand.
Our Resident Evil 4 remake Chapter 15 walkthrough will ensure you don’t miss any items from the beginning of the chapter through the Stronghold, Bulwark Gate, Cliffside Ruins, Specimen Storage, Sanctuary Approach and Sanctuary, and Luis’s Laboratory.
Throughout this walkthrough, we’re not going to mention every item that anyone (or anything) you shoot drops – if you kill something, look for a loot drop.
Also, there’s a little randomness to the contents of crates based on your inventory and weapons, so you probably won’t find the exact same things listed below. The crates and barrels themselves will always be in the same locations, though. And all other items – keys, collectibles, and resources not found in crates – should be the same.
Make your way to the summit
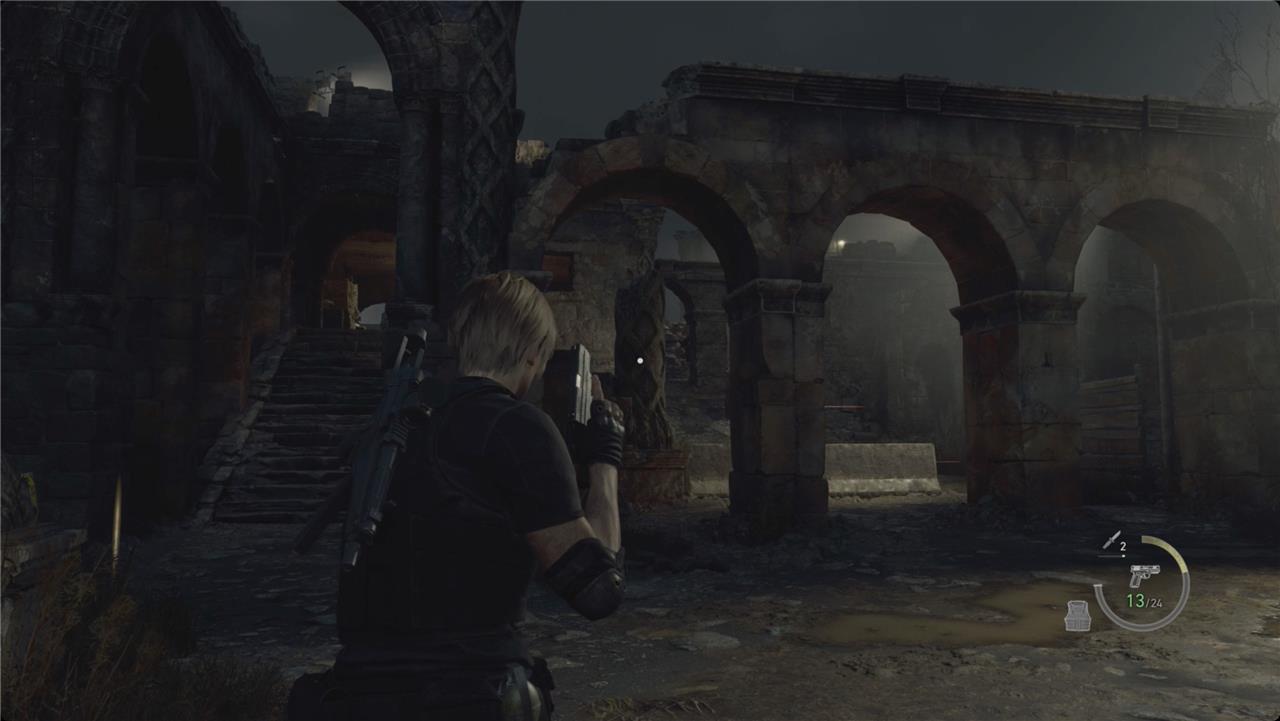
Chapter 15 begins with your ascent up the treacherous mountain path toward Saddler’s fortress. You’ll face heavy resistance from Ganados wielding crossbows and dynamite as you climb the narrow c
There are no phone calls or anything to start this chapter, so just go smash the barrels ahead of you for some pesetas, gunpowder, and a velvet blue.

Take the ramps up to a binocular spot and survey what’s coming up – spoiler: it’s a lot of bad guys.
Turn around to the right to smash a crate above the ramps for some gunpowder. Take the ladder on the north side down to the Merchant.
You won’t have anything special to sell this time, but we did just pick up that new Fighting Knife. It’s better than your default Combat Knife and it can also be repaired, so it’s safe to sell the Combat Knife to buy some tune ups for the Fighting Knife.
Hit the typewriter to save.
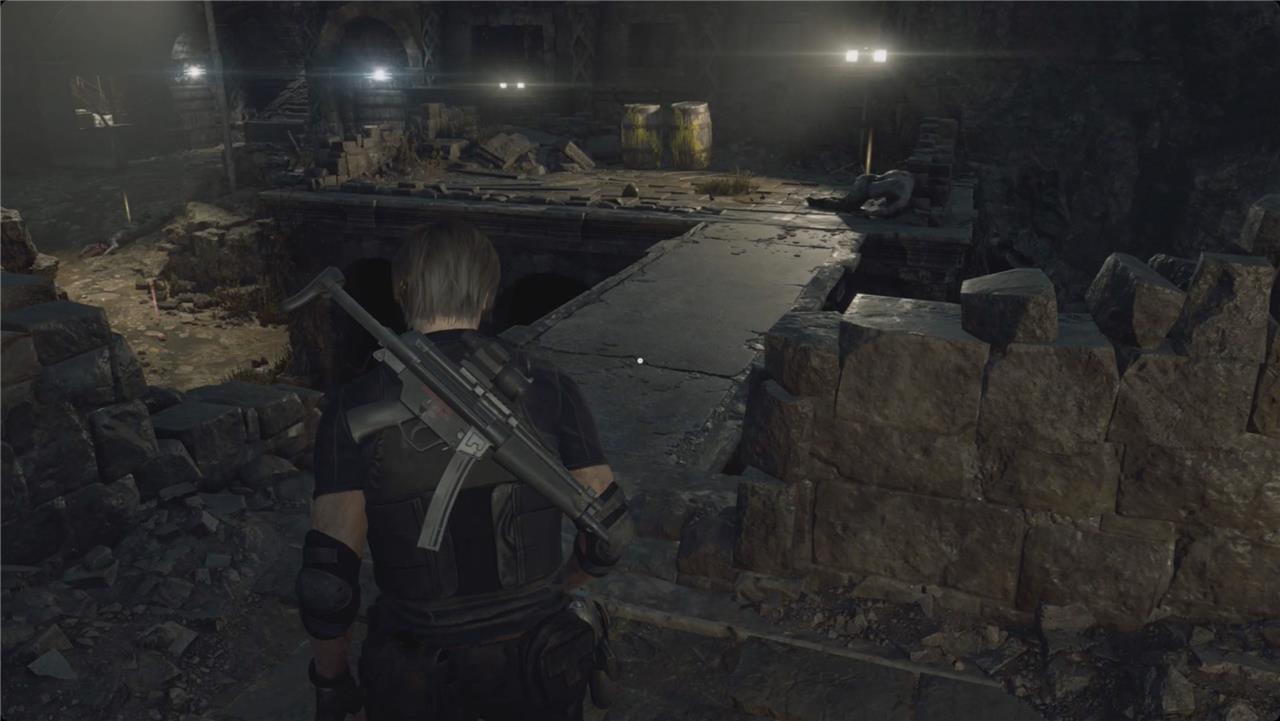
Stronghold approach
The Stronghold approach focuses on conserving ammo and stamina while exploiting the map’s choke points to stagger and disable tougher enemies, using the environment for cover, prioritizing safe routes, and timing assaults to maximize openings without exposing the player to unnecessary risk.
When you’re done at the Merchant, head to the left and cross the wooden bridge.
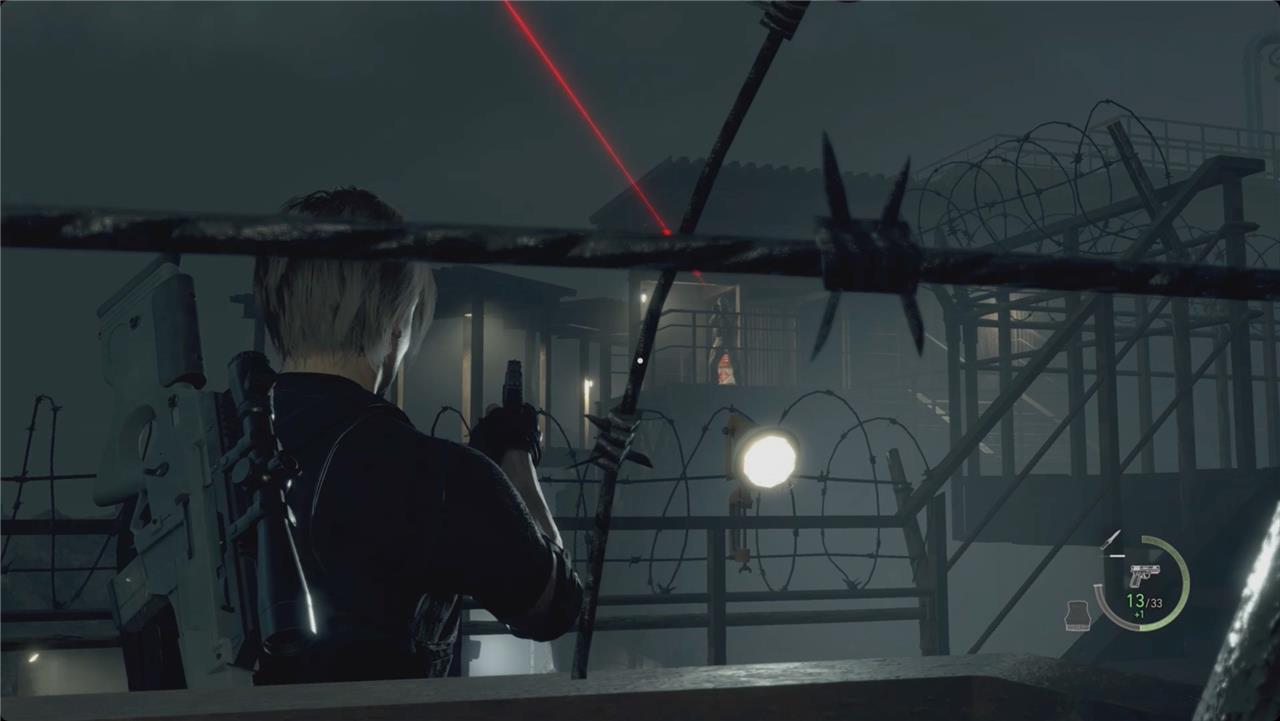
Take the right turn in the path and immediately get behind one of the barriers (which are apparently called Jersey walls?) to avoid getting shot. Thankfully, you don’t have to do the shooting this time.
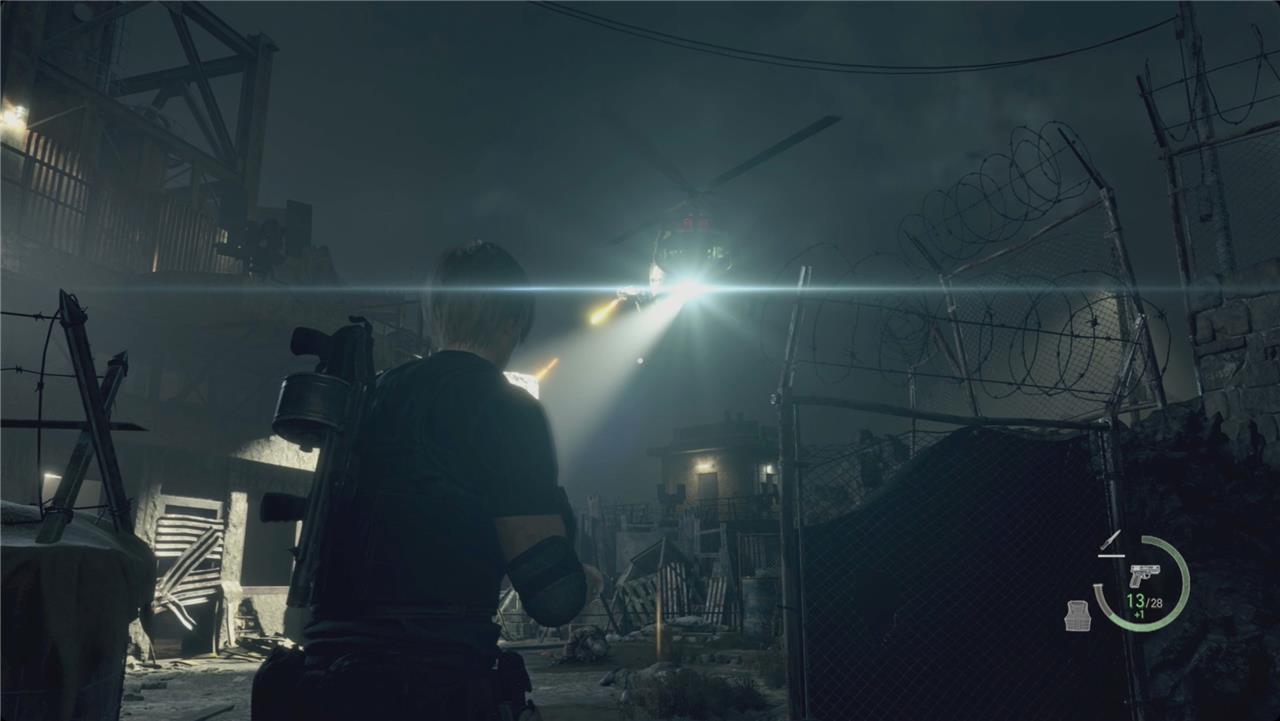
Clean up any soldiers Mike missed with his helicopter attack(s) and start forward. You’re going to get swarmed by more soldiers. Mike is circling to help you out – but you’ll have to make sure to get out of his way while he’s shooting. Watch for his spotlight as a clue to where he’ll strafe next.
Keep moving to get the soldiers out in the open. We recommend avoiding the gun emplacement up on the tower to your left. It’s fun for a couple seconds, but you’ll get attacked from the side before you do much damage.
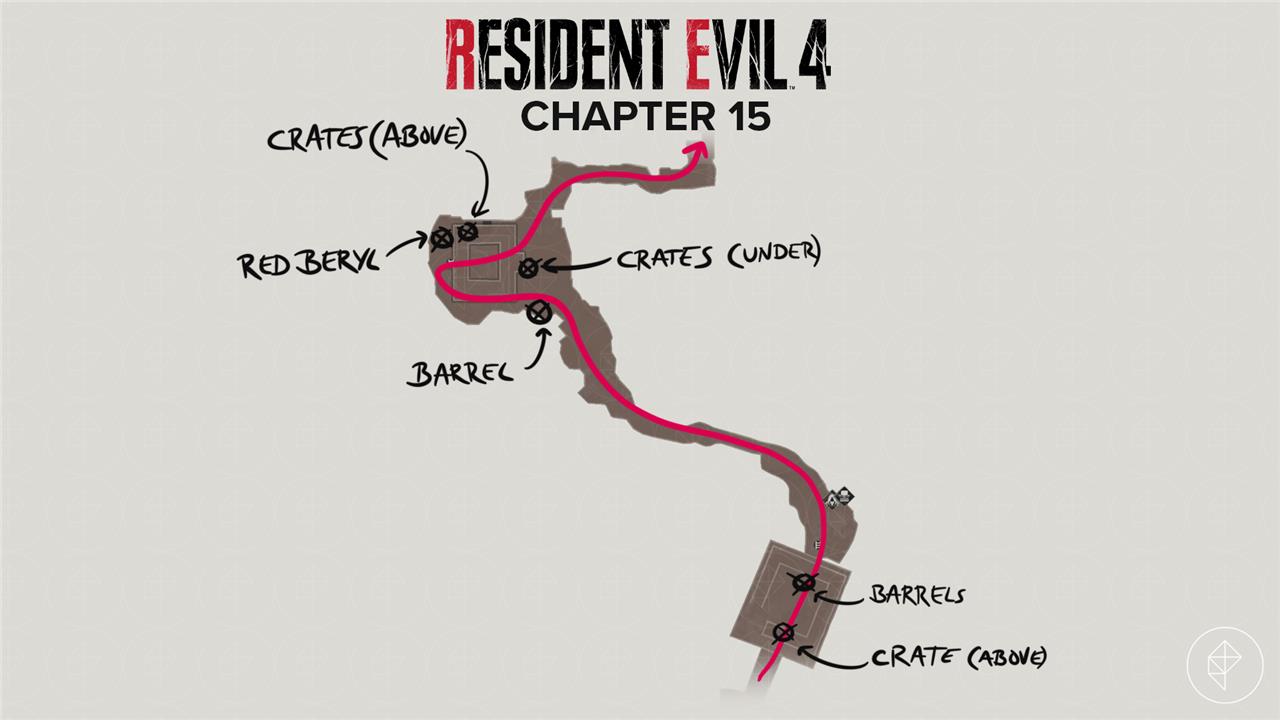
Eventually, Mike will blow up the rubble keeping you here, and the fight will end. There is a barrel to the left of where you entered with pesetas and handgun ammo, and a crate in front of the tower with pesetas and a boot knife. There are two crates inside the tower with pesetas and shotgun shells.
Circle around to the back of the tower. Look past the ladder there for a lantern with a red beryl inside. Climb the ladder and turn left for two more crates with pesetas and magnum ammo.
Do one last check for any drops you missed, and then head north through the gap Mike opened for you.
Stronghold
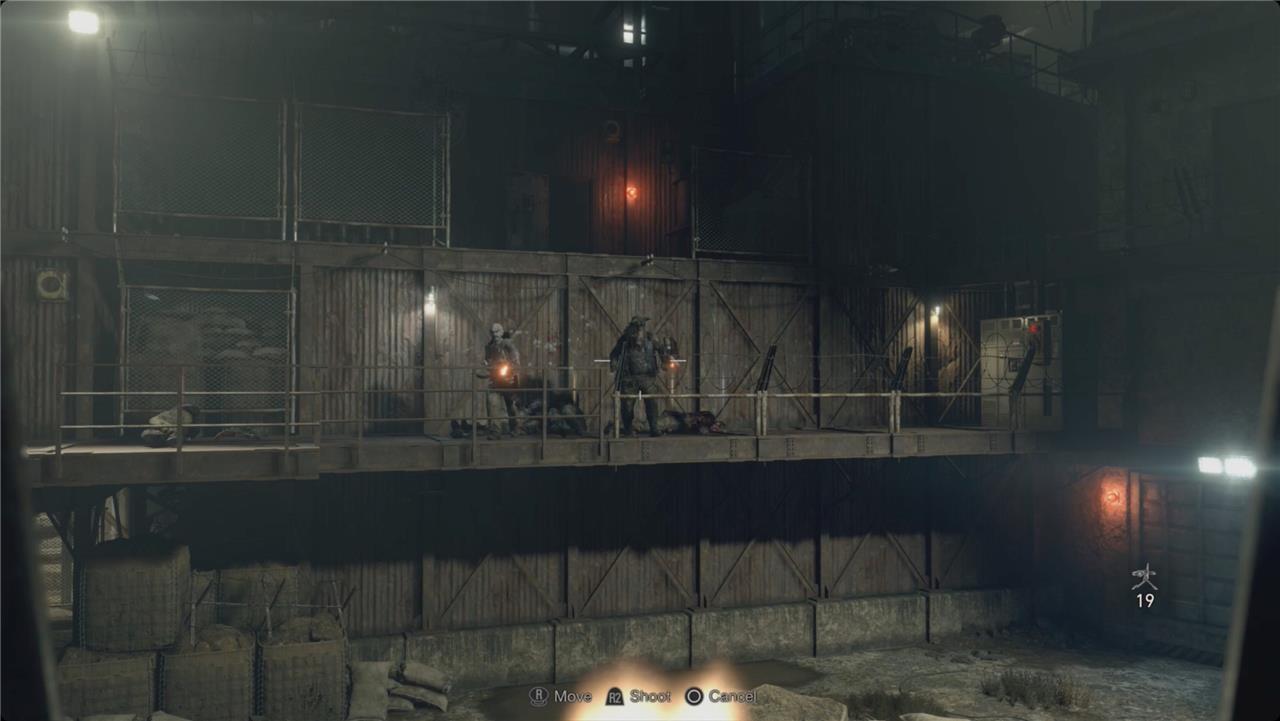
The Stronghold section throws Leon into intense combat against waves of enemies while Ashley operates the cannon to clear their path. Players must defend her from attacks while managing ammunition and positioning carefully. Use explosive barrels and the environment to thin out enemy groups quickly, keeping an eye out for heavy armor units that can disrupt progress. Once the area is secured, the gate ahead opens, leading to the final stretch toward the Sanctuary.
Follow the path around a couple turns, and take Mikes advice – get behind a barrier and wait for him to clear out most of the soldiers before you continue.
Just past the barriers, watch on the left for some gunpowder on top of some sandbags. Across from the tower Mike just destroyed, grab the first aid spray.
Climb the ladder on the left just past the explosive barrel. Take a left at the top for a couple barrels with pesetas, gunpowder, magnum ammo, and handgun ammo, along with a green herb.
When you head back, watch for a lantern hanging from the metal beams above you – shoot it down for a velvet blue.
Destroy the anti-aircraft gun
Use the rocket launcher found earlier to blast the anti-aircraft gun from a safe distance. Position yourself on the cliffside overlooking the stronghold, aim carefully at the gun’s base, and fire once it locks onto your position. A single well-placed shot destroys it completely, clearing the skies for the chopper extraction and halting enemy reinforcements. If you lack the launcher, scavenge one from the castle armory beforehand or rely on grenades as a backup, though they require multiple hits.
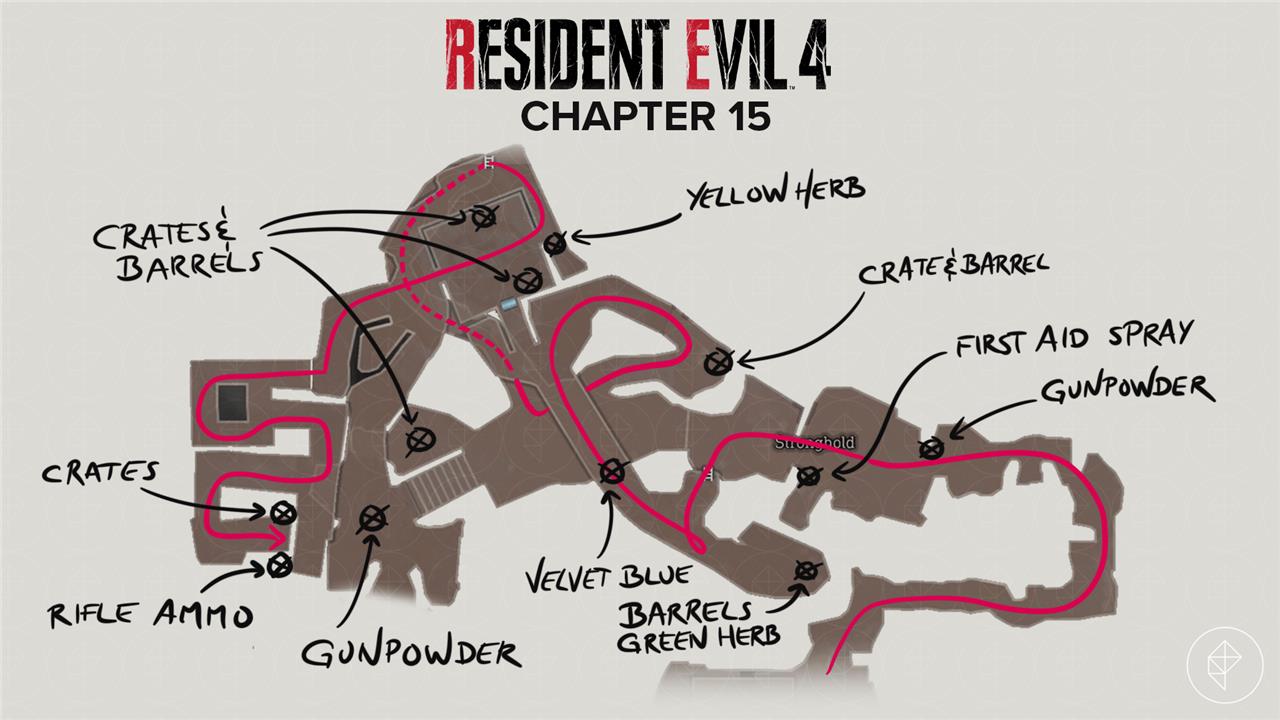
When you cross the metal bridge, an anti-aircraft gun will pop up and chase Mike away. Take a right at the end of the bridge and follow the path down. There’s a crate and a barrel at the first corner with rifle ammo, magnum ammo, and pesetas.
You’ll have to head (most of the way) down the stairs to trigger the next wave of baddies, but head back up as soon as you do – fighting from the top of the stairs gets you a shot at a couple of exploding barrels and keeps you out of range of the gun emplacement.
Deal with the soldiers on foot, and then turn your attention to the machine gunner. If you have the rifle ammo, you can snipe him from here, or just use the barriers for cover as you get closer. Watch for a pair of arbalists high above you on the left.
Ignore the tunnel on the right for a second and go smash the crate and barrel to the right of the stairs for some handgun ammo, submachine gun ammo, and gunpowder.
Go back to the tunnel and follow it to ladder at the end. At the top, head left around around the building. Grab the yellow herb by the door, and then head inside. There’s a barrel to the left with pesetas and two crates to the right with pesetas, gunpowder, resources (S), and a hand grenade.
Unlock the door to the left, and then head through the open doorway ahead of you. Take the metal stairs up and deal with the soldiers you run into.
At the next flight up (heading back to the east), there are two arbalists on your right and a rocket launcher soldier on a tower ahead of you. Keep heading up the stairs.
When you reach the roof, smash the two crates for pesetas. Go grab the rifle ammo just to the right of the gun emplacement, and then use the gun emplacement to blow up the anti-aircraft gun to your left.
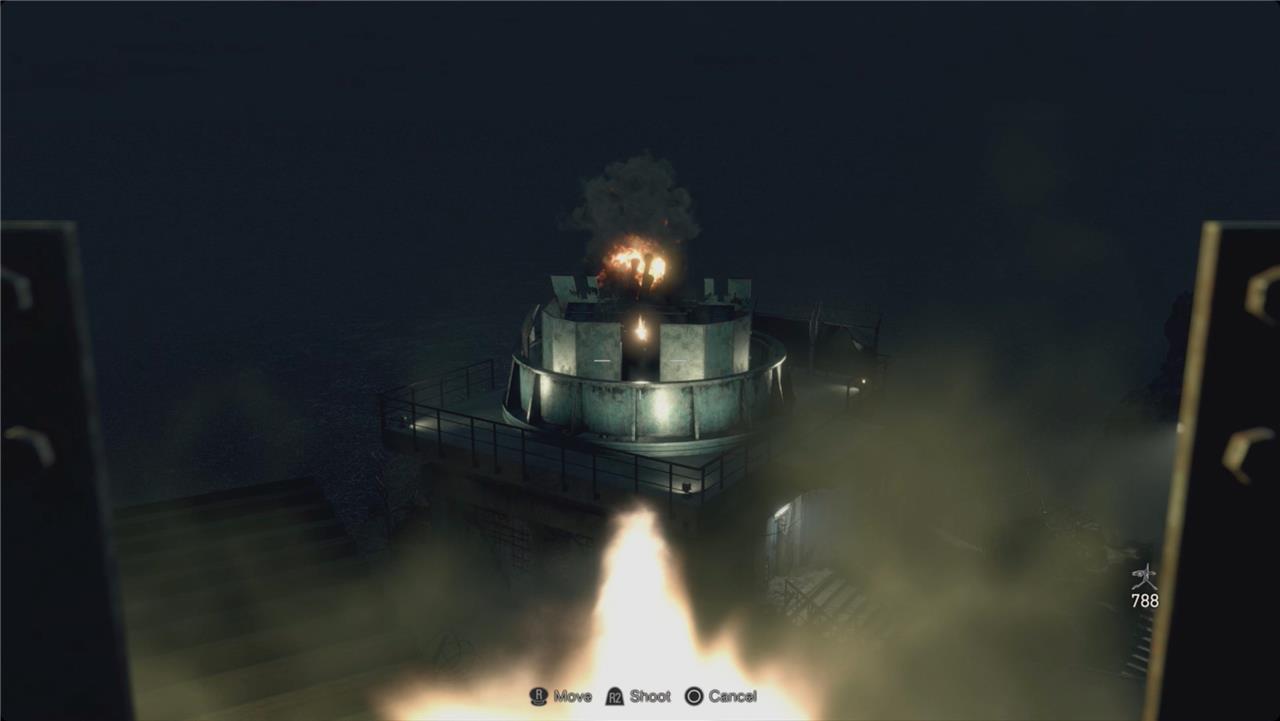
When it blows up, soldiers will stream out of the building across from you. Keep using the gun to help Mike clear them. As you head back downstairs, Mike will blow open the next gate for you – but he’ll also run out of ammo at that point.
Deal with the soldiers and then head for the gate. Grab the gunpowder from the crates as you pass.
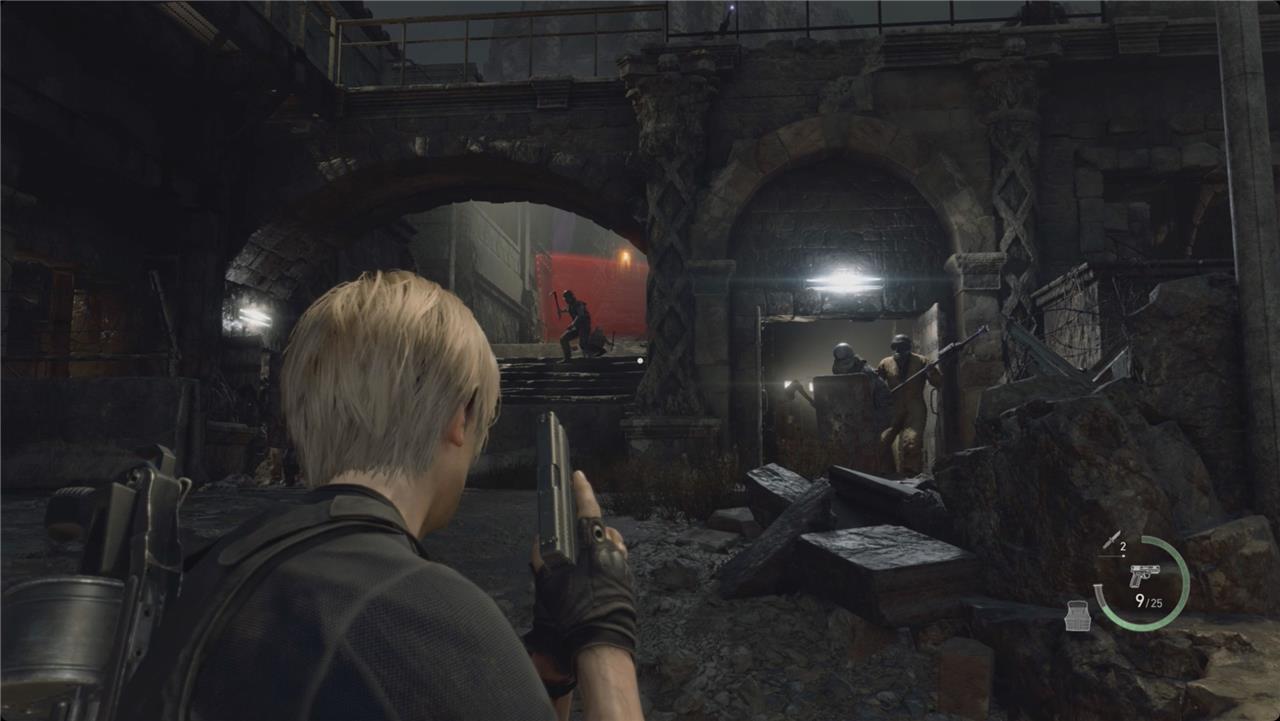
Bulwark Gate
The Bulwark Gate marks a tense defense point where players must withstand waves of enemies while figuring out a way to lift the massive gate blocking their path. Watch for ambushes from elevated positions and use the available turrets or explosives to thin out enemy groups. Timing and positioning are key here, as attackers approach from multiple angles, making resource management and quick reactions critical for survival.
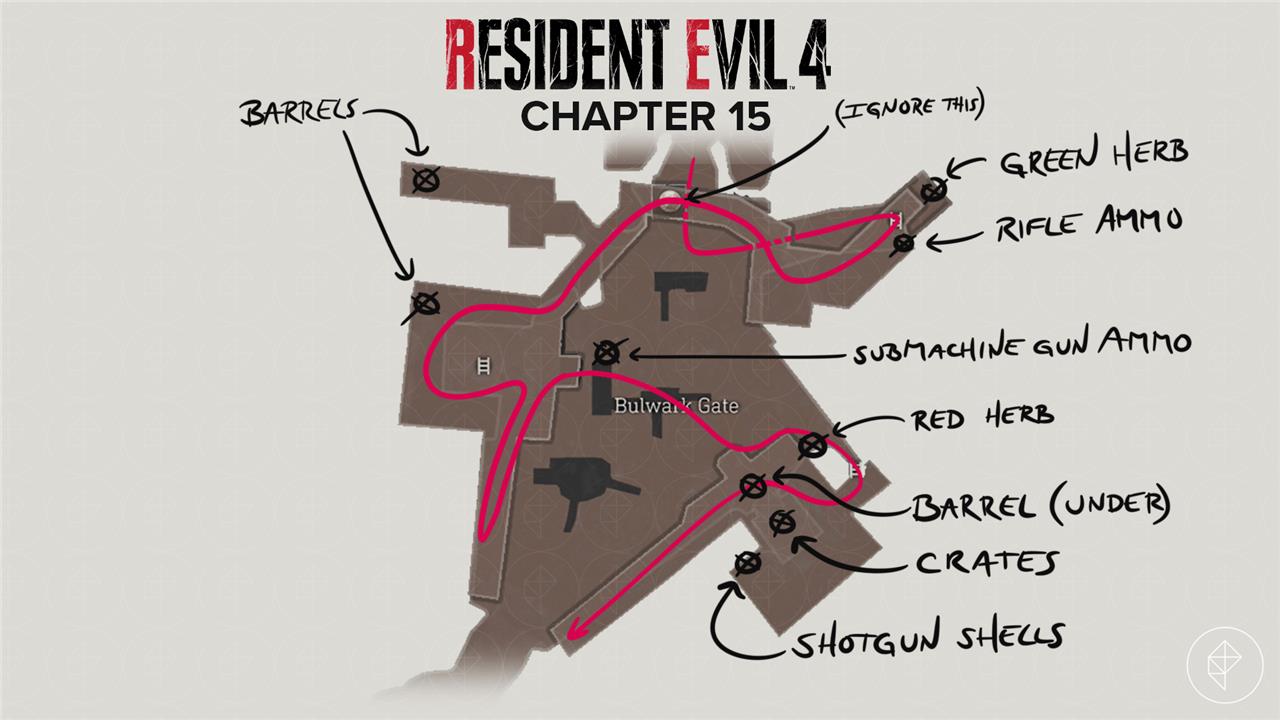
As soon as you go through the gate, there are two gun emplacements to deal with (and they suck). Avoid them by immediately cutting to the left and heading for the tunnel. Grab the green herb at the end, and then climb the ladder.
A few soldiers will probably follow you into the tunnel – if you have a grenade to deal with them, toss that, but they’re easier to deal with at the top of the ladder.
At the top of the ladder, grab the rifle ammo and turn around to deal with your pursuers. If you’re careful, you can snipe the gun operator across from you.
Sprint across the catwalk to the far side of the open area and take the first right you come to for a small room with a barrel containing shotgun shells, handgun ammo, and pesetas. This is also a good place to snipe the gun emplacement (and arbalist) across from you if you have the ammo.
Back outside, take a right and loop behind the building to find a barrel with handgun ammo and resources (L). Around front, use the gun to deal with the soldiers across from you if you haven’t already. That should finish off the soldiers in the area.
Head right to the far end of the walkway. Throw the switch there, and then sprint back to the gun – a handful of soldiers will appear opposite you, but you can make short work of them with it. Just be very conservative with your ammo. (You’ll see why in a second.)
Drop off the tower, just to the left of the gun and grab the submachine gun ammo on the crate. Another wave of enemies will show up on the far side – this time including a boar-headed brute. Climb back up to the gun and use whatever ammo is left in it to deal with as many as you can.
Drop off the tower again and head to the far side (heading east). Smash the barrel under the other gun emplacement for a hand grenade, some shotgun shells, and pesetas. To the left, grab the red herb and climb the ladder.
Take the first left and run around behind the building to find some shotgun shells on the stack of sandbags. Back around front, duck inside to find two crates with pesetas and gunpowder.
Exit and take a left. There’s another switch at the far end of the walkway. When the gate opens, backtrack to drop down, and head through it.
Cliffside Ruins
Perched along the cliff’s edge, the ruins offer little cover as enemies swarm from multiple angles. Narrow pathways force careful movement, with stray shots easily sending players over the edge. Watch for hidden treasure tucked among crumbled walls, but don’t linger too long-snipers and cultists can quickly close in. Keeping a rifle or long-range weapon ready makes this section much more manageable.
Take the stairs all the way up. When you come to the Cliffside Ruins, Mike will return. I’m sure everything will go great. Walk forward until you get a cutscene during which everything decidedly does not go great.
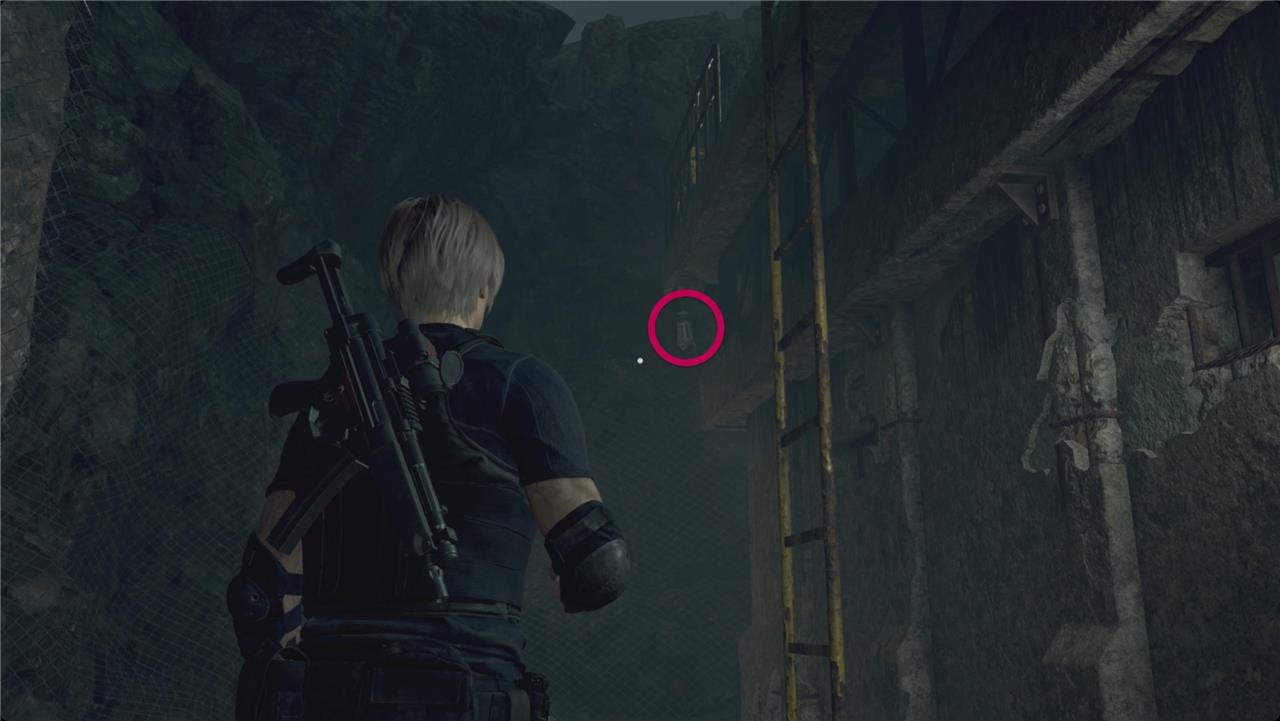
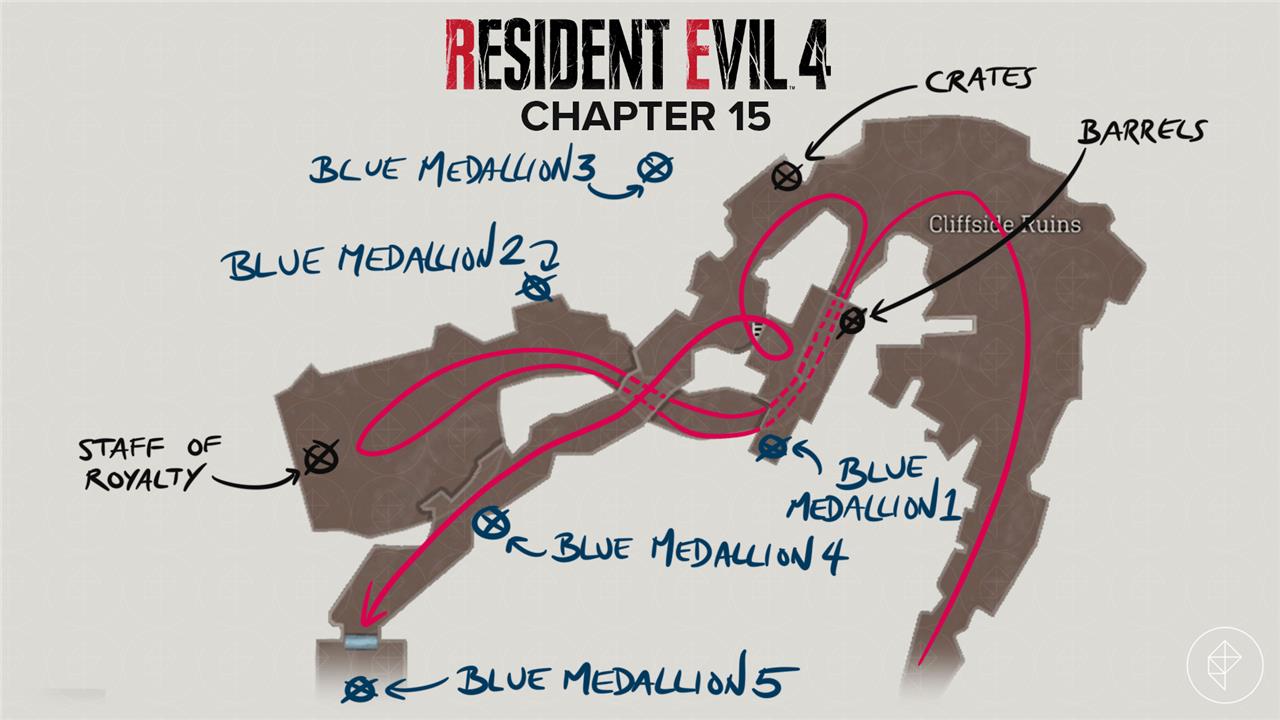
When you get control again, deal with the four novistadores. Before anything else, run over to the left side of the tower ahead of you (the side with the scaffolding). Face southwest and look through the window. You’ll see Blue Medallion 1 of 5 hanging at the back of the tower.
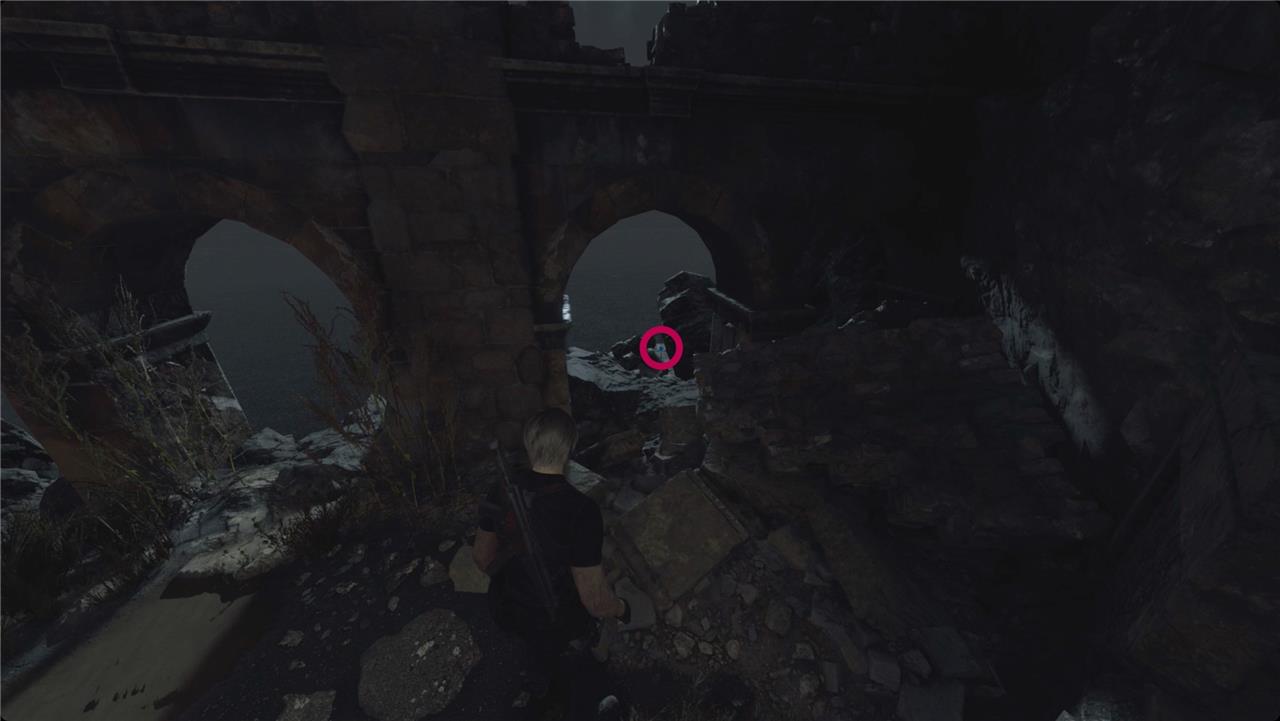
Head into the tower and down the ladder. Follow the path until you can see the ocean. Look through the first arch and a little down to spot Blue Medallion 2 of 5. Turn left and stick to the right. Read the headstone for the Cliffside Epitaph file. Open the chest to the left for a Staff of Royalty.
Head back topside and take a left. Smash the two crates for resources (S) and handgun ammo. When you pass the crumbling wall, look right to find Blue Medallion 3 of 5. Turn left and climb the ladder. Take a right at the top and smash the two barrels for handgun ammo and pesetas. Drop back down and smash the barrel to the left for more pesetas.

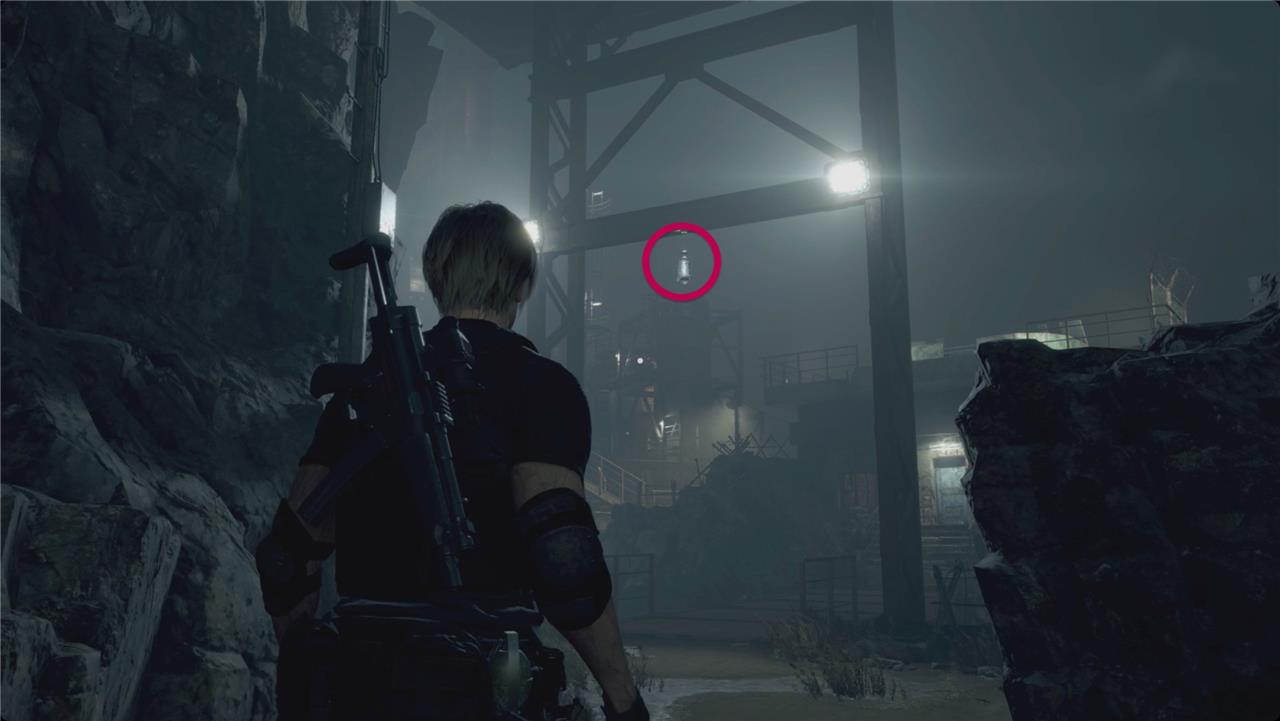
Continue along the path, and watch on your left for Blue Medallion 4 of 5 hanging in the scaffolding.
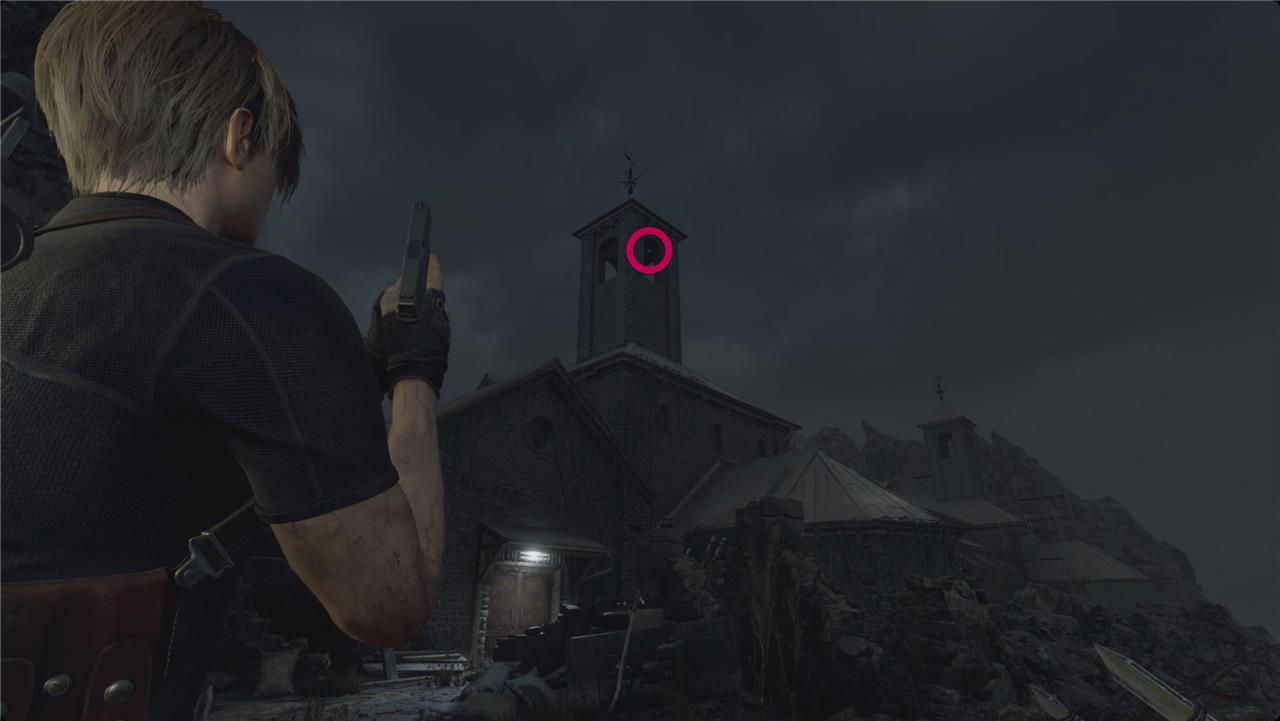
Stay right there and turn to the building southwest of you. Look up at the steeple(?) to spot Blue Medallion 5 of 5.
Just to the left of the door would be the Destroy the Blue Medallions 6 Blue Note Request if we hadn’t just finished it.
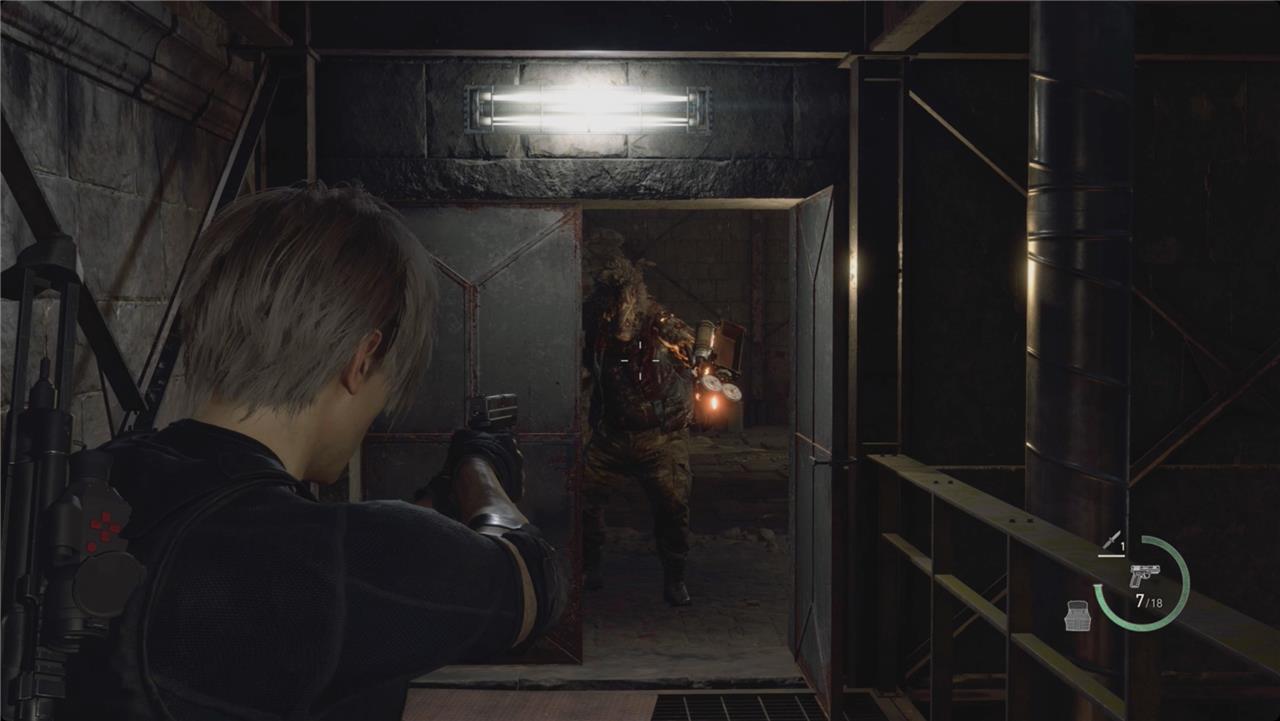
Push through the doors. Around the first corner, there are three body bags hanging in your way.
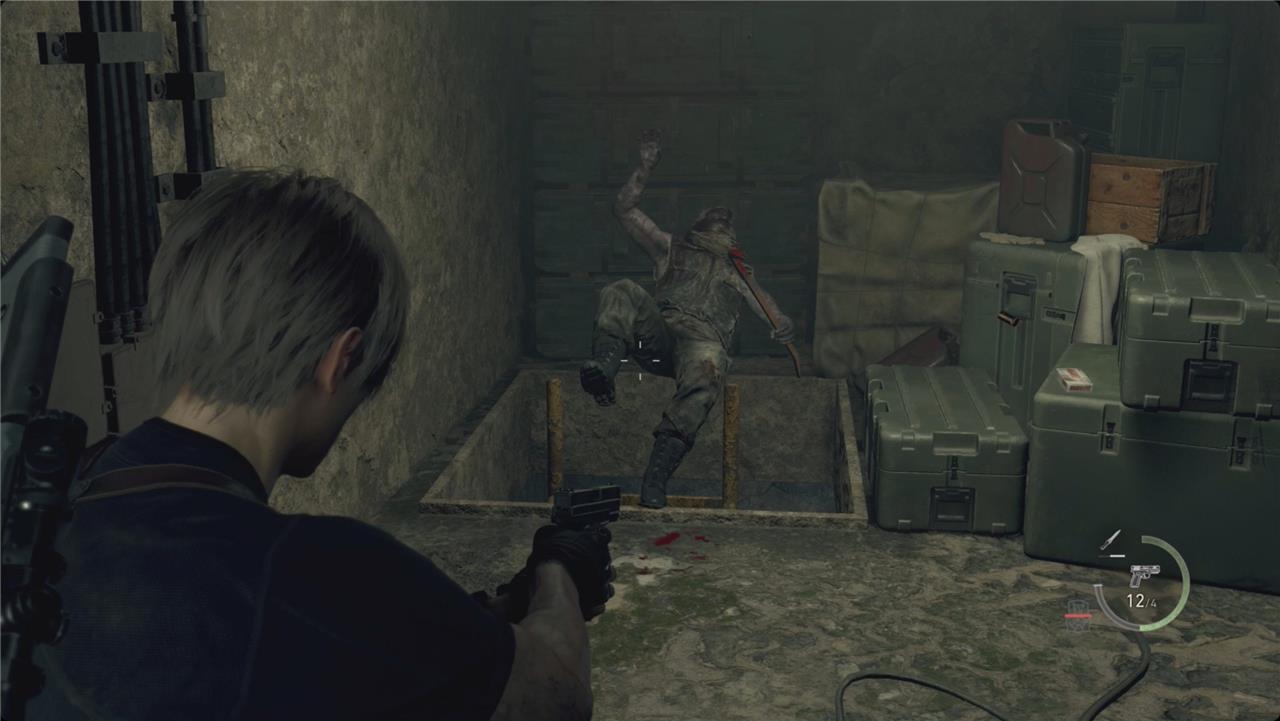
When you try to push past, a regenerador will drop out – thankfully not an iron maiden, and this one only has two parasites. Deal with it, and then smash the barrel in the corner for some pesetas.
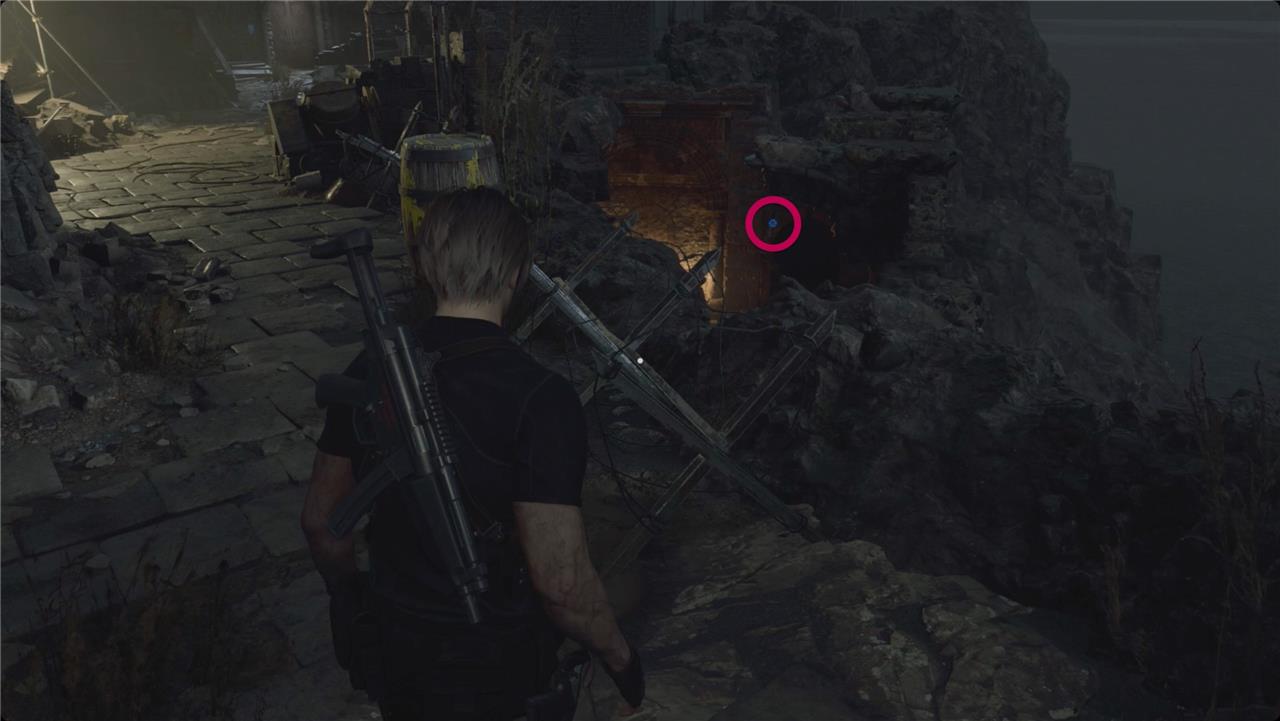
When you step into the next room, pick up the Biological Specimen Transfer file from the table. In the back right corner, grab the resources (L) from the filing cabinet. Head through the doorway opposite where you came and turn right for a chest containing a Splendid Bangle.
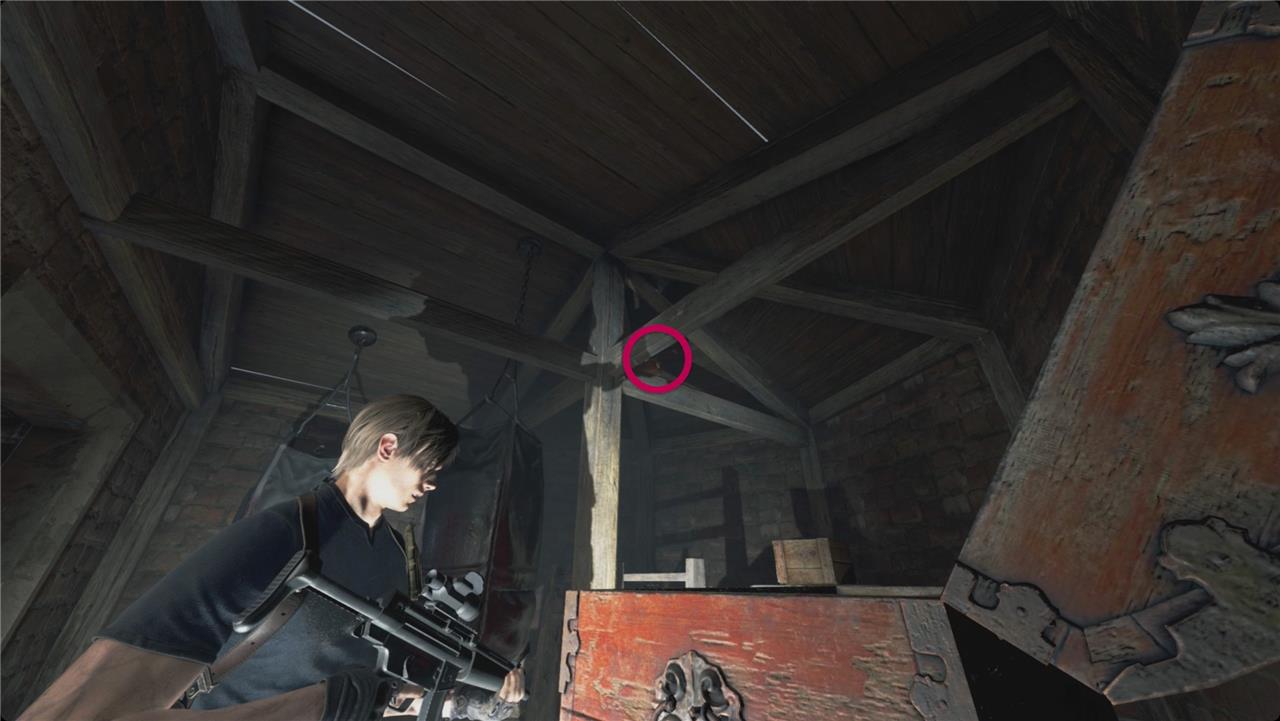
Turn around and, with your back to that chest, look up and to the right. Clockwork Castellan15 of 16 is in the rafters above you.
Back in the first room, use the wheel to (temporarily) open the metal gate. Duck through.
Specimen Storage
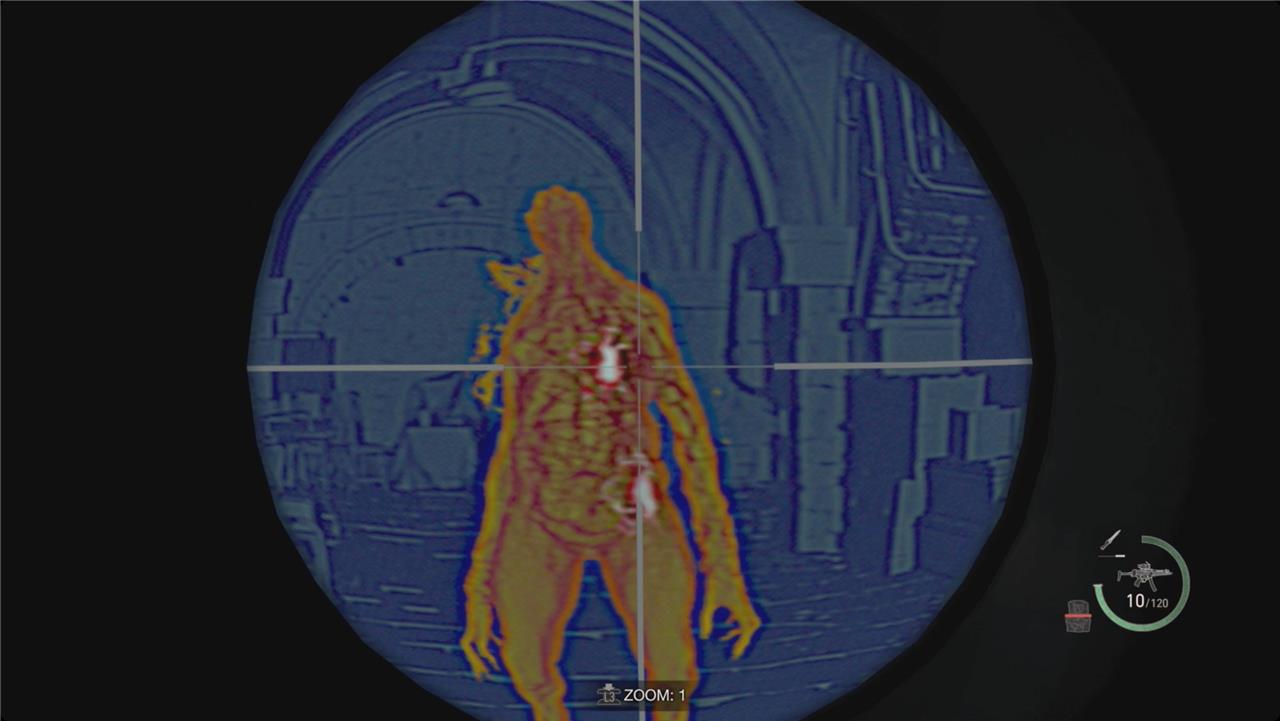
This area houses grotesque biological samples sealed inside large glass tanks, hinting at the scale of Sadler’s experiments. The dim lighting, cold metal surfaces, and humming machinery create an atmosphere of unease as you move through the facility. Be ready for sudden enemy encounters while scanning for valuable items and keycards among the storage units. Each specimen chamber tells a story of failed mutations and the cult’s obsession with control, setting a chilling tone before the next confrontation.
Smash the barrel ahead of you for some pesetas, and then follow the hall forward. Smash the next crate for some handgun ammo and another regenerador will drop out of the body bag next to it. This one has three parasites and is an iron maiden – once you pop the torso parasites, the final one is in its head.
Take a left to follow the room around. Smash the two crates by the gurney for a viper and a hand grenade. The other end of the gurney has a hand grenade.
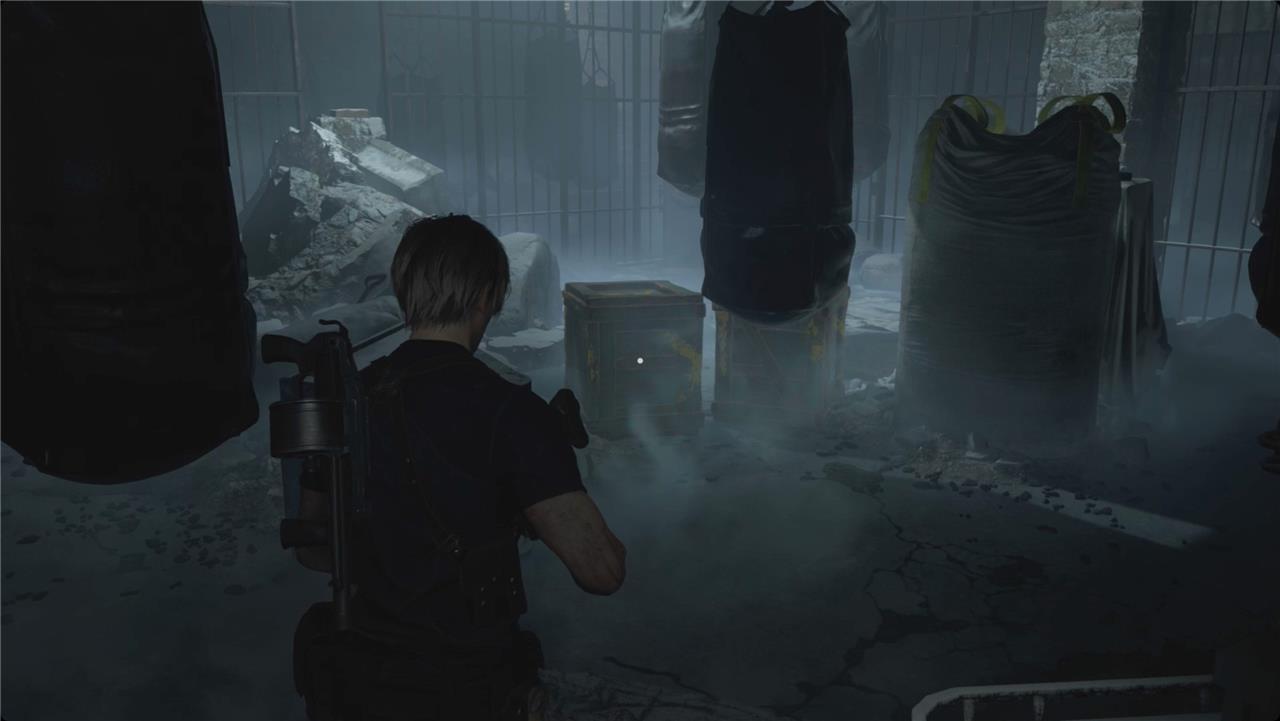
Keep following the room around and into the cage in the center. Smash the crates for pesetas and resources (L). At this point (and not before), another iron maiden regenerador will drop out of the body bag in the middle of the room (two torso parasites and one in the head).
Use the wheel in the northwest corner of the cage. This (temporarily) opens a gate at the top of the stairs to the northwest. Sprint around to get there.
There are two crates to the right with gunpowder, but nothing else in here or in the Merchant’s room.
Merchant
The Merchant appears once more near the entrance to the stronghold, offering valuable supplies and weapon upgrades before the battles ahead. This is a good time to trade any gems or treasures collected earlier and tune up your gear, as heavy combat is approaching. His shop includes new upgrade options, and the Shooting Range nearby provides another chance to earn Spinels for rare items.
When you talk to the Merchant, you’ll cash in the Blue Medallion Request for five spinels – this was the final Blue Note Request, so you’ll also earn the Jack of All Trades achievement or trophy.
Sell the Staff of Royalty and the Splendid Bangle (inlaying the right gemstones can really improve that 9,000 pesetas value). There’s nothing new, so just do your repairs and tuning up.
The elevator behind the Merchant takes you down to the fifth (and final) Shooting Range. There aren’t any new challenges here, though – it’s just another opportunity to earn Charms.
Sanctuary Approach
The Sanctuary marks one of the most intense sequences of Chapter 15, placing Leon against waves of enemies in confined spaces. Careful movement and resource management are key here, as the narrow corridors limit escape options. Ashley’s safety is again a priority, so clear every corner before advancing. Utilize cover and heavy weapons to handle armored zealots and Brutes quickly. The final approach demands patience and awareness, rewarding methodical players with smoother progress toward the island’s endgame.
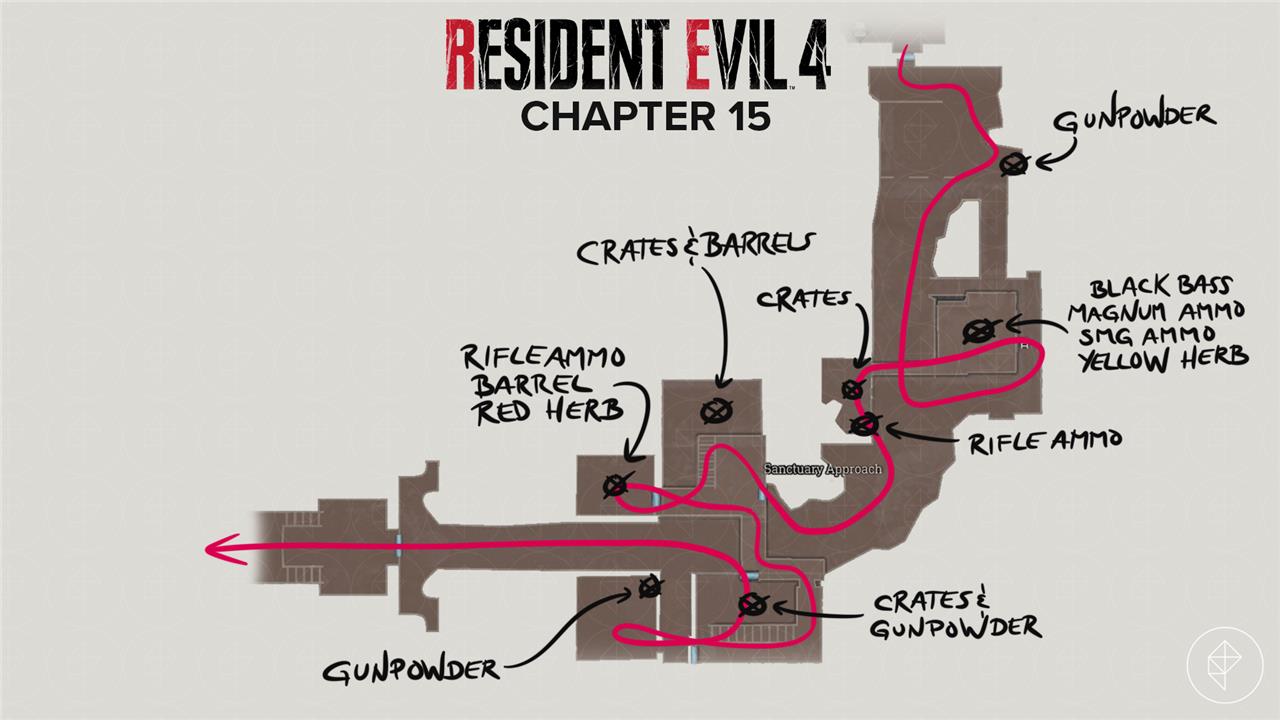
Head through the door on the south side of the Merchant’s room. Step to the left and watch the arches above and in front of you for two very sneaky and annoying arbalists.
Stick to the left. There’s a camouflaged novistador by the barrel there. Smash the barrel for some gunpowder and then go back to the right side (ignore the stairs for now).
Carefully make your way up the hill – there are three mines, two bear traps, and a handful of novistadors along the way. Use the pillars for cover at the top, and take out the rocket launcher soldier ahead of you.
Head left and back into the room. Grab the black bass (seriously Leon, stop eating random, room temperature seafood), smash the barrels for magnum and submachine gun ammo, and pick up the the yellow herb.
Step out onto the walkway on the east side of the room and climb the ladder there. Cross the bridge to the other roof and smash the crates for handgun ammo, a heavy grenade, and resources (S). In the southeast corner, grab the rifle ammo from the low wall.

Before you drop off, step as far to the right (west) as you can. Look through the window south of you to see an explosive barrel. Shoot it to save yourself some trouble in a second.
Drop down and continue up the hill. As you come around the turn, there are doors on either side of the path. When you get close enough, soldiers will pile out of them (fewer on the left side because of that barrel we just shot).
Once they’re dealt with, head into the building on the right (north). Inside, smash the crates ahead of you for some handgun ammo and shotgun shells. Head right for a pair of barrels with resources (L) and gunpowder. Go upstairs.
On the roof, deal with the swarm of novistadors, and then head to the right and into the room. Grab the rifle ammo from the case on the wall to the left, smash the barrel for handgun ammo and gunpowder, and pick up the red herb.
Back outside, cross the bridge on the right and into the other building. Go past the stairs and loop around to the other set of doors. A boar-headed brute and a couple soldiers will come out, and a few more will come up the stairs behind you.
When they’re all dealt with, push through the doors and cross into the next building. In there, redirect the auto-turret. Head to the right for some gunpowder in the cabinet, and then backtrack to the stairs and head down.
Smash the crate at the bottom of the stairs for some gunpowder, and then go smash the two crates under the stairs for submachine gun ammo, resources (S), and handgun ammo. Check the locker on the east wall for more gunpowder.
Head out through the front door and turn left. Ignore the auto-turret on your right as you pass – it was a different way to deal with the soldiers we already killed. Push through the blue doors at the top to enter the Sanctuary.
Sanctuary // Go after Ashley // Head for Luis’ Laboratory
Leon enters the Sanctuary after meeting Ashley inside the Stronghold. The area is filled with zealots, archers, and Brutes, so clear enemies carefully before moving ahead. Defeat the armored zealots to trigger a cutscene where Ashley assists in opening the door to the next section. Once reunited, follow the path together toward Luis’ laboratory. Watch out for ambushes along the way, especially in the narrow corridors leading out of the Sanctuary.
There’s nothing to grab inside (there are some markers with names on them along the walls, but they’re not files), so just run forward toward Ashley. You’ll trigger a cutscene as you reach the altar.
After Ada saves Leon (again), limp forward along the only path you can and push through the visions until you reach the lab and use Luis’ Key to open it.
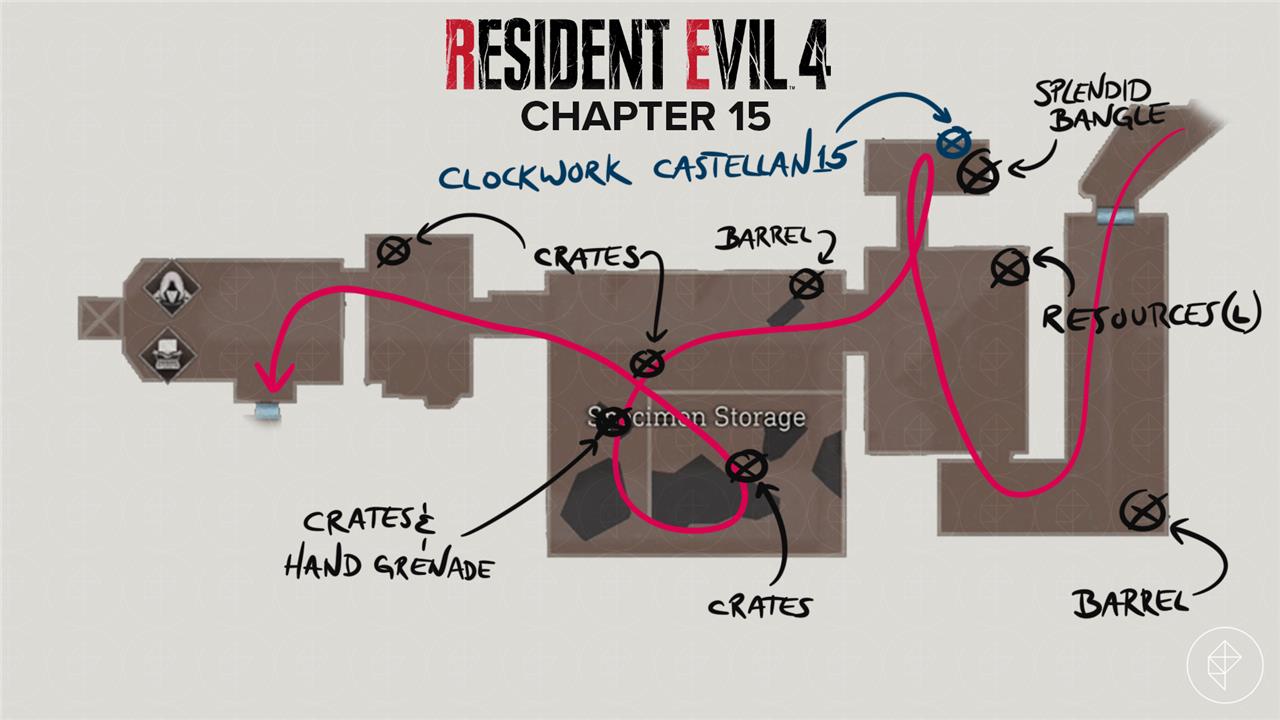
All treasures and collectibles in Chapter 15 RE4 Remake
Chapter 15 of Resident Evil 4 Remake features several treasures, a Clockwork Castellan, a merchant request, and key items across areas like the Stronghold, Cliffside Ruins, and Specimen Storage.
Treasures
These are the main treasures, often in silver containers, chests, or specific spots-combine gems for higher value where possible.
| Treasure | Location/Details | Value (base) |
|---|---|---|
| Red Beryl | First enemy area, behind left house-shoot silver container. | 10,000 ptas |
| Velvet Blue | Stronghold after tower cutscene, post-ladder-shoot steel beam container. | Varies |
| Staff of Royalty | Cliffside Ruins lower level via ladder, blue chest at shrine end. | High value |
| Splendid Bangle | Specimen Storage back room chest (last socketable treasure). | Varies |
Merchant Request
-
Destroy the Blue Medallions No. 6: Pick up note at Cliffside Ruins exit. Destroy 5-6 medallions (exact count per guide varies slightly) around ruins-rewards Spinel. Locations: opposite ruins near water, behind wall pre-ladder, out windows post-ladder, etc.
Clockwork Castellan
-
#15: Specimen Storage (post-request room), on wooden beams above north treasure chest-shoot it down.
Other Collectibles
-
Yellow Herb: Cliffside Ruins area during medallion hunt.
-
Files/Key Items: Cliffside Epitaph near Staff; resources like ammo, herbs scattered. Merchant and typewriter early for upgrades.
-
No new weapons here, but check merchant for maps/recipes. Progress carries over NG+ except full treasure sets per playthrough.
How to defeat the final boss in Chapter 16
Resident Evil 4 Remake’s Chapter 16 final boss is Osmund Saddler at the Loading Docks. Defeat him by targeting his glowing yellow eye weak points across two phases while dodging attacks and using the environment.
Phase 1: Docks Platform
Stay on the upper walkway initially to grab crates, barrels (for explosions), rifle ammo, and herbs. Shoot Saddler’s four eyeballs (legs and mouth)-destroying all four stuns him for a melee stab prompt in his exposed mouth eye. He summons Novistadores swarms and leaps to the central tower; use explosive barrels and Biosensor Scope (if equipped) to clear bugs while targeting eyes. Evade tail swipes (horizontal or charging), acid spits (duck/sidestep), and ground pounds-run under his body or drop to the lower U-shaped area for space. Ignore most bugs as Saddler crushes them on landing.
Phase 2: Fallen Form
Saddler falls off the dock; unload on his single massive glowing weak point with your strongest gun (e.g., upgraded Stingray or Chicago Sweeper). Dodge two tentacles: upright ones slam (sidestep), twisting ones swipe (evade). He spits acid pools-keep moving. After heavy damage, Ada tosses the Rocket Launcher (Special); one shot to the eye ends the fight. Stock ammo/health beforehand via merchant.
Tips
Upgrade weapons (Riot Gun/Shotgun for close eyes, Rifle for distance), equip Body Armor, and use grenades sparingly. On higher difficulties, prioritize mobility and knife parries. QTE finishers follow.