Deep beneath the Moon’s Hellmouth, ancient horrors stir-will your fireteam conquer the resurrected Crota’s End raid and claim its legendary loot? This comprehensive walkthrough strips away the darkness, guiding Guardians through every encounter-from the Abyss to the final, pulse-pounding showdown with Crota himself-so you can emerge victorious on PC, PlayStation, or Xbox.
In this Destiny 2 Crota’s End guide, we’ll break down each of the raid’s four encounters, show you where to find the three secret chests, how to complete the encounter challenges, and teach you how to get a guaranteed Deepsight weapon once each week.
Crota’s End Loot table
Crota’s End features a diverse loot table spread across its four encounters, offering players a mix of powerful weapons, unique armor pieces, and coveted cosmetics. Each encounter has its own specific drops: the first encounter (Enter the Abyss) can reward you with weapons like the Song of Ir Yût machine gun, Fang of Ir Yût scout rifle, and Abyss Defiant auto rifle, as well as chest, leg, and class armor pieces. The second encounter (Cross the Bridge) introduces the Swordbreaker shotgun and Oversoul Edict pulse rifle, alongside scout rifles and additional armor drops. The third encounter (Ir Yût, the Deathsinger) and the final battle with Crota, Son of Oryx, offer some of the most sought-after rewards, including the Word of Crota hand cannon and the chance for the Necrochasm exotic auto rifle. Players can also earn exclusive raid cosmetics such as emblems, an exotic ship, a sparrow, and shaders. Notably, Crota’s End becomes fully farmable when it is the featured weekly raid, allowing unlimited runs for loot, and players can use Spoils of Conquest at the post-raid chest to purchase previously unlocked items.
Blueberries.gg, known for their fast and accurate loot tables, has assembled this one for the Crota’s End raid. Any of these items, minus the raid Necrocasm, can be earned from the secret chests once you acquire them from an encounter. We’ll discuss those secret chest locations more below.
Guaranteed Deepsight Resonance chest
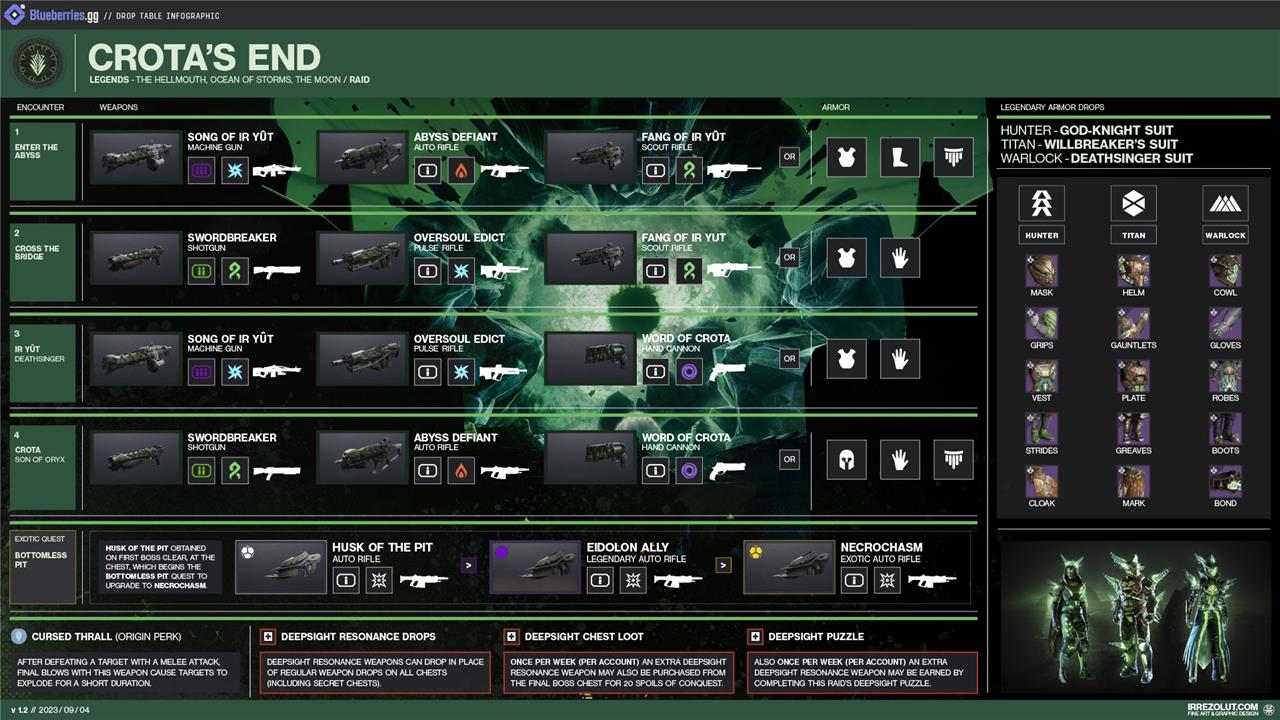
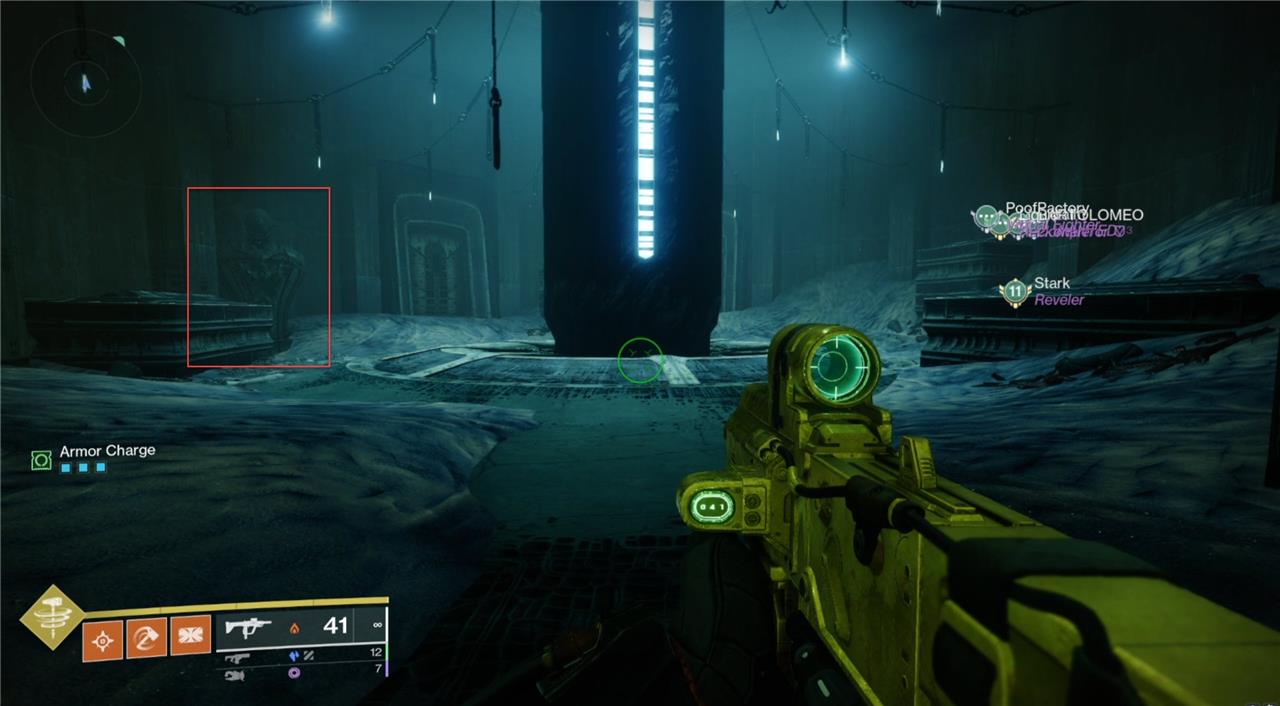
The Crota’s End raid in Destiny 2 features a guaranteed Deepsight Resonance chest, often referred to as the “red border chest,” which provides players with a Deepsight weapon once per week. To unlock this chest, you must complete a specific puzzle involving Hive statues scattered throughout the raid. At the very start, observe three pairs of Hive statues along the edge of the Hellmouth-each pair will have either the left or right statue lit. As you progress, you’ll encounter corresponding pairs of statues in later sections. To activate the chest, interact with the statue on the same side as the one you saw lit at the beginning for each pair. If all three pairs are correctly activated, the red border chest will spawn after defeating Crota, guaranteeing a Deepsight weapon for your collection.
Getting the Deepsight Resonance chest to spawn after killing Crota is really easy. When you spawn into the raid, walk forward, and look across the Hellmouth. You’ll see three sets of Hive statues.
Deepsight Legend
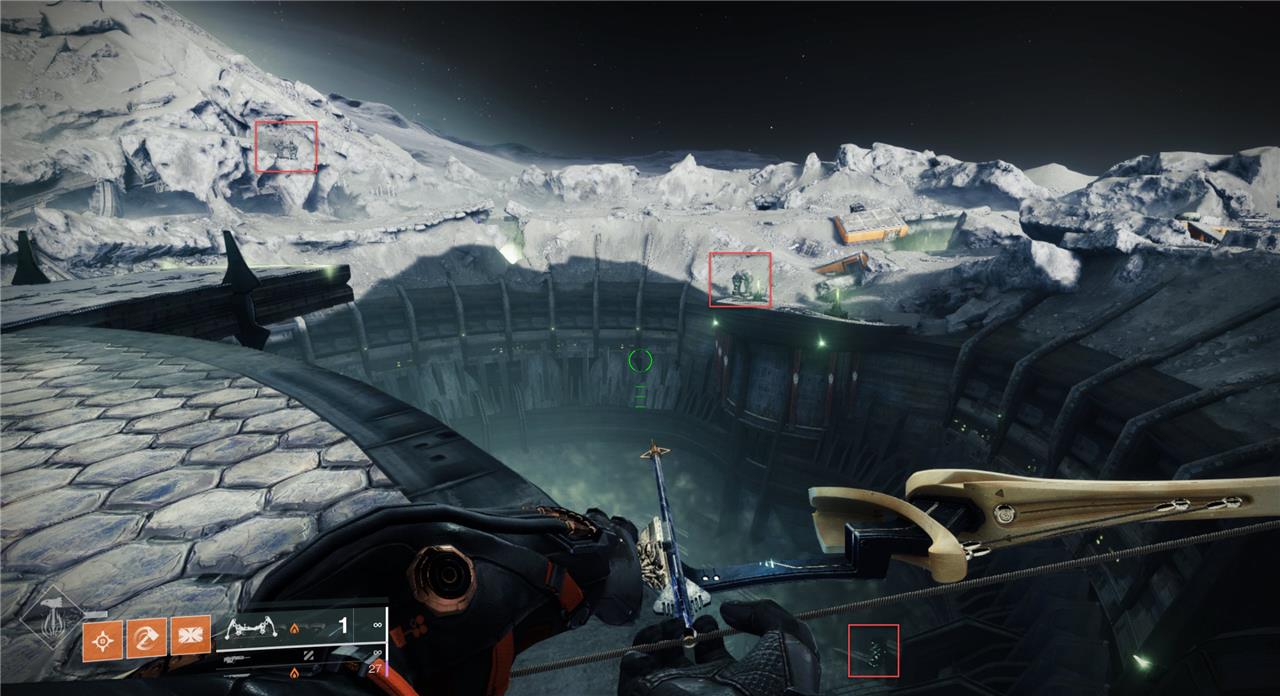
Each set of statues has a left and a right statue, and one will be lit up. Read the sets of statues from left to right, and note down either “left” or “right” for each set. For this example, it would be right, left, left. Progress through the raid until you reach the bridge encounter.
Deepsight statue set one
Once you reach the bridge encounter, stand on the rally flag and look across the chasm before you start. Whichever statue was lit up on the first set, walk down the stairs and head in that direction. In our example, we’d head to the right. Hug the wall until you reach an open room – this is where the ads spawn from in the encounter.
You will find a statue in the room. Walk up to it, and hold interact. You’ll know you selected the correct one because “A choice echoes into the future” will be displayed in the combat log. Now, complete the bridge encounter.
Deepsight statue set two
After you complete the bridge encounter, look at the stairs from the plate that builds the bridge. There is an area on each side of the stairs. Go to the side that matches the second statue set – left, in our example.
Walk to the back of the area and interact with the statue. Progress forward and complete the Ir Yut encounter.
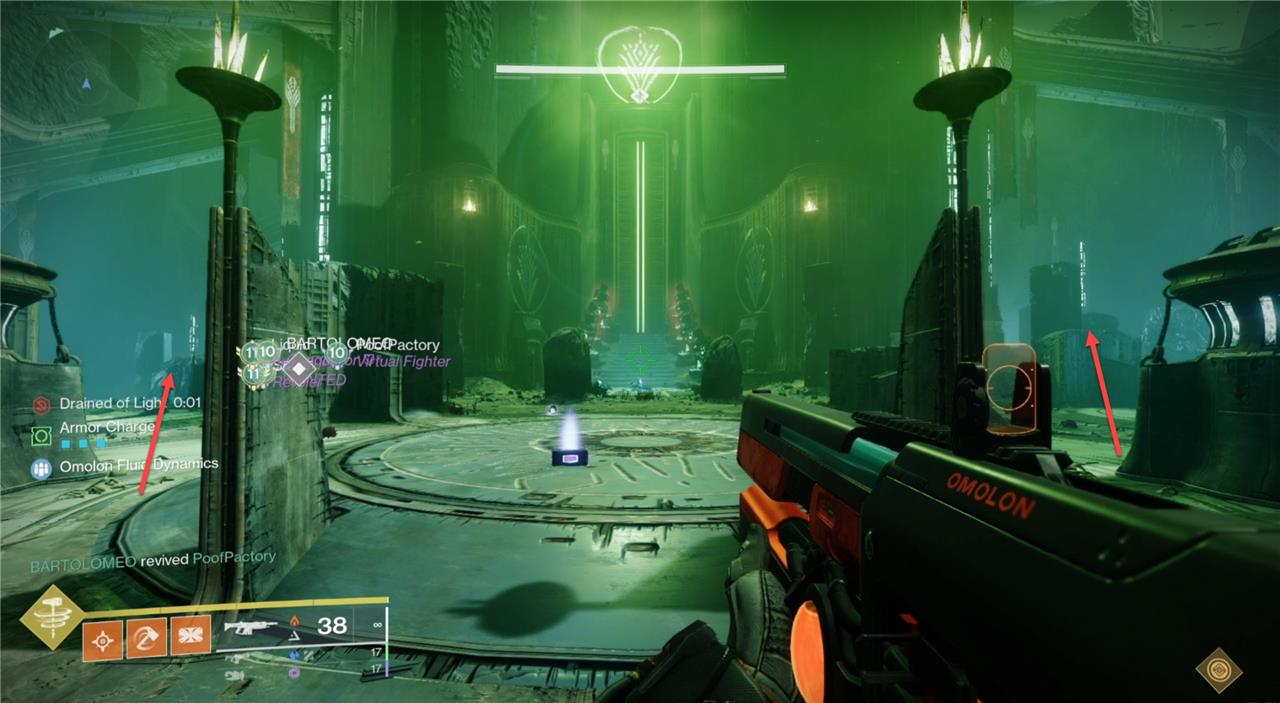
Deepsight statue set three
After you complete the Ir Yut encounter, jump up to the area above the Crota rally flag. On each side of the small center room is the statue. You want to interact with the statue that matches the third and final set from the beginning.
Note that the left and right are based on facing the Oversoul, so it’ll be backward once you turn around to jump up to the statues. For our example, we want to interact with the left statue on the picture’s right side.
Once you have interacted with the three correct statues, “A balance is reached. To the victor go the final spoils.” will appear in the combat log. This confirms that the chest will appear after you kill Crota.
Learning the ’Enlightened’ mechanic
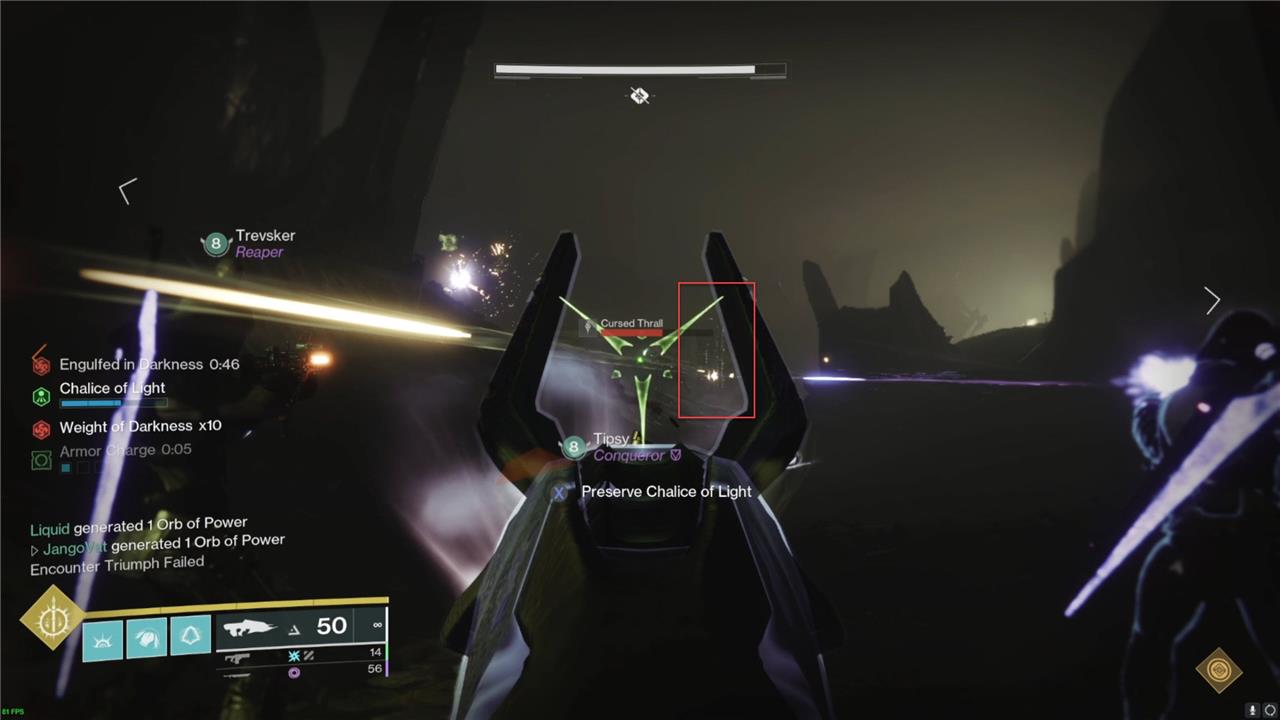
The ’Enlightened’ mechanic is central to every encounter in Crota’s End and revolves around the Chalice of Light. To become Enlightened, a Guardian must hold the Chalice until its energy meter fills, which grants the Engulfed in Light debuff-this must be quickly passed to another player to avoid death, leaving the original holder with the Enlightened buff. This buff is essential for interacting with key raid elements: only Enlightened players can activate plates, pick up Hive Swords, and perform crucial actions like destroying the Oversoul or expunging Crota for extra damage. Team coordination is vital-players must rotate the Chalice efficiently to ensure enough members are Enlightened at the right moments, enabling progress through mechanics like lighting lamps, constructing bridges, and breaking Crota’s shield. Mastering the timing and passing of the Chalice is the foundation for success in Crota’s End.
The core mechanic of the Crota’s End raid involves the Chalice of Light granting the player the “Enlightened” buff. A player can pick up the Chalice of Light to start to fill a bar on their screen called “Chalice of Light.”
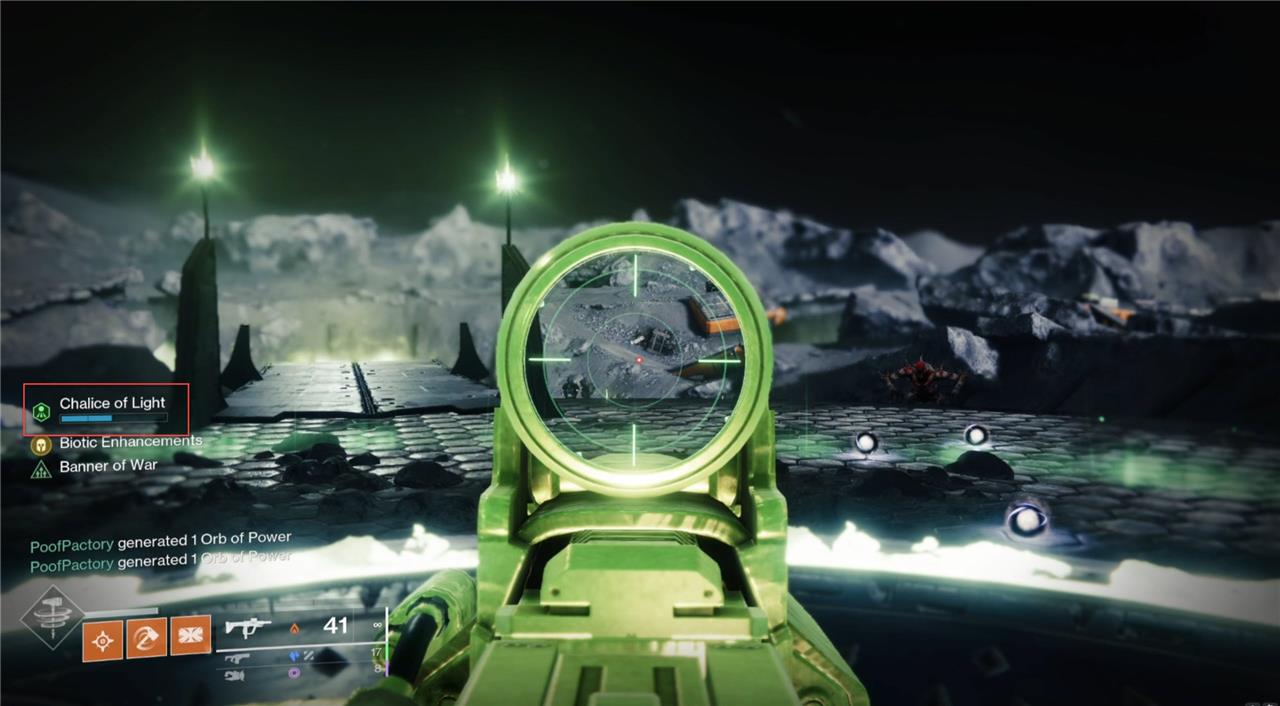
Once this bar is full, you’ll get a ten-second debuff called “Engulfed in Light.” You’ll die if another teammate does not take the Chalice off of you by standing next to you and holding interact. When your bar is full and the Chalice is removed from you, you’ll get a buff called “Enlightened.”
By using the “Enlightened” buff, via various ways that we’ll talk about in each encounter section, you’ll gain a debuff called “Drained of Light,” which prevents you from picking up the Chalice of Light and lasts for 45 seconds. You also cannot pick up the Chalice while you have the “Enlightened” buff.
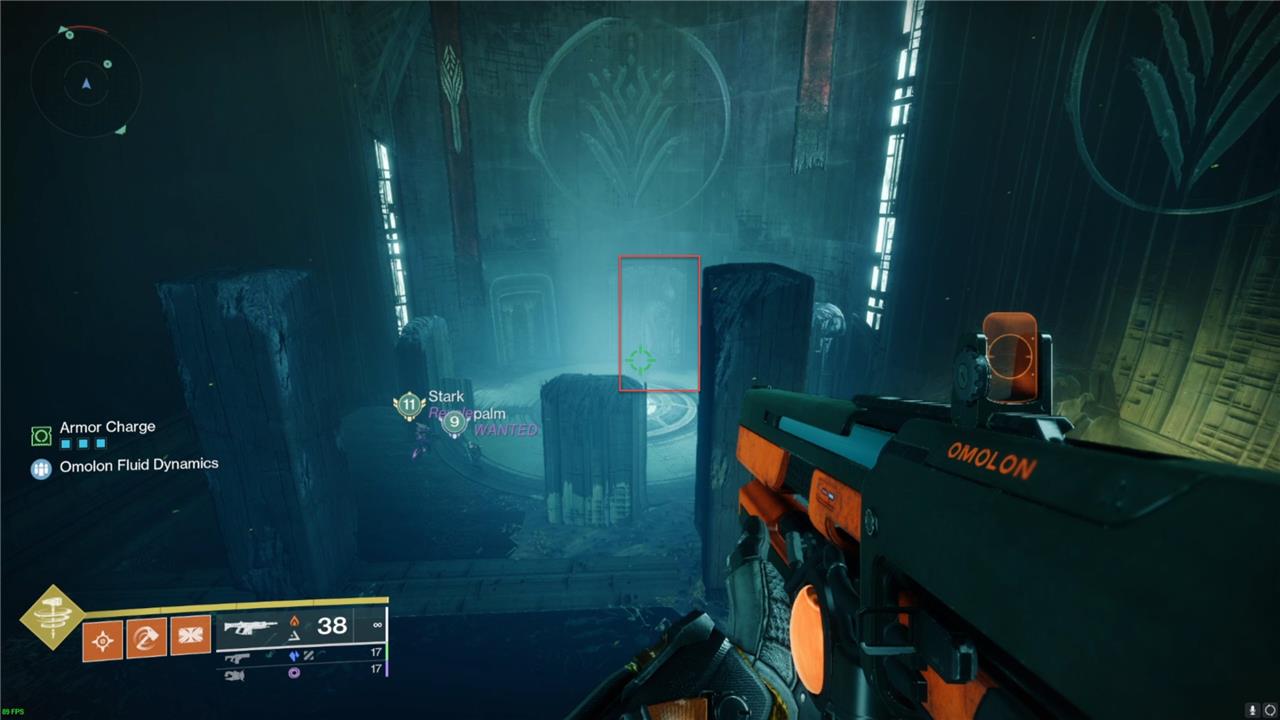
A player with the Chalice can deposit it into a node to preserve it. You won’t gain the Drained of Light debuff if it’s deposited before the bar is full. A preservation node looks like the above image. These are used in the first encounter to activate the lamps and the other encounters as a safe place to leave the Chalice so you don’t have to worry about passing it during certain parts of those encounters like DPS.
This buff is used for many things throughout the raid, but the process for getting it stays the same. We suggest setting up an order of who the Chalice should pass to at the beginning of the raid. You’ll need it in every encounter, and keeping this order the same will help things run smoothly.
For the rest of this guide, we’ll refer to players as Enlightened 1, Enlightened 2., and so on up through Enlightened 6, referring to the order in which they pick up the Chalice.
Starting the raid
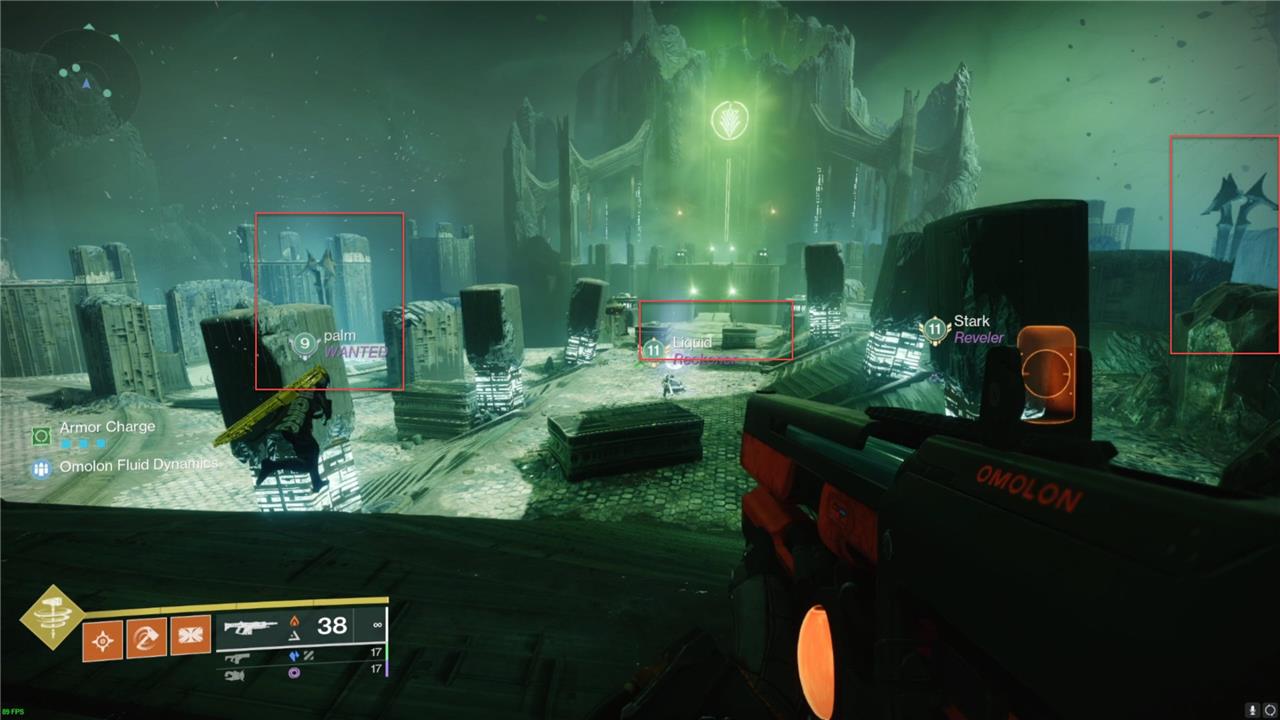
To start the Crota’s End raid in Destiny 2, your fireteam will begin near a circular plate at the entrance to the Hellmouth on the Moon. The initial objective is to energize this plate by using the Chalice of Light, which players must pick up and charge by interacting with the plate. Guardians take turns holding the Chalice to build up enough energy to activate the bridge that leads deeper into the raid. While Thralls and Knights will spawn during this phase, they pose little threat, allowing your team to focus on efficiently passing the Chalice and charging the plate before moving forward into the raid’s main encounters.
You’ll be dropped into the Hellmouth when you load into the raid. In front of you, you’ll see a Chalice of Light spawn and a plate to stand on to create a bridge. Grab the Chalice of Light to get Enlightened. This will cause Thralls to spawn.
Continue to stand on the plate to build the bridge slowly. Once you get the Enlightened buff, deposit it into the plate to help the bridge grow faster. After the bridge is fully formed, the enemies will stop spawning, and you can cross it to jump down into the raid.
First secret chest
The first secret chest in the Crota’s End raid is located during the Traverse the Abyss (Lamps) encounter. After dropping down into the area, head to the far left and stick close to the wall, moving forward until you reach a series of doors that open as you approach them. The chest will spawn behind the fifth door in a small room. Speed is essential here, as the debuff timer can wipe your team if you take too long. This chest is one of three secret chests hidden throughout the raid and offers valuable loot for players.
From the beginning of the Abyss encounter, run to the left and hug the wall. Every little bit, there will be a lit-up door. Keep following the doors until you can turn left, turn left.
There will be one more door on the left and one ahead of you. The chest will be behind the door directly ahead of you.
The Abyss – the opening encounter
The Abyss – the opening encounter
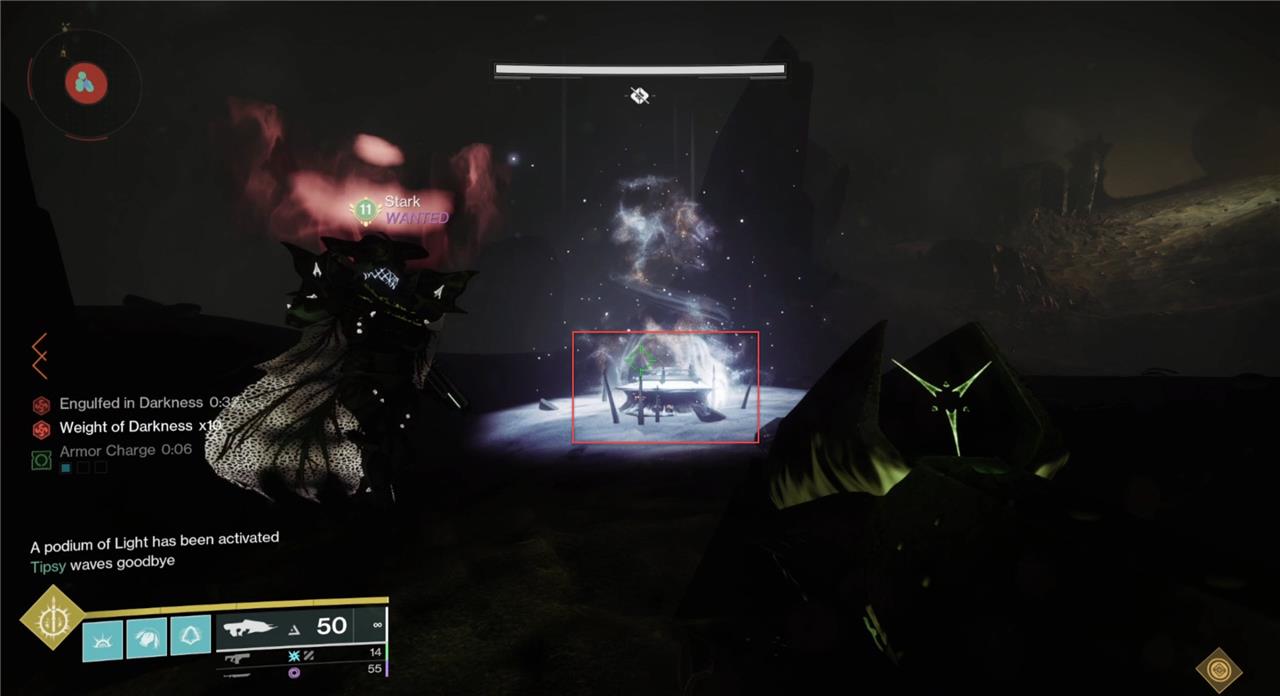
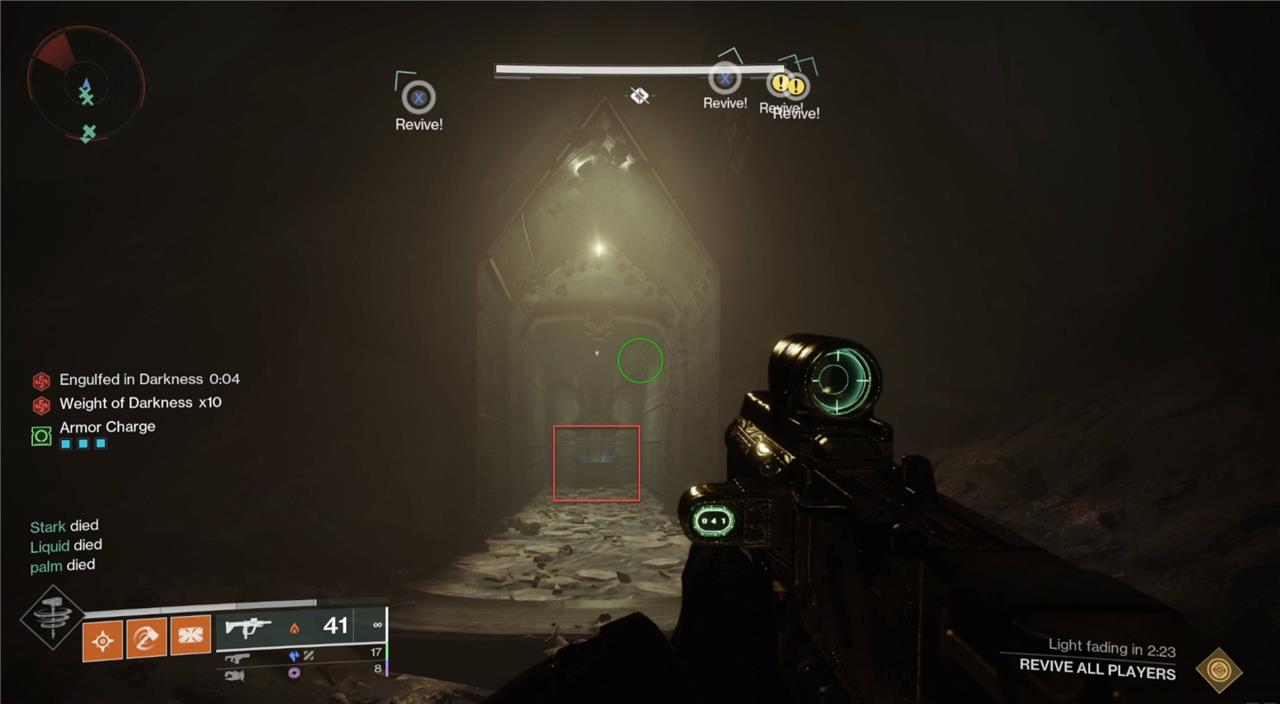
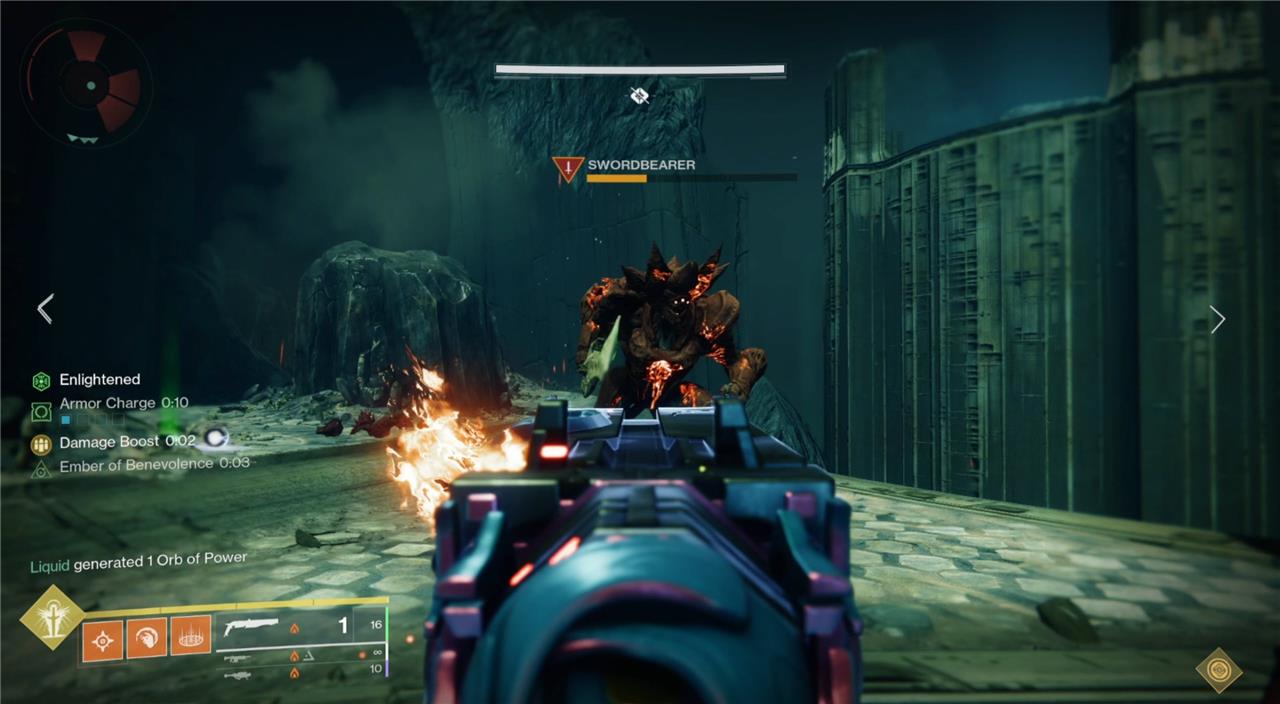
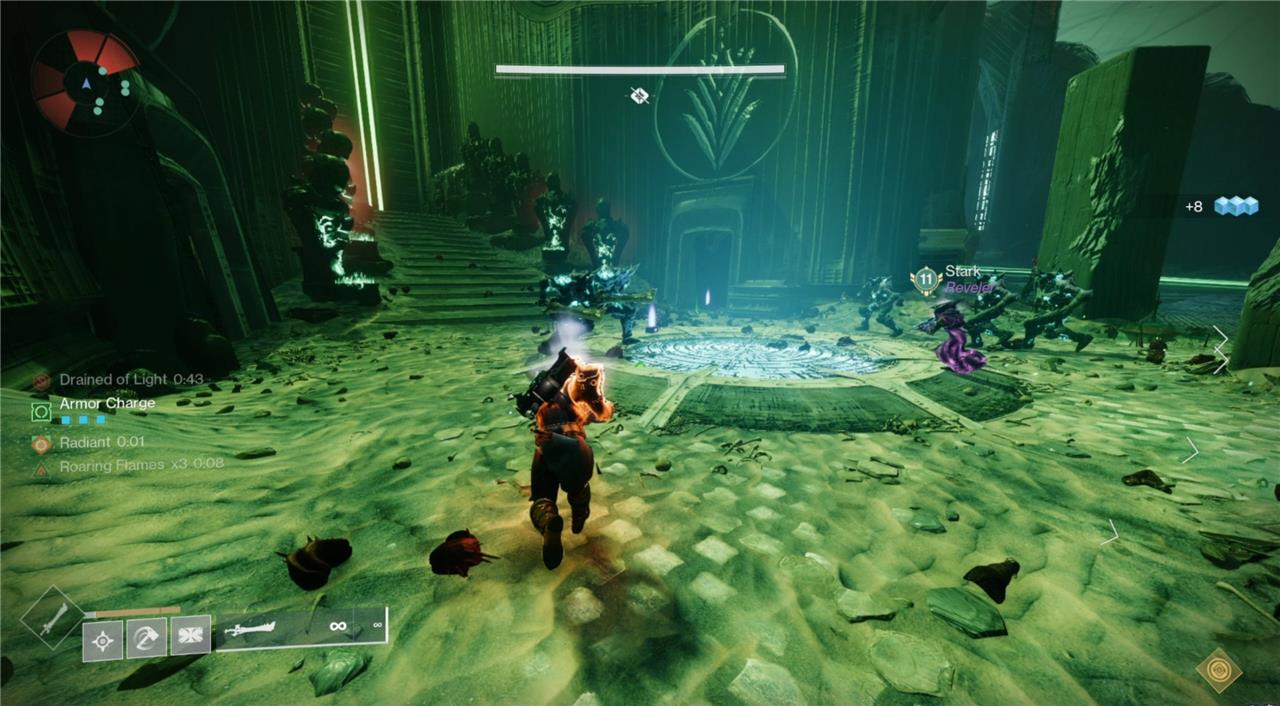
The Abyss is the first real encounter in the Crota’s End raid, set at the lip of the Hellmouth on the Moon. Players begin by grabbing the Chalice of Light, which grants the Enlightened buff necessary for activating key raid mechanics. The team must use this buff to charge plates and light a series of lanterns scattered through the darkness, while managing the accumulating debuffs Weight of Darkness and Engulfed in Darkness that hinder movement and impose a time limit. Coordination is crucial as players pass the Chalice to maintain the Enlightened status, light lamps, and build a bridge across a chasm. Along the way, players face relentless Thralls and powerful Unstoppable Ogres, requiring teamwork and strategic use of abilities to survive and progress deeper into the raid.
The first encounter of the raid, The Abyss, sees players navigate a maze shrouded in darkness. Standing in the darkness, you gain a debuff called “Weight of Darkness.” This debuff stacks to ten and makes you move slower, removing the ability to sprint and jump at higher stacks. You can remove this debuff by standing next to lamps that show the path out of the maze.
To activate a lamp, one player must use the Enlightened buff to turn it on. Once activated, it’ll last for about 12 to 15 seconds before exploding, killing anyone standing around it. Navigate the maze, passing around the Enlightened buff in the predetermined order as you move, taking turns activating the lamps.
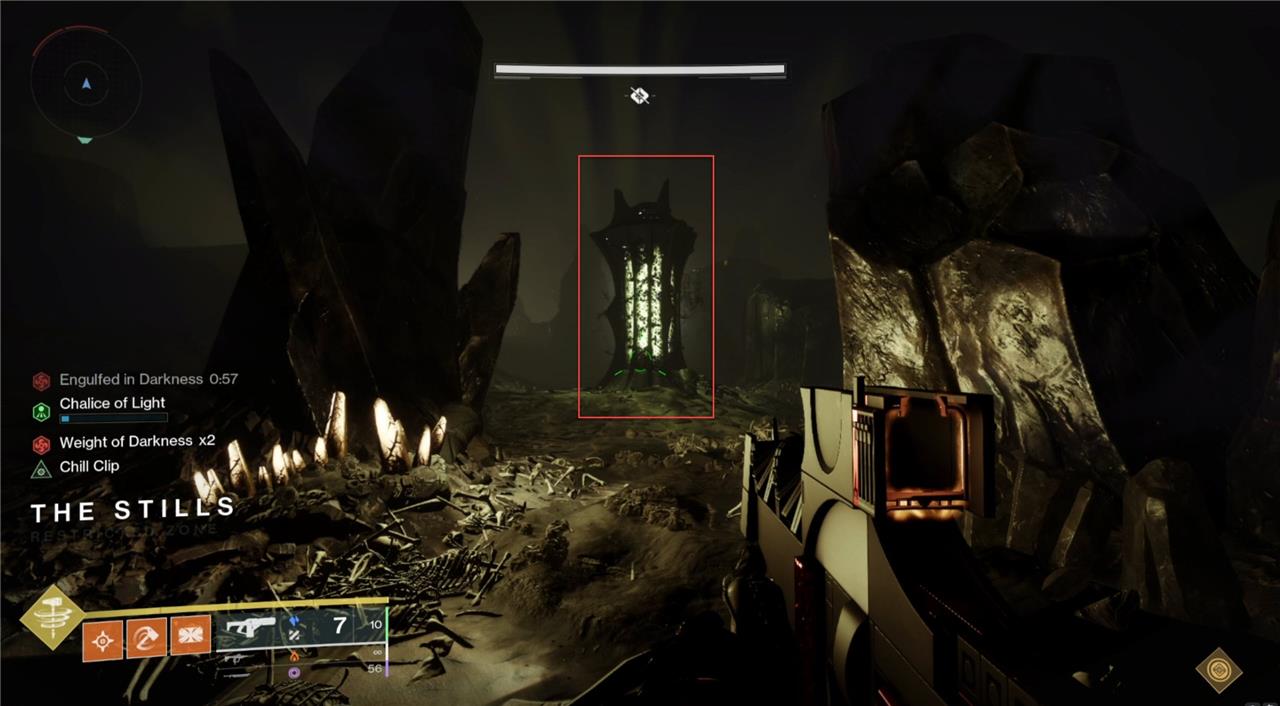
There will be a preservation node for the Chalice of Light every few lamps that looks like the above picture. You must deposit the Chalice into this to set up before you can activate the next set of lamps. These locations are random and change from run to run, but the first lamp will always have a node.
The next lamp ahead of you will be dark if there is a node.
There is also a timer on this encounter, you’ll see “Engulfed in Darkness” in the buff/debuff section of the screen. This timer will wipe you if it reaches zero, but activating a lamp and/ or depositing the Chalice will increase the time left on the timer. Sometimes, the Chalice dunk does not reset the timer. In that case, picking up the Chalice from the node should extend the timer. Keep progressing forward through the encounter, avoiding the pits and swinging pendulums.
Eventually, you’ll reach a plate similar to the one used to start the raid. As before, stand on the plate and use Enlightened buffs to build the bridge. Lots of enemies will spawn during the section, including Unstoppable Orgres. Kill them until the bridge is built. Once it forms, run across it into the light to end the encounter.
Example cycle
An example cycle, where the first two preservation nodes are at the first and fourth lamp, would look like the following:
- Enlightened 1 picks up the Chalice, and the group moves to the first lamp.
- Enlightened 2 picks up the Chalice from Enlightened 1 and deposits it into the preservation node.
- Enlightened 1 uses their buff to activate the lamp.
- Enlightened 3 takes the Chalice from the Preservation node.
- The group moves to the next lamp.
- Enlightened 4 takes the Chalice from Enlightened 3.
- Enlightened 3 uses their buff to activate the lamp.
- The group moves to the next lamp.
- Enlightened 5 takes the Chalice from Enlightened 4.
- Enlightened 4 uses their buff to activate the lamp.
- The group moves to the next lamp.
- Enlightened 6 takes the Chalice from Enlightened 5, depositing it into a preservation node to activate the next set of lamps.
- Enlightened 5 uses their buff to activate the lamp.
- Enlightened 1 takes the buff from the preservation node.
- The group moves to the next lamp.
- Enlightened 1 uses their buff to activate the lamp.
This process continues until you reach the end, build the bridge, and complete the encounter.
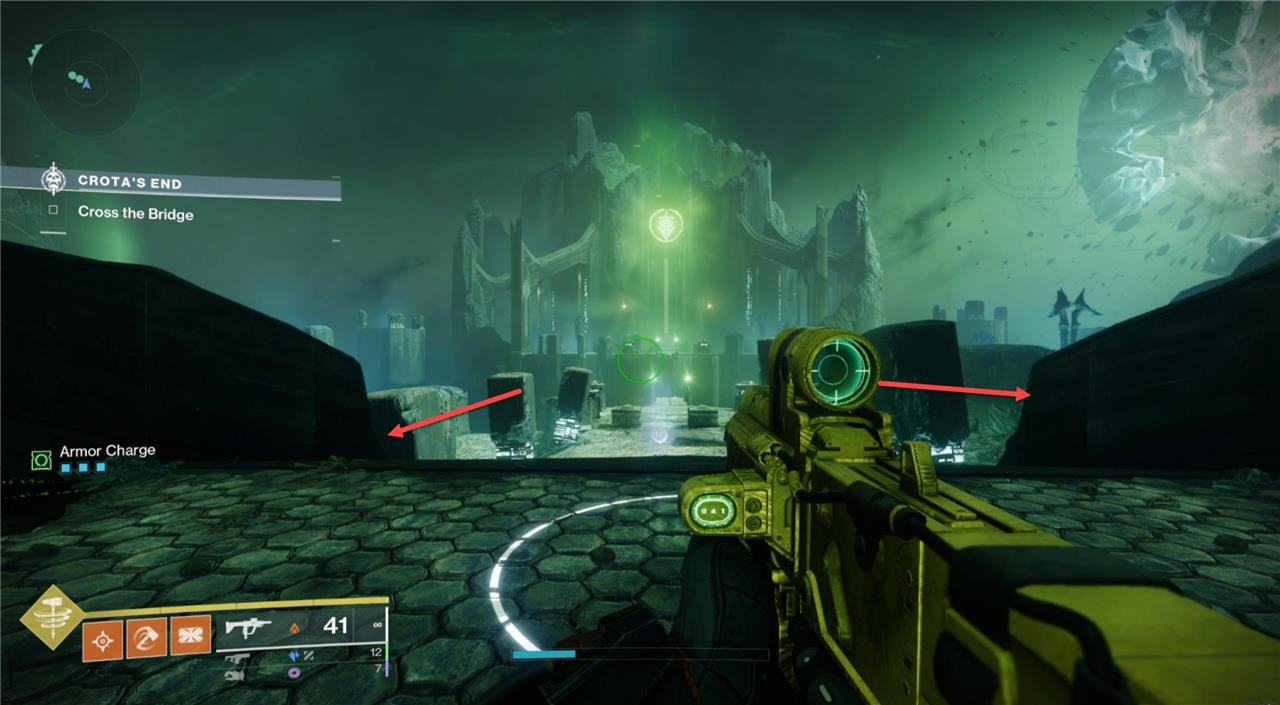
Oversoul Throne Bridge – the bridge crossing
The Oversoul Throne Bridge encounter in Destiny 2’s Crota’s End raid challenges your fireteam to construct a bridge spanning a massive chasm and systematically cross to the far side, all while fending off relentless Hive enemies. To build the bridge, players must rotate the Chalice of Light, charging it through kills and passing it to grant the Enlightened buff, which is required to empower the central plate and activate the bridge. Simultaneously, at least one Guardian must stand under each Annihilator Totem to prevent a team wipe. Once the bridge is formed, only those with the Enlightened buff can pick up Hive Swords dropped by Swordbearer Knights; these swords are essential for crossing the bridge and defeating the blue Gatekeeper Knights on the far side, who can only be damaged by sword attacks. As Guardians cross and dock swords at designated spots, the team must coordinate Chalice and sword usage to ensure everyone makes it across. After five swords are docked, a final wave of enemies and Gatekeepers appears-defeat them using the preserved swords to complete the encounter and unlock the next stage of the raid.
The Oversoul Throne Bridge encounter sees you cross a chasm to kill special Gatekeeper enemies. The goal of this encounter is to have all players cross the bridge, kill five Gatekeepers, store the sword relics, and then kill five more Gatekeepers. This encounter has a few tricky rules, which we’ll break down now.
Building the bridge and the Annihilator Totems
Each side of the bridge has three total plates, one in the middle and two on the sides. The middle plate is what someone must stand on to build the bridge, similar to before. The two plates on the sides are “Annihilator Totems.”
These totems will get mad when someone stands on the bridge-building plate. One player must be standing under each totem to prevent them from getting too angry and wiping the team, you have about seven to ten seconds if no one is on the totem when they activate to get there to prevent a wipe.
Do note that only the side where the bridge plate is being activated will have its totems get mad. As before, an Enlightened player can use their buff to help build the bridge faster, we suggest the first Enlightened player use their buff this way.
The Swordbearers and Gatekeepers
After about one minute, Sword Bearers will start to spawn on the starting side. Upon defeat, they’ll drop a sword relic. To pick up the sword, you must have the Enlightened buff. Once you have the sword, you can cross the bridge if it’s formed. Trying to cross the bridge without a sword or without the Chalice of Light will kill you. After crossing the bridge, enemies, including a Gatekeeper, will spawn on the ending side.
Gatekeepers are blueish Knights who can only be damaged by the sword. Once killed, make sure you don’t drop your sword. Instead, you’ll see five deposit points where you can store a sword until the last part of the encounter. There is also a preservation node for the Chalice of Light.
Strategy
The most effective way to complete this encounter is to ensure all players are Enlightened before anyone crosses the bridge. During this time, players should rotate around so that all the totems are covered, the bridge is being built, and all players should get the buff.
In this strategy, Enlightened 1 will dump their first buff into the plate to help build the bridge, and once it comes around to their time to collect the Chalice from Enlightened 6, Enlightened 2 will be on the middle plate with a sword ready to cross. Both players should cross at this time, with Enlightened 2 focusing on killing the Gatekeeper and Enlightened 1 focusing on dunking the Chalice into the preservation node before their bar fills up.
Once Enlightened 3 has a sword, they should cross and kill their Gatekeeper. At this point, there should be three players on each side. Those who have already crossed the bridge should now stand on the plates to hold the bridge so that the last three players can focus on getting swords and crossing.
If at any point someone dies on the first side while Enlightened, one player who has crossed will have to grab the Chalice and make their way back across. Once their bar is full, the player who died will take the Chalice and run across the bridge, swapping spots with the player who ran it back over. Repeat until everyone has crossed the bridge and five swords have been preserved.
Killing five Gatekeepers, again
Once all six players have crossed and the five swords have been preserved, you’ll enter the second phase of the encounter. Five more Gatekeepers will spawn, but now they’ll spawn simultaneously. You’ll need to pick up the Chalice and pass it around to Enlighten a few players, allowing them to pick up the preserved swords to kill the Gatekeepers. Do your best to stay off the middle plate because even though you no longer need the bridge, standing on it will activate the totems, possibly causing a wipe. You’ll complete the encounter once you kill the five Gatekeepers and the remaining ads. You’ll also need to preserve the Chalice to end the encounter.
Example cycle
An example cycle of the opening of the encounter using the above strategy would look like the following:
- Everyone goes to their starting spots.
- Enlightened 1 and 2 start on the middle plate.
- Enlighted 3 and 5 start on the left plate.
- Enlightened 4 and 6 start on the right plate.
- Enlightened 1 grabs the Chalice and begins charging.
- Once full, Enlightened 2 takes the Chalice.
- Enlightened 1 dunks their charge into the center plate and swaps places with Enlightened 3.
- Enlightened 3 takes the Chalice from Enlightened 2.
- Enlightened 2 swaps places with Enlightened 4.
- Once a Swordbearer spawns and is killed, Enlightened 2 will grab that sword.
- Enlightened 4 takes the Chalice from Enlightened 3.
- Enlightened 3 swaps places with Enlightened 5.
- Enlightened 5 takes the Chalice from Enlightened 4.
- Enlightened 4 swaps places with Enlightened 6.
- Enlightened 6 takes the Chalice from Enlightened 5.
- Enlightened 5 swaps places with Enlightened 1.
- Enlightened 2 will meet at the bridge with a sword, ready to cross.
- Once Enlightened 1 takes the Chalice from Enlightened 6.
- Enlightened 1 and 2 cross the bridge.
- Enlightened 6 will stay on the middle plate to keep the bridge built.
- Enlightened 1 will deposit the Chalice into the Preservation node.
- Enlightened 2 kills the first Gatekeeper and deposits the sword.
- Enlightened 3 will look for a sword while Enlightened 5 stays on the left plate and Enlightened 4 stays on the right plate.
- Enlightened 3 gets a sword, crosses and kills their Gatekeeper, and deposits their sword.
- Enlightened 2 will go to the far side left totem, Enlightened 3 will go to the far side right totem, and Enlightened 1 will stand on the far middle bridge plate.
- Enlightened 4, 5, and 6 now get off their plates, kill ads, and find swords until everyone crosses.
Getting to the Ir Yut encounter
After crossing the Oversoul Throne Bridge, your fireteam will find themselves at the entrance to the infamous Thrallway-a long, enemy-filled corridor leading to Ir Yut, the Deathsinger. Here, teamwork and coordination are crucial. The Chalice of Light sits on a platform at the start; as usual, one Guardian picks it up to gain Enlightenment. Only an Enlightened player can pass through the semi-transparent barriers that block progress, each guarded by a Hive Shrieker. The Enlightened Guardian must push ahead, destroy the Shrieker to open the barrier, and allow the rest of the team to advance. Pass the Chalice as needed so someone is always able to break through each barrier. After several cycles of this process, you’ll reach the end of the hallway, where docking the Chalice opens a path through the floor. If you’re quick, you can grab a secret chest before dropping down to face Ir Yut.
There is a short hallway, which we like to call the Shrieker Sprint, after the bridge encounter where you have to use the Enlightened buff to walk through a green force field. Once you pass through the wall, you’ll lose your Enlightenment. Juggle the Enlightenment buff and send one or two Enlightened people through the wall to kill the Shrieker. After the Shrieker is dead, the green wall will drop, and you’ll have to repeat this process twice. At this point, you can dunk the Chalice into the deposit point to end the run.
Second secret chest
The second secret chest in the Crota’s End raid is located in the Shrieker Hallway, immediately after you complete the Oversoul Bridge encounter. To access it, your fireteam must move quickly through the hallway, passing the Chalice of Light and using the Enlightened buff to break through two energy barriers and defeat the Hive Shriekers guarding each one. Once the barriers are down and the enemies cleared, the Chalice holder needs to reach the end of the hallway and dunk the Chalice at the podium before the giant door closes. If your team is fast enough, the door directly across from the podium will open, revealing the second secret chest inside. This chest offers bonus raid loot and can only be obtained if the sequence is completed within the time limit.
The second secret chest is located at the end of the Shrieker Sprint, but it’s timed. Once the second field drops, the player with the Chalice must sprint forward and dunk it into the preservation node at the front side of the hole before the door closes. If this is done correctly, the door will end up mostly closing, but the chest will spawn, and the door will reopen shortly.
Note on the third secret chest
There has been ongoing speculation and investigation within the Destiny 2 community regarding the existence and location of a third secret chest in the Crota’s End raid. While the raid’s Triumph initially displayed three checkboxes-suggesting three hidden chests-players have only reliably found two: one in the Abyss encounter and another in the Shrieker hallway after the bridge. Numerous theories have circulated, including potential hidden triggers near Crota’s arena or requirements involving specific actions during the final encounter, but none have yielded a confirmed third chest. Additionally, some believed the red border chest after defeating Crota might count as the third, but repeated testing has shown it does not fulfill the Triumph’s criteria. As of the latest updates, it appears the Triumph was bugged and later corrected, clarifying that only two secret chests exist in the raid. Players should be aware that, despite persistent rumors, no legitimate third secret chest has been discovered in Crota’s End.
The third and final secret chest has not been found at the time of writing. Fans currently theorize that the chest, which is tied to a Triumph, is actually the Deepsight chest and that the Triumph is bugged. Once we know for sure, we’ll update this guide with the location or confirmation.
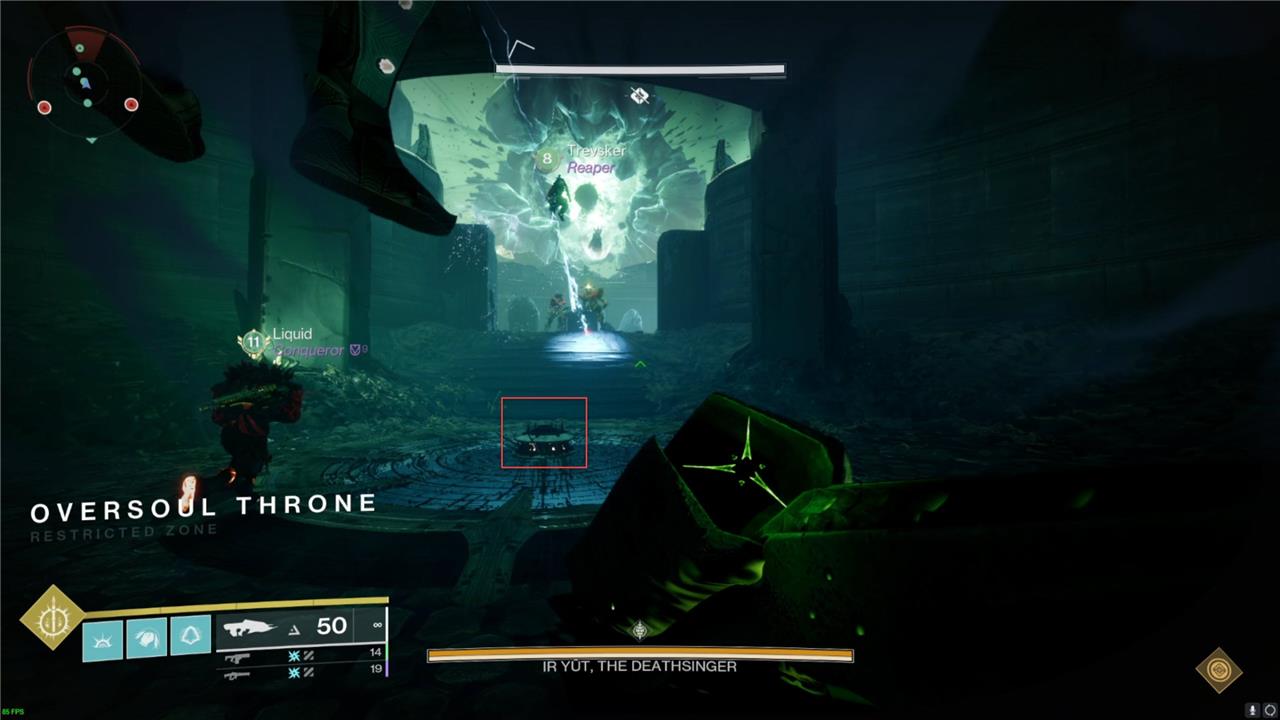
Ir Yut – the Deathsinger encounter
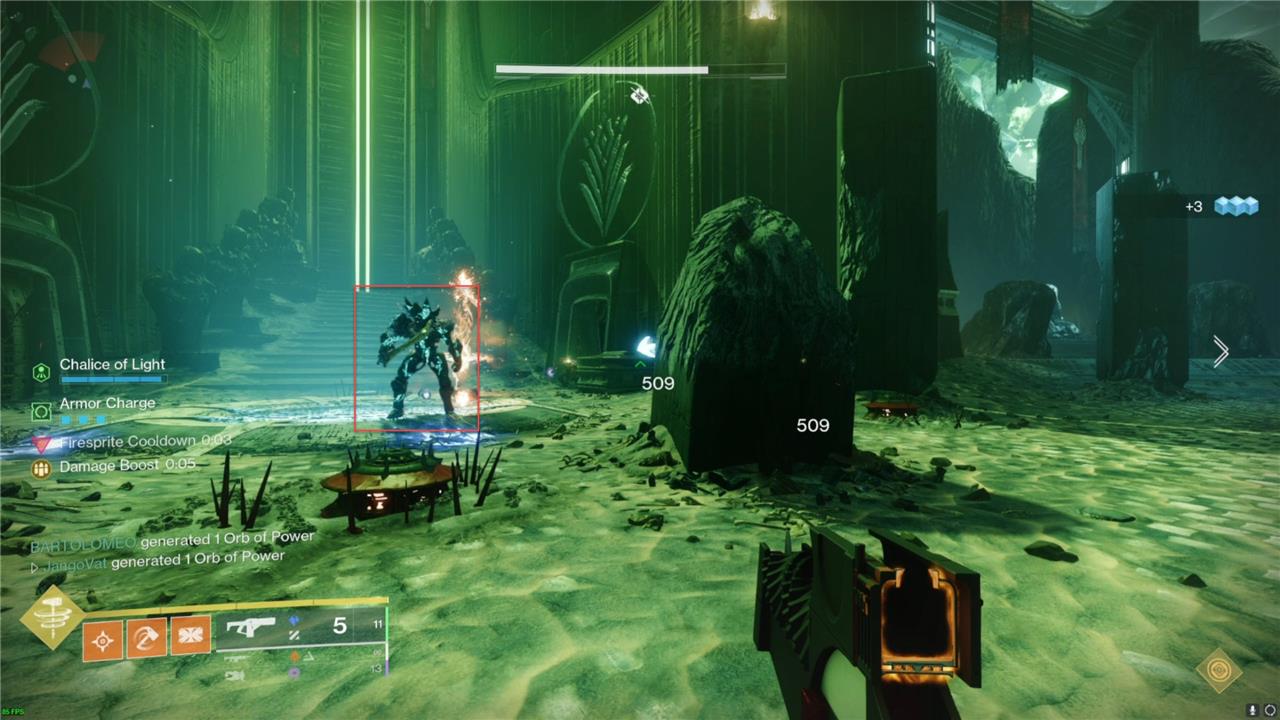
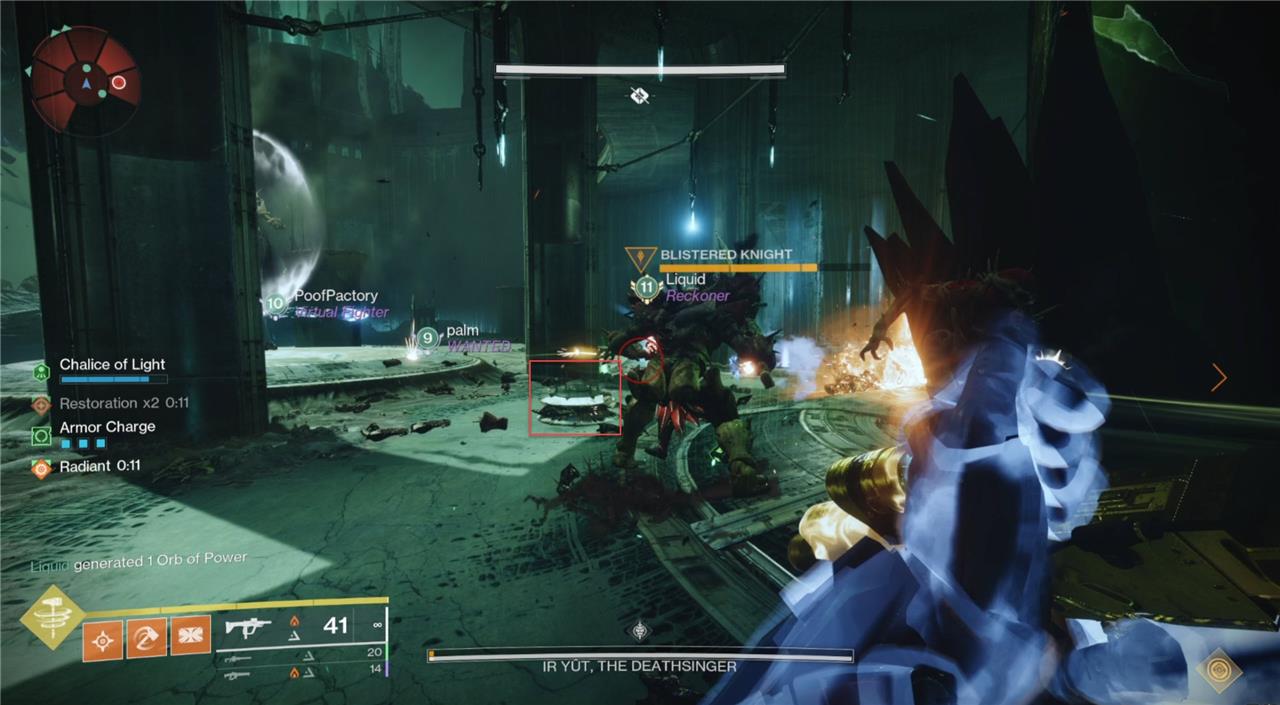
Ir Yut, the Deathsinger, marks the first true boss encounter in Destiny 2’s Crota’s End raid and serves as a significant DPS check for your fireteam. After navigating the perilous Thrallway by passing the Chalice of Light and using the Enlightened buff to bypass barriers and defeat Shriekers, your team enters an underground chamber leading to Ir Yut’s arena. The encounter begins with clearing waves of Hive enemies and quickly eliminating Blistered Knights to unlock Shriekers that guard the central room. Once the Shriekers are destroyed, the barriers drop and the Chalice becomes accessible, allowing Guardians to gain Enlightenment. The main objective is to defeat the Shieldsinger Wizards and interrupt Ir Yut’s Liturgy by dealing enough damage within a limited window, or risk a team wipe. Efficient coordination, Chalice management, and rapid add-clearing are crucial to overcoming this challenging fight.
The third raid encounter sees players fight against Ir Yut, a large wizard whose song has the power to kill anyone who listens to it in its entirety.
Starting the encounter
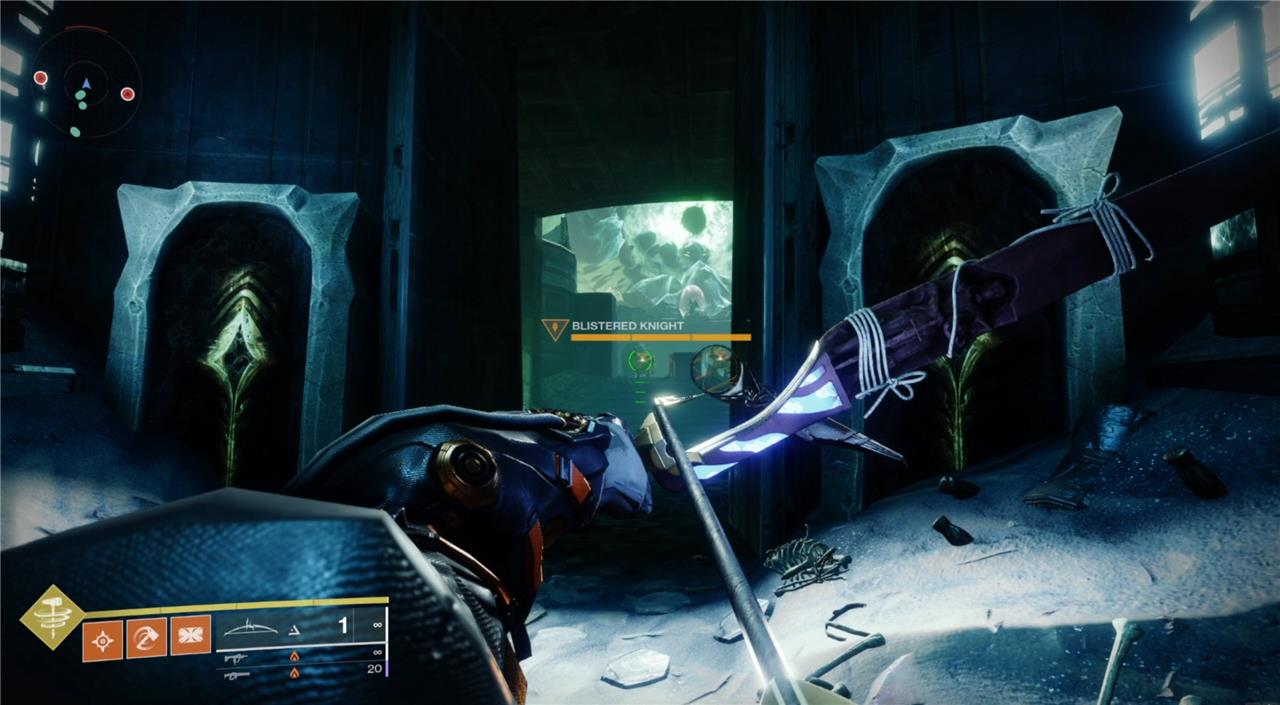
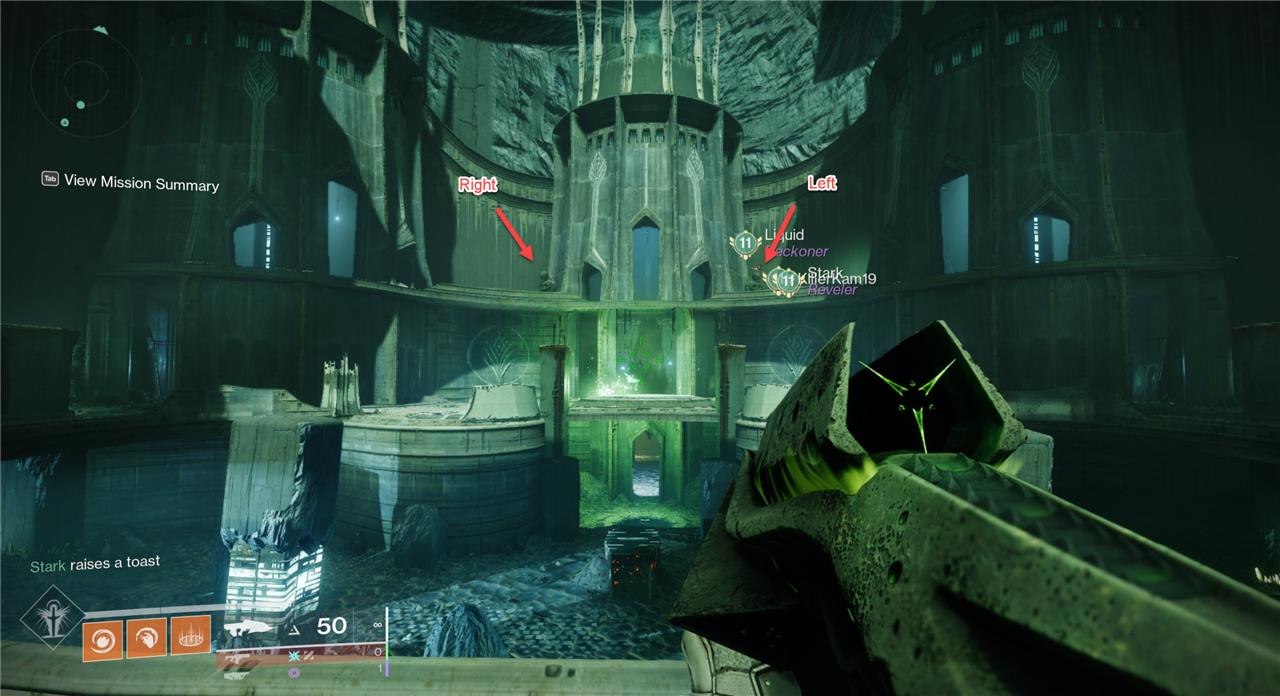
First, you want to break your team into two teams of three. One team will go out to the right and the other to the left. Make your way up and around back to the center room with the crystal in it, killing the six yellow-bar knights along the way. Once they die, one shrieker will open on each side, killing those will drop the green barrier to the middle. Your team will meet back here, starting the main part of the encounter.
Setup
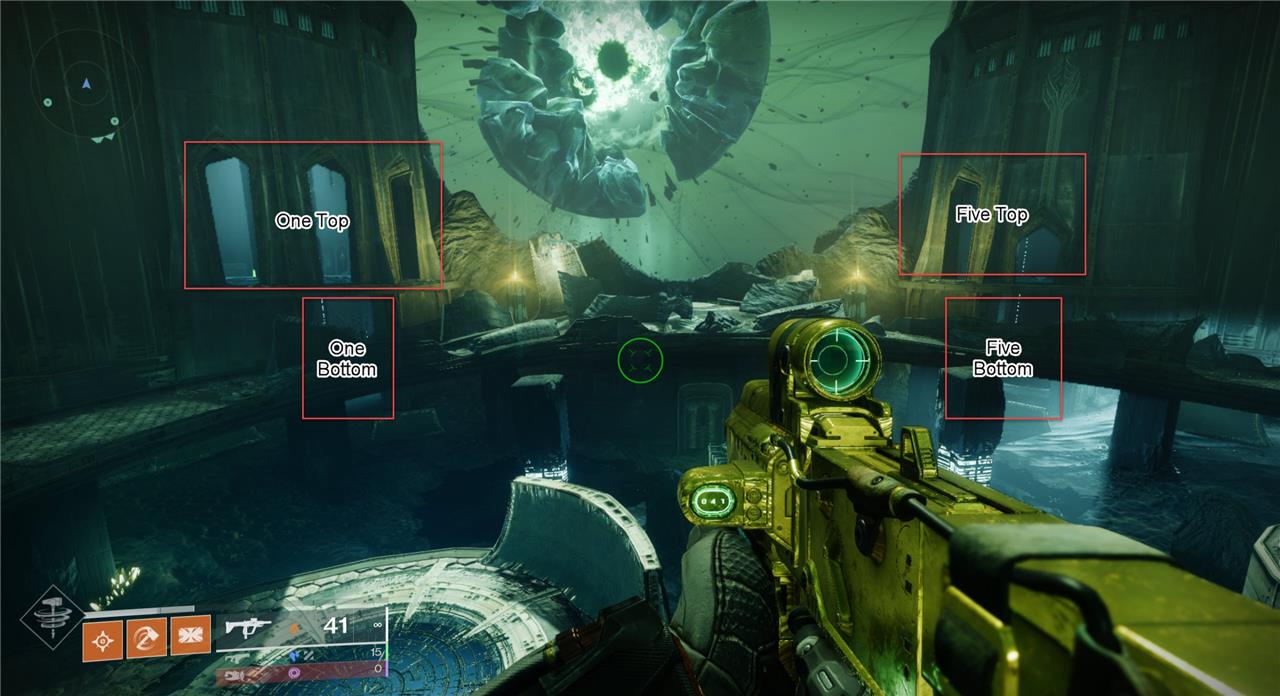
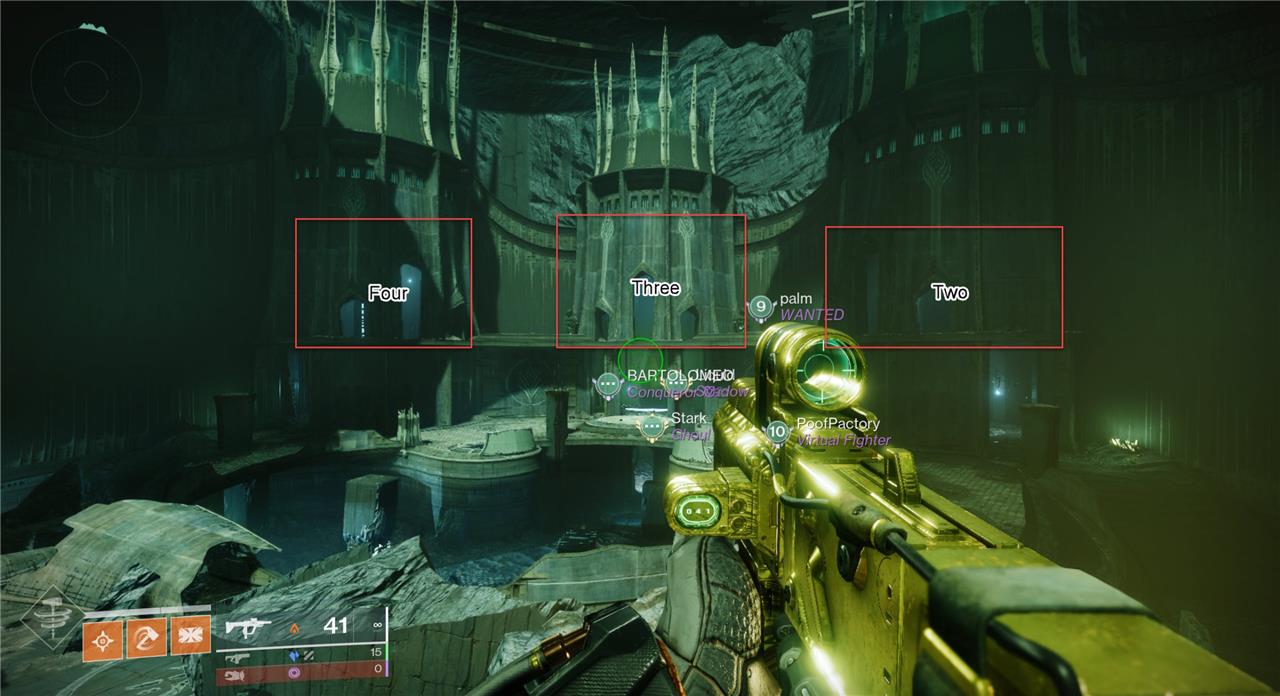
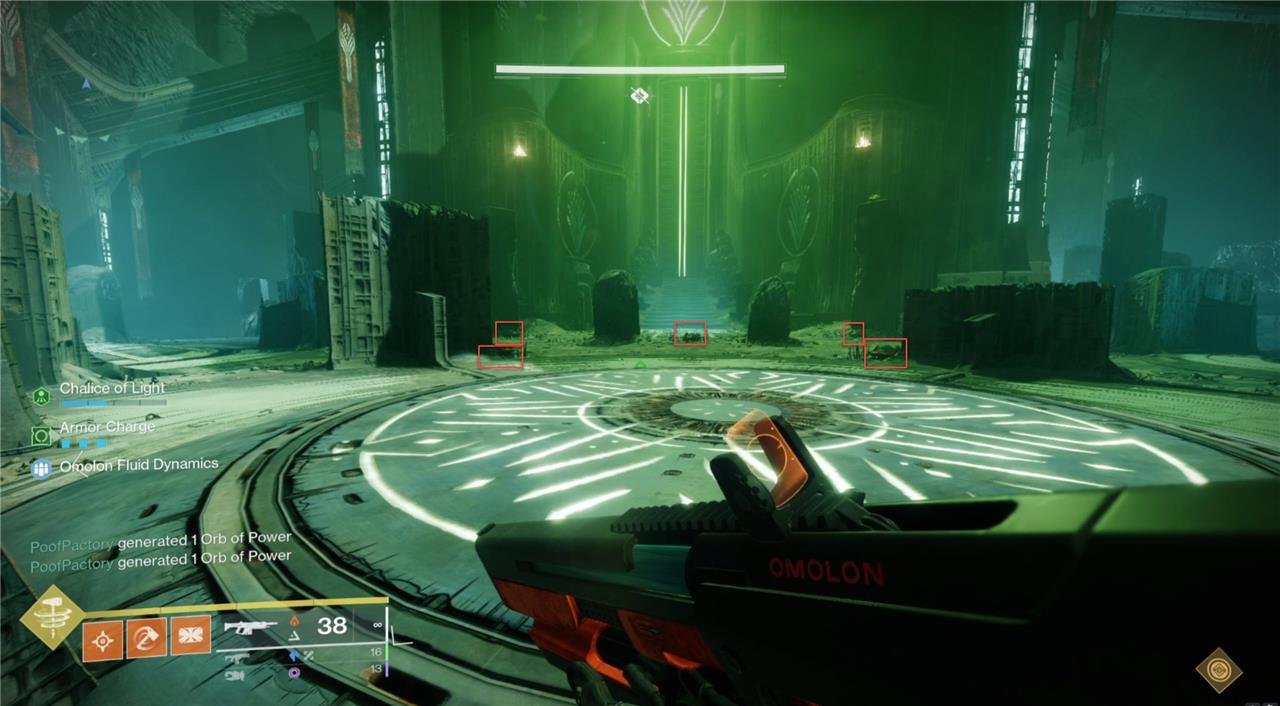
Once you’re in the room with the crystal, many more enemies will spawn and continue to spawn. The primary mechanic of this encounter is using the Enlightened buff to cross through the same type of green wall shields you passed through in the Shrieker Sprint to kill the wizards providing Ir Yut her shield. There wizards can spawn in seven places. We have provided a map of our team’s callout above.
The wizards can be hidden, so we recommended that Enlightened 6 or your team’s scout run Wish-Ender or something else to gain Truesight to see these hidden Wizards more easily. You can also use your radar and note that if you see a red circle, that is a Shrieker, not a wizard. (It’s best to designate Enlightened 6 as your scout because, while the rest of the team passes around the buff to get Enlightened, that player can run around and call out where the wizards are.) The first phase has three wizards to kill, the second phase has four wizards to kill, and the third and final phase has five wizards to kill if needed.
Collect the Chalice from the preservation node in front of the crystal. Pass around the Chalice to get the number of players Enlightened equal to the number of wizards that need to be killed. If you can get extra players Enlightened, those buffs can be used to deal more damage to Ir Yut, but we’ll talk about that shortly. Once the final person you want to get Enlightened gets the buff, that last player to take the Chalice dunks it into a preservation node in front of the crystal.
Each player responsible for killing a wizard should go to one of the spots the scout called out. You have a couple options here.
One option is to walk through the barrier when you get there and get the wizard into a finishable state, but note that walking through removes your Enlightened, and you cannot cross back out until the wizard dies. Once all wizards are ready to be killed, all players will have to finish the wizards at the same time.
Another option is to wait outside the door until all players are ready, and then all players jump through their doors and kill their wizards simultaneously. Either option works, but we found that it worked best if you could use the first method. Once the timer starts and all wizards are killed, the team should meet directly outside the crystal room for DPS.
DPS
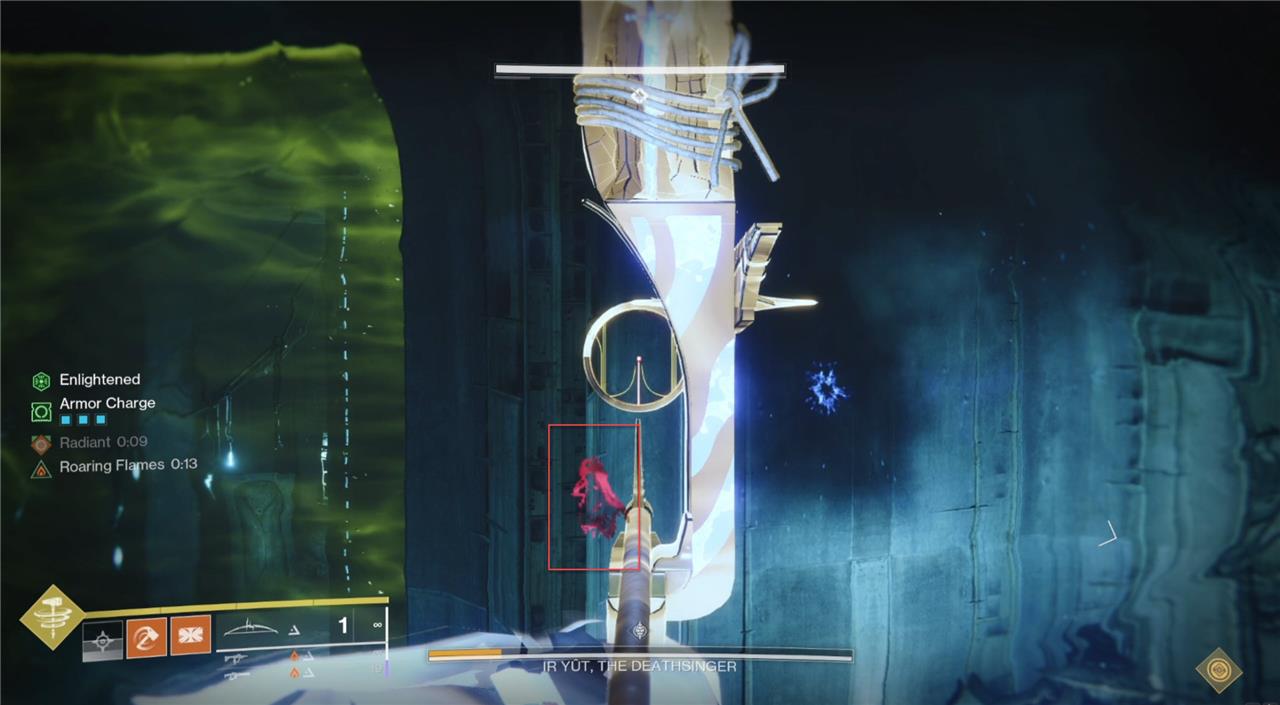
Once any of the hidden wizards have been killed, or if you take too long, Ir Yut will start her death song, noted by “Dark Liturgy” on your screen’s buff/debuff section. Once all of the wizards die, her shield will drop, and you’ll have the remaining time to damage her. One piece of her health bar will be highlighted. You must deal at least that much damage in a DPS phase, or she will wipe the party at the end of her song. When you run out of time and have dealt enough damage, repeat the setup steps again until she is killed.
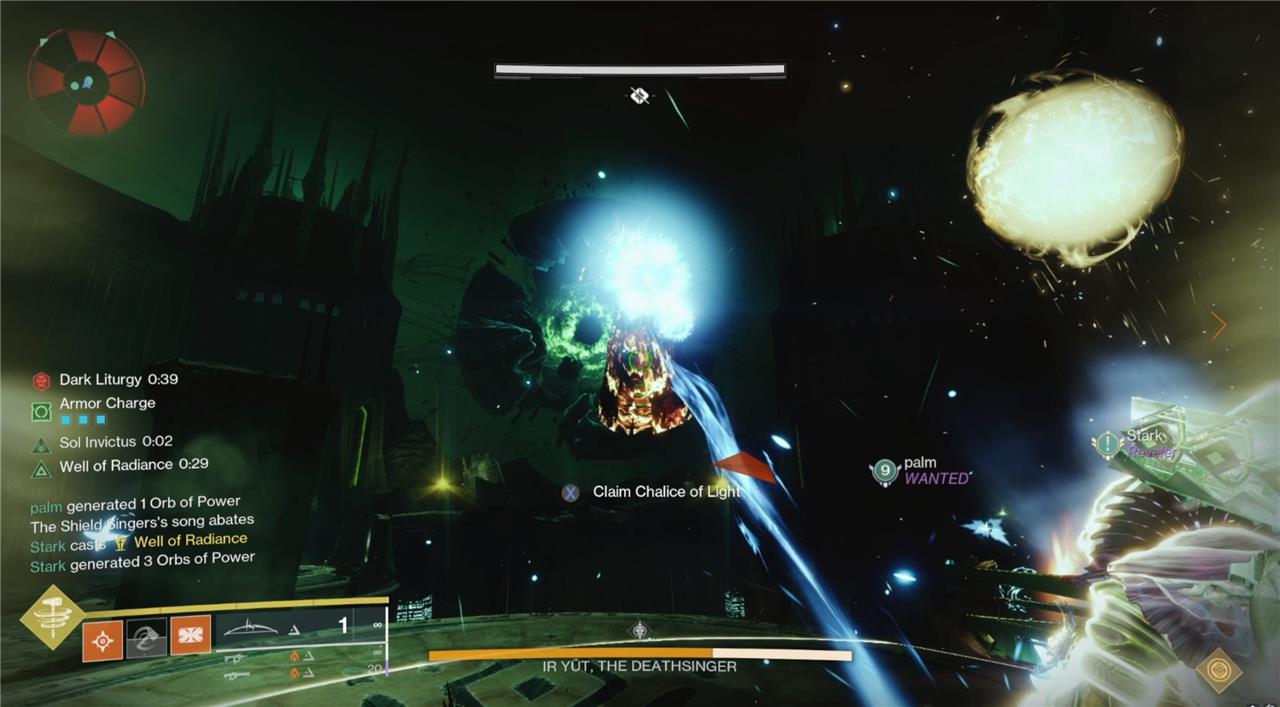
There are many different options for DPS, but you definitely want at least one Well of Radiance to stand in. We found that for most DPS options, including rocket launchers, having someone using Divinity helps immensely. Ir Yut has a small hitbox, so the Divinity critical hit bubble removes some of the difficulty. Rocket launchers, linear fusion rifles, Leviathan’s Breath, and even Heir Apparent deal great damage against her, so pick your favorite setup and have fun.
Remember when we mentioned that players can use extra Enlightenment buffs to deal damage to Ir Yut? A player with the buff can run next to her while her shields are down and interact with her. This gives you the option to “Expunge.” This deals significant damage and appears to make her take extra damage for the rest of that DPS phase. We highly recommend having at least one player Expunge her at the start of each phase to increase your damage even more. Repeat the cycle until she is defeated.
Example cycle
An example cycle would look like the following:
- Players split up and make their way around, killing knights and the shrieker.
- Enlightened 1 picks up the Chalice.
- Enlightened 6 scouts the wizard locations and finds they are in 1 top, 4, and 5 bottom.
- Enlightened 2 takes the Chalice from Enlightened 1.
- Enlightened 1 heads to the 5 bottom wizard location, walks in and gets the wizard finishable.
- Enlightened 3 takes the Chalice from Enlightened 2.
- Enlightened 2 heads to the 4 wizard location, walks in and gets the wizard finishable.
- Enlightened 4 takes the Chalice from Enlightened 3.
- Enlightened 3 heads to the 5 bottom wizard location, walks in and gets the wizard finishable.
- Enlightened 5 takes the Chalice from Enlightened 4 and places it in the preservation node.
- Enlightened 1, 2, and 3 simultaneously count down and finish their wizards.
- The team meets at the DPS plate, drops a Well of Radiance, and begins DPS.
- Enlightened 4 Expunges her right away, then gets back into the Well.
- Everyone damages her, dealing at least enough damage to stop the wipe mechanic.
- The DPS phase ends, and the cycle repeats.
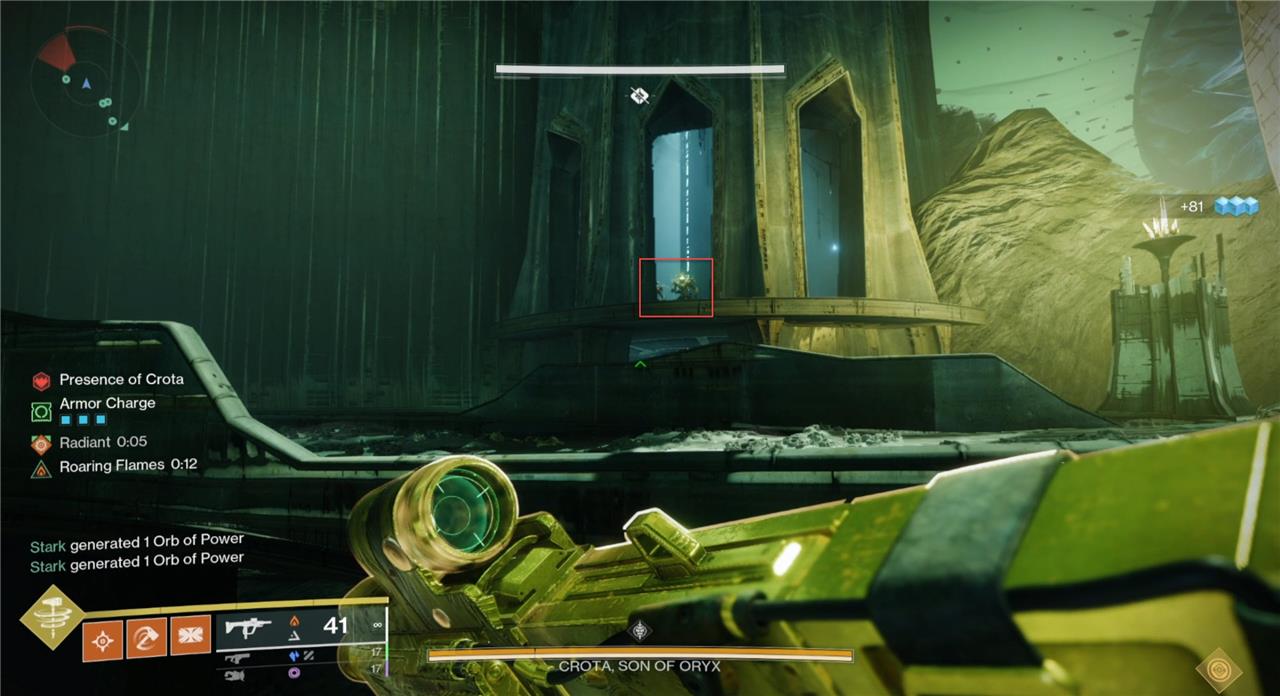
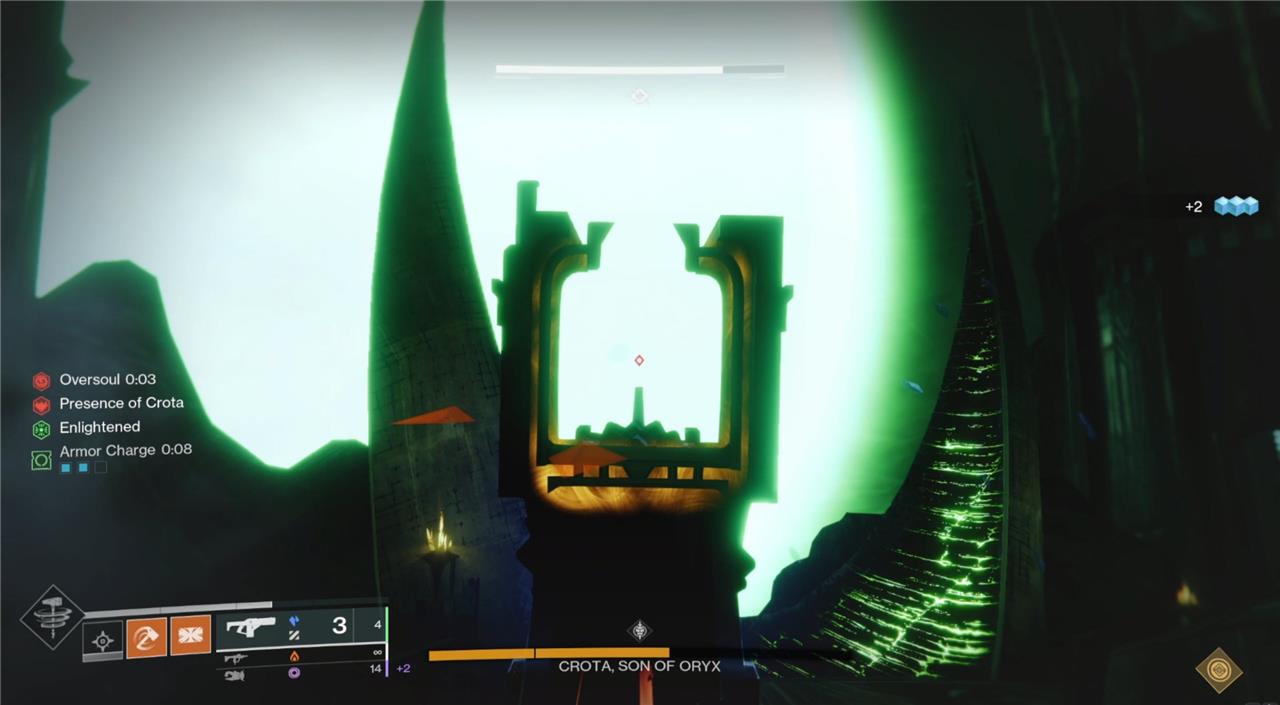
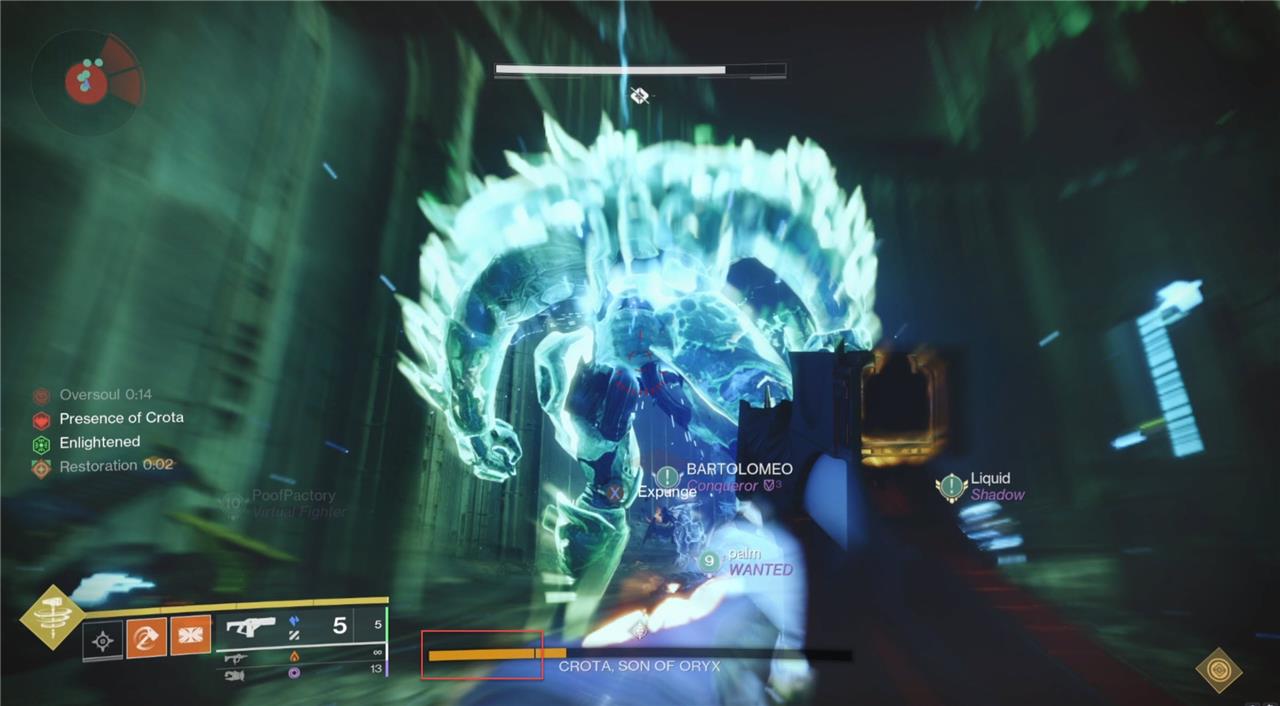
Crota, Son of Oryx – the final boss fight
The final boss fight against Crota, Son of Oryx, in Destiny 2’s Crota’s End raid is a high-stakes, multi-phase encounter that tests your fireteam’s coordination and DPS skills. To damage Crota, players must first use the Chalice of Light to become Enlightened and wield Hive Swords dropped by Swordbearers, as only these swords can break Crota’s shield. Once the shield is down, the team must unleash heavy damage while managing the Oversoul mechanic-a massive orb that appears with a 20-30 second timer and must be destroyed by an Enlightened player to avoid a team wipe. When Crota’s health drops to a critical threshold, he enters Final Stand, where his shield briefly returns and he performs a knockback AoE attack. The team must balance destroying the Oversoul quickly and focusing fire on Crota before the timer expires. Using powerful weapons like the Lament, Acrius, and Tractor Cannon greatly aids in this DPS race. Success requires precise timing, communication, and mastery of the raid’s mechanics to finally bring down the Son of Oryx.
We’ve finally made it to the boss, Crota, the Son of Oryx. You must use swords to lower his shields, damage him, and then shoot his Oversoul to stop DPS and prevent the team from being wiped.
Starting the encounter
To start the encounter, all players must gather around the crystal in the room where the Chalice was for Ir Yut. Everyone must be touching the crystal for it to start, so players have come up with the saying “Kiss the crystal” when they want everyone to gather and start the encounter.
Once it starts, green barriers lasting 5 to seconds will close everyone in the room. Crota will spawn directly in front of the room, so stand behind the crystal so he doesn’t attack you when the barriers come down. After the barriers drop, split the team into two groups of three again, one pushing out to the left and one to the right. Clear out the enemies and go outside to begin the setup to DPS.
The cycle
The cycle for this encounter is simple. First, kill the four boomer knights, two in the left and right towers. This will spawn two ogres and one Swordbearer in the middle. Once you kill the Swordbearer, someone who is Enlightened must pick up the sword. Like other parts of the raid, the window of opportunity to pick it up is short, so coordinate when to kill the Swordbearer. After that Swordbearer dies, some wizards and thrall will spawn under the towers and in the middle. The four boomer knights will respawn after a few seconds, and the cycle repeats.
Setup
The above cycle should be completed three times to get three swords. While the cycle is moving, the Enlightened cycle is also moving, but there is a small difference this time. For the entire encounter, players will see a “Presence of Crota” debuff on their screen.
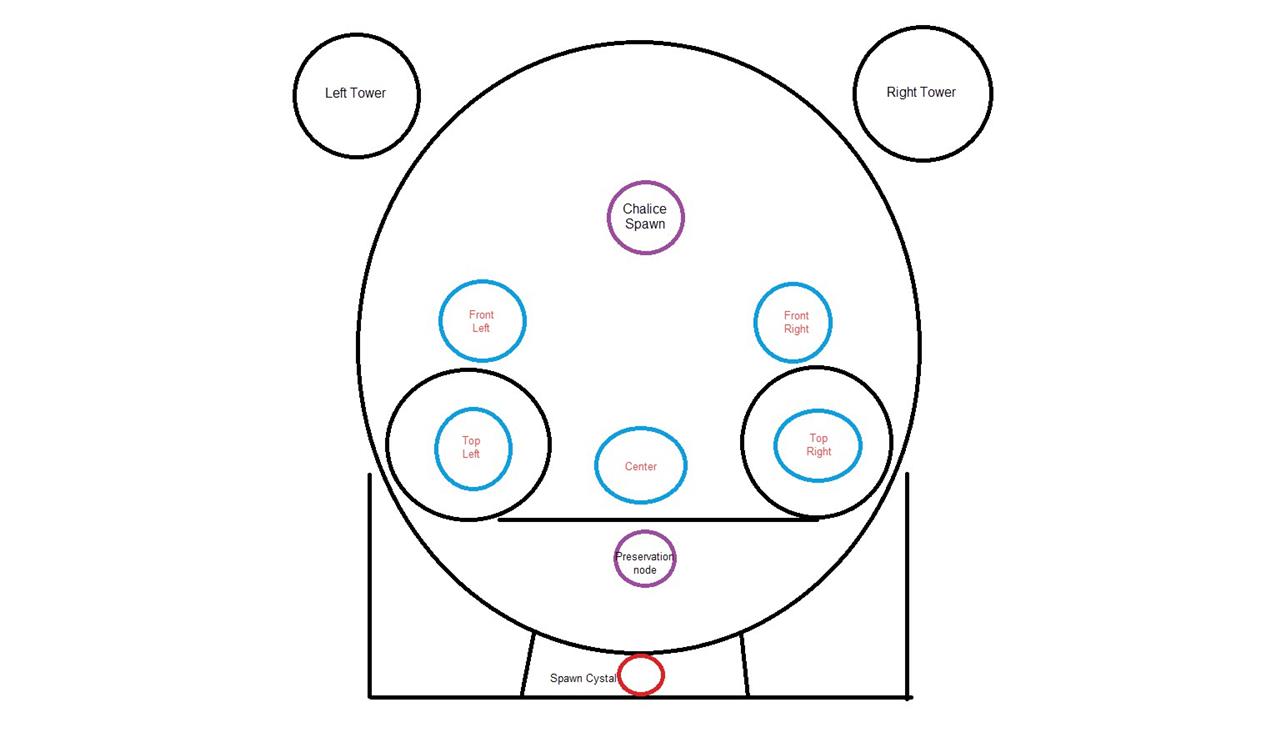
Unlike Destiny 1, this does not prevent you from healing but means you cannot swap the Chalice, save for a small circle of light that can spawn in one of five locations – see the map above. The blue circles represent the five swap points and the call-outs for each. This just means that there is a little more coordination needed to swap the buffs.
You need at least four players to become Enlightened, three for sword pick-ups, and one to shoot break the Oversoul; more on that in the DPS section. If you can get an additional person Enlightened, you can use that to Expunge Crota and, like Ir Yut, use it to deal free damage to him.
After the last Chalice swap happens, that last player, likely Enlightened 6, should dunk the Chalice in the preservation location directly under the crystal room, down in the pit. Once three swords have been collected, everyone should gather near Crota to prepare to start DPS.
DPS
Once you break Crota’s shields using the sword/swords, you can begin to actually damage him. There are two ways to break the shields: You can either have all three sword users attack at once, which is the challenge for this encounter. Or you can attack Crota with each sword as you get it. (Most people prefer the three-sword strategy, as attacking individually can be dangerous, because Crota can still attack you while you sword him down.)
Whether you use one or three swords, we recommend that one player on your team uses Tractor Cannon and hits Crota with it before the swords attack. This increases the amount of damage Crota takes, but more importantly, it increases the damage the swords do to his shield. This makes it much easier; his shield can be taken down with two swords if used this way. This is hard to do and has some luck involved as each sword user must hit all of their attacks, which isn’t a guarantee even for the best players.
The DPS strategies for Crota can be broken down into two categories: close-range and far-range. So far, the close-range options are the most popular.
Close-range damage
Both close and long-range strategies should use a Well; it is very important to have at least one Well, but it is best to have two or three. For close range, you want to drop the shields while you all surround Crota. As the swords are swinging, the first Well should be dropped. You want to use The Lament or Legend of Acrius for close-range damage. If you’re using The Lament, make sure you have the chest mod Lucent Blade; this increases the charge rate of swords. If you’re using Legend of Acrius, ensure you melee every three shots to get the massive Trench Barrel damage.
Long-Range damage
For long-range damage, rockets are the go-to choice. Most rockets are good here, but you’ll want at least one Gjallarhorn. Other than that, any rockets with perks like Explosive Light, Field Prep, Clown Cartridge, and Bait and Switch will work great. You want to position the team in the safest spot possible, so we recommend standing on top of the room with the crystal. Once Crota’s shield breaks, the sword player should join back up with the rest of the team ASAP.
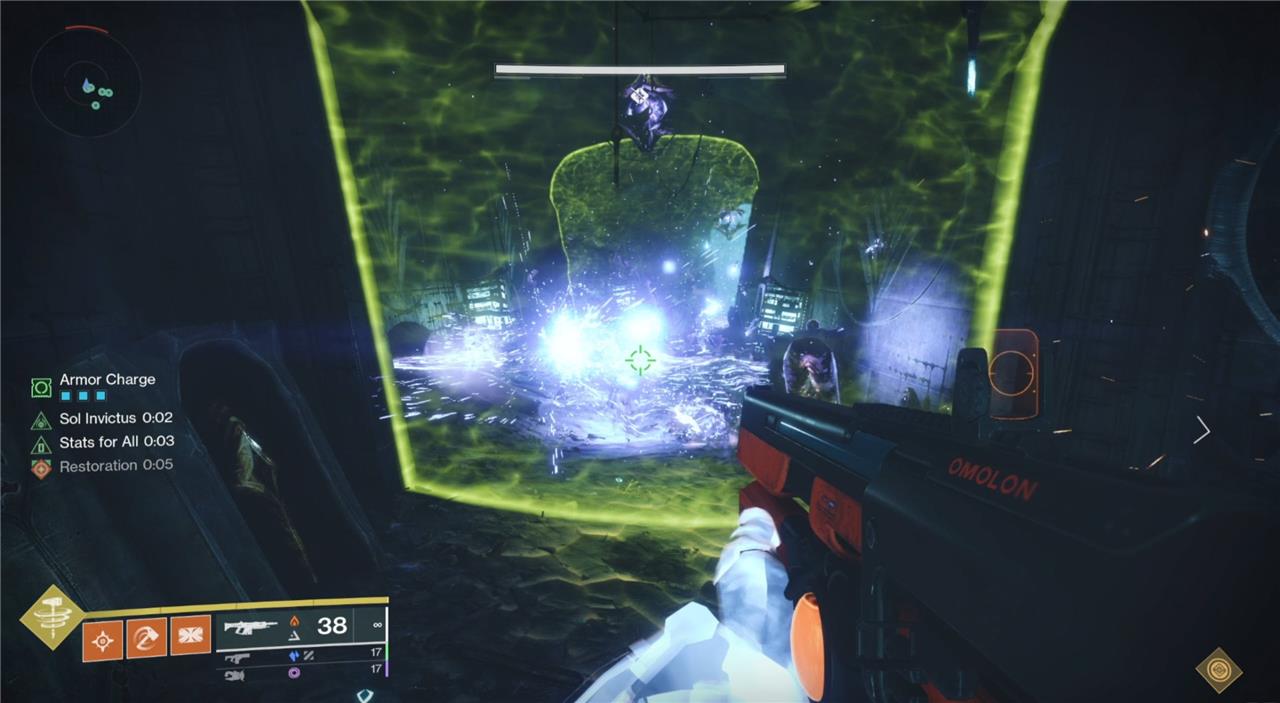
The Oversoul
During the DPS phase, there will be a countdown timer on your screen called “The Oversoul.” If this reaches zero, your team will wipe. When you destroy the Oversoul, you also end the DPS phase, so you want to destroy it as close to the end of the timer as possible. Only a person with the Enlightened buff can damage the Oversoul, so at least four players need to get Enlightened per phase. (One note: the Oversoul does not have a lot of health. It can be taken down in one or two fusion rifle shots, so it is very easy to destroy accidentally.) Whoever is responsible for destroying it should make sure to face in a direction such that shots that miss Crota won’t hit the Oversoul.
Final stand
You’ll reach the final stand once you do enough damage to Crota, as noted by the split on his health bar. Crota will stand up and go immune for a brief time. Players should run away to avoid getting damaged by him during this time. After that, his shield will drop again, and the Oversoul will reappear with a 20-second timer. You can destroy this Oversoul, assuming you have the Enlightened buff. Doing so will extend the DPS phase by ten seconds, giving you some more time to kill Crota. Once the Oversoul timer reaches zero, it will wipe you, but you have three to five extra seconds to deal damage. If you kill him in this time, the team will wipe, but you will respawn and still be able to collect your sweet loot.
Example cycle
An example cycle for the final fight would look like the following:
- Everyone kisses the rock.
- Three players run out of each side and kill the ads.
- One player from each side kills the two boomer Knights on their side, while Enlightened 1 grabs the Chalice.
- The orges and Swordbearer spawn and are killed once Enlightened 2 has the Chalice.
- Enlightened 1 picks up the sword.
- One player from each side kills the two boomer Knights on their side.
- The orges and Swordbearer spawn and are killed once Enlightened 3 has the Chalice.
- Enlightened 2 picks up the sword.
- One player from each side kills the two boomer Knights on their side.
- The orges and Swordbearer spawn and are killed once Enlightened 4 has the Chalice.
- Enlightened 3 picks up the sword.
- Enlightened 5 takes the Chalice from Enlightened 4 and preserves it.
- The team gathers around Crota, ready for DPS.
- The sword users jump onto Crota, lowering his shield.
- Everyone DPS’s until three to four seconds are left on the Oversoul timer.
- Enlightened 4 destroys the Oversoul, ending DPS.
- Repeat the cycle until Crota is defeated.
Encounter Challenges
Encounter Challenges in Crota’s End add an extra layer of complexity to each major fight, requiring precise teamwork and execution to earn bonus rewards. Each encounter features a unique challenge, such as lighting only one lantern between Chalice deposits in the Abyss (“Conservation of Energy”), or ensuring no one stands on the bridge plate while crossing during the Bridge encounter (“Precarious Balance”)-both of which demand careful coordination and communication from your fireteam. Completing these challenges not only grants double loot for that encounter but also counts toward raid triumphs and titles, making them essential for players aiming for full completion and the most prestigious rewards. Mastering these challenges will test your group’s adaptability and sharpen your skills throughout the raid.
As with all Destiny 2 raids, each encounter has a challenge that, when completed, drops extra loot. The encounter that has the active challenge rotates weekly, and we’ll break down each encounter challenge below.
The Abyss
The challenge for the Abyss encounter is activating only lamps with a preservation node next to them. This is pretty straightforward, but players must move as a group and keep track of the Chalice timer.
Oversoul Throne Bridge
The challenge for the Bridge encounter is only to cross the bridge while no one stands on the plate that builds it. This is simple: the person crossing the bridge must communicate when they are crossing, and those responsable for the middle plates just step off. The bridge will start to unbuild, so the player crossing must jump over the small gap made as the bridge deforms.
Ir Yut
The challenge for the Ir Yut encounter is that each player must become Enlightened before anyone gets it again. This challenge is one of the more difficult ones, as it requires you to constantly move the Chalice around without using the preservation node and keeping track of it during the DPS phases.
Crota, Son of Oryx
The challenge for Crota is to take his shield down at one time, meaning you must collect 3 swords, or 2 if you are confident in your sword-bearer’s skills, and attack him simultaneously. Similar to the Deep Stone Crypt final boss challenge, this is the preferred way to do the encounter, so getting the extra loot when this challenge is active should be a breeze.
What secret chests in Crota’s End unlock the best gear
Crota’s End in Destiny 2 features several secret chests that offer valuable loot, but the most sought-after rewards are tied to specific mechanics and chests:
-
Guaranteed Deepsight (Red Border) Chest:
-
This unique chest appears after defeating Crota, but only if you interact with Hive statues throughout the raid in the correct order. It grants a guaranteed Deepsight (red border) weapon, essential for unlocking weapon patterns. This is typically considered the “best” chest for acquiring top-tier gear due to the guaranteed high-value drop.
-
-
Abyss Encounter Secret Chest:
-
Found by exploring glowing doors in the Abyss after dropping into the Hellmouth. This chest can drop Legendary weapons (including red borders, if already unlocked), armor, Spoils of Conquest, and raid mods. The exact spawn location can vary, so thorough exploration is needed.
-
-
Shrieker Hallway Secret Chest:
-
Located after the Bridge encounter, this chest is accessed by clearing the Shrieker hallway quickly and depositing the Chalice before the door closes. Like the Abyss chest, it can drop Legendary weapons, armor, Spoils, and mods.
-
Summary Table
| Chest Location | Key Reward(s) | Notable Feature |
|---|---|---|
| After Crota (Red Border) | Guaranteed Deepsight weapon | Requires statue puzzle |
| Abyss | Legendary weapons, armor, Spoils, mods | Spawns behind glowing doors |
| Shrieker Hallway | Legendary weapons, armor, Spoils, mods | Timed Chalice deposit required |
The Deepsight chest is widely regarded as the best for unlocking top gear, especially for pattern completion and crafting. The other secret chests are valuable for additional loot, but do not guarantee the most sought-after rewards.
Do the secret chests in Crota’s End drop the most powerful gear
Secret chests in Crota’s End do not drop the absolute “most powerful” gear in terms of unique, top-tier weapons or armor that are exclusive to them. Instead, their main value lies in providing additional rewards and supporting your gear progression:
-
Guaranteed Deepsight Chest: This chest, unlocked by solving the statue puzzle, awards a guaranteed Deepsight (red border) weapon once per week. Deepsight weapons are crucial for unlocking weapon patterns, allowing you to eventually craft your own “god roll” raid weapons, which are considered among the most powerful gear in the game.
-
Abyss and Shrieker Hallway Secret Chests: These chests drop random raid loot, Spoils of Conquest, and sometimes raid mods. However, they typically only drop loot you’ve already obtained from main encounters, and do not guarantee the best or most sought-after rolls.
-
Exotics and Adept Weapons: The most powerful gear, such as the Necrochasm exotic auto rifle and adept raid weapons, are obtained through completing specific raid encounters, quests, or challenges, not from secret chests.
Summary:
The secret chests provide valuable supplemental rewards and pattern progress, but the most powerful gear-exotics and adept weapons-comes from raid encounters and challenges, not directly from secret chests. The exception is the guaranteed Deepsight chest, which is essential for crafting top-tier weapons.