Hidden across icy corridors, golden dunes, and derelict stations, Security Drones wait for sharp-eyed Guardians to find them. Here’s where each one hides-and how to reach them before the Witness’s eyes do.
In this Destiny 2 guide, we’ll go over the location of all 50 destroyable Security Drones, how to destroy them, and how to unlock the Drone Destruction Triumphs.
How to Destroy the Security Drones
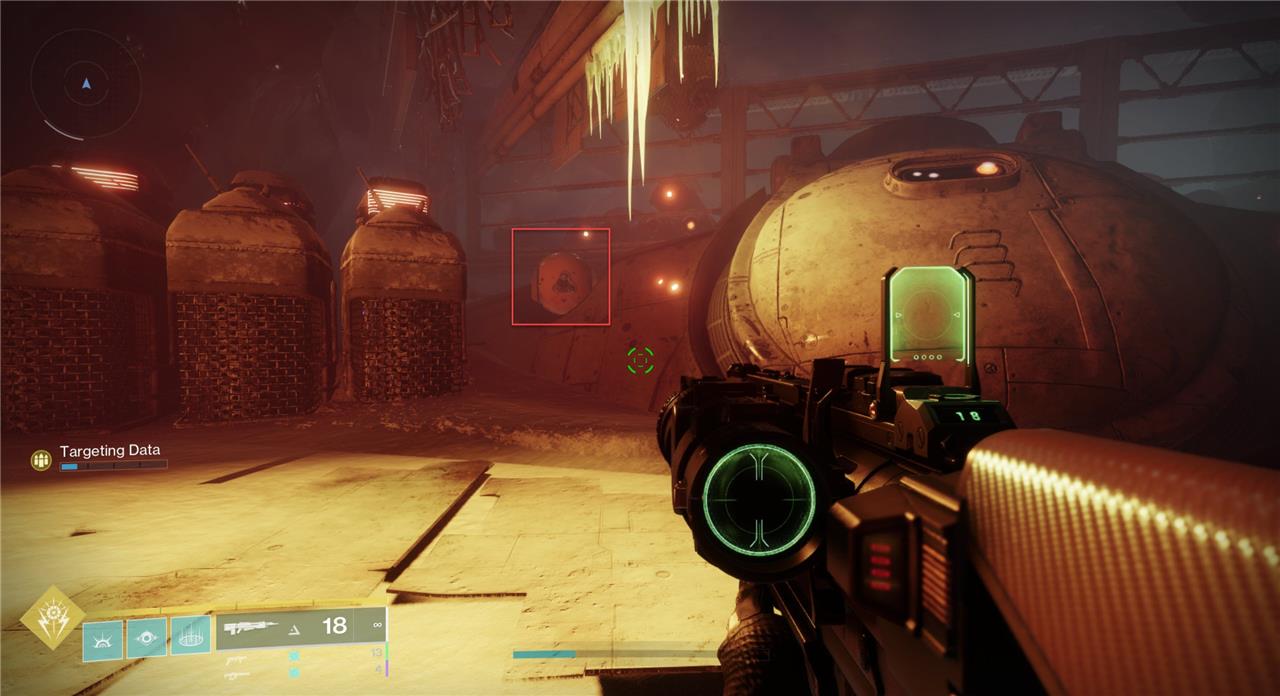
Security Drones can only be destroyed after acquiring the Exotic pulse rifle Revision Zero, obtained through the “Seraph’s Shield” mission. Equip the Rifle and fire its alternate mode to break the yellow orbs scattered across different locations. Each Drone takes a few precise shots to shatter, and any damage from other weapons will have no effect. Make sure to finish the campaign and the associated quest steps before attempting to clear these targets, as the weapon’s special rounds are needed to deactivate them.
Destroying the Security Drones is pretty straightforward. You’ll need the Revision Zero pulse rifle. (Here’s how to get it.) Once you have Revision Zero, you can use it to take out drones with a single shot. Note that drones are immune to any damage that is not from the Revision Zero pulse rifle.
Europa Security Drone locations
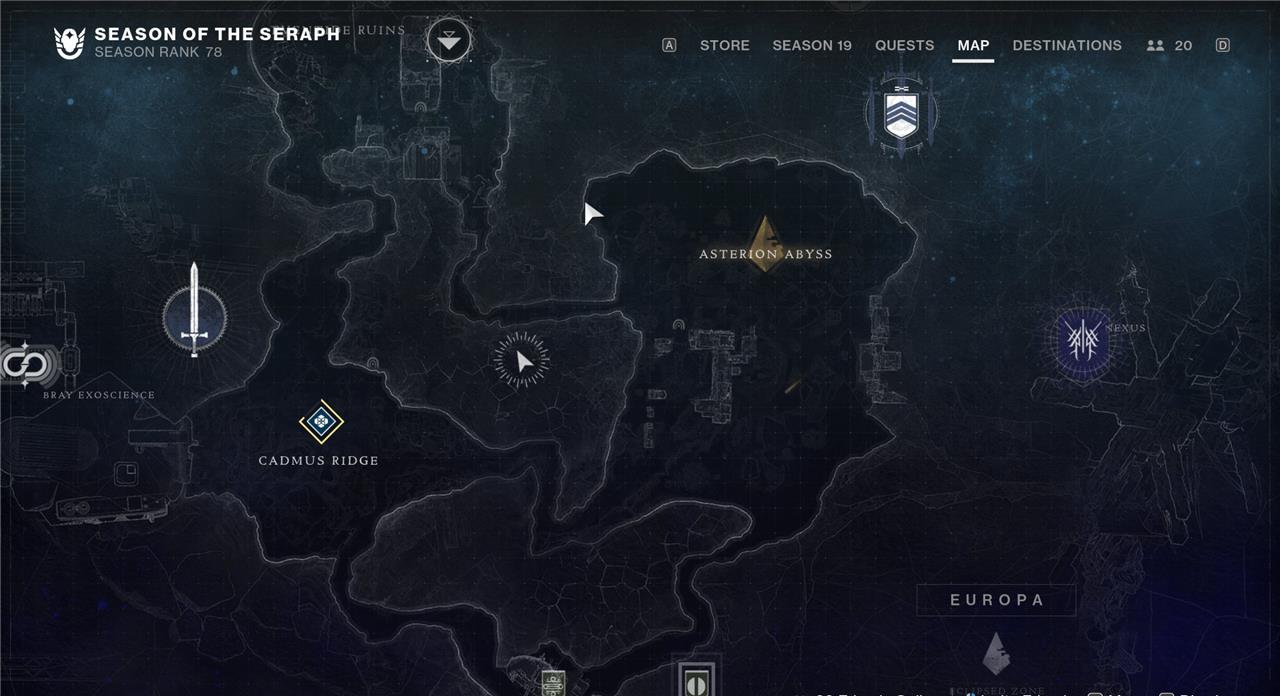
Europa’s Security Drones are scattered across key zones such as Cadmus Ridge, Asterion Abyss, and Eventide Ruins. Many are hidden on ledges, frozen cliffs, or near Braytech facilities guarded by enemy patrols. Others sit inside small structures that require specific seasonal abilities or weapons to destroy. Careful exploration of each region and a methodical sweep of high and low terrain will reveal every drone on the icy moon.
Destroying all ten Security Drones on Europa will unlock the Drone Destruction I Triumph.
Security Drone 1
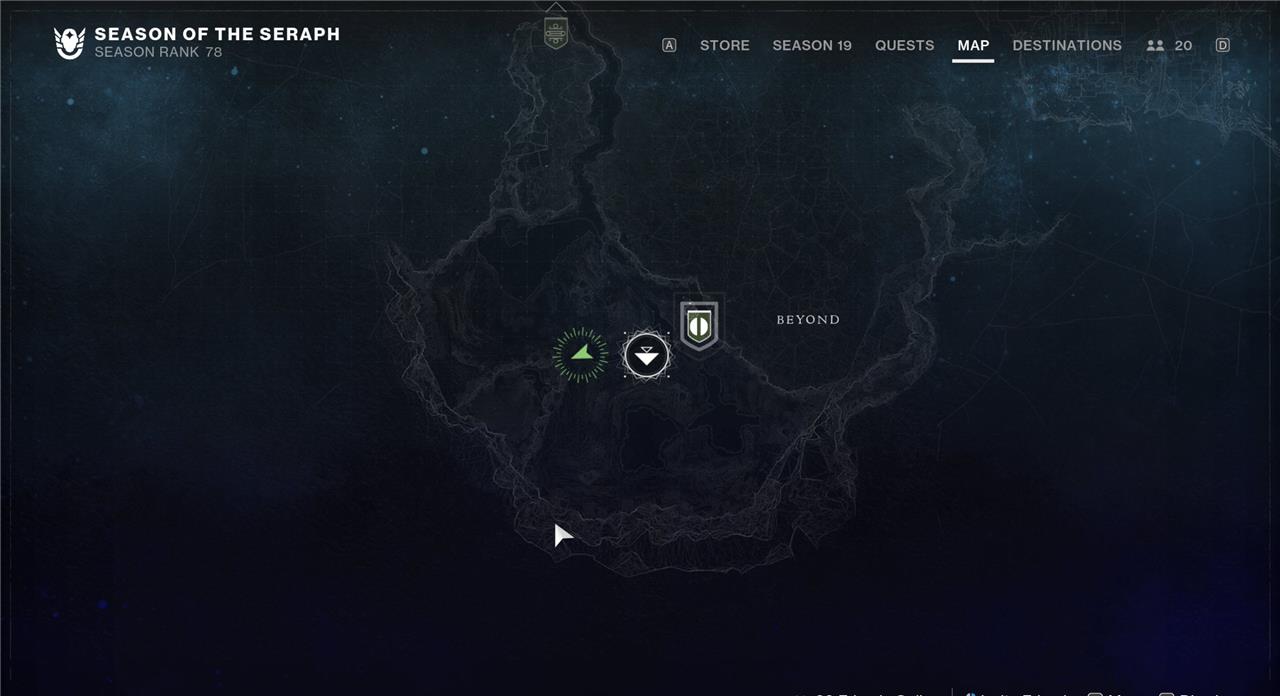
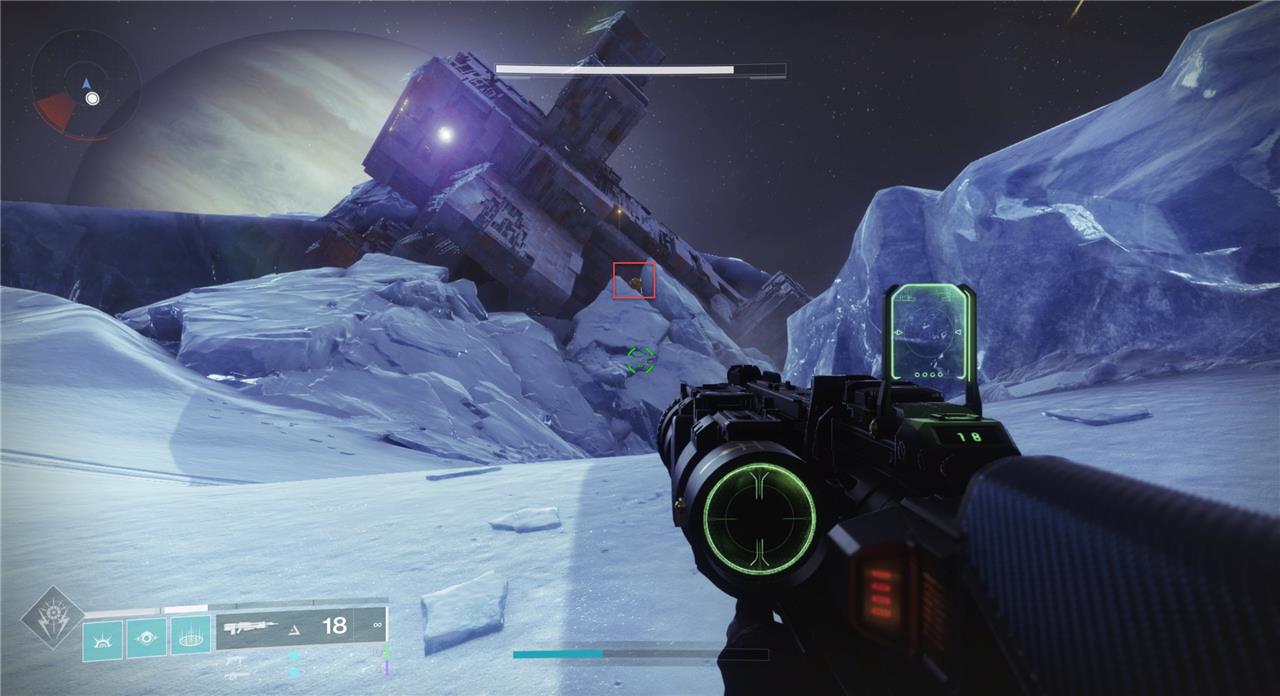
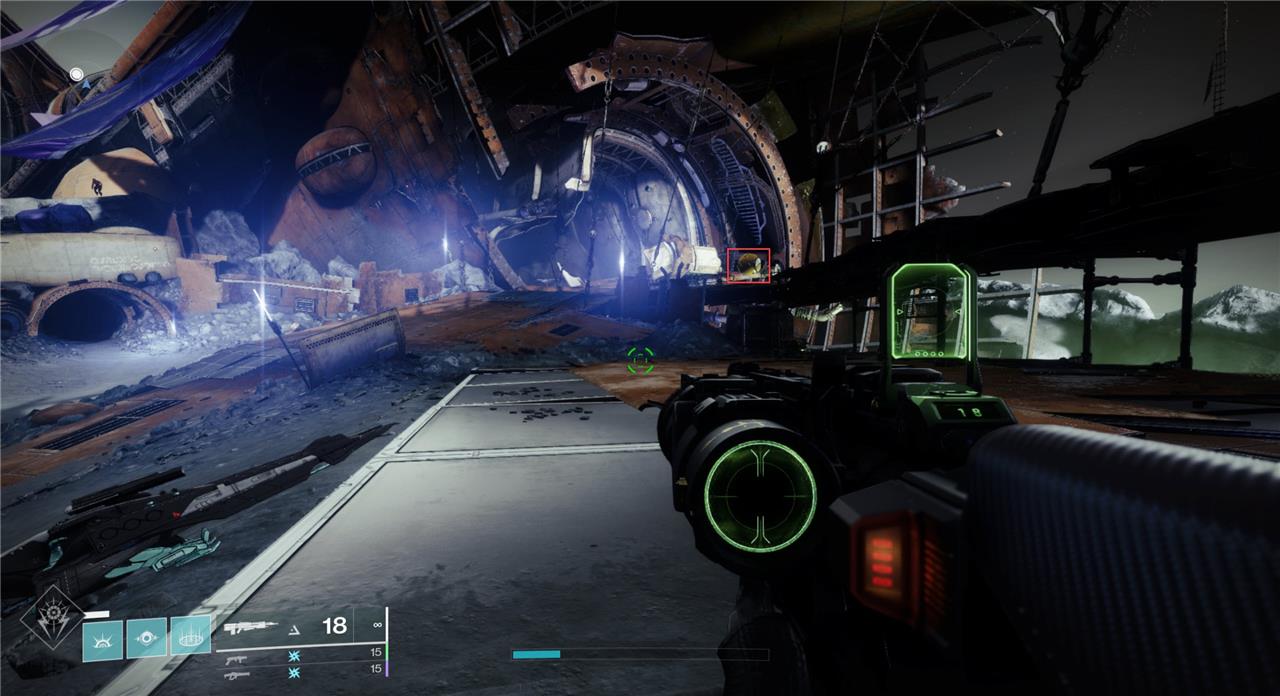
Spawn in at the Beyond transmat zone and turn around. Make your way toward the Ziggurat. The drone is on top of it.
Security Drone 2
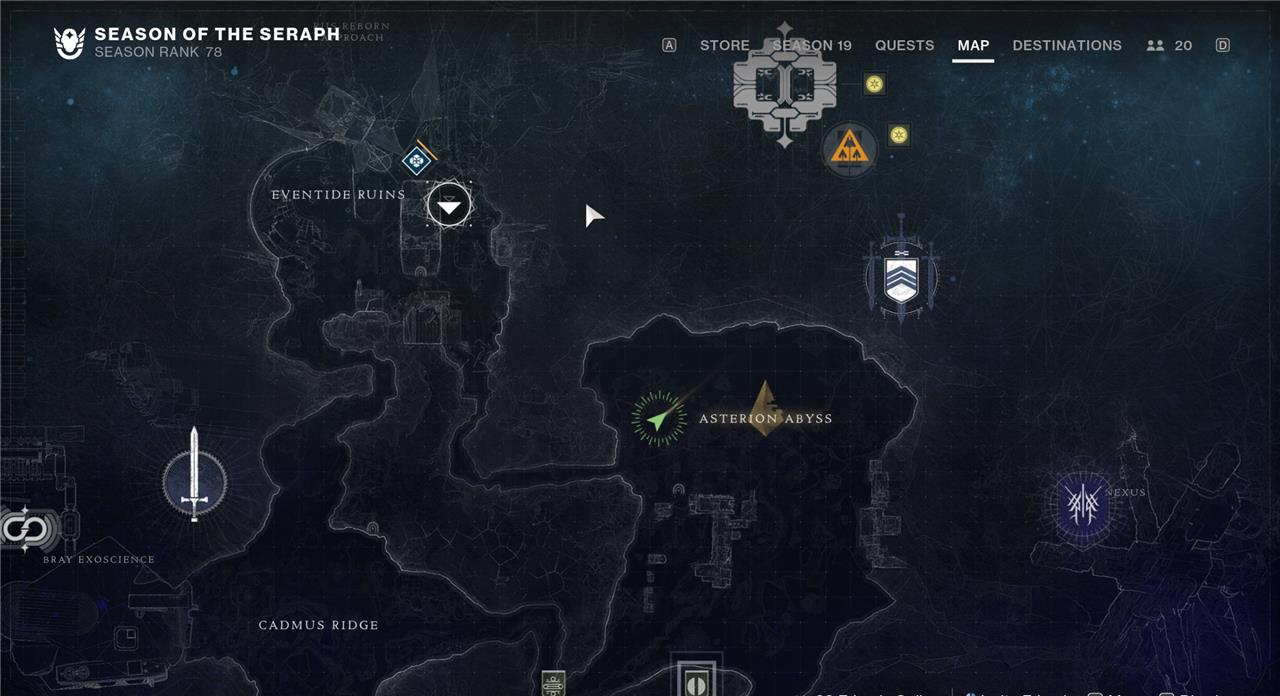
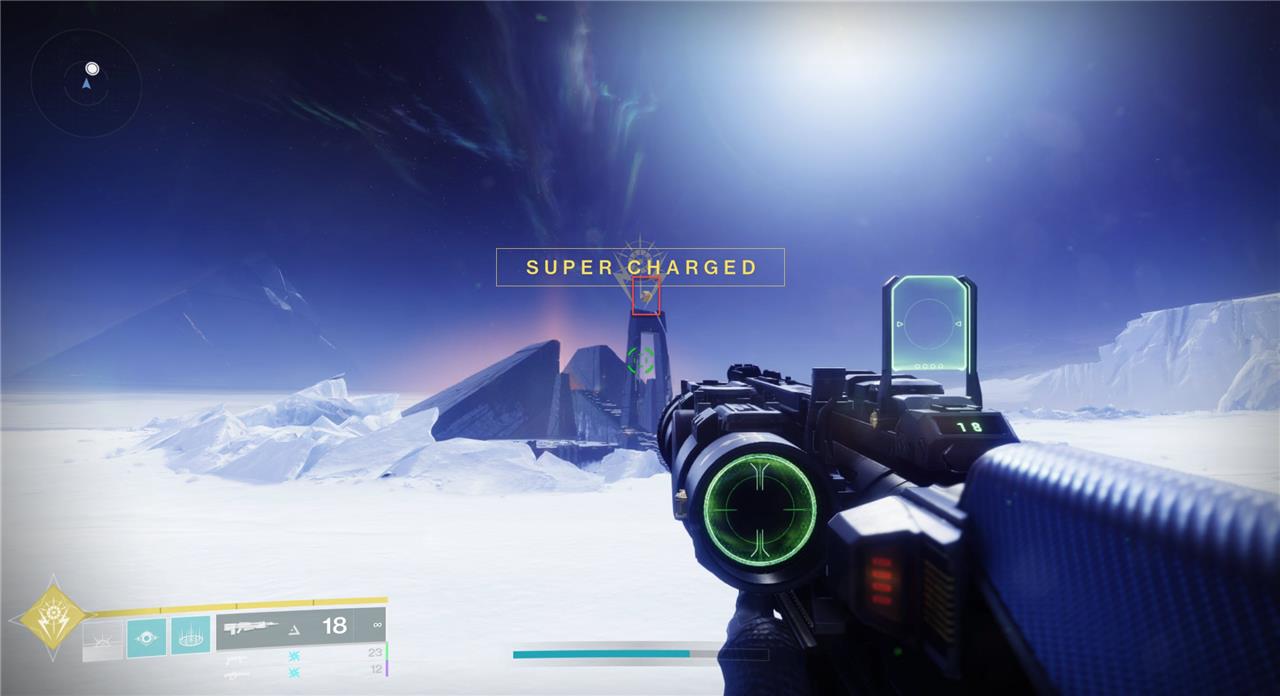
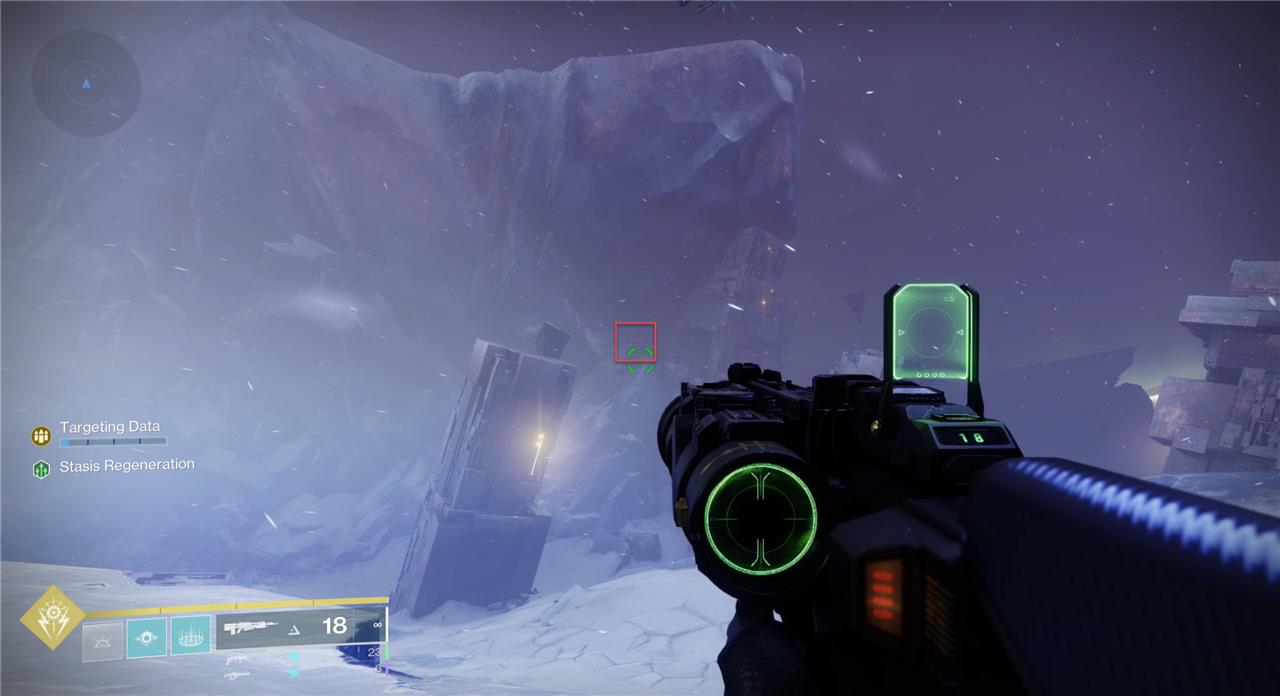
Go to Asterion Abyss. Towards the top of the area, near the vast openness, there is a small cave. The drone is located in that cave.
Security Drone 3
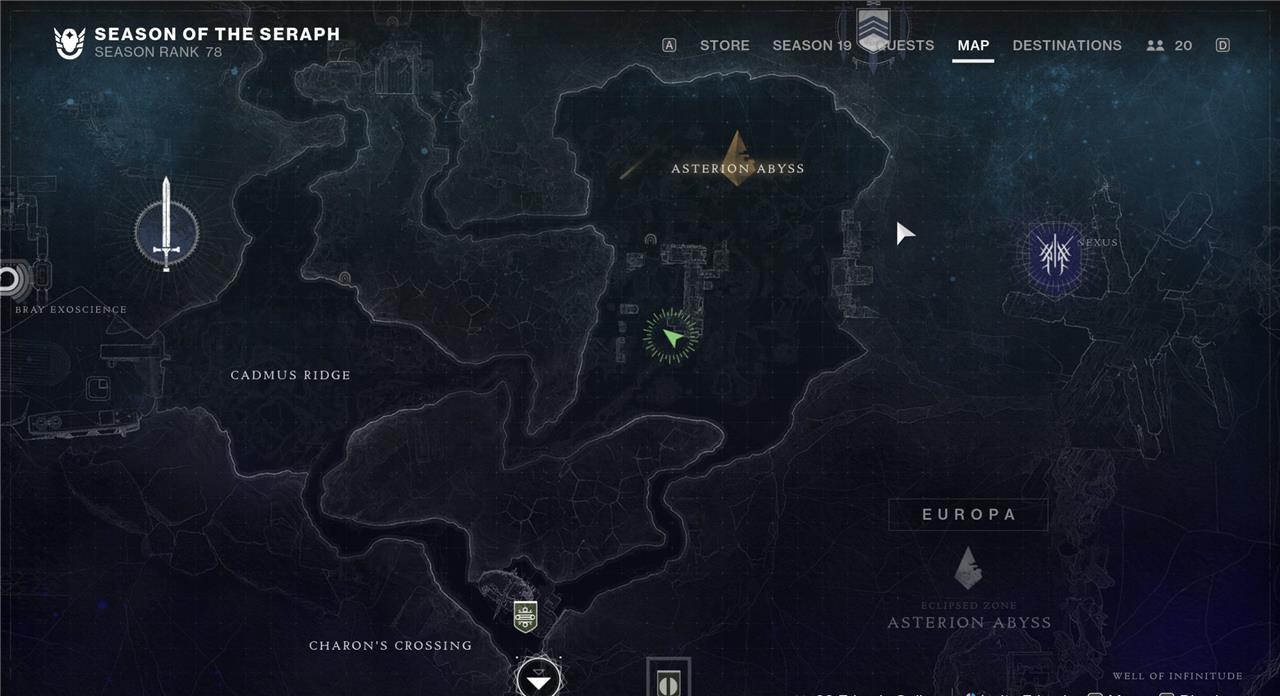
The third drone is tucked in the upper left corner in the Vex structure in the Asterion Abyss.
Security Drone 4
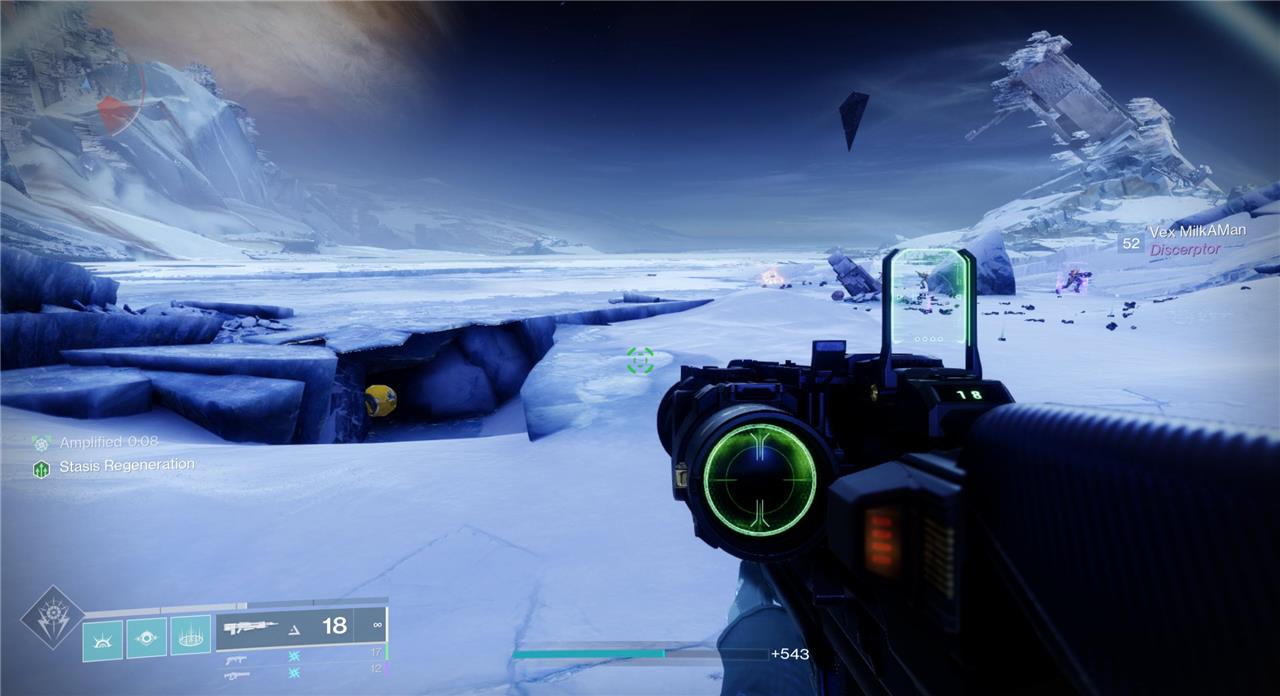
Head to the Concealed Void Lost Sector in the Asterion Abyss. Get to the large open area with Vex Milk on the floor. The orb is tucked in the large structure in the middle of the room.
Security Drone 5
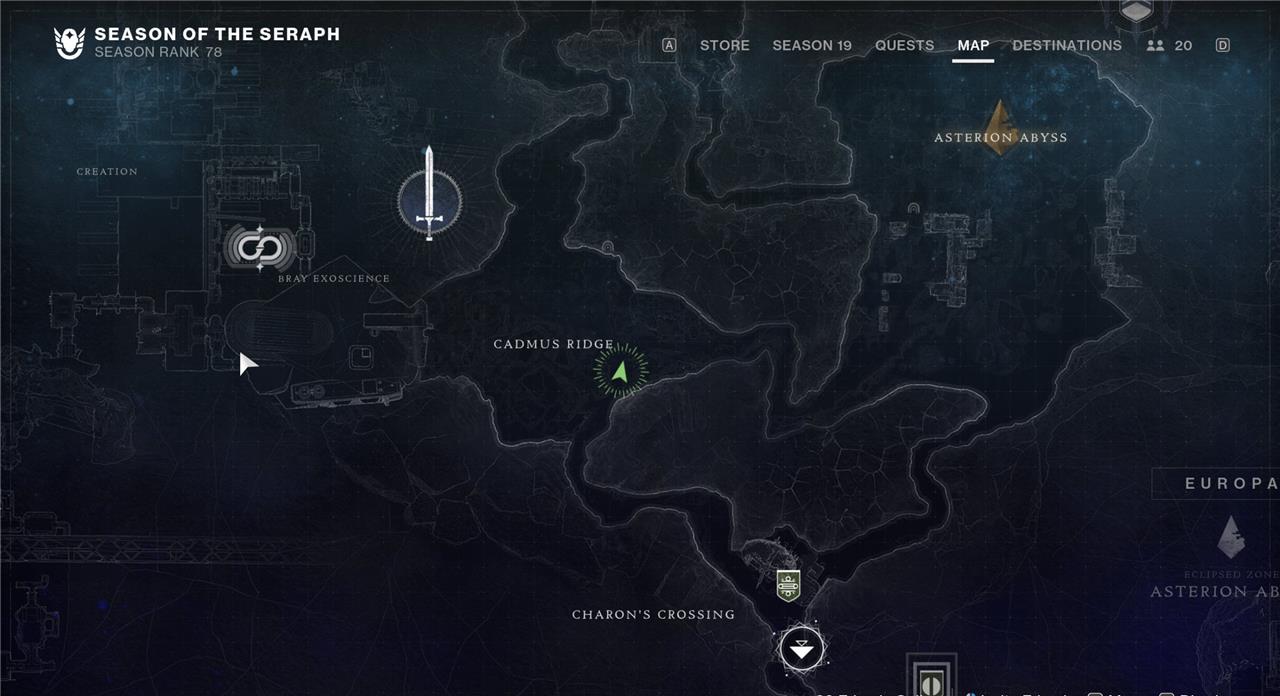
Head to Cadmus Ridge from Charon’s Crossing. The drone is directly in front of you in the mountains.
Security Drone 6
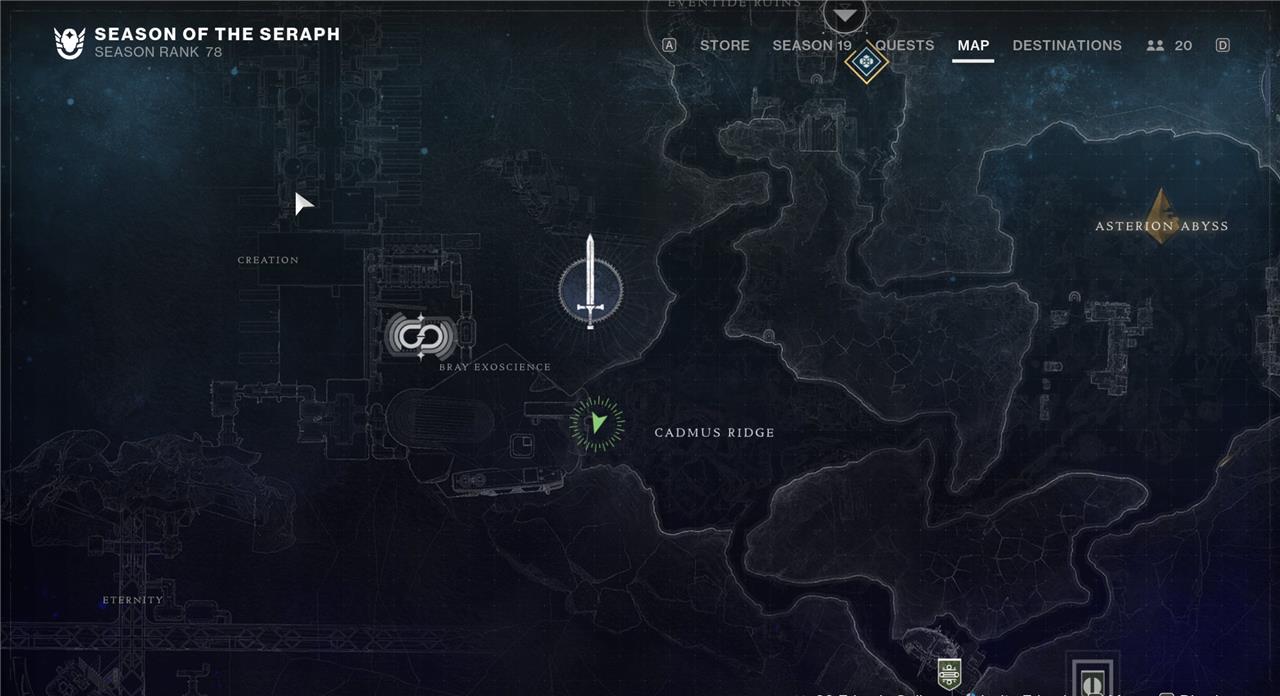
Head to the entrance of Bray Exoscience in Cadmus Ridge. Tucked just to the left of the door is the sixth drone.
Security Drone 7
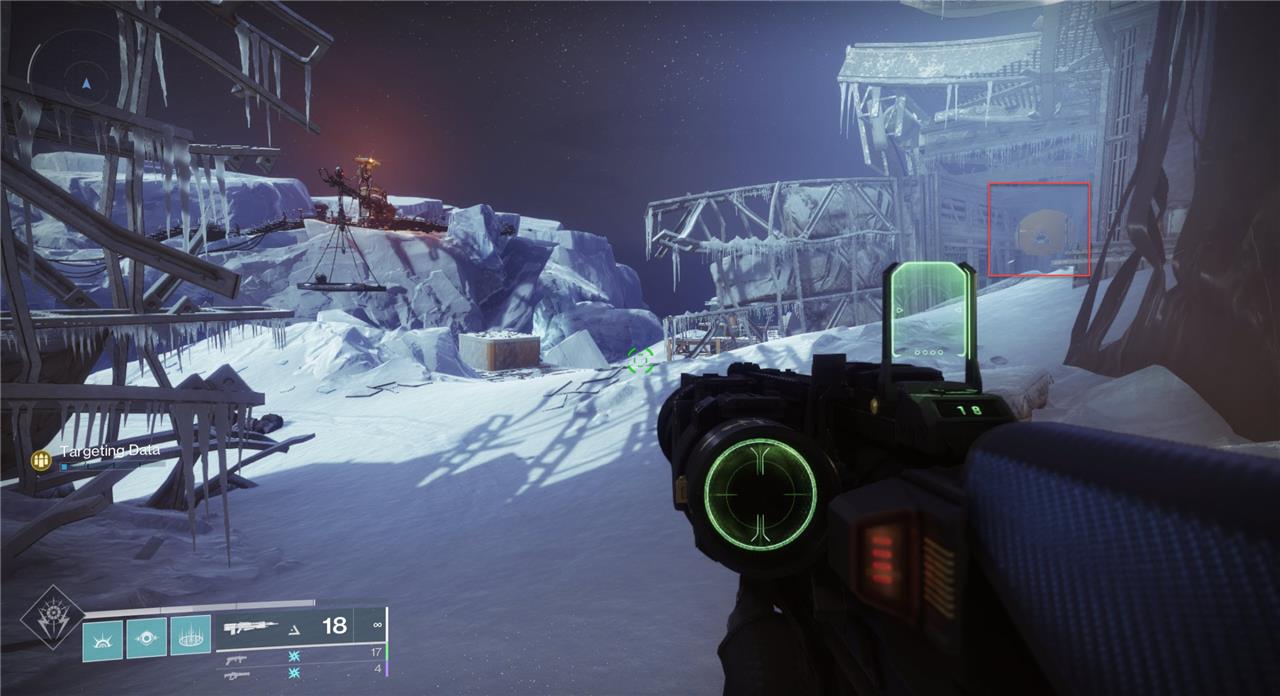
Head to the Bunker E15 Lost Sector. In the large open room with multiple sets of Braytech Frames, there is a small room on the left-hand side where you’ll find Drone 7.
Security Drone 8
Drone 8 is directly outside the entrance to the Bunker E15 Lost Sector. Jump up on the platform to the left of the entrance. The drone is on that platform.
Security Drone 9
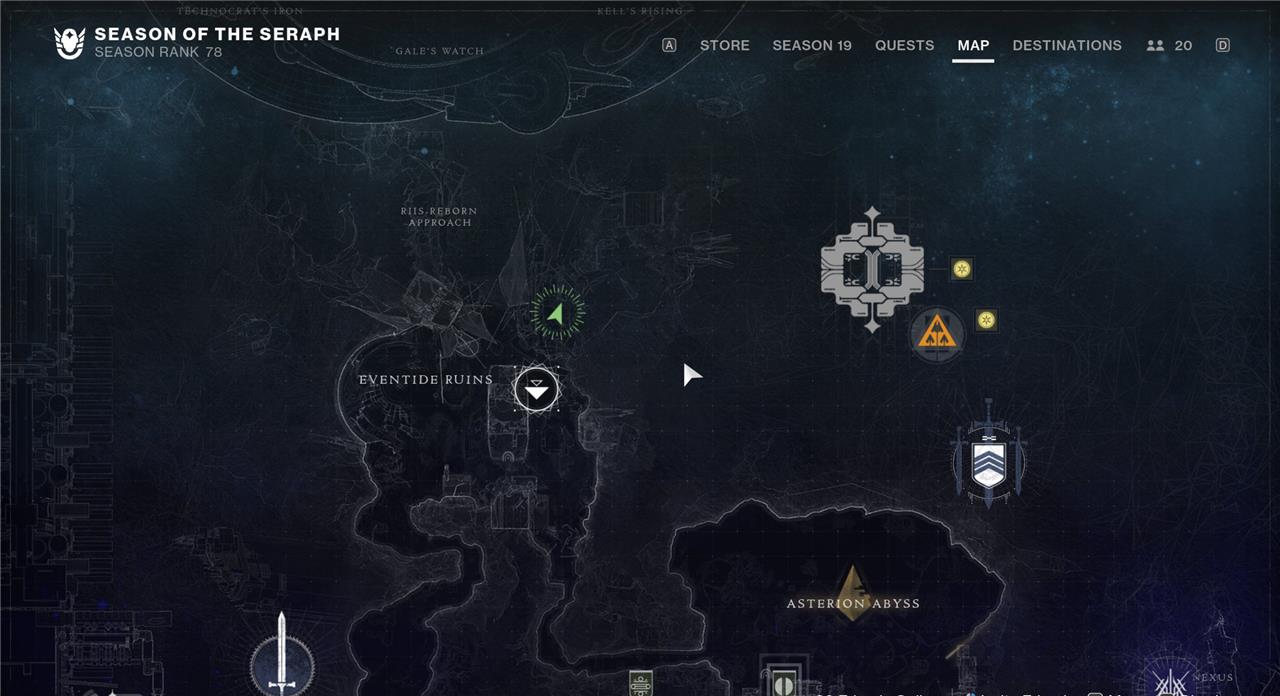
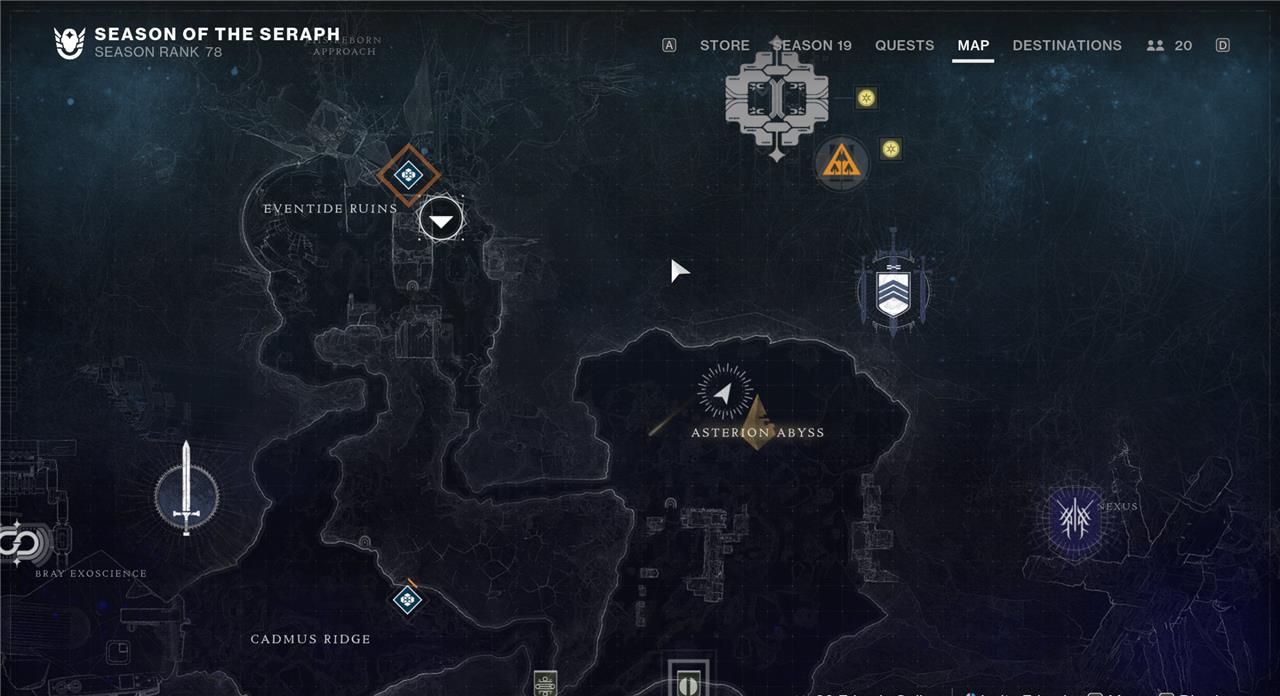
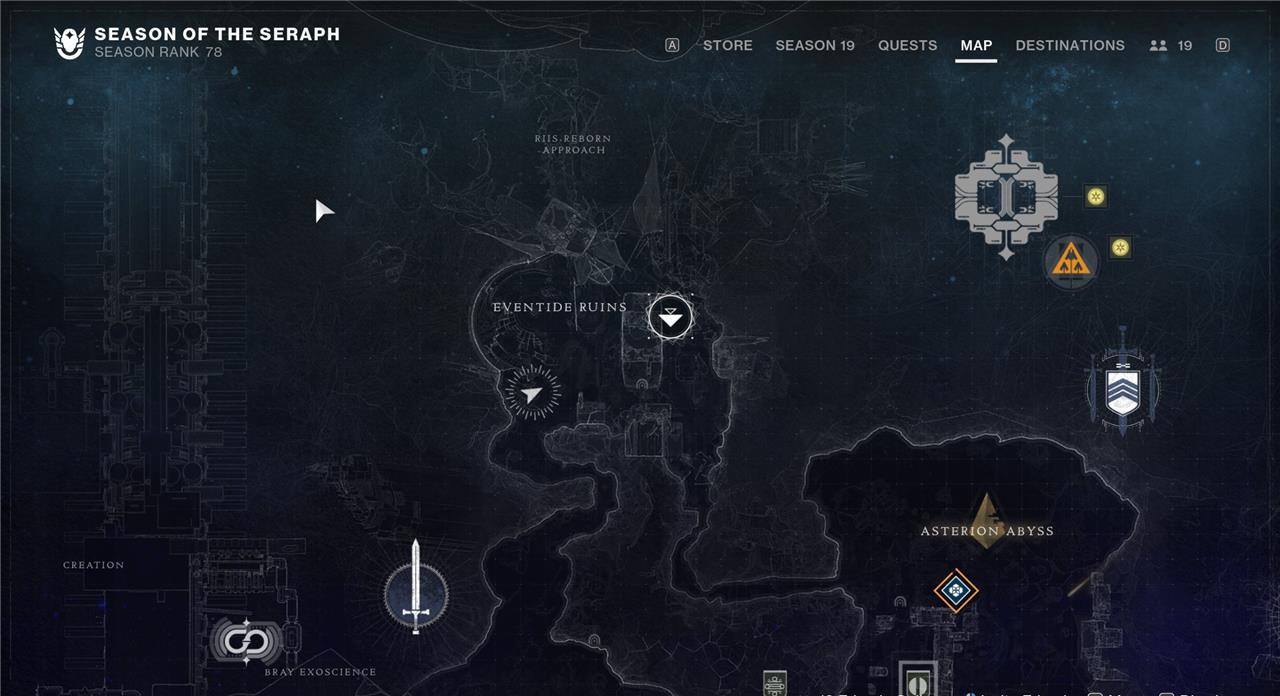
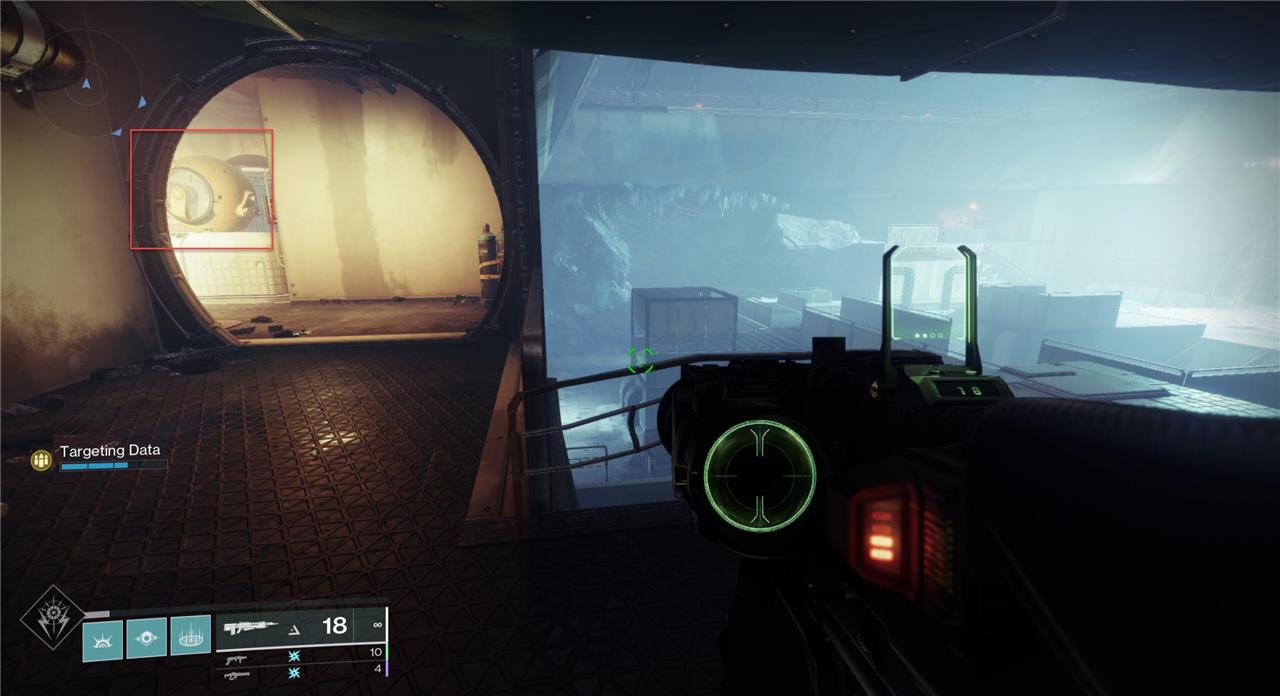
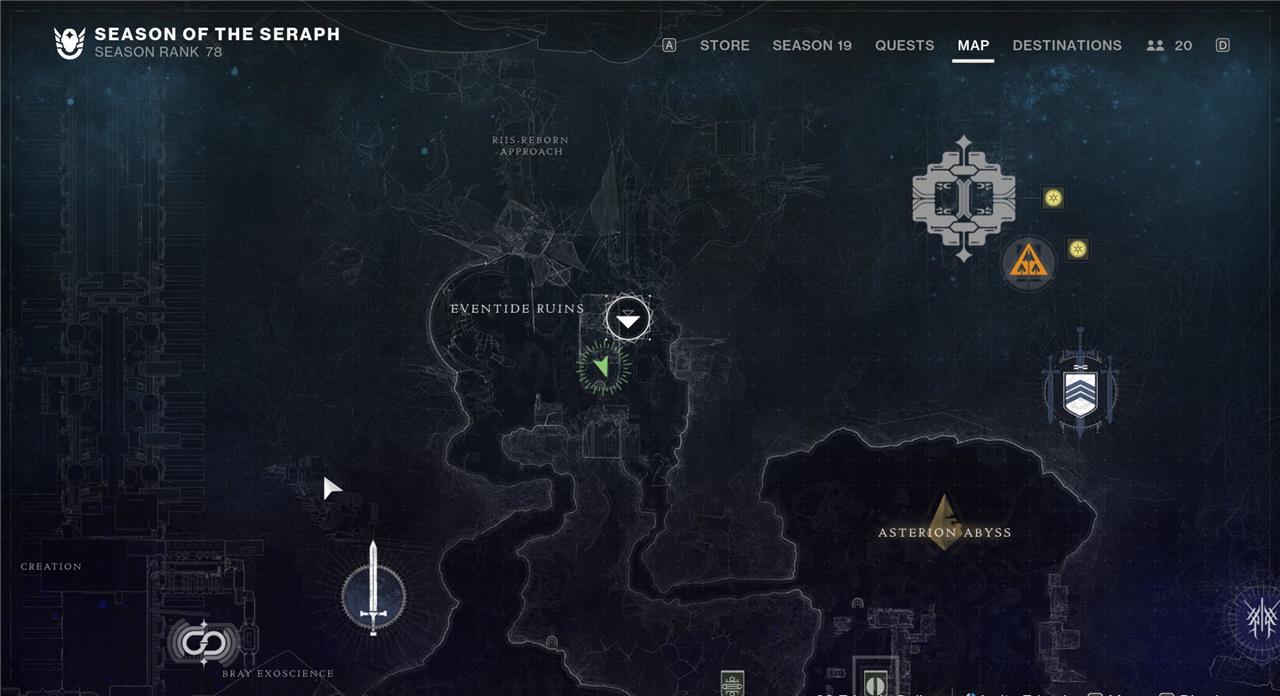
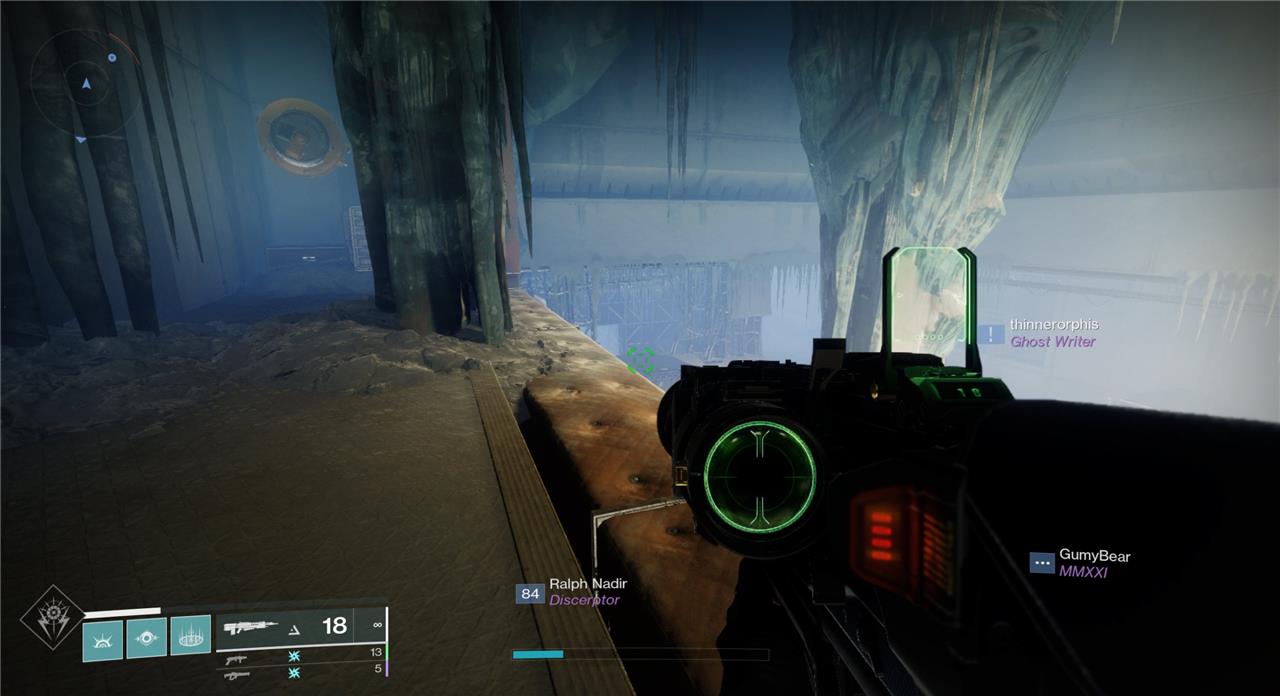
Head to the top right of the Eventide Ruins near the Deep Stone Crypt raid entrance. The drone is directly to the left of the entrance.
Security Drone 10
Head to the Perdition Lost Sector in Cadmus Ridge. Drone 10 is on the right of Lost Sector’s final chest.
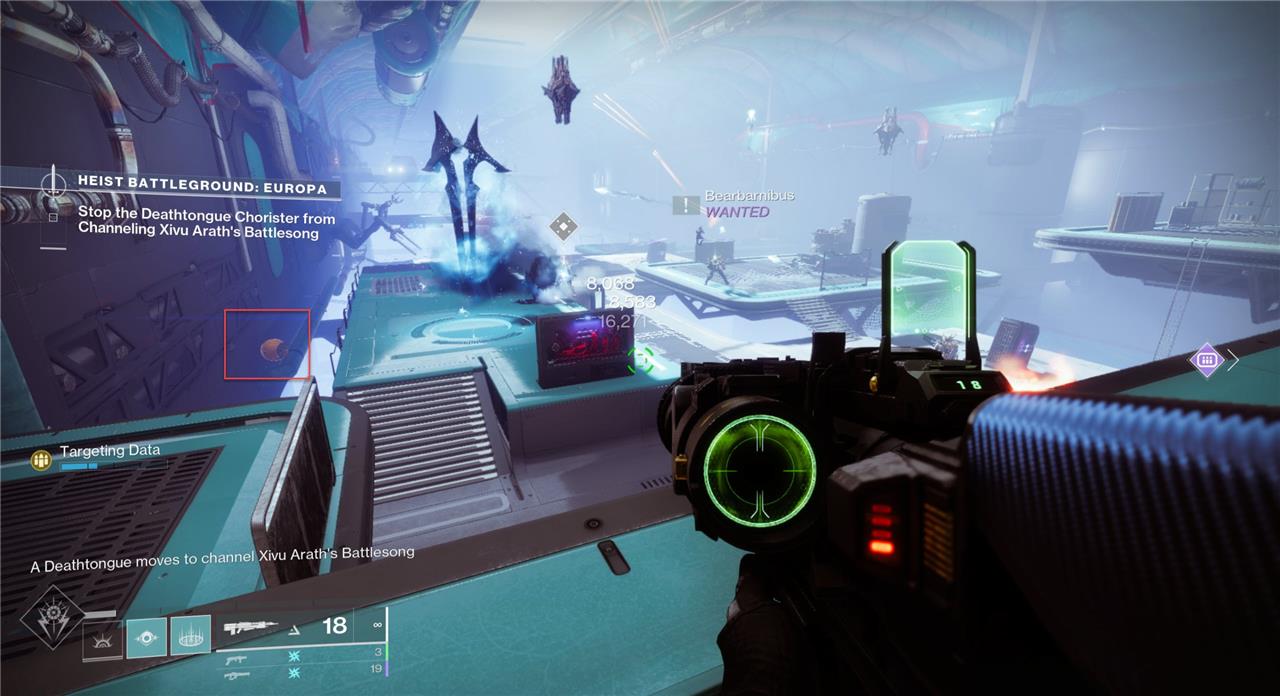
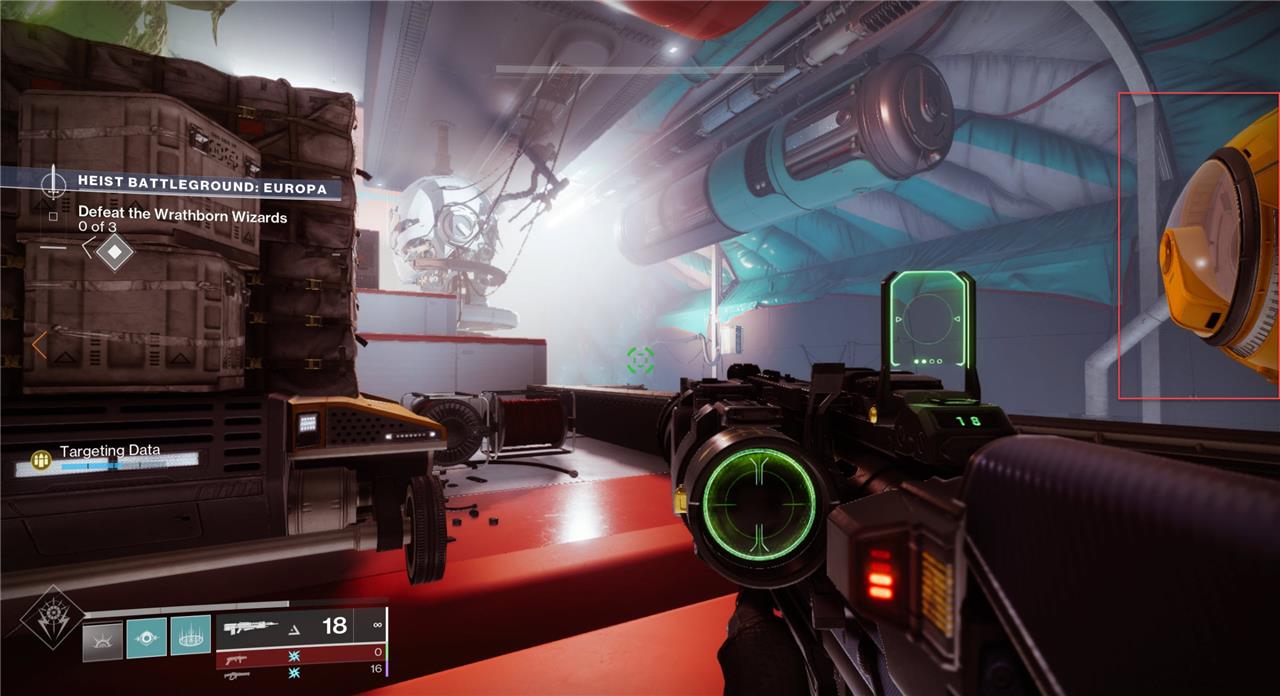
Europa Battleground Security Drone locations
Europa Battleground has several Security Drones scattered across icy terrain, often placed near combat zones and Cabal outposts. Many are positioned above structures or tucked behind walls, requiring careful aim and the Revision Zero Exotic Pulse Rifle to destroy them. Check the perimeter of the battleground for drones mounted on cliffs or machinery, and scan rooftops near the main battlefield area for the harder-to-spot ones. Clearing these drones contributes to Triumph progress and helps toward obtaining the associated seasonal rewards.
These six Security Drones must be found during the “Europa Battleground” mission. The easiest way to get them is by launching the mission from the Europa director rather than the playlist under the HELM. Destroying all six Security Drones will unlock the Drone Destruction II Triumph.
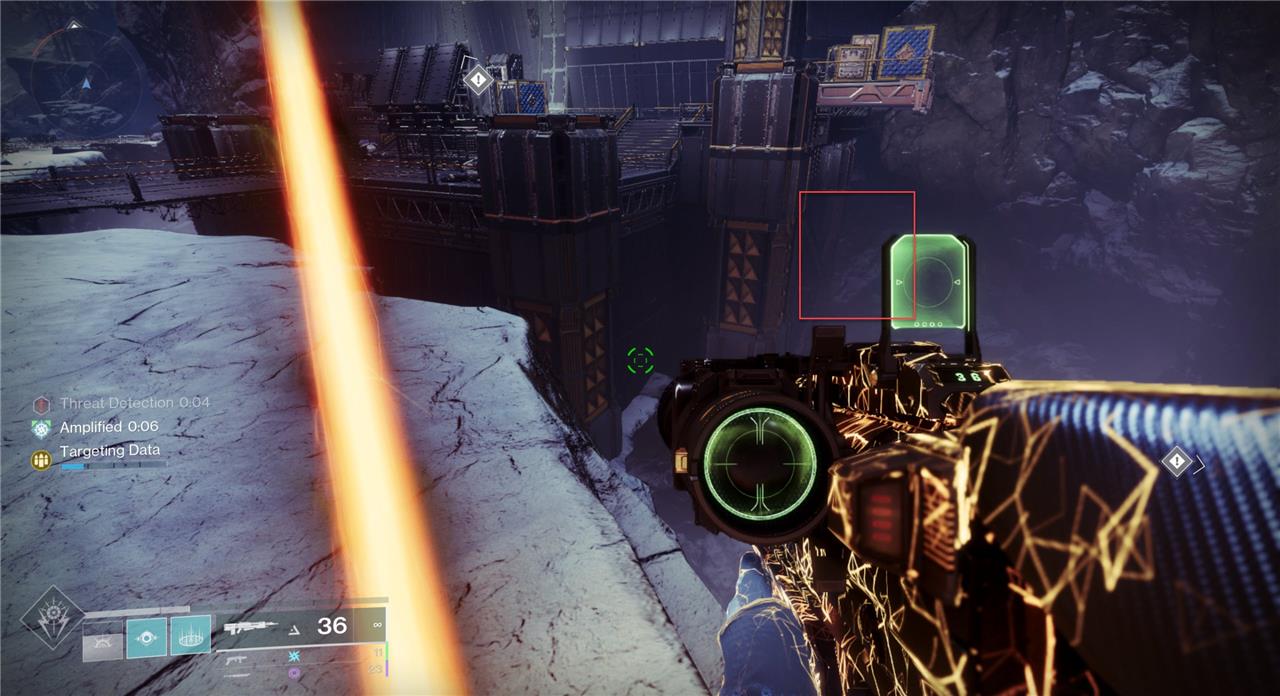
Security Drone 11
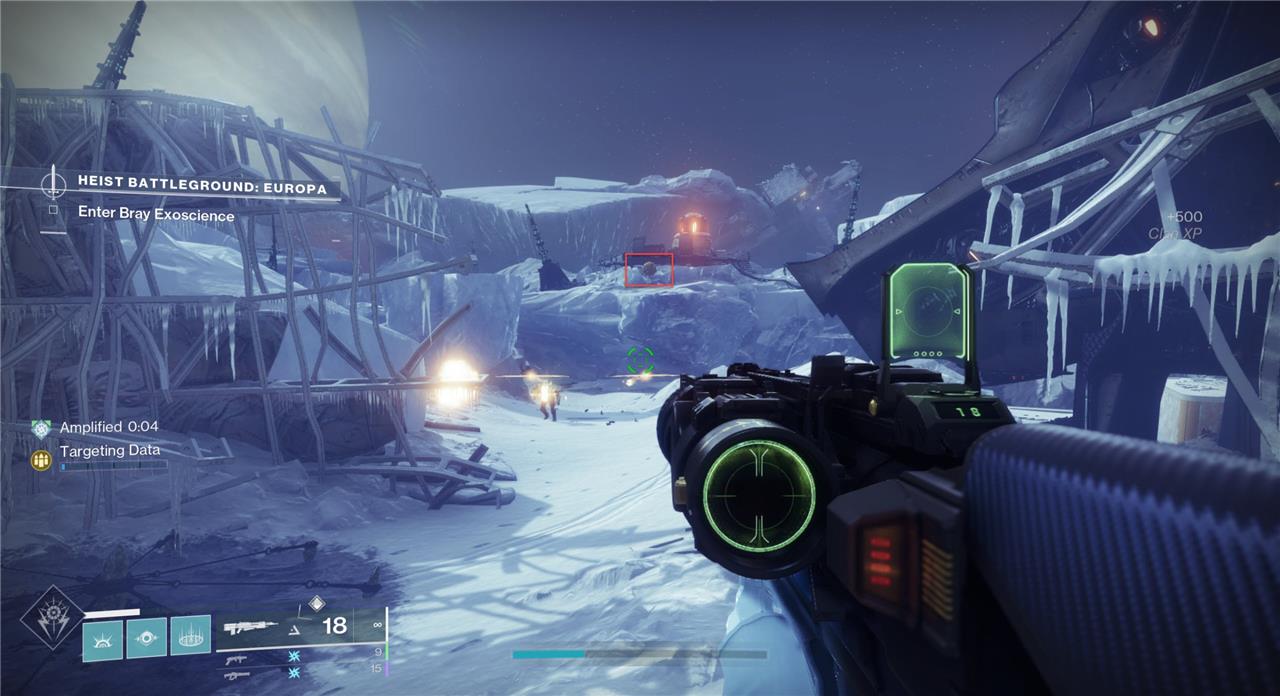
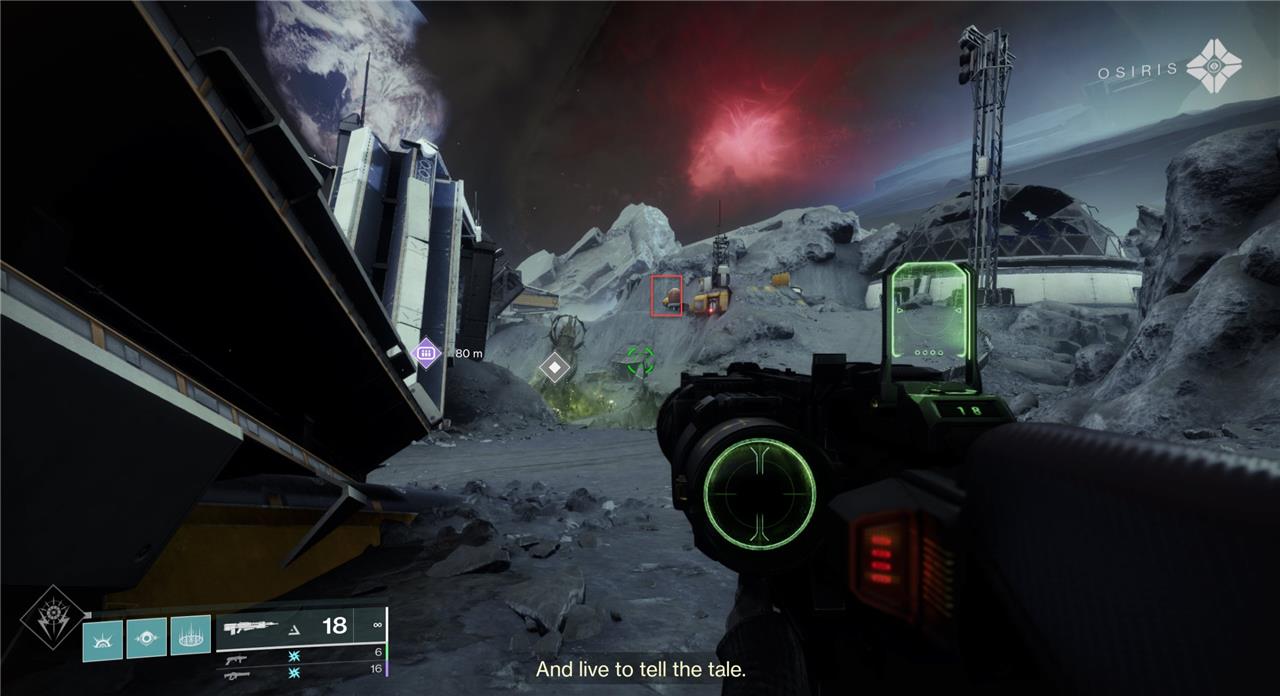
Reach the entrance of the Bray Exoscience and turn around. The orb is on the cliff directly ahead of you.
Security Drone 12
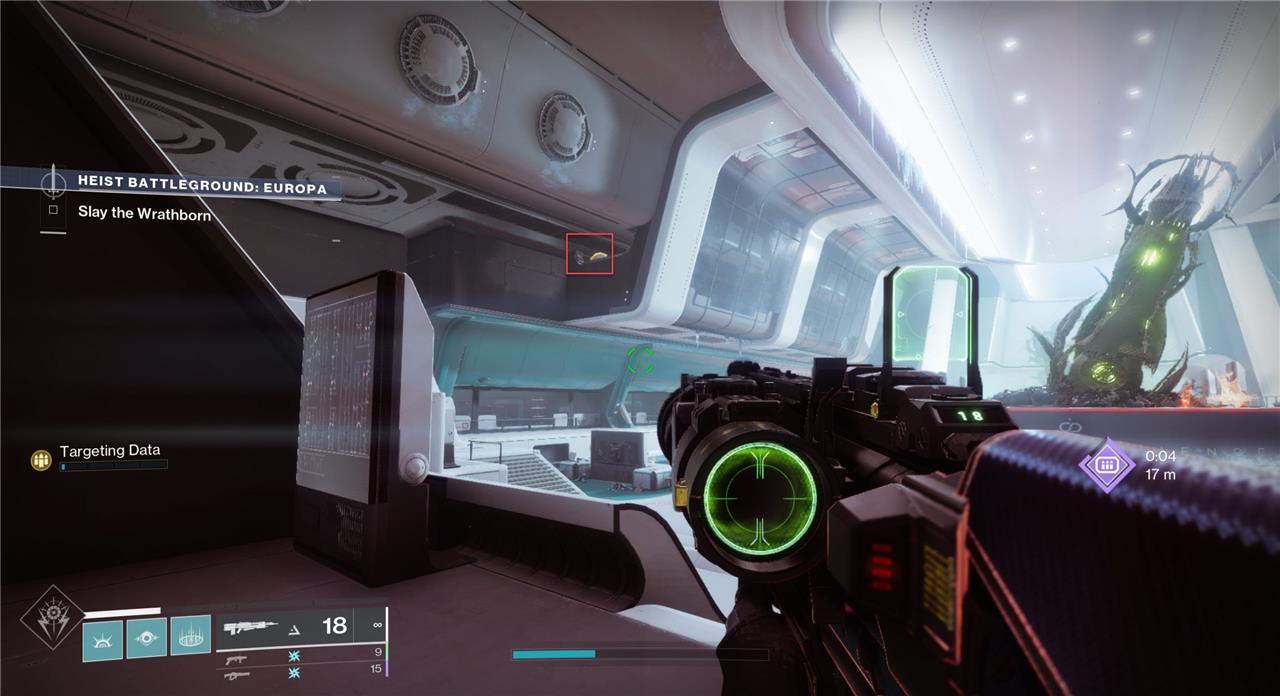
Once you enter the large room with the Hive Cryptolith, look to the upper left, and you’ll see the drone tucked away in the corner.
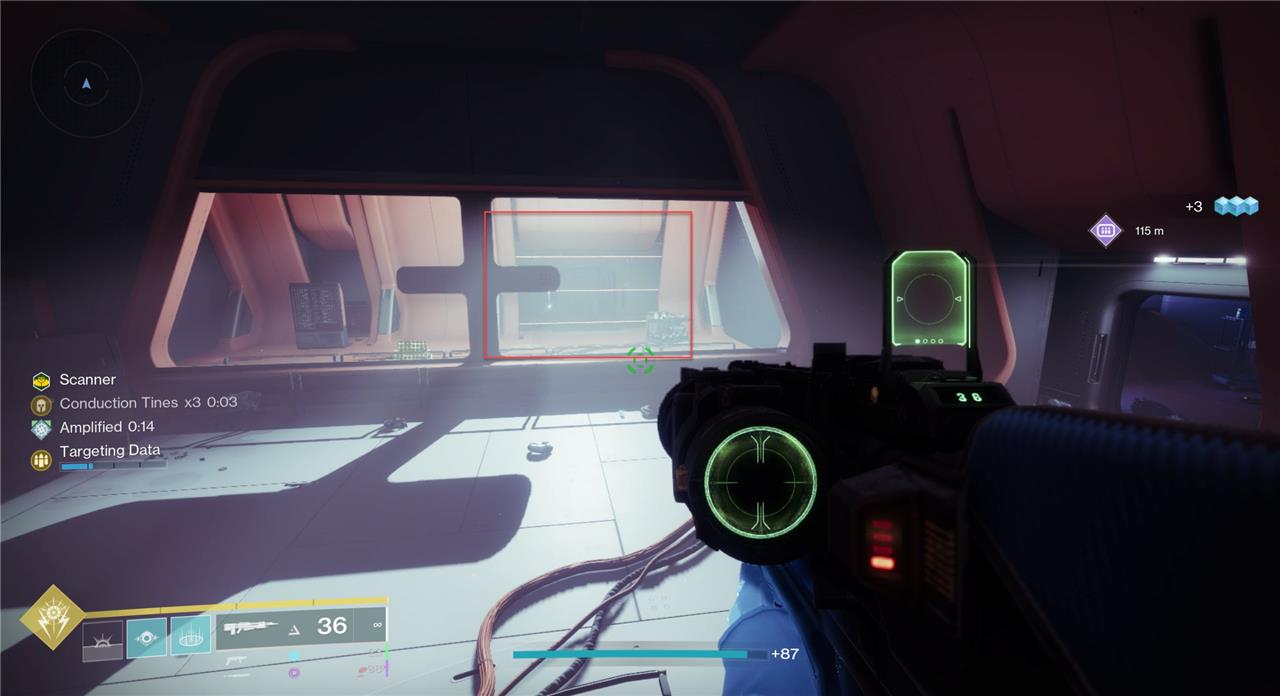
Security Drone 13
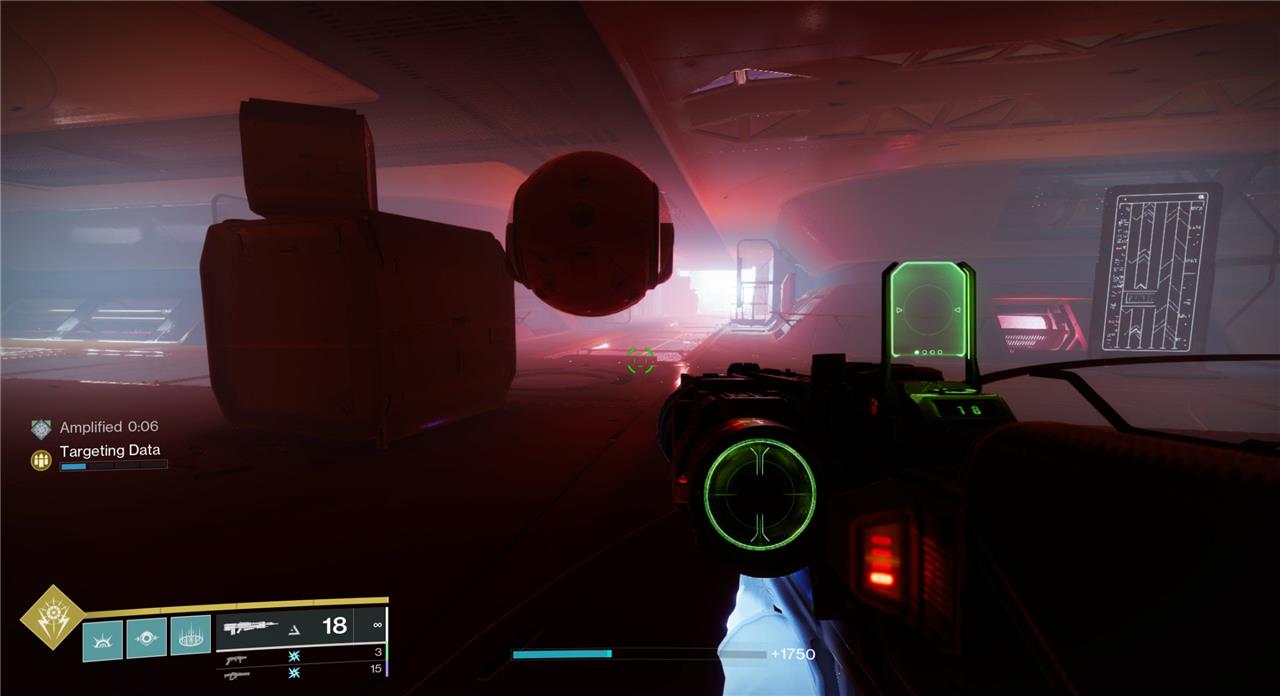
After you clear the room with the Hive Cryptolith, walk through the hallway until you reach the point where you need to turn left. Turn right instead, and you’ll see the drone hidden behind some boxes.
Security Drone 14
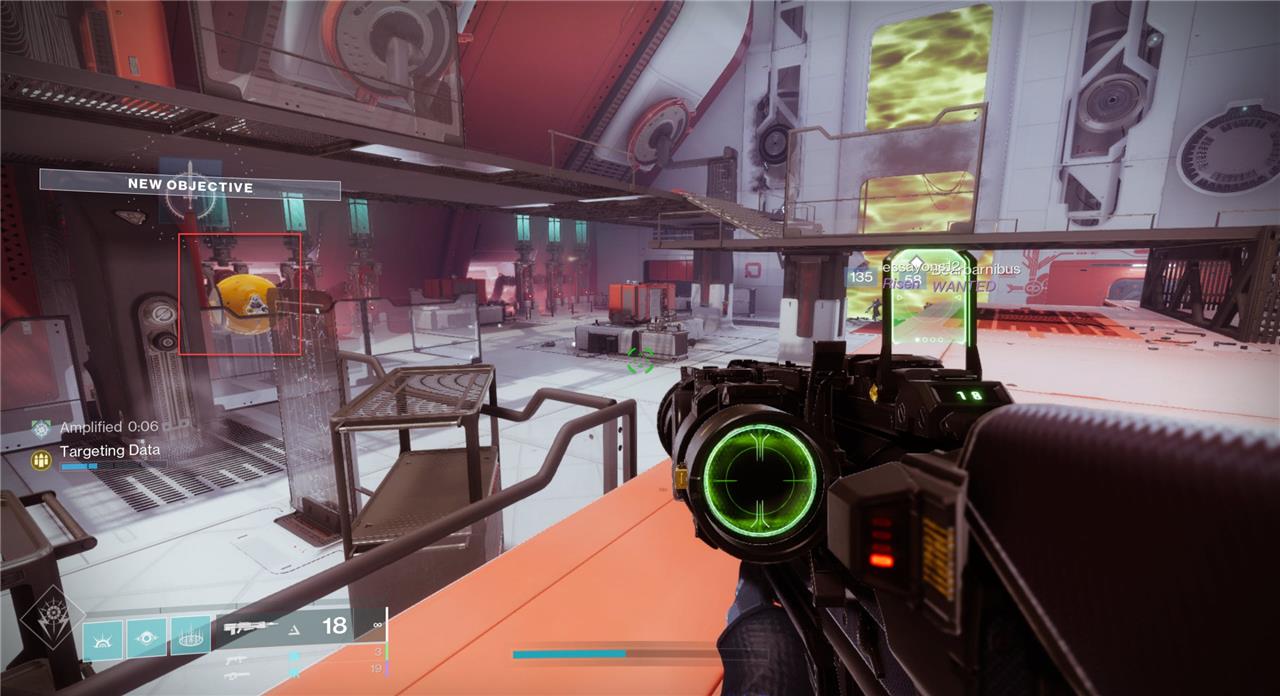
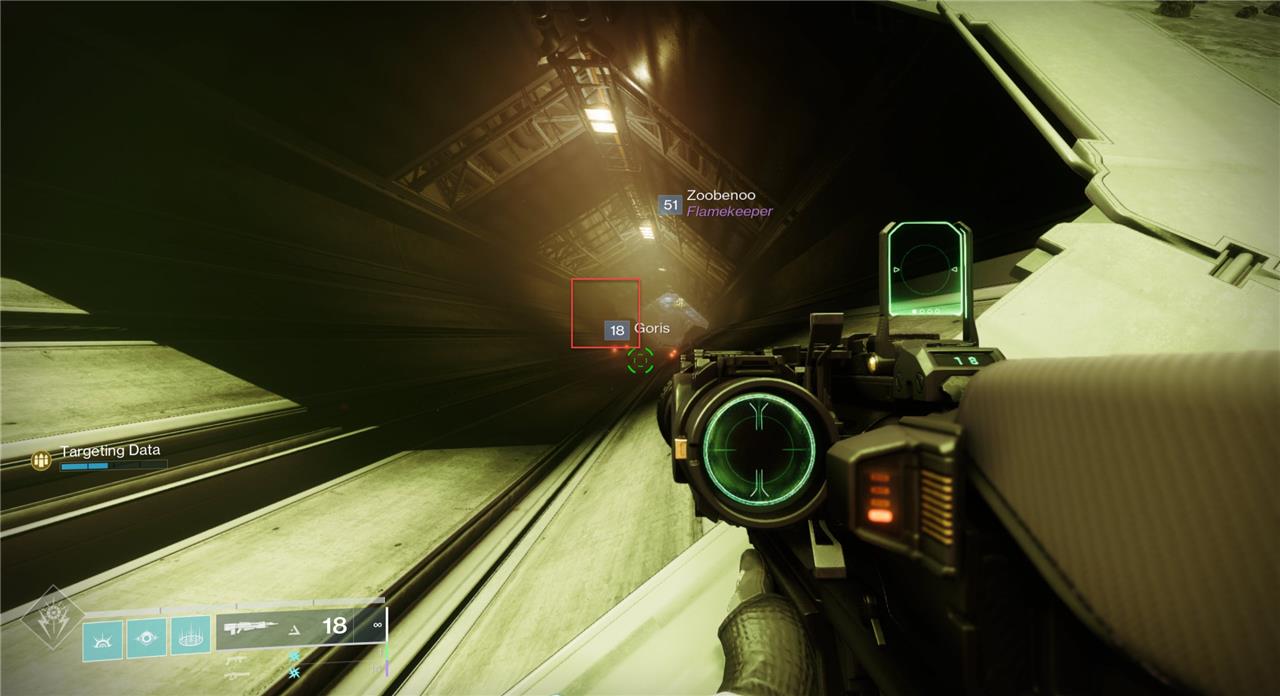
The next drone is in the room with the barrier champion and the train on the right-hand side, and it’s tucked under the catwalk on the left.
Security Drone 15
Head to the Annihilator Totem after the large drop-down. The drone is off the ledge to the left of the totem.
Security Drone 16
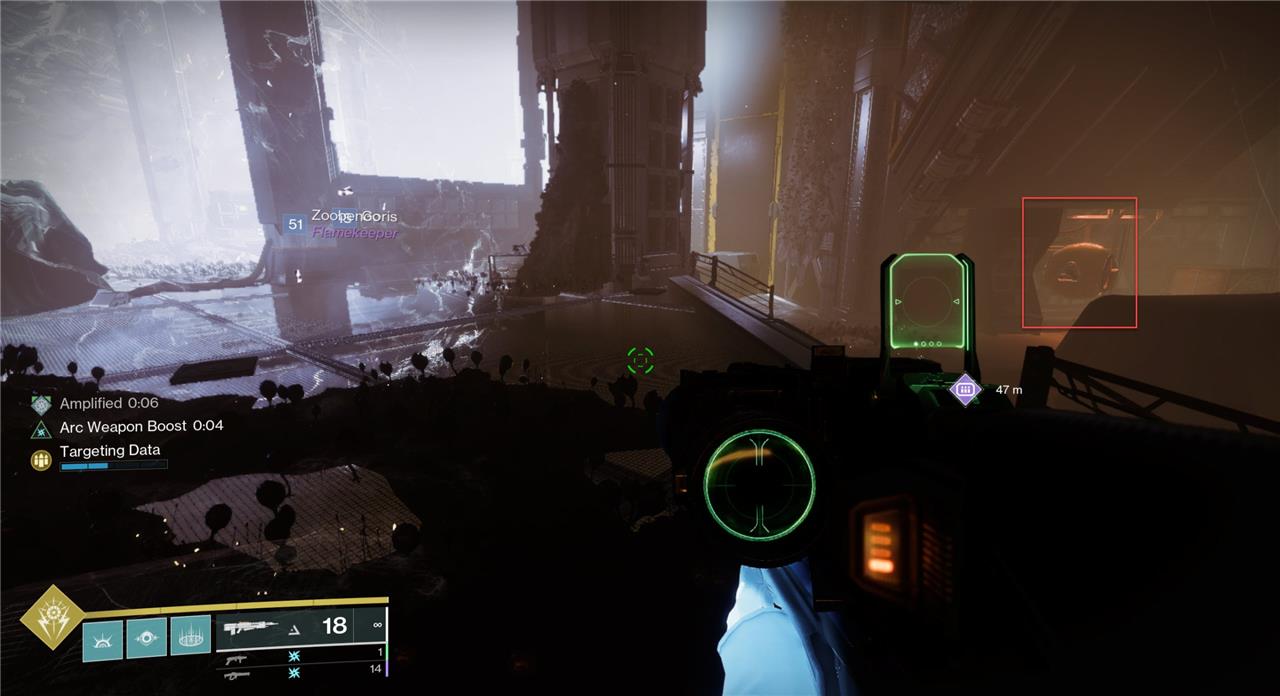
The final drone in the “Europa Battlegrounds” mission is in the room with the large Clovis head, and it’s to the right of the head, tucked behind some boxes.
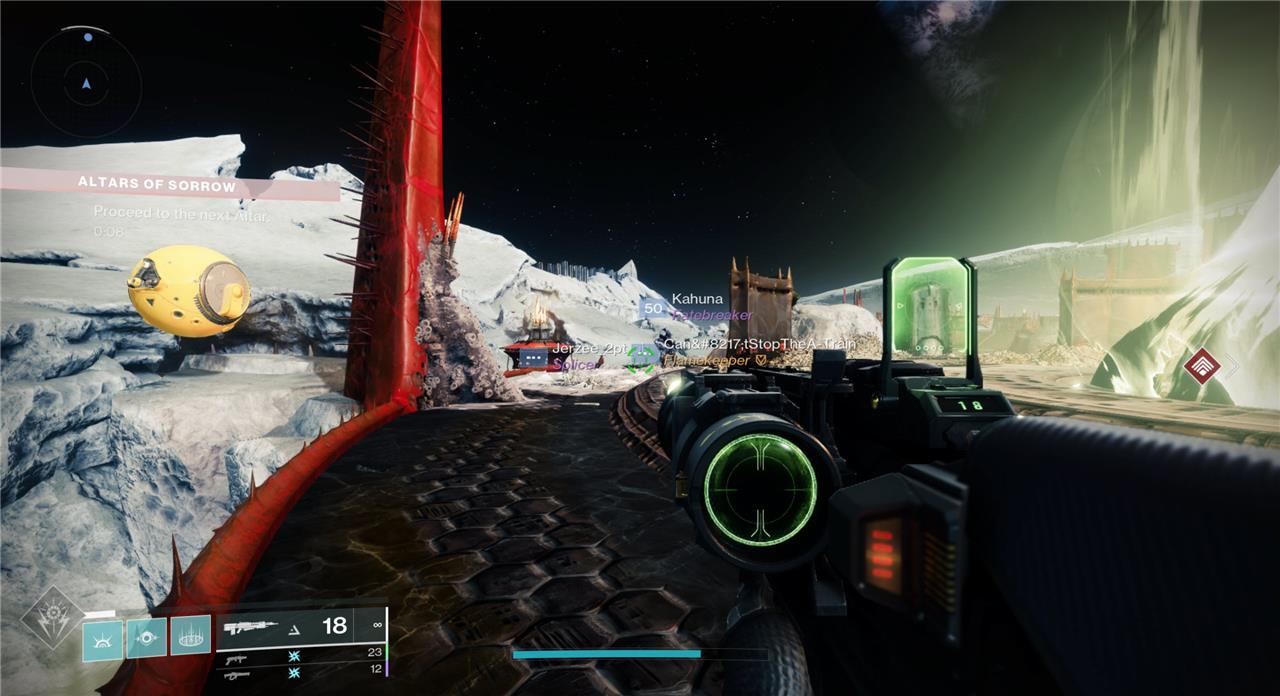
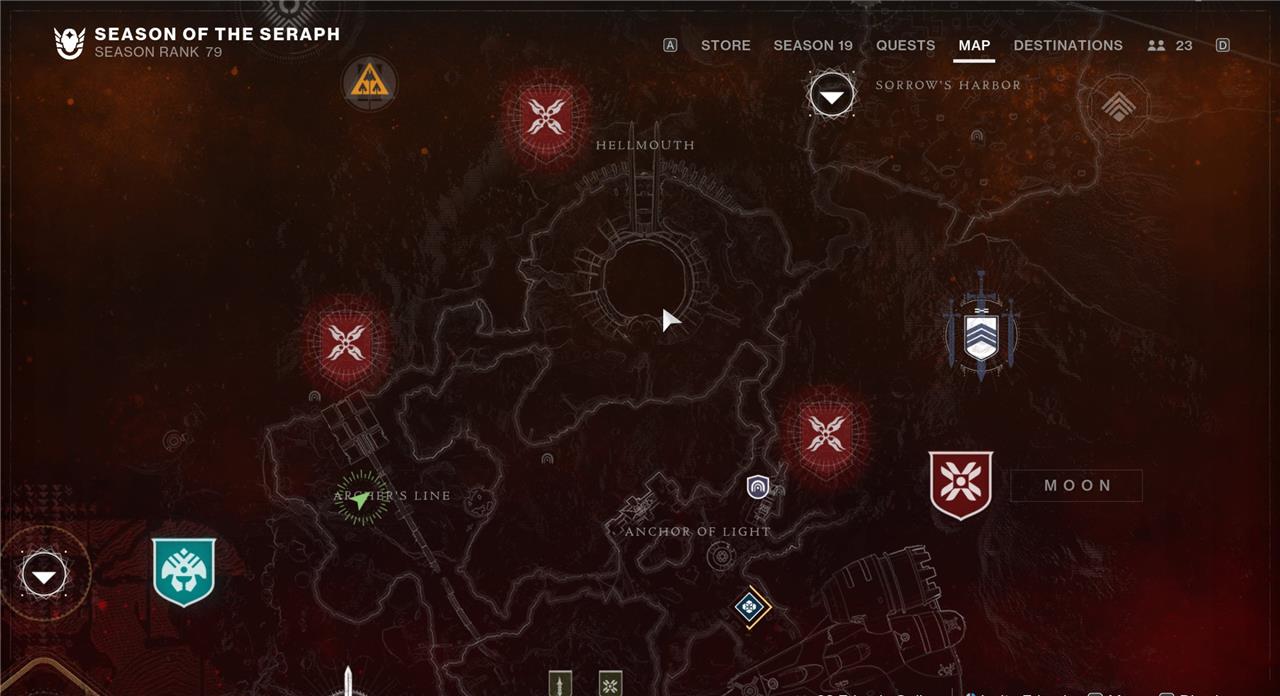
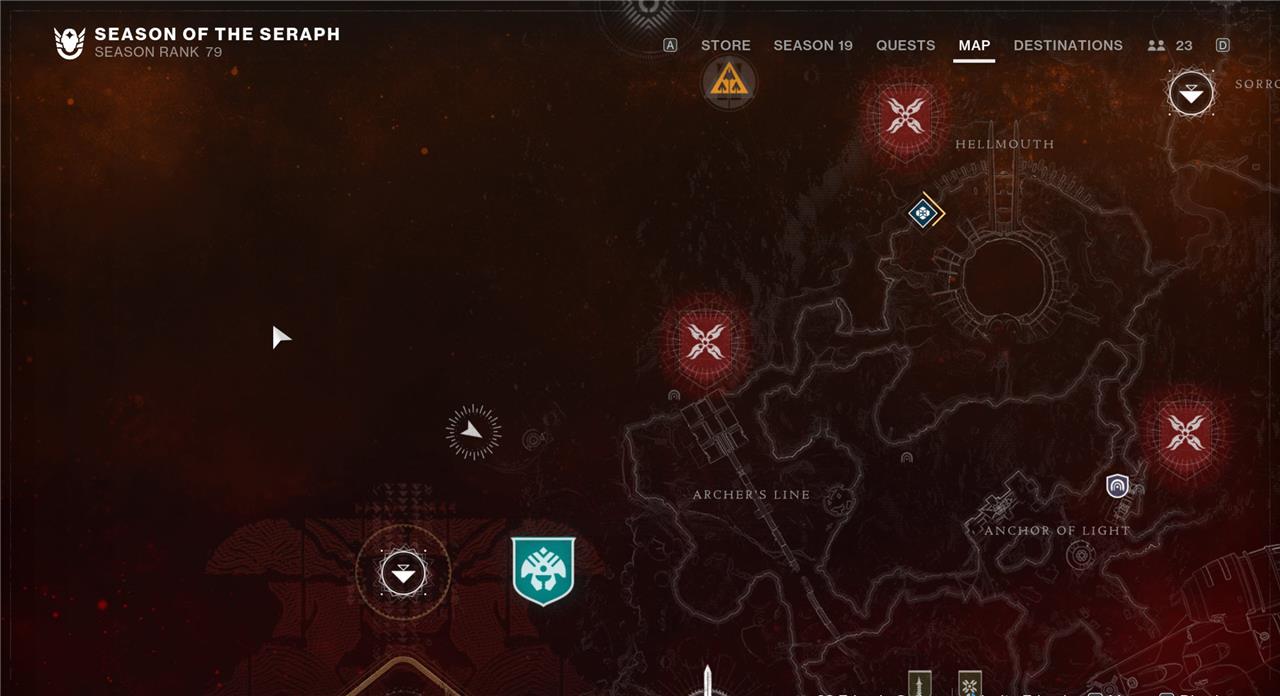
Moon Security Drone locations
The Moon’s Security Drones are spread across key patrol zones, Lost Sectors, and hidden corners that often require precise platforming or special abilities to reach. Many are found near entrances to pits and structures tied to the Scarlet Keep, while others float near Hive fortifications or tucked-away cliffs. To access them, players need the Revision Zero pulse rifle with the correct catalyst active. Checking areas such as Archer’s Line, Hellmouth, and Sorrow’s Harbor carefully will help ensure none are missed.
Destroying all ten Security Drones on the Moon will unlock the Drone Destruction III Triumph.
Security Drone 17
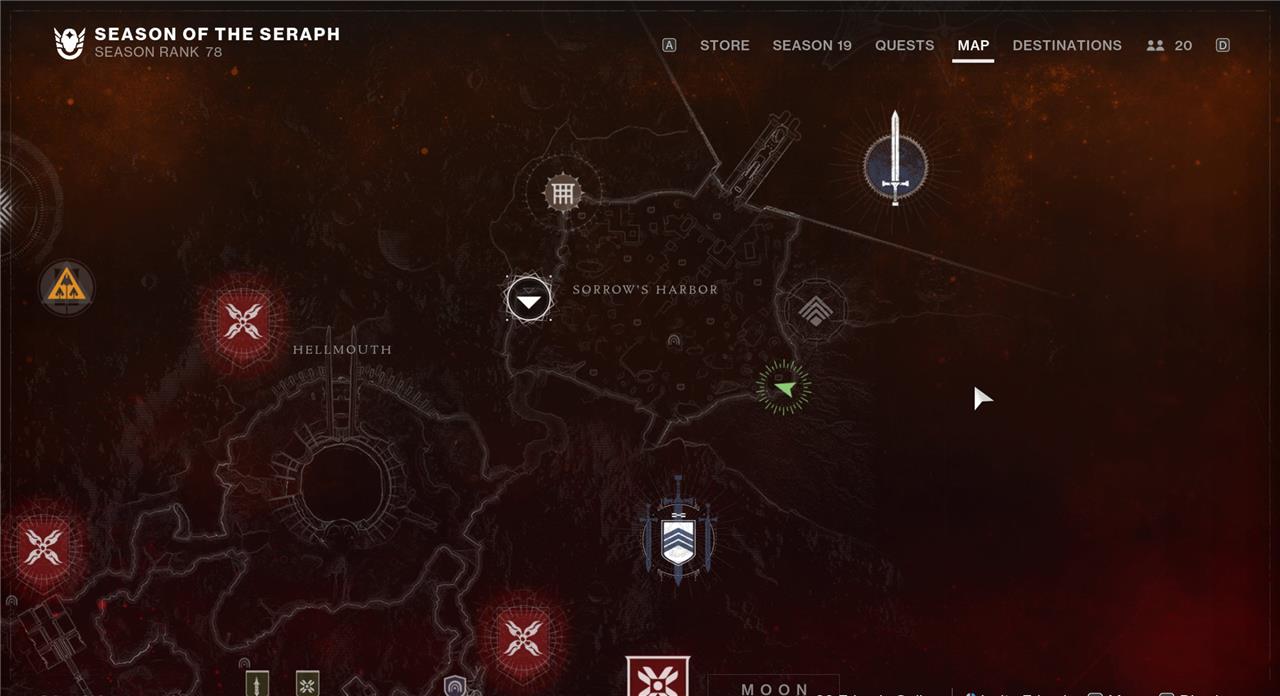
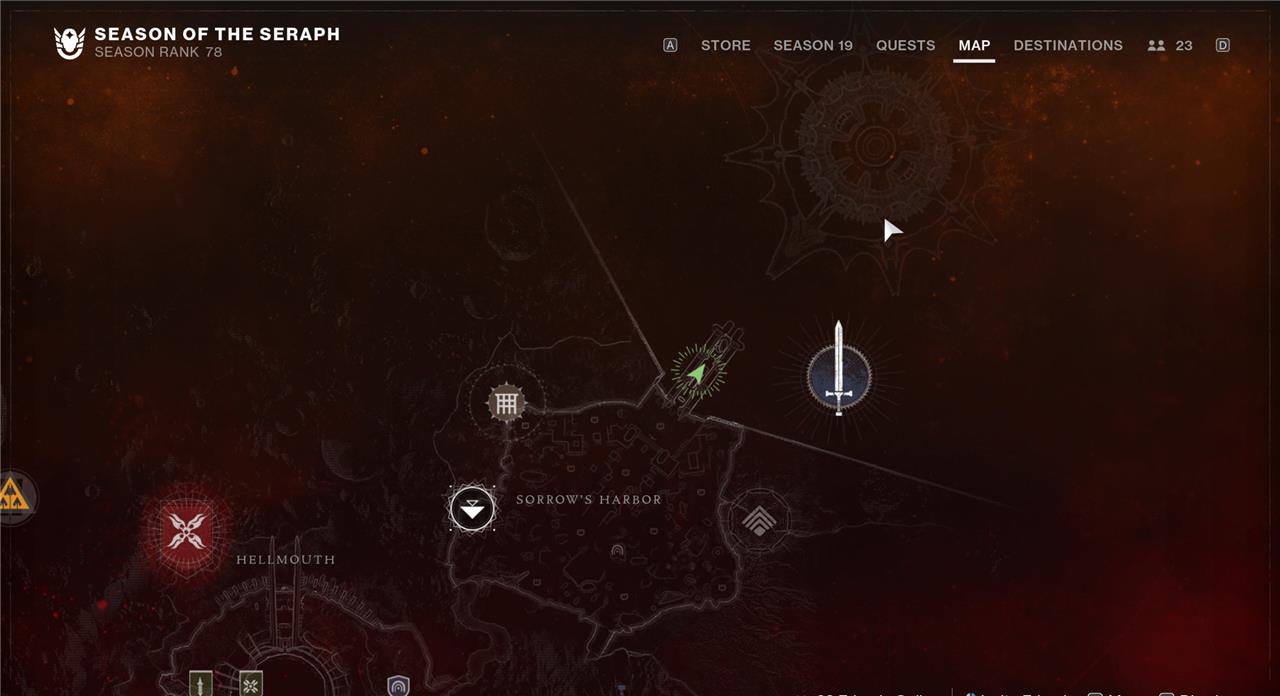
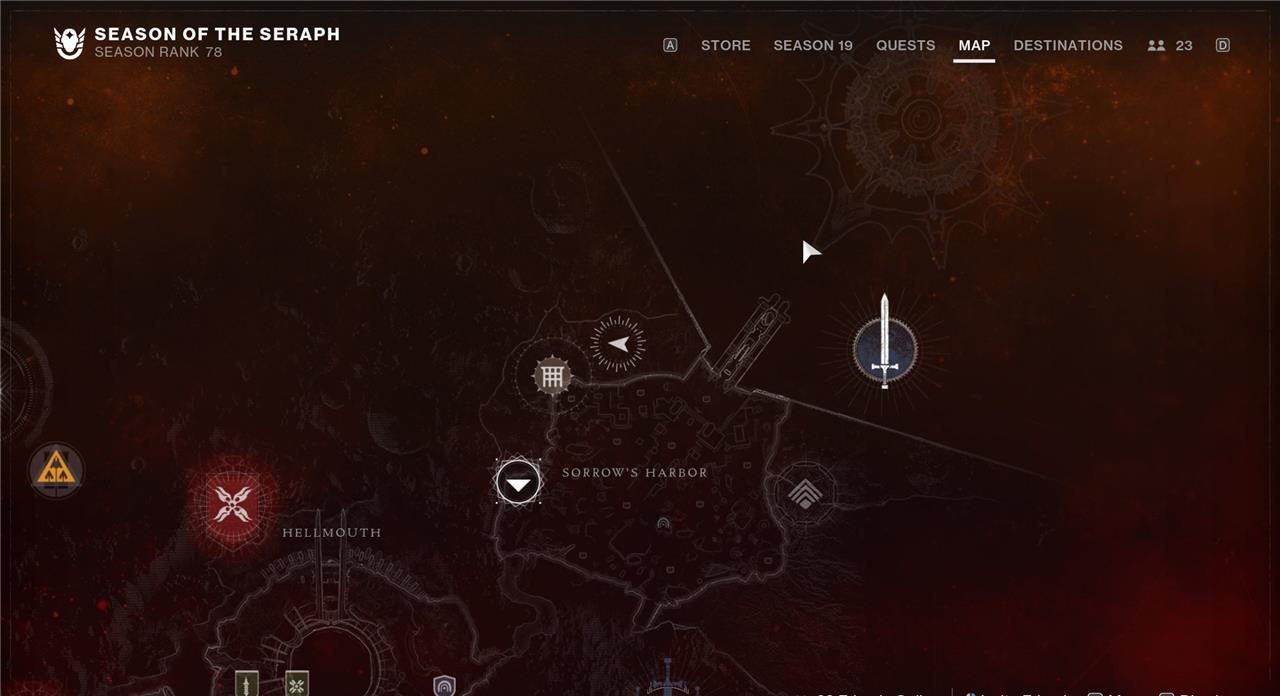
Head to the right edge of the Sorrow’s Harbor zone. Floating just off the edge near one of the spawning portals is Drone 17.
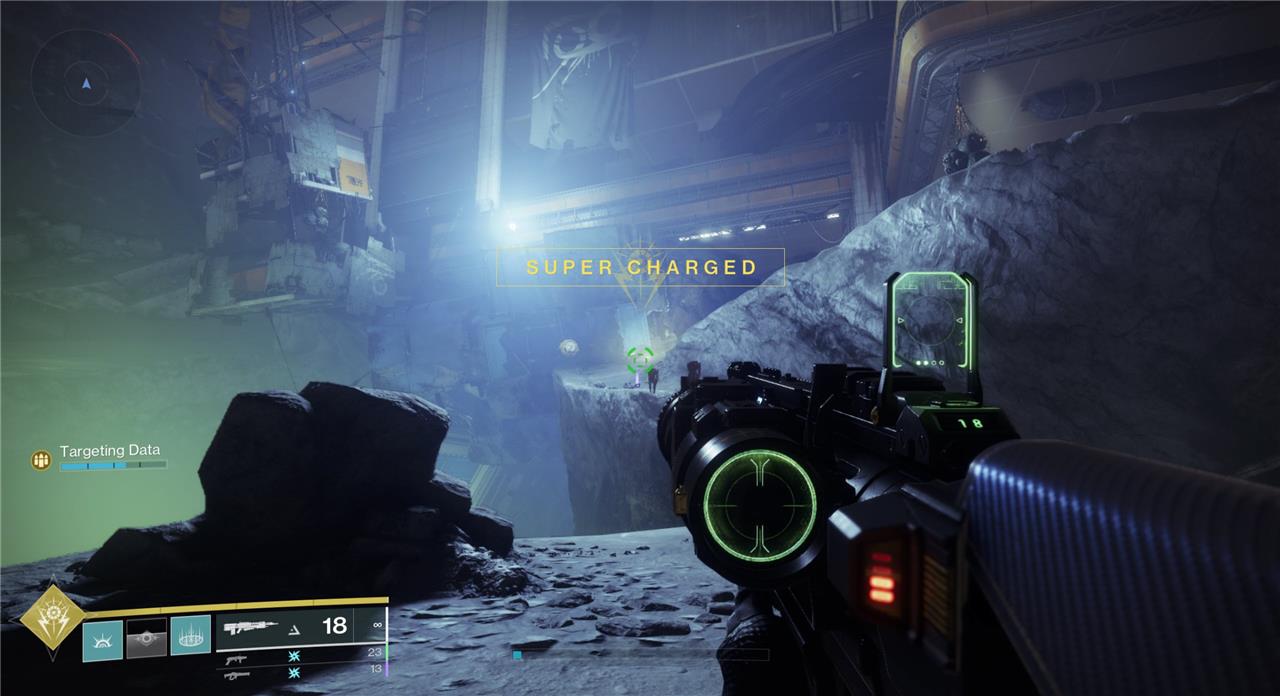
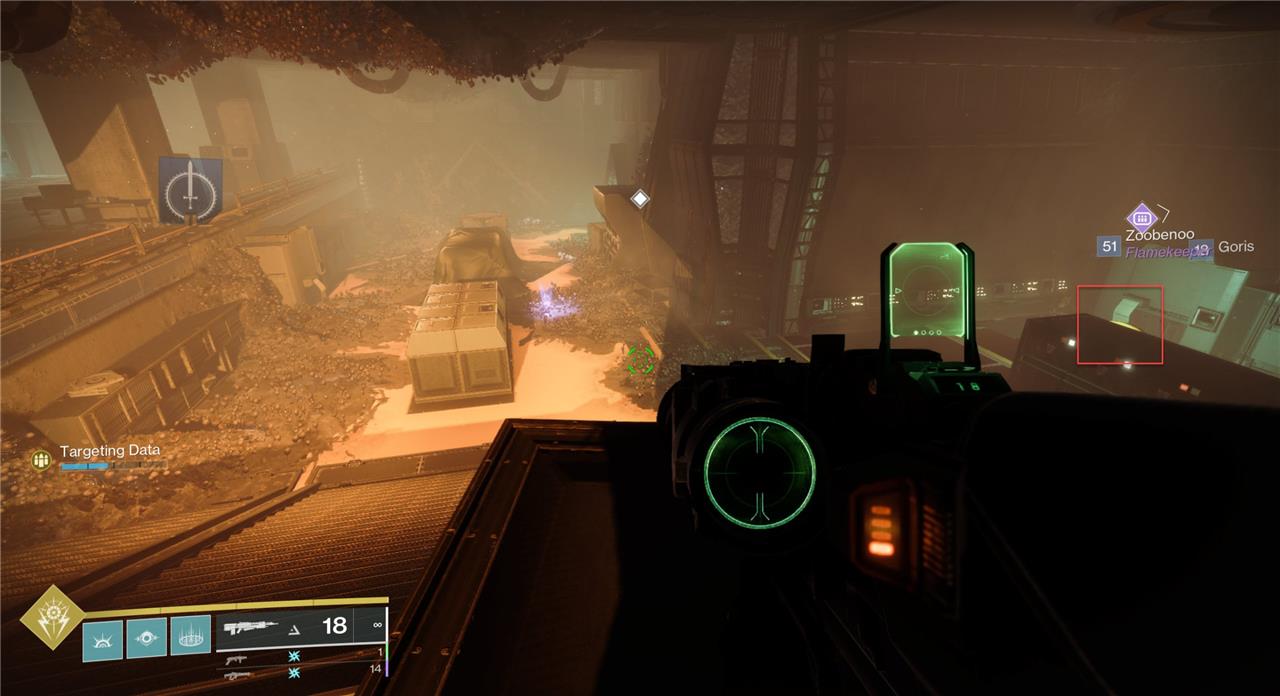
Security Drone 18
Head to the entrance of the Pit of Hearsey dungeon and “the Scarlet Keep” strike. Straight ahead through some small pillars is Drone 18.

Security Drone 19
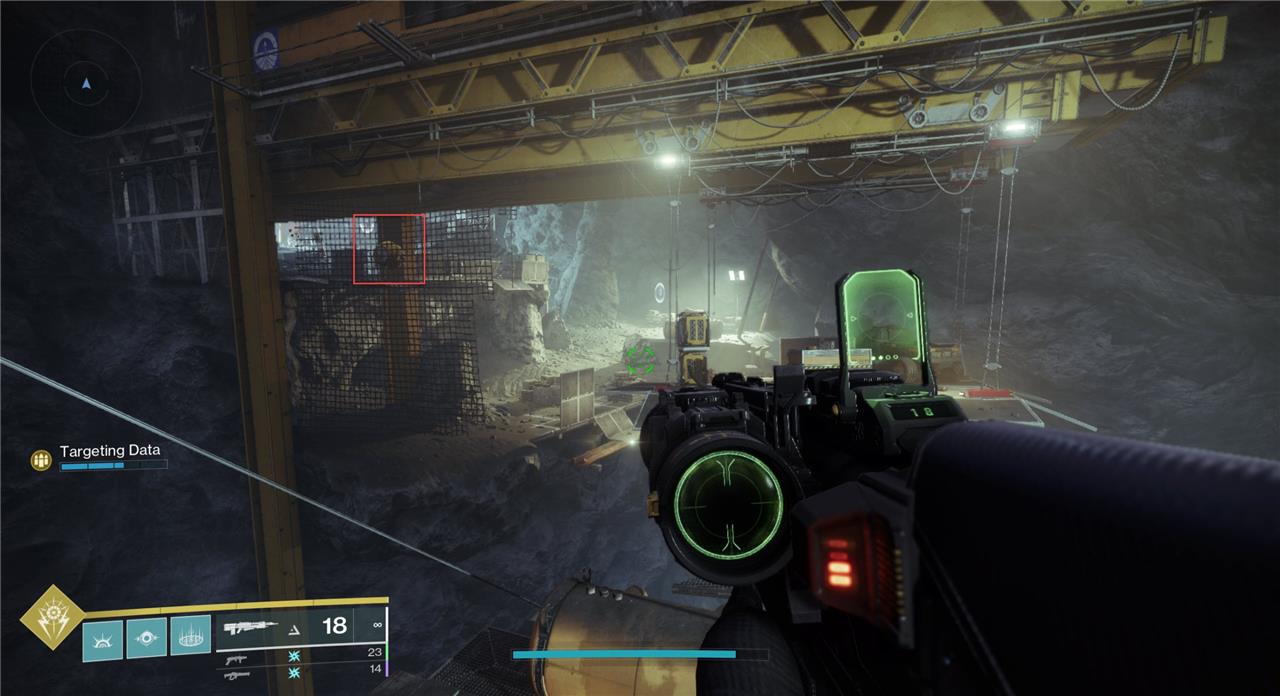
Head into the K1 Revelation Lost Sector. Once you defeat the Shrieker, look to the left. The drone is hidden behind some netting.
Security Drone 20
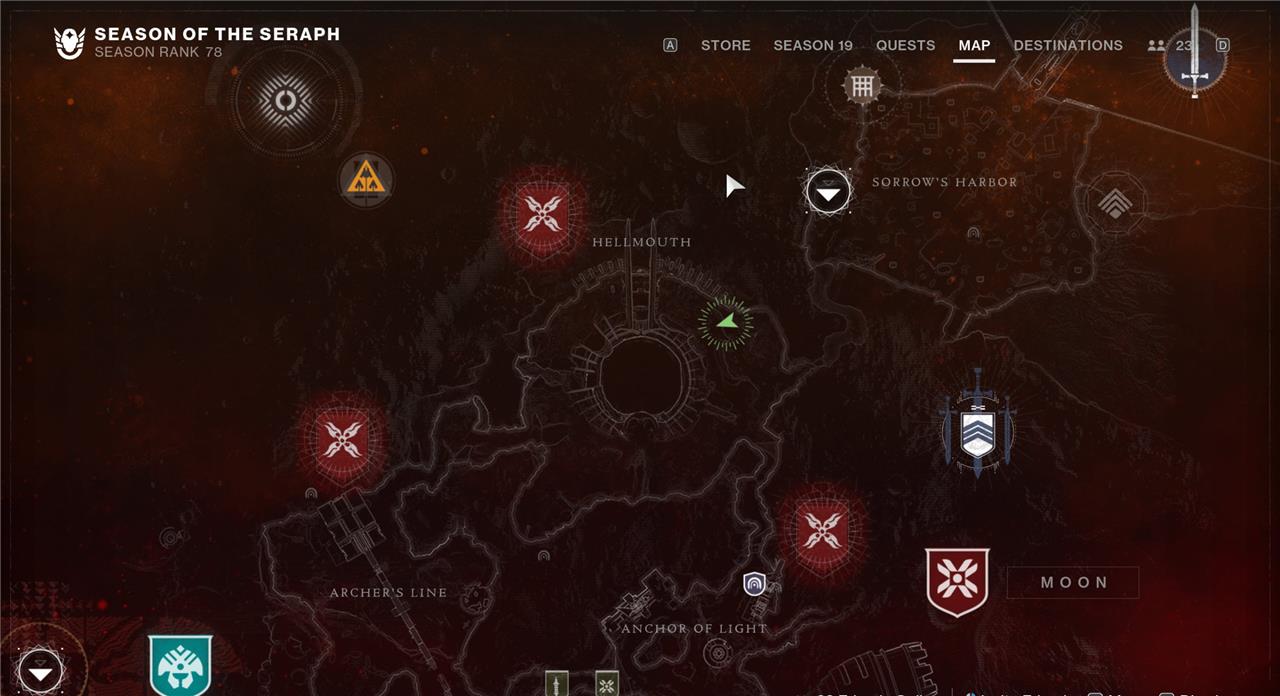
Head to the Hellmouth from Sorrow’s Harbor. Drone 20 is floating just outside and to the left of the large structure that leads you underground.
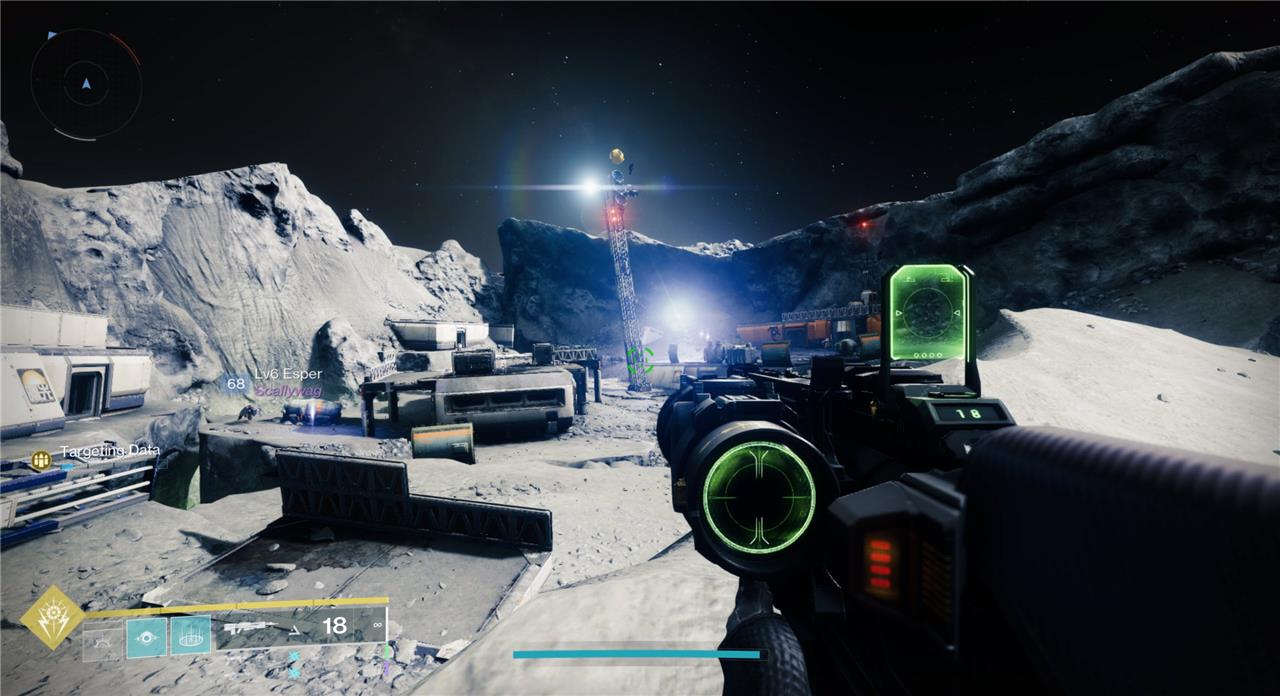
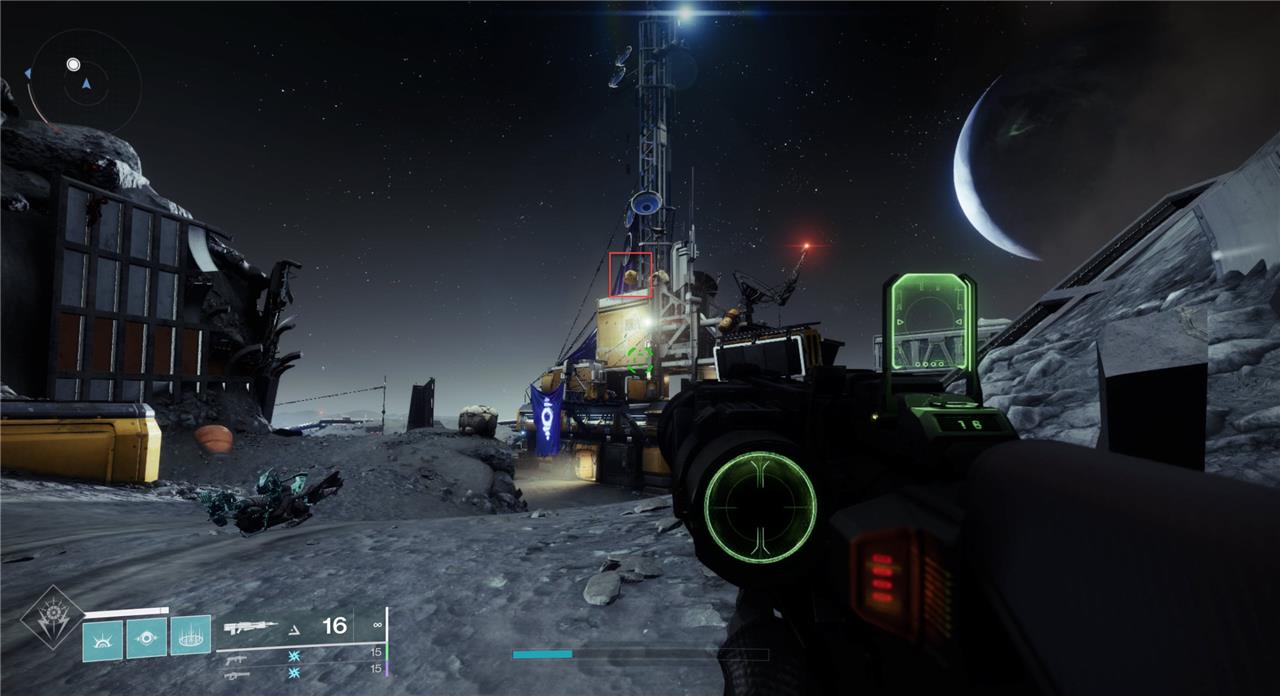
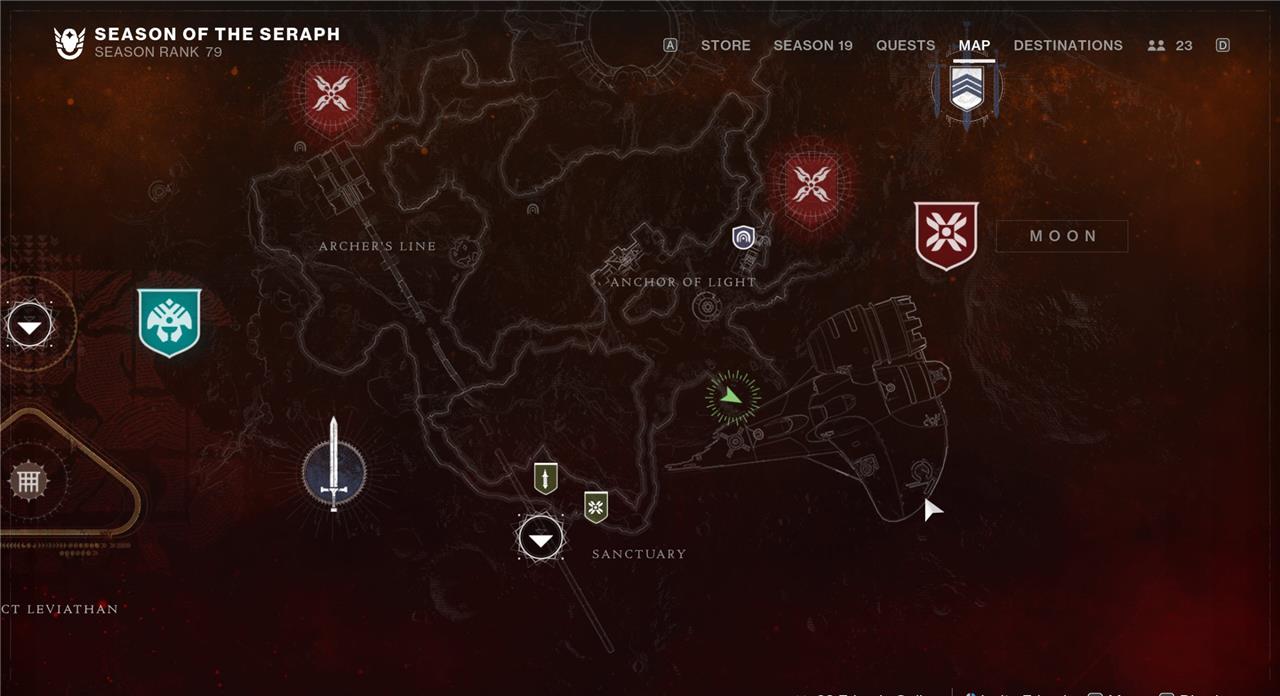
Security Drone 21
Go to the entrance of the K1 Crew Quarters Lost Sector. There is a large tower outside. Drone 21 sits on top of it.
Security Drone 22
Now go into the K1 Crew Quarters Lost Sector. Progress until you reach the path that leads you to the boss. The drone is on this path on the left.
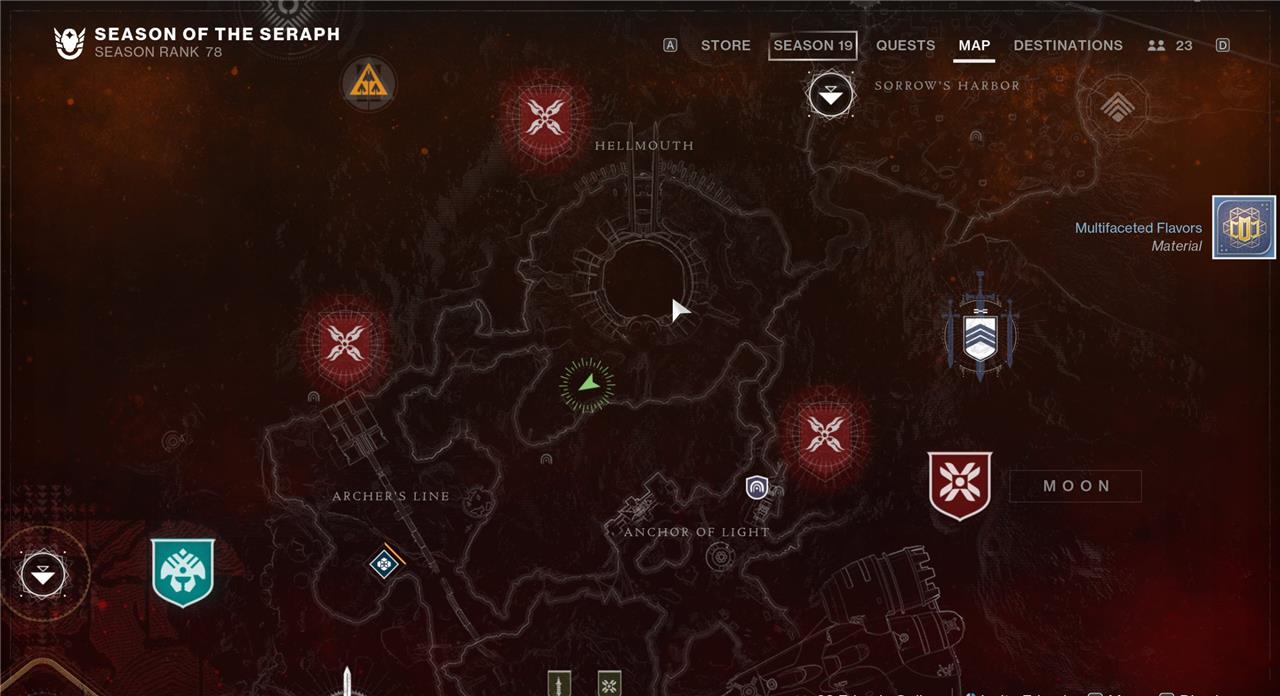
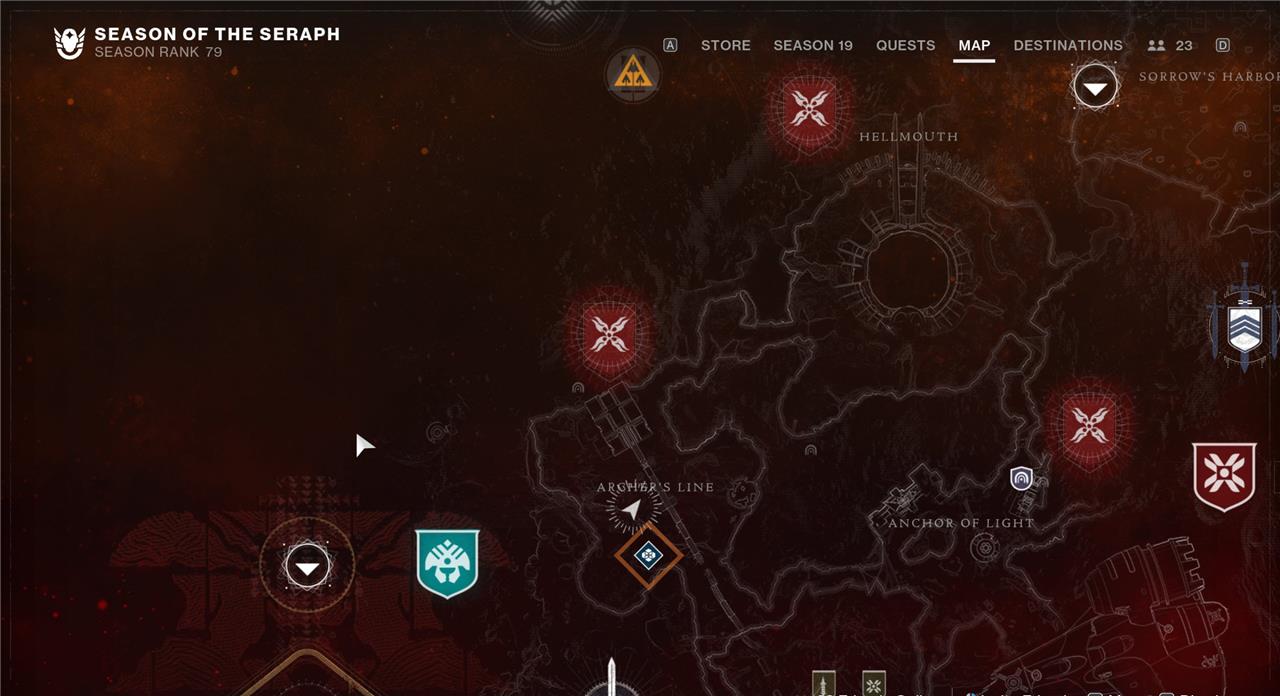
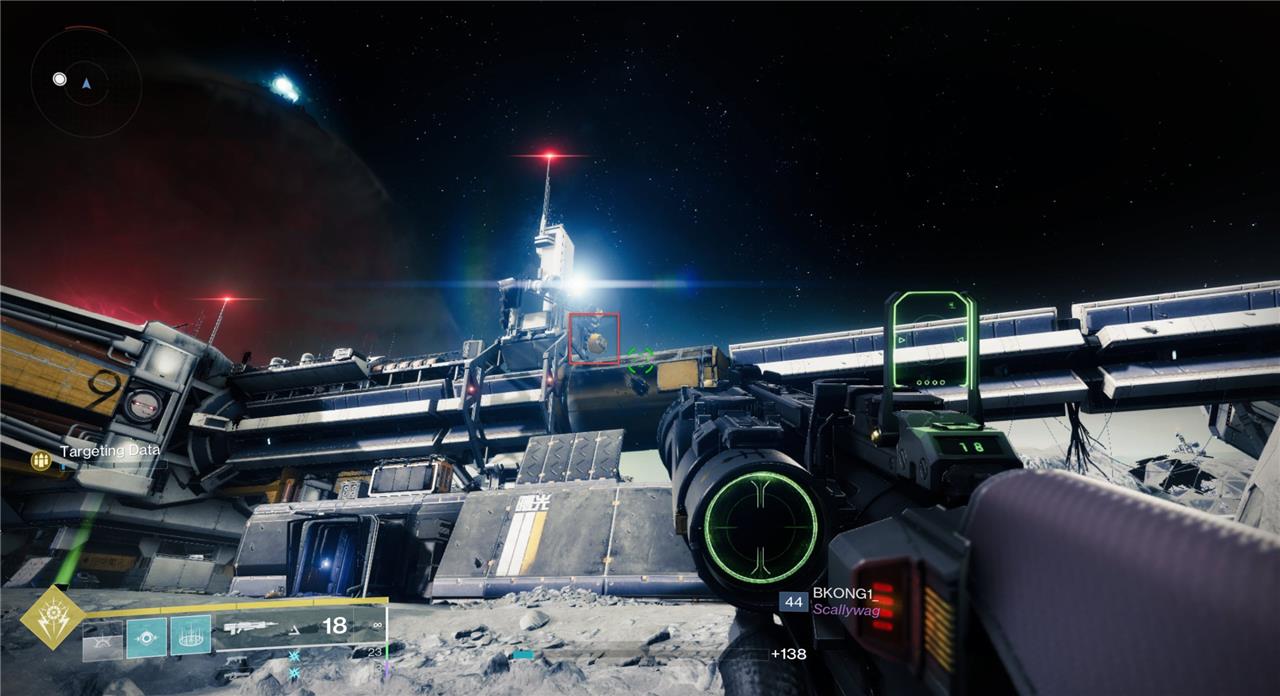
Security Drone 23
Drone 23 is on top of the large pipeline that runs through the Archer’s Line zone. It’s close to the building on the left-hand side. If you are having trouble seeing it, climb up and run along it until you reach the drone.
Security Drone 24
Drone 24 is in the boss room of the K1 Logistics Lost Sector. When you enter the boss room, it’s on the right above the small shack.
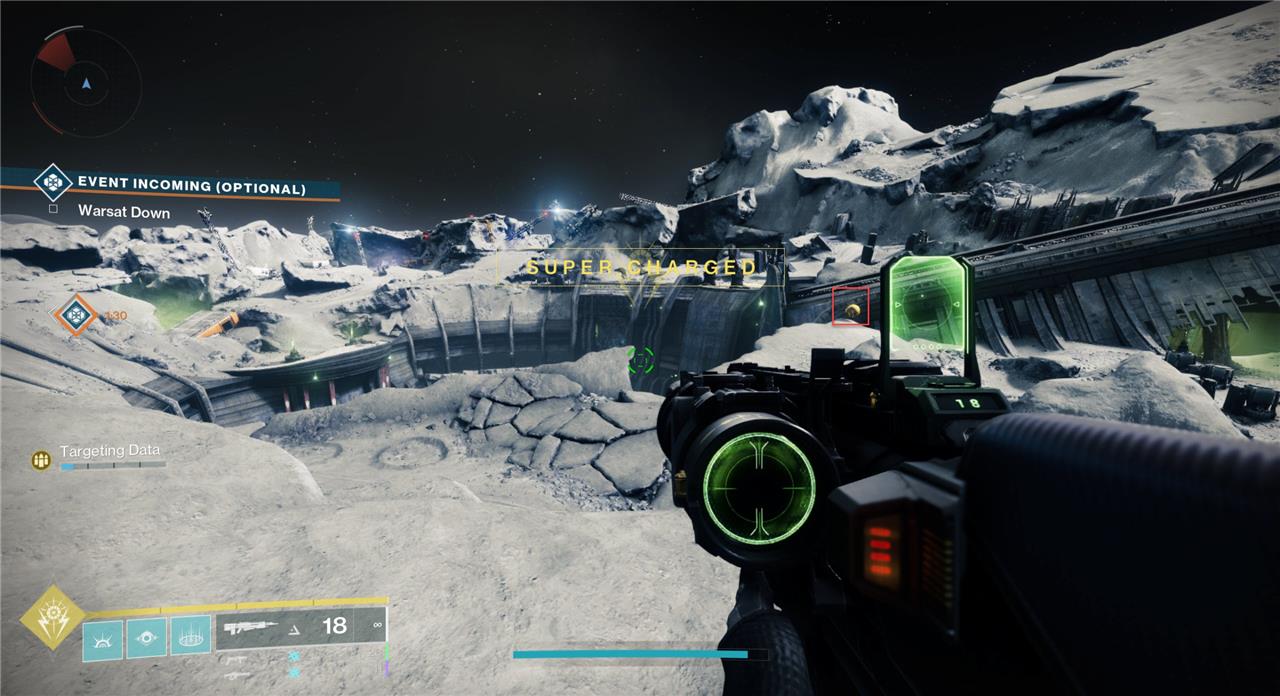
Security Drone 25
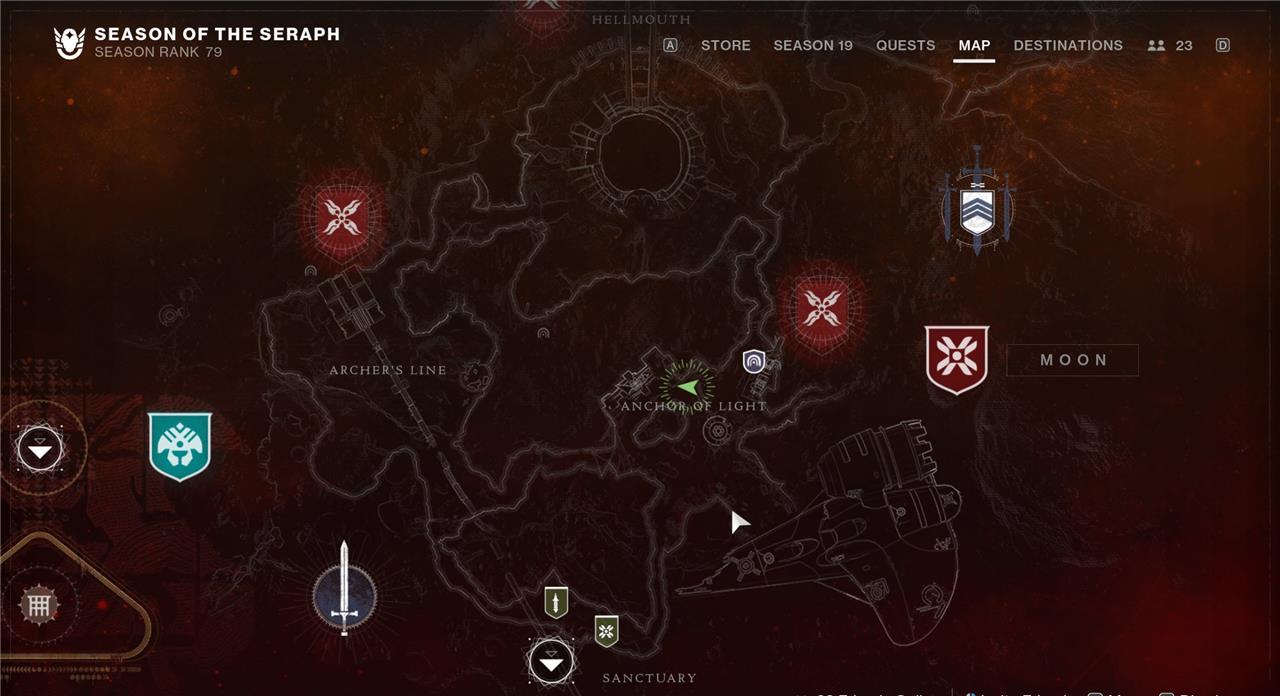
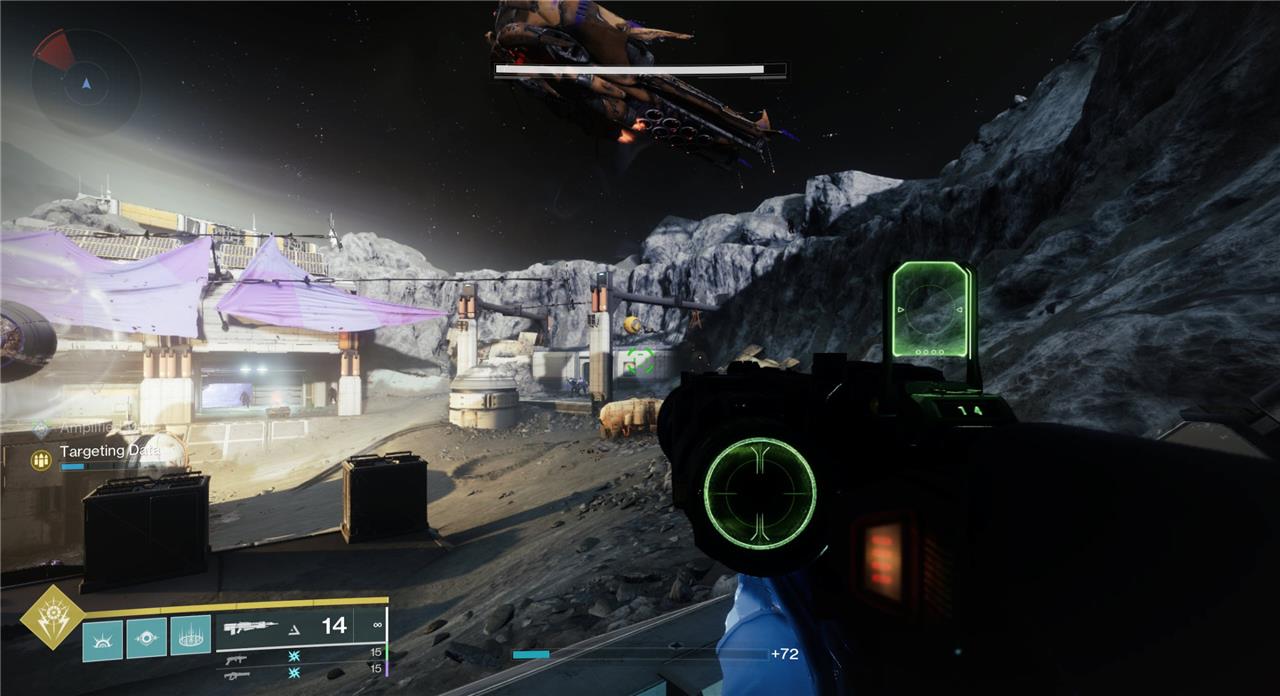
Drone 25 sits on top of the man-made structure on the left side of the Anchor of Light zone.
Security Drone 26
The last drone in the Moon’s free roam area is directly outside the Fallen Ketch located in the lower right side of the Anchor of Light.
Moon Battleground Security Drone locations
The Moon Battleground area hides several Security Drones that are scattered across the combat zones and high ground platforms. Players will find some hovering above the main pathways, while others are tucked near the cliffs and structures where Hive enemies patrol. Use a seasonal weapon capable of shooting drone targets, and make sure to clear out surrounding mobs before taking aim. A sparrow can help move quickly between clusters, as many drones sit far apart within this larger patrol zone.
These six Security Drones must be found during the “Moon Battleground” mission. The easiest way to get them is by launching the mission from the Moon director rather than the playlist under the HELM. Destroying all six Security Drones will unlock the Drone Destruction IV Triumph.
Security Drone 27
Drone 27 is found at the very beginning of the mission. Spawn in and make your way to the first Cryptoglyph. Look up and to the right to see the first drone of the mission.
Security Drone 28
This one can be tricky. Drone 28 is tucked away on the left-hand side of the slide that you must take down to progress the mission. You can barely shoot it from the top, but if you are having trouble, try to slide down slowly and shoot it while sliding.
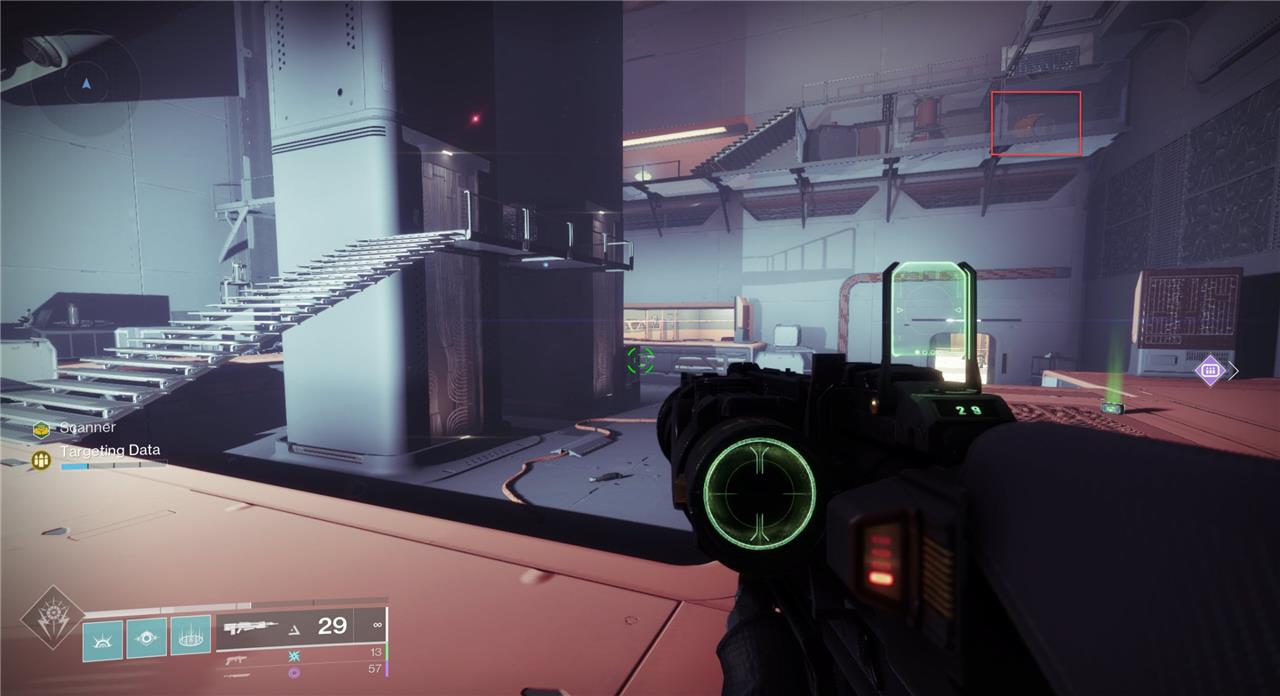
Security Drone 29
Directly after the slide, you’ll reach a room where you must go left to progress the mission. Turn right instead, the drone is just around the corner.
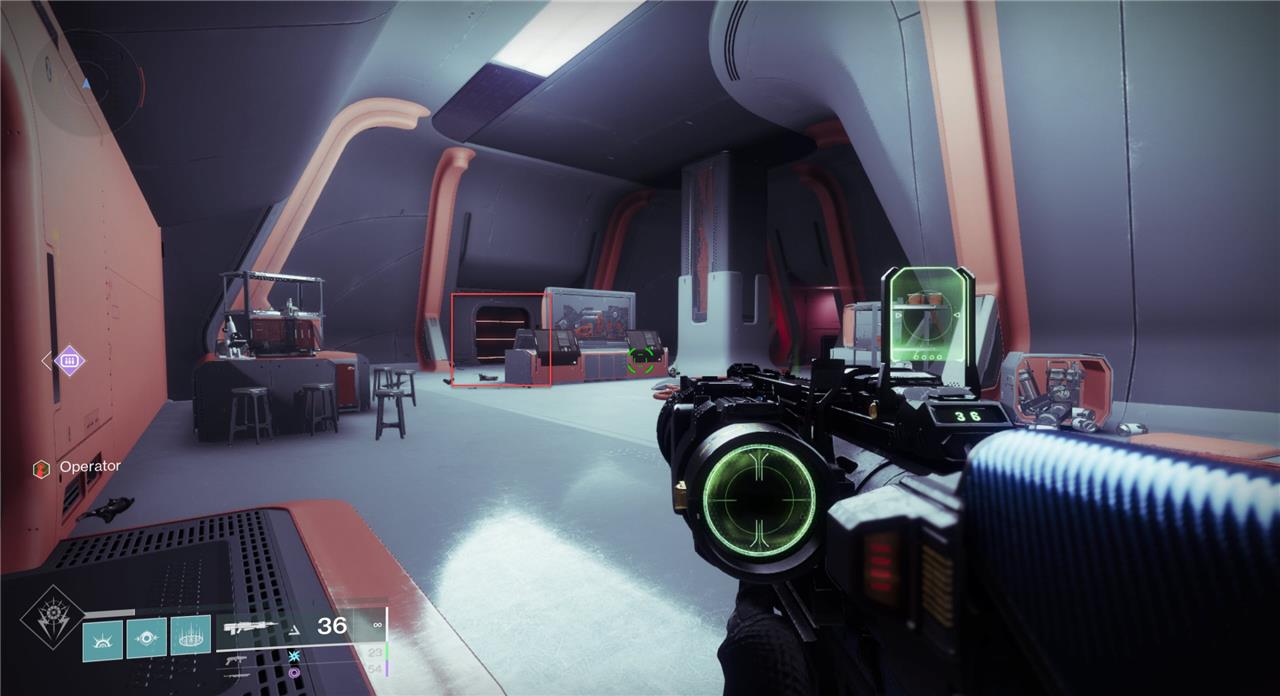
Security Drone 30
About three rooms later, you’ll reach a room with small stairs and computer consoles. Just behind the computer consoles on the right is Drone 30.
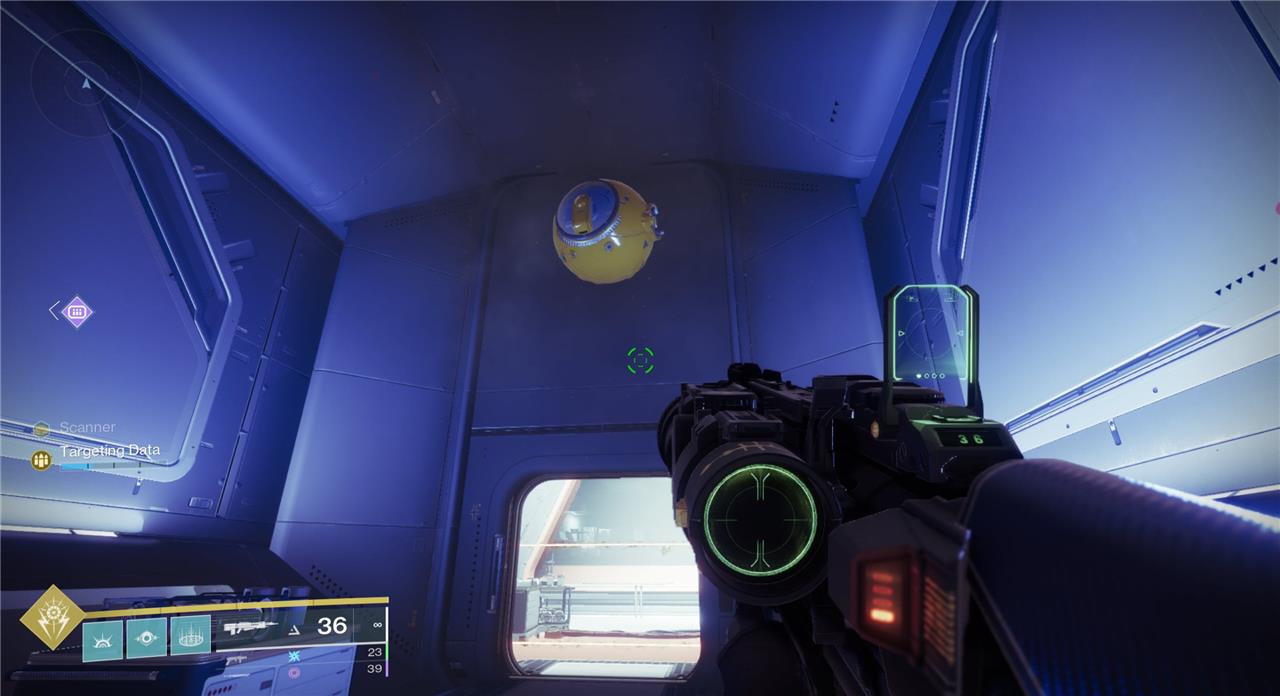
Security Drone 31
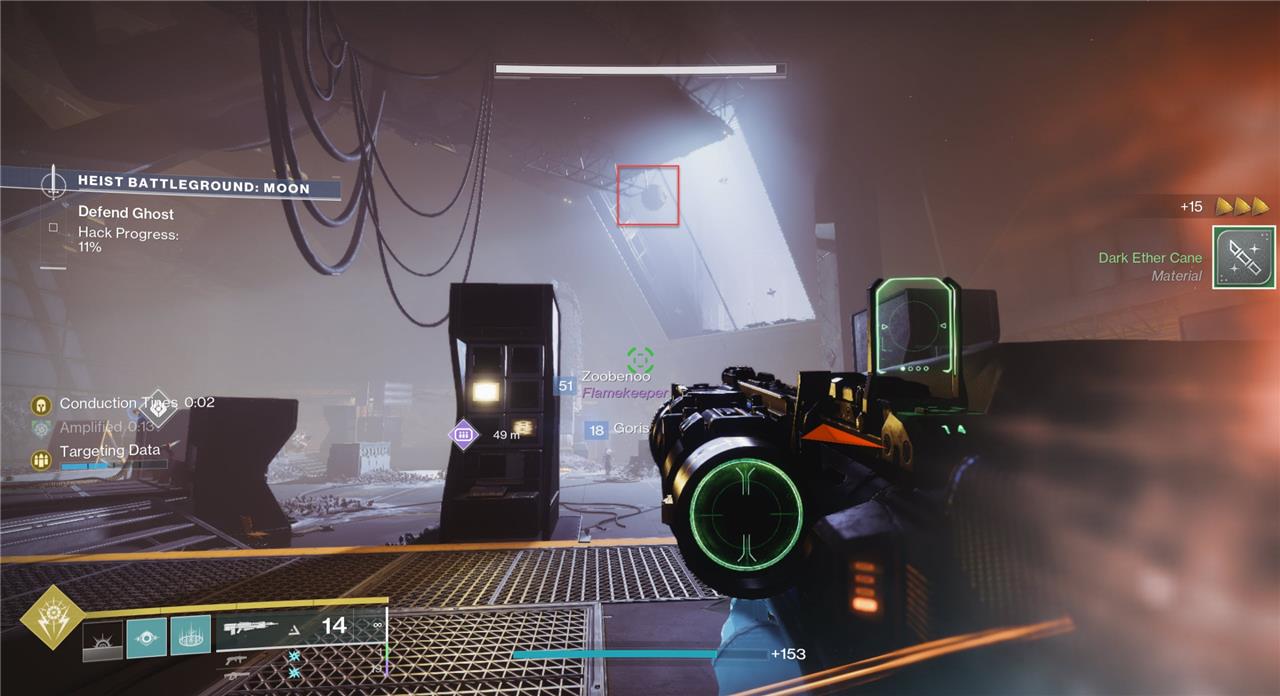
Drone 31 is in the large room where you must defend Ghost, directly above the center of the room.
Security Drone 32
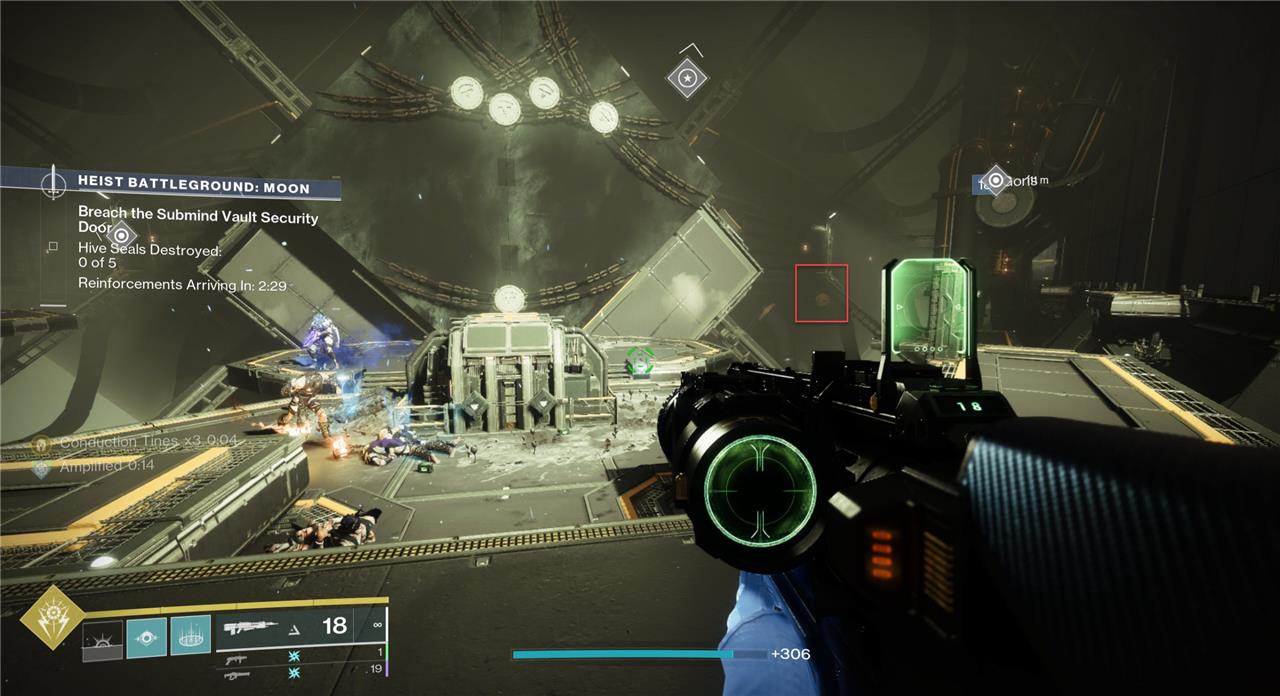
The last drone for the “Moon Battlegrounds” mission is the in the large area where you must remove the Hive locks on the door. Drone 32 is floating just to the right of the door.
Mars Battleground Security Drone locations
Mars hosts ten Security Drones scattered across locations like Braytech Futurescape and the Glacial Drift. Many hover near structures or tucked corners, often guarding warmind nodes or patrol routes. Expect to scale platforms, jump on ledges, or navigate tunnels to reach them. Using the Revision Zero exotic pulse rifle is required to destroy them once found, so make sure it’s equipped before heading out.
These six Security Drones must be found during the “Mars Battleground” mission. The easiest way to get them is by launching the mission from the Mars director rather than the playlist under the HELM. Destroying all six Security Drones will unlock the Drone Destruction V Triumph.
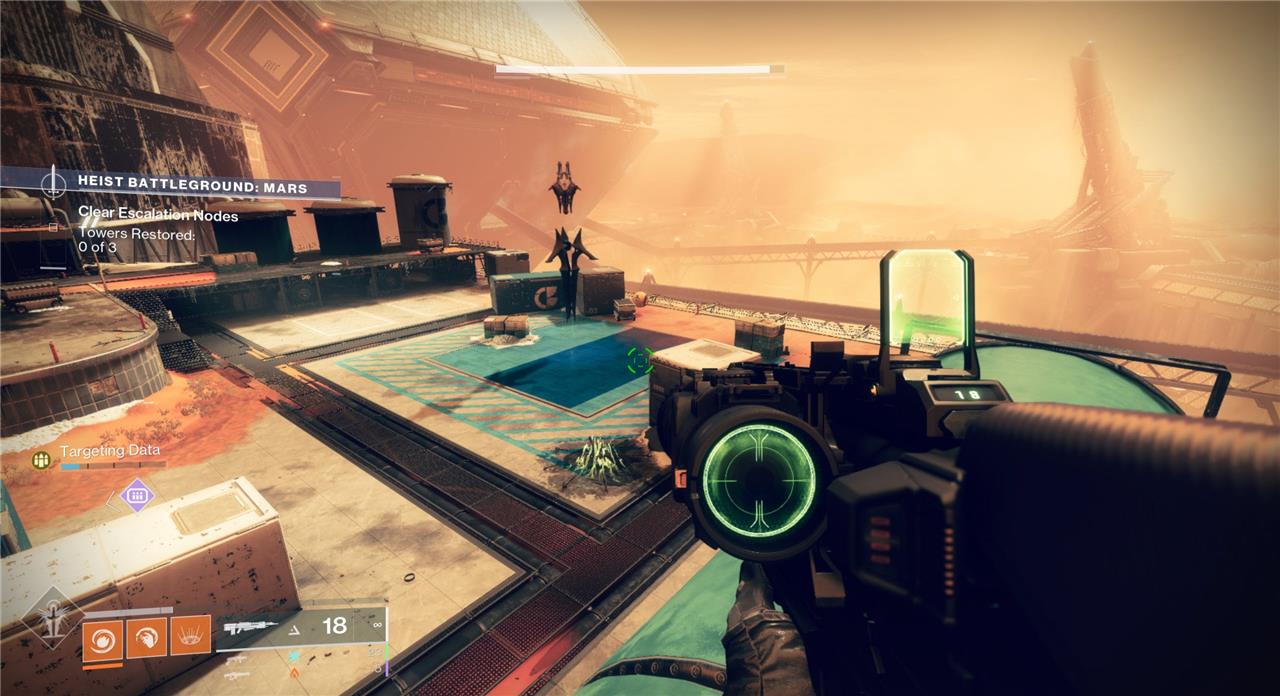
Security Drone 33
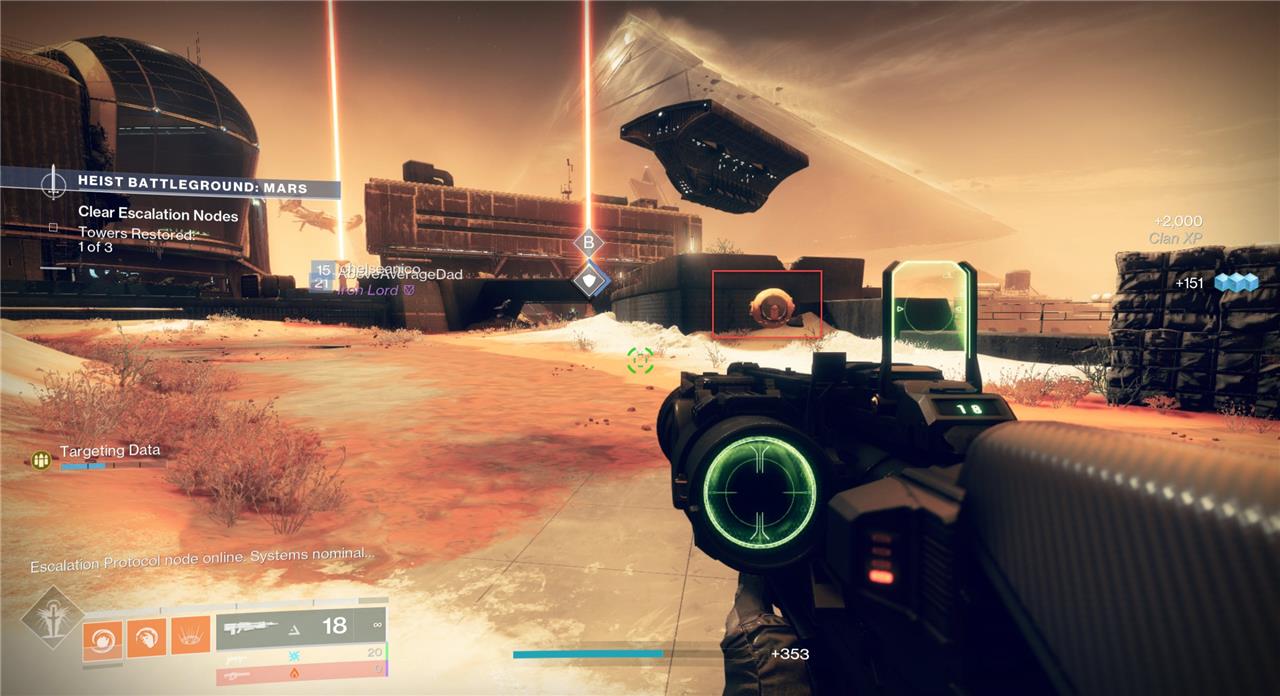
Once you load into the mission, make your way up the ramp and head towards and just past the B objective. Follow the walkway on your left to the end, and you’ll find Drone 33.
Security Drone 34
Head back to objective A. Drone 34 is next to the Annihilator Totem.
Security Drone 35
Once you have captured all three points, head into the facility. Go up onto the ledge that looks over the area the three objectives were. Look up, Drone 35 is up in the ceiling.
Security Drone 36
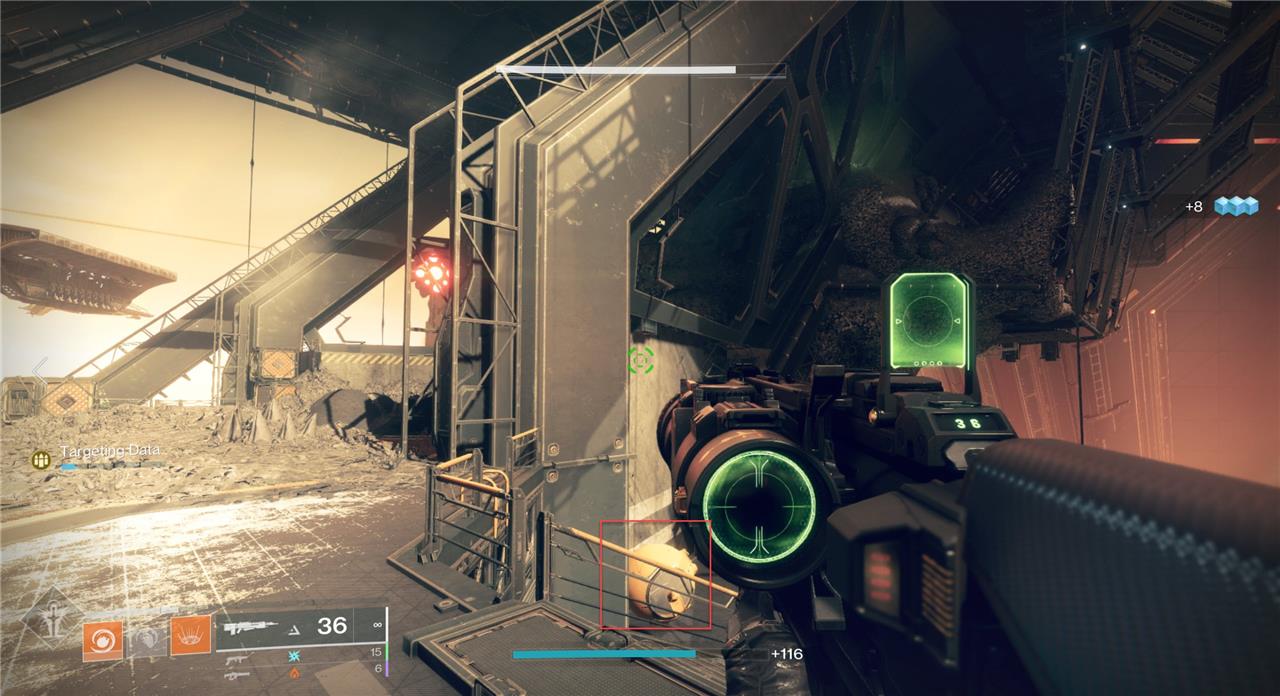
Make your way through the jumping puzzle until you reach the large complex. Before you climb up the Hive gunk, walk around the area, Drone 36 is just below on a small platform.
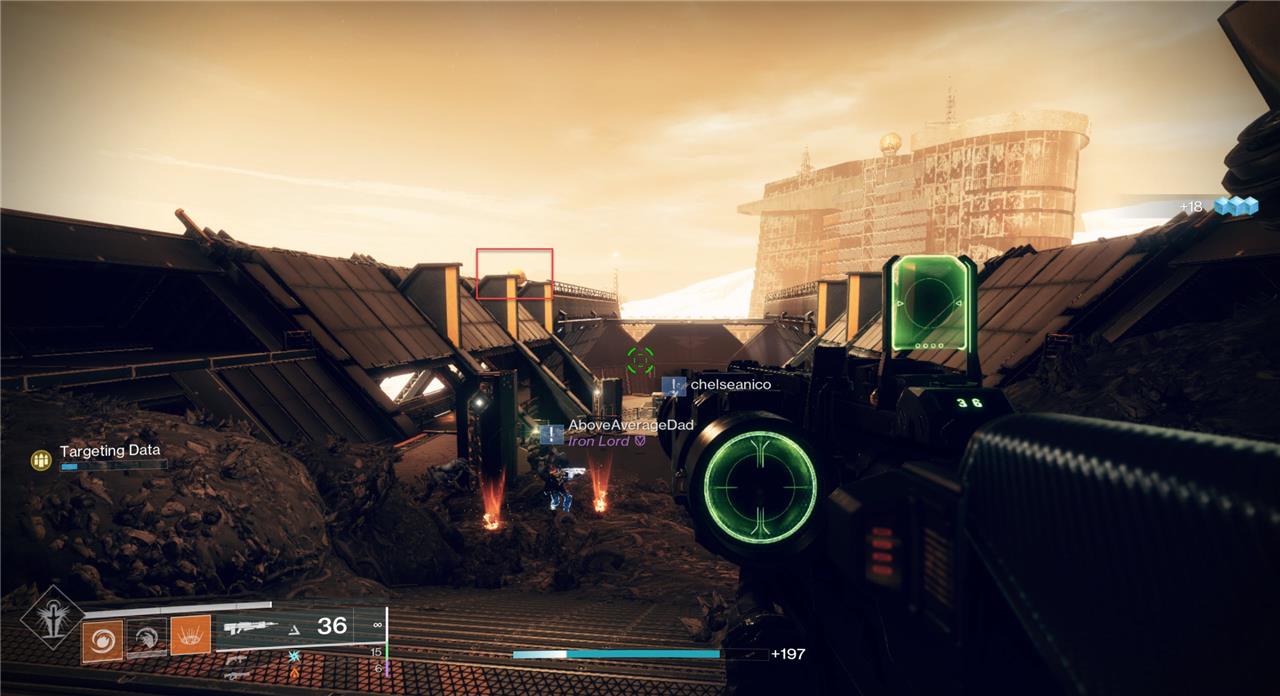
Security Drone 37

Drone 37 is on the other side of the Hive gunk from Drone 36. Once you are just around before you climb the wires to progress the mission, look up to find Drone 37.
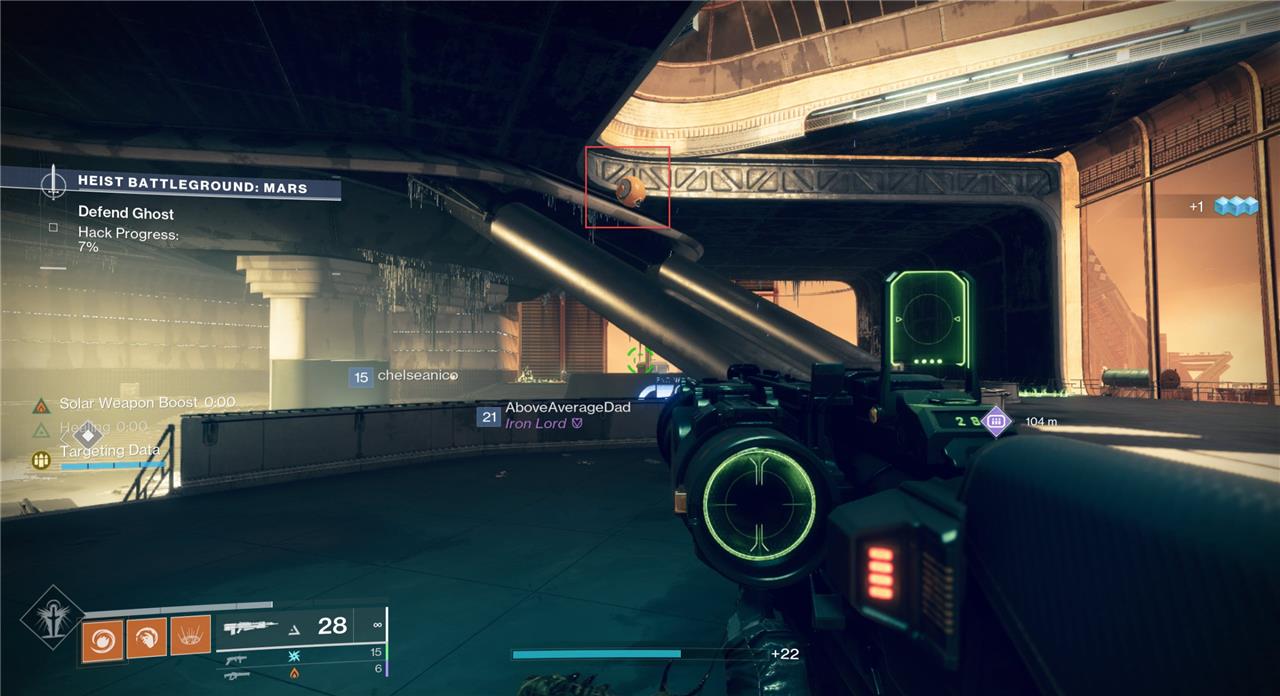
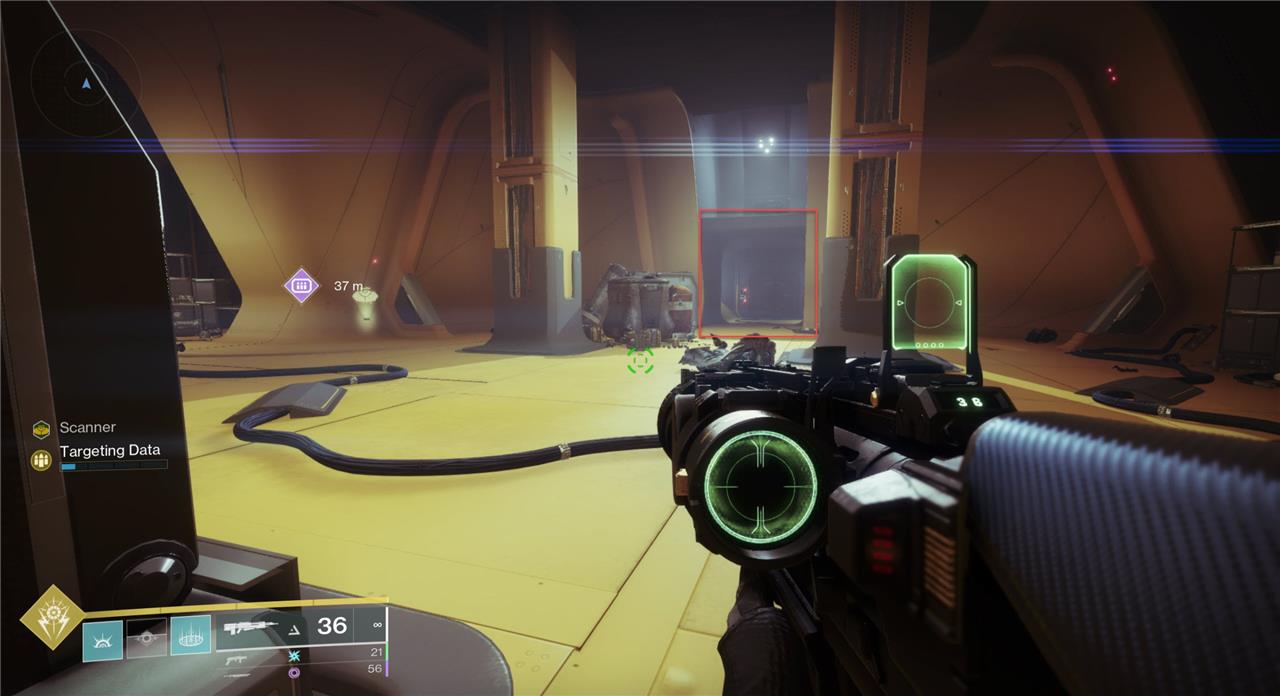
Security Drone 38
Once you reach the door that leads to the larger door locked with Hive runes, turn around. Along the upper left wall is the final drone for this Battlegrounds mission.
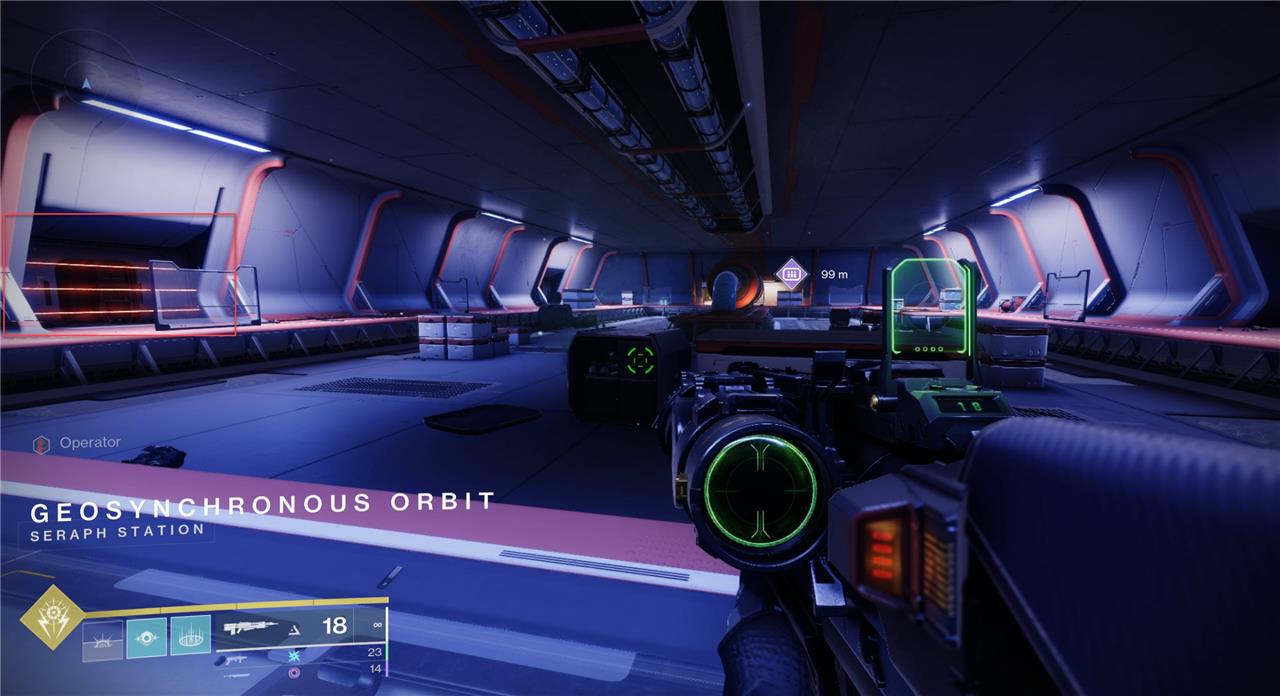
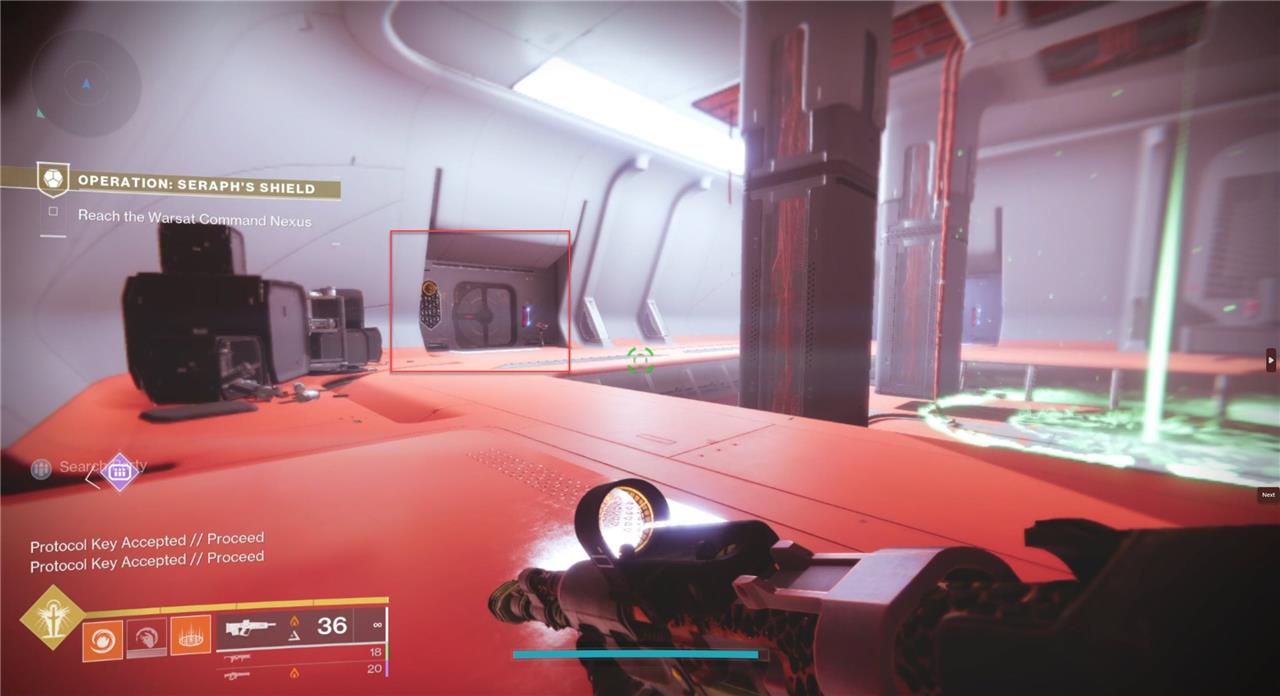
‘Operation Seraph’s Shield’ Security Drone locations
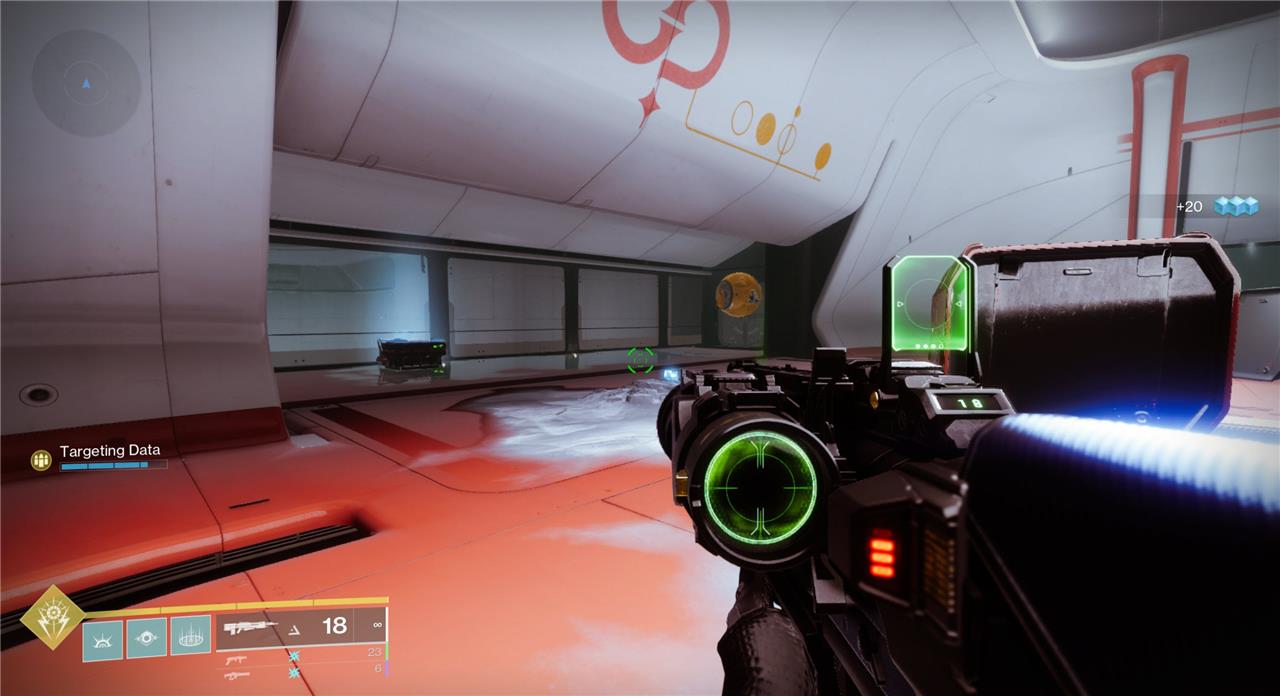
Security Drones in the Operation: Seraph’s Shield mission are hidden across several key areas of the Braytech orbital facility, each requiring careful exploration during the mission’s stages. Players will need the Exo Frame modules and operator buffs gained from mission progress to reach them. The drones are typically suspended in hard-to-reach positions such as upper walkways, behind sealed doors, or in maintenance shafts. Scanning each area methodically-especially before advancing to the next encounter-ensures none are missed, helping complete the collectible set tied to the Resonance Amp and triumph objectives.
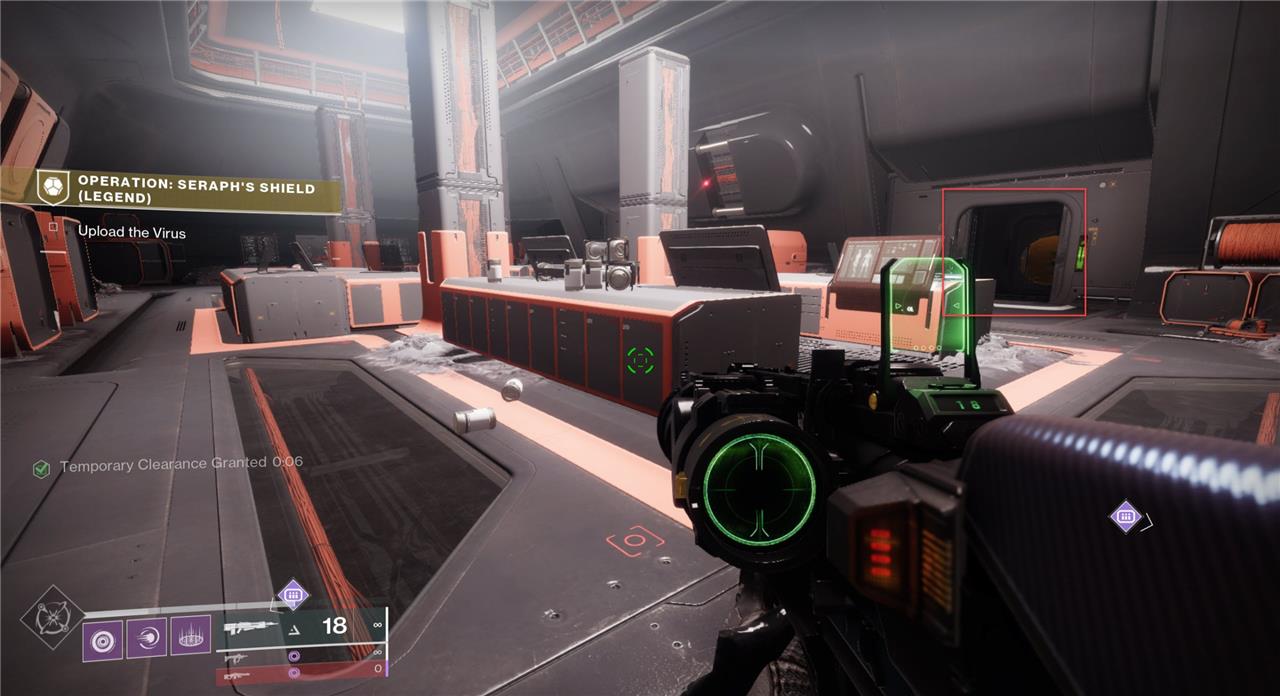
All the drones in the mission are now obtainable once you obtain the “Tactical Armor” and “Security Clearance” upgrades from the Exo Frame in the HELM. Destroying all twelve Security Drones will unlock the Drone Destruction VI Triumph.
You can obtain some of these drones early by dashing through the lasers guarding them with a sword with the perk “Eager Edge.” The sword lunge bypasses the laser’s damage and allows you to destroy those drones. You can acquire these drones without an Eager Edge sword once you unlock the “Tactical Armor” upgrade.
Drones 39, 41, 42, 45, 46, 48, and 49 require the “Security Clearance” upgrade, however. This upgrade allows you to interact with terminals throughout the mission, starting a small puzzle every time you do. Once you activate the terminal, you’ll see three symbols spread around the area plus an icon above the terminal indicating which one you need to shoot. If you shoot the correct one, it will show the next symbol in the sequence. Once you shoot the three symbols in the correct order, a door will open, allowing you to take out the drones.
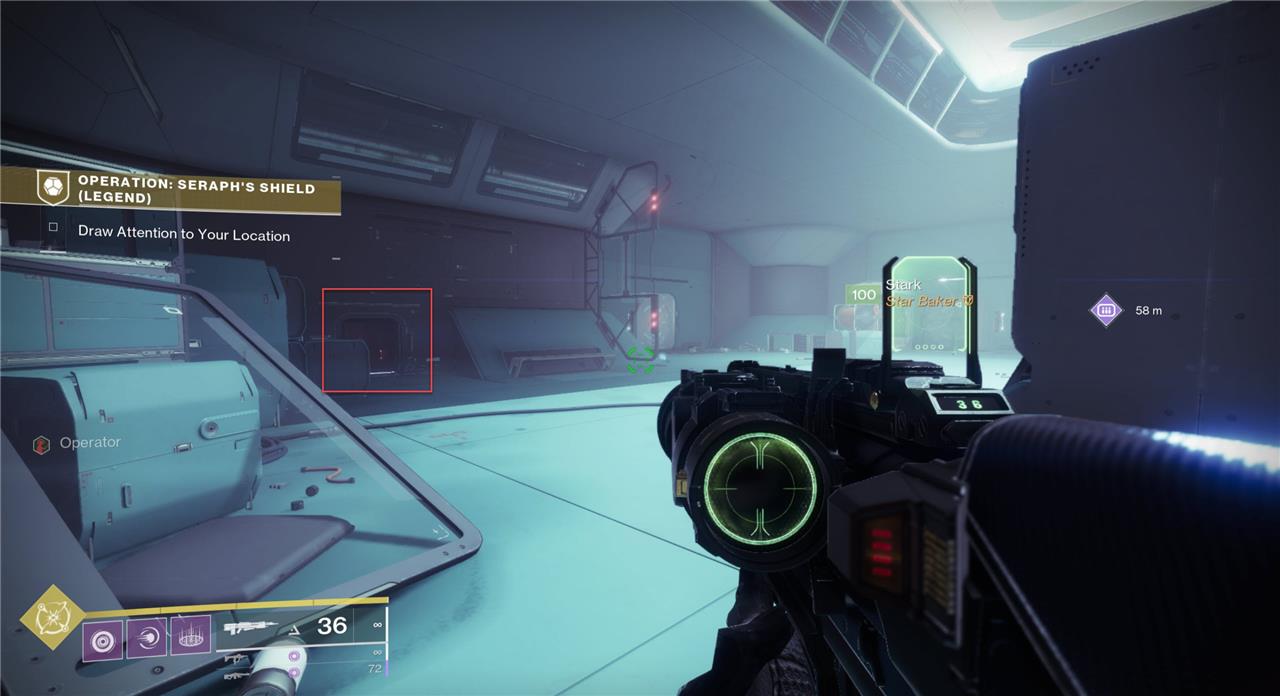
Security Drone 39
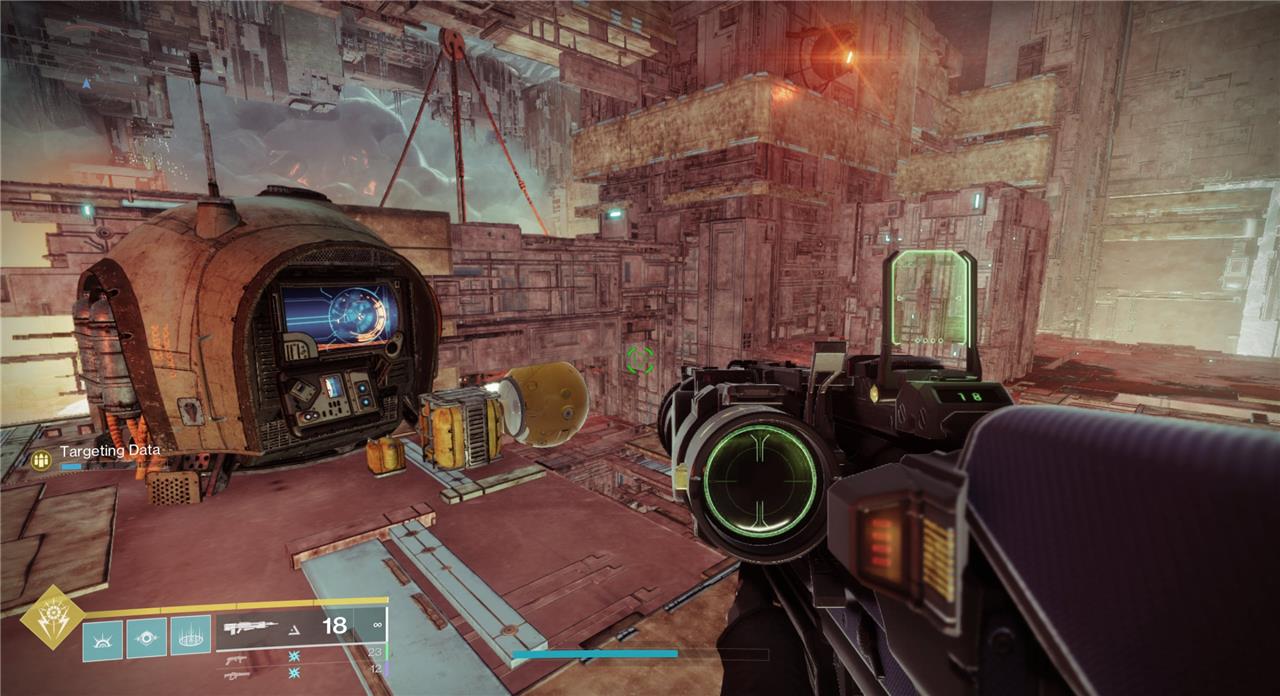
Load into the mission and make your way to the doorway that takes you into the base. Right before that doorway is a platform with an Ogre on it. Go to the right side of the platform, as shown above, and jump down. Here you’ll find the terminal and puzzle for Drone 39.
Security Drone 40
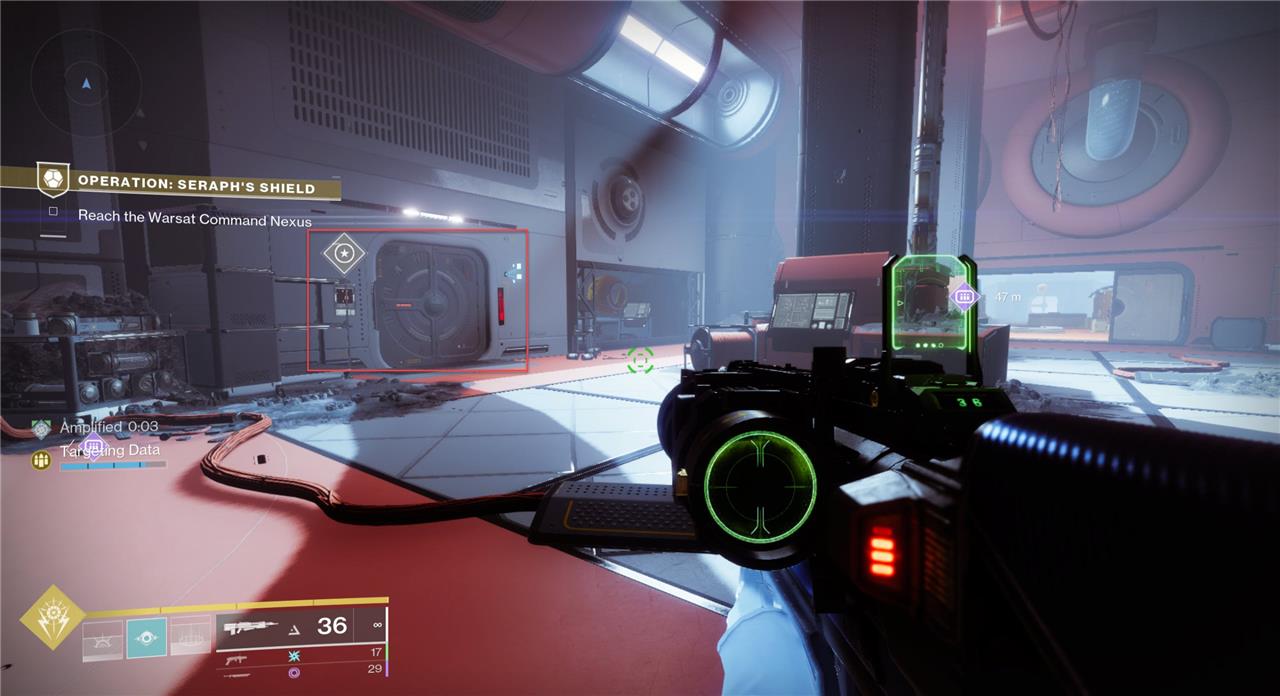
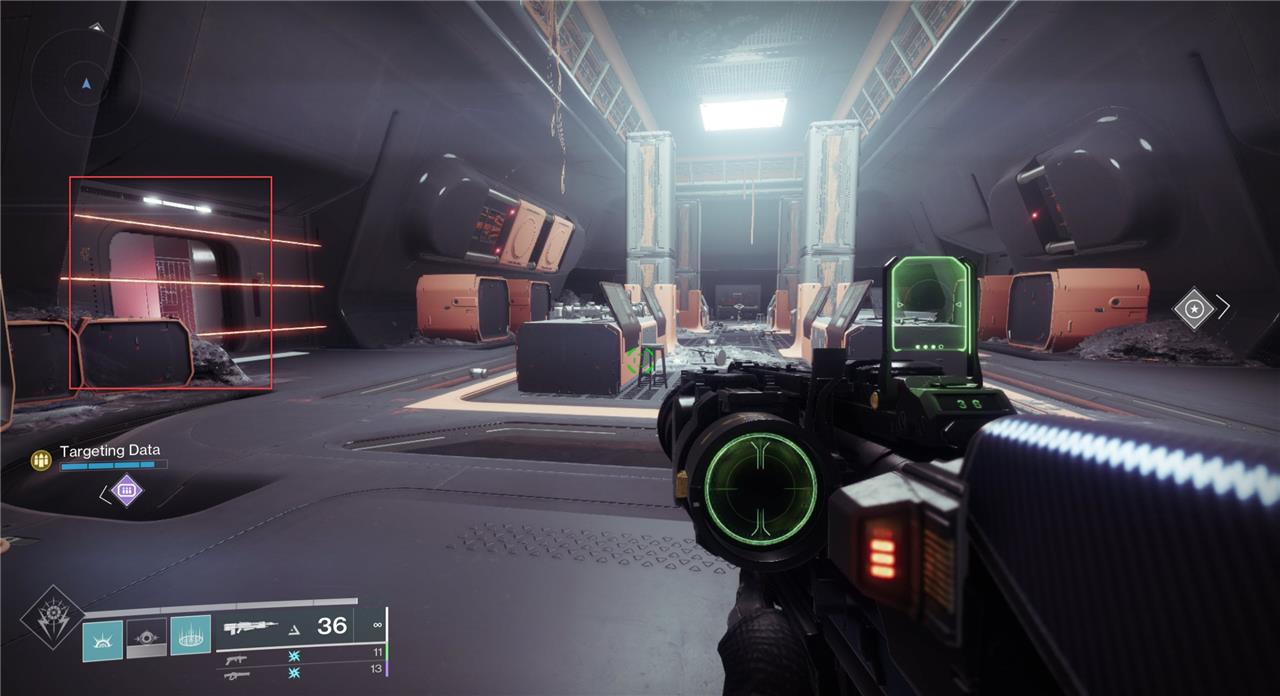
Progress through the mission until you get the second Scanner buff. Head through the vents to the second terminal you need to activate. Drone 40 is just through the door, blocked by lasers.
Security Drone 41
Drone 41 is located in the room where you get the Scanner buff for the third time. Below the vent you must travel through to progress through the mission, you’ll see a door and a terminal. Activate the terminal and complete the puzzle, then Drone 41 will be accessible behind the door.
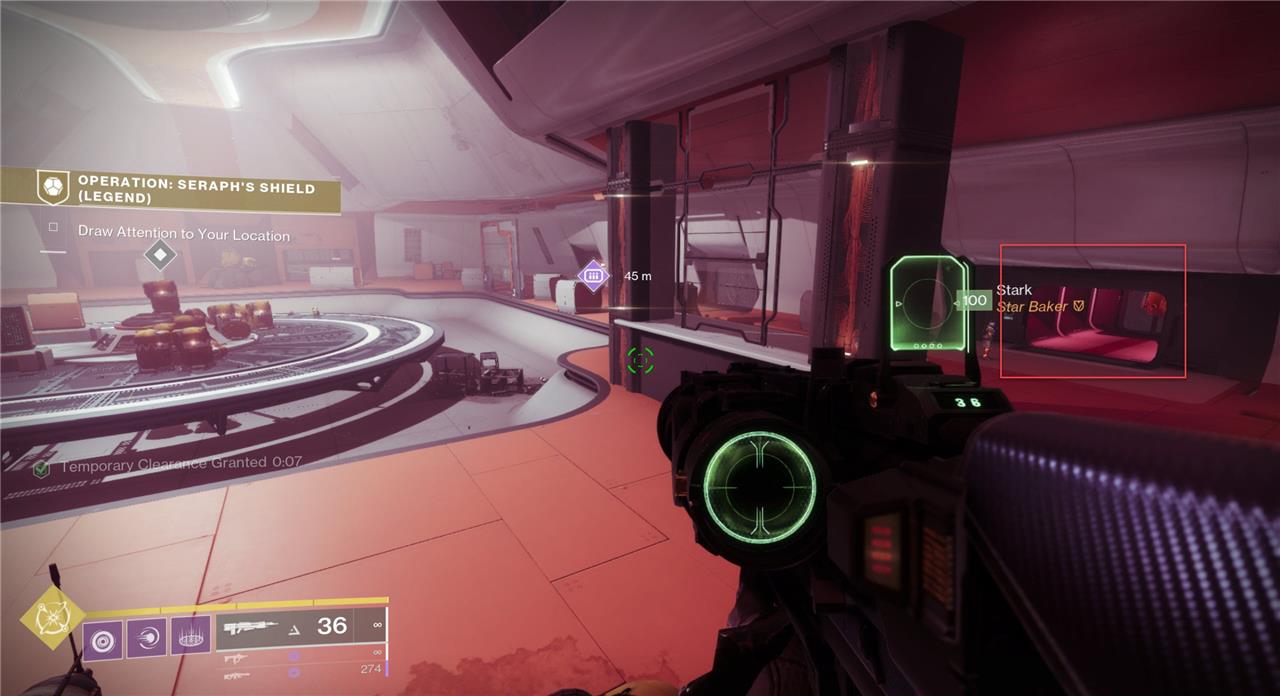
Security Drone 42

On the right-hand side of the room where you first get the Operator buff, you’ll see a door and a terminal. Activate the terminal, complete the puzzle, and go back to the door to shoot Drone 42.
Security Drone 43
Make your way to the room where you have to follow the path on the floor to not get burned. In the room just before, near the top of the room is Drone 43.
Security Drone 44
After you get the first Operator buff, make your way to the room with the Shriekers. Toward the back of the room, you’ll find a pathway blocked by lasers, Drone 45 is just past those lasers.

Security Drone 45
Drone 45 is found in the room before the first boss. There is a small door on the same side of the room that you enter from. Activate the terminal on the door and complete the puzzle. Once completed, the door will open to reveal Drone 45.
Security Drone 46
In the room where you fight the first boss, there is a door and terminal on the left-hand side. Activate the terminal and complete the puzzle to reveal Drone 46. This can be done before, during, or after the boss fight, though we recommend knocking it out before you start the fight.
Security Drone 47
Make your way to the end of the spacewalk section to the room with all the Hive. On the left-hand wall, there is a small room blocked by lasers. Drone 47 in that small room.
Security Drone 48
Drone 48 is in the room directly before the final boss, where you put down the rally flag. There is a terminal and a door on the left-hand side. Activate the terminal to start the puzzle. Once you complete the ensuing puzzle, Drone 48 is behind that door.
Security Drone 49
After you defeat the final boss, head to the room with the chest. The first door on the right has the terminal to activate the puzzle. Once you complete the puzzle, Drone 49 will be behind that door.
Security Drone 50
In the same chest room as Drone 49, on the left-hand side there is a small area blocked by lasers. Drone 50 is behind those lasers.
Guardian’s Best Friend Triumph
Each Security Drone acts as a silent companion for Guardians chasing triumphs across Destiny 2’s patrol zones. Gathering them demands precision, patience, and a sharp eye, as many are hidden behind puzzles or tucked away in high places. With every drone secured, players edge closer to powerful rewards, secrets, and the satisfaction of completing one of the game’s trickier collectibles.
Once you destroy all 50 Security Drones, you can access a secret door in the “Operation: Seraph’s Sheild” mission. It’s located on the left-hand side of the room where you kill the first boss (for the second time). Once you open the door, you’ll need to progress through a few lasers and a door closed by a terminal. You’ll need the “Security Clearance” upgrade to get through the door with the terminal, and you’ll need the “Tactical Armor” upgrade to get through the lasers (though you can skip them using an Eager Edge sword, much the same as the method outlined above). You’ll then go through an extensive series of tunnels, platforms, and drops before reaching an Exo dog. Interact with the dog to “activate good boy protocol” and receive the Guardian’s Best Friend Triumph. For a full breakdown of how to get to the Exo dog, you can follow our guide here.
How to get Revision Zero pulse rifle
Revision Zero is an exotic craftable pulse rifle from Destiny 2’s Season of the Seraph, obtainable via the “Operation: Seraph’s Shield” exotic mission.
Acquisition Steps
Start by completing the first few weekly “Operation: Heist” missions at the H.E.L.M. to unlock the “The Hidden Shape” quest from the Holoprojector. Launch “Operation: Seraph’s Shield” (weekly or on-demand in later seasons), which involves scanning consoles, picking up buffs like Scanner from Vandals, navigating vents, shooting panels, and defeating a boss by targeting floating balls to expose shield generators. Finish the mission to receive the rifle and its pattern; craft it at the Enclave on Mars (must “Shape,” not “Reshape,” to progress).
Current Availability
As of 2024 updates, access the mission anytime from the H.E.L.M. Director (not seasonal-locked), though some players note occasional rotation-confirm in-game. It’s soloable but scales with fireteam size; equip anti-barrier mods as it inherently stuns those champions.
Crafting and Catalysts
Level Hunter’s Trace (intrinsic perk) by replaying Legend/Legendary Seraph’s Shield to unlock barrels, mags, and perks like Perpetual Motion or Feeding Frenzy. Four catalysts come from weekly “Should You Choose to Accept It” quests involving lost sectors (e.g., Perdition, Archer’s Line), patrols, and hidden Exos in the mission.
Revision Zero best god roll and perks
Revision Zero is a craftable exotic pulse rifle in Destiny 2 with a unique Hunter’s Trace intrinsic perk that enables a charged sniper-like shot after precision hits, making it versatile for both PvE and PvP.
PvE God Roll
This setup maximizes stability, recoil control, and boss/Champion damage via its anti-barrier stun.
| Column | Option | Stats/Benefits |
|---|---|---|
| Barrel | Arrowhead Brake | +30 Recoil Direction, +10 Handling |
| Magazine | Ricochet Rounds | +10 Stability, +5 Range |
| Perk | Vorpal Weapon | 20% damage vs bosses/minibosses |
| Stock | Fitted Stock | +10 Stability, +5 Recoil |
| Catalyst | Fourth Time’s the Charm | Reload 2 bullets after 4 precision hits |
| Masterwork | Range | Boosts sniper mode |
| Mode | Hakke Light Burst | Balances stability/range |
PvP God Roll
Focuses on handling, range, and consistent uptime during engagements.
| Column | Option | Stats/Benefits |
|---|---|---|
| Barrel | Arrowhead Brake | Near-perfect recoil |
| Magazine | Ricochet Rounds | Stability for long fights |
| Perk | Perpetual Motion | ADS speed/stability on movement |
| Stock | Short-Action Stock | +15 Handling |
| Catalyst | Outlaw | Fast reload on precision kills |
| Masterwork | Stability | Tighter bursts |
| Mode | 2-Round Burst | Max range for duels |
Unlock all via weekly Expert Operation: Seraph’s Shield runs; alternatives like Eye of the Storm or Elemental Capacitor suit specific playstyles.