In Destiny 2: The Final Shape, unlocking the game-changing Exotic class items isn’t as simple as finishing the campaign-these powerful, randomly rolled pieces are hidden behind the mysterious “Dual Destiny” mission, a secret two-player challenge tucked away in the Pale Heart. Ready to combine the perks of two Exotics and supercharge your Prismatic subclass? Here’s how to find, unlock, and farm these coveted items before your rivals do.
In this Exotic class items guide, I’ll walk you through how to unlock the “Dual Destiny” Exotic mission so you can start farming for your own randomly rolled Exotics.
How to unlock the ’Dual Destiny’ mission in Destiny 2: The Final Shape
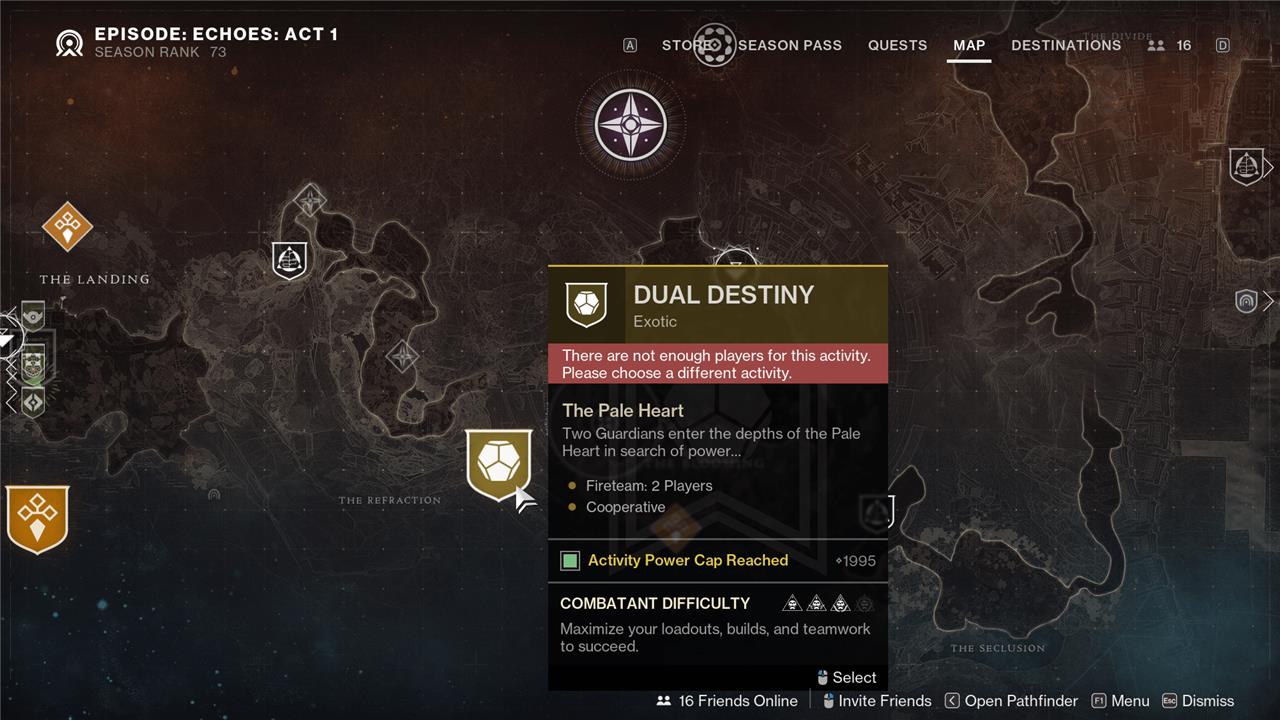
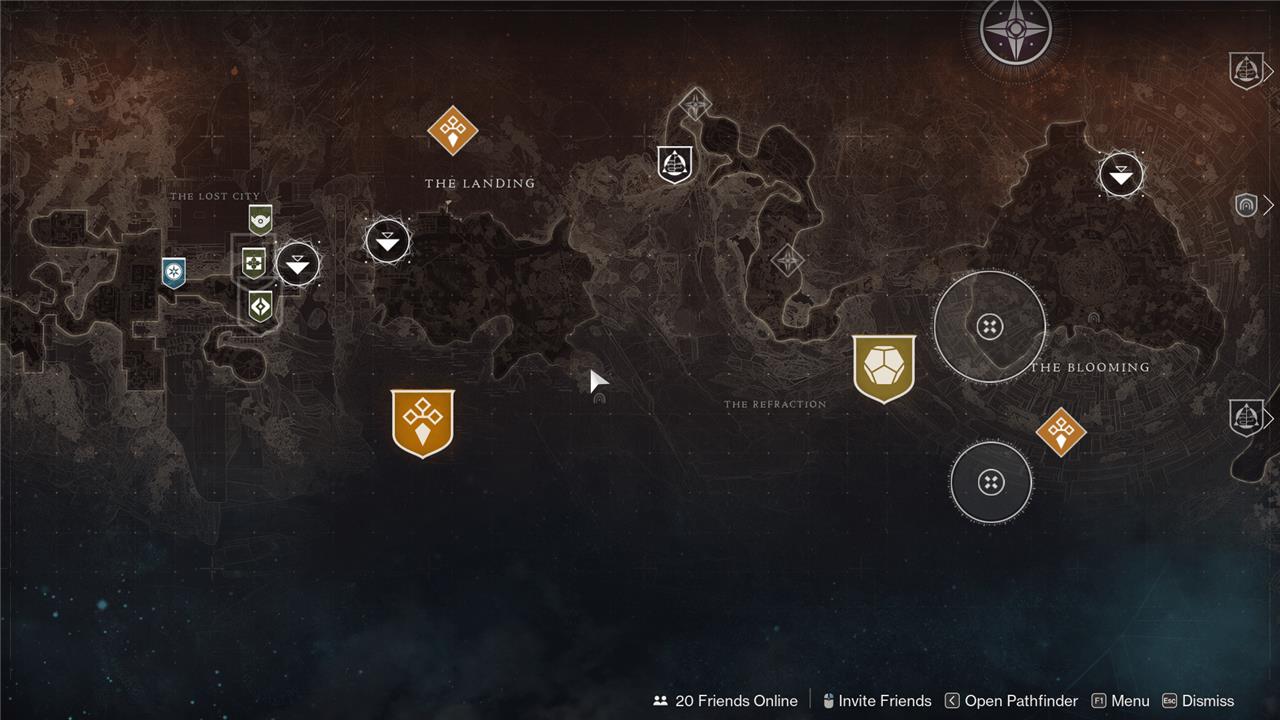
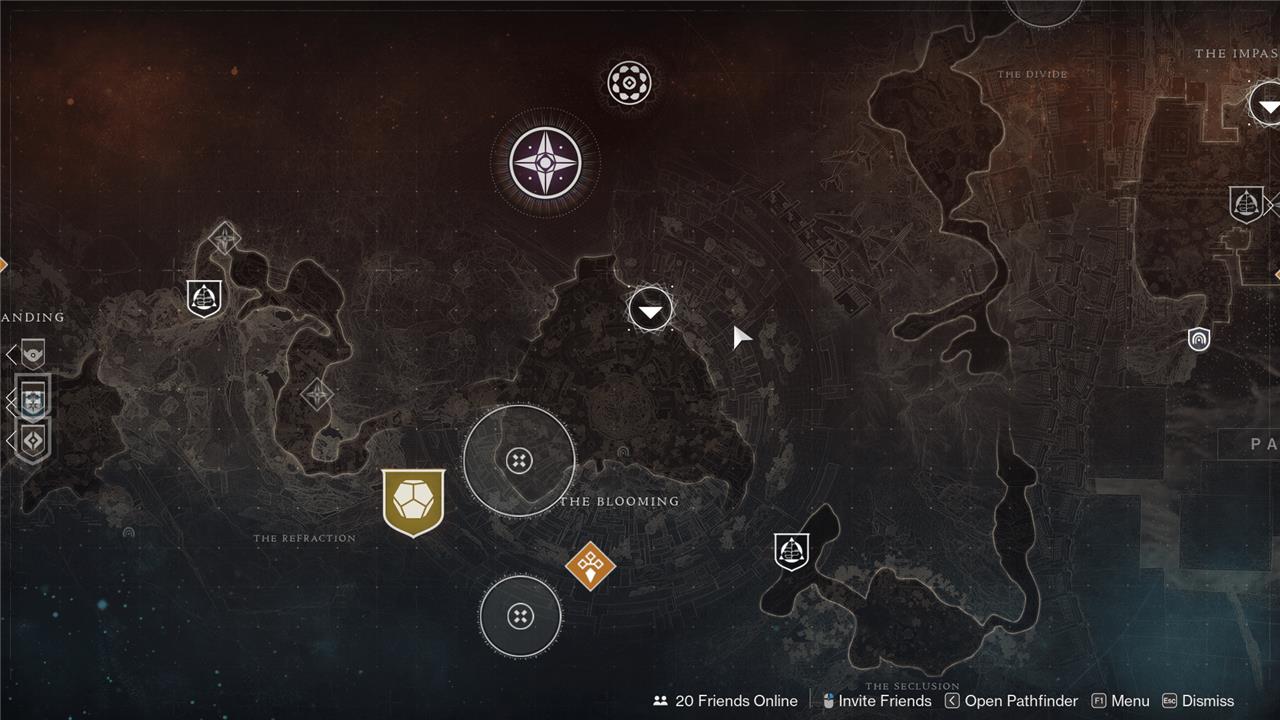
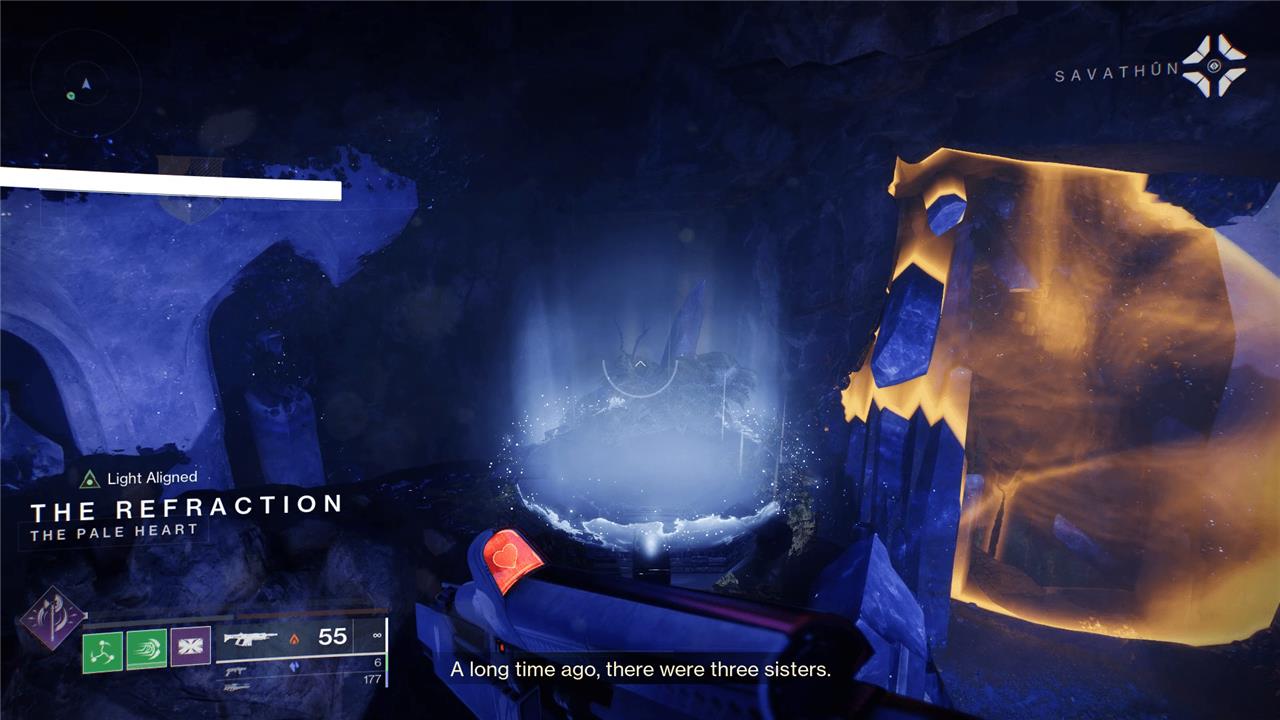
To unlock the ’Dual Destiny’ mission in Destiny 2: The Final Shape, you must first complete the Overthrow public event activities in all three zones of the Pale Heart: The Landing, The Blooming, and The Impasse. These Overthrow events escalate through multiple tiers, culminating in a boss fight at Tier 3, which you need to defeat in each zone. After clearing each Overthrow and defeating the associated boss, a special Lucent Hive enemy (often referred to as the Secret-Keeper of the Witch Queen) will spawn-defeat this boss within the five-minute window before moving to the next zone. Once all three zones are complete, head to The Refraction area (between The Blooming and The Landing), where you’ll receive the Savathun’s Envoy buff in a crystallized room. Here, you must collect and return two orbs (one Light, one Dark) to unlock the mission. Only then will the ’Dual Destiny’ secret mission become available, allowing you and a partner to attempt it for a chance at Exotic class items. Note that this mission requires a fireteam of two and does not offer matchmaking.
To unlock “Dual Destiny,” you need to do a puzzle for Savathun in The Pale Heart. The trick here is that there is no quest to pick up or real suggestion that there’s a hidden mission at all. You need to know exactly what to do and where to go with this mission to unlock it.
First, you need to group up in a party, as it seems like players aren’t able to unlock the quest alone. Then, successfully finish a run inOverthrow. Start in whatever location you’d like and do the entire thing. Once you defeat the boss, the game will say the area is “at peace” and give you a short timer before Overthrow starts back up. During this window, a Lucent Wizard will spawn somewhere in the area. You need to kill this Lucent Wizard in all three Overthrow zones in order to progress this secret quest.
These Wizards aren’t exactly hiding, so you can find them on your own if you’d like. But here’s where you can locate each, starting with The Landing:
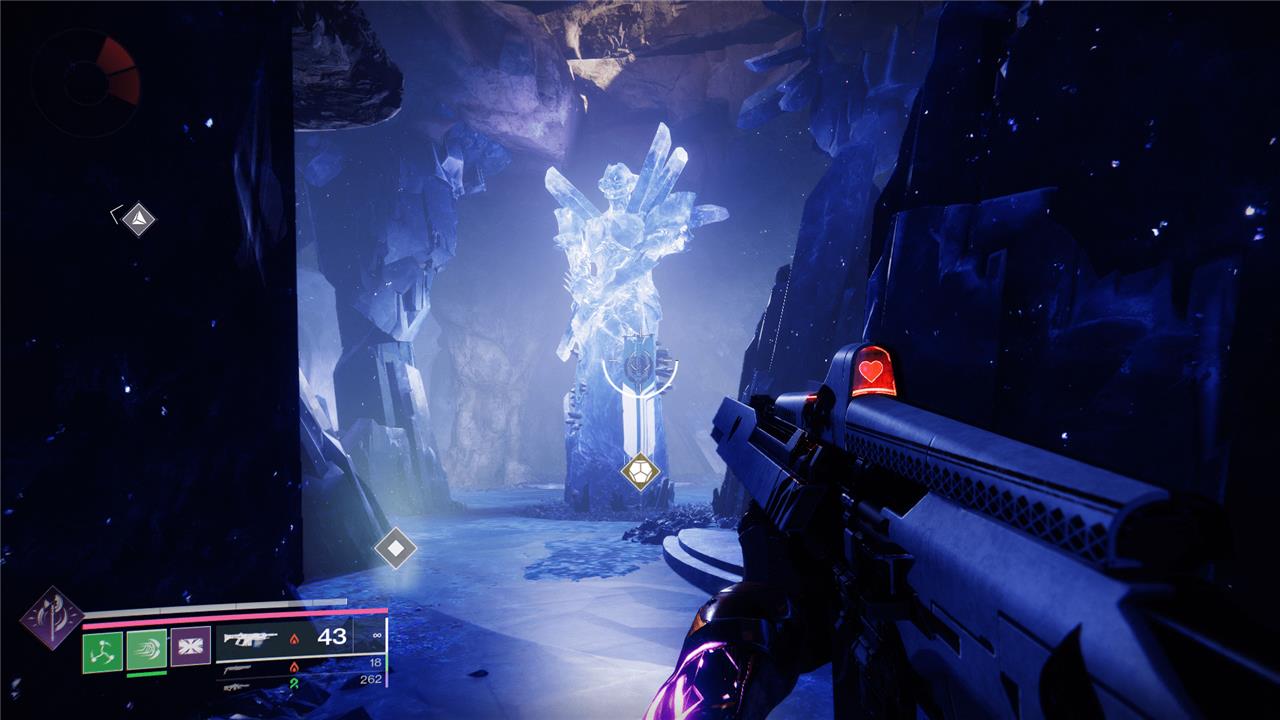
- Head to The Landing first and clear the Overthrow. While you’re at peace, head south and into the cave near where The Forgotten Deep Lost Sector is. Wait around and the Wizard will spawn. Shoot the crystals to break its shield, kill it, and crush its Ghost. You’ll get a prompt that says a “Secret-Keeper of the Witch Queen is vanquished!” Once you see that, move on to The Bloom.
- Complete another Overthrow and then hop on your Sparrow once you’re at peace. Head to the right side of The Bloom, but don’t follow the cave that leads to The Seclusion. Instead, look for a back path that goes behind the mountain on your right. You’ll find the next Secret-Keeper here. Kill its enemies and do the mechanic prompt so you can destroy the Wizard. Crush the Ghost and you’ll get another notification.
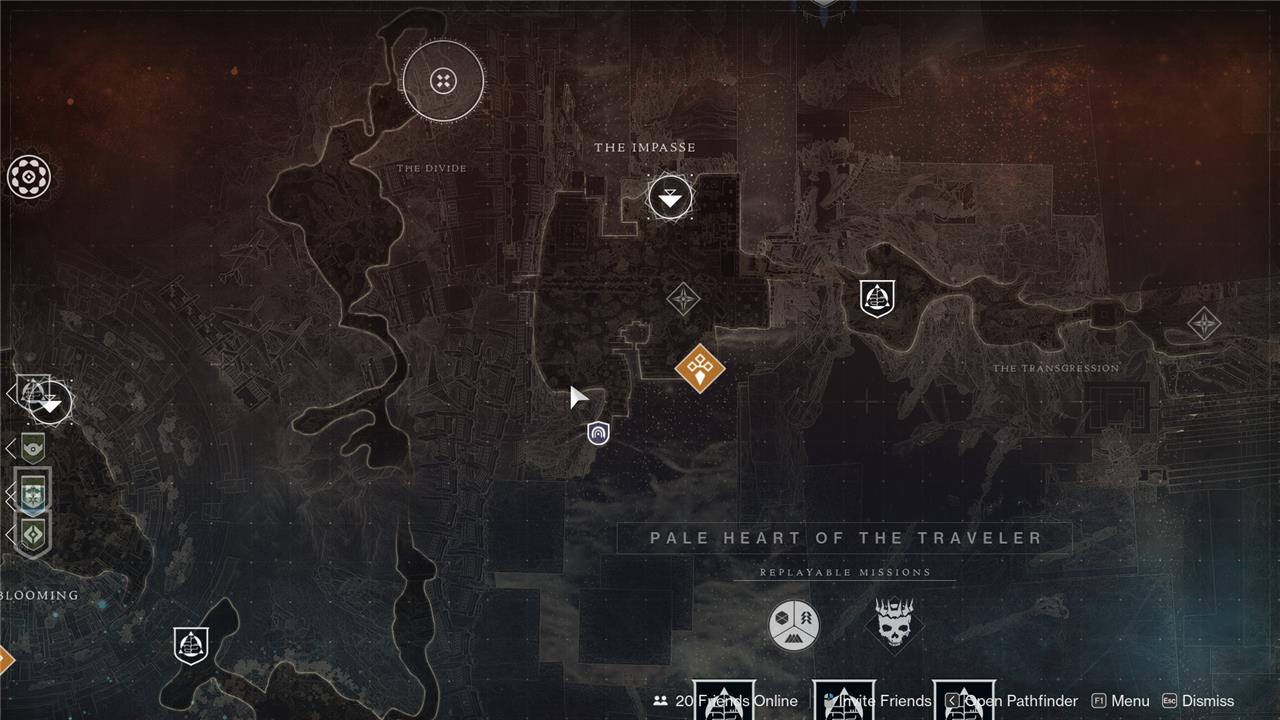
- Finally, head to The Impasse. Clear Overthrow here and then head southwest to the elevated area in the rocks – if you hit the Lost Sector, you’ve gone too far. You’ll find the final Secret-Keeper here. Kill it like you did the others.
Now, travel back to The Landing. Once you load, look into the sky, toward The Blooming. You’ll see a big green light in the sky. Follow it through The Refraction. Eventually, you’ll come across Savathun’s Chrysalis from Season of the Lost. You’ll hear The Witch Queen cackle and two objective markers will appear behind you. You’ll have a short timer here, but it’s plenty to do what needs to be done.
Head back the way you came, over by where Ikora’s ship crashed. Defeat the enemies here until a Subjugator spawns. Damage the Subjugator until it drops either a Light or Dark ball. Pick up the ball and head over to Savathun to dunk it in either the Light or Dark receptacle – whichever matches the kind of ball you have. Ideally, your Fireteam members should be taking on the other Subjugator – which spawns in the same area under the other Crux – and getting the other ball while you do this.
Once you and your squad have dunked both balls by Savathun, she’ll invite you to participate in an Exotic mission: “Dual Destiny.” This is a two player only mission, so if you have a third in your Fireteam, you’ll need to kick them out before you play.
One final tip if you did this in a Fireteam of three. Only the Fireteam members who dunked balls will be able to launch the “Dual Destiny” Exotic mission from their map – as in they won’t need to unlock the quest again. The third wheel will technically need to unlock it on their own. However, if you kick one of your teammates who did dunk a ball and launch the mission with the third wheel, they’ll also gain permanent access to the mission.
’Dual Destiny’ walkthrough
The Dual Destiny mission in Destiny 2: The Final Shape is a challenging two-player activity designed to reward Exotic class items-unique Hunter cloaks, Titan marks, or Warlock bonds with powerful, randomized perks. After unlocking the mission by defeating Secret-Keeper bosses in all three Pale Heart regions, you and a partner must coordinate closely, as each player is assigned either a Light or Darkness alignment at the start. These alignments dictate which plates you can activate, which enemies you can damage, and which symbols you can see during various encounters. Progress through a series of puzzle rooms and combat challenges by stepping on matching plates, defeating minibosses aligned to your element, and communicating to match and shoot the correct glyphs-many of which are borrowed from the Vow of the Disciple raid. Each successful completion of Dual Destiny rewards a new roll of the Exotic class item, making teamwork and clear communication essential for both victory and efficient farming.
“Dual Destiny” is a secret mission in the veins of “The Whisper” or “Zero Hour.” There’s a few unique elements before we start:
- You can only play it in a Fireteam of two – no more and no less.
- You also won’t be able to start the mission until you and your Fireteam member have opposing subclasses, i.e one Light and one Dark. Prismatic counts for both.
- Finally, before you get started, make sure to set aside about 45 minutes for your first time through. When you know what you’re doing, you can get that down to about 20 to 25 minutes.
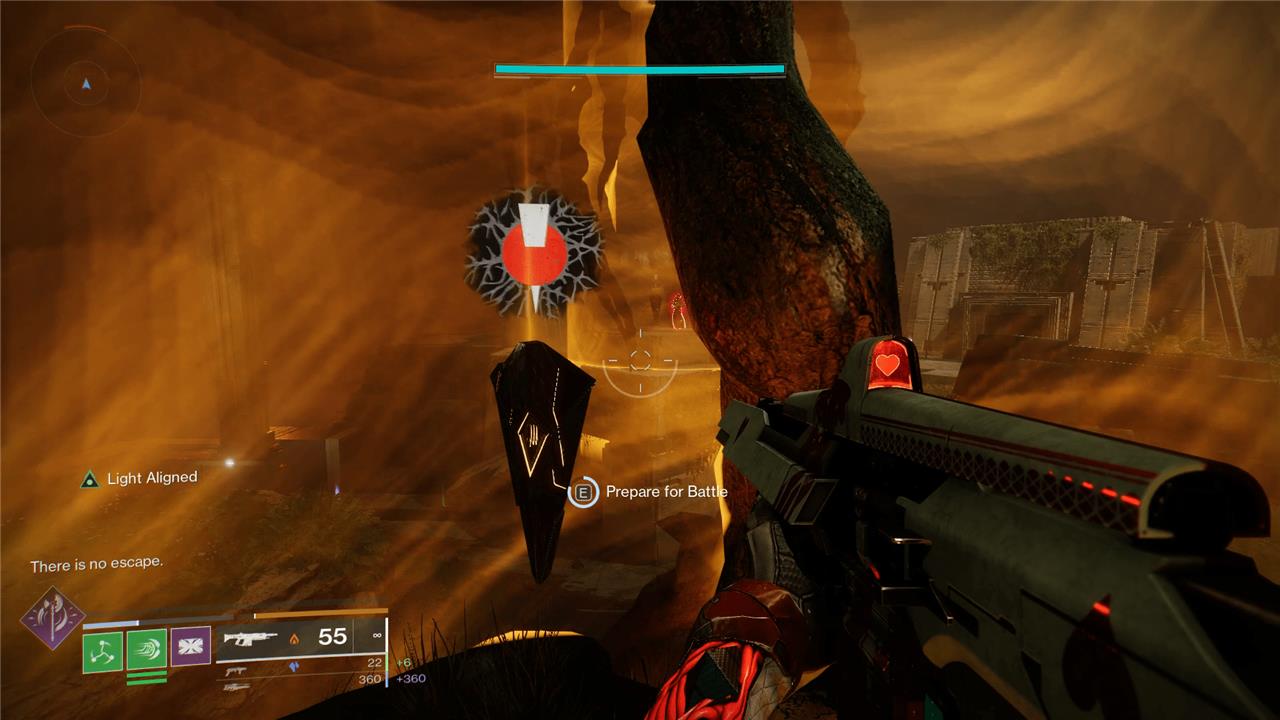
When you start the mission, you’ll be either Light Aligned or Dark Aligned, depending on your subclass. Your ally will have the opposite alignment.
You’ll see two plates ahead of you, one glowing with Light and the other with Darkness. Hop on the plate that fits your alignment and have your ally do the same. When you’re both situated, the barrier ahead will drop and you’ll see a six minute timer appear alongside a single objective: escape.
Heed the mission’s warning and make a run for it, through the caves, up the rocks, and out into The Pale Heart. Work through the enemies and the Cruxs until you find yourself in the crystal cave from the third campaign mission. You’ll find another set of glowing plates here, with Light on the right and Dark on the left. Split up, step on your plates, and continue on once the barrier drops.
Continue deeper into the cave to reach the first encounter.
Part 1: How to read and shoot symbols
Drop a Rally flag and run forward. You’ll see a Dark plate on the crystal building above you. The Light plate is below. Split up and head to your respective plates. You’ll add 10 minutes to your timer when you start.
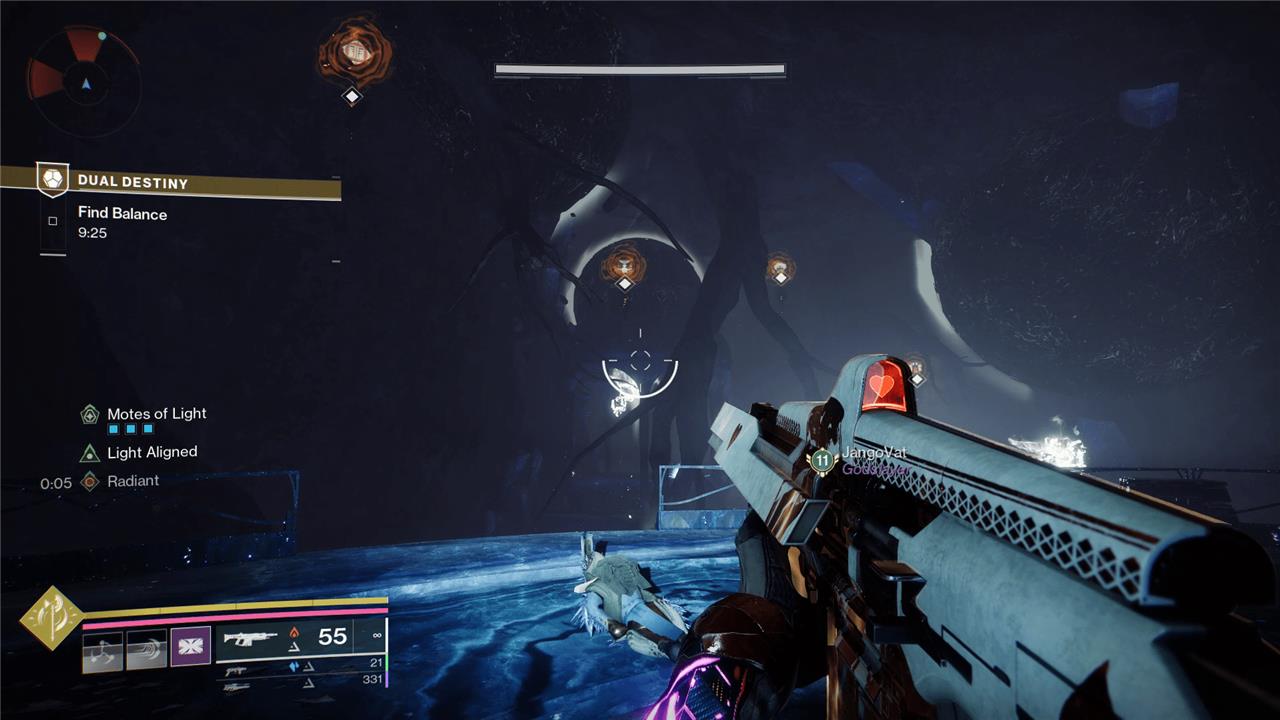
When you’re both in position, enemies will start to spawn. After a wave or so, you’ll each encounter an enemy that matches your alignment and glows with either Light or Dark. For the Dark player, it’ll be a Taken Knight, while the Light players will get a Taken Centurion. You’re only able to damage the enemy that matches your alignment, so there’s no use running up to help your friend.
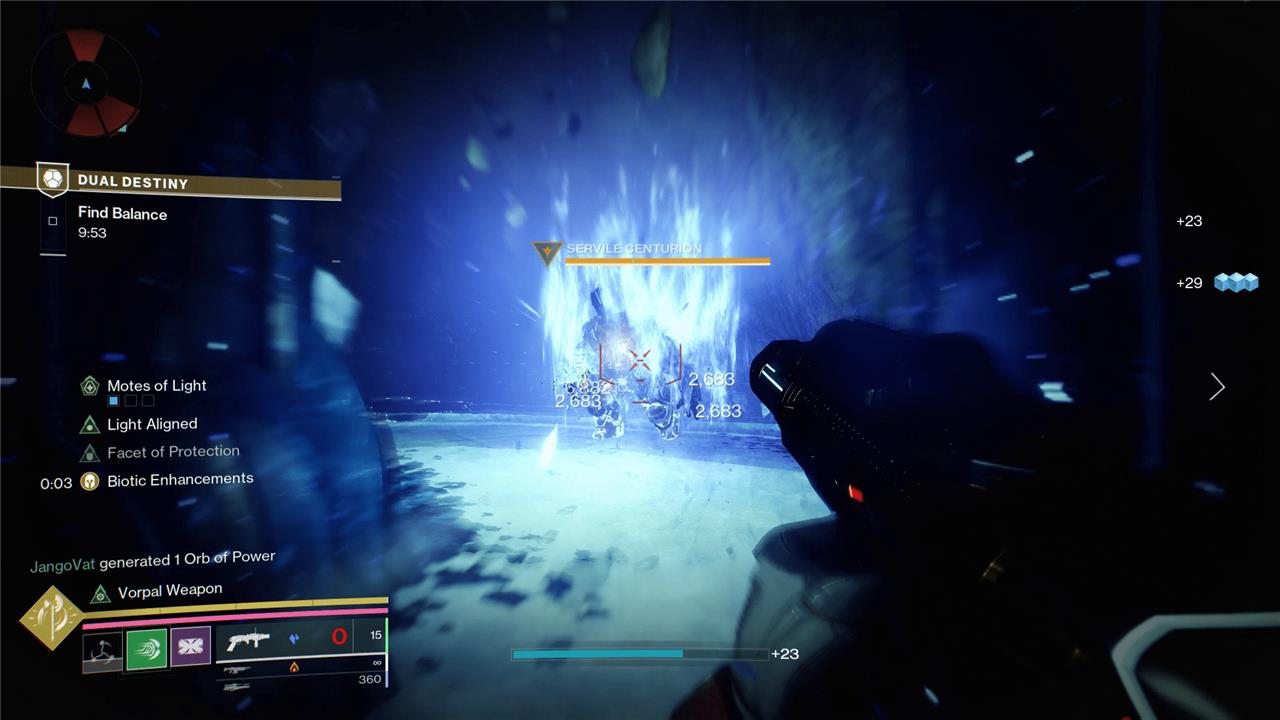
When you kill your alignment boss, it’ll drop a mote on the ground – also Light or Dark, depending on the enemy. This is one out of two motes each of you can collect in this phase. Holding this mote allows you to see things in the environment that weren’t there before. For the Light players, you’ll be able to see some symbols floating above a box. For the Dark player, you’ll be able to see a lot of floating crystals in the air that also have symbols on them.
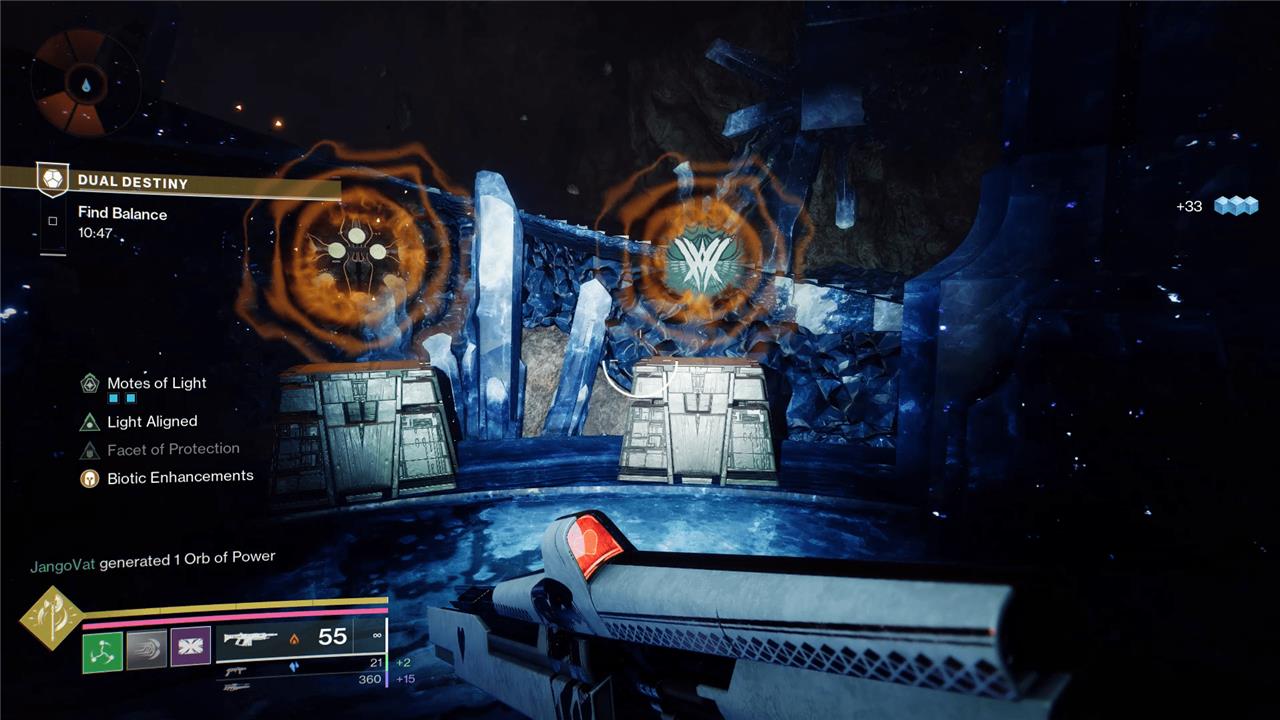
Don’t do anything just yet. First, max out your mote counter, which you can see on the left side of your screen. To do this, keep killing enemies until your aligned boss spawns again. Once it shows up, kill it, and grab its mote. As long as you’re both full on motes, it’s time to get out of here. As the Light player, read off the symbols you have on the chests, in order from left to right. As the Dark player, listen for the callouts and shoot the crystals that have the matching symbols your ally just called. You must do this in order from left to right or you’ll fail.
You’ll know you’re making progress here because you’ll get prompts on the left side of your screen. If you get a pair right, it’ll say “Paracausal energy gathers around you .” and if you finish the sequence you’ll get “Paracausal energy tears through you!“
When you succeed, you’ll get teleported to another arena. If you mess up, you’ll lose your motes and need to start again.
There are two more rooms in this encounter. The third room swaps your roles and adds a third mote. So now the Light player will be shooting crystals that the Dark will read symbols. The third room swaps the roles back to how they were in the first, the only difference is you’ll need to get a fourth mote each.
When the encounter ends, you’ll add six minutes to your timer and will need to do a bit of jumping. Follow the path – the lights lead the way, as usual – and watch out for the flying Grim enemies, as they’ll slowly shoot at you while you run. Keep going until you reach another set of plates. Here, you’ll need to climb the spire and occasionally swap sides with your ally as you go, stepping on plates along the way. Each time you successfully step on as a group, the room will change and reveal your next path, so keep an eye open for new places to jump.
When you reach the top, get ready for another encounter.
Part 2: How to disable the Crux
This encounter is a bit of a puzzle, but it is very quick if you know what you’re doing. Rally at the flag and take position on your plate. You’ll add 10 more minutes to your time.
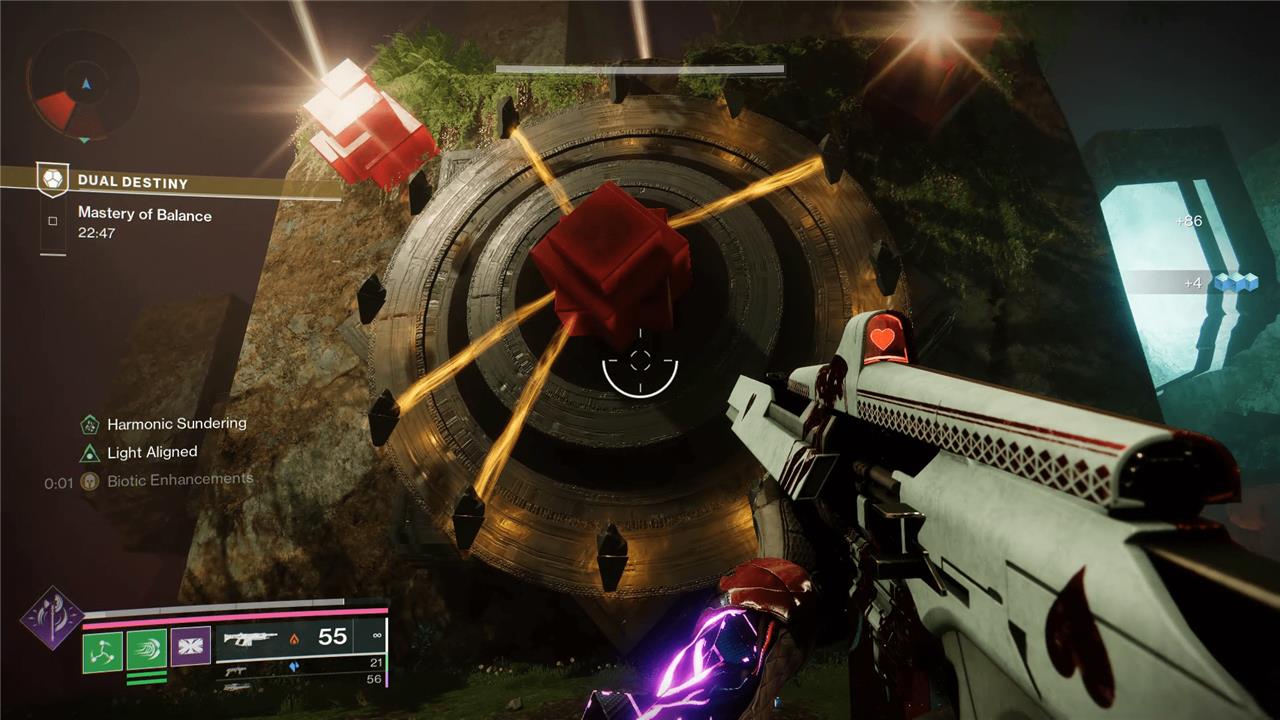
When the encounter begins, a ton of enemies will spawn in the arena. You’ll also see three Crux show up in the front of the room: one left, one right, and one middle. The middle Crux will have multiple smaller Crux floating in front of it, with some connected to each other via dark lines, and some floating alone. This is your key to getting out of here.
The trick is that you and your ally see different things. Some of the Crux that are connected with lines for you aren’t for them. And some that they see as blank, you’ll see with lines. However, three of the Crux will be the same for both of you, and those are the ones you want to shoot.
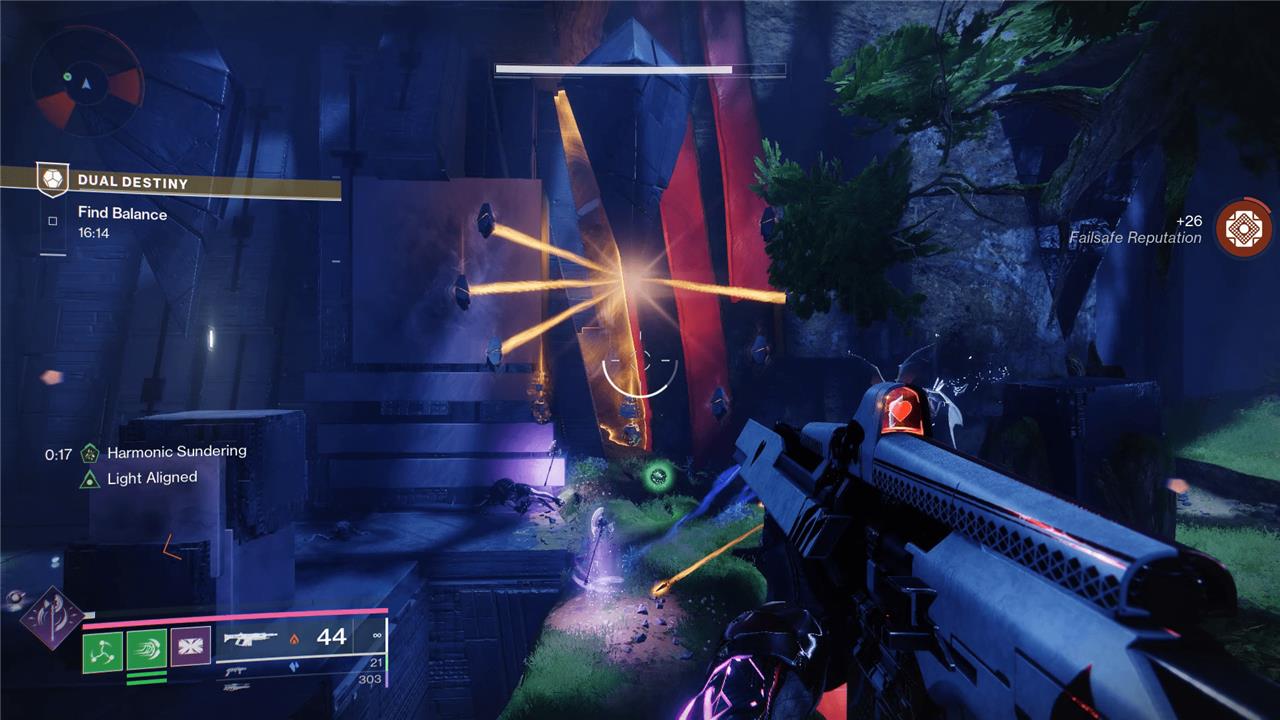
However, there is one more thing. In order to shoot these Crux, you need to have a special buff on you called Harmonic Sundering. To get Harmonic Sunder, you need to deal the killing blow on the Tormentor that spawns in the middle of the room after you kill a bunch of enemies.
Kill the Tormentor to get the buff. You now have 30 seconds to identify and shoot the correct Crux with your ally. Have your non-buffed friend read left to right what they see, saying “Dark” for ones with lines and “Light” for ones without. With the buff, go left to right and shoot a Crux if they call out the same thing you see.
Once you shoot the three matching Crux with Harmonic Sundering, you’ll destroy the big Crux on either side. Do this two more times to end the fight.
When the fight ends, you’ll get six more minutes and the door will open. Head through and follow the tree branch, killing enemies as you go. Eventually, you’ll come across another set of plates. Take your positions and fight the enemies that spawn. Here, you’ll need to split up again, with Light going right and left going Dark. Kill your enemies and then step on your plates when they appear. Do this with your ally and you’ll eventually regroup at the top. Defeat the final set of foes, including two Tormentors, to reach the boss room.
Part 3: Expector Selin and Yemiq boss fight, clock puzzle
The boss fight with the double Subjugators will ask you to do what you’ve done in the other two encounters here, but with a slight twist. You’ll add 10 more minutes for the final time here.
First, take down the initial health bar for the Stasis Subjugator, Selin. When it goes immune, spread out and you’ll each find a Taken Wizard that matches your alignment. Kill it to gain the ability to either see symbols above the boss’ immunity shield or see crystals scattered around the arena. If you can see the symbols on the boss, read what they are top to bottom. If you can see the crystals, shoot them in order based on what your ally reads to break the boss’ shield. Beat on Expector Selin until you reach the final third of its health bar.
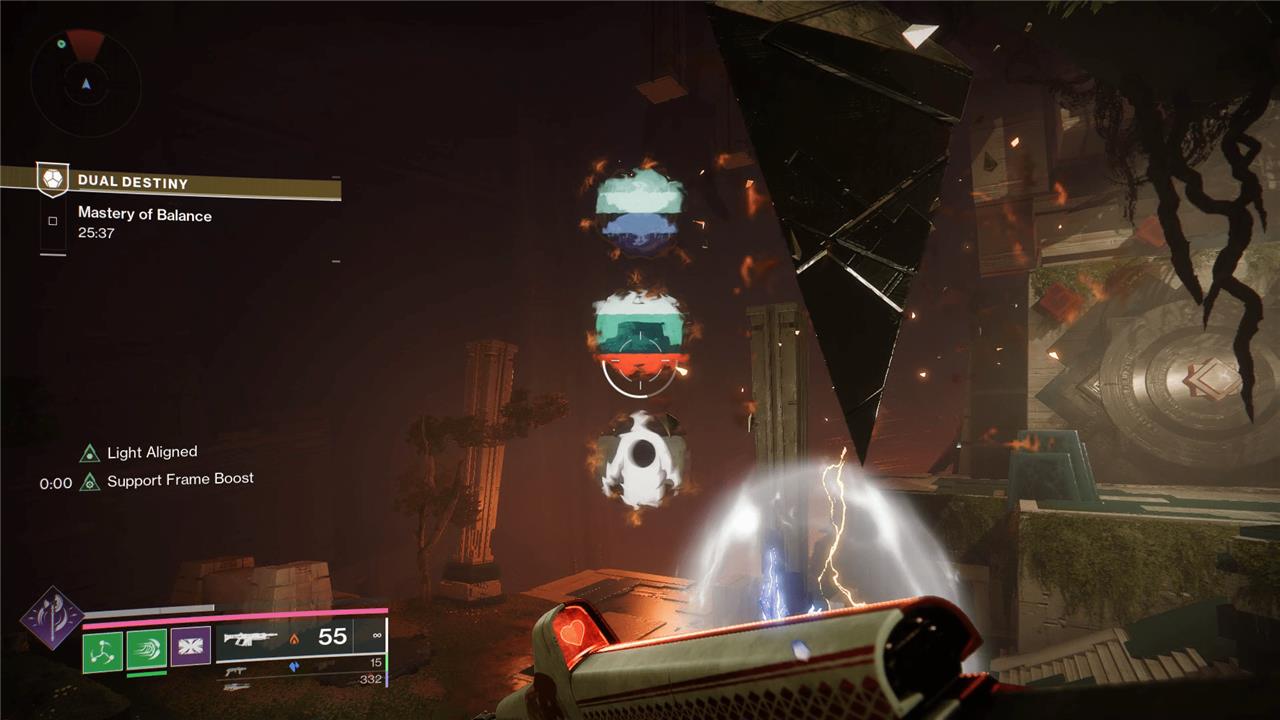
When Selin retreats again, you’ll need to battle Expector Yemix, the Strand Subjugator. Take its health bar down a third until it immunes itself. Find the Wizards again and kill them so you can break Yemiq’s shield and take its health bar down to a third.
Once you’ve caused both bosses to retreat, you’ll need to revisit the Crux mechanic again. Kill your aligned Wizard when it spawns and run over to the side of the arena, opposite to where your ally is. This time you’ll see four dark lines appear for about 10 seconds before they change. Your partner will also be able to see four dark lines, although three of them will be different from yours. The idea is the same as before, you need to shoot the one you both can see.
The difference here is that this Crux formation is shaped exactly like a clock, so try using callouts that range from noon through 11. Quickly shoot your matching Crux to free the bosses. Take them both down to stop the timer and almost complete the mission.
Should you choose Prepare for Battle or Choose Peace?
When you proceed into the next room, you’ll see the class items. Go stand on your plates to proceed. Instead of getting a reward, Savathun will trap and kill you. You’ll respawn back in the arena with two choices: Prepare for Battle or Choose Peace.
This section is impossible to do wrong, so I won’t spoil it for you. Make the same choice as your ally to continue forward. However, if it’s both of your first times doing the mission, I highly recommend picking battle.
When you finish this section, you’ll actually earn your reward, a randomly rolled Exotic class item that combines the powers of two Exotics into one.
How to farm more Exotic class items in Destiny 2
To farm more Exotic class items in Destiny 2 after completing the Dual Destiny mission for the first time, you have several efficient options. You can repeatedly run the Dual Destiny mission with a partner for a guaranteed drop each time, or you can focus on Overthrow activities in the Pale Heart, where higher-tier chests provide an increased chance of Exotic class item drops. Additionally, opening any chest in the Pale Heart-including Overthrow, Resonance, and resource chests-can yield Exotic class items, though the drop rates are lower and you must have completed the Dual Destiny mission at least once to unlock these farming opportunities.
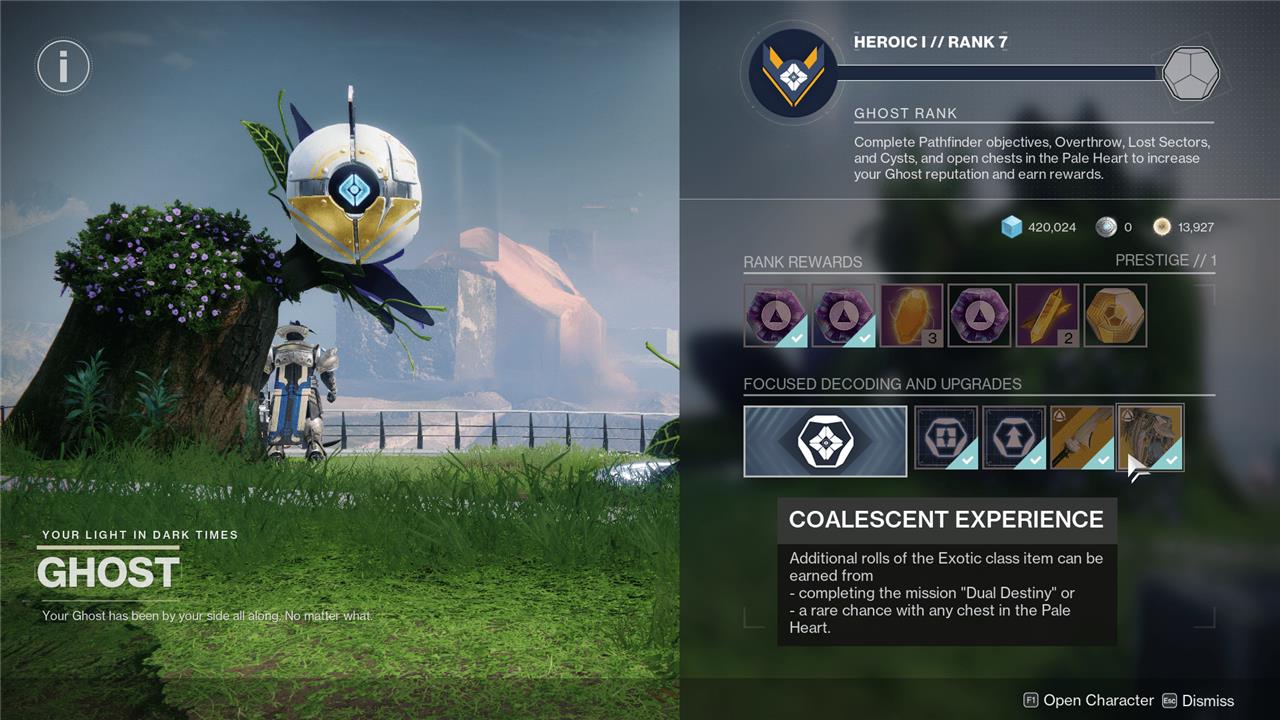
Once you do the “Dual Destiny” mission once, you technically never need to do it again, even if you want to get more Exotic class items. If you visit Ghost in The Lost City, he’ll show you that you can now earn additional Exotic class items byopening any chest in The Pale Heart.
The drop rate here is about one per hour, at least if you’re just exploring The Pale Heart naturally or running Overthrow for Motes of Light and Khvostov or Ergo Sum.
However, the fastest way to get more rolls of your class item is to run “Dual Destiny” with a friend again. Now that you know what to do, you can get through these runs very quickly.
What perks can roll on each Exotic class item in Destiny 2?
Exotic class items in Destiny 2: The Final Shape can roll with two randomly selected perks, each drawn from a pool of powerful Exotic armor effects traditionally unique to other gear. These perks are split into two columns and only function while using the Prismatic subclass. Each class-Hunter, Titan, and Warlock-has a distinct set of 16 possible perks (eight per column), inspired by existing Exotics. For example, Hunters can roll combinations like Spirit of Caliban (melee ignitions), Spirit of Gyrfalcon (volatile rounds after invisibility), or Spirit of the Star-Eater (overcharged Super from Orbs of Power). Titans can get perks such as Spirit of Hoarfrost (Stasis barricade), Spirit of Synthoceps (improved melee when surrounded), or Spirit of the Armamentarium (extra grenade charge). Warlocks have access to effects like Spirit of the Phoenix (self-rez on Super cast), Spirit of the Vesper (Arc shockwaves from Rift), or Spirit of the Verity (grenade damage bonus from weapon kills). This system allows unprecedented perk combinations, letting players craft unique builds that were previously impossible.
Each of the class items – Essentialism for Hunters, Stoicism for Titans, and Solipsism for Warlocks – can roll with a handful of Exotic traits from other armor pieces. You’ll get one trait in the left column and one in the right. Note that while these aren’t the full traits as you know them on their original Exotics, they’re typically the most iconic effects – Spirit of the Synthoceps makes you punch a lot harder, for example, but won’t increase your Super damage. It’s also worth noting that these Exotics only work if you’re using Prismatic .
There are a ton of desirable combinations for every class, and some can make-or-break your Prismatic build. Below, we’ve listed out the full perk list for each Exotic, which should help you plan out exactly what you’re going for.
Essentialism Exotic Hunter Cloak
The Essentialism Exotic Hunter Cloak is a powerful new class item introduced in Destiny 2: The Final Shape, obtainable through the challenging Dual Destiny mission. To unlock this cloak, players must first defeat the final boss in each Overthrow event across the main Pale Heart locations, then hunt down the Secret-Keeper of the Witch Queen in each region. After these steps, a green beam will appear in The Refraction, guiding players to a buff that enables the start of the Dual Destiny mission-a two-player activity requiring teamwork and coordination. Upon completion, the Essentialism cloak drops with two random Exotic perks, drawn from a pool that includes unique cross-class abilities like Spirit of the Assassin and Spirit of the Star-Eater, but these perks only activate when using the Prismatic subclass. Players can farm the mission for better perk rolls or occasionally find the cloak as a rare drop from Pale Heart chests, making it a highly sought-after item for Hunters seeking to maximize their build diversity.
First column perk and description |
Second column perk and description |
|---|---|
| Spirit of the Assassin: Finishers and powered melee final blows grant invisibility. | Spirit of the Star-Eater: While your Super energy is full, picking up an Orb of Power overcharges your Super, granting it bonus damage. |
| Spirit of the Inmost Light: Using an ability empowers the other two abilities granting them improved energy regeneration. | Spirit of the Synthoceps: Improved melee damage when you’re surrounded. |
| Spirit of the Ophidian: Weapons ready very quickly. | Spirit of Verity: Weapon final blows with a damage type matching your grenade grant a stacking grenade damage bonus. |
| Spirit of the Dragon: Using your class ability reloads all weapons and increases weapon handling speeds for a brief time. | Spirit of the Cyrtarachne: Gain Woven Mail when you use your grenade. |
| Spirit of Galanor: Hits and final blows with your Super will return Super energy after it ends. | Spirit of Gyrfalcon: Your Void weapons gain Volatile Rounds after you emerge from being invisible. |
| Spirit of Foetracer: Damaging a powerful combatant or Guardian with an ability grants you a temporary damage bonus for weapons matching that abilitiy’s element. | Spirit of the Liar: Dealing damage with a powered melee or being hit by a melee attack will allow you to follow up with an extremely powerful melee counterpunch. |
| Spirit of Caliban: Powered melee final blows trigger an ignition. | Spirit of the Wormhusk: Dodging gives a small health and shield bump. |
| Spirit of Renewal: Allies inside the Duskfield take reduced damage, and targets inside the area deal reduced damage. | Spirit of the Coyote: Gain an additional class ability charge. |
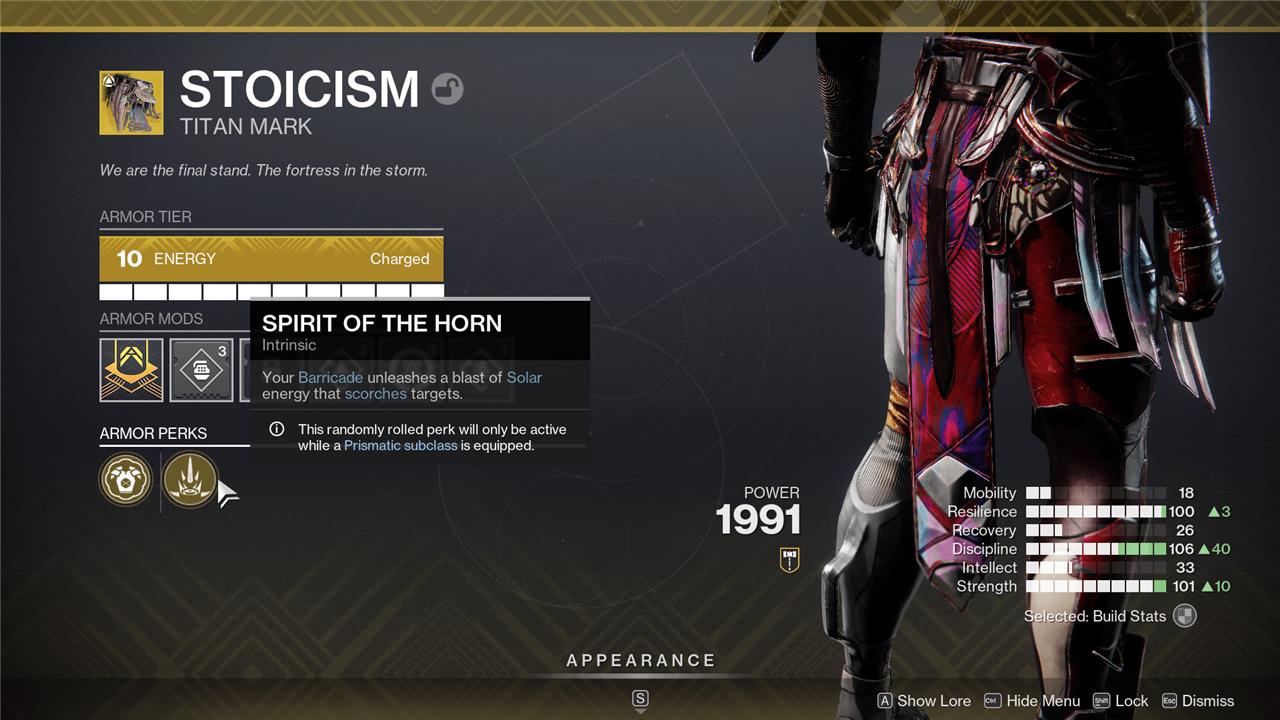
Stoicism Exotic Titan Mark
The Stoicism Exotic Mark is the new Exotic class item specifically for Titans in Destiny 2: The Final Shape, obtainable through the Dual Destiny mission. This item stands out because it can roll with two random Exotic perks, allowing Titans to combine powerful effects that were previously exclusive to other armor pieces, opening up unique build possibilities. To earn Stoicism, players must first unlock and complete the challenging Dual Destiny mission, which requires two players and emphasizes teamwork and communication. Once acquired, Stoicism can be farmed for better perk combinations by replaying the mission, looting chests in the Pale Heart, or checking Xur’s inventory after the initial unlock. While not strictly necessary for every Titan build, Stoicism is highly sought after for those aiming to maximize the potential of Prismatic subclass synergies and experiment with advanced loadouts.
First column perk and description |
Second column perk and description |
|---|---|
| Spirit of the Assassin: Finishers and powered melee final blows grant invisibility. | Spirit of the Star-Eater: While your Super energy is full, picking up an Orb of Power overcharges your Super, granting it bonus damage. |
| Spirit of the Inmost Light: Using an ability empowers the other two abilities granting them improved energy regeneration. | Spirit of the Synthoceps: Improved melee damage when you’re surrounded. |
| Spirit of the Ophidian: Weapons ready very quickly. | Spirit of Verity: Weapon final blows with a damage type matching your grenade grant a stacking grenade damage bonus. |
| Spirit of Severance: Powered melee or finisher final blows unleash a damaging explosion. | Spirit of Contact: Damaging a target with a powered melee causes all nearby enemies to suffer lightning strikes and become jolted. |
| Spirit of Hoarfrost: Your Barricade becomes a wall of Stasis crystals that slow nearby targets when created. | Spirit of Scars: Final blows with weapons that have a damage type matching your Super’s element create a burst of healing around you that grants allies restoration. |
| Spirit of the Eternal Warrior: Gain a damage bonus for weapons matching your Super’s element when your Super ends. | Spirit of the Horn: Your Barricade unleashes a blast of Solar energy that scorches targets. |
| Spirit of the Abeyant: Improves Drengr’s Lash. Drengr’s Lash projectiles track targets more aggressively and travel further. | Spirit of Alpha Lupi: Generates a healing pulse when Barricade is activated. |
| Spirit of the Bear: Move faster while guarding with the Unbreakable shield. Damage blocked with Unbreakable is converted to Super energy. | Spirit of the Armamentarium: Gain an additional grenade charge. |
Solipsism Exotic Warlock Bond
Solipsism is the Warlock-exclusive Exotic class item introduced in Destiny 2: The Final Shape, obtainable by completing the challenging Dual Destiny mission-a two-player quest unlocked after finishing The Final Shape campaign and specific activities in the Pale Heart. Unlike traditional Exotic armor, Solipsism stands out for its unique double-perk system: it rolls with two randomized Exotic perks, each drawn from curated pools that include both Warlock and cross-class traits. This dual-perk setup allows Warlocks to combine powerful effects previously limited to other Exotics, enabling unprecedented build variety and synergy-especially when using the Prismatic subclass, as these perks only activate with it equipped. With thousands of potential combinations, chasing the perfect Solipsism roll can dramatically enhance both PvE and PvP performance, making it a top priority for Warlocks seeking to maximize their class’s potential.
First column perk and description |
Second column perk and description |
|---|---|
| Spirit of the Assassin: Finishers and powered melee final blows grant invisibility. | Spirit of the Star-Eater: While your Super energy is full, picking up an Orb of Power overcharges your Super, granting it bonus damage. |
| Spirit of the Inmost Light: Using an ability empowers the other two abilities granting them improved energy regeneration. | Spirit of the Synthoceps: Improved melee damage when you’re surrounded. |
| Spirit of the Ophidian: Weapons ready very quickly. | Spirit of Verity: Weapon final blows with a damage type matching your grenade grant a stacking grenade damage bonus. |
| Spirit of the Stag: Your Rift provides damage reduction to allied Guardians standing in it. | Spirit of Vesper: Rifts periodically release Arc shockwaves. |
| Spirit of the Filaments: Casting an empowering rift will grant you Devour. | Spirit of Harmony: Final blows with weapons that have a damage type matching your Super’s element grant you Super energy. |
| Spirit of the Necrotic: Damaging combatants with your melee poisons them. Defeating a poisoned enemy spreads the condition. | Spirit of Starfire: Grenades recharge from empowered weapon damage, with empowered weapon final blows granting more energy. |
| Spirit of Smiomancy: Your grenades recharge quicker on hits. The seeker spawned from Coldsnap grenades travels further. | Spirit of the Swarm: Destroying a Tangle spawns Threadlings. |
| Spirit of Apotheosis: Temporarily gain greatly increased melee regen after your Super ends. | Spirit of the Claw: Gain an additional melee charge. |
How can I unlock the Dual Destiny exotic quest in Destiny 2 final shape
To unlock the Dual Destiny exotic quest in Destiny 2: The Final Shape, follow these steps:
-
Complete the Overthrow public event in all three main zones of the Pale Heart: The Landing, The Blooming, and The Impasse. You must finish all waves (usually up to wave 4) and defeat the final boss in each area.
-
After defeating the final boss in each zone, a message will appear stating that a “Secret Keeper of Savathun has appeared.” You then have a limited time (before the next Overthrow starts) to find and defeat this Lucent Hive boss in the area. Repeat this process in all three zones.
-
Once all three Secret Keepers are defeated, head to The Refraction (a connecting area between The Blooming and The Landing). Enter the crystallized room to receive the Savathun’s Envoy buff.
-
Two orbs, one Light and one Dark, will spawn nearby. Clear out enemies, collect the orbs, and return them to the crystallized room as directed by the game.
-
Completing these steps will unlock access to the Dual Destiny exotic mission, where you can earn the new exotic class items.
Note: You must have completed the “Alone in the Dark” and “Lost in the Light” quests from Micah-10 for the Lucent Hive bosses to appear after Overthrow completions. The mission requires two players to complete.
What secret objectives are needed to unlock Dual Destiny in Final Shape
To unlock the Dual Destiny mission in Destiny 2: The Final Shape, you must complete several secret objectives in a specific sequence:
-
Complete the final tier (Tier 4 boss) of the Overthrow activity in each of the three Pale Heart zones: The Landing, The Blooming, and The Impasse.
-
After defeating the final boss in each Overthrow, a message will appear stating “A Secret-Keeper of the Witch Queen is nearby.” Locate and defeat this Secret-Keeper (a Hive Wizard) in the same zone before the next Overthrow event starts.
-
Repeat this process for all three zones, defeating a Secret-Keeper in each one without leaving the Pale Heart or going to orbit.
-
Once all three Secret-Keepers are defeated, a green pillar of light will appear in The Blooming, leading you to The Refraction area.
-
In The Refraction, kill Dread enemies until a Subjugator appears; damage it until it retreats and drops a Light or Darkness orb. Repeat for the second Subjugator to get both orbs.
-
Dunk both orbs at the marked plates to unlock the Dual Destiny mission for your character.
These steps must be completed in one session, and the mission requires two players to enter. There is no quest marker, making these objectives intentionally secret and challenging to discover without guidance.