Dwarf Fortress is less a game and more a living ecosystem of chaos, creativity, and catastrophe. Before you dig your first tunnel, you’ll want to know how to keep your dwarves sane, your fortress dry, and your ambitions from collapsing under their own weight.
Learn to love the phrase “losing is fun”
Failure in Dwarf Fortress isn’t just expected-it’s part of the fun. Every fortress will collapse sooner or later, often in spectacular and hilarious ways, whether from goblin sieges, flooding tunnels, or forgotten beasts. Each failure teaches you something new about how the game’s simulation works and how dwarves react to chaos. Treat every disaster as a story worth telling and every loss as progress toward mastering the madness.
There is no way to win Dwarf Fortress – no end screen, no real goal. There’s the ostensible aim of becoming a mountainhome – a capital – but the game doesn’t really end there. And that means every fortress you build will eventually fail. Maybe it’ll fall to an enemy attack or your own managerial mistakes or maybe you’ll just get bored with it.
There’s a phrase that’s been adopted by the Dwarf Fortress community: “Losing is fun.” The new Steam version includes a tutorial and healthy help menu, but your first several fortresses are still going to fail. Because there are lots of ways to fail.
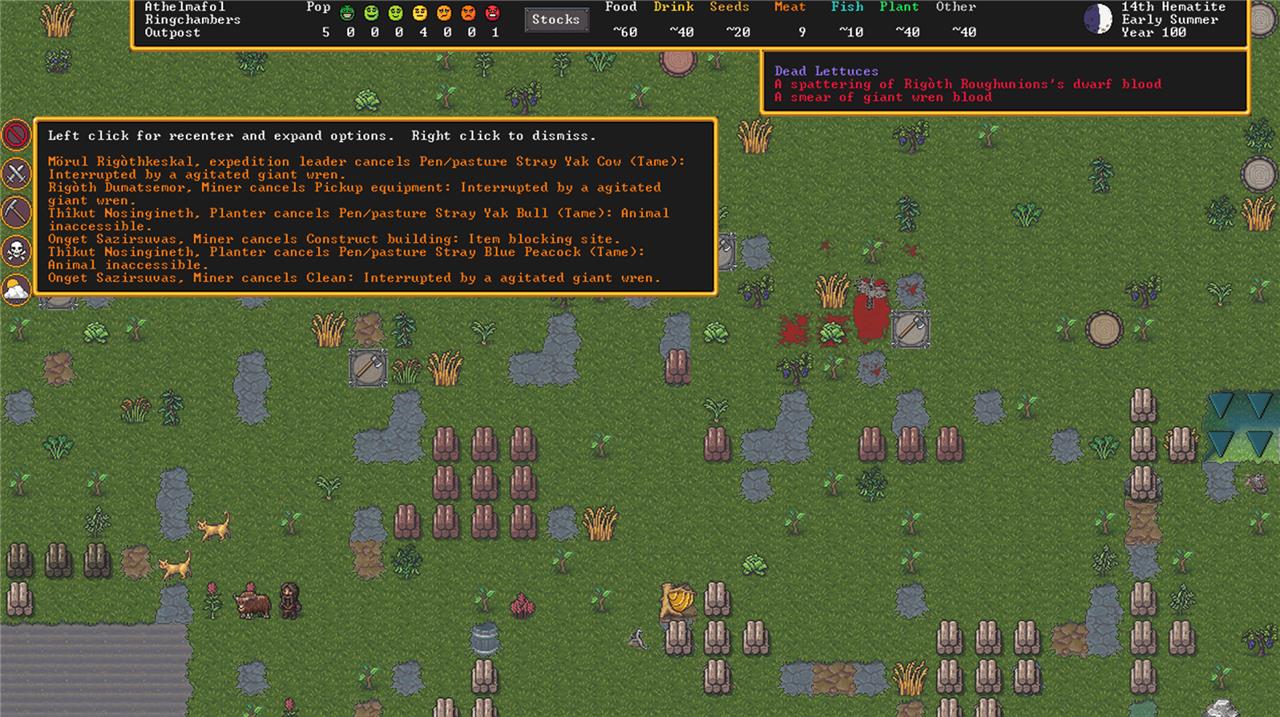
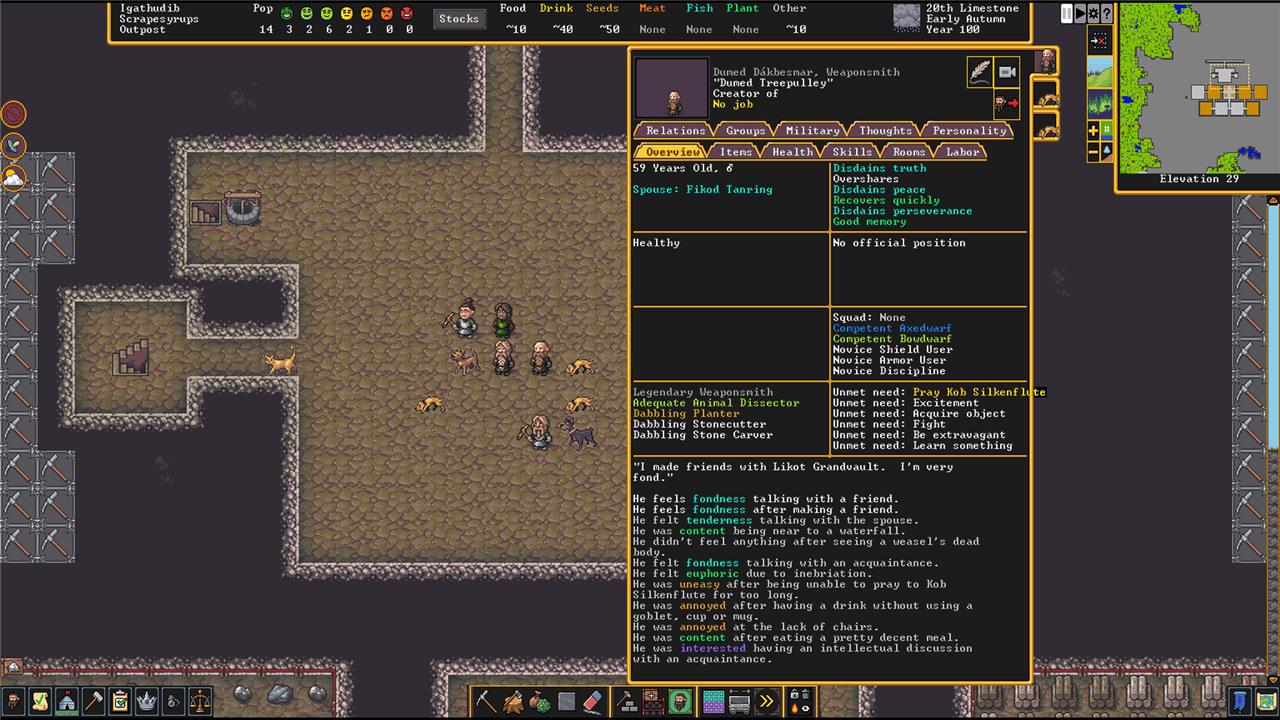
We’ve described Dwarf Fortress as barely contained chaos. That’s where a lot of that “losing is fun” comes from. In the screenshot above, the fortress failed because, every time I chopped down a tree, a flock of giant wrens would murder whoever did the chopping – along with any pets they could reach. Everyone was dead within minutes.
Discovering (or creating) new and exciting ways to fail is the fun of Dwarf Fortress. Embrace that.
Location, location, location
Your choice of settlement site shapes every part of your fortress’s fate. The terrain, nearby resources, and presence of water or minerals determine how your dwarves survive and thrive. A mountain slope offers strong defenses but limited farmland, while a lush valley might invite more threats. Check for soil depth, nearby trade routes, and potential hazards before striking the earth – a good start can mean the difference between prosperity and a slow collapse.
Once you’ve created a world, you’ll need to pick an embark location. This is where you’ll build your new fortress home. We go into more detail in our guide to building your first fortress, but here are the important things to look for: no aquifers, at least some trees, and at least some soil.
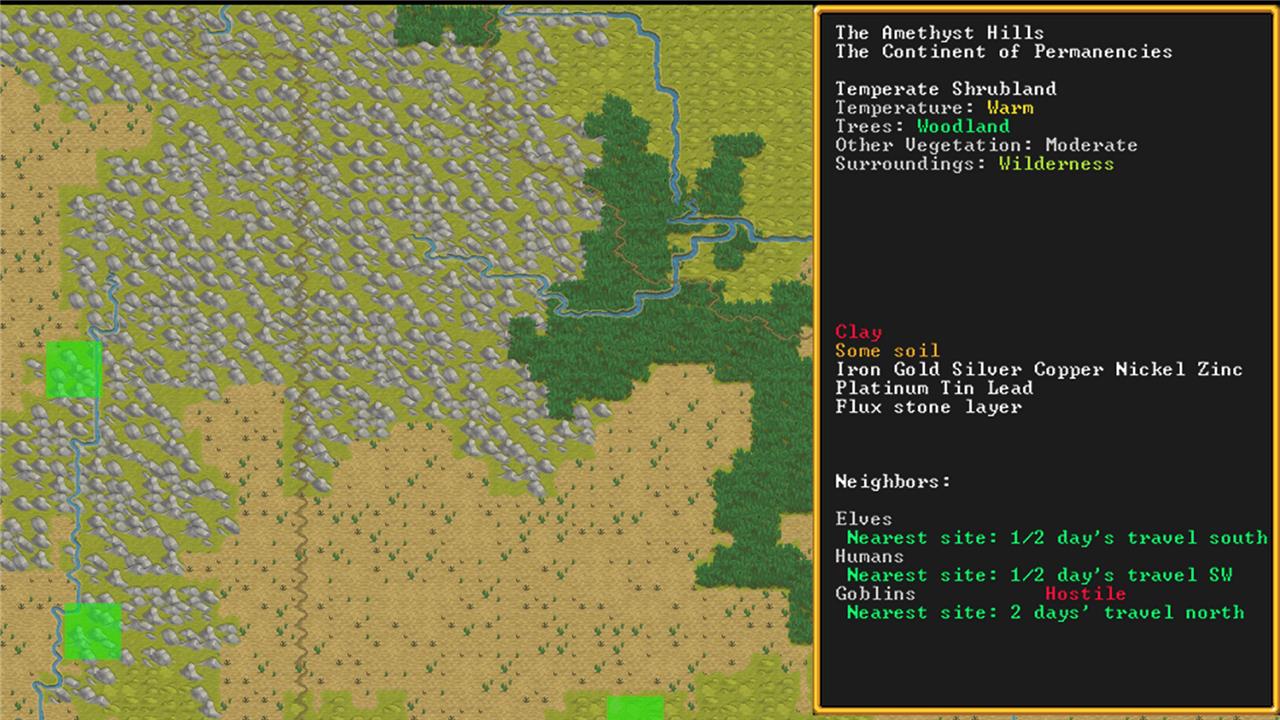
Aquifers are underground water deposits that will slowly flood your fortress and are a pain to deal with. Trees supply lumber for building furniture and constructing workshops. Soil lets you plant crops for farming.
Don’t dig too much at once
It’s tempting to carve out a sprawling underground base right from the start, but doing too much too soon will only overwhelm your dwarves and drain resources. Focus on a few key areas-food production, workshops, and sleeping quarters-before expanding further. Gradual construction keeps your workforce manageable and lets you respond to hazards like flooding or invasions more easily. A slow pace ensures stability and prevents your fortress from collapsing under its own ambitions.
When it’s finally time to start digging your fortress with the Digging Orders menu (m), don’t stretch your miner(s) too thin. It’s easy to get carried away and start drawing your entire base right away. That’s counterproductive, though, since it’s going to take a long time for your miners to work, and they’ll leave chunks unfinished if you give them too many options for where to dig next. Instead, work in small sections at a time with a purpose, and wait for the miner(s) to finish before moving on.
And remember that it’s faster to dig through dirt and loam than it is to dig through rock.
Don’t go overboard on hallways
Hallways might seem harmless, but they can waste space and time for your dwarves if you build them too wide or long. Keep your corridors compact and practical, letting dwarves move efficiently between workshops, stockpiles, and living areas. Long tunnels not only slow productivity but also invite more cleaning and patrolling. Plan layouts with function in mind-short paths and smart intersections will keep your fortress running smoothly and your workers from wandering too far.
You can make your rooms any size you want and your hallways can be as wide as you like, but digging takes time, so it’s pointless to make things bigger than they really need to be.
Hallways only need to be one block wide. Your dwarves can pass over or through any structures or furniture, and they don’t run into each other, so you don’t have to worry much about traffic jams.
Assign Nobles and Administrators to work for you
Nobles and administrators keep your fortress running smoothly by managing tasks beyond manual labor. Appoint a manager to organize work orders, a bookkeeper to maintain accurate records, and a broker to handle trade deals. Some nobles have demands or personal quarters, so plan space for their comfort early on. Balancing their needs with practical assignments ensures your dwarves’ productivity stays high and prevents unnecessary grumbling.
There’s a lot to keep track of while you’re trying to keep your fortress functioning. Luckily, you can assign dwarves to administration positions and make your job easier. You’ll do this in the Nobles and Administrators menu (n).
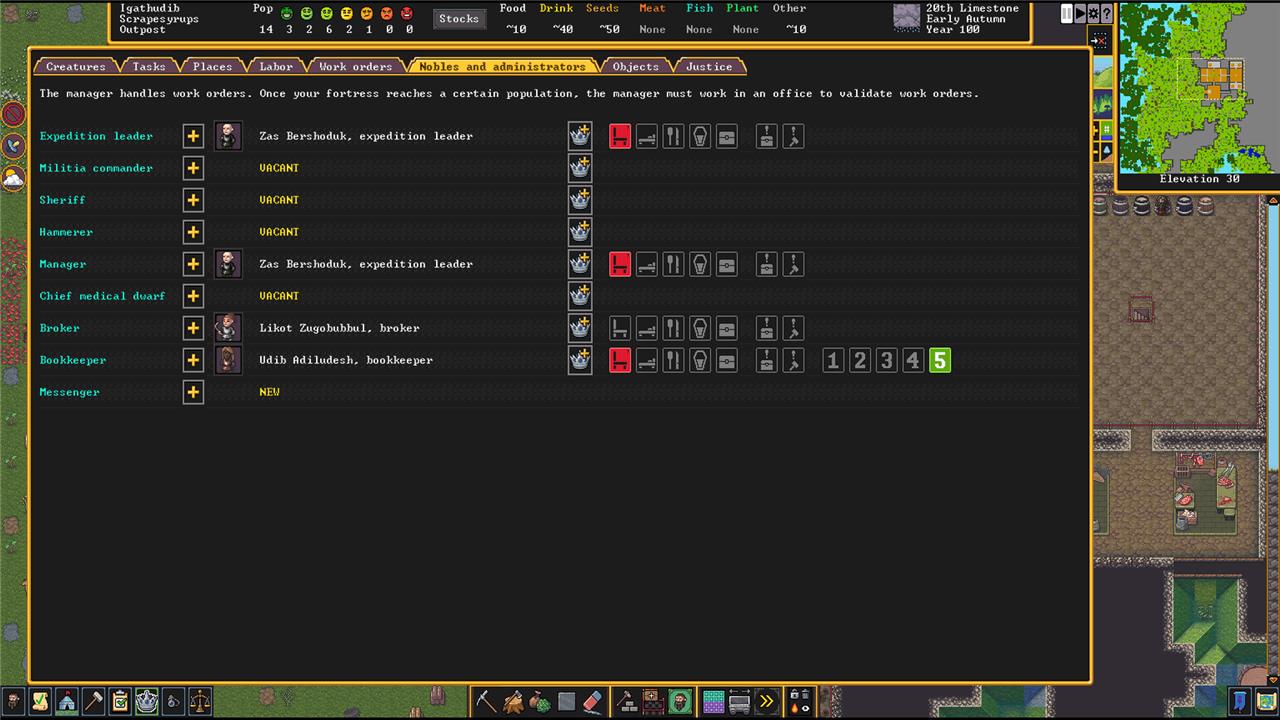
Here, you can assign jobs like Manager to handle work orders and Bookkeeper to keep track of your resources. Eventually, the Manager and the Bookkeeper will need offices – a room with a door and a chair – but you don’t have to worry about it right away.
Use warnings to decide what to do next
Warnings in Dwarf Fortress are your best source of feedback about what’s going wrong and why. Each alert hints at a problem that needs attention-whether it’s thirst spreading through your colony, animals running loose, or enemies sighted at the gate. Don’t ignore them; instead, pause and assess what triggered the message. A red warning often signals immediate danger, while yellow or blue ones might point to logistical or management issues. Learning to interpret these alerts helps you decide whether to assign new tasks, adjust stockpiles, or pull the military into action before trouble spirals out of control.
Periodically, alerts and warnings will pop up in the upper left corner. You’ll get news about the weather and births here, but you’ll also get reports about jobs that can’t be finished for whatever reason.
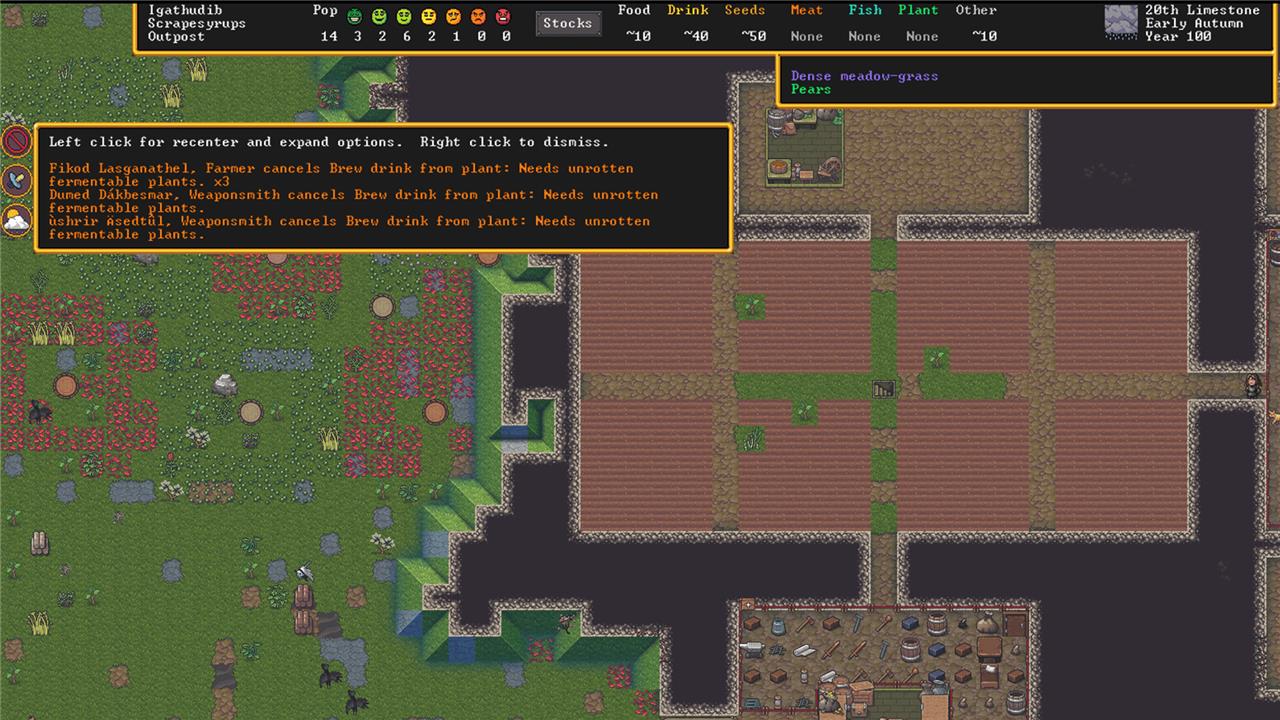
You’ll get warnings if you don’t have materials. See the screenshot above, for example – the fortress has run out of plants to turn into alcohol. You’ll also get warnings about not having barrels to store alcohol in or warnings about running out of building materials.
Use these warnings to plan your next move. If you’re out of plants, farm or gather some more. If you’re out of materials, expand your mines or chop down more trees. If you need something specific like barrels or blocks, create a new work order for them.
Keep your dwarves (relatively) happy
Your dwarves need food, drink, and a bit of comfort to stay content, so balance practical needs with morale. Keep their alcohol supply steady-sober dwarves slow down and grumble. Build pleasant meeting halls, carve out personal bedrooms, and decorate spaces to lift their mood. Happy dwarves work harder, stay loyal, and are less likely to spiral into tantrums that can throw your fortress into chaos.
Generally speaking, your first handful of fortresses probably won’t last long enough for your dwarves’ happiness to become a real issue. That said, there are some pretty simple things that’ll keep them happy longer.
You can check on each dwarf by clicking on them and looking at their Thoughts. Look for negative emotions to see what you help with. (You can also get there from the Citizens menu with u.)
Some common unhappiness causes and their solutions might be:
- Build some beds at a Carpenter workshop. Place them in a room with four walls and door, and make that room a dormitory or bedroom zone.
- Place some chairs and tables (built at either a Carpenter or Stoneworker workshop) in a Meeting Area zone so they have somewhere to sit. Also, make sure your Meeting Area is inside or underground – dwarves don’t like getting caught in the rain.
- Collect and farm different plants – dwarves get bored drinking and eating the same thing every day.
Remember that losing is fun
Failure isn’t something to avoid in Dwarf Fortress-it’s part of the entertainment. Every collapsed fortress, flooded mine, or goblin invasion adds to the story you’re creating. The game is designed so that your mistakes often lead to hilarious or unexpected situations, teaching you new strategies for the next attempt. Treat each loss as a chance to watch dwarven chaos unfold and learn something new from it.
Best embark sites for first fortress
For your first Dwarf Fortress fortress, especially on Steam, prioritize safe, forgiving embark sites to focus on learning basics without constant threats. Ideal spots emphasize resources and low danger over challenge.
Core Criteria
Select serene, calm, or mirthful surroundings to minimize wildlife attacks and sieges.
Aim for warm/temperate climate with trees (woodland/forest), soil layers (3+ for farms/storage), flowing water (brook/stream, not stagnant), and no aquifer.
Ensure proximity to your dwarven civilization (check region map for multiple sites on the same landmass) to guarantee immigrants.
Top Biome Picks
-
Broadleaf Forest or Woodland: Abundant wood, thick vegetation for food, often with streams; add shallow metals if possible.
-
Swamp or Marsh (freshwater): Soil-rich for easy digging/farming, water access, but skip saltwater.
-
Shrubland edge near hills: Trees, flux stone potential, defensible elevation without extremes.
Search Tips
Use the embark screen’s filters: Set flux to “Yes,” metals “2+ shallow/any deep,” savagery “low,” evil “no,” and enemies “off.”
Zoom local view for soil depth and water; avoid hamlets/towers (early raids) or oceans/islands (isolation).
Example: Temperate broadleaf forest with brook, soil, no aquifer-perfect for quick farms and power from water wheels.
How to prepare embark profile for beginners
Preparing an embark profile for beginners in Dwarf Fortress (Steam edition) involves customizing your starting dwarves, skills, items, and animals via the “Prepare Carefully” screen to ensure early survival. Save these as reusable profiles for quick setups in future games.
Access Prepare Carefully
After selecting a safe embark site (like temperate broadleaf forest with soil and brook), hit “Prepare Carefully” instead of defaulting to Play Now.
Spend your ~1,500 embark points wisely-prioritize skills/items over fancy gear, leaving ~200 points unspent if needed.
Customize dwarf roles, then save the profile (hit ‘s’) to data/init/embark_profiles.txt for reuse.
Essential Skills (7 Dwarves)
Assign these proficiencies (aim for Proficient+ where points allow):
-
2x Miner (core for digging).
-
1x Carpenter/Grower (beds, farms, barrels).
-
1x Mason/Engraver (workshops, furniture).
-
1x Mechanic (traps, doors later).
-
1x Manager/Record Keeper (admin roles).
-
1x Brewer/Cook/Herbalist (booze, food).
Key Items and Animals
-
Food/Drink: 20+ bags plump helmets (for brewing/farming), seeds x5 types; skip meat initially.
-
Tools: 2 anvils, extra picks/axes, 10 sand bags (glass later).