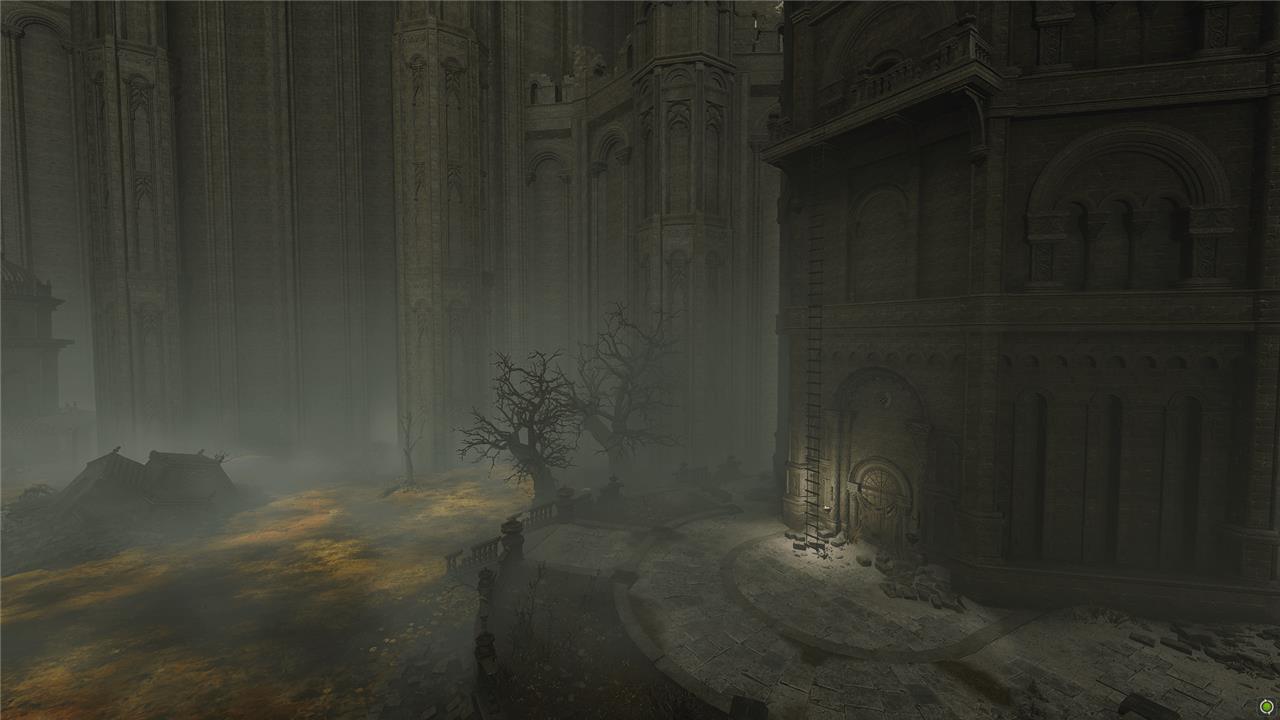
Step into the eerie and sprawling Belurat, Tower Settlement-the first Legacy Dungeon of Elden Ring’s Shadow of the Erdtree DLC. Nestled in the northwest corner of Gravesite Plain, this forsaken tower once housed practitioners of ancient hexing arts and now teems with hostile spirits and deadly creatures transformed by a mysterious “fly sickness.” Prepare to navigate treacherous corridors, uncover hidden treasures, and face formidable bosses as you unravel the dark secrets lurking within Belurat’s haunted walls.
Our Elden Ring guide will walk you through the Belurat, Tower Settlement legacy dungeon in Shadow of the Erdtree and point you toward every site of grace, boss fight, and important item.
Belurat, Tower Settlement location
Belurat, Tower Settlement is the first Legacy Dungeon in the Elden Ring: Shadow of the Erdtree DLC, located in the northwest corner of the Gravesite Plain region within the Shadow Realm. It serves as an early major dungeon where players encounter hostile spirits and powerful enemies, including giant scorpions and Revered Spirits, in a sprawling, multi-level tower. The settlement is notable for its dark history as a place of ancient hexing arts and a site where those afflicted by the “fly sickness” succumbed to death or transformation into hostile creatures. Players can access it soon after starting the DLC by heading northeast from the Gravesite Plain Site of Grace, passing through the Main Gate Cross Site of Grace, and ascending the tower’s stairs to reach the Belurat Tower Settlement Site of Grace, which acts as a checkpoint and summoning pool within the dungeon.
Belurat is located in the northwest of Shadow of the Erdtree’s starting region, the Gravesite Plain. This is your first stop on the quest to follow Miquella given to you by Needle Knight Leda.
Inside Belurat, you’ll meet one NPC, Hornsent Grandam, and you’ll face tough fights against Fire Knight Queelign, an Ulcerated Tree Spirit, and the Divine Beast Dancing Lion. After beating the Dancing Lion, you’ll find a note pointing you to the next destination on your journey.
Entering Belurat, Tower Settlement
Belurat, Tower Settlement is the first major legacy dungeon in Elden Ring’s Shadow of the Erdtree DLC, located in the northwest corner of the Gravesite Plain region. Upon arrival, players find the Main Gate Cross Site of Grace, where NPCs Moore and Sir Ansbach provide lore and items. The settlement is a sprawling, maze-like tower filled with hostile creatures, including giant scorpions and corrupted spirits, remnants of ancient hexing arts and a mysterious “fly sickness.” Navigating its interconnected tunnels and staircases requires careful exploration, as the dungeon contains numerous ambushes, locked doors, and valuable treasures such as Scadutree Fragments and Revered Spirit Ashes. Players must prepare to face challenging enemies and puzzles as they ascend toward the tower’s summit and its formidable boss.
From where you first emerge into the Shadow Realm, follow the road north through the Scorched Ruins (and past the first Furnace Golem). From the Three-Path Cross site of Grace where you meet Redmane Freyja and Hornsent, follow the road west and through the gap in the mountains to reach the Main Gate Cross Site of Grace.
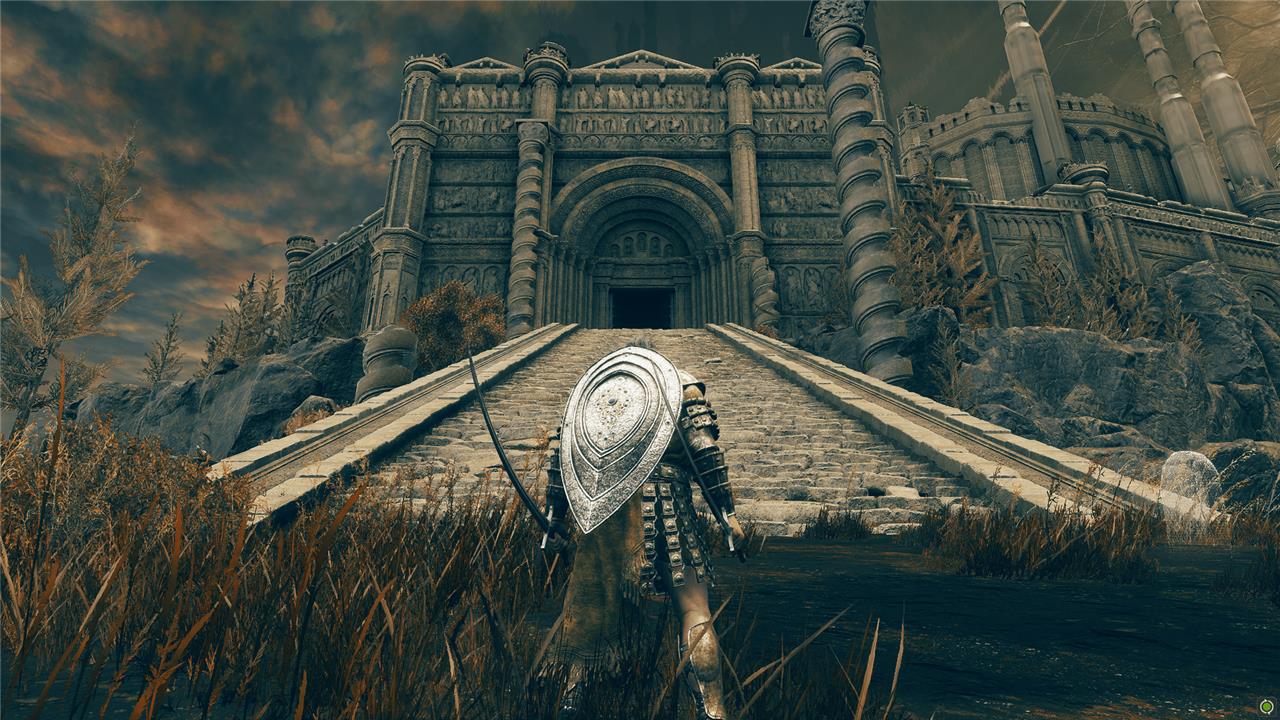
There, you’ll find another Miquella’s Cross, another Scadutree Fragment, and the NPCs Sir Moore and Ansbach. Head northwest up the stairs and through the huge doors.
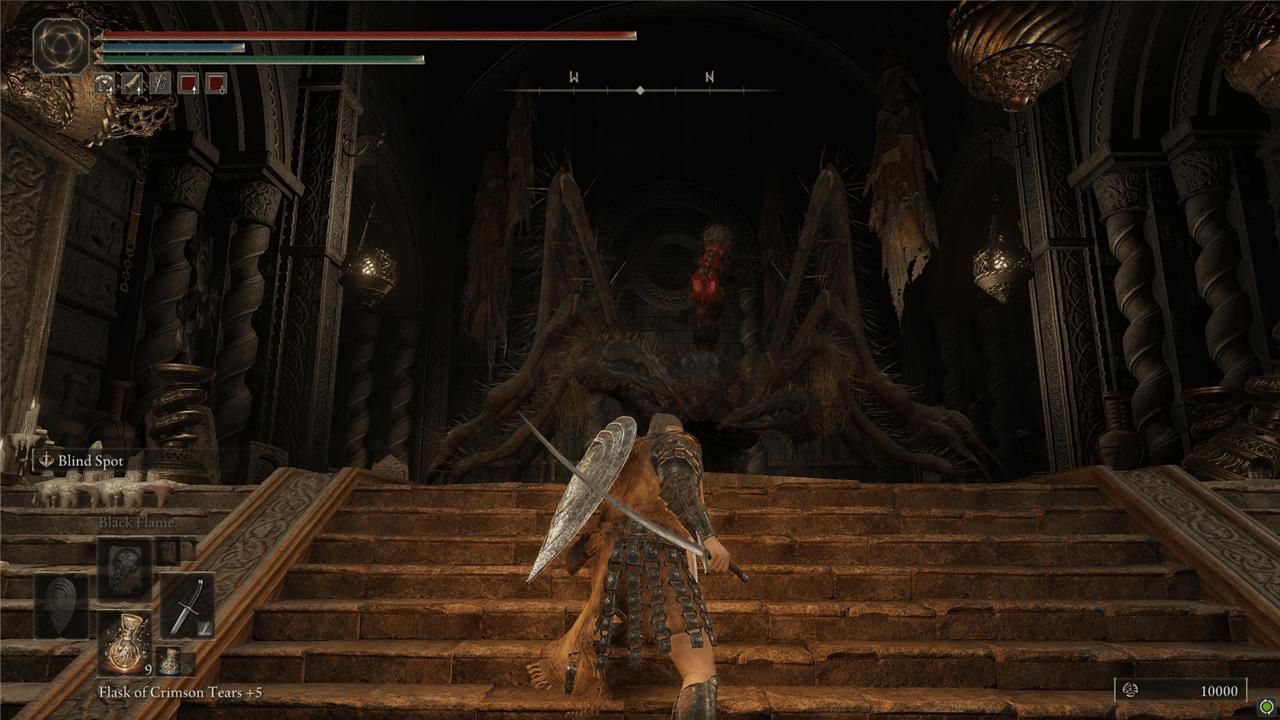
Inside, you’ll meet your first giant Spider Scorpion. Behind it, there’s a Revered Spirit Ash at the top of the stairs inside at the weird altar and some poisonbone darts back to the right.
Continue up the stairs and through the rest of the gatehouse. At the top of even more stairs, the Belurat, Tower Settlement Site of Grace will be on your left.
Reach the Small Private Altar Site of Grace
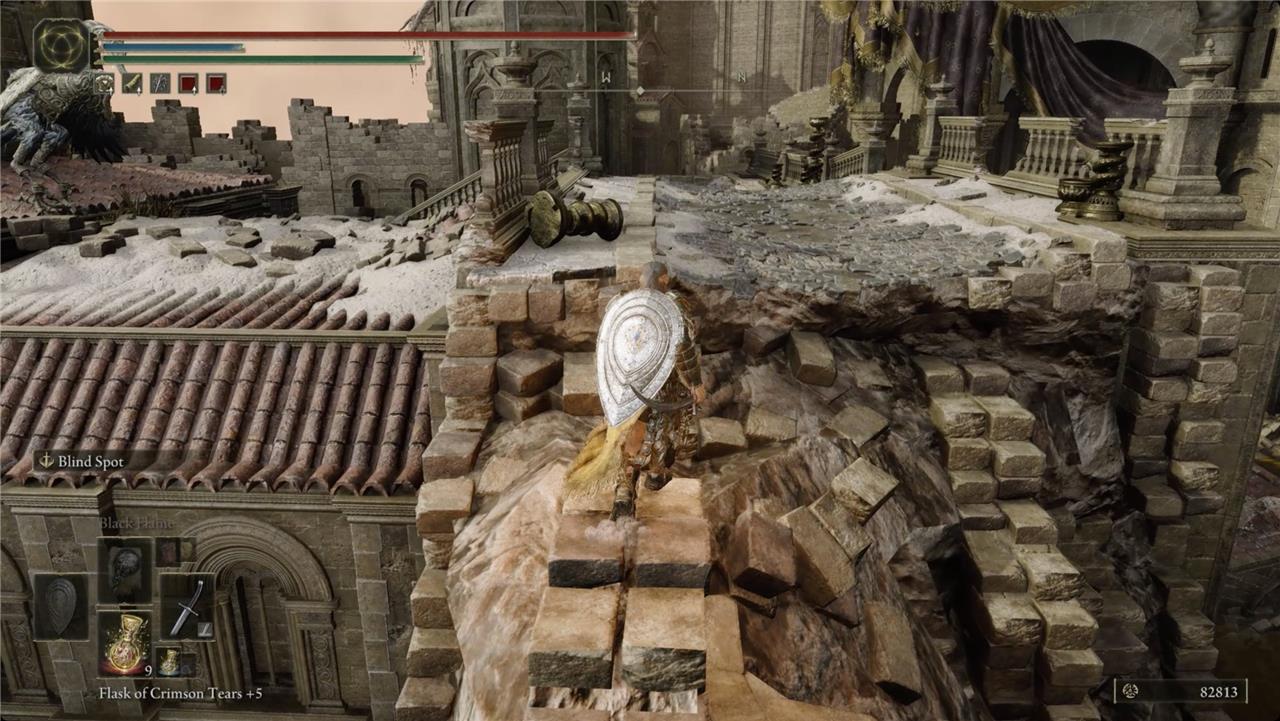
To reach the Small Private Altar Site of Grace in Belurat, Tower Settlement, start by proceeding southeast from the main Belurat, Tower Settlement Site of Grace. Head up the stairs to find this secluded Site of Grace, where you can rest and prepare for further exploration of the dungeon. From here, exit through the northwestern door to enter a small room that leads to two different paths. This Site of Grace serves as a crucial checkpoint before facing tougher enemies and unlocking new areas within the settlement. It also provides access to the storeroom key location and the rooftops where valuable items like the Silver Horn Tender and Somber Smithing Stone can be found.
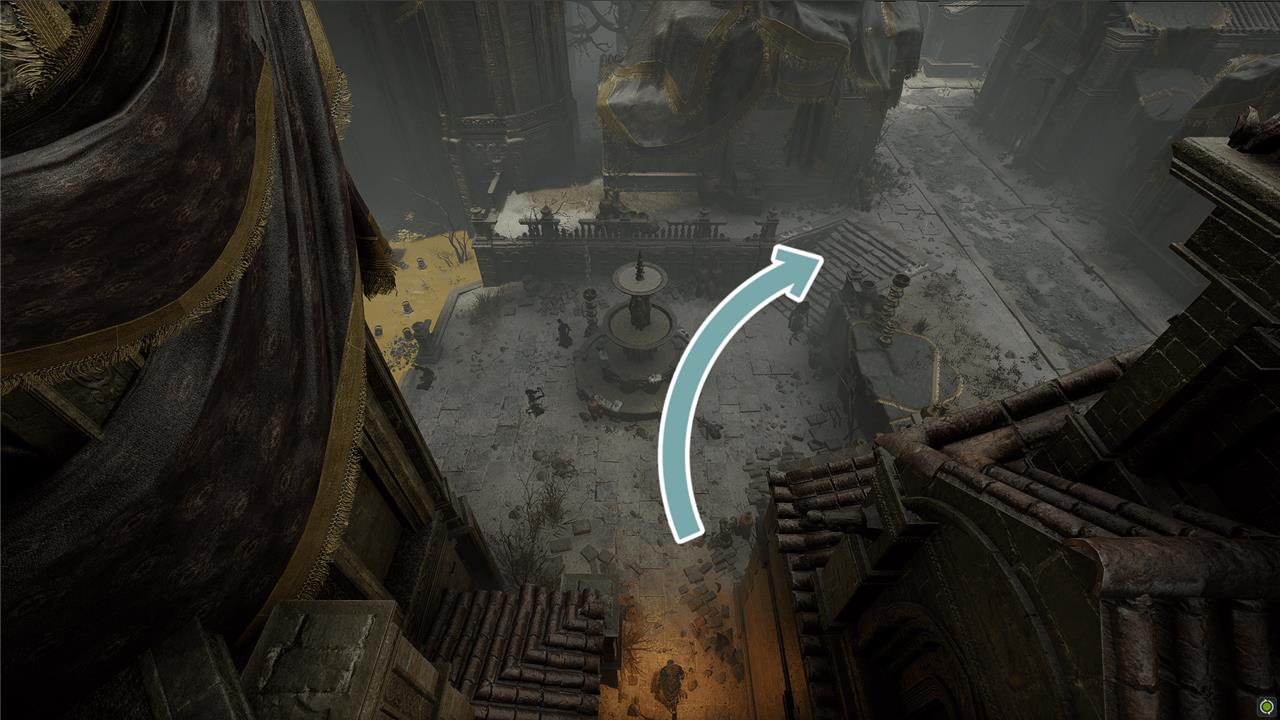
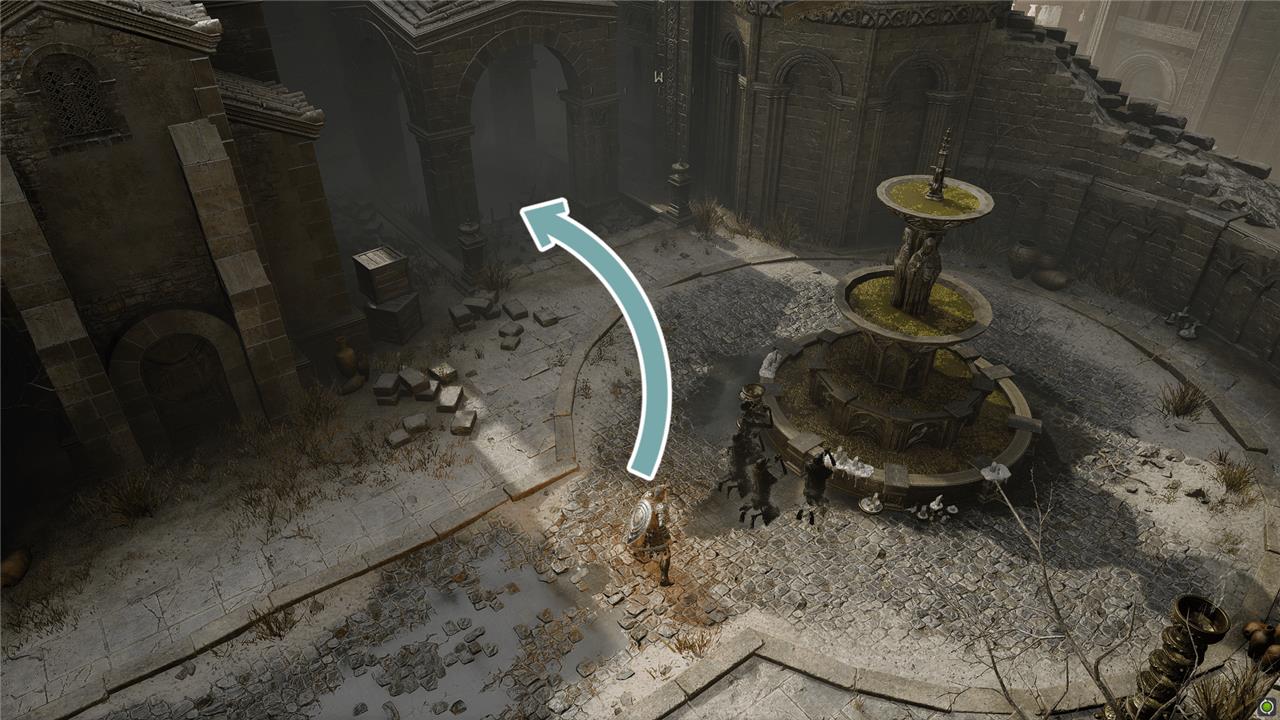
We’ll start by heading to the east. Go past the main doors and clear the Shadow Undead around the fountain. Take the stairs on the right and then take a left along the street.
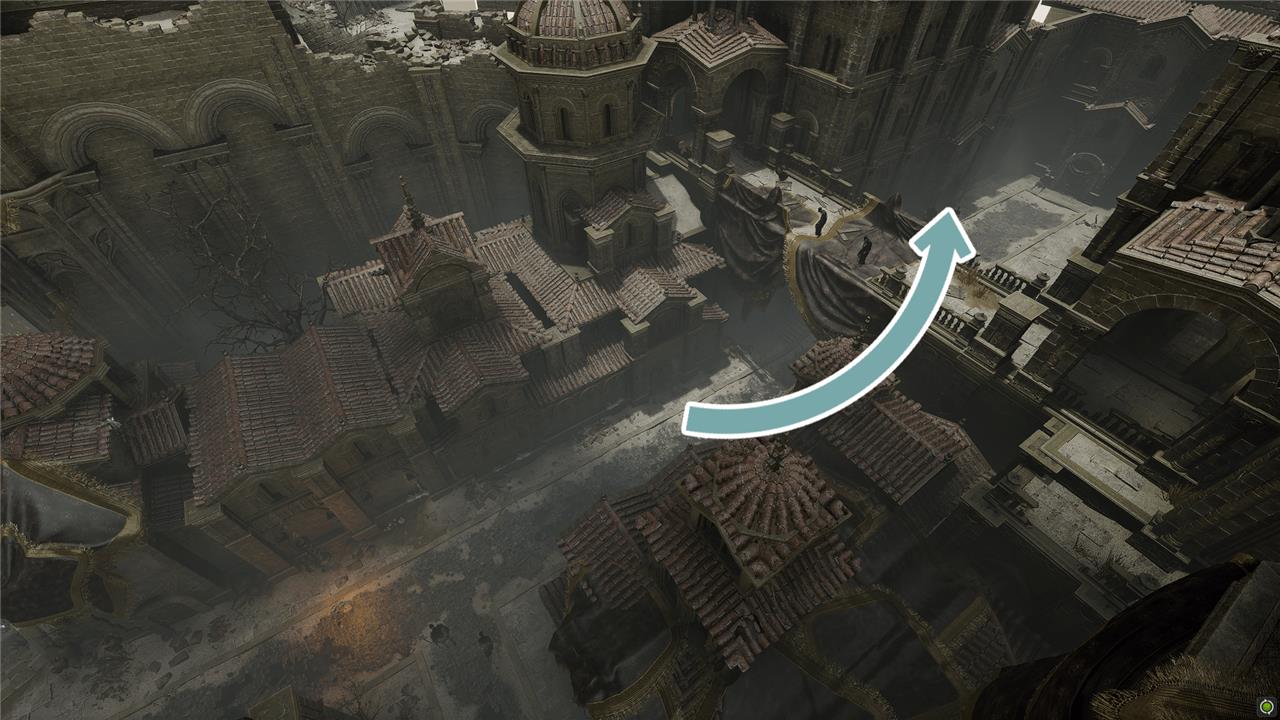
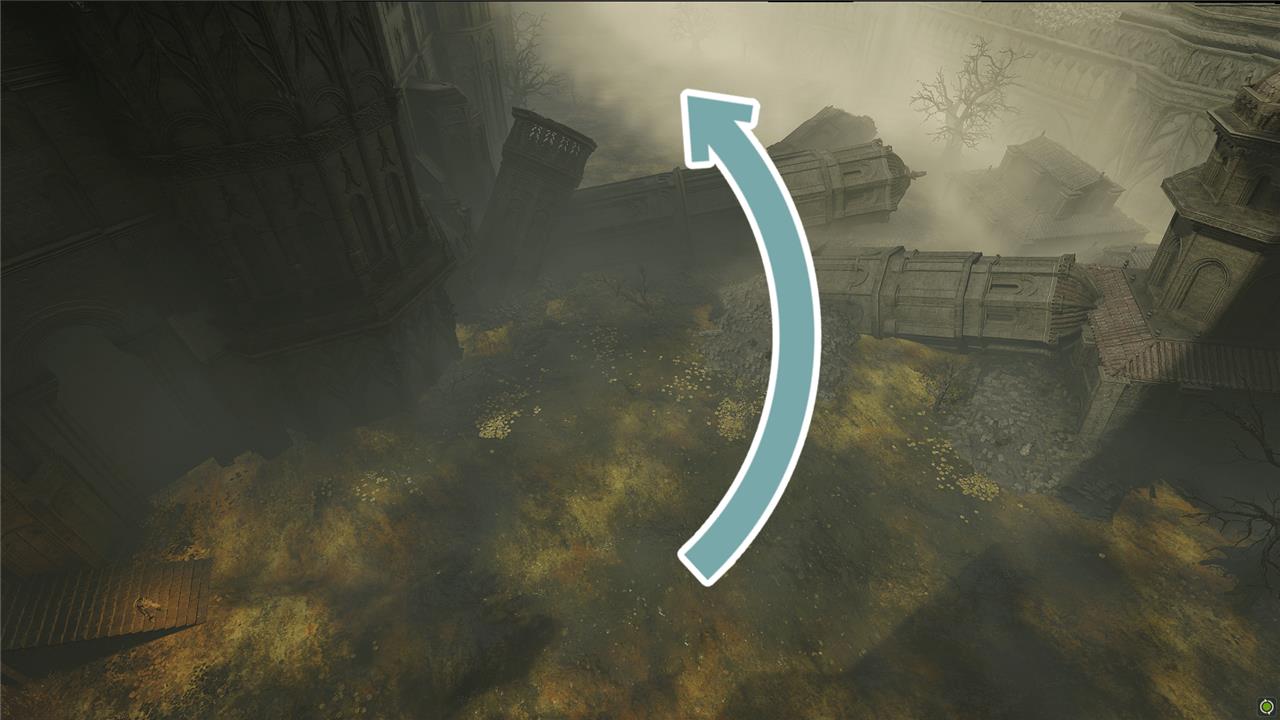
There’re more Shadow Undead to deal with – along with a couple of sniping casters on a bridge. There’s an alley on the right you can duck into for cover, but there are more Shadow Undead waiting for you there.
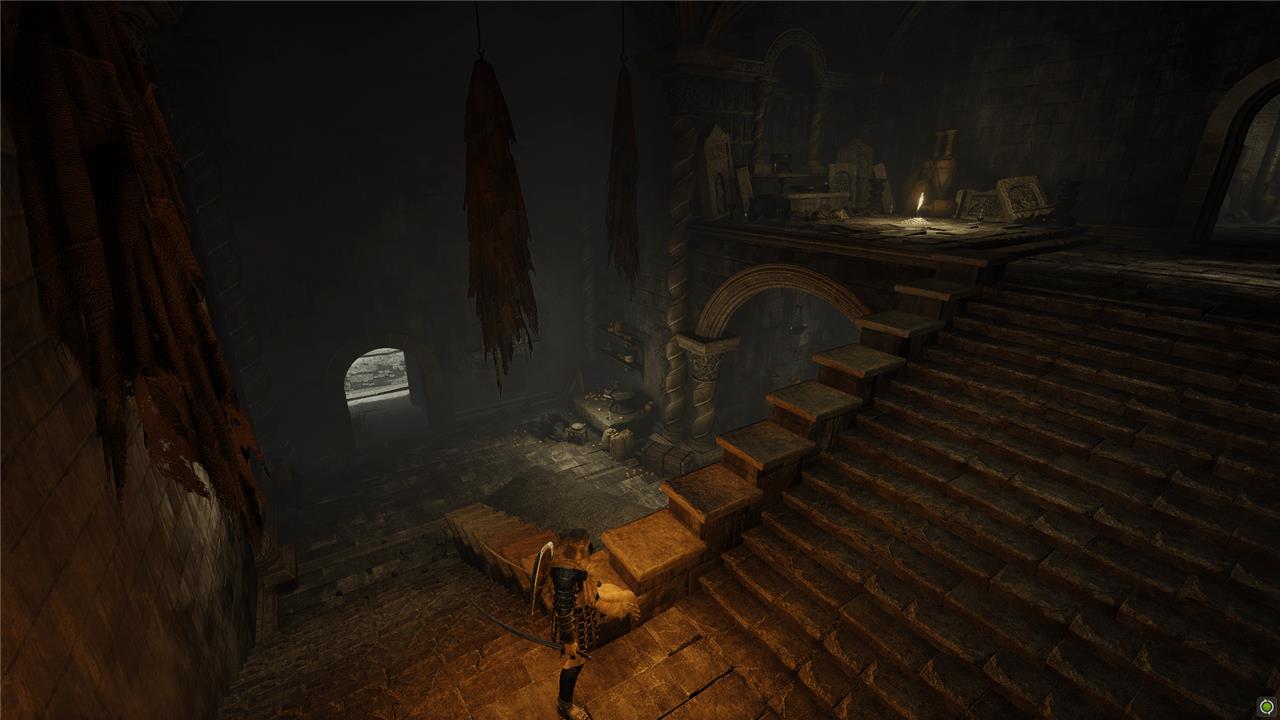
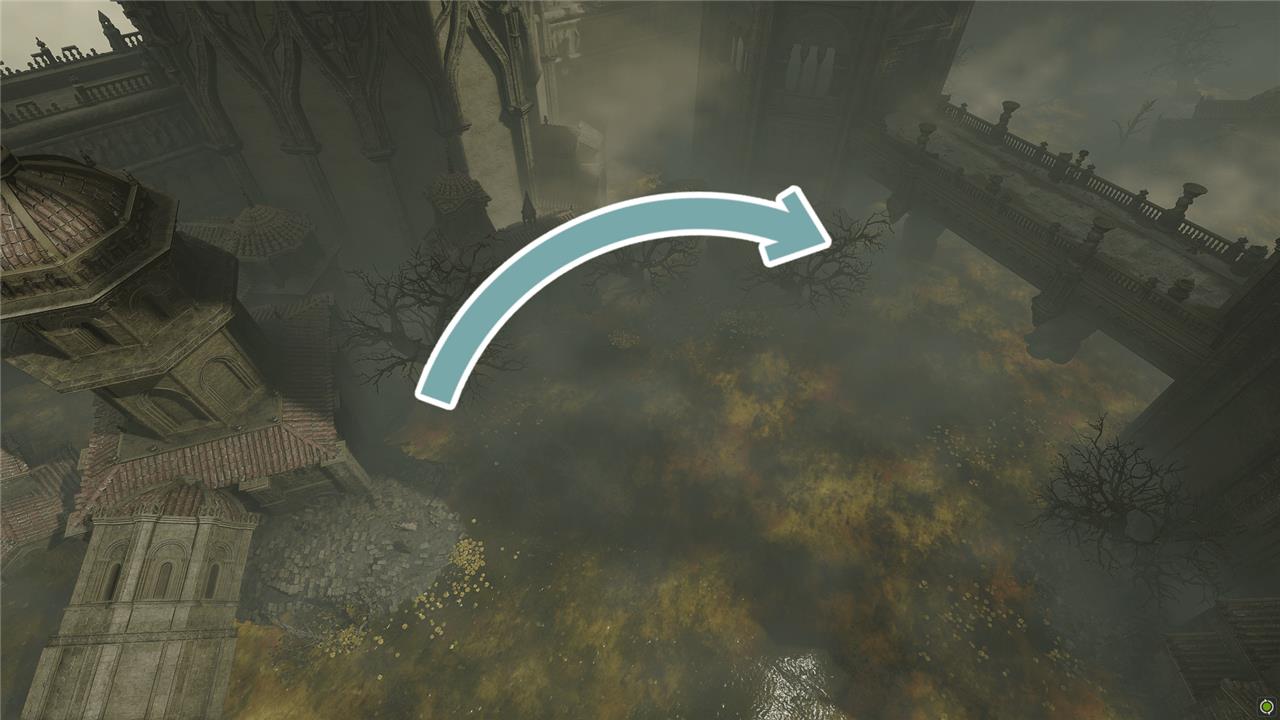
Get back to the road, pass under the bridge, and go up the stairs. At the top, take a left into the building. Head up the stairs to the Small Private Altar Site of Grace.
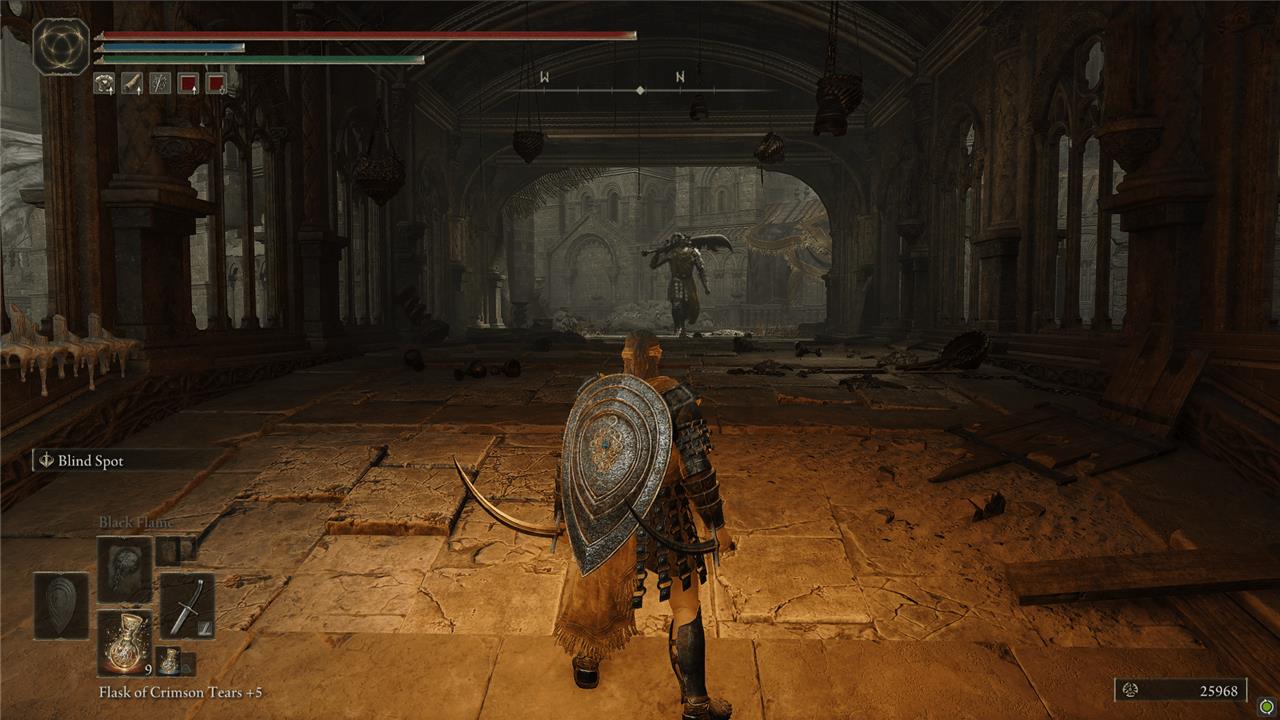
Fire Knight Queelign invasion
Fire Knight Queelign invasion occurs in the Belurat, Tower Settlement area of Elden Ring: Shadow of the Erdtree DLC. He is a hostile NPC invader who wields a flaming greatsword and attacks relentlessly with fiery spear thrusts and a homing fireball projectile. Queelign first appears near the Small Private Altar Site of Grace in a large courtyard by the fountain, challenging players with aggressive and fast-paced combat. Defeating him here is essential to progressing his questline, which also involves a second invasion at the Church of Crusade and rewards such as the Prayer Room Key and Ash of War: Flame Skewer. His attacks require careful dodging and timing, as he can leap and strike with powerful fire-infused moves, making the invasion a challenging encounter for players exploring Belurat.
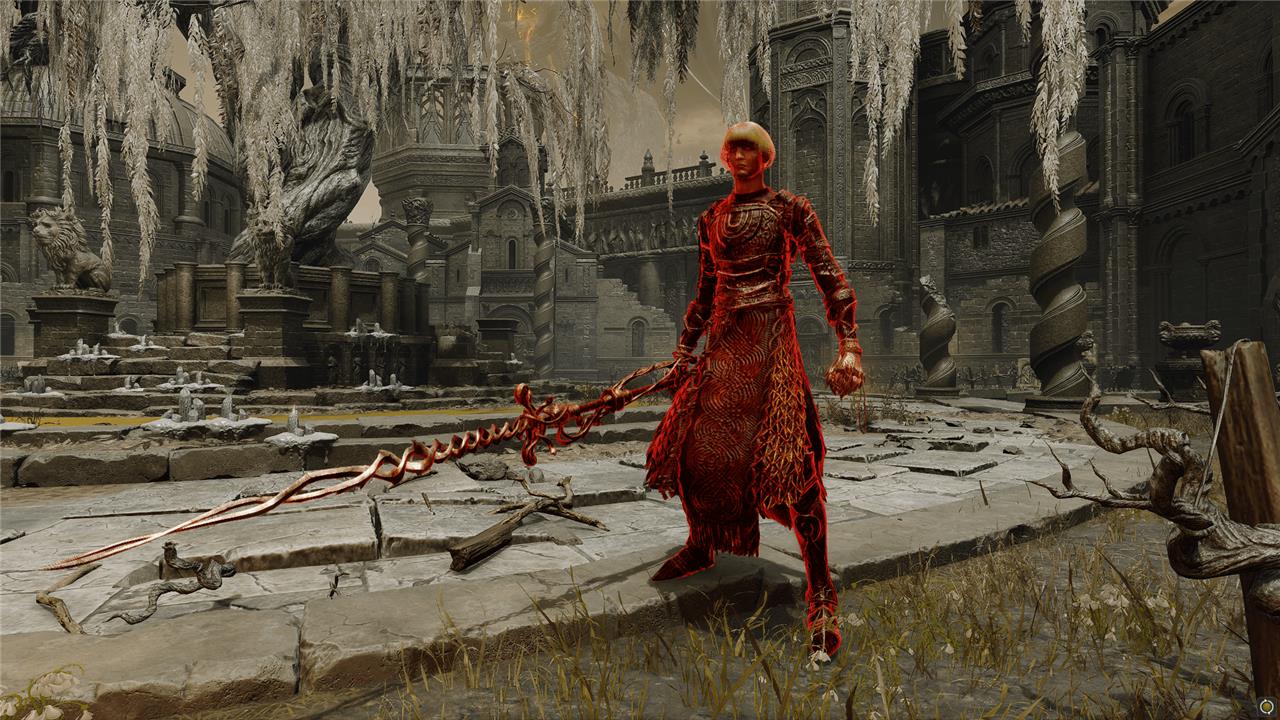
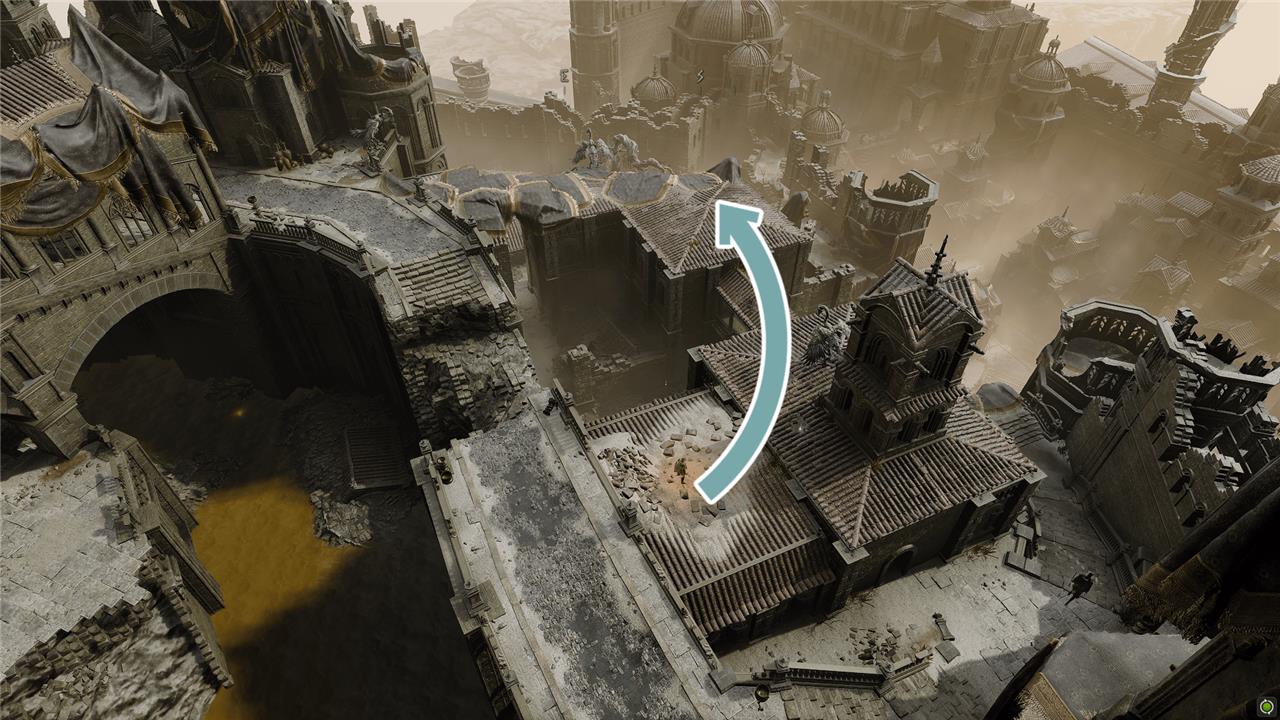
There are a couple options when you leave. For now, head north and up the stairs to face your first Horned Warrior (of many). Take a right and follow the rubble-strewn path to the east. When you reach the large open area, you’ll get invaded by Fire Knight Queelign (and his terrible haircut). Defeat him for the Crusade Insignia talisman.
Check around the tree in the center of the arena for the Ash of War: Shriek of Sorrow.
Find the Storeroom Key and meet Hornsent Grandam
To find the Storeroom Key in Belurat, Tower Settlement, start from the Small Private Altar Site of Grace and head out the northwest door, then turn left onto a bridge guarded by two enemies. At the bridge’s end, a locked door leads to the Storeroom, which you cannot open without the key. To get the Storeroom Key, explore the area carefully, defeating enemies and navigating the rooftops and corridors until you locate it on a corpse atop a ladder near a watery path. Once you have the key, return to unlock the Storeroom near the Site of Grace, where you will find Hornsent Grandam. She remains unresponsive until you defeat the main boss of the settlement, the Divine Beast Dancing Lion, and equip the Divine Beast Head, which triggers her questline and dialogue.
Back where you faced the Horned Warrior, take a left and you’ll be at the top of the waterfall (god, we hope that’s water) that falls down to the fountain square from earlier. Stick to the right (north), to find an alley that leads around to the other side – watch for Shadow Undead as you go.
Take a left at the river, and then head into the building on your right. Climb the ladder to find the Storeroom Key on a corpse at the top.
Head all the way back to the Small Private Altar Site of Grace. This time, when you leave, take a left (south) to cross the bridge those casters were sniping from earlier.
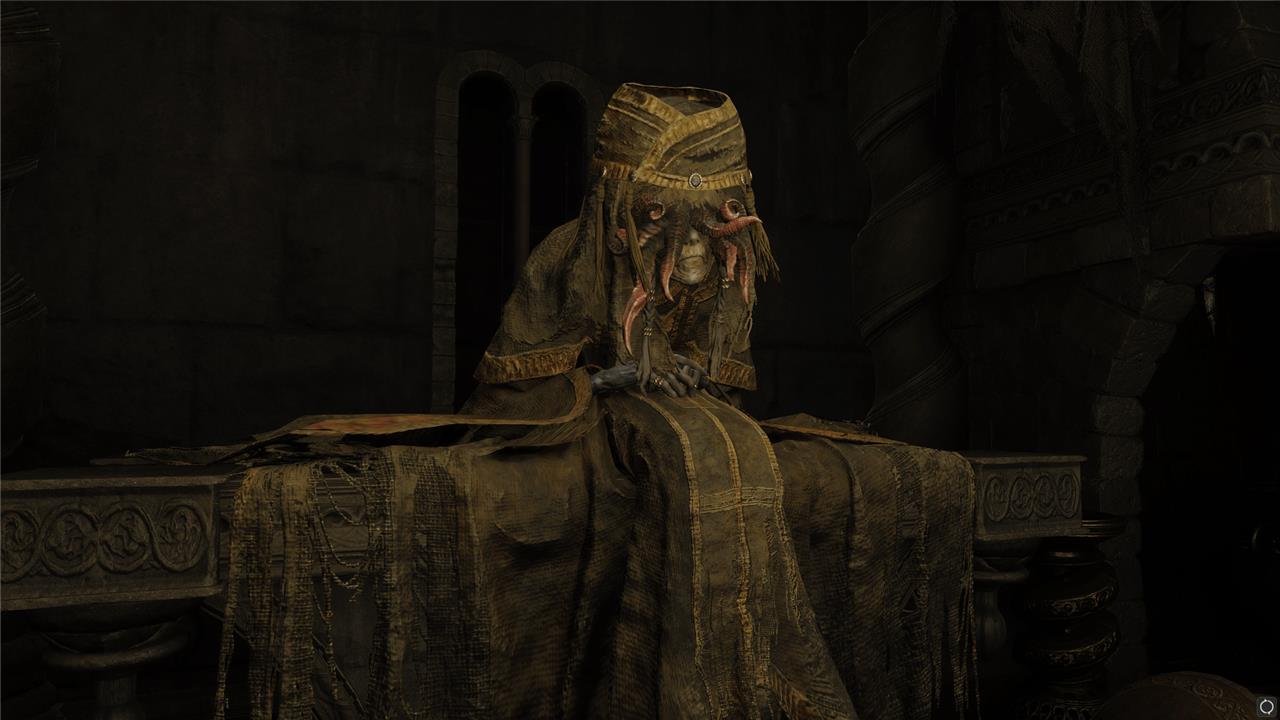
At the far end, you’ll use the Storeroom Key to unlock a door to meet Hornsent Grandam. There’s nothing to do with her yet, but she’s creatively insulting. Unlock the other door just to have more options – it’s not really a shortcut, but it does give you the drop on the Shadow Undead in that dead end.
Find the Well Depths Key
To find the Well Depths Key in Elden Ring: Shadow of the Erdtree, begin by progressing through the Belurat, Tower Settlement dungeon until you reach the Small Private Altar Site of Grace. From there, head to the top of the central waterfall, enter the room to the right, and climb the ladder to exit outside. Take a left and follow the rooftop ledge around the building until you reach a bridge connecting to another tower. Jump to the bridge, enter the tower, and loot the corpse inside to obtain the Well Depths Key. This key unlocks the door to the poisonous swamp area beneath the settlement, accessible by descending the well near the fountain at the courtyard after the Site of Grace.
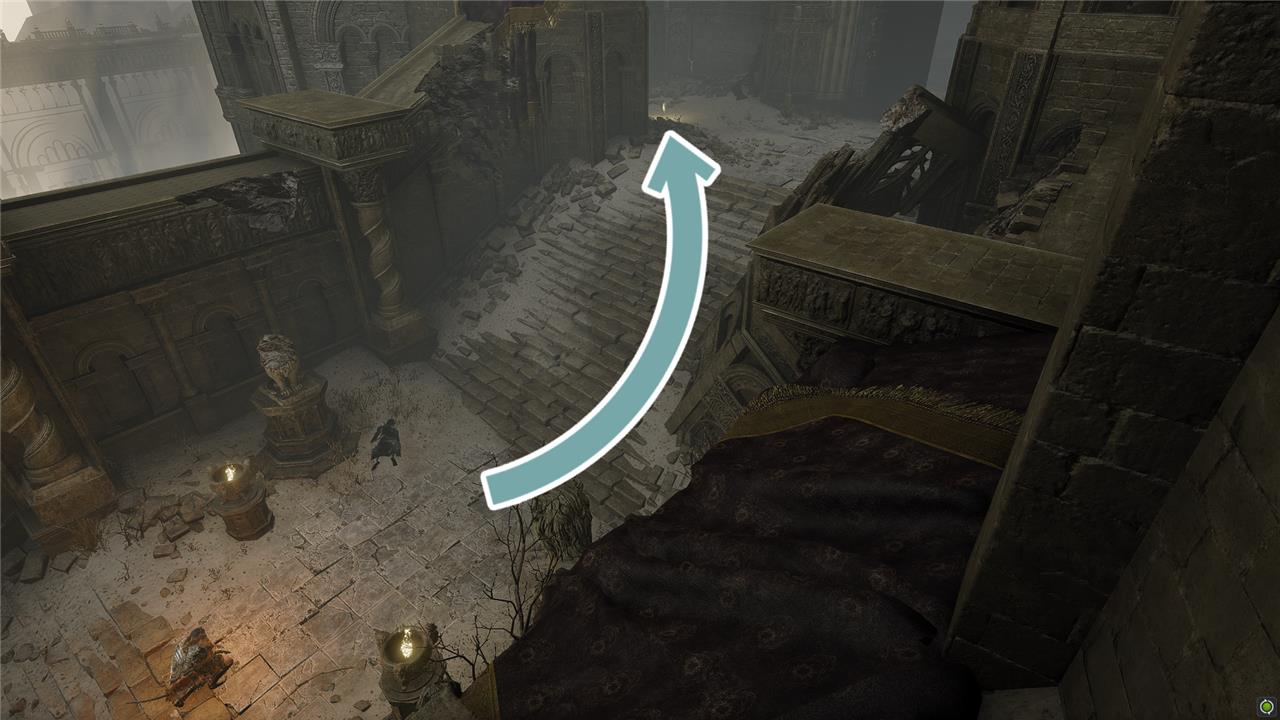
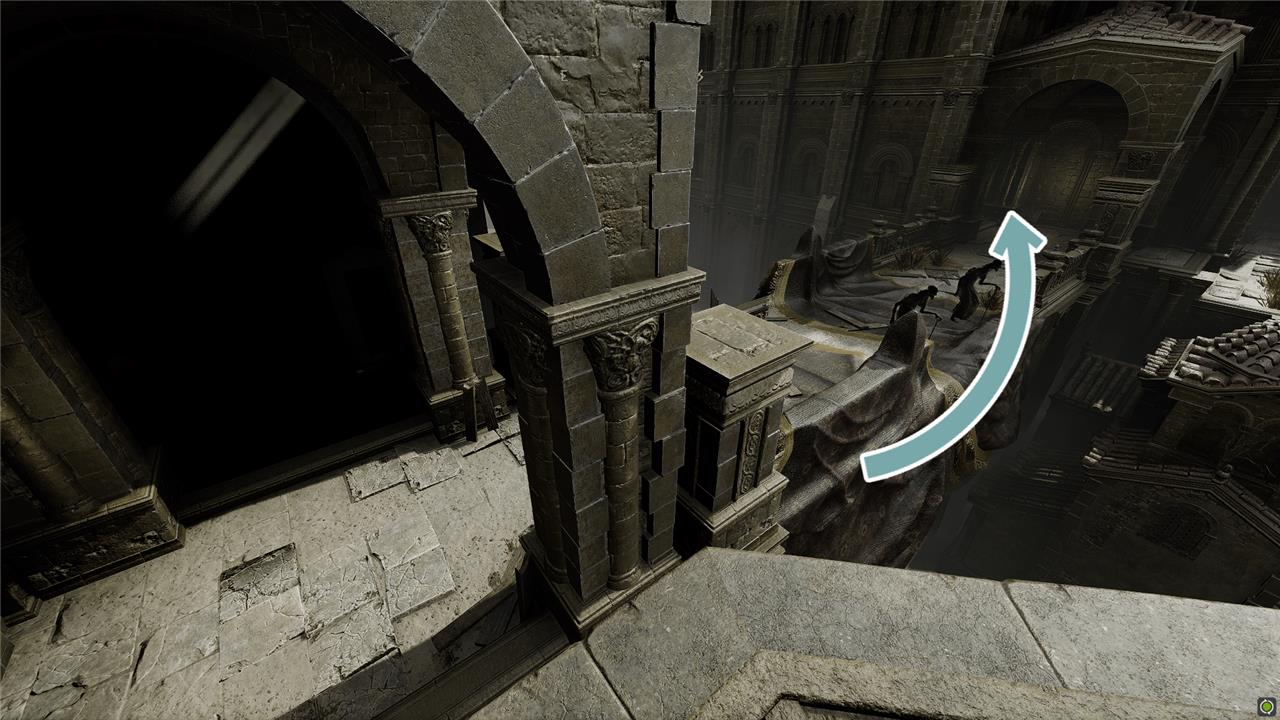
Retrace your steps to where you picked up the Storeroom Key. Go past the corpse and take a right up the stairs. At the top of the stairs, turn right. The rampart you’re on is broken, so you’ll have to take another right and work across the rooftops and past some Gravebirds. When you reach the southeast corner, you’ll be standing on some rugs(?) covering a hole in the roof.
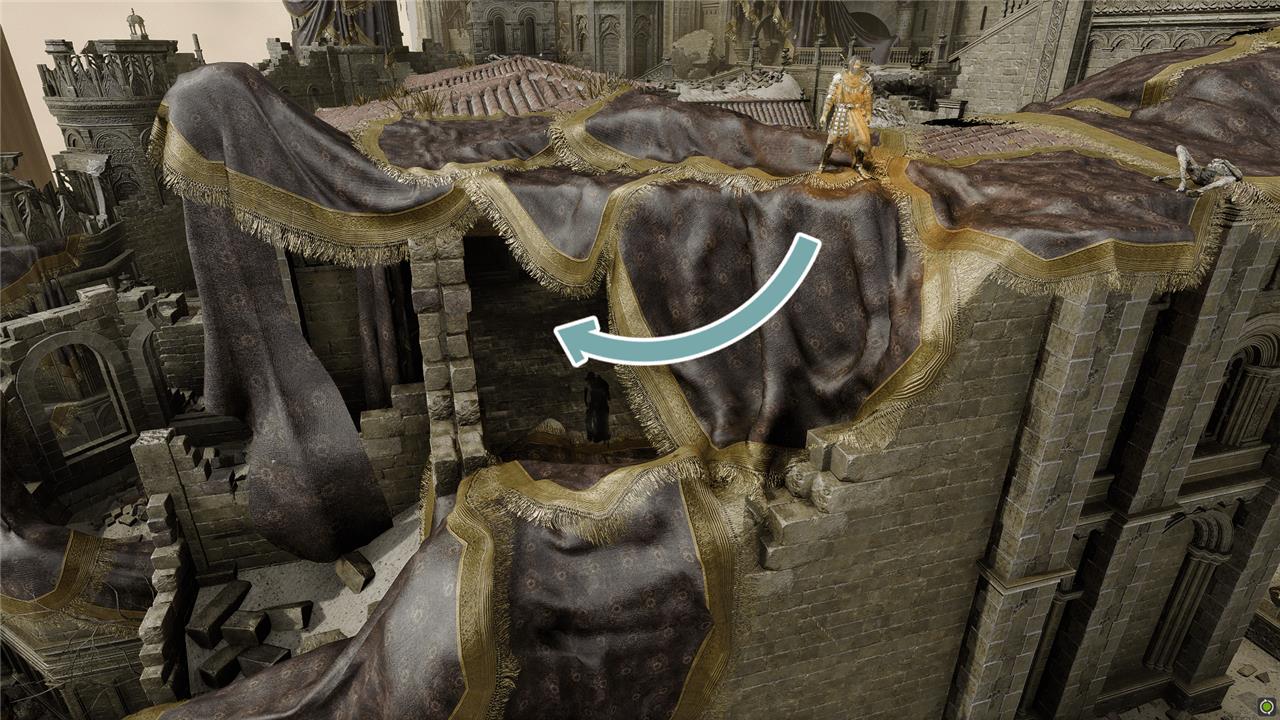
If you look close, there’s a gap you can drop into to reach the room directly below you. Do that. On the left, you’ll find a corpse with the Well Depths Key. Continue west across the bridge, drop off the gap, and climb the ladder – this is where you found the Storeroom Key earlier.

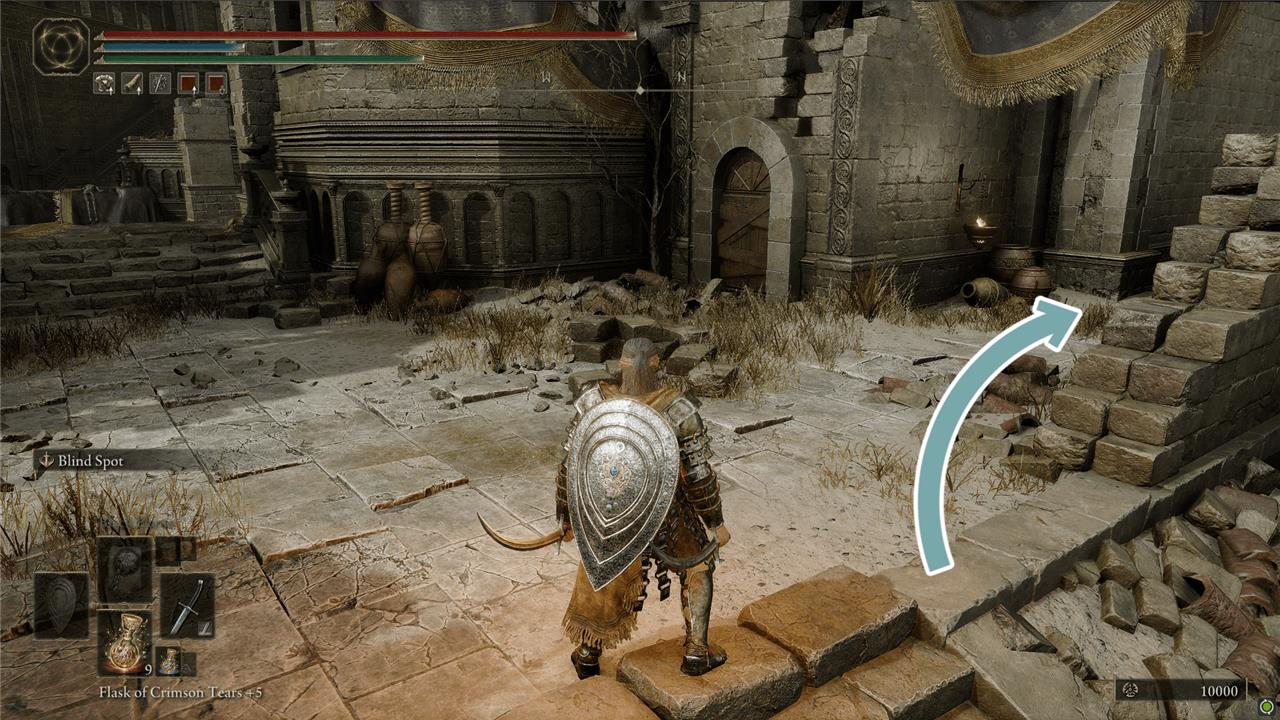
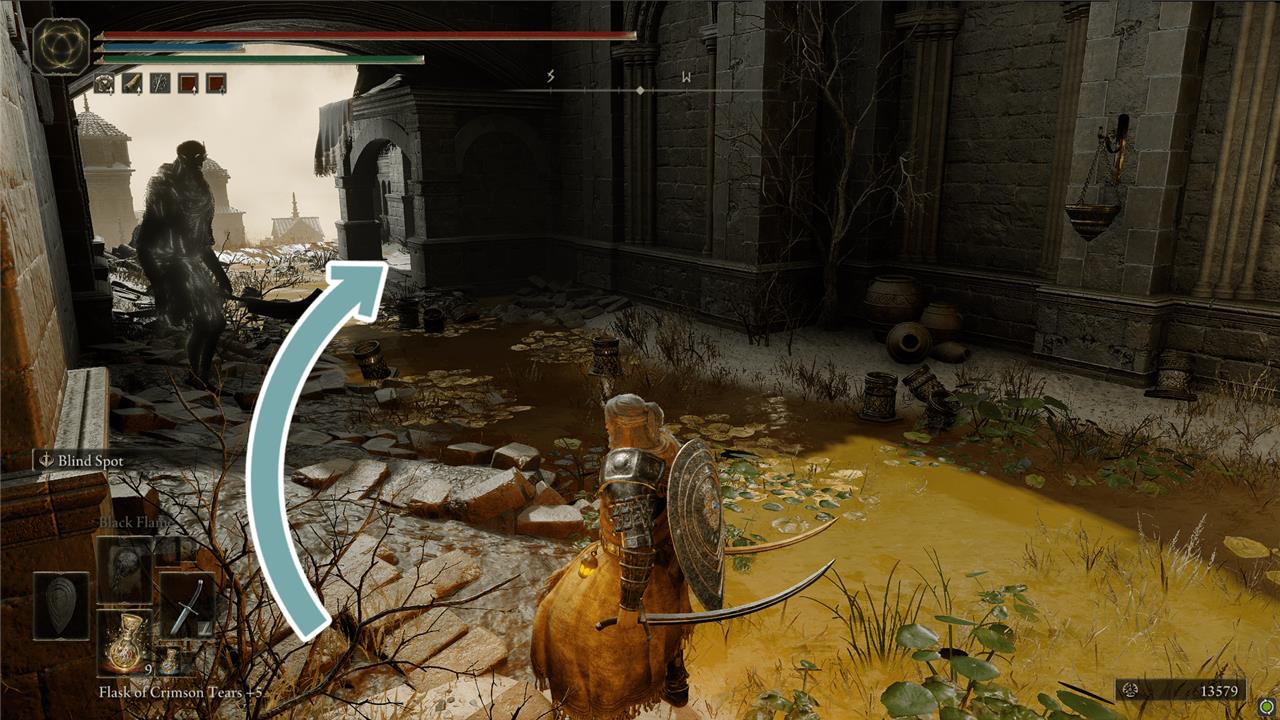
Go through the door and take a left. Before you head inside the tower at the end of the road, climb over the rubble on your right to find an out-of-sight doorway.
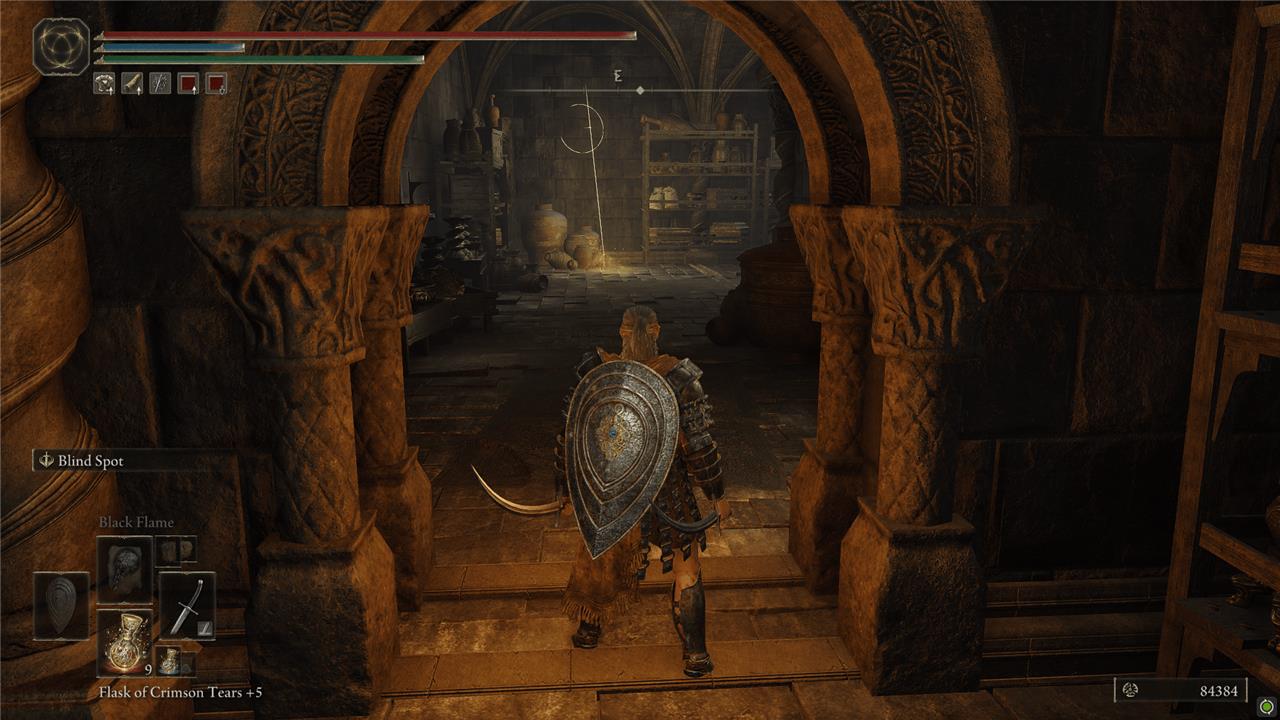
Deal with the Man-Flies inside and continue through the rooms to the right. You’ll find a Scadutree Fragment and a Miquella’s Cross.
Continue onto the balcony to the right, and then take a left to find the Dried Bouquettalisman.
Drop off the balcony and into the gross moat area below you (it’s mercifully not poisonous). There are a lot of Man-Flies and items to pick up, but your goal is over to the left. Follow the moat around and through the door to find a ladder that leads up to the roofs.

At the top, take the first left and pass through the covered bridge (we’ll be back here in a few minutes). Take a right at the end to bring you back to the other side of the rooftops you crossed earlier.
Head straight across the rampart – you can climb out of the gap heading this way – to return to where you started this detour. Head into the tower at the end of the street.
Inside, fight the two giant Spider Scorpions to pick up the Bone Bow.
Head back out. Take the first right (to the south) and go down the stairs to find an elevator. Ride it down and look for a switch along the right side in the next room. That switch opens the main doors all the way back at the very first site of grace.
Explore the poison well
The “Explore the poison well” section of Belurat, Tower Settlement in Elden Ring: Shadow of the Erdtree guides players through a hazardous, poison-filled area within the dungeon. This toxic section requires preparation with Neutralizing Boluses to counteract poison buildup and careful navigation to avoid swarms of Man-Fly enemies. Players will encounter an elite toxic variant of the Lesser Ulcerated Tree Spirit here, whose defeat is necessary to progress and rewards an Immunizing Horn Charm +2. The area also contains valuable loot scattered on bodies, including smithing stones, poisonbone darts, and consumables, making thorough exploration essential before moving forward. Unlocking a shortcut ladder in this zone provides easier access back to the Belurat Tower Settlement Site of Grace, facilitating safer travel through this perilous environment.
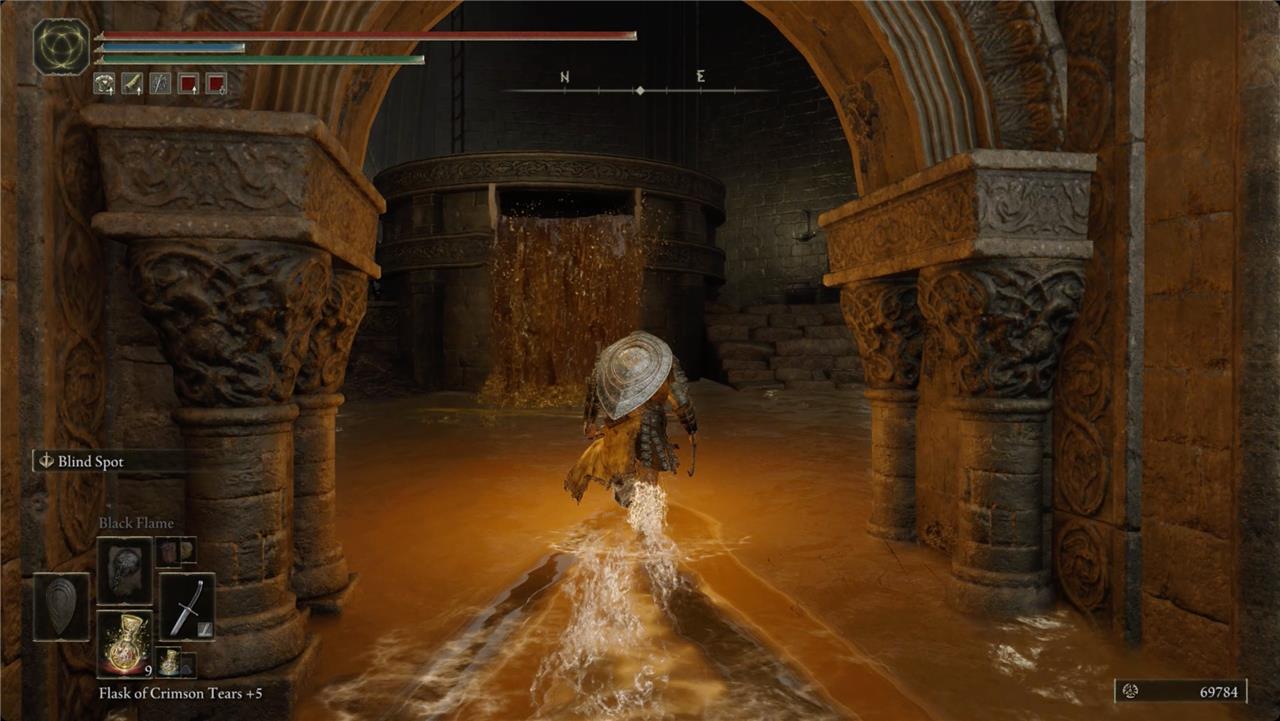
From the Belurat, Tower Settlement Site of Grace, head east again and through the fountain square (again). This time, turn right at the road. At the next fountain, look to the left for a well with a ladder inside. At the bottom of the ladder, head west and use the Well Depths Key to open the gate.
You’ll come to a poisonous swamp (sewer? moat?), so you’ll want to have some items like Immunizing Cured Meat and Neutralizing Boluses, or the Cure Poison incantation.
Head to the left first – generally southeast – and work your way around the fallen towers, rooftops, and patches of non-poisonous land to the large open area.

In the clearing at the end, you’ll find an Ulcerated Tree Spirit that drops an Immunizing Charm 2. Once it’s dead, head back to the northwest and use the fallen towers to climb onto the roofs.
Work around to the west and then head north along the narrow (non-toxic) alley. Cut back to the east to pass under the bridge. You’ll be attacked by Man-Flies throughout this next section, so be prepared.
Do a clockwise loop around for collectibles. In the north, past a Horned Warrior, you’ll find the Poisoned Hand weapon. Back to the south, just before the bridge, there’s a landing with a ladder. Climb it. Open the door at the top to open another shortcut back to the first site of grace.
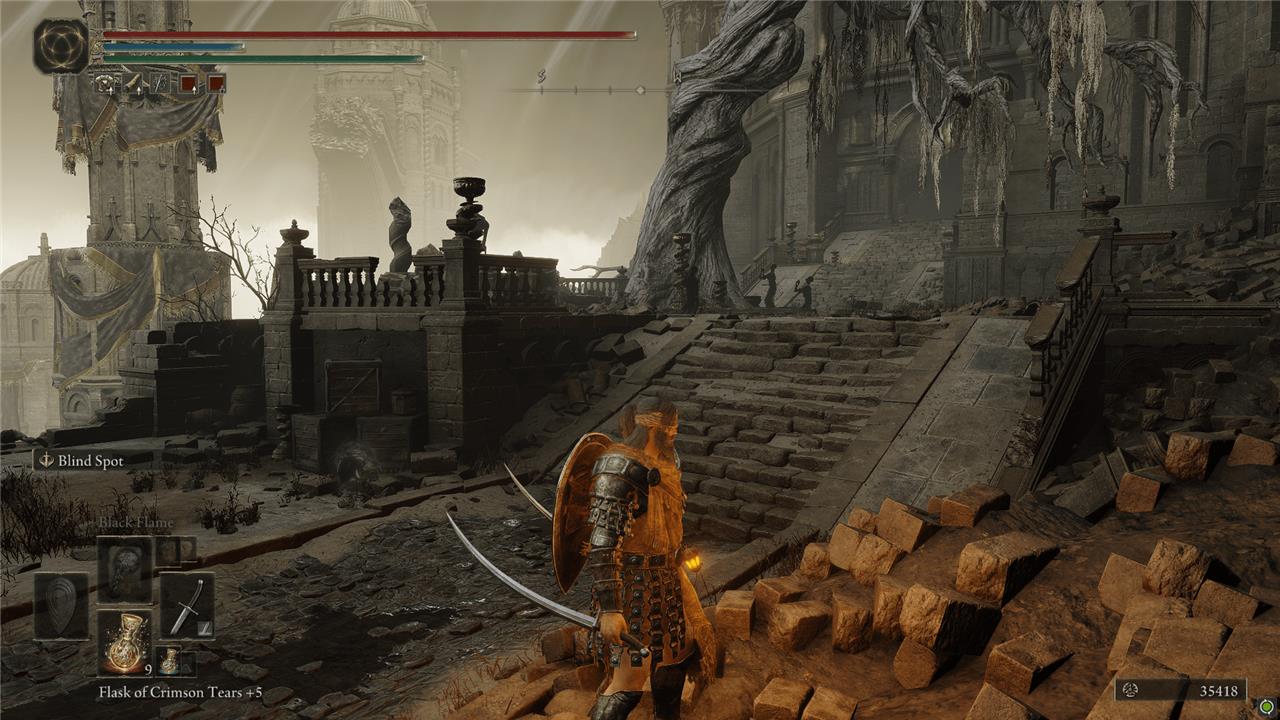
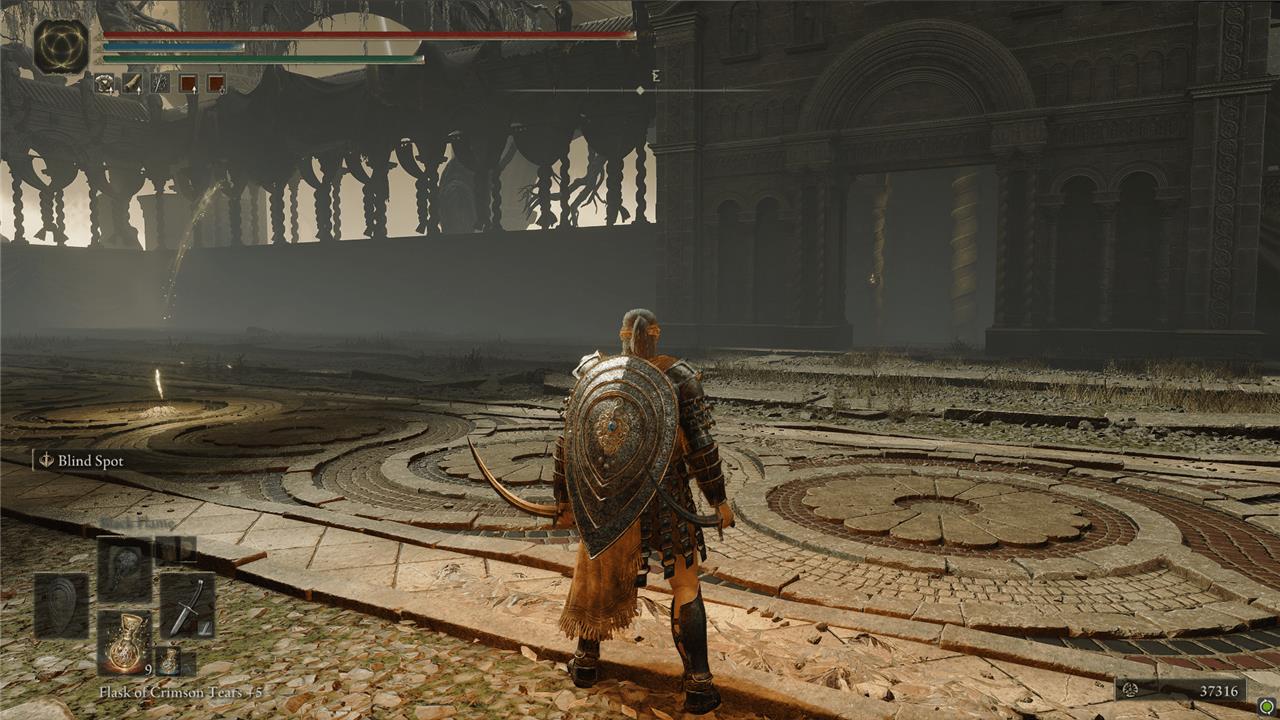
Reach the Stagefront Site of Grace
To reach the Stagefront Site of Grace in Belurat, Tower Settlement, continue along the main path from the shortcut until you find a set of stairs on your right. Partway up these stairs, a secret ledge allows you to jump around a rooftop corner to a hidden passage where you can find the Well Depths Key. After exploring this area and dealing with enemies such as Grave Birds and a shade carrying valuable items, you will face a strong Horned Warrior guarding the route ahead. Defeating or sneaking past this enemy will allow you to progress further toward the Stagefront Site of Grace, which provides a safe resting point before continuing deeper into the settlement.
Through those big main doors we just opened, take the elevator back up top. Go up the stairs, take a right, and work around the rooftops – don’t drop down into the room this time. Back on the rampart, cross the covered bridge (you can hide and wait for the horned warrior to pass you if you don’t feel like fighting).
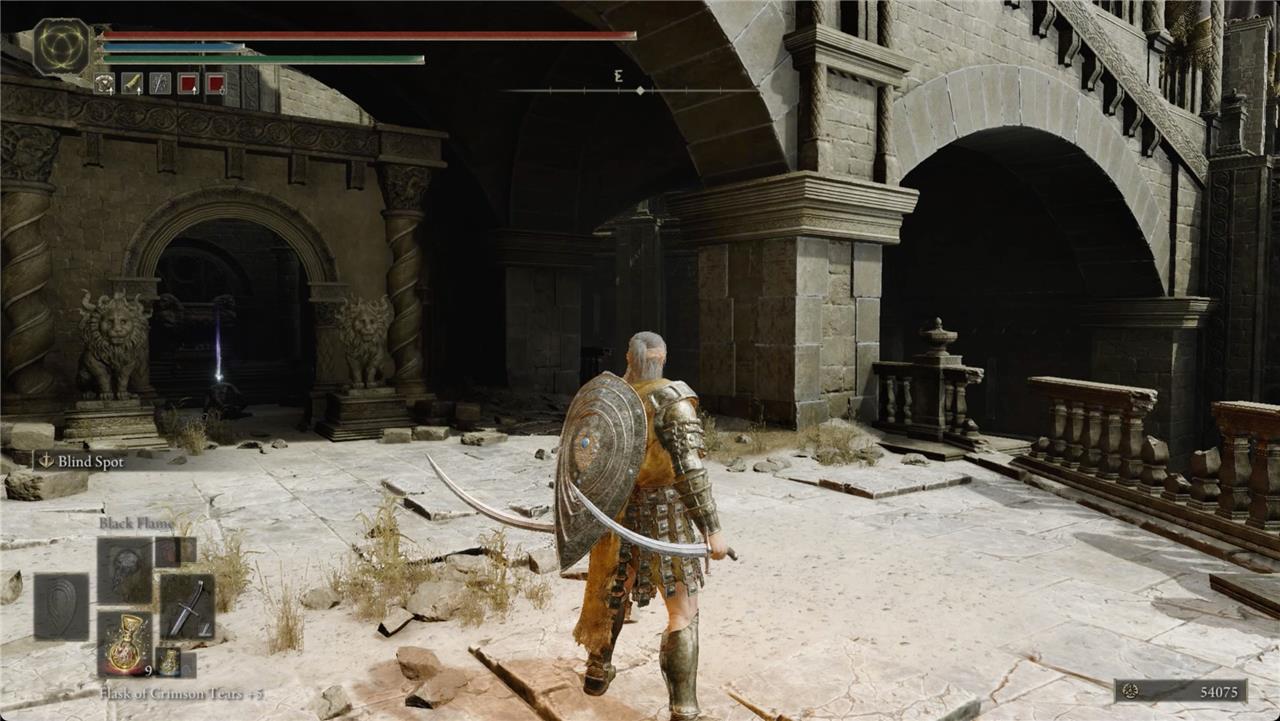
At the other end, take a left (to the right is the ladder down to the moat we just climbed). You’ll pass a lot of praying Shadow Undead. At the tree just before the stairs, watch along the left for a Revered Spirit Ash.
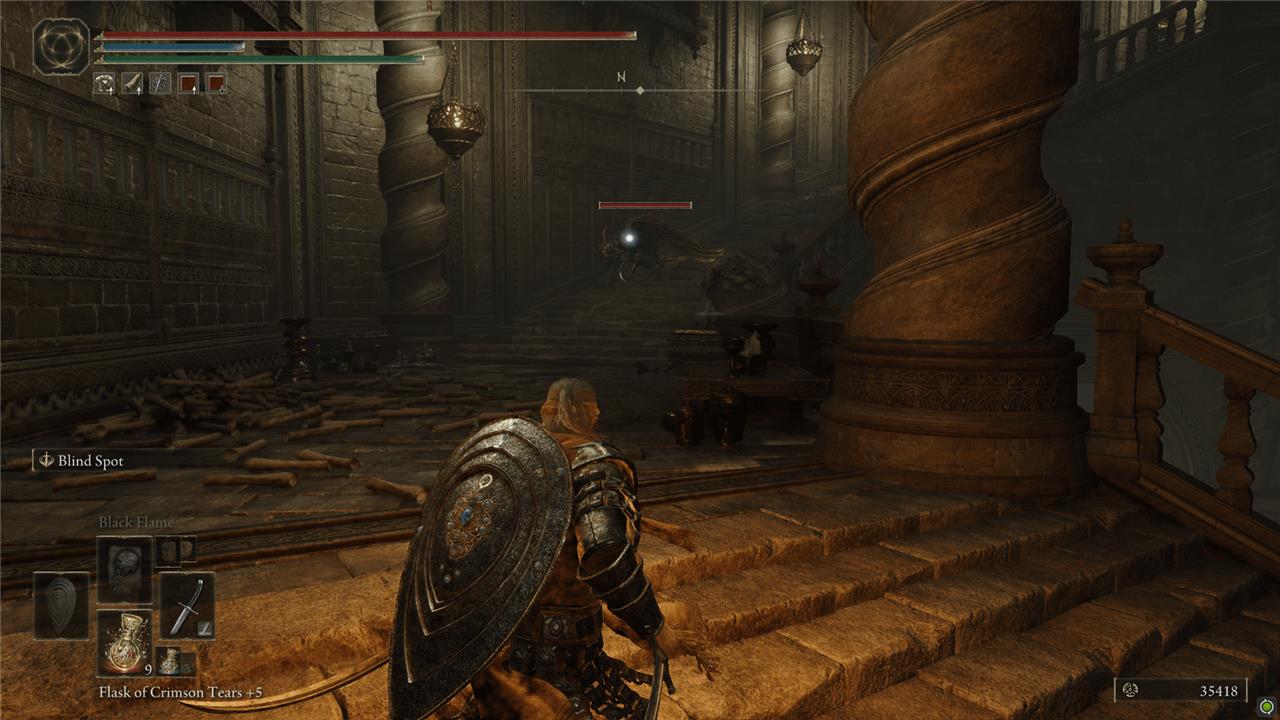
Go up the stairs and into the tower – this is above where you found the Bone Bow earlier. Head up the stairs and deal with the Curseblade. Keep taking the stairs all the way up to the Stagefront Site of Grace.
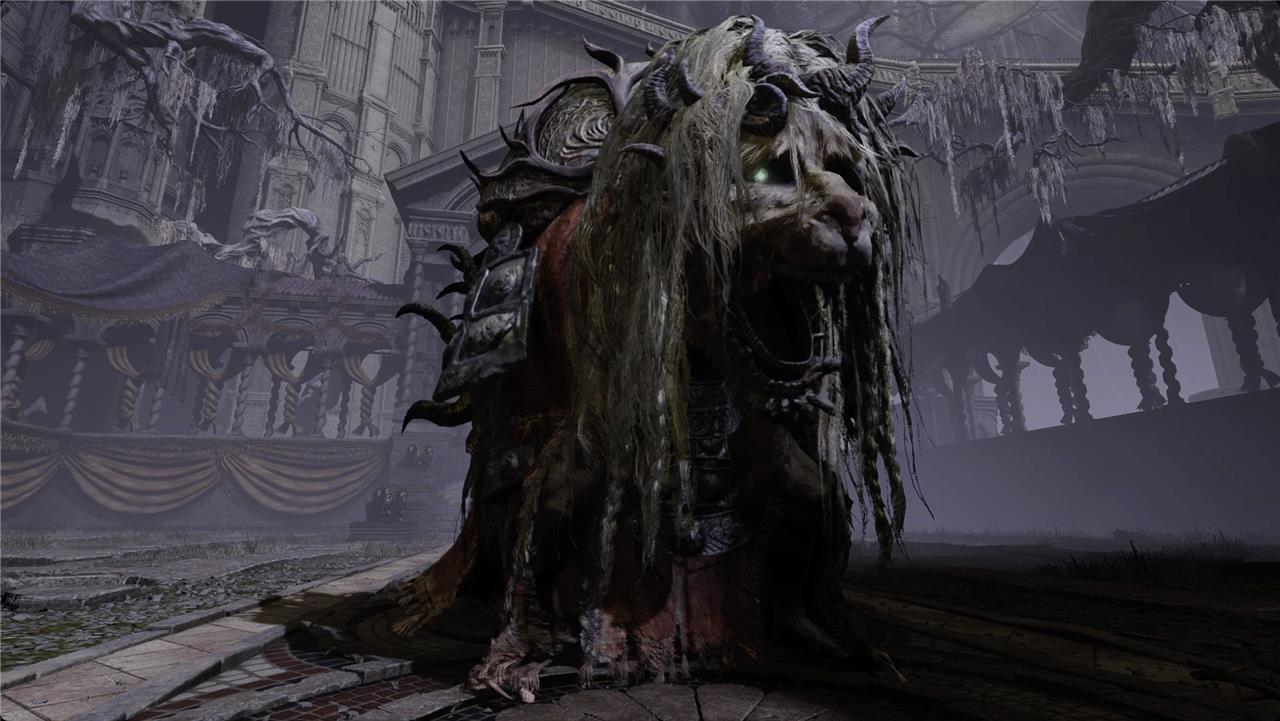
Divine Beast Dancing Lion boss fight
The Divine Beast Dancing Lion is the formidable boss guarding the Belurat, Tower Settlement in Elden Ring: Shadow of the Erdtree. This multi-phase fight challenges players with a variety of elemental attacks-lightning, storm, and frost-each altering the beast’s moveset and requiring careful observation and timing to counter. The lion uses a mix of sweeping bites, spinning breath attacks, and powerful grabs that can be dodged or blocked if anticipated correctly. Melee fighters benefit from focusing on the beast’s head movements to predict attacks and deliver heavy counterattacks when it is vulnerable. The battle intensifies as the lion shifts through its elemental phases, culminating in a chaotic final stage where it randomly cycles through all elements, increasing its attack speed. Mastery of dodging, blocking, and exploiting openings after its combos is key to overcoming this challenging yet rewarding encounter.
Before you head in, there’s a yellow summon sign for Redmane Freyja at the doors. Push through to face the Divine Beast Dancing Lion boss. It will drop the Remembrance of the Dancing Lion and the Divine Beast Head (oversized) helmet. After the fight, which our guide on how to beat Divine Beast Dancing Lion can help you with, hit the new Theatre of the Divine Beast Site of Grace.
Back at Roundtable Hold, the remembrance can be turned into the Enraged Divine Beast talisman or the Ash of War: Divine Beast Frost Stomp.
After the Divine Beast Dancing Lion
After defeating the Divine Beast Dancing Lion in Elden Ring: Shadow of the Erdtree, your journey in Belurat, Tower Settlement continues with several key objectives. You can now obtain Belurat’s final Revered Spirit Ash, use the Storeroom Key to interact with Hornsent Grandam, locate Miquella’s Cross, and explore the mysterious Well Depths. These tasks unlock further exploration and progression within the legacy dungeon, leading you deeper into the story and challenges of the DLC. Additionally, the next major destination after the boss is Castle Enis, followed by the Moon Gazing Grounds and Shadowkeep, guiding you through the subsequent parts of the expansion.
When you’re ready, look for a doorway to the east of the Theatre of the Divine Beast Site of Grace – it’s just to the right of where you entered. Take the elevator up, push through the doors, and grab the Revered Spirit Ash from the altar ahead of you.
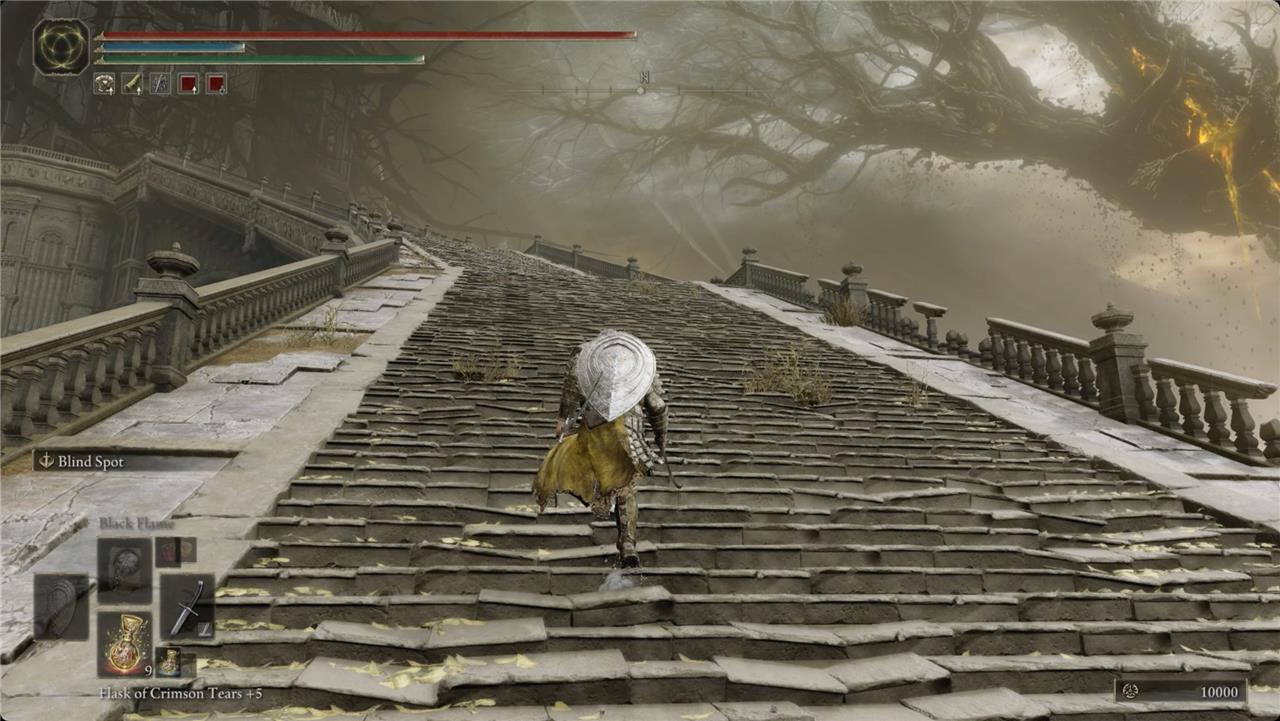
Off to the left, take the stairs all the way to the top. You can’t get inside, but you’ll find the Tower of Shadow Message from Needle Knight Leda telling you to head east instead (basically, “your princess is in another castle”). Specifically, you’re heading to Castle Ensis next.
What hidden treasures await inside Belurat Tower Settlement in Elden Ring
Inside Belurat Tower Settlement in Elden Ring: Shadow of the Erdtree, explorers can uncover a variety of hidden treasures including rare crafting materials, powerful consumables, and unique talismans. Notable items include:
-
Revered Spirit Ashes found near statues and after defeating Spider Scorpion enemies, valuable for summoning aid in battles.
-
Shadow Realm Rune, Fireproof Dried Liver, and Black Pyrefly, which enhance resistance and combat capabilities.
-
Messmerfire Grease, a potent upgrade for fire-based attacks.
-
Somber Smithing Stone and other smithing materials used to upgrade weapons.
-
Unique items like Scadutree Fragments and the Dried Bouquet talisman, found in secret rooms and storerooms.
-
The Bone Bow and Euporia Twinblade, rare weapons hidden within the settlement.
-
Various boluses and knot resin that boost player stats and weapon effects.
Additionally, there are secret rooms and locked areas that require specific keys, rewarding players who thoroughly explore the tower with valuable loot.
What rare items and secrets are hidden in the sewer depths of Belurat Tower
The sewer depths of Belurat Tower Settlement in Elden Ring: Shadow of the Erdtree hide several rare items and secrets accessible after obtaining the Well Depths Key. Once inside the sewers, players encounter a vast poisonous swamp filled with hostile Man-Fly enemies and toxic hazards, requiring Neutralizing Boluses to survive.
Key rare items and secrets found in the sewer depths include:
-
Immunizing Horn Charm +2, dropped by an elite toxic variant of the Lesser Ulcerated Tree Spirit guarding the area, which boosts poison resistance.
-
Various consumables and crafting materials looted from corpses scattered throughout the sewers, such as Whiteflesh Mushrooms, Knot Resin, Beast Liver, Poisoned Hand, Serpent Arrows, Neutralizing Boluses, and Smithing Stones.
-
A shortcut unlocked by climbing a tall ladder in a tower within the swamp, providing faster access back to the Belurat Tower Settlement Site of Grace.
-
The sewer area also features a challenging fight against a dual sword-wielding Horned Warrior, who drops valuable loot including the Horned Warrior’s Sword and Knot Resin upon defeat.
-
The sewer contains locked doors requiring the Well Depths Key, emphasizing exploration and backtracking to uncover all hidden treasures and pathways.
Overall, the sewer depths offer a rich trove of rare items and secrets that reward thorough exploration and careful combat within this toxic, enemy-infested environment.