Hidden among the rocky plains of Akkala, the Jochi-iu Shrine tests your precision and timing with a clever “Proving Grounds: Flow” challenge. Here’s how to reach its exact location and outsmart its traps for a clean victory in Zelda: Tears of the Kingdom.
When you’re done, our shrine locations page or interactive Hyrule map can direct you toward something else to do.
Jochi-iu Shrine location
The Jochi-iu Shrine sits on the southern edge of the Gerudo Highlands, at coordinates (-3889, -2381, 0371). Players reach it by heading southwest from the Gerudo Highland Skyview Tower or scaling the cliffs south of the Mount Homeysoa area. A nearby Korok seed puzzle marks the approach, and the shrine entrance faces north toward the desert expanse below. Fast travel from the Popla Foothills Skyview Tower shortens the trip across the uneven terrain.
The Jochi-iu Shrine is found within the Deep Akkala region. It sits just off the north-south road that connects East Akkala Stable to the Akkala Ancient Tech Lab.
Jochi-iu Shrine walkthrough
Enter Jochi-iu Shrine on Great Sky Island at coordinates (0531, -2447, 2033). Activate the nearby Flux Construct I by hitting its weak points until it drops a Zonaite core, then pick it up. Carry the core to the central platform and insert it into the gear mechanism to rotate the barriers. Glide across the opened path, defeat the Soldier Constructs with arrows or melee attacks, and open the treasure chest for a Lightscale Trident. Climb the ladder, strike the final Flux Construct’s eye when exposed, and claim the Sign of the Shadow for your Reward.
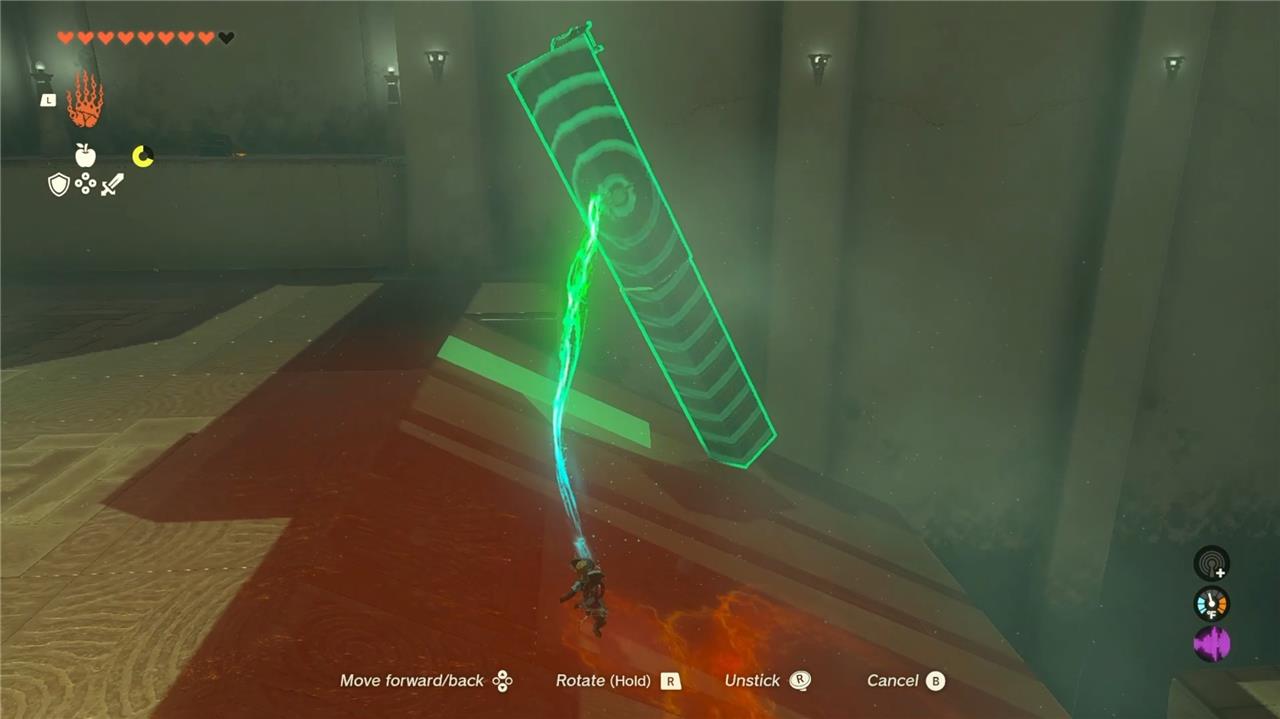
The Jochi-iu Shrine has Link playing the largest game of Jenga ever with the assistance of Ultrahand. The goal of this shrine is to collect the ball from the top of a precariously stacked pillar of rectangular blocks and place it the ball socket. If Link knocks the tower over, or tries to step on the platform the tower is standing on, the platform will dump the blocks (and Link!) into a bottomless pit and reset to the starting position. Resetting also returns all blocks that were removed back to the tower, erasing any other progress you’ve made.
1. Approach the tower on its left side. Just like in Jenga, you’ll want to remove the blocks that aren’t load bearing, allowing the tower to stay balanced. The third row from the bottom of the tower has three blocks visible. Use Ultrahand to gently slide out the center block.
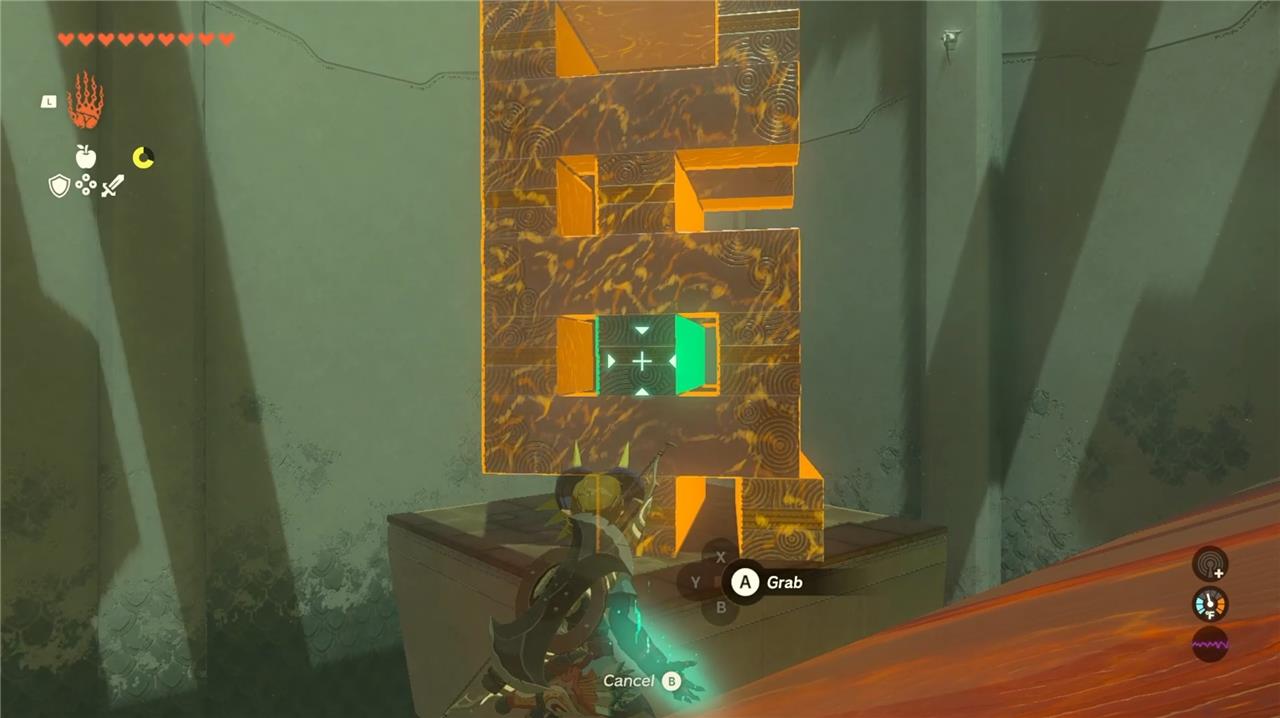
2. Place that piece in the alcove to the right. There is a electrical pad and its unpowered friend that need to be joined to create a circuit to power a moving platform. These Jenga blocks are perfect electricity conductors.
3. Return to the tower to grab another block. This one is also precarious; the tower’s bottom row has both a center piece and an edge piece. Use Ultrahand to slowly slide out the edge piece. The tower will remain standing on just that center block as long as you’re careful.
4. Guide the second block over to the alcove, and join the two pieces at an obtuse angle to connect the two electrical pads. The platform will power on and begin moving horizontally toward the far wall.
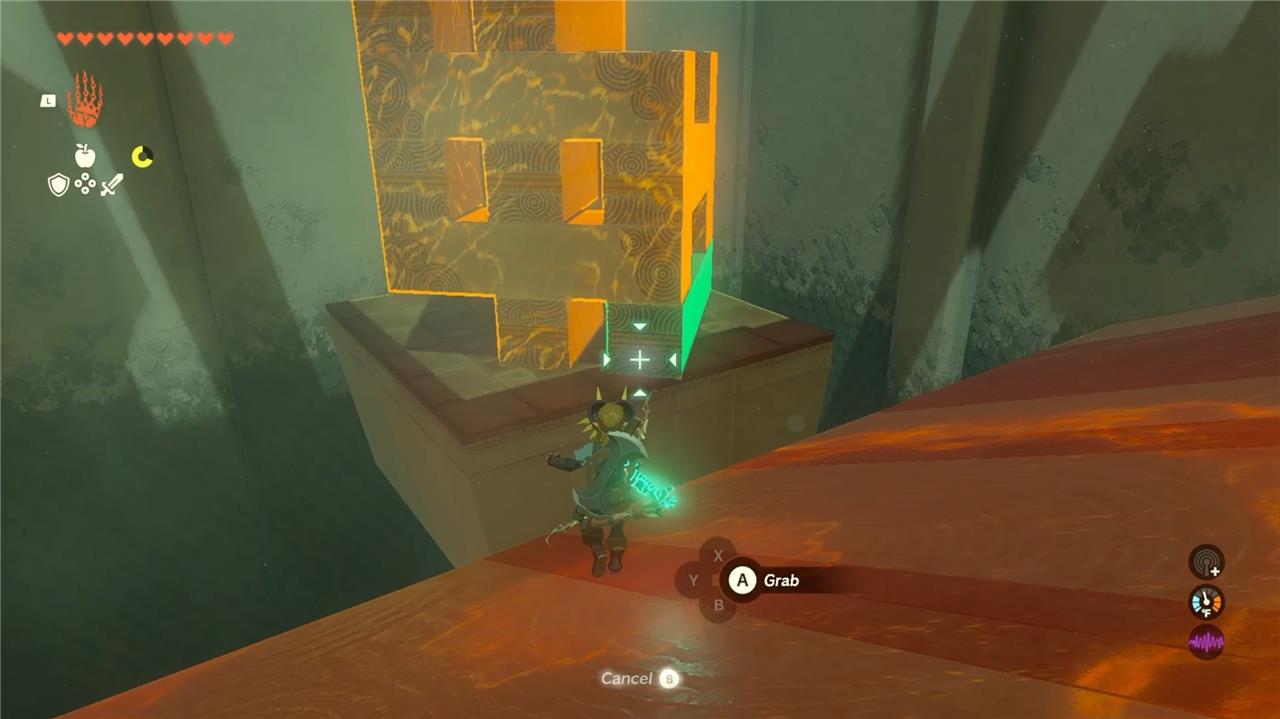
5. Hop on the platform and use Ultrahand to grab the ball from the top. Carry the ball back over to the ball socket and drop it in.
6. Voila! The door is open. But don’t leave just yet. There are two chests to collect.
How to get the Jochi-iu Shrine chests
After placing the ball in the socket and opening the main door, turn back toward the block tower instead of heading straight to the altar. Use Ultrahand to carefully pull out the upper blocks until the hidden chest is exposed, then grab and drop it onto safe ground to claim the Large Zonaite. Next, gather two long blocks, attach them into a simple ramp, and lean it against the ledge with the visible chest near the entrance so you can run up, open it, and claim the Zonaite Bow before leaving the shrine.
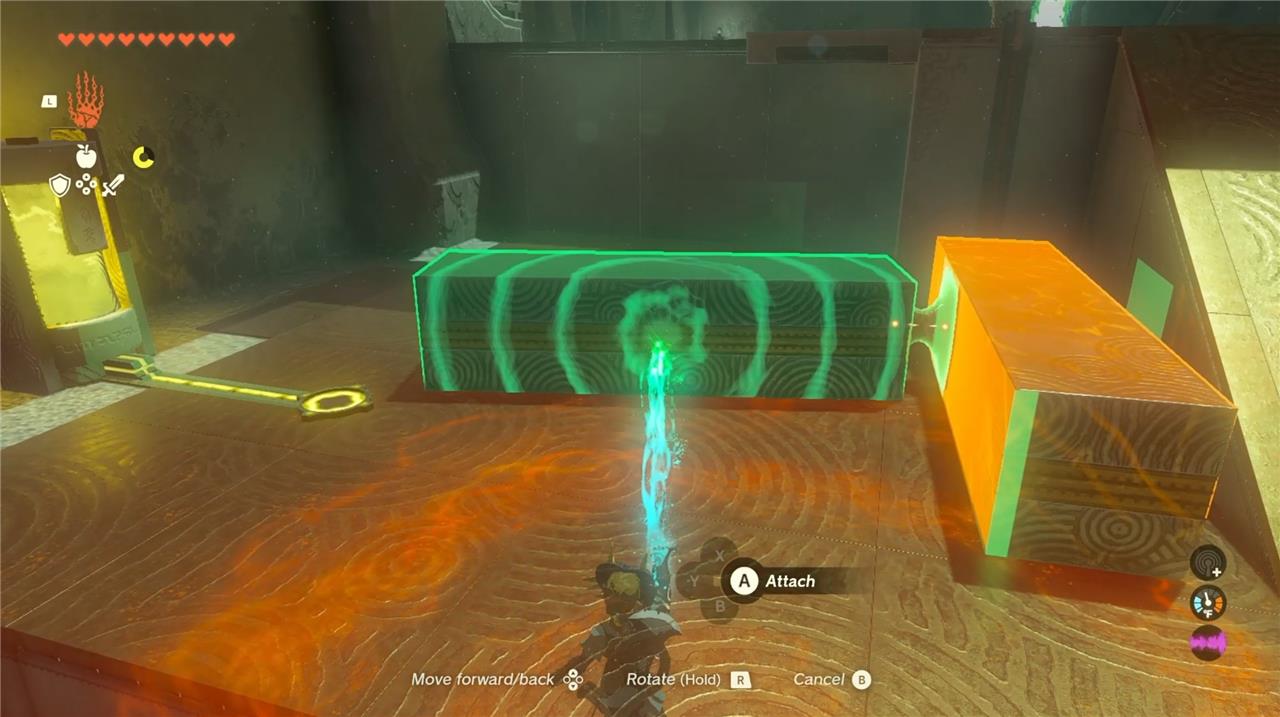
1. Let’s start with the hardest chest first, while you have the moving platform still working. There is a chest resting on one of the middle beams of the tower, and it’s obscured from view by the top of the tower. You have a couple of options to reach it.
2. Use Ultrahand to pull the top piece off the tower gently, careful to not knock the tower over. This should expose the chest to your line of sight.
3. You can continue to ride the platform back and forth, waiting for the short window of time where your Ultrahand indicator over the chest turns green and you can grab it.
4. Another method: Fuse two blocks together to create a long block stick, and (gently, I said!) navigate it toward the chest. Once the “Attach” prompt appears, you should be able to fuse your long block stick to the chest and extract it.
5. Open the chest to find a large Zonaite.
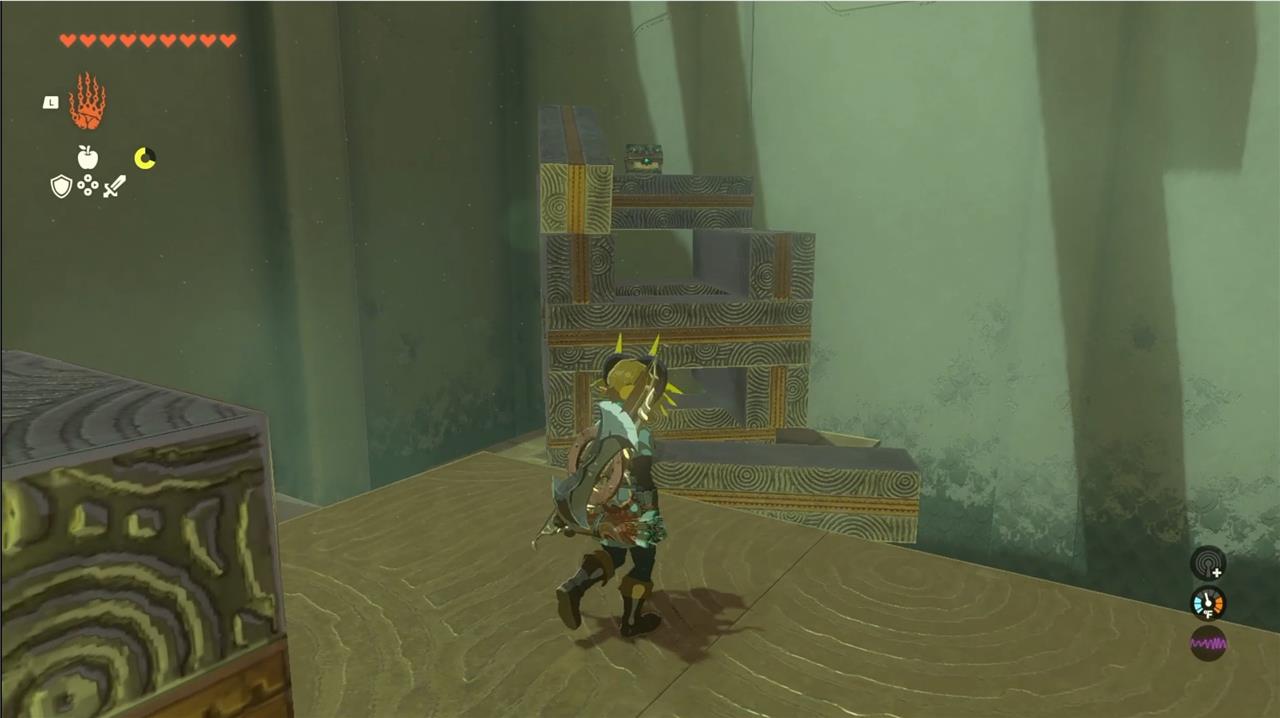
1. The other chest is on a ledge on the left side the room. Once you’ve finished with the moving platform, grab one of the blocks with Ultrahand. You can lean it against the platform to climb it.
2. Alternatively, you can use Recall on the block. First, use Ultrahand to create a path that raises and lowers the block, like a short elevator. Then use Recall to hop on the block as it rises to the top of the ledge.
Jochi-iu Shrine exact coordinates in Tears of the Kingdom
The Jochi-iu Shrine’s exact in-game coordinates are 4346, 2875, 0165 in the Deep Akkala region, just northeast of East Akkala Stable.
Show Jochi-iu Shrine on the Tears of the Kingdom map with marker
Jochi-iu Shrine is located in the far northeast of Hyrule, in the Deep Akkala region, near East Akkala Stable. In-game, you can place or view a marker for it by using its known coordinates around 4346, 2875, 0165 on your Purah Pad map and dropping a pin at that spot.
To see it clearly marked on an external interactive map (with a visual marker already placed):
-
Open a Tears of the Kingdom interactive map site in your browser (for example, ones that list all shrines and let you toggle them on/off).
-
Enable or search for shrines, then look to the top-right corner of the surface map in Deep Akkala, where Jochi-iu will appear with its own shrine icon; clicking that icon will highlight it just like a marker.