Hidden deep within Death Mountain’s fiery depths, the Marakuguc Shrine challenges your puzzle instincts with moving platforms, flame jets, and a clever use of Zonai devices. Here’s where to find it and how to solve every trick inside for an easy Light of Blessing.
Marakuguc Shrine location
The Marakuguc Shrine sits on the southern side of the Thyphlo Ruins in the Great Sky Island’s Depths, at coordinates 0448, -0912, 0004. Players reach it after activating the Thyphlo Ruins’ floating platforms by striking the Lightroots above and below ground, which reveal the ruins’ full structure. From the South Eldin Canyon Mine lightroot, head southeast through the chasms until the ruins appear, then drop to the shrine’s base amid the floating stone formations.
The Marakuguc Shrine is found within the Eldin Canyon region at the (1761, 2508, 0437) coordinates. It’s west of Death Mountain and just northeast of Goron City, for reference.
Marakuguc Shrine walkthrough
Enter Marakuguc Shrine on the Great Sky Island at coordinates (0857, -1523, 3134). Activate the nearby Recall device to launch a ball into the spinning gear, timing it so Recall sends the ball upward into the receiver above as the gear rotates. This opens the gate to the second chamber. There, Recall the moving platform to reach the higher ledge, then use it again on the slab to cross the gap and strike the green switch. A final Recall on the lowered platform aligns it with the exit switch, granting access to the altar for the Light of Blessing.
1. After entering the shrine, head straight forward until you reach the gap. Stand on the edge and peer down – you’ll see there’s a panel on the floor you can grab with Ultrahand. Pull the first one up and the rest will come with it.
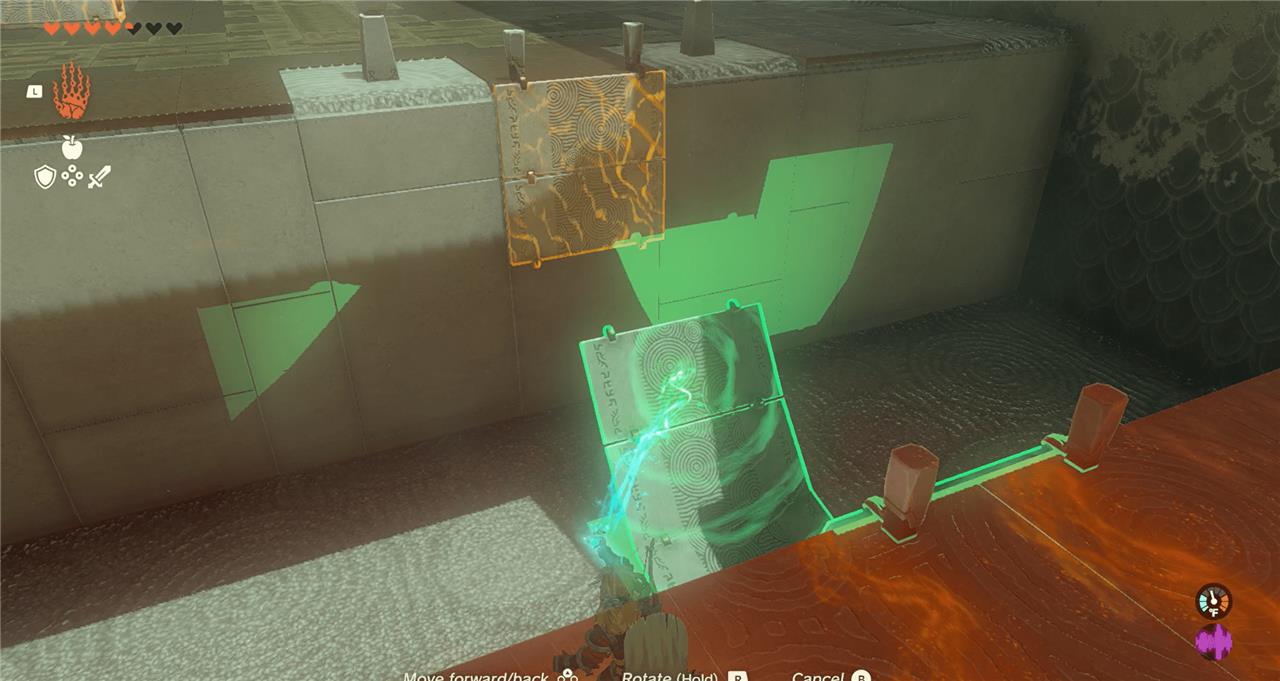
2. Attach the panel to the two dangling from the other side of the gap to create a bridge. Cross over.
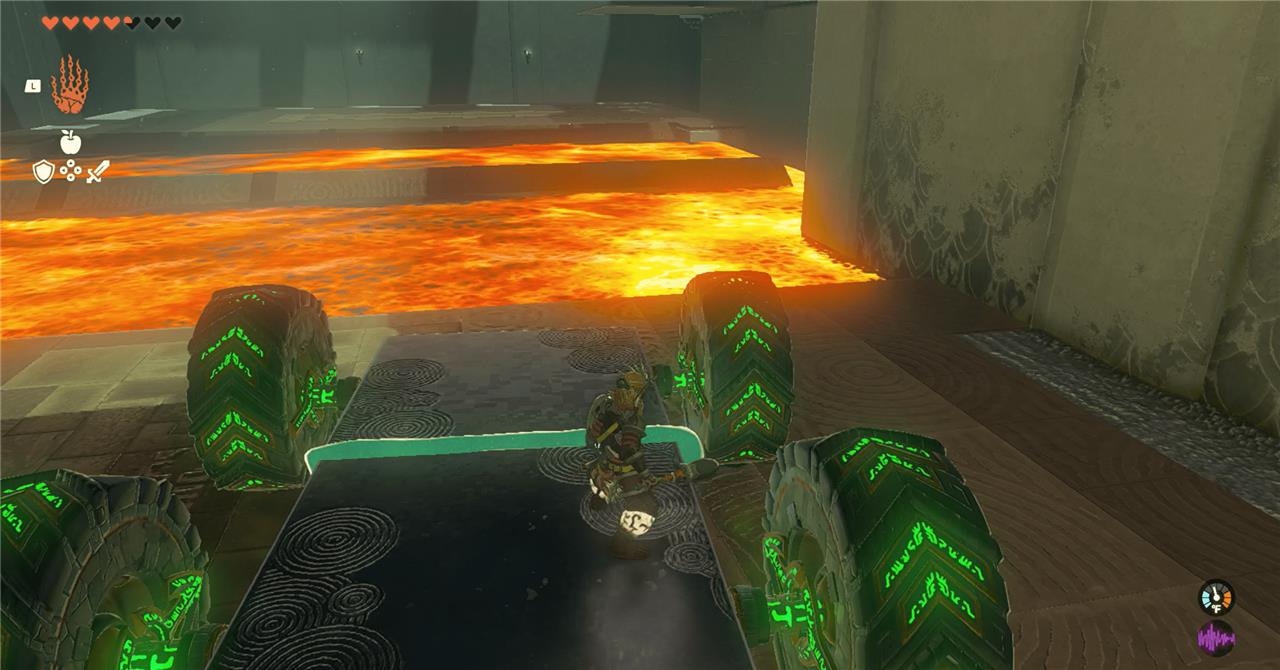
3. Next, there’s a fiery pit to cross. In front of you, there’s a pile of panels to make a bridge and to the right of that, a wheeled mechanism. Take the wheel mechanism and use Ultrahand to attach it to the front of the pile of panels. Hit the wheels to activate them and they’ll pull the panels across the fiery pit to make a bridge. Cross over.

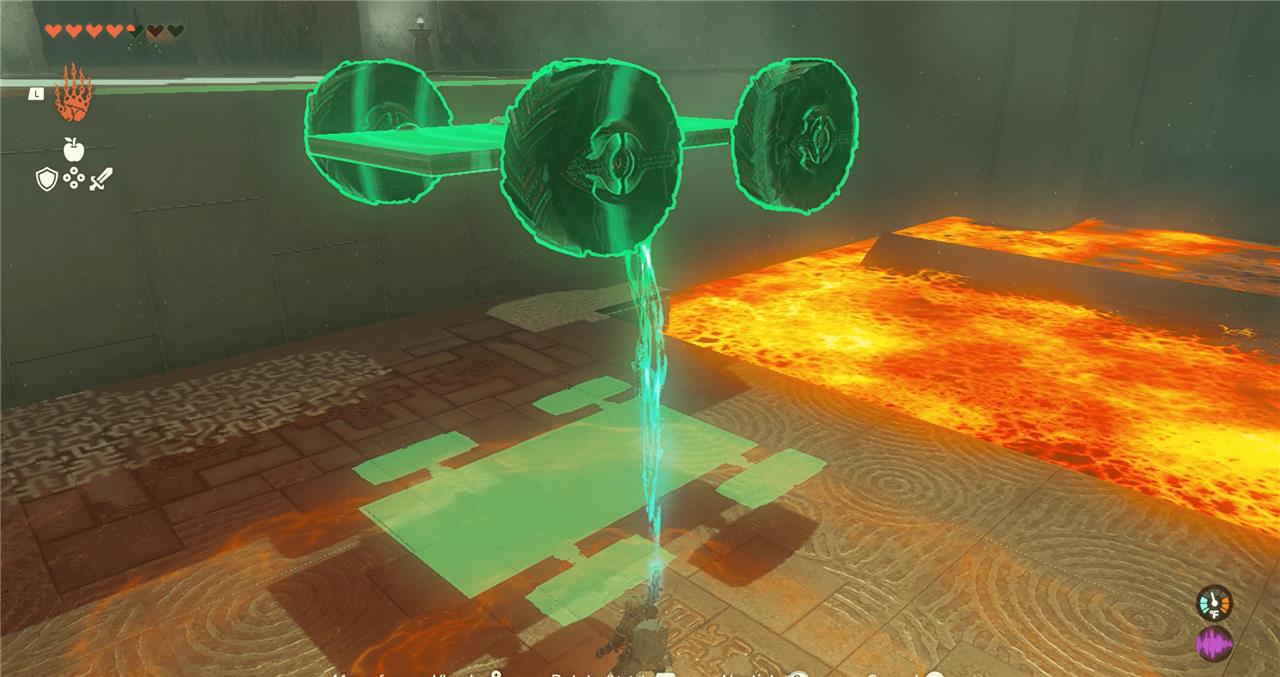
4. There are two more wheeled devices straight ahead. Combine the panels attached to both of these to create a vehicle of sorts. Hop on, hit the wheels, and cross the pit.
5. Hit a wheel to stop the car.
6. On your right, there’s an overhang. Move your vehicle using Ultrahand over there, right where the lip of the overhang is. Raise the vehicle to the overhang then back to the ground. Hop on and use Recall to raise the vehicle so you can access the ledge.
7. Head straight forward and you’ll find a Construct. Fight it and defeat it.
8. Further in, there’s another vehicle inside toward the left of the room. Move it to the right side of the room, right at the back corner where there’s a high platform. Again, raise the vehicle to the lip of the platform and back down again. Use Recall to get yourself up there and get the chest. Inside there’s a strong Construct bow.
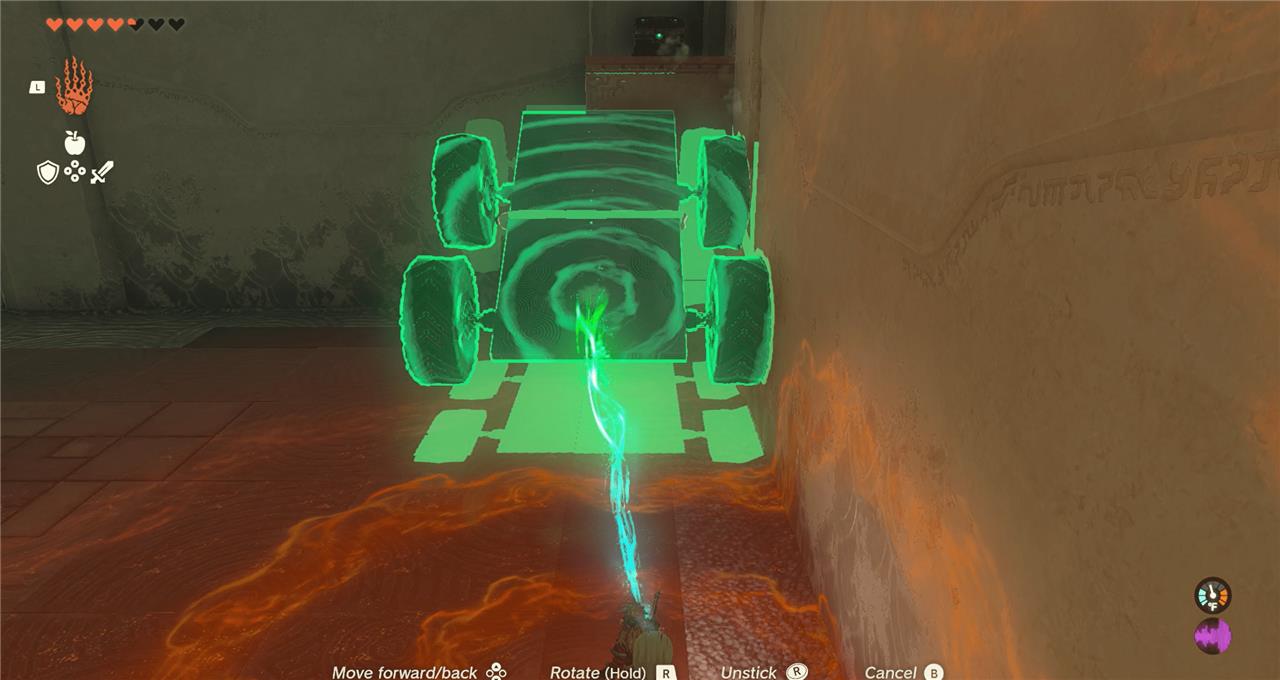
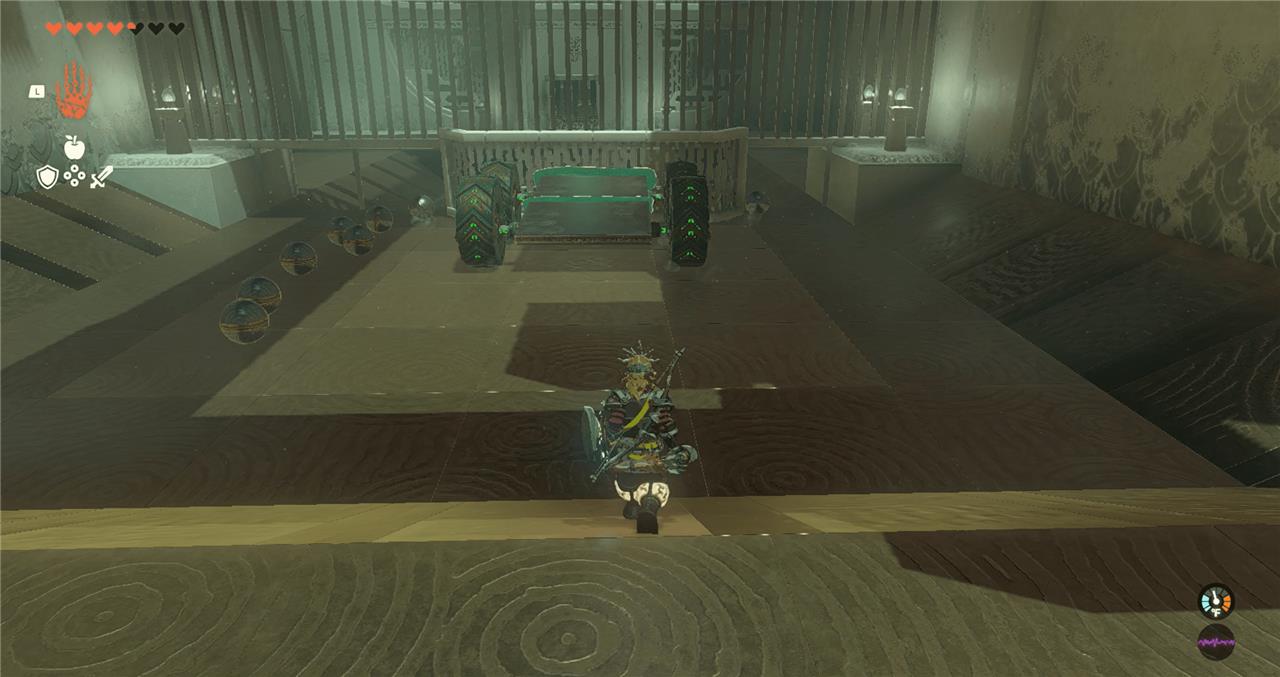
9. Hop down and turn to the left. There’s another gap filled with balls and a gated off area with gaps leading into the next chamber. In front of the gap, there’s a piece of metal. Attach the piece of metal to the vehicle, which you should move right in front of the gap. Essentially, you’ve created a plow.
10. Hit the wheels and the plow will push the balls into the next room. If you miss any, use Ultrahand to reposition the car and try again. You don’t need to move all the balls, however – just most of them, it seems.
11. Head through the gaps. If you’ve got enough balls in the indent in the floor, the gate at the end of the room will open.
How to reach Goron City and Death Mountain in Zelda TOTK
You reach Goron City and Death Mountain by heading through the Eldin region from central Hyrule, usually as part of the “Regional Phenomena” main quest that points you To Goron City.
Preparing for Eldin
-
You don’t need flameproof gear just to reach Goron City in Tears of the Kingdom; the outer paths are safe enough to walk with normal armor.
-
Heat protection becomes important only if you go into the really hot caves and interior lava areas around Death Mountain, where flame-proof elixirs or the Flamebreaker set are needed.
Route to Goron City
-
From Lookout Landing, go northeast toward the Eldin region, using the huge volcano (Death Mountain) as your visual landmark.
-
Make your way to Woodland Stable (north of central Hyrule); from there, follow the main road north toward Death Mountain.
-
Early on you’ll pass Ekochiu Shrine near a road sign that points right to Goron City; follow this right-hand path up into Eldin.
-
Keep following the lantern-lit mining road and stone archways; you’ll eventually see Bedrock Bistro and then the lights and structures of Goron City ahead.
Getting up Death Mountain
Once you’ve progressed the “Yunobo of Goron City” quest, your next big goal is climbing to the summit of Death Mountain.
-
From Goron City, go to the west side of Death Mountain; there are minecart rails leading up the mountain.
-
Use a minecart found near Death Mountain West Tunnel and attach a fan (and battery if you like) to power it up the track.
-
Ride the cart along the rail line; you’ll pass combat encounters you can clear by firing Yunobo’s rolling attack while riding.
-
At the top, you reach the rim of Death Mountain, activate nearby shrines like Sitsum Shrine for fast travel, and trigger the mid-boss Moragia and then the dive into Death Mountain’s depths toward the Fire Temple.
If you tell me where you are on the map (nearest tower/stable), I can give you a very specific “turn-by-turn” path to Goron City.
Where to buy Flamebreaker Armor in Goron City
In Tears of the Kingdom, you buy the Flamebreaker set at Ripped and Shredded, the armor shop in Goron City.
Shop location in Goron City
-
The shop is on the right-hand side just after you enter Goron City, in the cluster of buildings near the main road and general store. Look for the armor sign and a Goron outside pointing tourists to the shop.
-
The armor shop’s approximate coordinates are around -,,-1640, 2410, 0384-,, in the Eldin region.
What you can buy and prices (TOTK)
Exact prices in Tears of the Kingdom differ slightly from Breath of the Wild, but the structure is the same: three pieces, all sold at Ripped and Shredded.
-
Flamebreaker Armor (chest) – sold here (in TOTK this piece can also be obtained at YunoboCo HQ, but is purchasable in the Goron shop as well).
-
Flamebreaker Helm (head) – sold at Ripped and Shredded.
-
Flamebreaker Boots (legs) – sold at Ripped and Shredded.
In Breath of the Wild, the armor and boots are a few hundred rupees each and the helm is the most expensive; Tears of the Kingdom keeps the idea that this is a costly but permanent source of Flame Guard.
Quick recommendation
-
If you are short on rupees, you can get one piece free by doing a fireproof-lizard side quest at Southern Mine, then buy the remaining pieces in Goron City once you can afford them. This still works as a way to reduce how much you must buy.
If you tell me how many rupees you have, I can suggest which piece to buy first and how to cover the rest with elixirs.