Hidden in the icy expanse of the Hebra Mountains, the Mayausiy Shrine challenges your sense of direction with a clever spatial awareness puzzle. Mastering its shifting platforms demands patience and precision-but the reward inside makes every tricky turn worth the effort.
Mayausiy Shrine location
Mayausiy Shrine is located in the Hebra Mountains region, just west of Rito Village in Tears of the Kingdom. You can find it on a snowy plateau at coordinates roughly (-3863, 2685, 0702). The shrine lies near Rospro Pass and can be reached by gliding from the Rospro Pass Skyview Tower. Make sure to bring cold-resistant gear or food, as the low temperatures in this area can quickly drain health.
The Mayausiy Shrine is found inside of the Forgotten Temple in the Tabantha Frontier region. The exact coordinates for the shrine are (-1165, 2602, -0083).
You’ll first need to make your way into the Forgotten Temple, which is labeled on the map above. The entrance is elevated off of the ground, so you’ll need to either glide into it from the cliffs beside it or use Ascend to climb your way up.
Mayausiy Shrine walkthrough
The Mayausiy Shrine centers on a spatial awareness puzzle that challenges you to align moving platforms to progress. Begin by observing the pattern of the shifting blocks, then use precise timing to cross each section safely. You’ll need to manipulate platform positions using nearby controls to create a clear path forward. Pay attention to how the platforms’ movements connect-success depends on syncing your actions with their rhythm. Once you reach the end, activate the final switch to reveal the exit and claim your reward.
The Mayausiy Shrine tests your spatial awareness by having you recreate a block using an assortment of shapes.
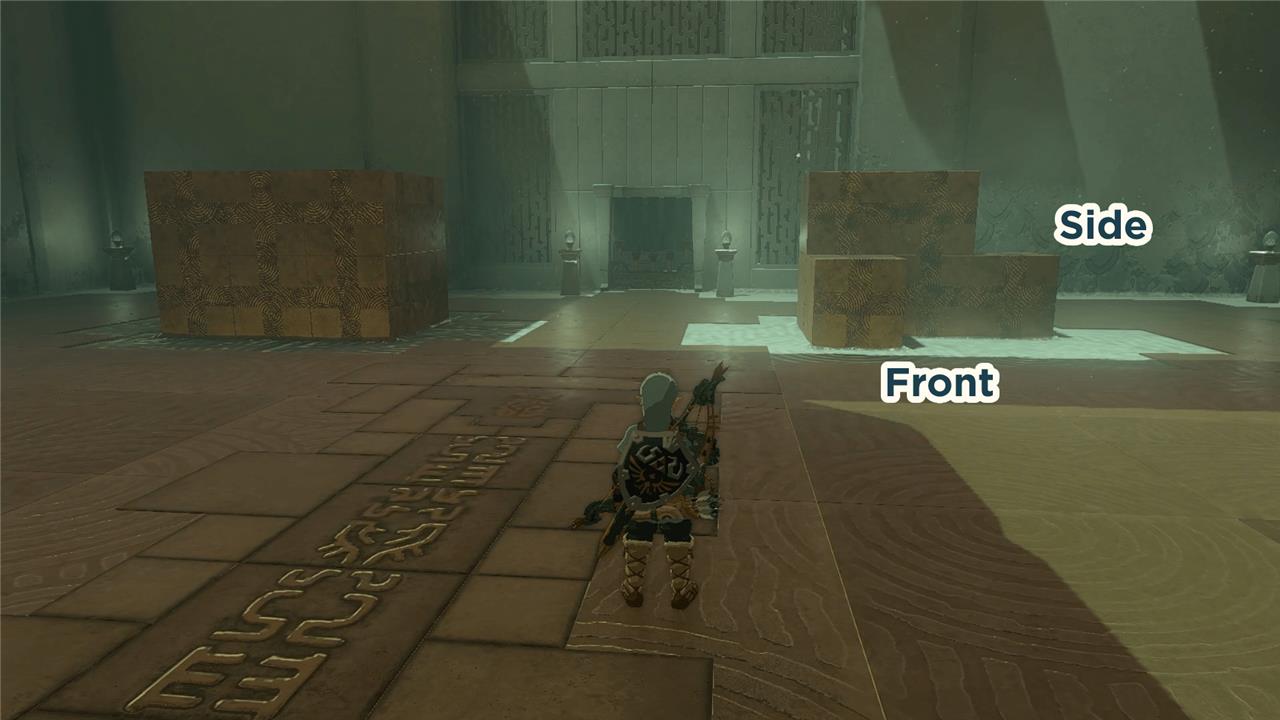
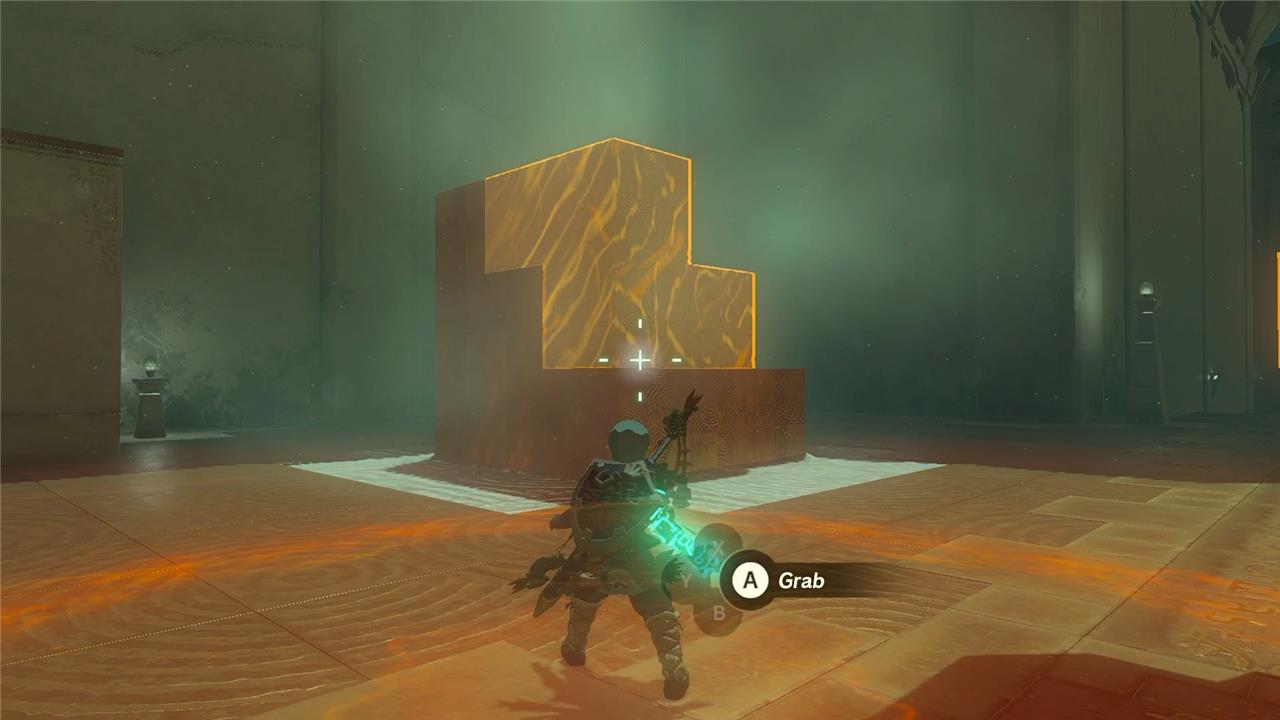
1. Proceed down the stairs to find one complete bronze rectangular prism on the left, an incomplete bronze rectangular prism on the right, and two L-shaped blocks along the right wall. The objective is to recreate the left rectangular prism using the incomplete prism and the two L-shaped blocks.
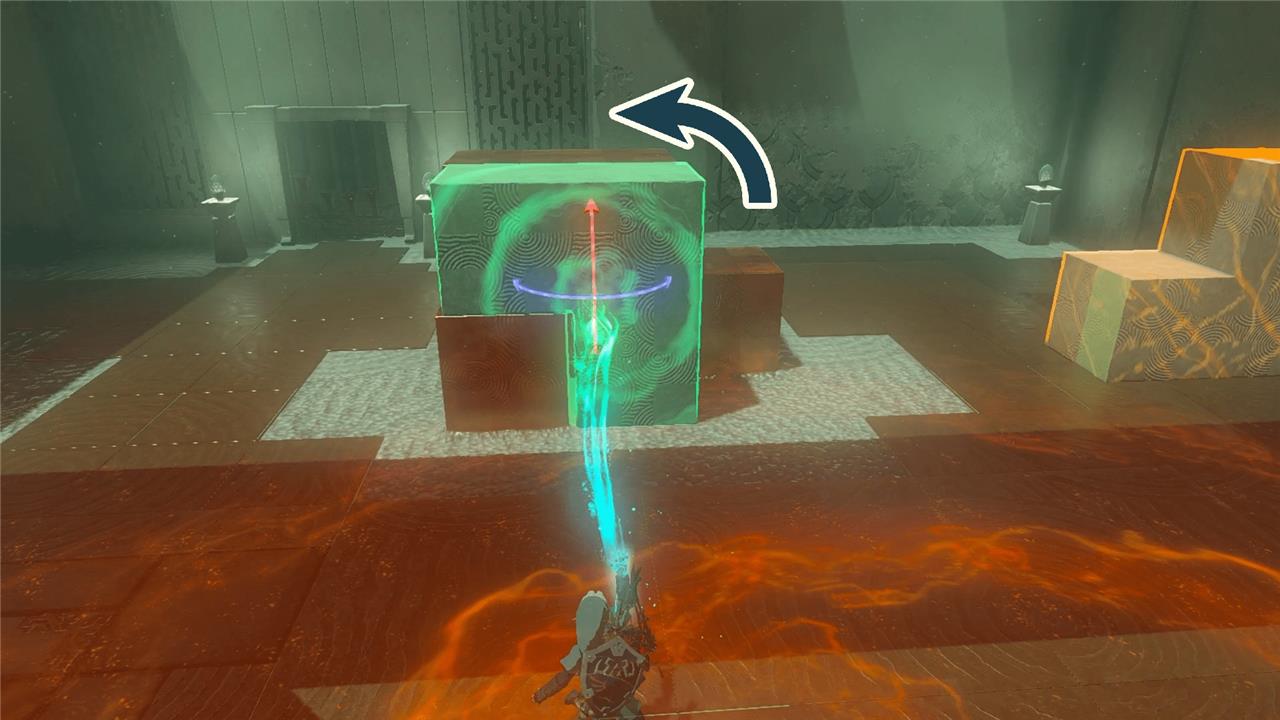
2. Rotate one of the L blocks twice to the left, twice upwards, and twice to the right. If you’re having trouble, view the second image in the gallery for a reference.
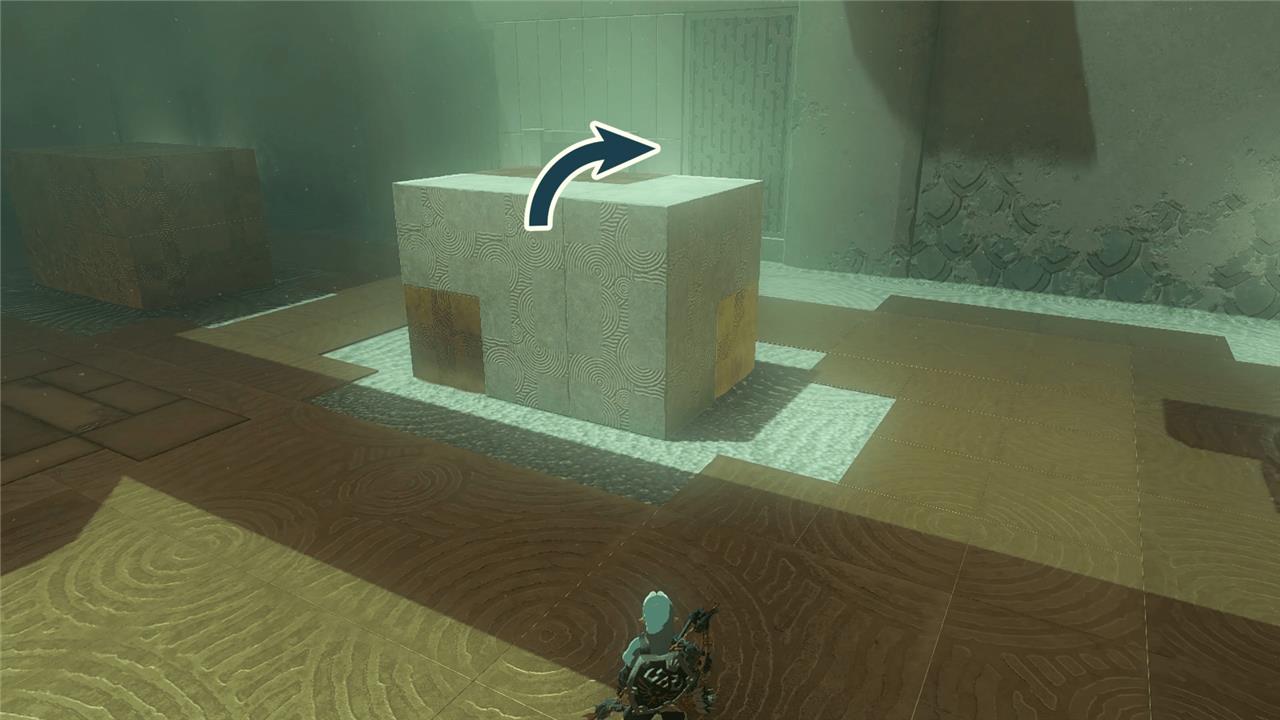
3. Place the L block on top of the block on the front of the incomplete prism.
4. Take the second L block and fit it into the remaining space on the side of the incomplete prism to complete the puzzle.
5. Continue through the opened gate to find a Captain Construct.
6. Defeat the Captain Construct and move into the next room.
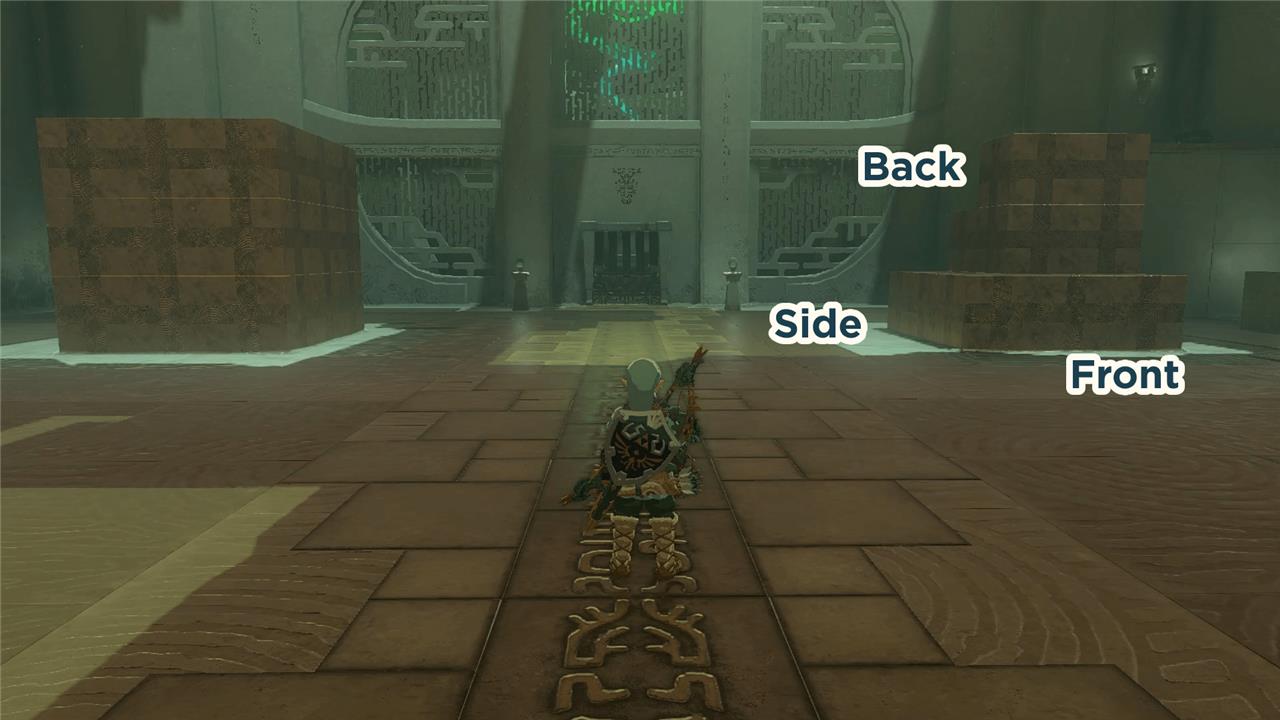

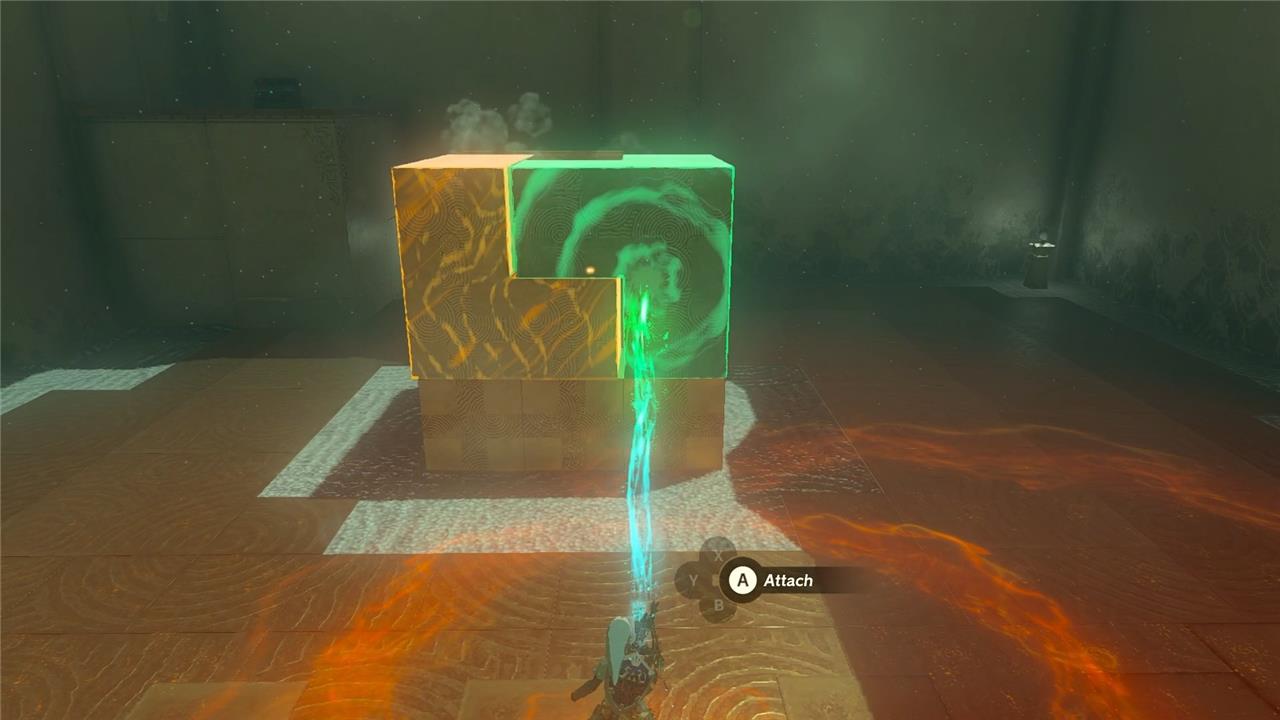
7. Inside the second puzzle room, you’ll find a 3×3 cube on the left, an incomplete cube on the right, and three shaped blocks on the right. For clarity, we will be naming the blocks from left to right – corner, L, and Z. If you need an image reference, check the second image in the gallery above.
8. Take the Z block and fit it into the open slot on the back of the incomplete cube.
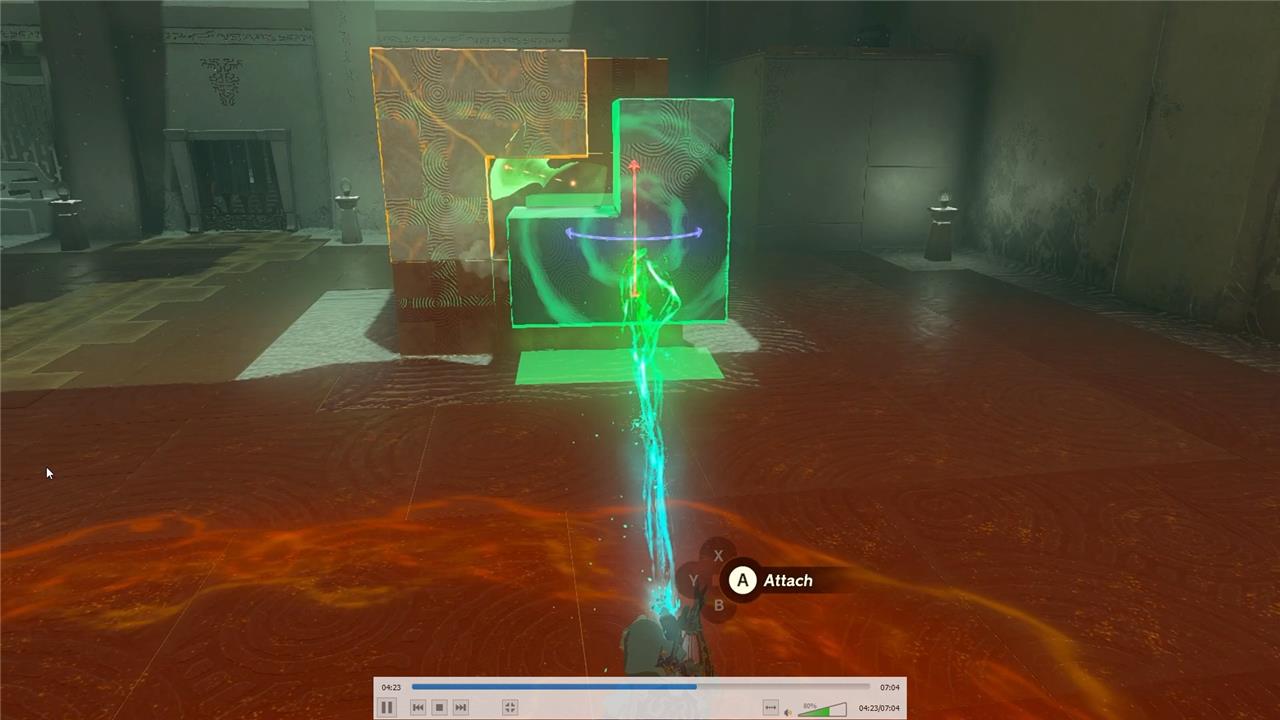
9. Grab the corner block and rotate it to fit beside the Z block while completing the corner on the side of the incomplete block.
10. Finish the cube by slotting the L block into the remaining slot on the front of the cube, opening the exit.
11. Look in the corner of the room behind your newly created cube to find a large platform jutting out of the wall. On top of the platform, you’ll be able to find a chest.
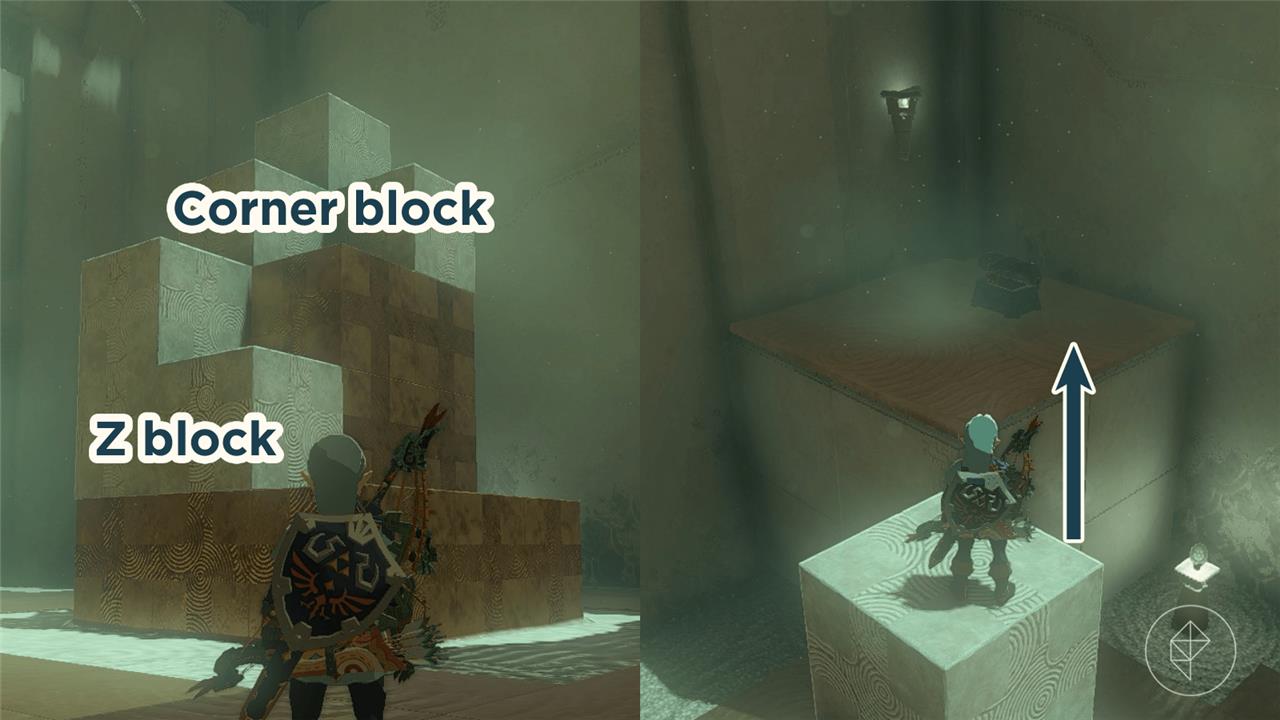
12. Remove the L and corner block from your cube, and place one of the two on top of the block to create higher elevation.
How to reach the Forgotten Temple entrance coordinates
The Forgotten Temple entrance in Zelda: Tears of the Kingdom is located in the Tabantha Frontier region, deep within Tanagar Canyon at coordinates approximately (-1420, 2269, -0050).[conversation_history]
Travel Directions
Start from New Serenne Stable (formerly Serenne Stable) and head northeast along the road toward Snowfield Stable in Hebra. Follow the path below Tanagar Canyon until you spot the large ruined temple structure overlooking the valley between Rowan Plain and South Tabantha Snowfield.[conversation_history]
Reaching the Entrance
Position yourself on the cliffs overlooking the ravine on either side of the canyon’s northern end, then paraglide down into the semi-circular opening at the southern side of the temple structure. If landing in the ravine below, climb protruding ledges on the walls to ascend halfway up, where you’ll find a hot air balloon and a character named Cado nearby.
Inside the Temple
Proceed through large rooms filled with Bokoblin camps-fight or sneak past them-using Ascend on wall ledges to progress quickly. Activate the Mayausiy Shrine shortly after entry as a fast travel point, then continue past a toppled Goddess Statue to deeper chambers.
Best paraglide launch points to reach the Forgotten Temple
The best paraglide launch points for reaching the Forgotten Temple entrance in Zelda: Tears of the Kingdom are elevated spots along the northern rim of Tanagar Canyon, offering direct sightlines to the semi-circular opening on the temple’s southern face at coordinates around (-1420, 2269, -0050).[conversation_history]
Cliffs Overlooking Ravine
Stand on either side of the canyon’s northern cliffs above the ravine between Rowan Plain and South Tabantha Snowfield, then glide straight down toward the arched entrance. These positions provide the clearest drop without overshooting into the valley floor.[conversation_history]
Nearby Shrines and Towers
Launch from Rin Oyaa Shrine (southeast edge near Snowfield Stable) or Lindor’s Brow Skyview Tower for a broader aerial view-glide southeast into the canyon and adjust mid-flight toward the temple ruins. Alternatively, warp to Mogg Latan Shrine on Satori Mountain and paraglide down from its heights.
Stable Approaches
From New Serenne Stable, hike north up the hill to the valley rim and launch off the closest cliff facing the central entrance. Snowfield Stable works similarly by heading south along the canyon edge for a shorter glide path.[conversation_history]