Lurelin Village isn’t the peaceful coastal spot it once was-ruffians have taken over, and Link must drive them out to restore the locals’ home. Here’s how to complete every step of the “Ruffian-Infested Village” quest in The Legend of Zelda: Tears of the Kingdom.
As you interact with NPCs around Hyrule, they’ll tell you about how worried they are about the pirates occupying Lurelin Village, and if it’ll ever return to normal. Head over to the Sifumim Shrine on the cliff overlooking Lurelin Village to meet Bolson and Rozel. They’ll tell you that they’re working on restoring the village, but every single pirate must be taken care of before they can start.
‘Ruffian-infested Village’ starting location
The quest begins in Lurelin Village, a coastal settlement overrun by bandits. Once a peaceful fishing community, it now lies damaged and tense after the attack. Wooden huts are broken, supplies are scattered, and the villagers have fled or are hiding nearby. The area serves as the starting point for clearing out the ruffians and restoring the village to safety.
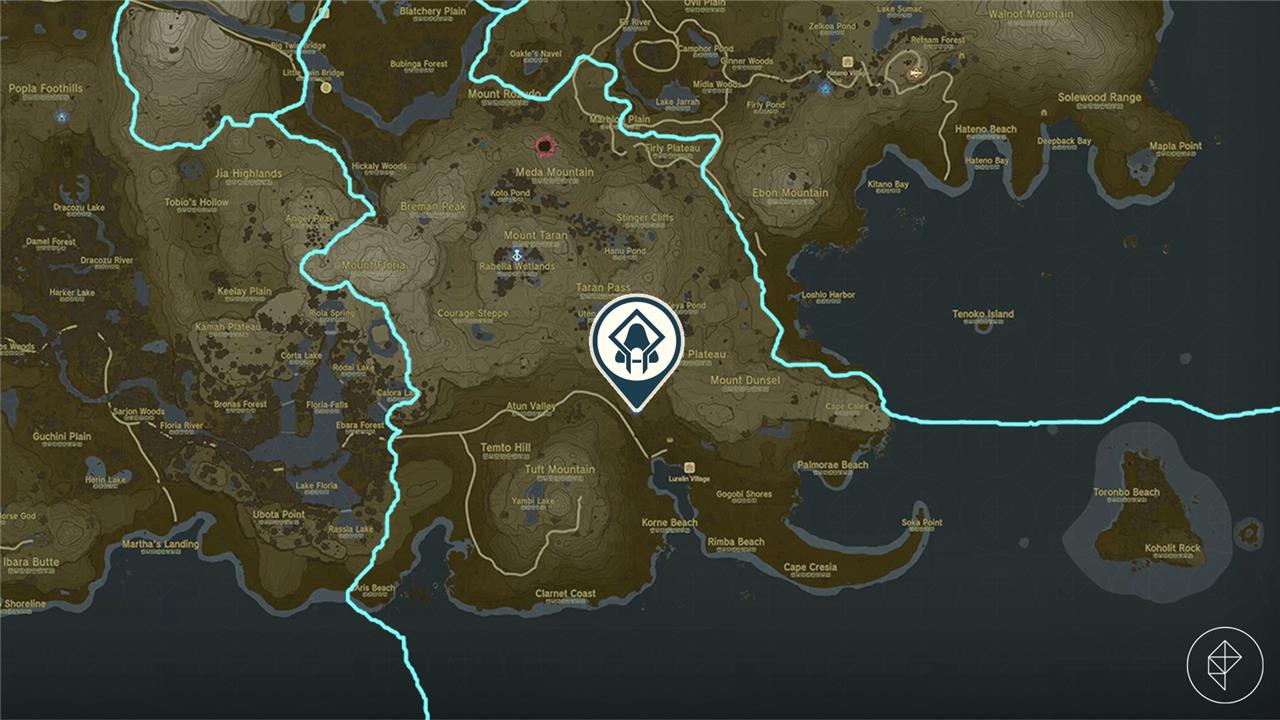
Travel to the Sifumim Shrine just outside of Lurelin Village, and talk to Bolson and Rozel to start the “Ruffian-infested Village” side adventure. The shrine’s exact coordinates are (2826, -3271, 0078), which is in the southeastern section of the Faron region.
How to defeat all the pirates in Lurelin Village
Clear the village by defeating all pirate enemies scattered around Lurelin. Focus on archers stationed on rooftops first to reduce ranged threats, then deal with melee foes on the ground. Use elemental attacks or explosives to disrupt groups and take advantage of elevated positions for a safer approach. Once every pirate is defeated, speak to Bolson or the locals to proceed with rebuilding efforts and restore peace to the village.
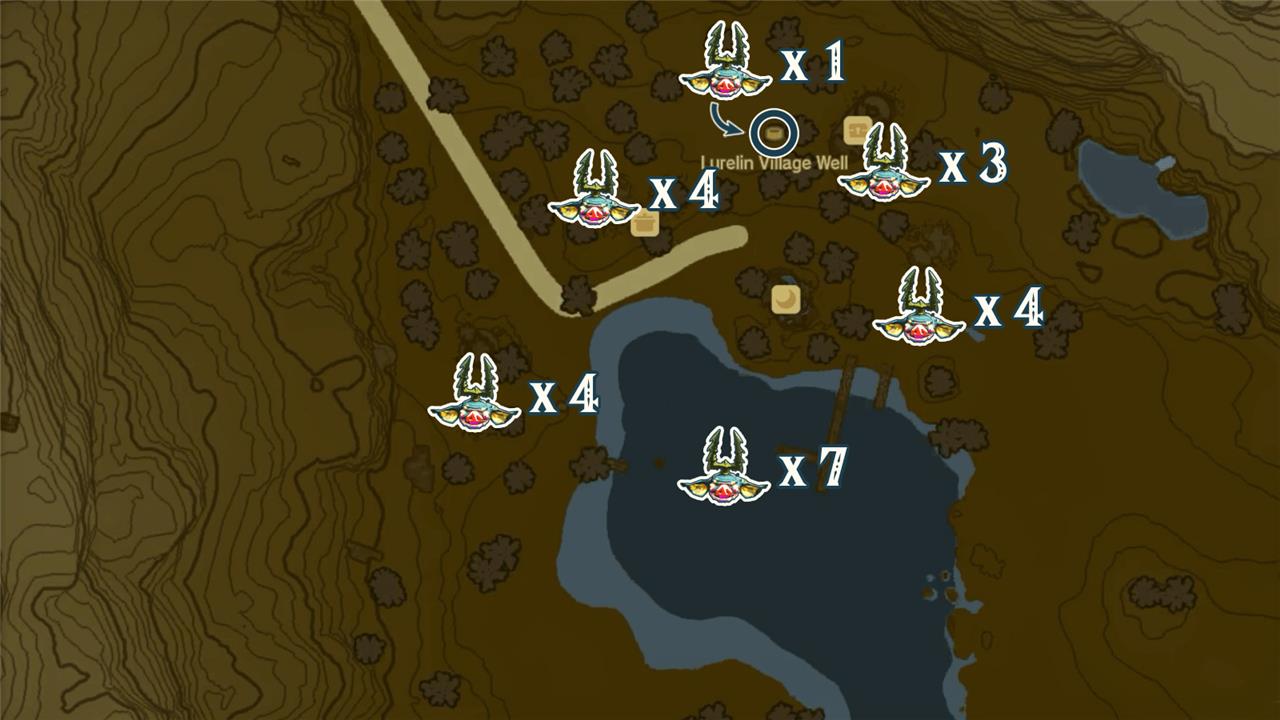
The one and only goal of this quest is to eliminate every pirate that is occupying the Lurelin Village. There are a total of 23 pirates which include Blue and Black Bokoblins, Black Moblins, Black Lizalfos, and a Black Boss Bokoblin. Before heading in to get rid of the pirate infestation, here are a few tips:
- Bokoblins can’t swim – Lurelin Village is coastal, so there’s is a lot of water nearby. Certain enemies like Bokoblins will perish if they fall into a body of water, so be sure to launch them into the ocean to easily defeat them and save your resources.
- Upgrade your armor and health – With a non-upgraded armor set and nine hearts, we would take around four to five hearts per hit from the Black Bokoblins. If you’re not the most well-versed in combat, it may be helpful to upgrade your armor and health before taking on the challenge. Head to a Great Fairy to upgrade your armor, and visit a Goddess Statue with Light of Blessings in hand to increase the number of hearts you have.
- Bring powerful weapons, shields, and bows – There are a lot of enemies in the area, which means your weapons, shield, and bows are likely to break at least one during the encounter. Bring along multiple of each, and the stronger the better.
- Gather a few explosive materials – The enemies are often clumped together, which make them perfect prey to AOE attacks. A well-placed bomb flower or elemental Chuchu jelly will help you deal a lot of damage to multiple enemies at once. Also, when you’re taking on the pirates on the ship, a bomb may send the Bokoblins off of the ship into the water, which will kill them instantly.
- Cook up some food – If you’re confident that you won’t take any damage, you might be able to skip this step, but since you’re facing off a lot of enemies, you may need to heal your health at some point.
Where is the last pirate in Lurelin Village?
In Lurelin Village, the last pirate hides behind the shack near the docks, waiting for you to spot the flicker of their lantern as night falls and the waves whisper against the piers.
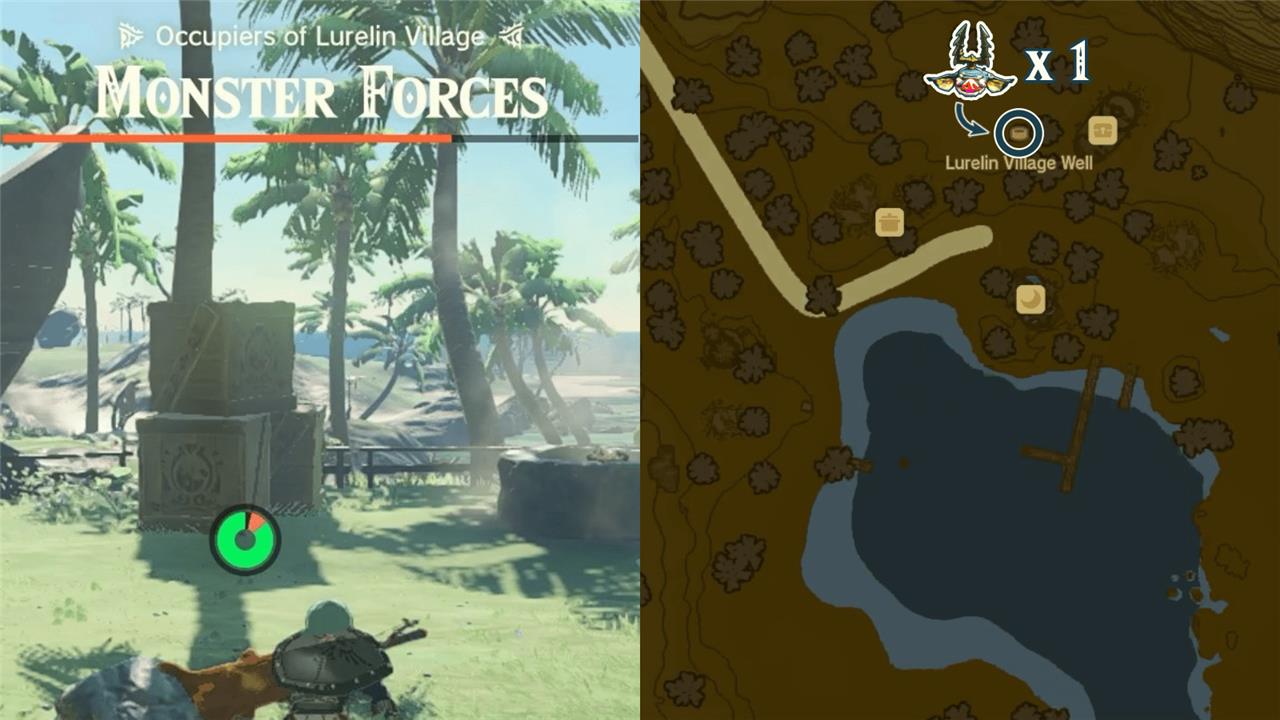
You may have defeated a majority of the pirates occupying Lurelin Village, and you’re having a hard time finding the last pirate hiding away. One sneaky pirate is hiding inside of the Lurelin Village Well, which can be found on the north side of the village beside a stack of wooden boxes. Drop into the well to find one lone Bokoblin, and take them down to defeat all of the pirates.
‘Ruffian-infested Village’ rewards
Completing the “Ruffian-infested Village” quest rewards players with a generous payout of rupees and restores Lurelin Village to its lively state. After clearing out the enemies and repairing the damaged buildings, new merchants return to the area, allowing players to shop and rest freely again. The restored village also opens additional side activities and offers a peaceful spot to revisit later in the adventure.
Where is the Sifumim Shrine exactly in Lurelin Village area
Sifumim Shrine Location
The Sifumim Shrine sits on a cliff northwest of Lurelin Village in the East Necluda region. It overlooks the village from the edge of a hill, positioned west of Mount Dunsel and northeast of Tuft Mountain.
Exact Coordinates
Use in-game coordinates 2826, -3271, 0078 to pinpoint the shrine precisely. Travel southeast from Rabella Wetlands Skyview Tower or glide down from nearby highlands for easy access.
Finding It Easily
From Lurelin Village, head uphill northwest along the cliffside path; the shrine’s glowing entrance becomes visible atop the ridge. Nearby Lightroot Mimufis in the Depths aligns directly below for fast travel reference.
How to reach Sifumim Shrine from Rabella Wetlands Skyview Tower
Reaching Sifumim Shrine from Rabella Wetlands Skyview Tower
Launch from Rabella Wetlands Skyview Tower and glide southeast toward Lurelin Village. The shrine lies on a cliff overlooking the village, at coordinates 2826, -3271, 0078.
Step-by-Step Directions
-
Activate the Skyview Tower for map reveal if needed, then launch upward.
-
Glide southeast, maintaining altitude; around Y-coordinate -3210, descend slightly while aiming for the hill northwest of Lurelin Village.
-
Spot the shrine’s glowing green entrance on the cliff edge west of Mount Dunsel-adjust glide path to land directly atop it.
Travel Tips
Avoid enemies below by staying airborne; use stamina food or elixirs for longer glides if stamina runs low. Paraglider adjustments ensure precise landing without climbing.