Hidden in Hyrule’s rolling fields, the Sonapan Shrine challenges players with clever motion puzzles that twist perspective and logic alike. Here’s where to find it and how to master every step inside.
When you’re done, our shrine locations page or interactive Hyrule map can direct you toward something else to do.
Sonapan Shrine location
Sonapan Shrine is located in the Hebra region, south of Hebra Falls and west of Lake Kilsie. The nearest fast travel point before discovery is Rospro Pass Skyview Tower, making it a convenient starting point. You’ll find the shrine on a small elevated area surrounded by trees, clearly visible from a distance thanks to its glowing entrance. Reaching it may require climbing, so bring stamina-boosting food or equipment to help ascend the slopes.
The Sonapan Shrine is found in the Hyrule Ridge region beside a large patch of apple trees. The coordinates for the Sonapan Shrine are (-1921, -0356, 0228).
Sonapan Shrine walkthrough
Enter Sonapan Shrine on the Gerudo Highlands plateau at coordinates ( -1200, -2000, 0850). Activate the nearby Korok leaf fan to blow air toward the first rotating platform, timing it so Link glides across gaps and grabs the floating orb. Place that orb into the socket to open the gate ahead. Next, use Ultrahand to rotate the large gear mechanism counterclockwise, aligning platforms for safe passage while dodging gusts. At the end, fuse a rocket to your shield for a boosted flight to the altar, claiming the Light of Blessing.
The Sonapan Shrine will test your knowledge on the Ascend ability; you’ll have to reach higher heights to retrieve treasure chests and proceed through the challenge.
1. Proceed into the shrine and use Ascend to rise to the next floor.
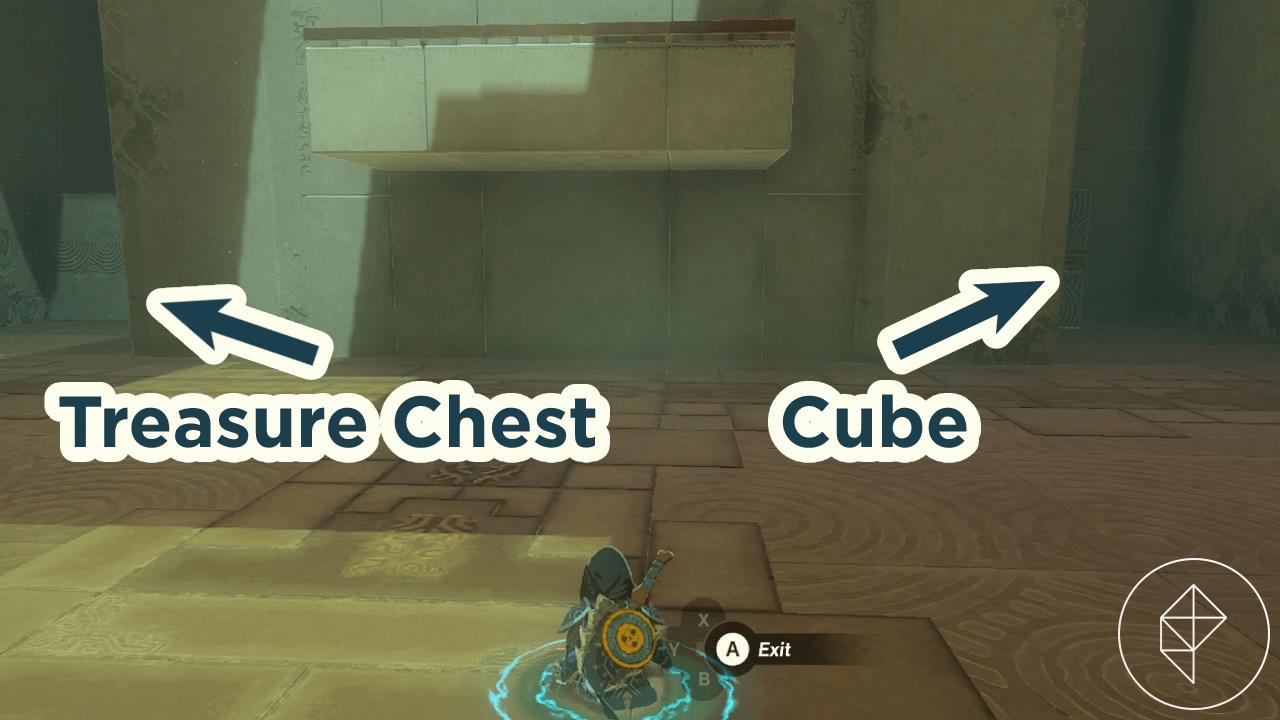
2. Head to the left side of this floor to find the treasure chest and a movable cube.
3. Move the cube under the treasure chest and return to the middle of the room.
4. Go to the right side of this floor to find a large cube.
5. Grab the cube and place it on top of the platform in the middle of the room.
6. Align the cube closer to the left side of the platform.
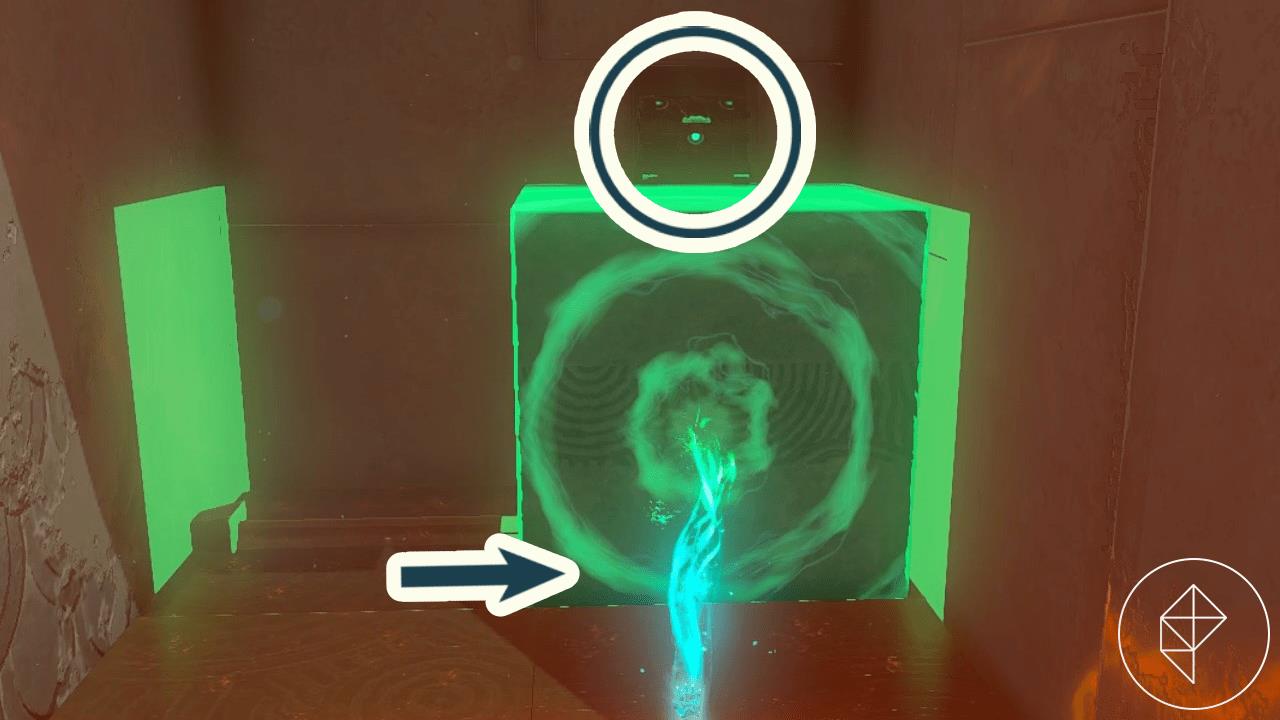
7. Stand under the platform so you’re aligned with the cube you placed on top of the platform.
8. Use Ascend to move to the top of the cube.
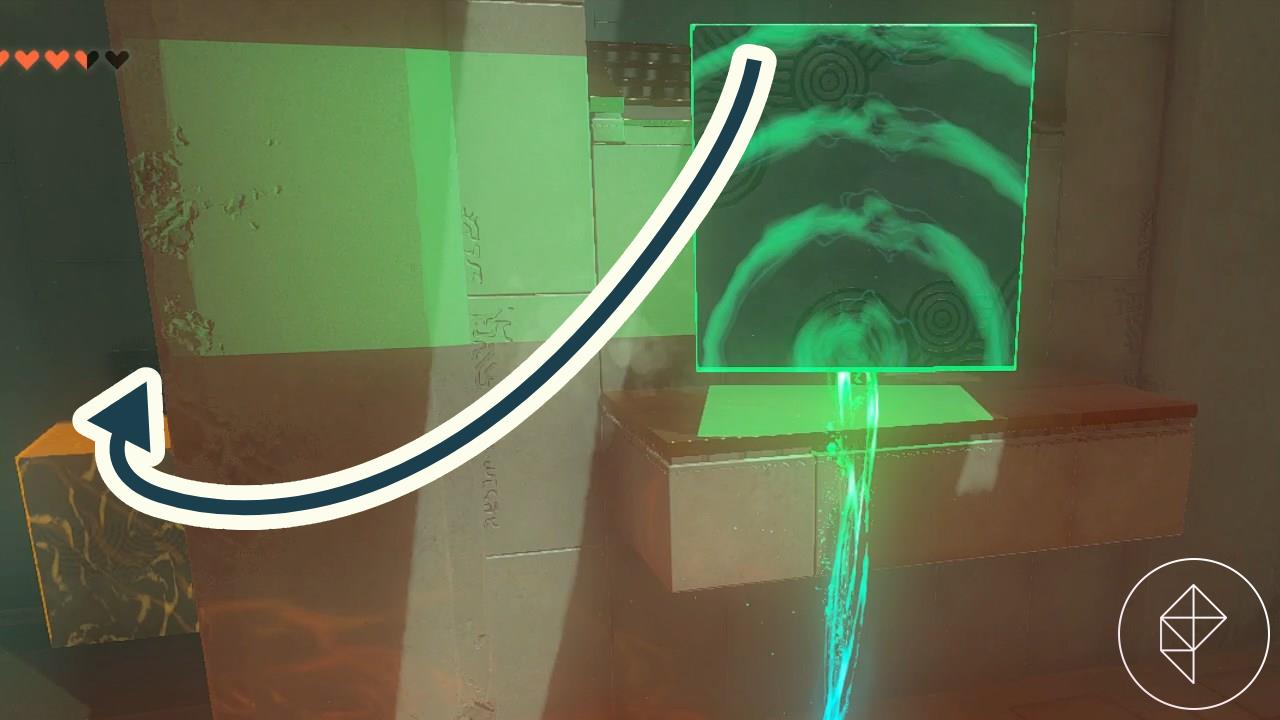
9. Jump off of the cube and glide around the left corner to the top of the cube in front of the treasure chest.
10. Open the treasure chest to receive five arrows.
11. Proceed down the stairs into the next room to find a pool of water with a platform overhead and another cube under a platform.
12. Move the cube into the pool of water and align it with the platform above it.
13. Return to the location from where you grabbed the cube and use the Ascend ability to rise to the top of the platform.
How to get the chest with 5 Arrows in Sonapan Shrine
To get the chest with 5 Arrows in Sonapan Shrine, you need to use the cubes plus Ascend (and optionally your paraglider) to reach the ledge in front of the chest.
Simple method (two stacked cubes + Ascend)
-
From the entrance, use Ascend once to reach the first upper floor. You’ll now see the chest set into the left wall and two movable cubes in the area.
-
Go to the left side and use Ultrahand to move the nearby cube directly under the chest, flush with the wall so it lines up with the opening.
-
Go to the right side and grab the other cube. Attach this second cube to the top corner of the first one so you have a tall “L” or stack you can Ascend through.
-
Stand on the floor under the higher cube, then use Ascend to pass up through the lower platform and into/onto the upper cube.
-
From the top cube, drop or glide down onto the cube in front of the chest and open it to get 5 Arrows.
After looting the chest, you can reuse the same upper cube by moving it to the main ledge to continue the shrine.
How to complete the rest of Sonapan Shrine after the chest
Once you’ve looted the 5 Arrows chest, you only have two short sections left, both solved with Ascend and a single movable block.
Second room after the chest
-
Take the same block you used for the chest and move it onto the high central platform in front of the exit door, lining it up near the edge closest to the door.
-
Stand on the floor directly under the platform/block combo, use Ascend, and you’ll pop out on top of the block at door level; walk forward to go into the final room.
Final room to the altar
-
In the last room, look to the side to find a single metal/stone cube sitting in a recess; pull it out with Ultrahand and drop it in the middle of the small pool, roughly between the two wall torches and aligned under the high ledge opposite the entrance.
-
Go back to the recess where the cube was and use Ascend to reach the top of that side platform.
-
Glide or jump onto the cube floating in the water, then use Ascend again to rise through the cube and up to the top central platform; go up the short stairs and interact with the altar to finish Sonapan Shrine and get your Light of Blessing.