Surviving on a hostile planet in The Alters demands more than grit-it hinges on your ability to hunt down elusive minerals while dodging deadly anomalies and mastering the tools of extraction. Ready to outsmart the hazards and expand your base? Here’s how to find, mine, and maximize minerals whether you’re on PC, PlayStation, or Xbox.
Where to find Minerals in The Alters
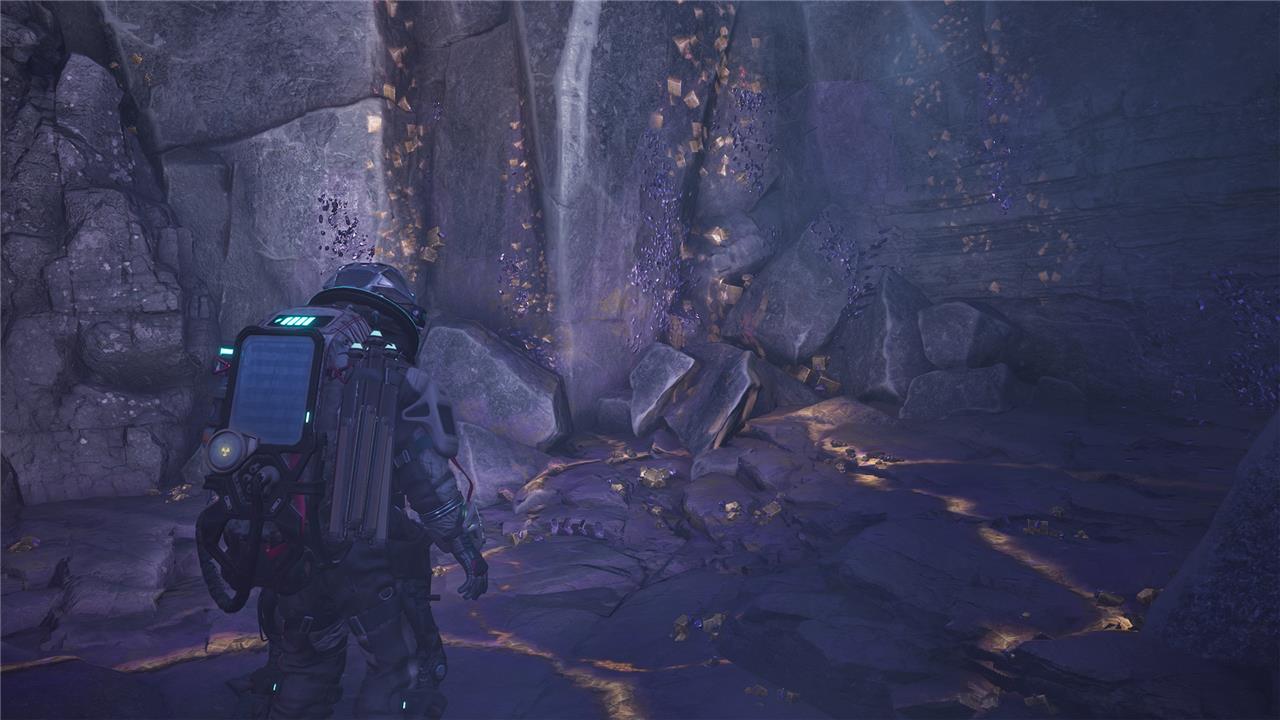
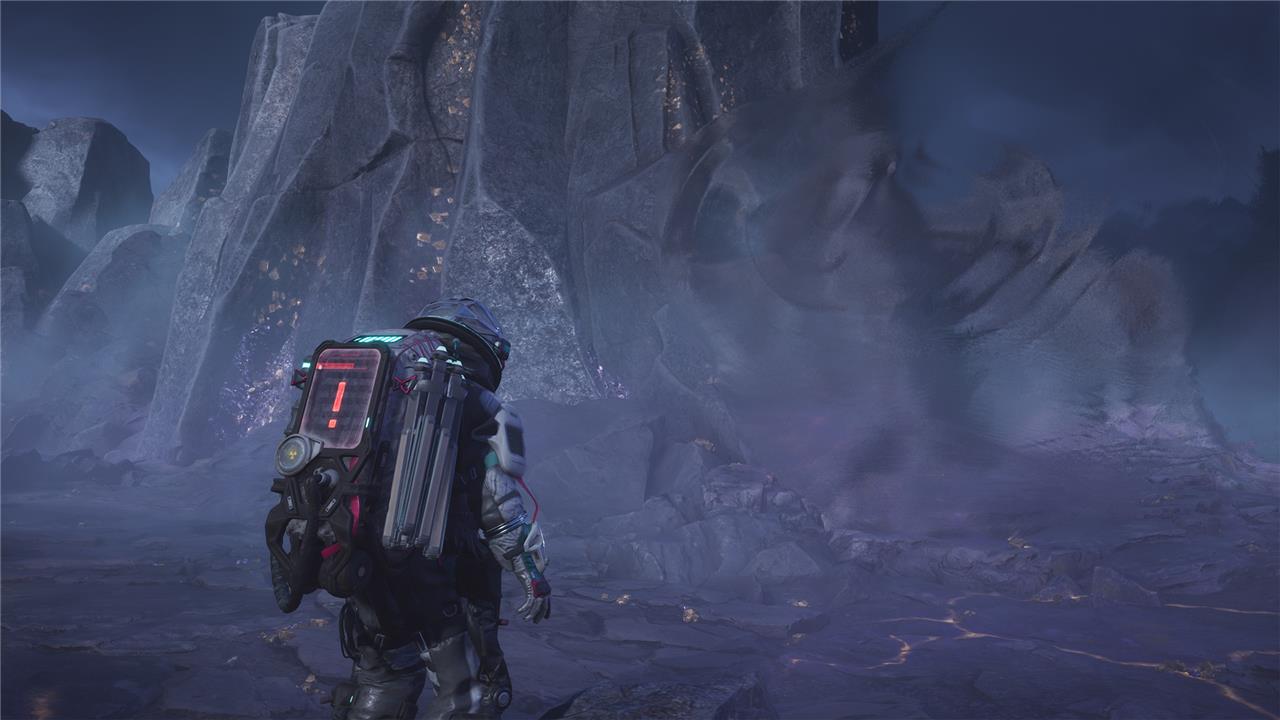
Minerals in The Alters can be primarily found by exploring the map and looking for deposits marked by distinctive purple rocks with gold linings. The main Mineral deposit is usually located in one of the farthest parts from your base-typically just before a broken bridge or beyond natural obstacles. To reach these deposits, you’ll need equipment such as Drill Charges and a Climbing Hook, as both barriers and steep terrain often block the path. As you venture to these sites, be cautious of Anomalies-dangerous, translucent energy fields that cause radiation damage if touched. Smaller surface deposits can be found scattered near the base for quick access, but deep deposits offer the bulk of resources and require setting up a Mining Outpost and connecting pylons for efficient extraction. Using high vantage points can help you spot these mineral deposits across the terrain, and careful planning with the right tools ensures a safe and productive mining run.
Although you don’t need to look for Minerals in the prologue, you must find Minerals to complete Act 1 in The Alters.
Like Organics and Metals, Minerals are found by exploring the map. You can recognize a Mineral deposit by their purple rocks and gold lining.
Here’s where to find the location of the Mineral deposit in Act 1:
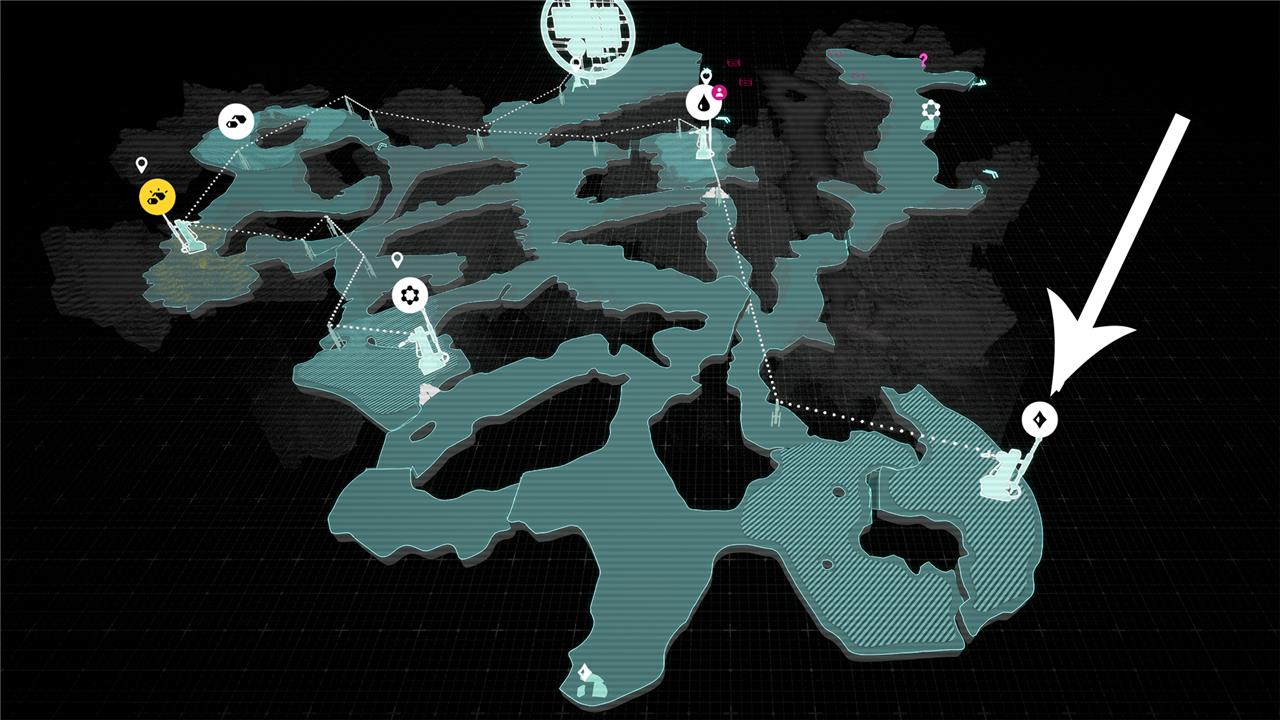
Beware that the deepest part of the Mineral deposit is on a higher level, which will require a Climbing Hook and two energy to reach. You will also need at least two Drills to remove rock formations between the deposit and your base. And last but not least, don’t forget to bring a Mining Outpost and several AELGAMESs to establish a connection with the base.
As if that’s not enough, the area around the Minerals deposit is full of translucent blobs called Anomalies. It’s important not to touch them, as this causes radiation damage.
Don’t worry, you can get past them, but since the gaps are narrow, it’s best to approach slowly. The Anomalies are difficult to spot from a distance, but up close, it’s far easier to see their general outline and pulsating movements.
What are the most effective strategies for locating rare minerals in The Alters
The most effective strategies for locating rare minerals in The Alters combine thorough exploration, smart tool use, and careful avoidance of hazards:
-
Explore Distant and Elevated Areas: Rare mineral deposits are often found in remote, elevated sections of the map, especially before major points like broken bridges or higher vantage points.
-
Identify Deposits Visually: Look for purple rocks with gold linings, a distinctive visual cue for mineral deposits.
-
Equip Essential Gear: To access the richest deposits, you’ll need both a Climbing Hook for elevation changes and Drill Charges to clear rock walls.
-
Use Polygonal Scanners and Probes: Once near a suspected deposit, deploy the scanner and place probes to precisely triangulate the richest mineral spot, then set up a Mining Outpost directly on top.
-
Avoid Anomalies: Navigate carefully around Anomalies (translucent, radiating blobs)-contact with these causes radiation damage, potentially ending your run. Move slowly, observe their movement patterns, and use tight spaces to slip by safely.
-
Connect Outposts to Your Base: Always link your mining outpost back to your base with pylons to facilitate resource hauling and fast travel.
-
Time Your Mining Efficiently: For higher yields, consider mining during Magnetic Storms, which boost resource output by 50%.
-
Delegate Wisely: Assign Alters (such as the Miner) to mine when possible, managing their schedules to maintain steady resource flow.
-
Preserve Loose Nodes for Emergencies: Don’t immediately harvest every loose mineral node. Save some for crises, as each yields a significant quantity and scattered nodes periodically respawn.
-
Scout Multiple Locations: Each act offers several surface deposits (quick access) and at least one deep mine (requires investment but contains more resources).
By systematically combining these strategies-thorough scanning, hazard avoidance, efficient use of tools and outposts, and careful resource management-you’ll maximize your ability to locate rare minerals and maintain your operation’s momentum in The Alters.
How can I identify mineral deposits quickly on the map
To identify mineral deposits quickly on the map, focus on distinct visual and scanning cues:
-
Look for unique visual markers: In many games and real-world mapping systems, mineral deposits often have visually distinctive elements-such as unusual colors or reflective surfaces. For example, in The Alters, rare mineral deposits are described as purple rocks with gold linings-this visual cue allows for instant identification while exploring the map.
-
Use terrain scanning tools: Employ in-game or technical tools like polygonal scanners, probes, or remote sensors that highlight or ping deposit locations. These often allow you to scan areas quickly and mark the richest spots for mining.
-
Prioritize strategic map areas: Rare minerals are typically found in elevated or remote regions-check high ground, cliffs, and hard-to-reach zones for a higher chance of discovery.
-
Analyze map overlays and data layers: In real-world exploration and advanced mapping (including game representations), overlays such as infrared, hyperspectral, or geophysical layers help distinguish minerals by their unique spectral signatures or electromagnetic properties.
Combining these methods-focusing first on unique visual signatures, then using scanning tools and map overlays-will significantly speed up your ability to spot and confirm mineral deposits on any map.