Surging currents, shifting platforms, and clever puzzles await inside the Water Temple of Zelda: Tears of the Kingdom. This guide reveals how to control the flow, master the mechanics, and claim victory over one of Hyrule’s most fluid challenges.
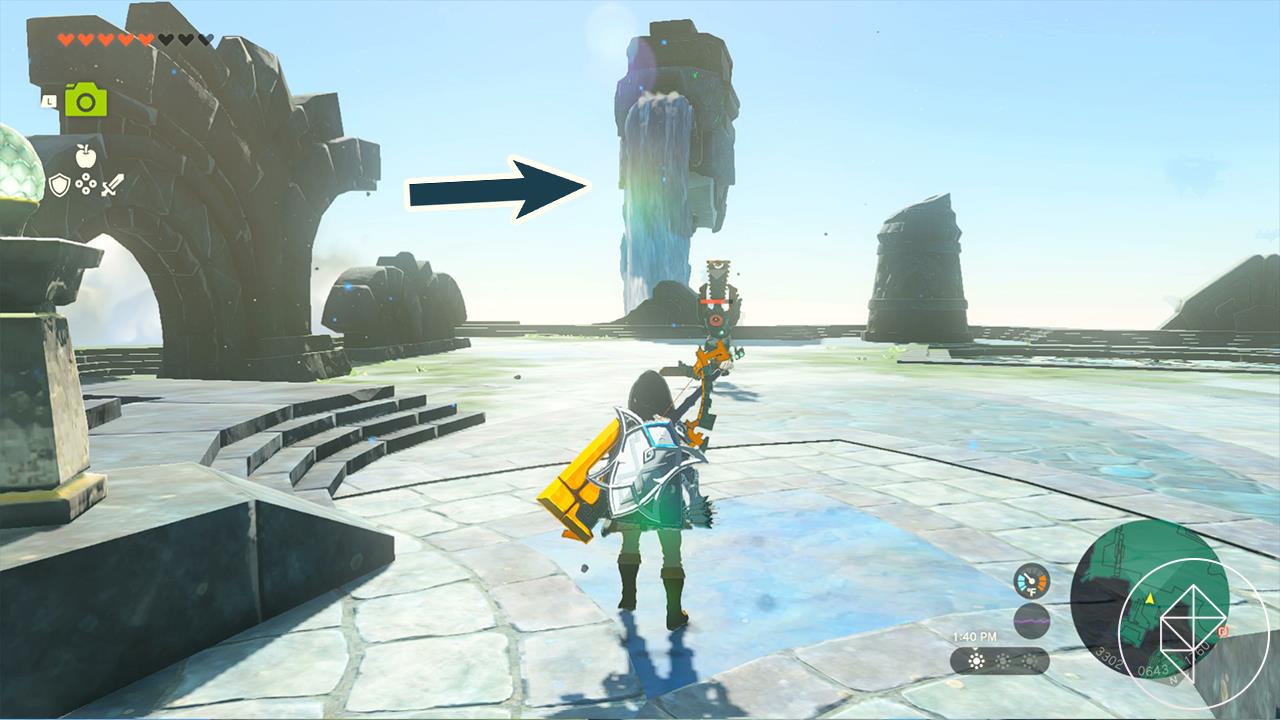
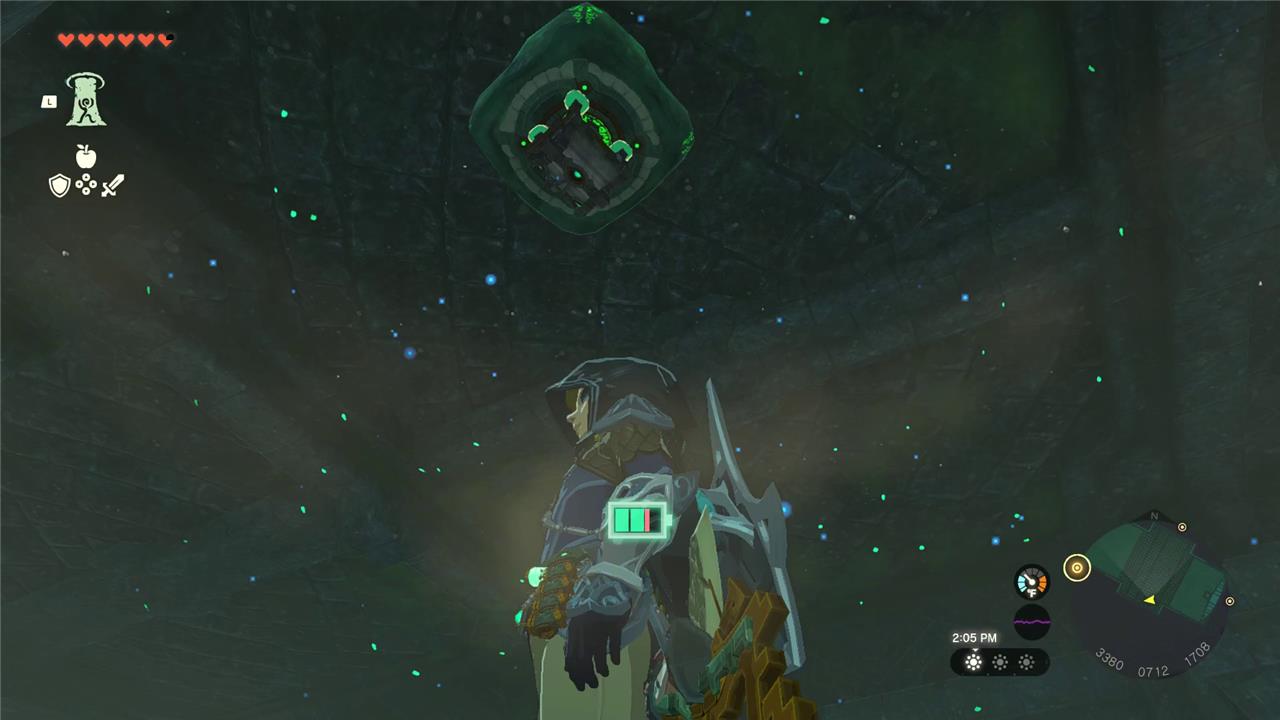
After you launch yourself up from Wellspring Island using the waterfall, you’ll be greeted with a fairly small sky island, called the Water Temple. Link and Sidon will talk a bit and you’ll be able to interact with the altar directly in front, unlocking the Water Temple as a fast travel location.
The temple itself is pretty small, but the puzzles can be brain scratchers and the boss is no joke. Here’s how to solve the Water Temple dungeon, and things to know before you get started.
What you need to know before starting the Water Temple
Before entering the Water Temple, make sure you’ve completed Sidon’s quest in Zora’s Domain and equipped gear that improves your swimming and water mobility. Stock up on splash fruit, arrows, and food to restore stamina since many puzzles rely on water manipulation. It’s also smart to have a few Zonai devices that help with floating or reaching higher areas. The temple’s challenges revolve around activating water-related mechanisms, so understanding how Sidon’s water ability works will give you a big advantage.
Once you have unlocked the Water Temple as a fast travel location, if you wanted to leave and grab more food and other material, you can do that freely without having to worry about trekking through a lengthy island again. We recommend having food, splash fruit, and arrows on-hand.
You’ll be tasked with opening up four more water valves to wash away the sludge. Below, we list the valves in order from left to right, but you do not need to do them in any specific order.
Sidon will also rejoin you, so you’ll need to interact with him to use his water abilities, like how you did during the Sludge Like fight. For the Water Temple boss specifically, you may want to hold on to any Zonai hydrant capsules you have.
How to get to the Water Temple
From the entrance, head left through the ancient hall, follow the flooded corridors until you reach the rising stair, then climb to the central chamber and descend into the water-filled main arena where the temple’s trials begin.
To reach the Water Temple, you’ll first need to complete the “Sidon of the Zora” quest from Zora’s Domain. It requires first traveling through Ancient Zora Waterworks to unclog them, then traveling to Wellspring Island in the sky.
Water Temple chests
Several treasure chests are hidden across the Water Temple, each containing valuable rewards such as weapons, shields, and materials. One chest sits on a floating platform near the northeastern section-use the floating bubbles to reach it. Another lies behind a waterfall on the upper level, revealed after activating the nearby water device. Don’t forget the chest in the central area that appears once you drain the excess water; it often holds a powerful Zonai item. Careful observation and creative use of water currents will help you find them all.
- Zora shield
- Large Zonaite
- Strong Zonaite longsword
- 5 arrows
- Opal
Opening the first valve in the Water Temple
Head to the central platform in the Water Temple’s main chamber and spot the submerged valve beneath the water surface. Swim down and attach Ultrahand to its handle, then rotate it fully clockwise to drain the initial water level. Bubbles will rise as the chamber partially empties, revealing new paths along the walls. Watch for the water dragon circling nearby-it won’t interfere yet. This clears access to the next phase of the dungeon.
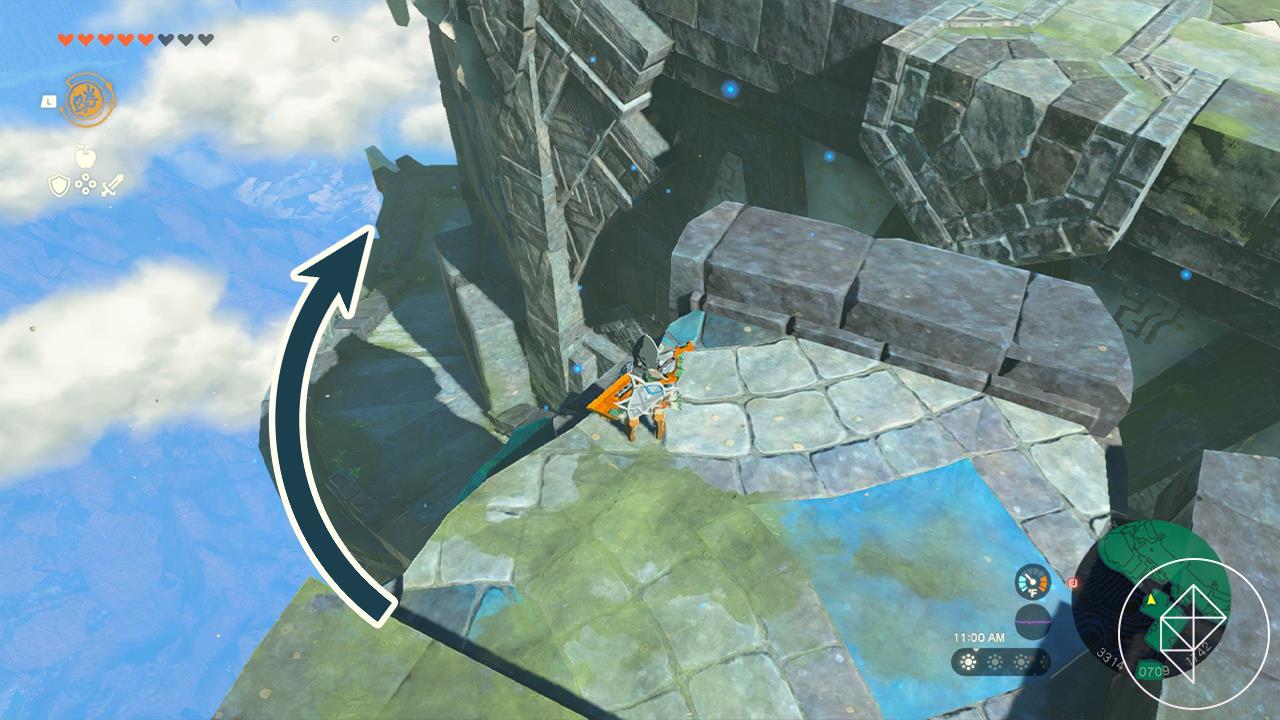
There’s only one visible way to head up the upper platforms right off the bat, so head to the southwest and jump up the platforms that create a somewhat broken bridge. Using the low gravity on the islands, Link should be able to jump and glide up.
Take out the three constructs waiting for you up there. Use a splash fruit arrow to clean mud off a clogged up waterfall floating in the air in the south. Swim up the waterfall to grab a Zora Shield from a chest.
A water bubble maker will be aimed at the upper platforms, but it’ll be covered in mud. Use Sidon’s trusty water ability to clean it off.
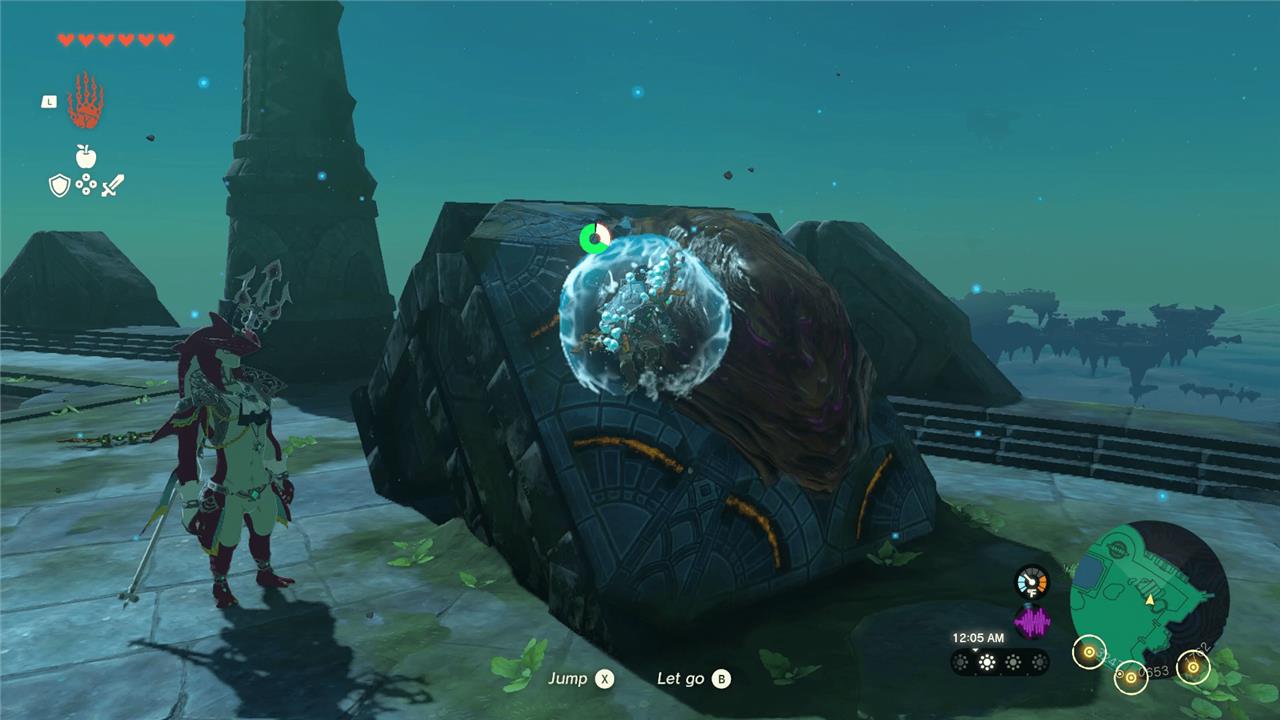
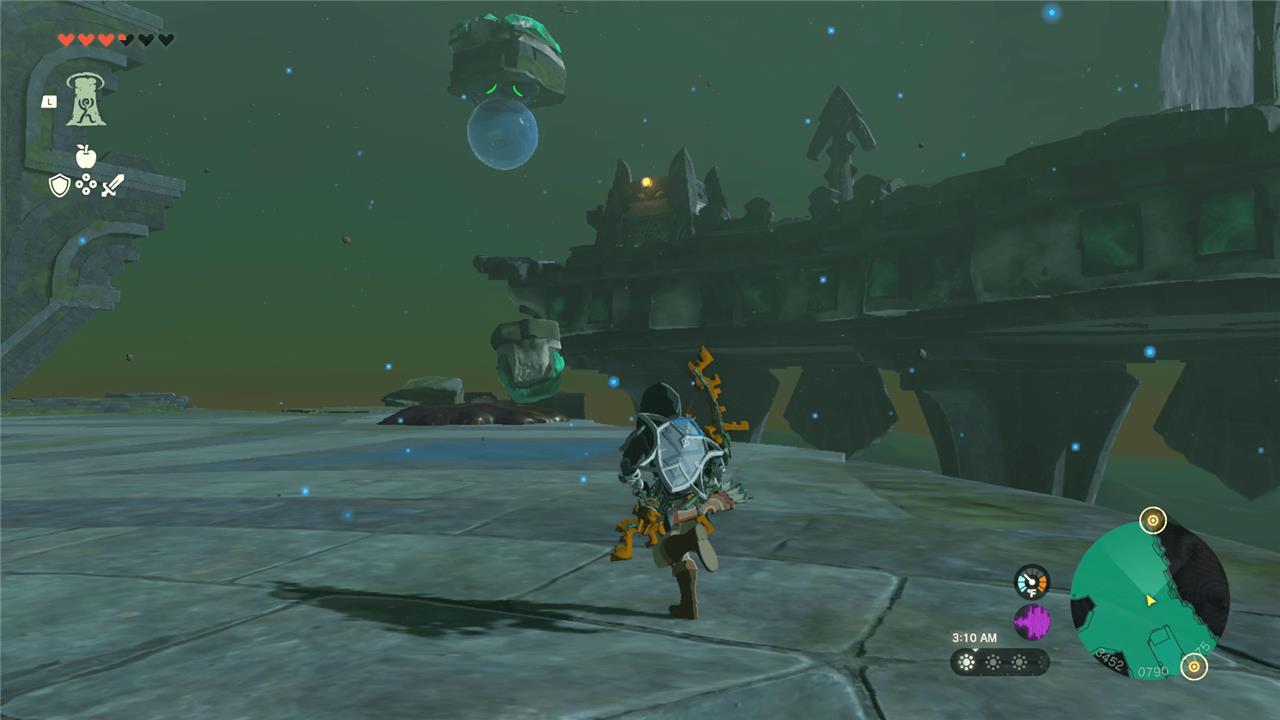
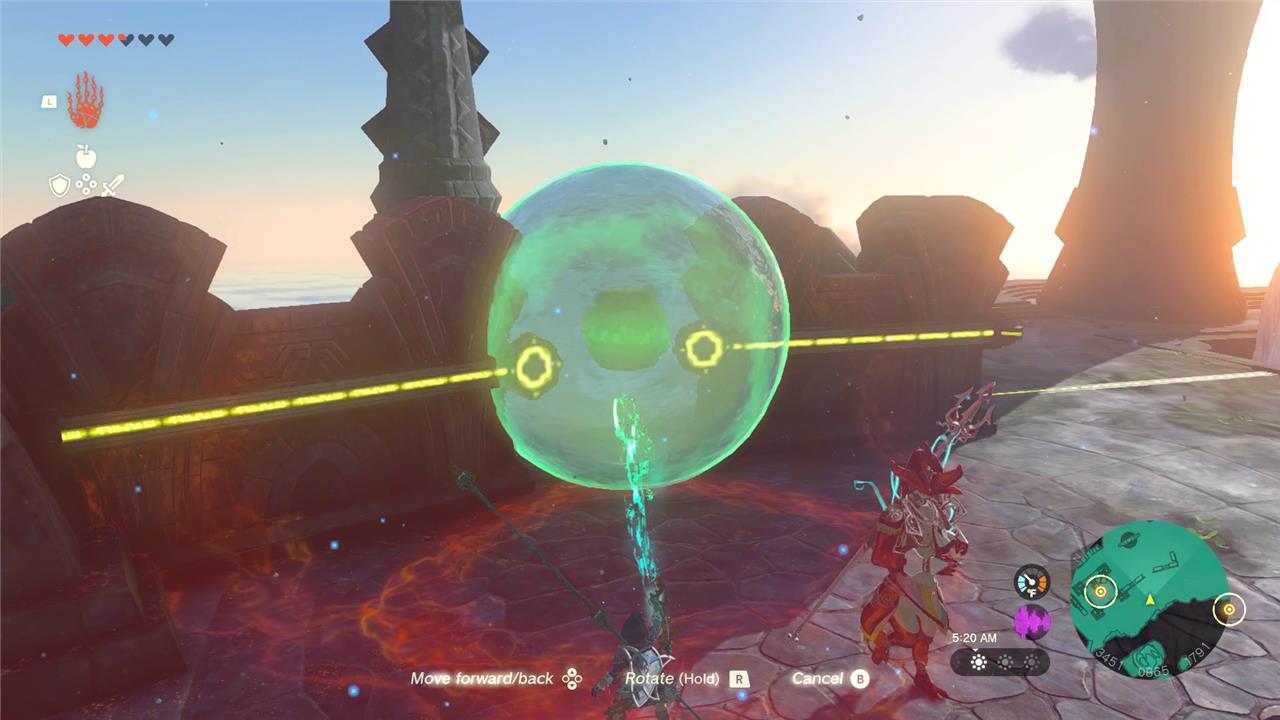
Use Ultrahand to take the glowing ball in the water and place it into a water bubble, sending it up to the higher platform. Jump into a bubble to meet it there.
Place the ball over the glowing hole using Ultrahand. It won’t go in, but it’ll float nicely over it.
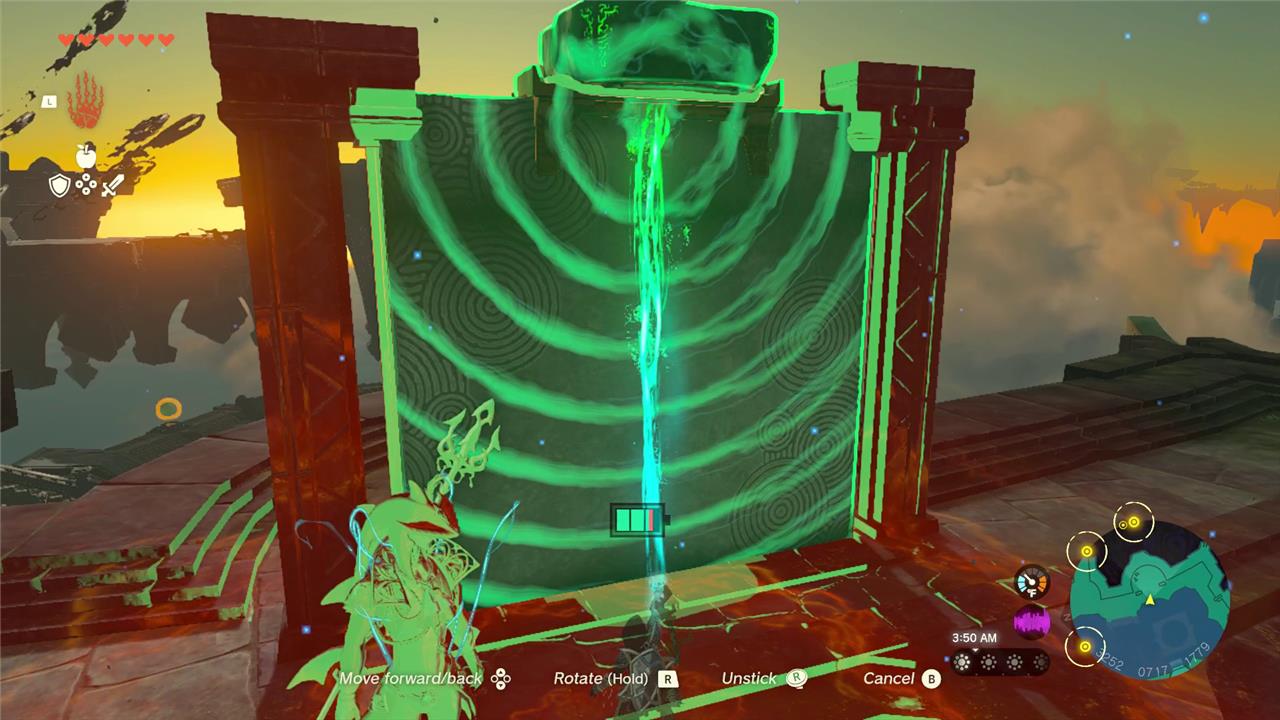
Next, use Ultrahand on the nearby floating platforms and attach it to the top of the floodgate. Hit the platform to activate it and use Ultrahand to raise the floodgate. The water will drain out, allowing the ball to fall into the hole. This will open the cage, allowing you access to the wheel that controls a valve.
Use Sidon’s water ability to hit the valve, turning it on. Head back down to the main area of the Water Temple once you’re finished.
Opening the second valve in the Water Temple
Use the nearby floating platforms to reach the second valve on the eastern side of the chamber. Align the water flow by fixing the broken pipe with a Zonai hydrant, then activate the valve using the water pressure. Each rotation raises the water level slightly, opening access to new areas. Watch for constructs guarding the platform, as they can push you off with their attacks. Once the valve is fully turned, the current will shift toward the central reservoir, preparing the next section for exploration.
The next valve is actually inside the Water Temple on a lower floor. From the broken bridge you took up to the first valve, jump down and follow this path to head under the temple:
Use Sidon’s water shield ability to run through the flames blocking the entryway. Once you’re inside, you’ll need to transport a glowing ball from one side of a spike pit to the entrance. Use Ultrahand on the floating platforms to build a bridge over the spikes and bring the ball forward. You can attach the ball to the platforms using Ultrahand to keep better tabs on it.
Remember that you need to hit the platforms (with a weapon, arrow, etc.) in order for them to float.
Fire an arrow at the floating platform with the chest to bring it down out of the sky to get a large zonaite.
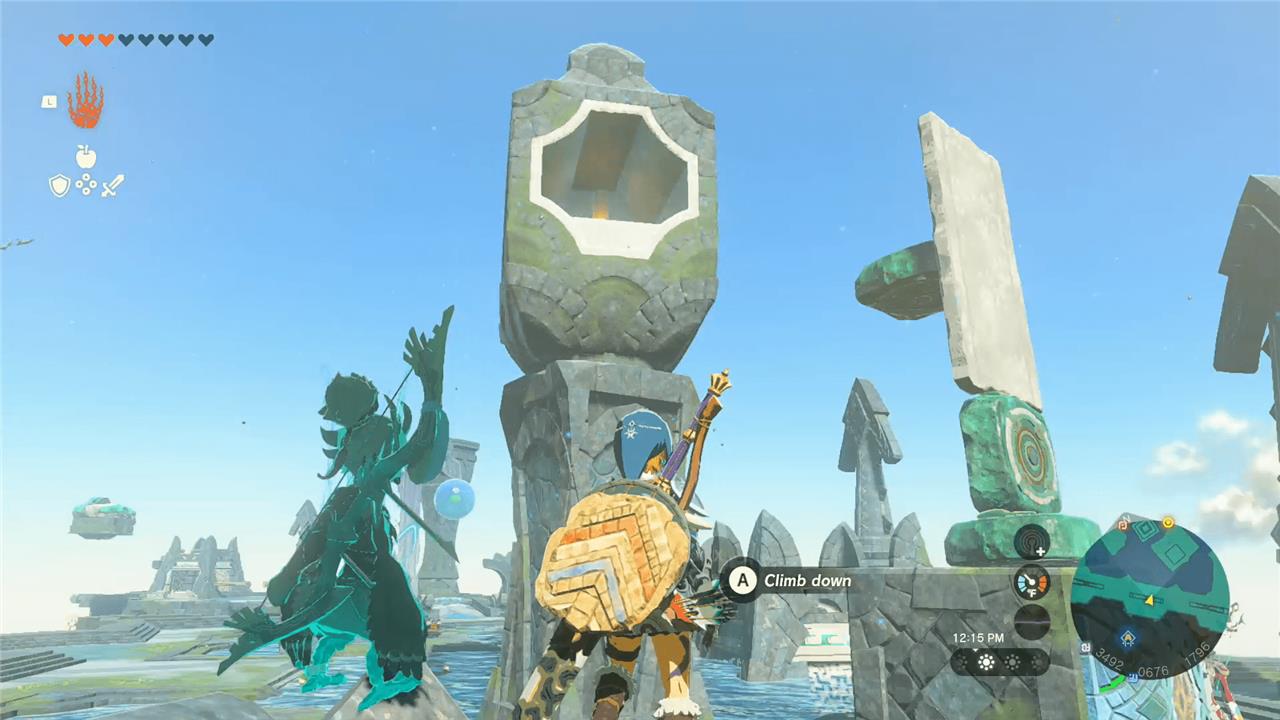
Once you get to the wall, you can either use the platforms to build steps back up, or you can use Ascend on a floating platform to climb up quickly.
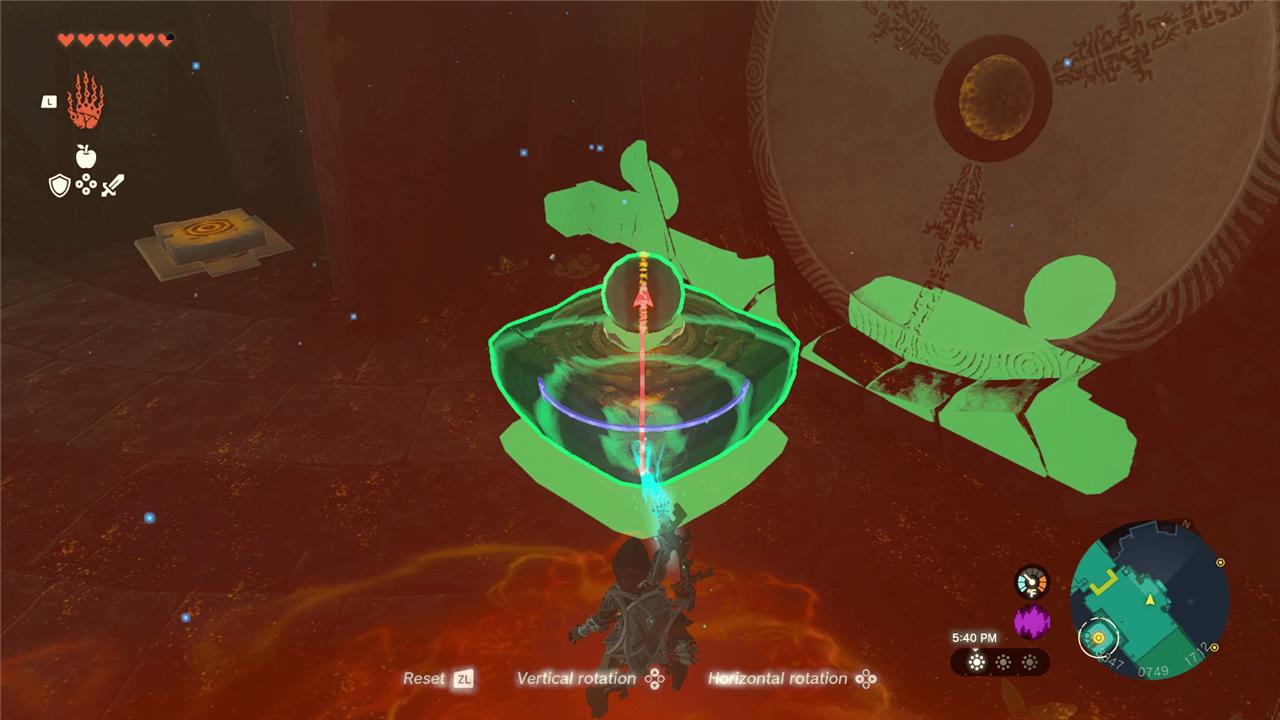
Attach the ball to the center of a floating platform using Ultrahand, hit and rotate the platform, and use it to insert the ball into the hole.
Use another platform to press down on the square switch by the door, allowing Sidon to join you.

Use Sidon’s ability to hit the now-open water wheel and return to the main area of the Water Temple.
Opening the third valve in the Water Temple
Head to the central platform and swim underwater toward the third submerged valve, located near the eastern wall guarded by a few Bubblefrogs. Clear the enemies with arrows or melee strikes, then attach a rocket to a raft or fan-powered device to cross the water quickly. Grip the valve with Ultrahand and turn it clockwise until water drains from the room. This lowers the final barrier, revealing the path forward to the boss door.
At this point, a construct may have appeared in the central part of the Water Temple, along with some chuchus, so take them out as necessary.
Fire an arrow with a splash fruit up at this clogged waterfall to the northeast:

Swim up the waterfall and take out the fire-like enemy you’ll see on the right. The chest it drops rewards a strong zonaite longsword. Ignore that area for now and keep heading this way:
Use Sidon’s water ability on the mud pile in the photo above to clean off a chest with five arrows inside.
Climb up the rubble and use Recall on a water bubble to float up to the higher platforms.
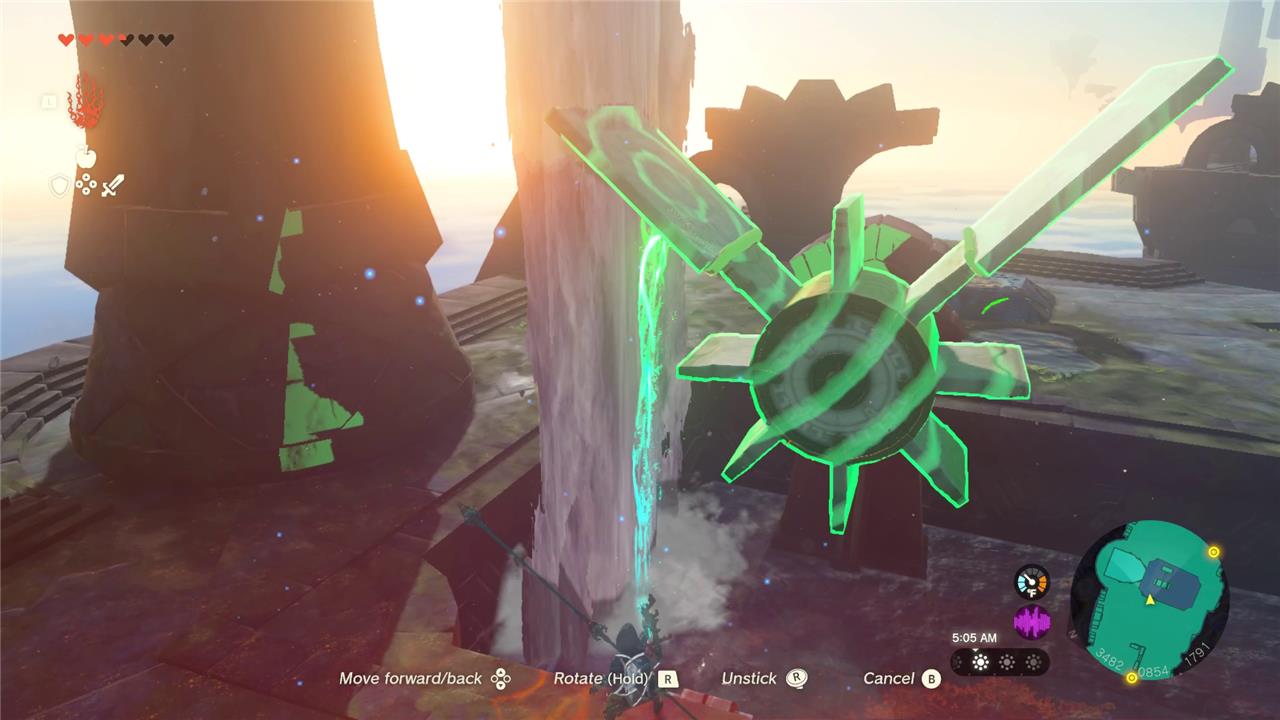
Use Ultrahand to attach the square pieces on to the waterwheel and then spin the waterwheel, allowing it to get enough momentum to keep spinning.
Grab the water bubble with Ultrahand and use it to connect the two electrical lines.
Use Sidon’s ability to activate the water wheel and jump back down to where you fought the fire like enemy.
Opening the fourth water valve
After activating the previous valves, head toward the section with the spinning water wheels on the upper platform. Use the Zora Armor to swim up the waterfall and reach the lever mechanism near the fourth valve. Strike the nearby water wheel with a water ability or projectile to start its rotation, then glide onto the moving platform as it rises. From there, trigger the valve switch to release the final stream and restore full water flow through the temple’s main system.
Use Ascend to jump through the floor where the fire like used to be. Take out the constructs and chuchus that are waiting for you up there.
After taking them out, use the water bubbles to clean the sludge off of the spinning structure.
Use the objects around to build yourself a tall platform near the spinning structure. From there, glide off and take out your bow and aim at the switch inside the structure. Time will slow down, allowing you to successfully hit the switch without too much fuss.
Grab the chest from the northern side of the now-drained pool to get an opal.
Once you hit the switch, the water will drain, giving you access to the water wheel. You know the drill: use Sidon’s ability to hit the wheel and turn on the last valve.
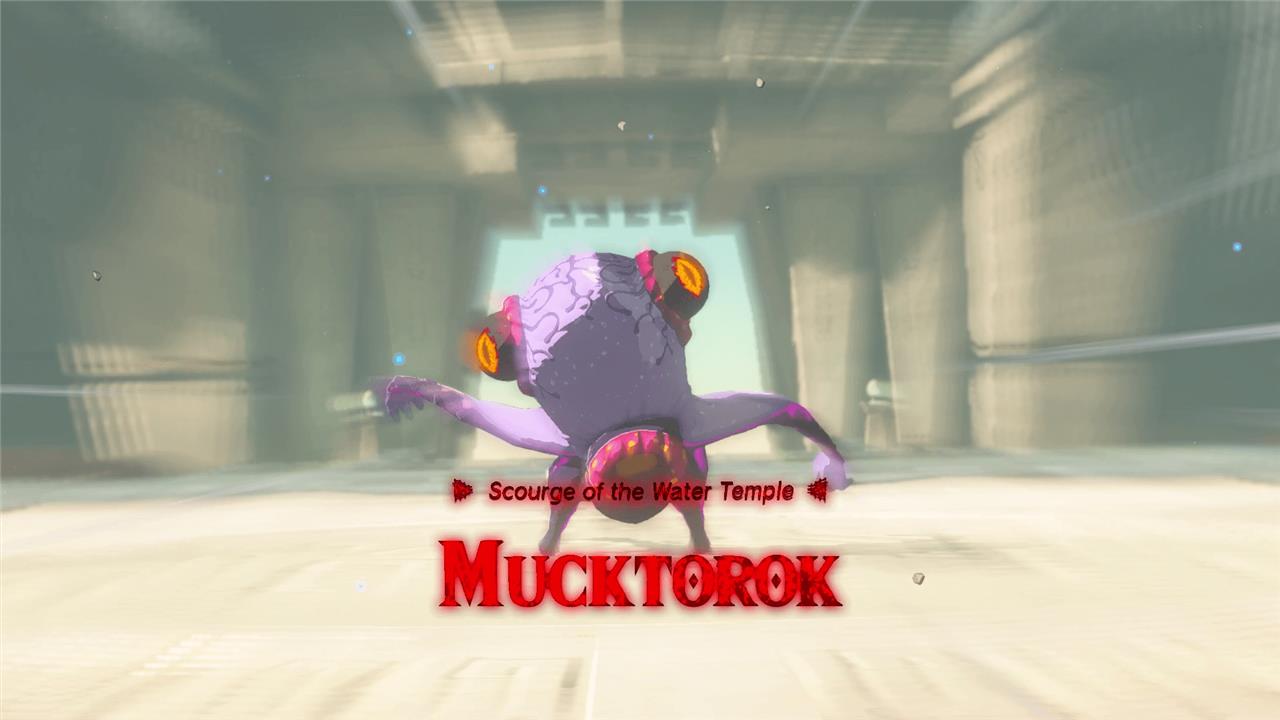
How to beat Mucktorok, boss of the Water Temple
Mucktorok begins the fight by hiding inside a water creature form that you must shatter using Sidon’s water ability and ranged attacks. Once exposed, chase it down and strike quickly before it rebuilds the watery shell. In the second phase, Mucktorok coats the arena with sludge, slowing your movement. Use water attacks or splash fruit to clear paths and strike again when it slips or pauses. Keeping the area clean and timing your attacks around its movement is the key to bringing it down fast.
Once you get back down to the central area of the temple you can now interact with the altar and the water will wash the mud away. A disgusting little creature, a Mucktorok, will jump out of the mud and you’ll need to take it out to actually stop the mud.
The Mucktorok’s fight patterns aren’t too hectic. It takes on a muddy shark form for most of the fight, which you’ll need to clean away using Sidon’s water ability. In its shark form, it’ll fire off several types of attacks that involve beams and waves that are low to the floor. Since the gravity levels are low, you can jump over both of these attacks without too much trouble.
Once it’s clean of mud, get a few hits in and it’ll start running away. If you hit it as it’s running, it’ll get temporarily stunned. We recommend locking on to it and firing off arrows to stun it. Repeat these steps until the boss is around half health.
The real problem hits at the halfway point, as it’ll start spitting mud everywhere. Admittedly, it was spitting out mud faster than we could keep up with cleaning it using Sidon’s ability, which is why we recommended bringing in extra splash fruit.
You can clean up excess mud with Sidon’s abilities and splash fruit – in fact, you should – as too much mud will make it hard to navigate around the arena.
You can also Fuse a Zonai hydrant to your shield or weapon to create an accursed hydrant fusion that’ll allow you to cleanse the area quickly. You should have found at least one Zonai hydrant capsule on your way to the Water Temple on Wellspring Island. You can also attach one to a Zonai homing cart if you have one, to create an automatic mud-cleaning Roomba of sorts. (Note that using the Zonai devices will eat your battery power, so it’ll need time to periodically recharge.)
Now when you wash away the muddy shark exterior, the Mucktorok will start jumping from mud puddle to mud puddle, making it harder to hit with your arrows. If there isn’t much mud for it to jump around to, it’ll be an easier shot.
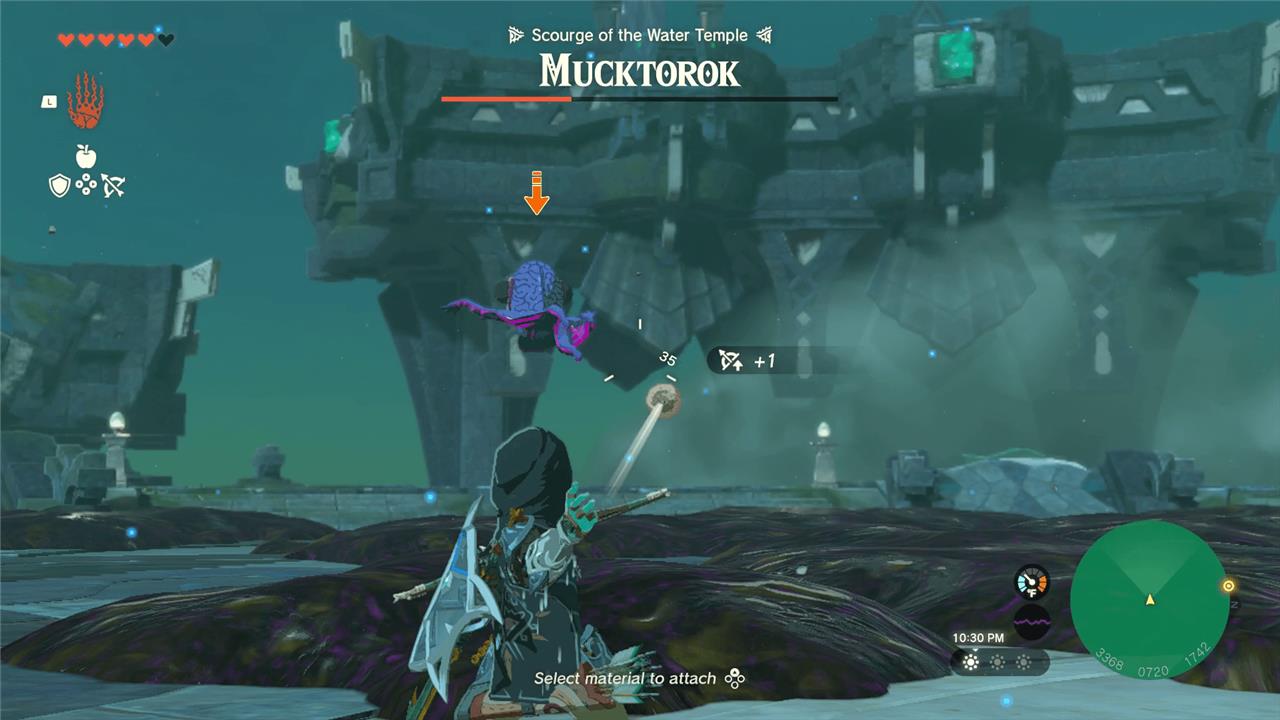
We ended up using Keese eyes on our arrows, allowing our arrows to home in on the Mucktorok when it was out of its shark form, stunning it and letting us get some good hits in. After repeating this process a few times, the Mucktorok died.
How to defeat Mucktorok boss in Water Temple
Mucktorok goes down easily if you focus on cleaning sludge fast, using Sidon’s water ability, and abusing slow-motion arrow shots.
Prep and general tips
-
Bring lots of arrows plus Splash Fruit or Chuchu Jelly for instant sludge cleanup and easy hits.
-
Fuse Keese Eyeballs to arrows so they home in when Mucktorok runs or jumps.
-
Use the low gravity: jump, hold bow in mid-air to enter slow motion and line up precise headshots.
Phase 1 – Sludge shark
-
Mucktorok hides inside a fast-moving sludge shark; you can only hurt it after you wash that form off.
-
Build Sidon’s water shield, then swing your weapon to send a water slash at the shark, instantly stripping the sludge in one hit.
-
Alternatively, hit it twice with water arrows (Splash Fruit / Chuchu Jelly) to clean it.
-
When the small octopus form pops out and runs, shoot it once with an arrow (use mid-air slow motion if needed) to knock it over, then rush in and combo with your strongest melee weapon.
-
Repeat: dodge its charge and sludge-beam attacks by sprinting sideways or jumping over the waves in low gravity, then punish every time you clean it.
Phase 2 – Sludge flood
-
At half health, it covers the arena in sludge pools and jumps between them, making the floor dangerous and reducing your mobility.
-
Keep a ring of safe ground by regularly throwing Splash Fruit or using Sidon’s water wave to clear paths.
-
Watch for it leaping from pool to pool: jump, draw your bow to slow time, and shoot it mid-air to stun it, then rush in to melee again.
-
Homing Keese-eye arrows make these airborne shots almost guaranteed hits.
-
Continue the loop: clean sludge, stun when it jumps or runs, and unload melee combos until its health bar is gone.
If you tell me what’s giving you trouble (dodging the beam, staying mobile in all the sludge, or actually hitting it), I can give a short, tailored tactic for your current gear.
What rewards do you get after beating Mucktorok
After defeating Mucktorok in the Water Temple, you mainly get story progression rewards rather than a special weapon drop.
Rewards from the Water Temple fight
-
A permanent Heart Container appears in the arena; picking it up increases your maximum hearts by one.
-
Sidon awakens fully as a Sage and you receive Sidon’s Vow, letting you summon his avatar and use his water ability anywhere.
-
The sludge polluting Zora’s Domain and surrounding waters is cleansed, healing King Dorephan and automatically resolving the “Mired in Muck” side quest if not already done.
Extra rewards from Depths rematch (if you refight Mucktorok later)
-
In Depths rematches, beating Mucktorok opens a nearby gloom-covered chest containing a Huge Crystallized Charge (worth 100 normal Crystallized Charges).
-
It also drops Octorok materials like Octo Balloons, Octorok Eyeballs, and Octorok Tentacles, but no unique boss fuse part.
If you tell me where you are (first clear in the temple or Depths rematch), I can point you exactly to the chest or NPCs that appear next.