Facing the Divine Beast Dancing Lion in Elden Ring: Shadow of the Erdtree is like dancing with death-this towering, elemental foe is as unpredictable as it is relentless, but with the right strategy, even its fiercest moves can be turned into a beat you can dance to.
Our Elden Ring: Shadow of the Erdtree guide covers how to beat Divine Beast Dancing Lion, including its weaknesses and the best ways to prepare yourself for the challenge.
Divine Beast Dancing Lion location in Elden Ring DLC
The Divine Beast Dancing Lion is the main boss at the end of the Belurat, Tower Settlement legacy dungeon in Elden Ring’s Shadow of the Erdtree DLC, making it the first major boss encounter for most players entering the new content. Located in the theater area near the settlement’s highest level, you can reach the boss by navigating through the upper sections of Belurat, following the path from the Stagefront Site of Grace and ascending a series of staircases and rooftops until you reach the large double doors that lead to the boss arena. This sprawling, multi-level dungeon is west of the Three-Path Cross site of grace, and the Dancing Lion’s location is hard to miss once you’ve progressed through the main path within Belurat.
The Dancing Lion is the final boss in Belurat legacy dungeon and makes its home in the theater area near the settlement’s highest level. It’s the dungeon’s end point and, eventually, a mandatory location you’ll visit during the DLC’s main storyline.
Like with all of Shadow of the Erdtree’s major bosses, there’s a site of grace just outside, along with a Stake of Marika for summoning human help, and a single golden summoning mark that lets you bring an NPC ally into battle.
Divine Beast Dancing Lion weaknesses and how to prepare
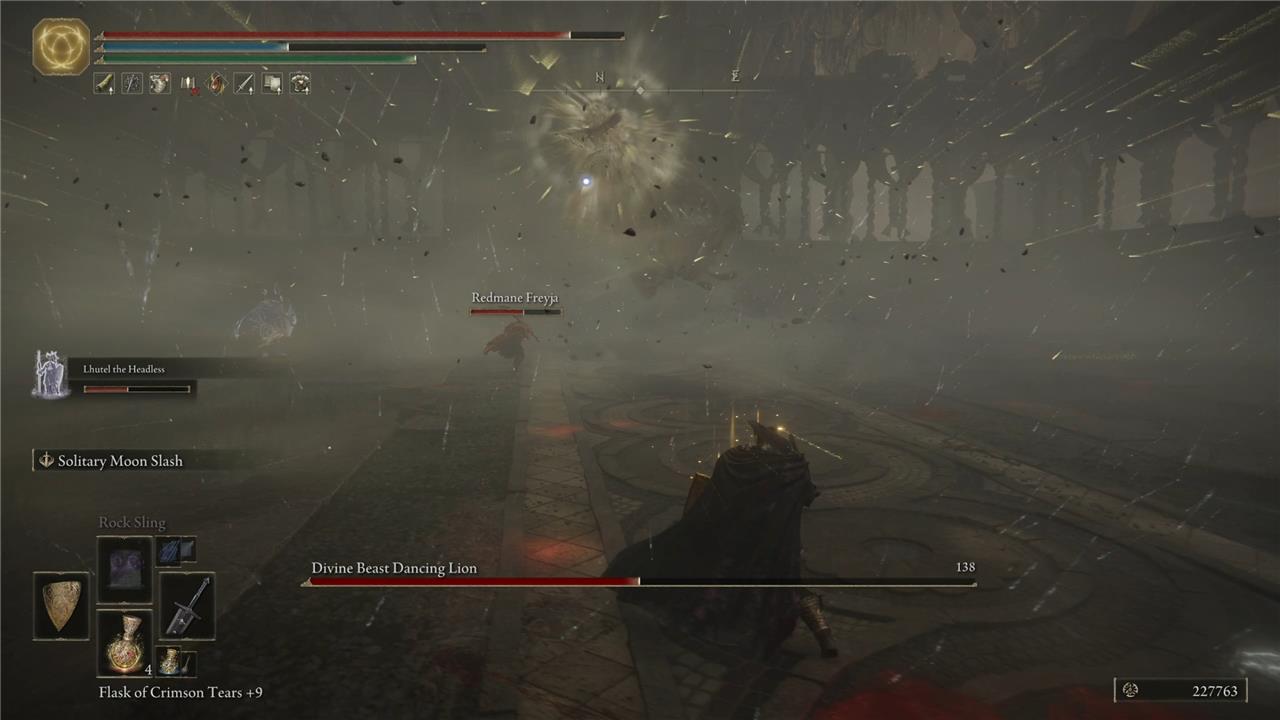
The Divine Beast Dancing Lion, a formidable early boss in Elden Ring’s Shadow of the Erdtree DLC, is notably weak to Fire damage, making weapons or spells imbued with fire highly effective. Additionally, the boss is susceptible to status effects such as Bleed and Scarlet Rot, so incorporating these into your build-through weapon buffs, infusions, or consumables-can significantly accelerate its defeat. Preparation should include upgrading your character with Scadutree Fragments for added damage and defense, equipping armor to resist Frostbite (especially for phase two), and considering a stamina-boosting talisman to keep up with the boss’s relentless movement. Summons like Redmane Freyja and Spirit Ashes can also provide valuable distractions, allowing you to exploit the boss’s vulnerabilities more safely.
As far as I could tell, across more than a dozen battles, the Dancing Lion has no status ailment vulnerabilities. It won’t bleed, it shakes off poison, and I saw no effect from rot and deathblight.
On the bright side, it is more prone than most major bosses to having its poise broken if you use the right kind of weapon or spell, which leaves it open to critical hits that take a nice chunk out of its HP bar.
Good timing and movement are more important than specific weapons for this fight, though you might want to consider shelving heavy weapons that move slowly. The Dancing Lion is anything but slow, and there’s a good chance it will have moved on before you finish prepping your attack. Greatswords and hammers work well, as do thrusting and straight swords. The Blackgaol Knight’s sword and the Anvil Hammer from Gravesite Plain’s Ruined Lava Forge are two strong options if your build is geared toward strength and dexterity.
Magic users can stick with their favorite intelligence- or faith-scaling weapon. It should be an endgame weapon, though. Our picks are the Darkmoon Greatsword, Onyx Lord’s Greatsword, Death’s Poker, and Royal Greatsword from Blaidd’s quest are solid choices for intelligence builds, and Golden Order Greatsword or Blasphemous Blade for faith builds.
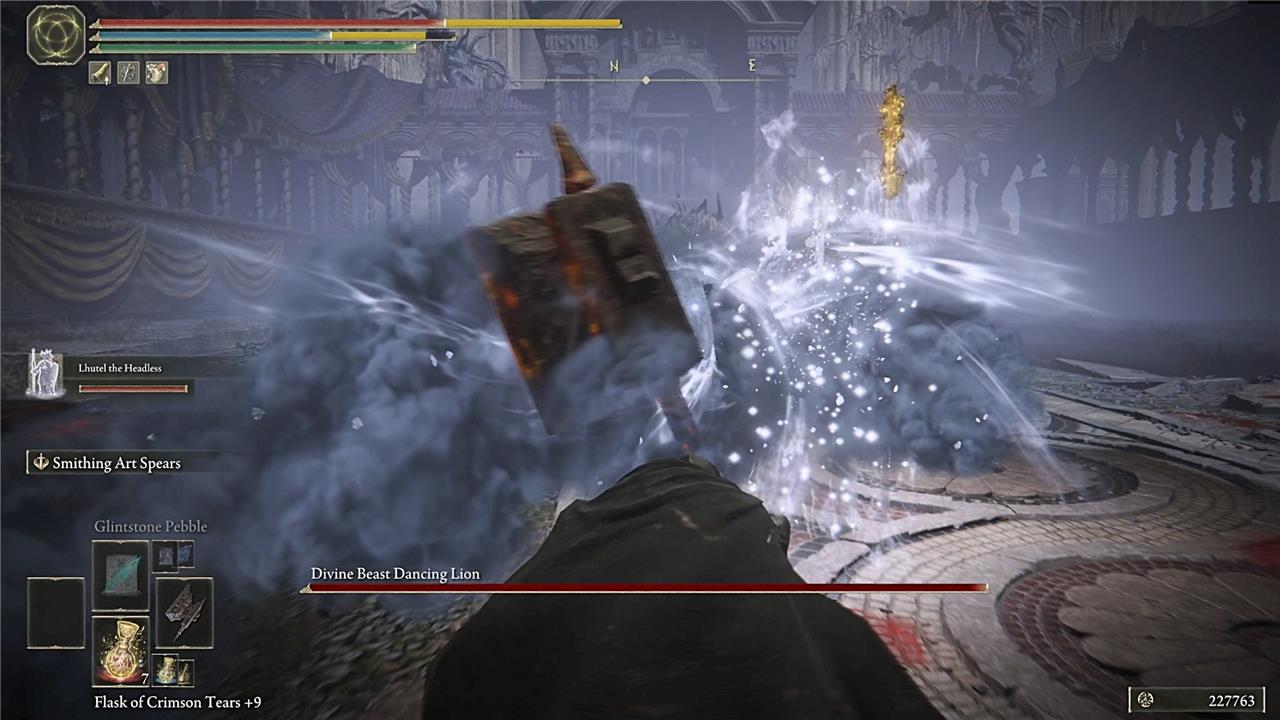
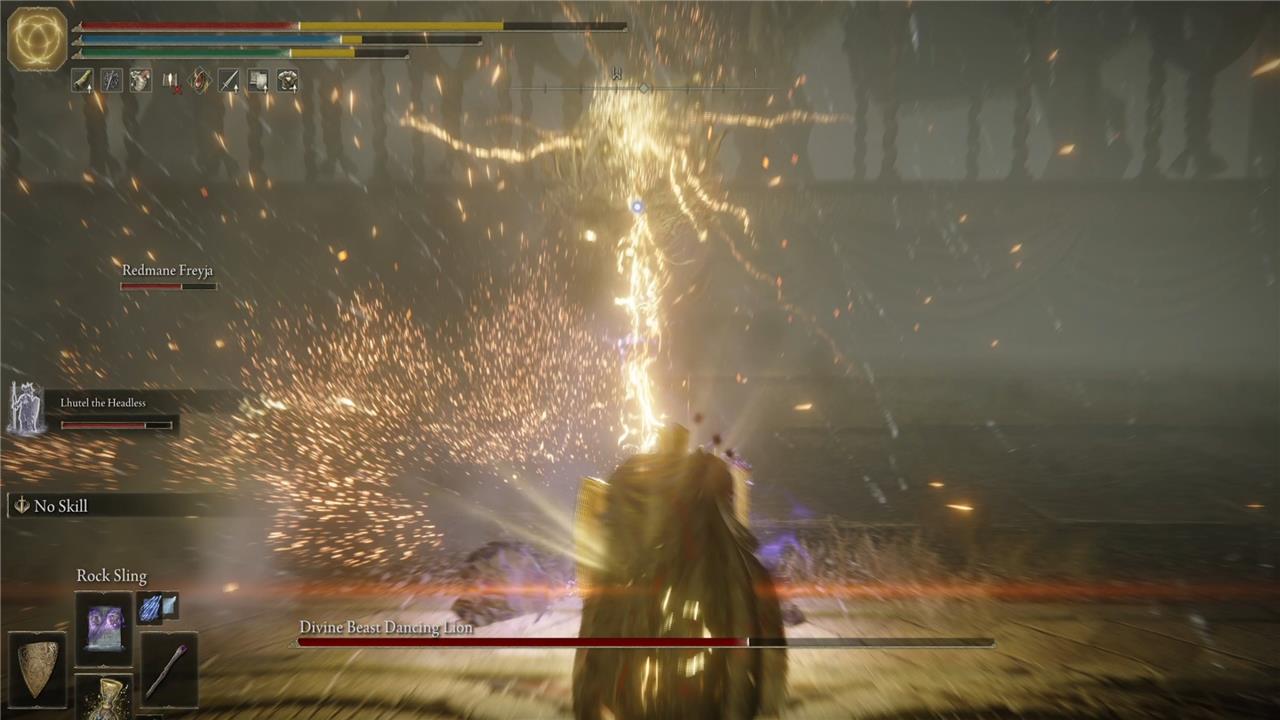
That said, this boss fight is one that favors spells as well. You have several chances to put enough distance between yourself and the Dancing Lion to where you can safely fling a few sorceries before having to relocate, and the best – and easiest to cast even for faith builds option is Rock Sling. Four or five hits from this spell will break the Dancing Lion’s poise and leave it open to a critical hit, if you strike fast enough with your melee weapon.
Your weapon should be maxed out, ideally, but you can get by with a 7 weapon if you’re missing weapon upgrade materials.
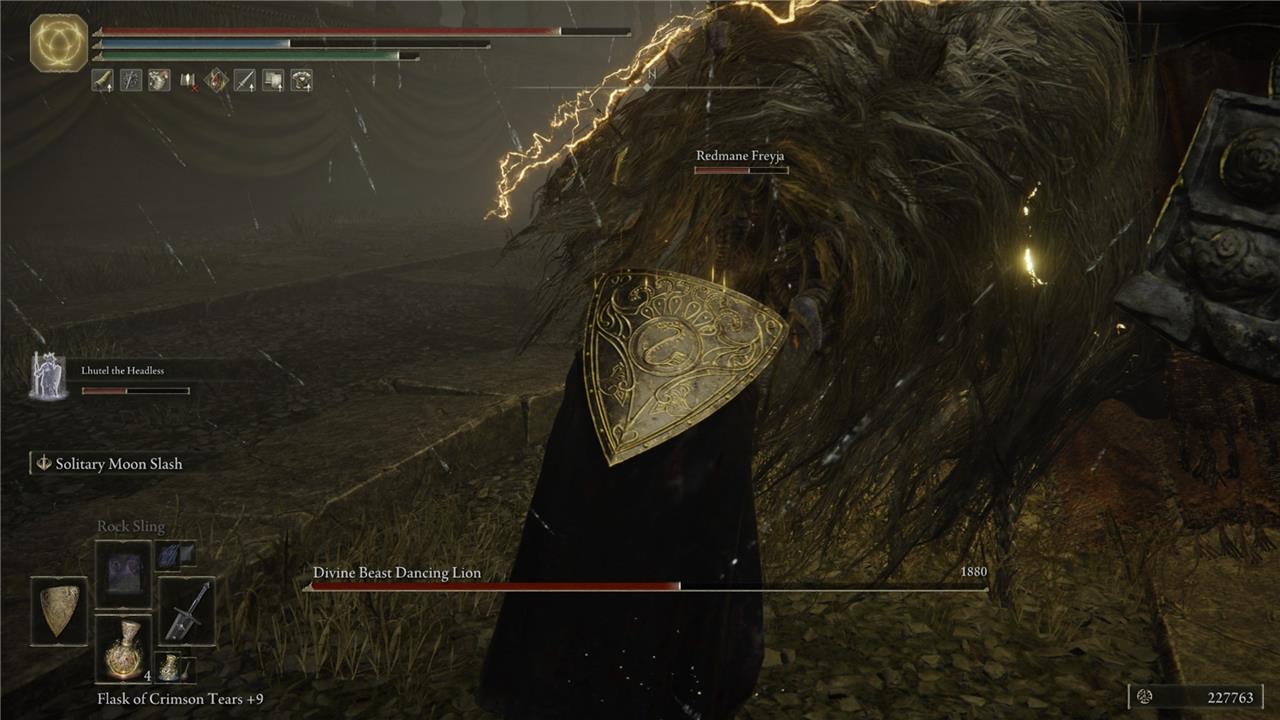
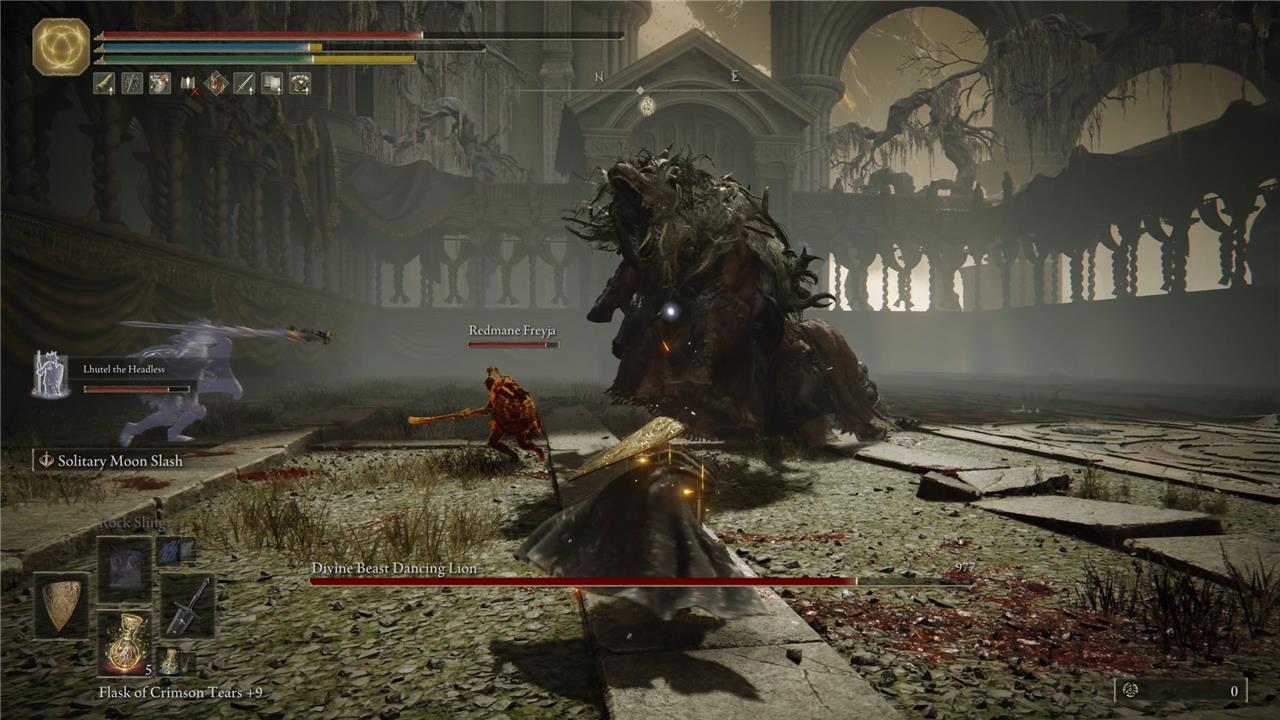
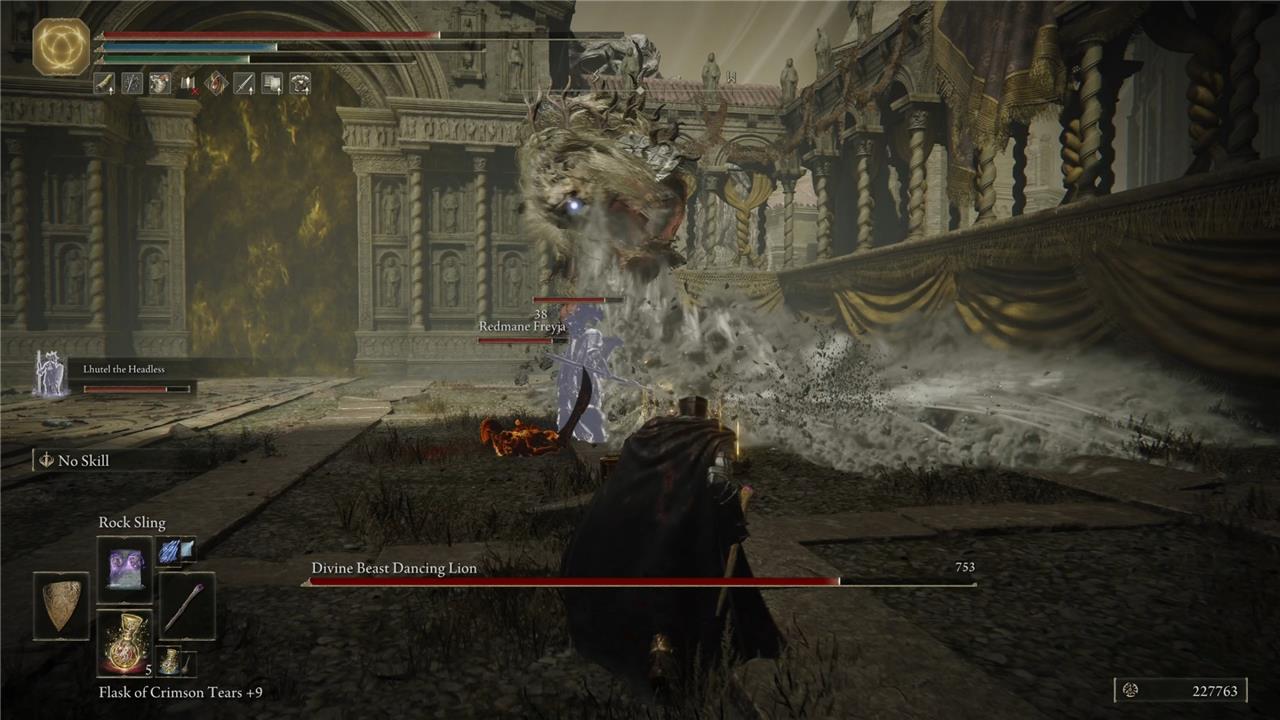
You can summon the NPC Redmane Freyja for this fight and use a Spirit Ash summon of your own. Even though a boss’ HP increases when you use NPC or human summons, I recommend bringing Freyja into battle for at least your first few attempts. The Dancing Lion’s moves are erratic and unlike pretty much anything in the base game, and it takes practice to understand the right timing. Freyja and your Spirit Ash keep it occupied so you can take pot shots with spells, sneak some melee strikes in, and learn how its attacks work from a safe distance.
Good Spirit Ash summons for the Dancing Lion fight include anything fast and powerful, such as:
- Black Knife Tiche, from the Black Knife Catacombs
- Mimic Tear
- Nightmaiden and Swordmistress Puppets
Tanky summons like Lhutel aren’t tanky enough to last more than a few hits from the Dancing Lion, so avoid using them. Stock up on Ghost Glovewort for Spirit Ash upgrades, if you haven’t already, and pick up some Bell Bearings if you’ve exhausted the natural supply of Glovewort.
Finally, you might want to have some Thawfrost Boluses on hand, depending on how well you fare during the fight’s later stages.
How to beat the Divine Beast Dancing Lion in Elden Ring DLC
To defeat the Divine Beast Dancing Lion in Elden Ring: Shadow of the Erdtree, players must master a mix of aggression and careful dodging, as this boss is fast, aggressive, and features multiple phases with changing elemental attacks. Stay close to avoid its wide-reaching strikes, dodge into its lunges and spins to create openings, and use fire spells or status effects like Scarlet Rot for extra damage if possible. Summons such as Redmane Freyja or Black Knife Tiche can help draw its attention, though be aware that summons may increase the boss’s health. Keep moving, stay away from arena walls to avoid camera issues, and be ready to adapt as the fight progresses through its elemental phases.
The Dancing Lion fight is a challenging battle that demands a more agile and adaptable strategy than earlier Elden Ring bosses, and the only way to learn what not to do is to make mistakes – a lot. If you can, consider recording the fight so you can play it back and learn without the pressure of not dying.
A good rule of thumb that applies to the whole fight is that, if the beast is still, you should hit it once or twice before retreating. The method I used to wear the Lion down was casting Rock Sling to break its poise, then rushing in for a critical strike, lingering to execute a few melee attacks, and repeating the process. The caveat is that this method is only easy to use if you have summons to distract the Lion, which means once they vanish later in the fight – as they almost surely will – you’ll have to rely on something more hands-on.
Divine Beast Dancing Lion boss fight phase 1
The Divine Beast has multiple attacks in the first phase, including one that might finish you off in a single hit. The most common is a three-move combo where the Lion rears back and dives forward, then spins in a circle, and dives forward slightly more before finishing with an upward head thrust. If you’re close, the Lion will sometimes forego its big swirly animation in favor of a lunging bite, so stay on your toes.
The best way to deal with all variations of this attack is to dodge forward when the Lion first dives at you. Its first attack will miss, and if it finishes the combo, you won’t be anywhere close enough to take damage. It often stops the combo and moves to something else after the first attack misses, though, so attack a few times and move to safety.
There’s an annoying quirk where the camera goes haywire if you’re right near the Lion while it’s moving, which makes targeting and dodging a nightmare. Dodging forward has the added benefit of creating enough distance between you so this situation doesn’t happen.
The Dancing Lion’s bite is truly more dangerous than its bark. It will sometimes rear back, snap its jaws together a few times, then lunge forward. If it makes contact, it swings you around in its mouth and chomps several times, dealing heavy damage – enough to completely deplete your HP if it’s not full. Dodging forward precisely when it lunges will get you past this attack as well, and the Lion takes a few seconds to recover when it misses, giving you the perfect chance to use some heavy attacks and wear it down a little faster.
The Dancing Lion has several debris attacks it alternates between, depending on your distance. The first one sees it spew an arc of dust and stone at you, which you need to dodge or sprint sideways to avoid. Less frequent is a variation of this where it belches a single stream of debris instead, though dodging sideways works here as well. These attacks usually happen if you’re at a distance, and they keep you from spamming spells like Comet Azur unless someone else distracts the Lion.
When you’re closer, the Dancing Lion stands on its back legs, vomits debris, and spins in a full circle three times. You can dodge backwards and run away from it or dodge sideways, stay close, and attack, if you’re feeling brave.

The camera issue pops up when you’re too close during this attack as well, so bear that in mind. The Lion ends this with a backflip that smacks you hard if you’re too close. There’s a window of about a second or two after this where you can rush in and attack before retreating, so get yourself ready once the Lion spins for the third time.
The final variation involves just one spin and an arc of debris.
Things get a lot more intense once the Lion’s HP drops by about a third of its total.
Divine Beast Dancing Lion boss fight phase 2
From here on, the Dancing Lion ditches debris and alternates between lightning, ice, and wind instead, each with a few slight attack pattern variations. Lightning is always first. The Lion still uses its spewing attacks, only with lightning now. It also throws a spear of lightning at you that explodes – and a second one if you successfully dodge the first – and its lunge attacks summon lightning in an X-shape that strikes and explodes after a few seconds. The ground sparkles in places where lightning is going to strike, and you’ll have a second to dodge away before it hits.
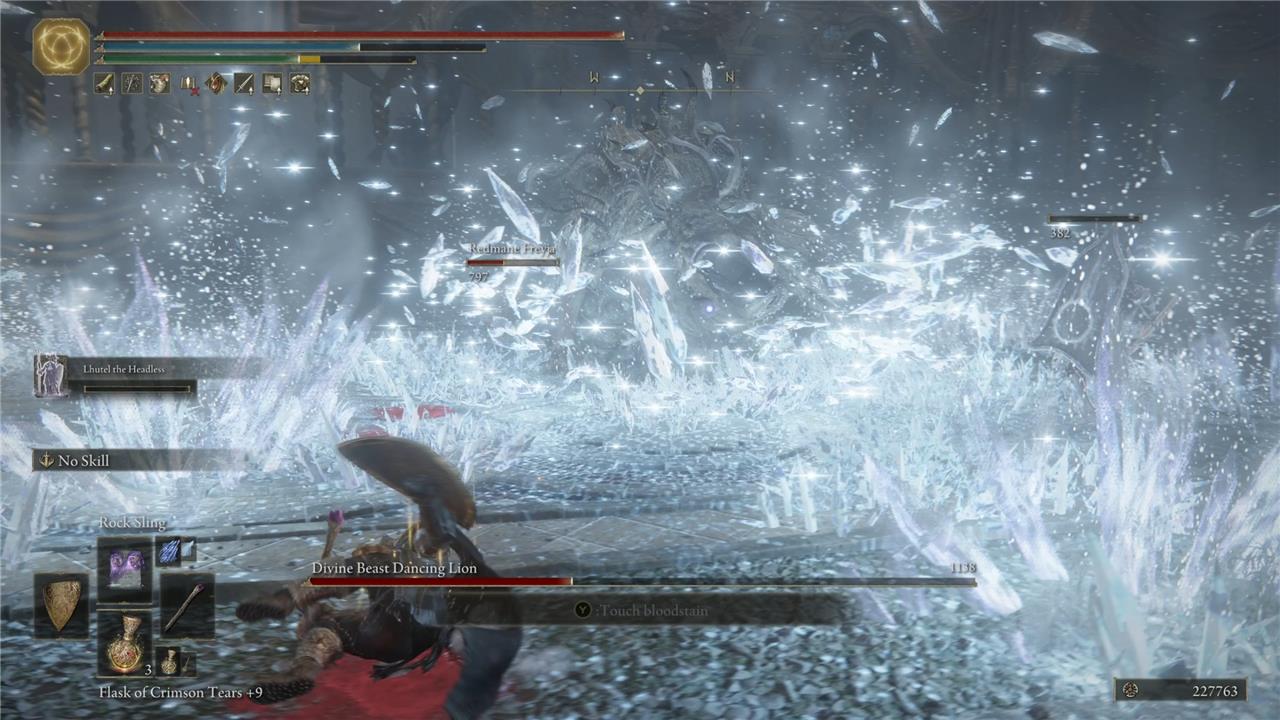
The Lion switches to either ice or wind next, though ice was the most common second element in my experience. Its attacks are the same in this phase, except instead of exploding like lightning, the ice it summons lingers on the field for a few moments before exploding – similar to the Hoarfrost Stomp effect. It builds Frostbite if you’re caught in the explosion, and if the meter maxes out, you take damage and have lower defense for a short time. Try dodging outside the affected area if you can, though if your timing is very good, you can jump before it explodes. Retreat and use Thawing Boluses to reset the Frostbite gauge if you have to.
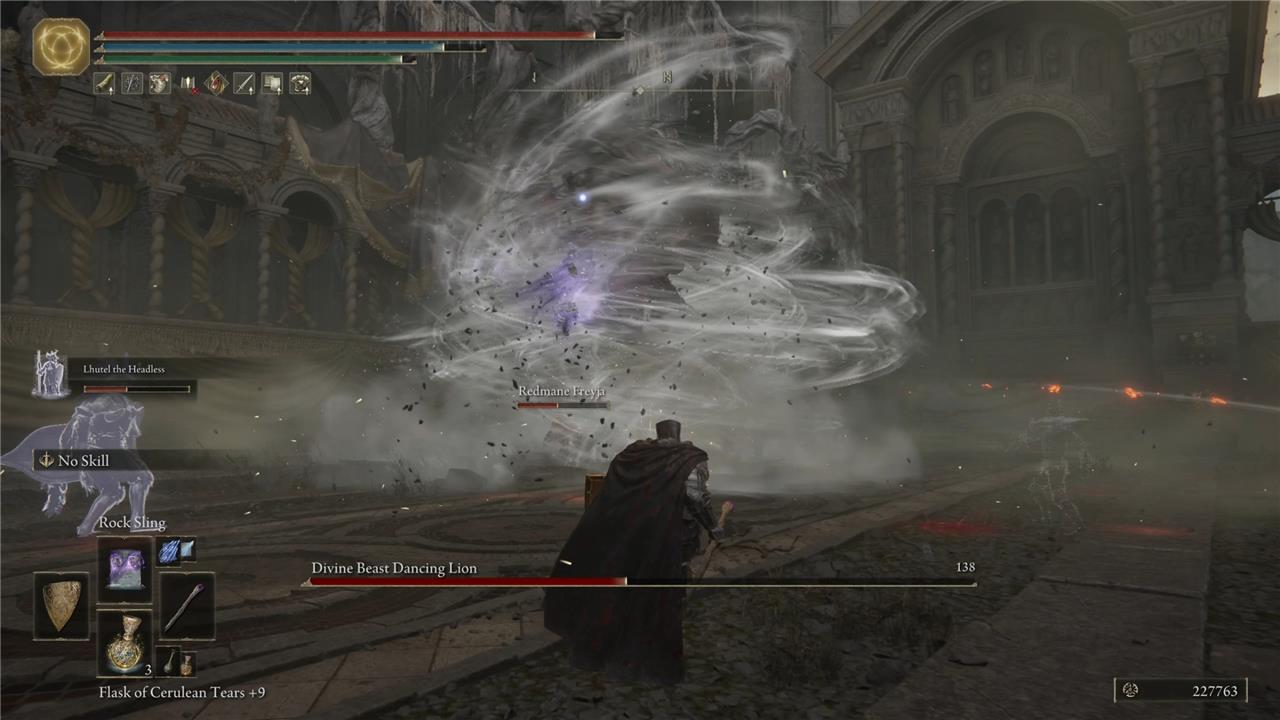
The wind phase works a little differently. The Dancing Lion still lunges, but it’s more likely to whip up a few whirlwinds. The most powerful of these happens when the Lion spins in midair and creates a proper twister. The funnel moves toward you, and if it connects, it deals damage and launches you into the air for a second. Dodge forward to escape this attack. Don’t try moving sideways, as the tornado is too broad and will launch you anyway.
The Lion also spews a tunnel of air at you, which you can dodge sideways to avoid, and it creates small whirlwinds when it lunges.
The Dancing Lion whirls in the air for two seconds or so when it changes elements, and there’s an extra second after the change before it does anything. Use this moment to retreat and heal if you need to, or fire off some spells.
Regardless of the element, your offensive strategy should remain mostly the same. Use the moments after lunges to attack with melee weapons, and make some distance between yourself and the Lion to use spells.
Divine Beast Dancing Lion boss fight phase 3
Calling this a third phase is a little bit of a stretch, as the Dancing Lion doesn’t use any new attacks. However, it does alternate between elements much more quickly, with fewer chances for you to catch your breath. You’ll need to think quickly and play a bit more aggressively to take the Lion down before it wears you out, and if you held off summoning your Spirit Ash earlier, now’s the time to do it.
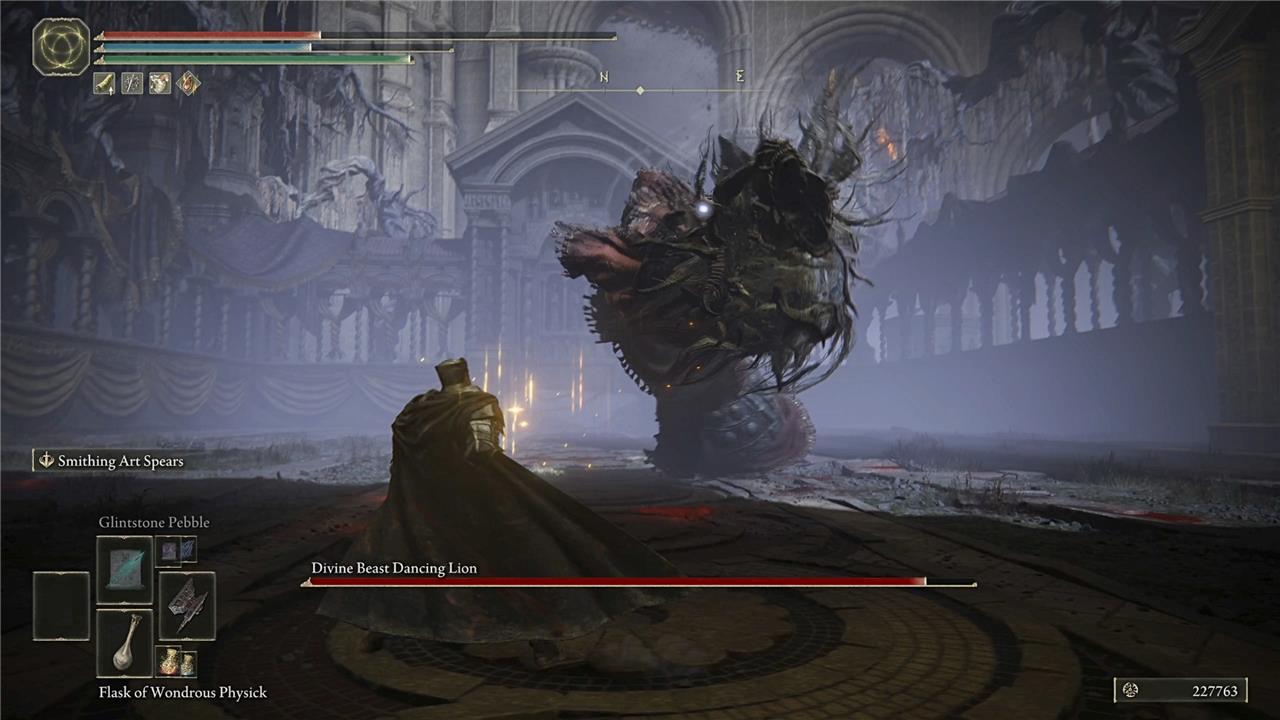
Defeating the Lion earns you a Remembrance for Enia back at Roundtable Hold and the Lion’s head as a piece of armor.
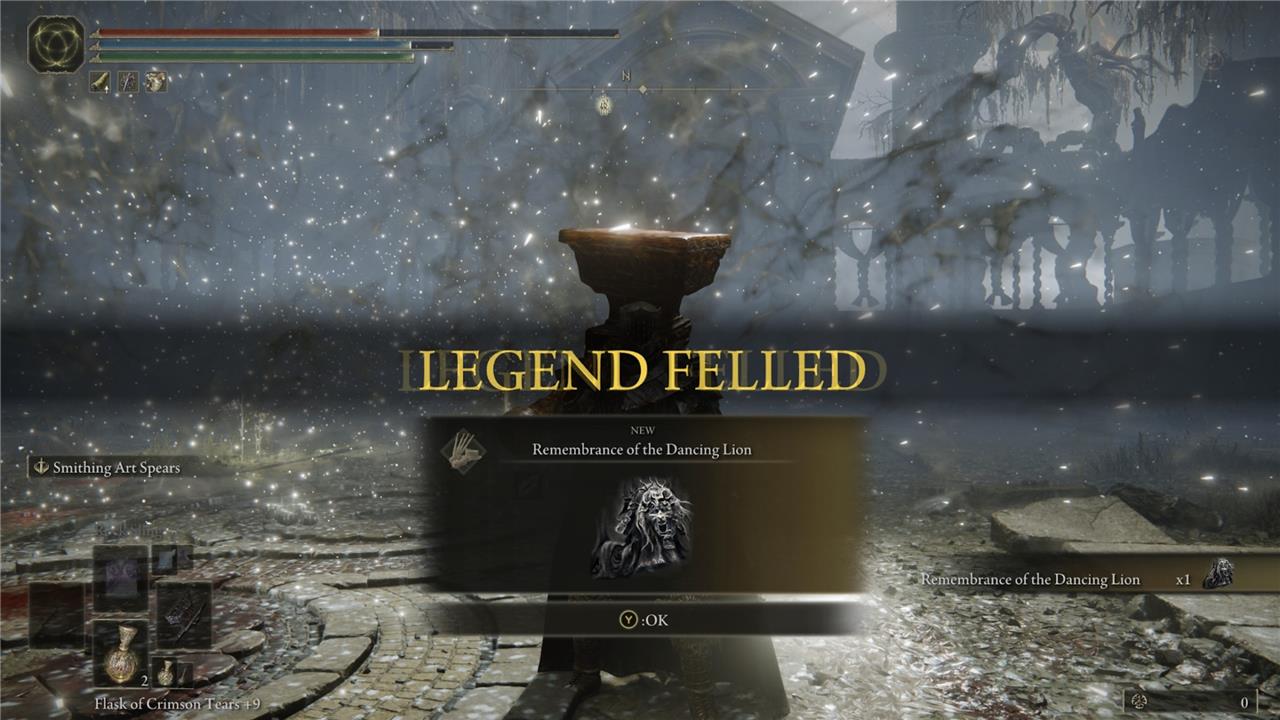
“That’s gross,” you might say, and it kind of is, but if you wear it and speak to the Hornsent Grandam in Belurat’s storage room – a locked area near the Small Altar Site of Grace – you’ll get a new Incantation for your troubles.
What are the key timing tricks to dodge Dancing Lion’s spinning attacks
To consistently dodge the Divine Beast Dancing Lion’s spinning attacks, timing and direction are crucial. Here are the key timing tricks for each major spin-type attack:
-
Rotating Breath and Spin Attacks:
-
For the rotating breath, stay out of the attack’s range and keep moving backward. If you must dodge through it, time your rolls just as the breath reaches you-usually requiring three well-timed rolls, though this is riskier.
-
For the double rotating lunge combo, dodge-roll backward during the first lunge, wait about a second and a half, then dodge-roll toward the Lion to avoid the second lunge. Immediately sprint away to avoid the rotating breath that follows.
-
-
Spinning Whirlwind and Dust Spin:
-
When the Lion spins in the air and creates a tornado, dodge forward as it comes toward you-don’t try to move sideways, as the tornado is too wide.
-
For the dust spin, roll toward the Lion as it jumps; this will put you behind him, avoiding most of the damage.
-
-
Elemental Spins (Lightning, Frost, Wind):
-
For lightning and wind-based spins, watch the Lion’s head and animation cues. Dodge toward or to the side of the Lion just as the attack is about to land-timing your roll with the moment the effect is about to hit you is safest.
-
When the Lion levitates and shoots whirlwinds, dodge to the side or forward as the attack is about to land.
-
Paying attention to the Lion’s head and body movements will help you anticipate these attacks and time your dodges more effectively.
What is the safest way to time dodge rolls during Dancing Lion’s breath attack
The safest way to time your dodge rolls during the Divine Beast Dancing Lion’s breath attack is to stay out of its range and keep moving backward-this is the most reliable method to avoid damage altogether. If you are caught close and must dodge through the breath, you can time your dodge rolls three times as the breath reaches you, though this is riskier and requires precise timing. For optimal safety, prioritize positioning and only resort to rolling through the breath if absolutely necessary.
Alternatively, using a shield to block the breath attack can mitigate damage if you are unable to dodge, but you will still take chip damage and lose stamina.
In summary:
-
Best: Stay at mid-range or farther and move backward to avoid the breath entirely.
-
If caught close: Dodge roll three times as the breath reaches you, but this is less safe.
-
Shield option: Block the breath with a high-stability shield if dodging is not possible.