Ready to conquer Fort Condor in Final Fantasy 7 Rebirth? This beloved tower defense mini-game returns with fresh twists and strategic depth, challenging you to master unit placement, hero abilities, and lane control to crush your foes and claim victory. Whether you’re facing the early stages or the punishing Hard Mode, our guide breaks down winning formations, hero unit usage, and essential tactics to dominate the battlefield on PC and PlayStation.
Completing all of the protorelics across the different areas also rewards you with a summon materia – though we won’t spoil who the materia is for. If you’re interested in the platinum trophy for FF7 Rebirth, you do need to beat all of Fort Condor and its hard mode levels. You don’t need to do the hard mode for the summon, but you do need to complete the protorelic for Junon in its entirety.
Learn more about how to play Fort Condor and a method to easily complete all four normal stages below.
How to play Fort Condor in FF7 Rebirth
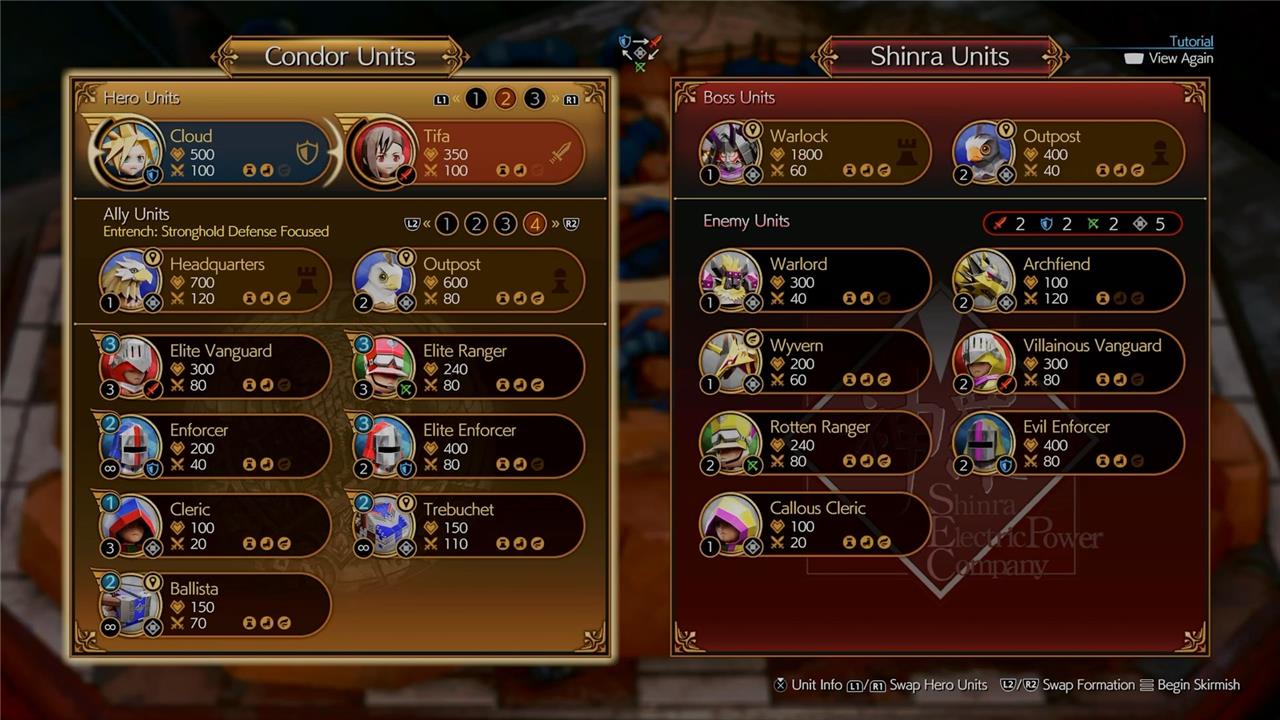
To play Fort Condor in FF7 Rebirth, start by selecting your Hero Units-typically Cloud, Barret, or Tifa-each with unique powerful abilities that charge as you deploy related ally units. Focus on deploying a balanced mix of units such as Enforcers, Vanguards, Rangers, Clerics, and Trebuchets along predetermined paths to defend your base and attack enemy outposts. Use ranged and defense units strategically to counter the opponent’s unit types, and place trebuchets near your base for strong area damage. Once your units have advanced close to the enemy boss, summon your Hero Units to unleash their special attacks and secure victory. Managing your unit placement and timing your Hero summons effectively are key to winning Fort Condor battles in FF7 Rebirth.
First, you’ll need to understand the basics of Fort Condor:
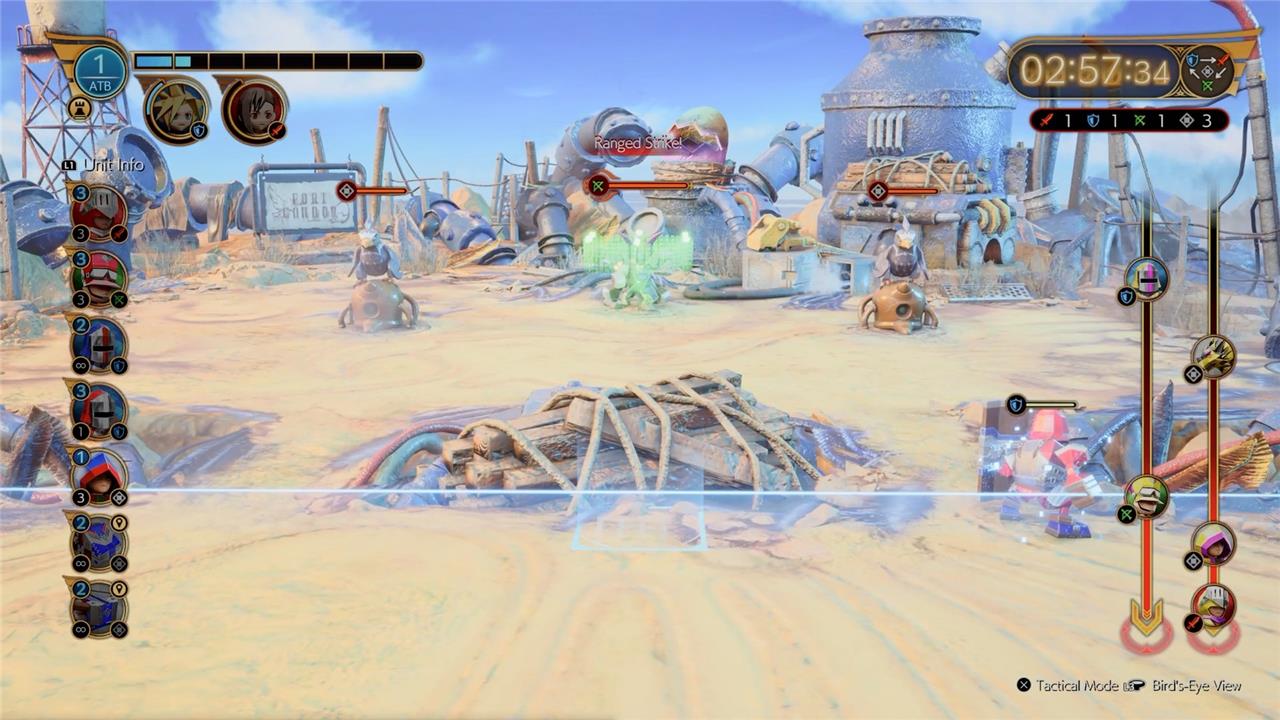
- There are two lanes where friendly and enemy units will traverse. Check the right side of the screen to see what your enemy is sending and counter their units accordingly.
- The units follow a rock-paper-scissors system, but in this case it is defense (shield) >vanguard (sword) >ranged (bow).
- Each unit has an associated ATB cost, which can be located in the top left of their portrait on the left side of the screen. To see how much ATB you currently have, check your ATB gauge in the top left corner of the screen.
- Once you’ve summoned enough units of the same typing (defense, vanguard, and ranged) as your hero (Cloud, Tifa, and Barret), you can call them into battle.
Best Fort Condor strategy in FF7 Rebirth
The best Fort Condor strategy in FF7 Rebirth involves using an offense-focused formation with hero units like Cloud and Barret for early stages, and switching to a stronghold defense formation with Cloud and Tifa for tougher battles. Key tactics include deploying trebuchets and ballistae near your base entrances to control enemy advances, placing Enforcers and Elite Vanguards along the lanes to hold ground, and using Clerics to support your units. Timing the summoning of hero units is crucial-wait until your defenses have softened enemy forces before unleashing their powerful attacks. In harder stages, manage unit deployment carefully to avoid hitting usage limits, and adjust your unit types based on the enemy’s composition and the main tower’s changing type to maximize effectiveness.
The best strategy we’ve found is to use the Stronghold Defense Focused setup, and spam ballista and trebuchet units in front of their headquarters and outpost. Here’s a framework that can be used to beat each normal stage of Fort Condor:
- At the start of the game, observe what units your enemy is sending and in which lane.
- Counter their units according to the shield-sword-bow system by placing either an elite vanguard, elite enforcer or both in the respective lane.
- Spawn a cleric behind your vanguard and enforcer to help keep them alive.
- Continue to spawn elite vanguards, elite enforcers, and clerics until you’re able to build up a strong frontline or summon your heroes.
- Spam ballistas and trebuchets in front of the enemy’s headquarters and watch as they whittle away its health.
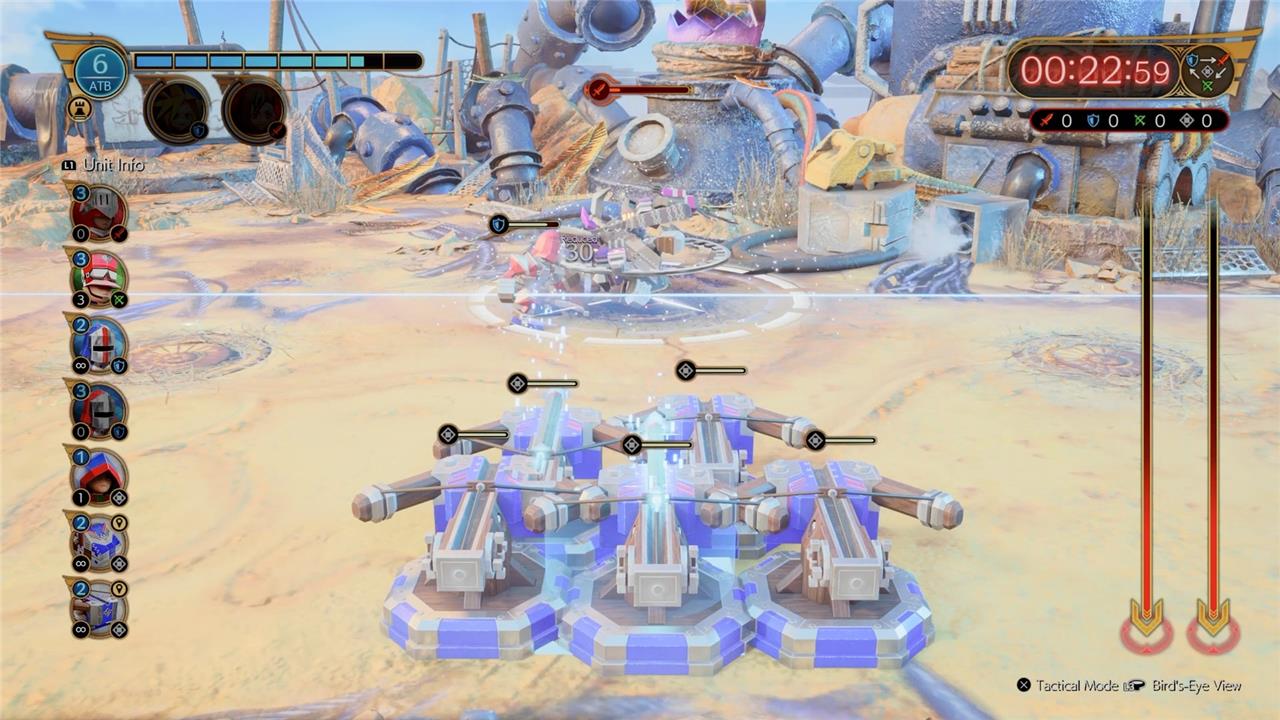
Note, ballista and trebuchet placement is very important! Ballistas and trebuchets both attack whatever is in front of them. Ballistas will shoot an deceptively wide arrow, while trebuchets will launch a projectile at a fixed range. Place your trebuchets a little closer to the center of the battlefield to ensure that the projectiles hit the target.
If you’re struggling and seem to be getting overrun by units, you can change the overall difficulty of Final Fantasy 7 Rebirth, which will change how quickly your ATB gauge charges. On easy difficulty, your ATB gauge will charge significantly quicker than on dynamic difficulty.
The world of Final Fantasy 7 Rebirth is huge, but we have your back if you need help. We have a beginner’s guide, list of side content rewards, and even an explainer on how to plan ahead for your Gold Saucer date.
What secret strategies can help me dominate Fort Condor in FF7 Rebirth
To dominate Fort Condor in FF7 Rebirth, several secret strategies can give you a decisive edge:
-
Balanced Unit Deployment: Use a mix of units strategically placed on both lanes. For example, deploy Elite Vanguard on the left path and regular Vanguard on the right, supported by Clerics and Rangers to maintain offense and defense.
-
Trebuchet Placement: Position trebuchets outside your base between the two paths to deal significant damage to enemy units, especially targeting enemy clerics and ranged attackers early on.
-
Hero Unit Timing: Don’t rush deploying heroes like Tifa and Barret. Save Tifa’s battlefield entry effect to wipe out clusters of enemies at critical moments, and deploy Cloud on the right path to control the majority of foes.
-
Adapt to Enemy Types: Pay close attention to the enemy’s main tower type, which changes during battle. Adjust your unit types accordingly to exploit weaknesses and counter their evolving attacks.
-
Hard Mode Discipline: In Hard Mode, unit deployment is limited per type. Plan carefully, avoid spamming units, and focus on well-timed, strategic placements, especially reinforcing the left lane heavily with Enforcers and Elite Vanguards.
-
Counter Boss Mechanics: The boss changes attack types and counters your units, so keep switching your deployed units to match the boss’s weakness and maintain pressure on both lanes.
By combining these tactics-strategic unit placement, careful hero deployment, adaptive countering, and disciplined resource management-you can consistently secure victory in Fort Condor battles on both normal and hard difficulties.
What specific unit placements can give me an edge in Fort Condor battles
For a strong edge in Fort Condor battles in FF7 Rebirth, specific unit placements are key:
-
Right Path: Deploy Elite Vanguard units supported by Clerics behind them to maintain frontline strength and healing. Place Elite Rangers on the right path to provide ranged support and cover.
-
Left Path: Use regular Vanguard units at the left entrance of your base with Clerics behind for healing. Position additional Elite Rangers near the left entrance and middle-left side to control enemy advances.
-
Trebuchets: Place trebuchets outside your base between the two paths, ideally one near the center and another slightly to the left, to bombard enemy units and structures from a distance without exposing your troops.
-
Concentrate Forces on One Side: Focus your main force on one lane (commonly the right) to overwhelm enemy units, while minimally defending the other lane to conserve resources.
-
Ballista Placement (Hard Mode): Place Ballista units as far back as possible near choke points, such as in front of the Condor statue, to maximize splash damage and cover enemy spawn points effectively.
-
Hero Deployment: Deploy heroes like Cloud on the right path to clear the majority of enemies, using their abilities to support your units and break enemy lines.
-
Unit Type Matching: Always consider the weakness triangle – Vanguard (red sword) beats Ranged (green arrow), Ranged beats Defense (blue shield), and Defense beats Vanguard. Place units to counter the enemy’s main troop types on each path.
This combination of focused lane pressure, strategic support unit placement, and effective use of siege units like trebuchets and ballistae will give you a significant advantage in Fort Condor battles.