Hidden deep beneath the sands of the Gerudo Desert, the Kikakin Shrine challenges players with shifting platforms, timed lasers, and precise motion puzzles that test both reflex and patience. Here’s how to reach it and solve every trick inside to claim its hidden reward.
Kikakin Shrine location
Kikakin Shrine is found in the Gerudo Highlands region, southwest of Hyrule. Its exact coordinates are (-3950, -3825, 0040), situated on a rocky plateau near the Gerudo Summit area. The terrain is cold, so carrying warm clothing or food that provides cold resistance is recommended before reaching the site. The shrine’s exposed location makes it easier to spot from higher ground, especially during clear weather or from nearby Skyview Towers.
The Kikakin Shrine is found within the Great Hyrule Forest region at the coordinates (-0395, 2736, 0302). It’s located on a mountain ridge.
Kikakin Shrine walkthrough
Kikakin Shrine challenges players with a puzzle centered on precise timing and object placement. Use the provided spheres to trigger switches and open paths to the final chamber. Observing the motion of the mechanisms is key to reaching the treasure chest and the Light of Blessing at the end. Careful coordination of each moving part will lead you smoothly through this shrine.
Kikakin Shrine is dark, and it requires the use of a Zonai flashlight or Brightbloom Seeds, else you run the risk of hurting yourself on obstacles. (We used the flashlight, but brightbloom seeds make this much easier – you don’t even need that many.) Inside the main chamber, there’s a locked door. You’ve got to run around in a small maze find the key.
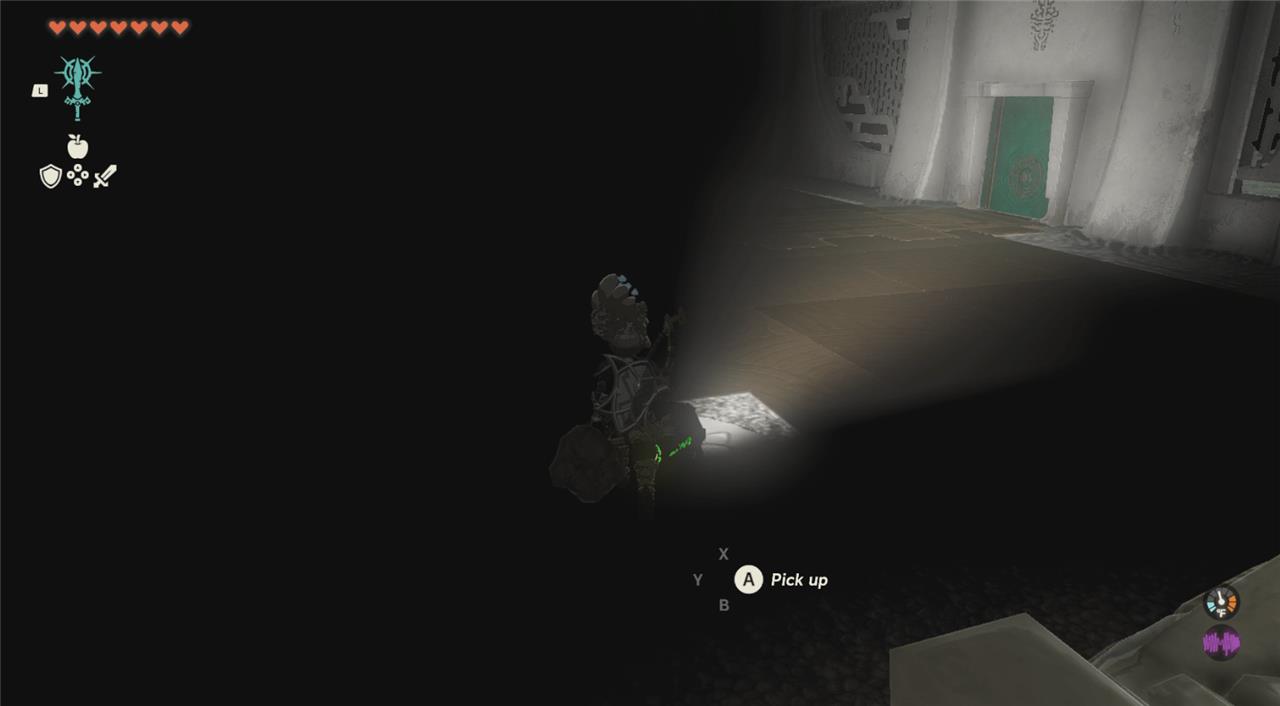
1. Pick up the Zonai flashlight. You can also use brightbloom seeds if you’ve got some to spare. (Place them on the ground and hit them to activate the seeds.)
2. Head toward the back, left-hand side of the room. Turn left, then left again. You’ll see red lasers. Avoid them, but head straight back to get a chest with opal inside. Head back through the red lasers.

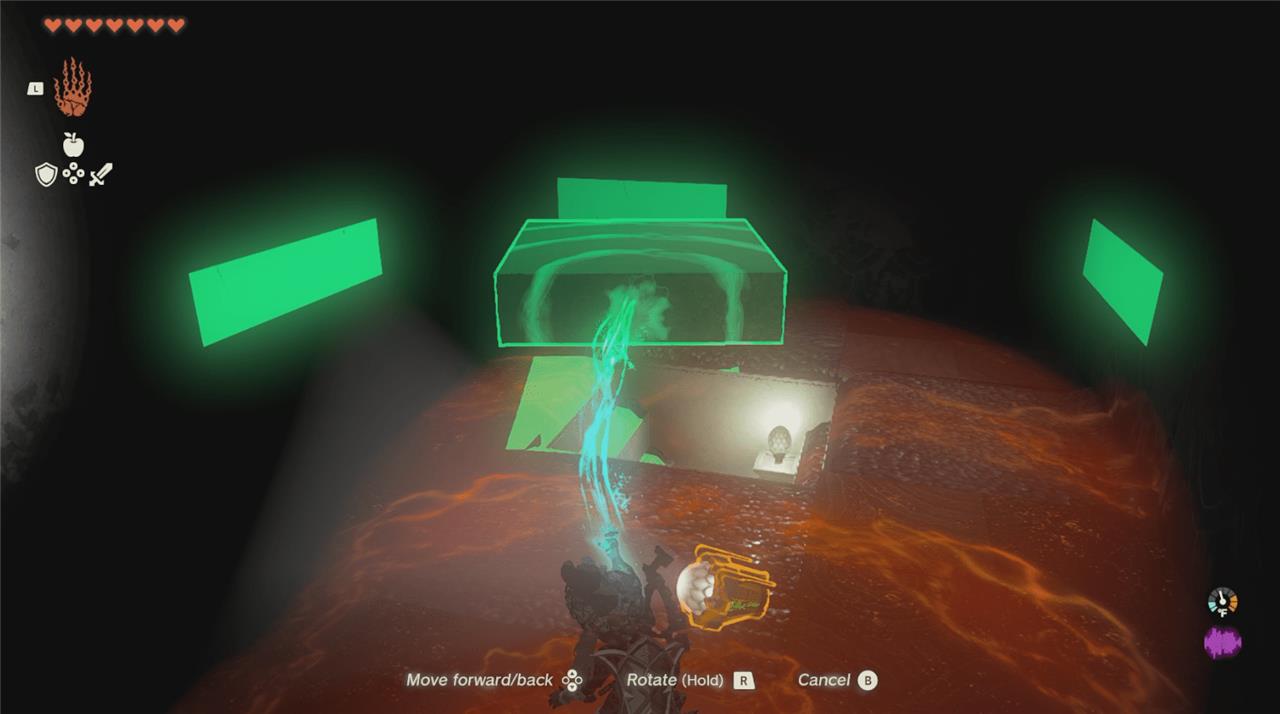
3. Go straight until you see a spiked wall. Be careful, but continue through. Continue through another spiked wall, and turn right. There’s a panel on the floor that can be removed with Ultrahand – do that and pull up the chest, which has a key inside. You can head back where you came from now and open the locked door in the main chamber, but you’ll miss some loot.
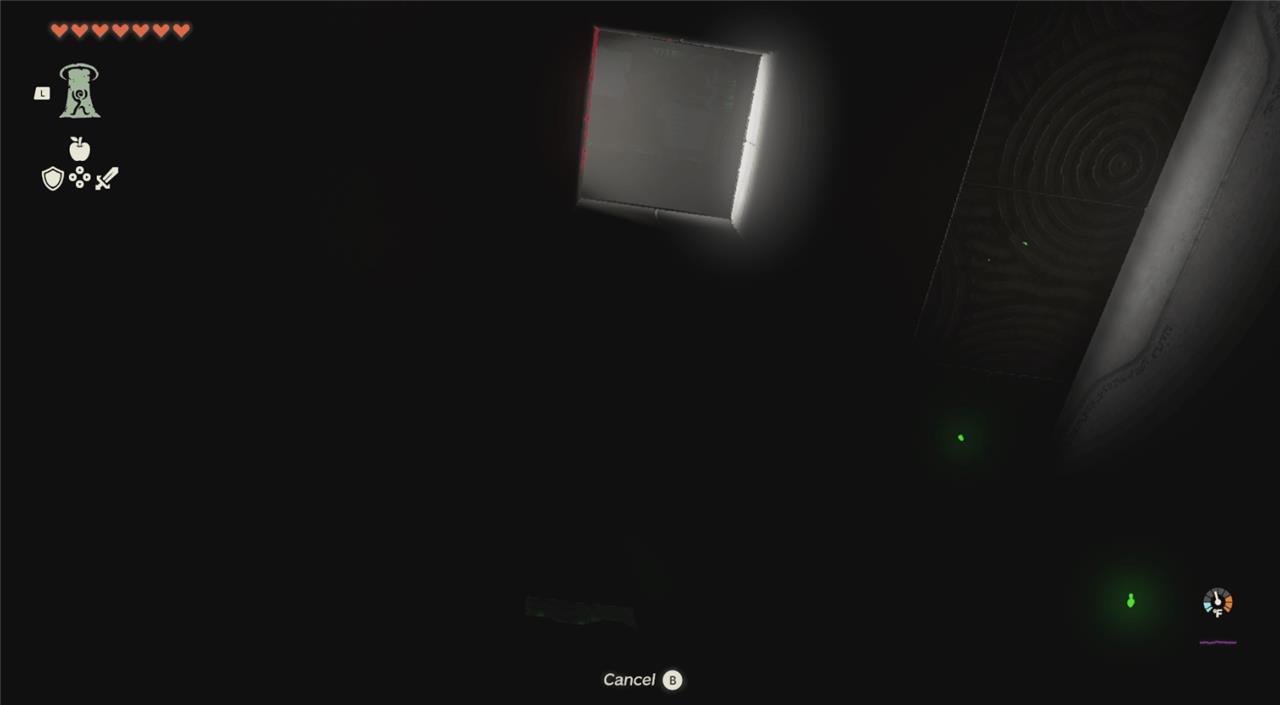
3. Look up at the ceiling around this area. There’s a shining light above, in the shape of a square. Ascend through the ceiling to get to the next level, which has a chest with a Zonaite bow. Drop back down.
4. Go back past the spiked wall and turn left. Turn left again, and then right. You’ll head through spiked walls, so be careful. The chest at the end of the hallway has a luminous stone inside.
5. Turn around again and head left, then left again. You’ll see a panel on the wall toward the right. Use Ultrahand to remove the panel and grab the chest. This one has amber. Continue past the wall (and the spiked wall on the right) and turn left. Turn left again and you’re back in the main chamber.
What are all treasure chest locations and contents in Kikakin Shrine
Kikakin Shrine contains five treasure chests with valuable items, accessible by navigating its dark, maze-like paths while avoiding lasers and spike traps. Use Brightbloom Seeds or a Zonai lantern for visibility, and follow the left-wall rule to explore systematically. All chests can be collected before unlocking the final door.
Chest Locations and Contents
| Chest # | Location Directions | Contents |
|---|---|---|
| 1 | From entrance, go left past lasers to alcove at end of hallway. | Opal |
| 2 | After single spike wall (near key area), look up for ceiling hole; use Ascend to upper platform. | Zonaite Bow |
| 3 | Past single spike wall, lift middle floor tile with Ultrahand in patterned area. | Small Key (required for altar door) |
| 4 | From spikes near Luminous Stone path, turn left twice into hallway; chest past moving spikes. | Luminous Stone |
| 5 | Near entrance hall (left from locked gate), use Ultrahand on wall cube/block to climb to hidden chest. | Amber |
How to complete Kikakin Shrine main puzzle
Kikakin Shrine’s main puzzle, “Shining in Darkness,” requires navigating a pitch-black maze using a Zonai lantern or Brightbloom Seeds for light while avoiding lasers and moving spikes. The core objective is to find the Small Key by sticking to the left wall rule, then return to unlock the altar door. This straightforward path ensures completion, though optional chests add rewards along the way.
Required Items and Prep
Grab the Zonai lantern near the entrance immediately, as the shrine is completely dark without it. Ultrahand and Ascend are essential for accessing hidden areas, but the key path only needs basic movement and timing.
Step-by-Step Main Path
-
Enter and turn left into the first hallway; dodge red lasers to proceed safely.
-
Pass a single moving spike wall on the right, then continue to a dead-end area with a patterned floor tile-use Ultrahand to lift it and claim the Small Key from the chest below.
-
Backtrack past the spikes, turn left at intersections while hugging the left wall, weave through a double spike corridor, then navigate another laser hallway.
-
Return to the central entrance chamber, unlock the gated door on the left with the Small Key, and interact with the altar statue for your Light of Blessing.