Hidden in the icy reaches of Hebra, the Sahirow Shrine challenges players with a precise series of laser puzzles that test timing and observation. Here’s how to locate the shrine and master its clever light-based mechanisms to claim your reward.
SahirowShrine location
Sahirow Shrine is located in the Hebra Mountains region of Hyrule, just northwest of the Rospro Pass Skyview Tower. The shrine sits on a snowy plateau surrounded by steep cliffs, so players will need cold resistance gear or warming food to reach it safely. Coordinates are roughly (-3369, 2381, 0467), placing it near the edge of the frozen wilderness. The path can be tricky due to icy slopes and Bokoblin patrols, so bringing a shield for surfing or Revali’s Gale-like abilities makes the trip easier.
Sahirow Shrine is found within the Hebra Mountains region. The shrine is located southwest of Hebra Peak. The shrine is easily accessible by either gliding down from a higher peak or climbing up from a valley. The exact coordinates are (-3355, 2387, 0361).
Sahirow Shrine walkthrough
Inside Sahirow Shrine, you’ll face a series of laser puzzles that test timing and precision. Use the mirrors scattered around the room to redirect laser beams toward the switches that open each gate. Pay attention to angles, as slight adjustments often make the difference between success and failure. The final chamber requires combining multiple reflections to activate the exit mechanism, rewarding players who carefully study the path of each beam.
Sahirow Shrine is stuffed to the brim with laser puzzles, but don’t let that scare you. Although various hallways look like they’ll send Link on a spy mission fit for Mission Impossible, many of the lasers can be avoided by crouching or jumping.
1. Start by running through the first hallway. You will encounter a red laser. Continue running through the hall and jump over it. If you hit the laser, a trap door will open under Link and he will restart at the front.
2. The next hallway has significantly more lasers to avoid. First, jump over the first laser.
3. Second, crouch and walk under the next four lasers. The first one runs parallel to the floor. It looks low, but Link’s crouch is low enough to avoid it. After that, keep walking while crouching under the next three, as shown below.
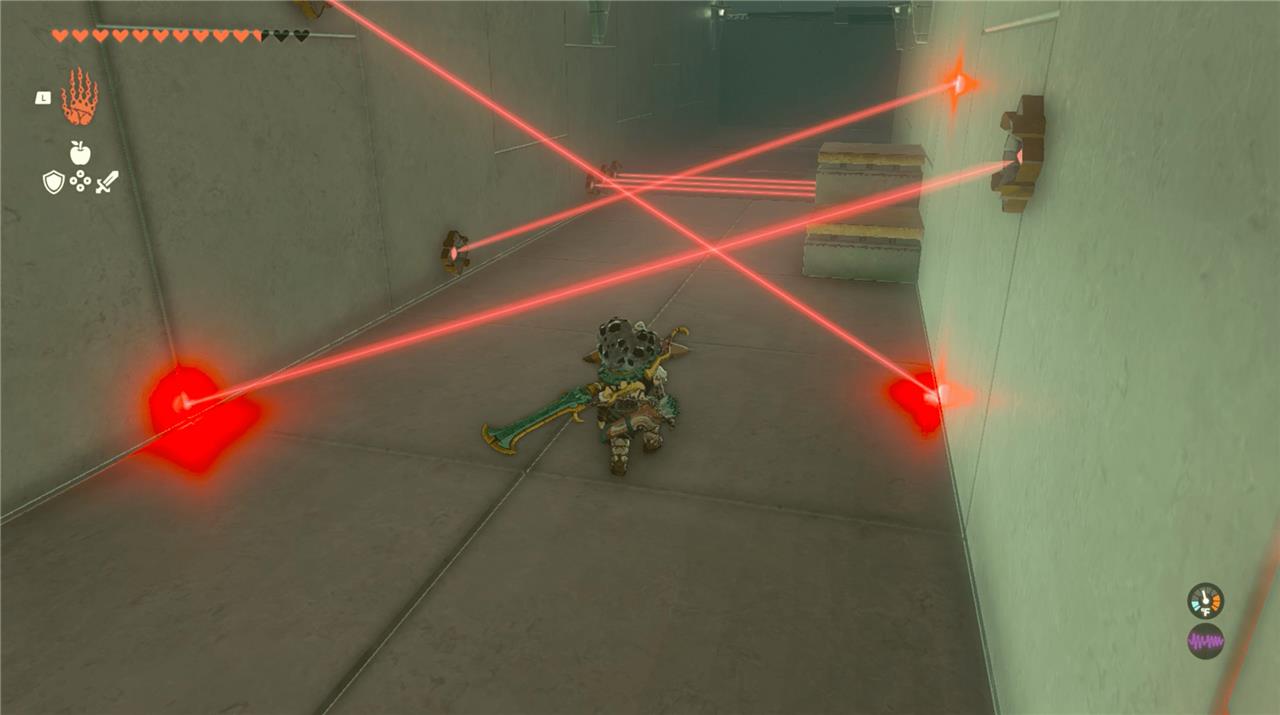
4. As you approach the other end, you will see a small raised platform on your right. Jump up onto the higher platform. From there you can jump and glide past the last three lasers.
5. Once you are at the end of the hallway past the lasers, look up. There is a platform moving above you. Use Ascend to jump up through it and bring Link to the next area.
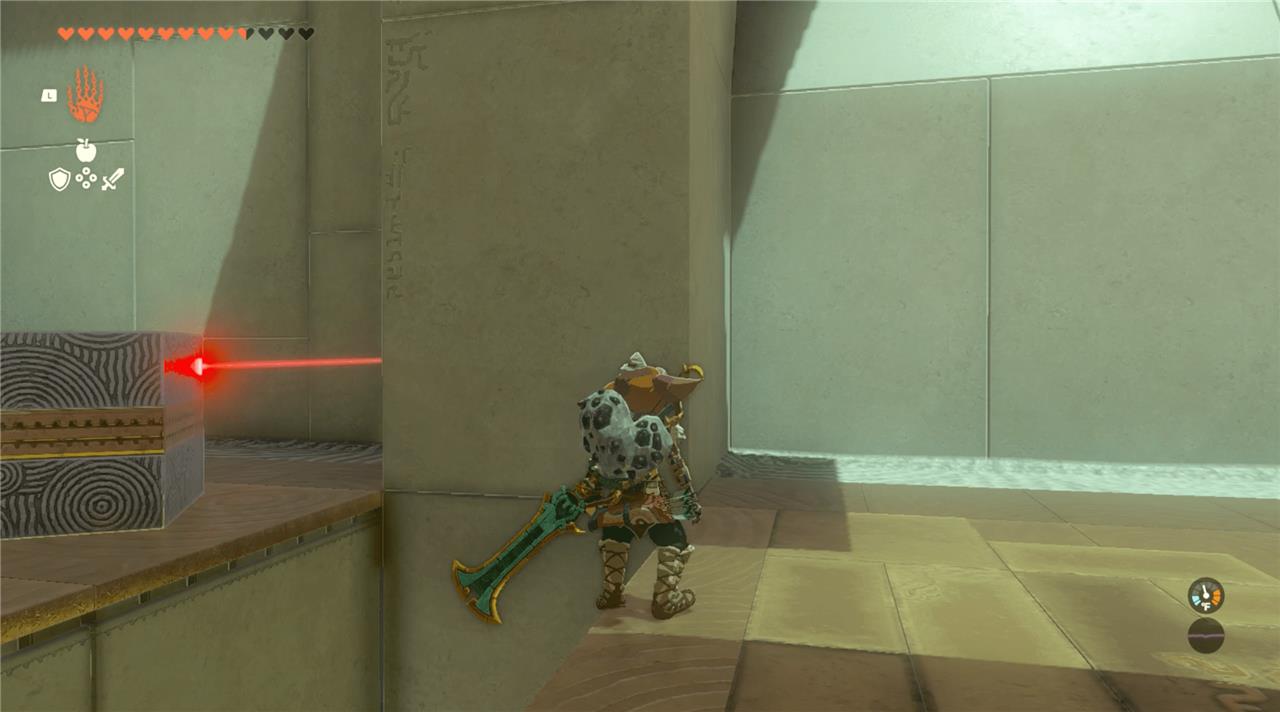
6. At this point, there are two directions you can go: one looks like a long hallway and the other looks like a room guarded by a laser. Walk toward the laser and the room behind it to grab a chest.
7. Crouch under the laser to get past it and walk into the room.
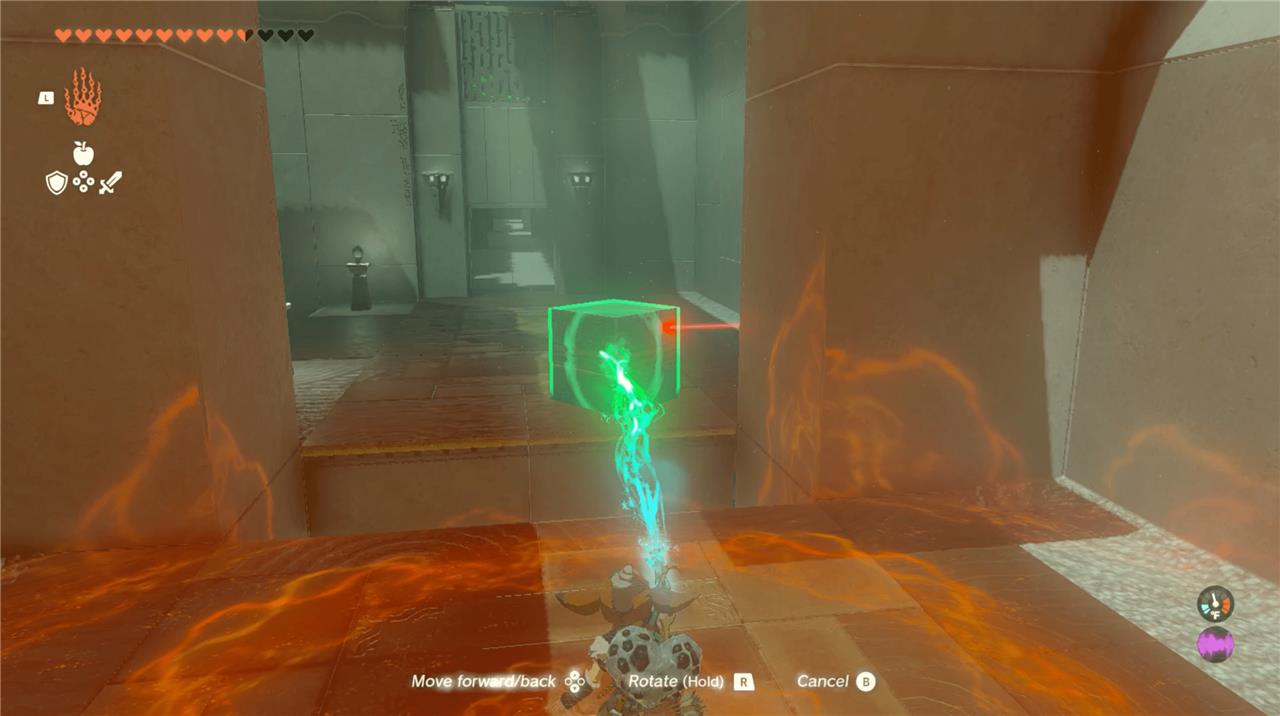
8. Once inside, you will see the chest behind big metal bars and two blocks. Use Ultrahand to grab one of the blocks, and position it so that it blocks the laser you just walked under.
9. Make sure to keep your distance when you do this. A trap door at the entrance of the room will open once you block the laser, as shown below.
10. Once you block the laser, the door to the chest will open. Walk in and grab the spicy elixir.
11. Now you need to get back. Use Ultrahand to remove the block obstructing the laser. Once you move it away, the trap door will become a regular path again and you can get past by crouching under the laser again.
12. Now that we’re back in the room with the split path, we will take the path that looks like a hallway. The next part is a series of hallways that have moving lasers.
13. You can’t see it at the start, but as you walk through the first hallway a laser will appear at the end and move towards you. Jump over it as it approaches you.
14. In the next hallway the same thing will happen. As you walk through, a laser will appear and move toward Link. This time, crouch to avoid the laser.
15. In the third hallway, you’ll see a giant laser wall approach that you can’t jump over or crouch under. Don’t panic – if you stay at the entrance of the room it can’t touch you. Wait for it to reach the end and reverse its path.
16. At this point, you can run towards it and use the Ascend ability to morph through the ceiling of the concrete platform containing the lasers.
How to reach Corvash Peak from Rospro Pass Skyview Tower
Rospro Pass Skyview Tower Overview
Rospro Pass Skyview Tower lies in the snowy Hebra Mountains northwest of Hyrule, north of Rito Village. Activate it first by burning surrounding thorns with fire fruit arrows to reveal the entrance.
Preparation for the Journey
Equip cold-resistant armor or consume cold-resistant food/elixirs, as the Hebra region inflicts Freeze status without protection. Corvash Peak stands east and slightly north of the tower near coordinates -3356, 2385, 0360.
Skyview Launch Method
Enter the activated Rospro Pass Skyview Tower and use its launch pad to rocket upward. Immediately deploy your paraglider and glide east toward Corvash Peak’s summit, adjusting for wind currents to cover the short distance efficiently.
Landing at the Peak
Spot Sahirow Shrine on the peak’s northeast side during your glide; aim to land directly nearby or on a flat ledge. This aerial route avoids ground hazards like steep cliffs and ice.
Ground Alternative Route
From the tower base, head east along snowy paths or climb the peak’s slopes using stamina boosts from food if needed, though gliding remains faster and safer. Hebra Trailhead Lodge serves as a southern starting point for climbers.
Best paraglider route from Rospro Pass to Corvash Peak
Rospro Pass Skyview Launch
Launch from Rospro Pass Skyview Tower to gain maximum height for gliding toward Corvash Peak. Face east-southeast upon exiting the tower to align with the peak’s position roughly 1-2 km away.
Optimal Gliding Direction
Deploy your paraglider immediately after launch and steer east-northeast, aiming for Corvash Peak’s upper slopes near coordinates -3356, 2385, 0360. Ride updrafts from the Hebra winds to extend your glide and counteract cold-area stamina drain.
Wind and Stamina Tips
Use Tulin’s Gust ability if unlocked to boost forward speed against headwinds; otherwise, circle in minor thermals over snowy ridges for height. Land on the northeast ledge by Sahirow Shrine to avoid overshooting into cliffs.
Visual Landmarks
Spot the tall, jagged Corvash Peak summit during descent, with Sahirow Shrine visible as a glowing structure on its flank. This direct aerial path takes under 2 minutes and bypasses icy ground traversal.