A ruined outpost hides more than broken walls-its core conceals a complex orb puzzle powered by the Koboh Tuner Beam. This guide breaks down each step to restore the settlement’s energy flow and claim the hidden rewards within.
Devastated Settlement orb puzzle part one solution
In the Devastated Settlement orb puzzle, observe the beam pathways and align Koboh Tuner interactions to channel the energy toward the central orb, then use a calibrated sequence of activations to restore the orb’s position and reveal the hidden chamber.
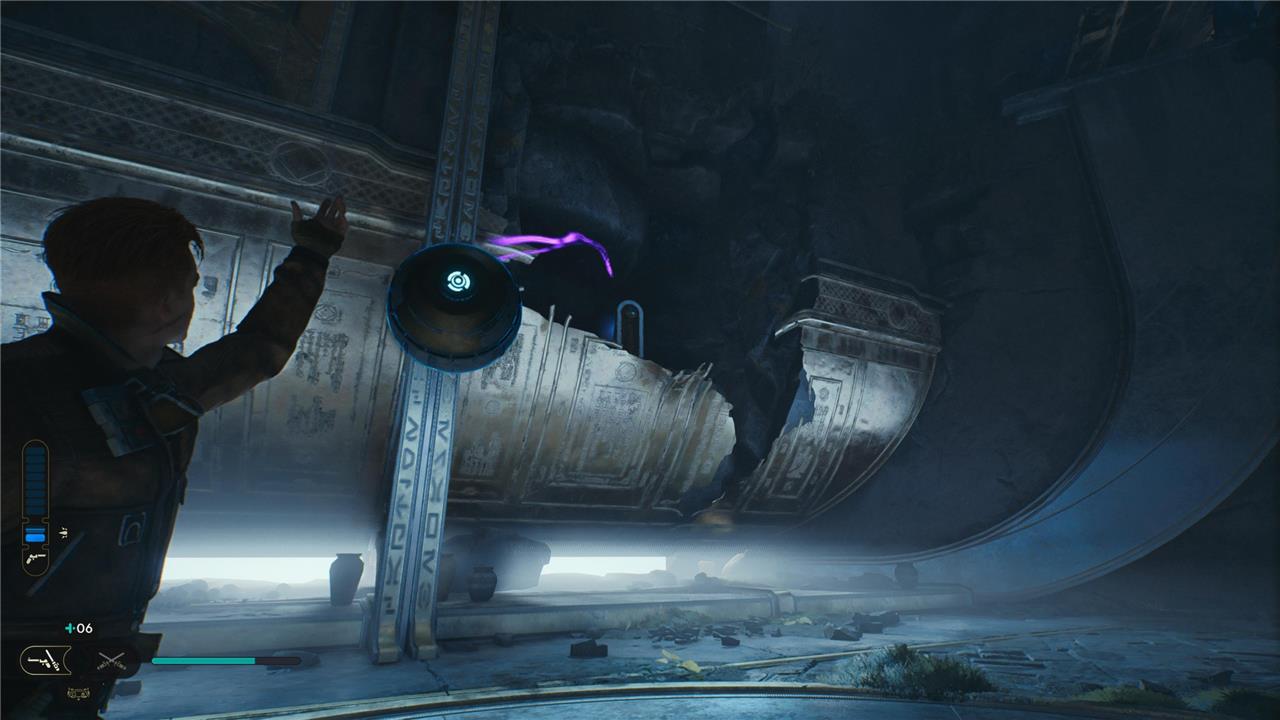
After defeating the droid, shimmy through the crack in the wall, then Force Pull the giant crate off the ledge with the Koboh Tuner Beam.
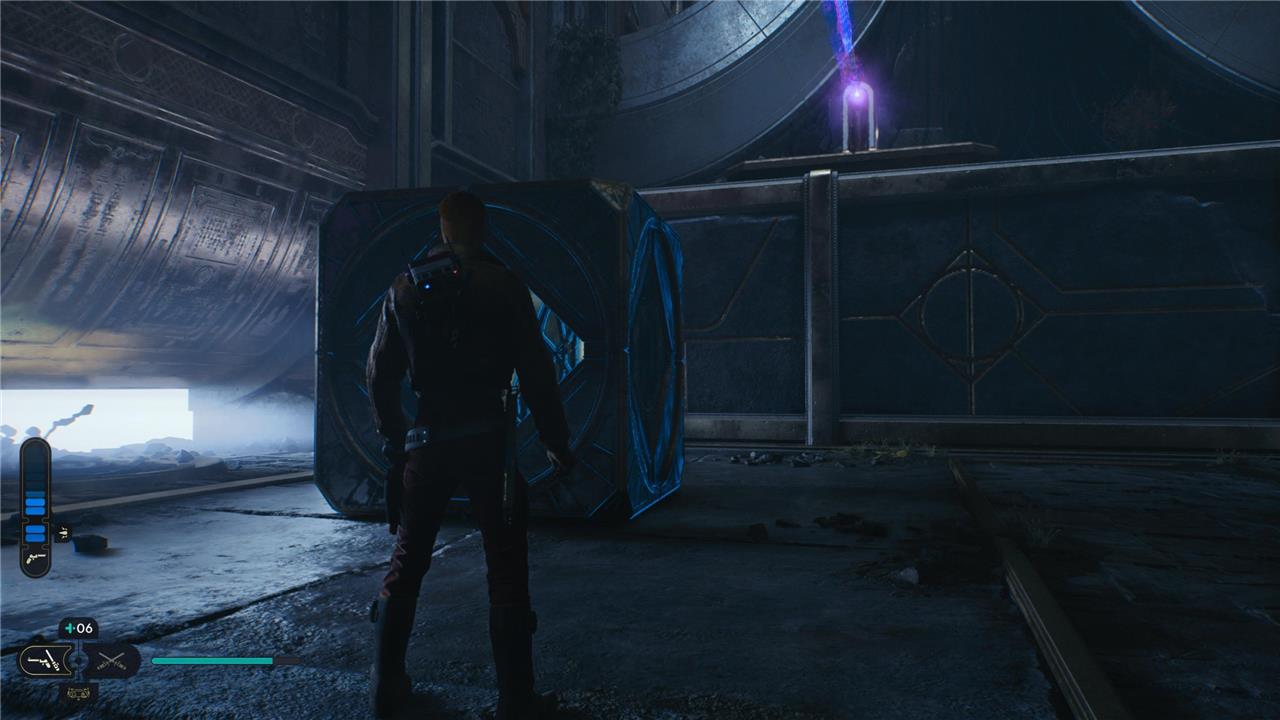
Go back through the crack, then Force Push the switch in the center of the room twice. This will cause the Koboh Tuner Beam to eliminate the weird dark bramble covering the left (or right, perspective dependent) side of the wall bisecting the room. Next, go back through the crack again. Using the giant crate, jump to the ledge with the laser on it. (Completionists, you’ll find a Force echo in the corner.)
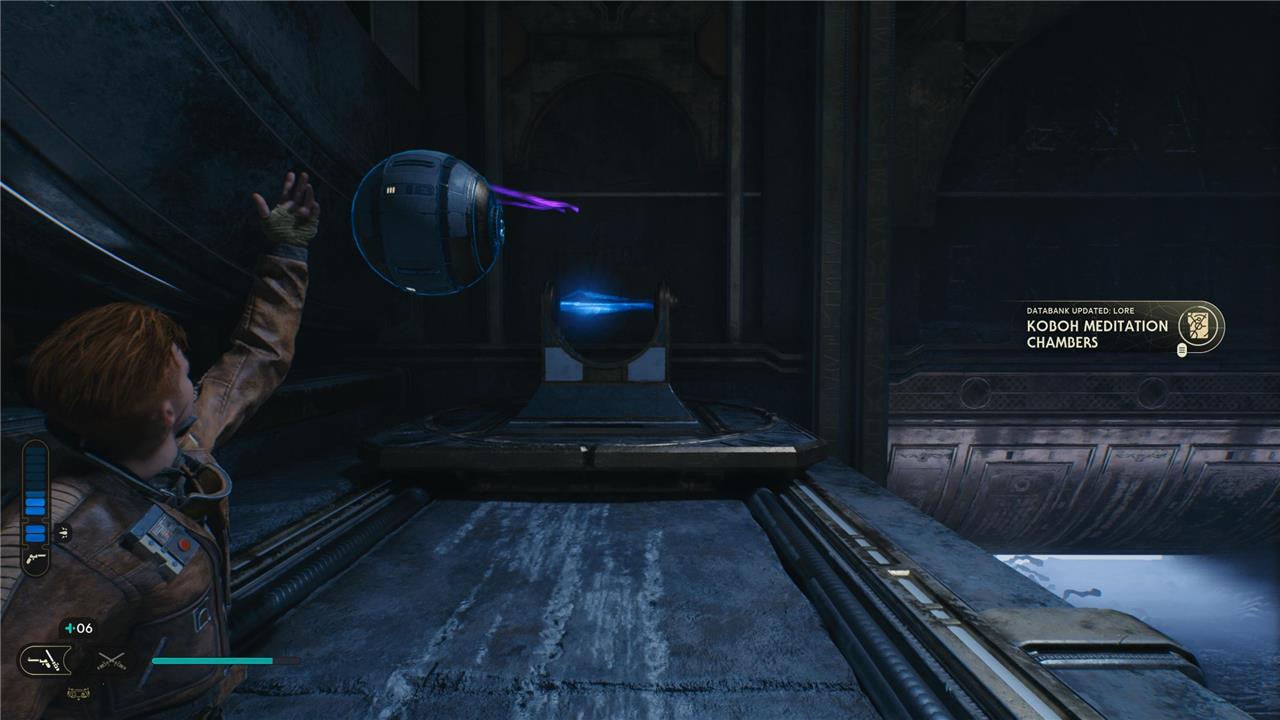
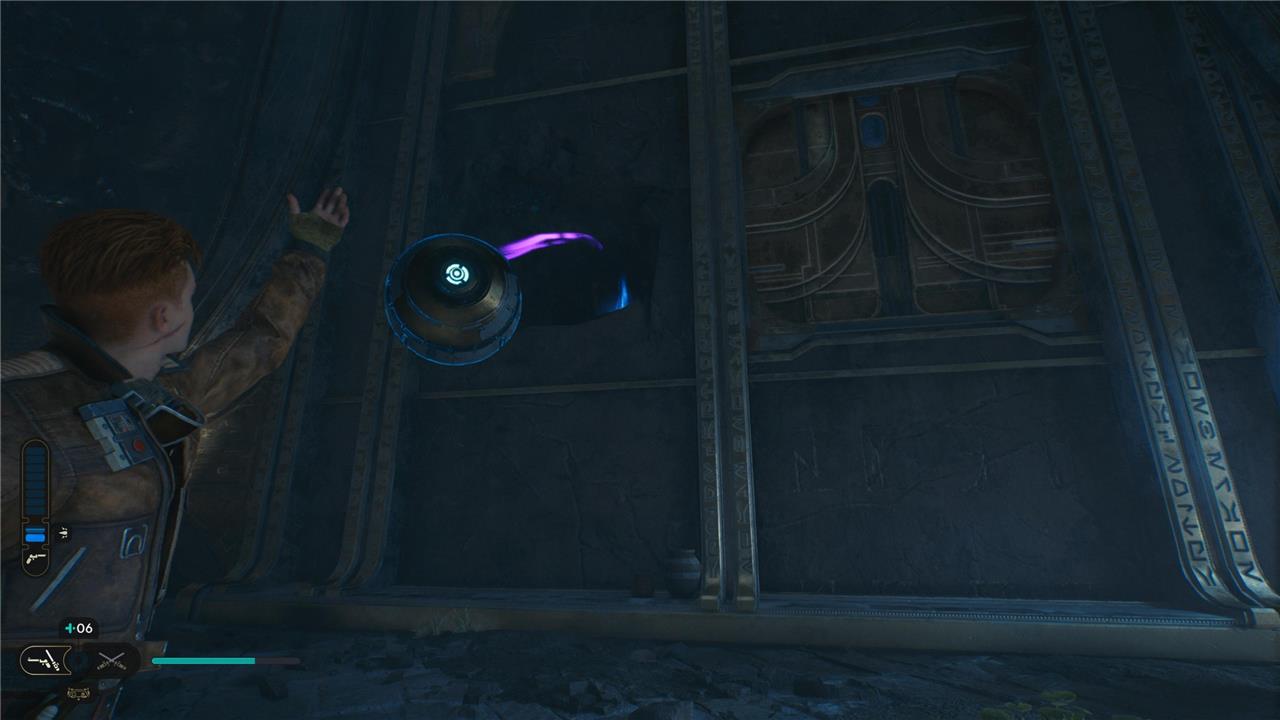
Remove the orb from the Koboh Tuner Beam and, while continuing to hold onto it, jump down below. Toss the orb into the glowing blue socket that was behind the now-disintegrated bramble.
Using the giant crate as a step stool, jump up to the ledge below the socket you just slotted the orb in. Shimmy through the wall to get to the other side of the room. Grab the same orb, jump down, and head back outside. Go straight, and toss the orb into the laser beam slot at the edge of the cliff.
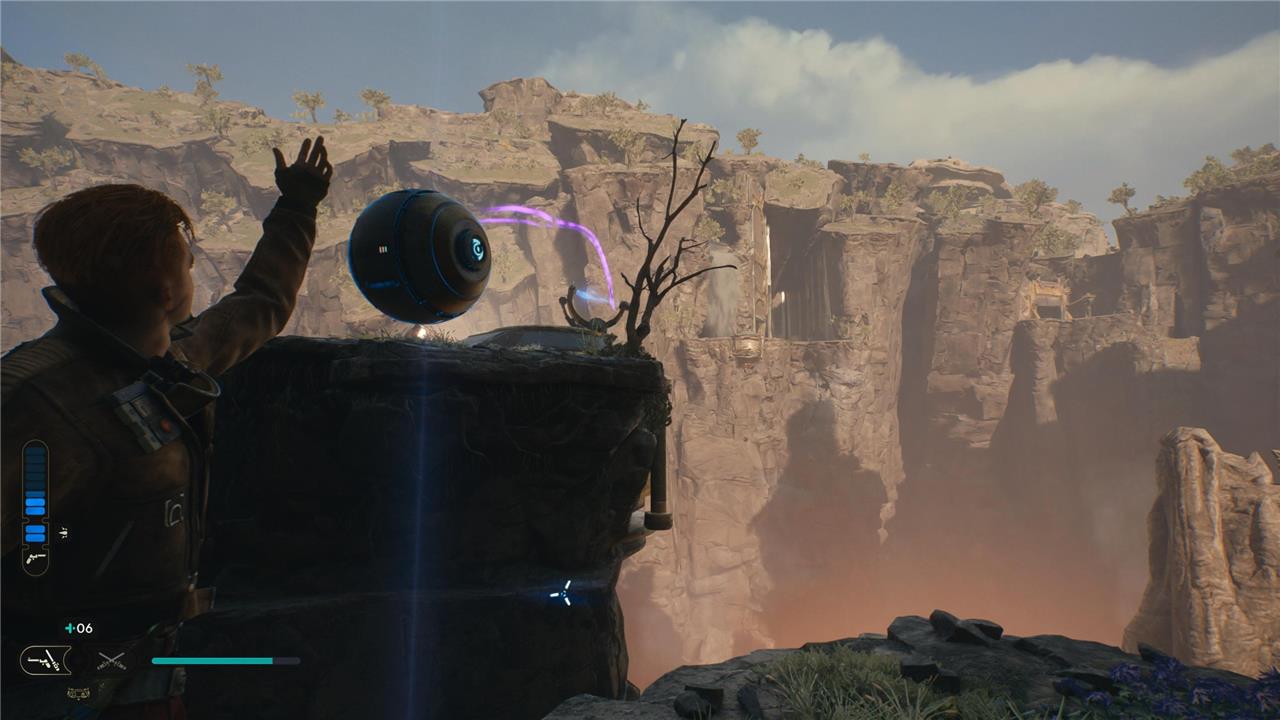
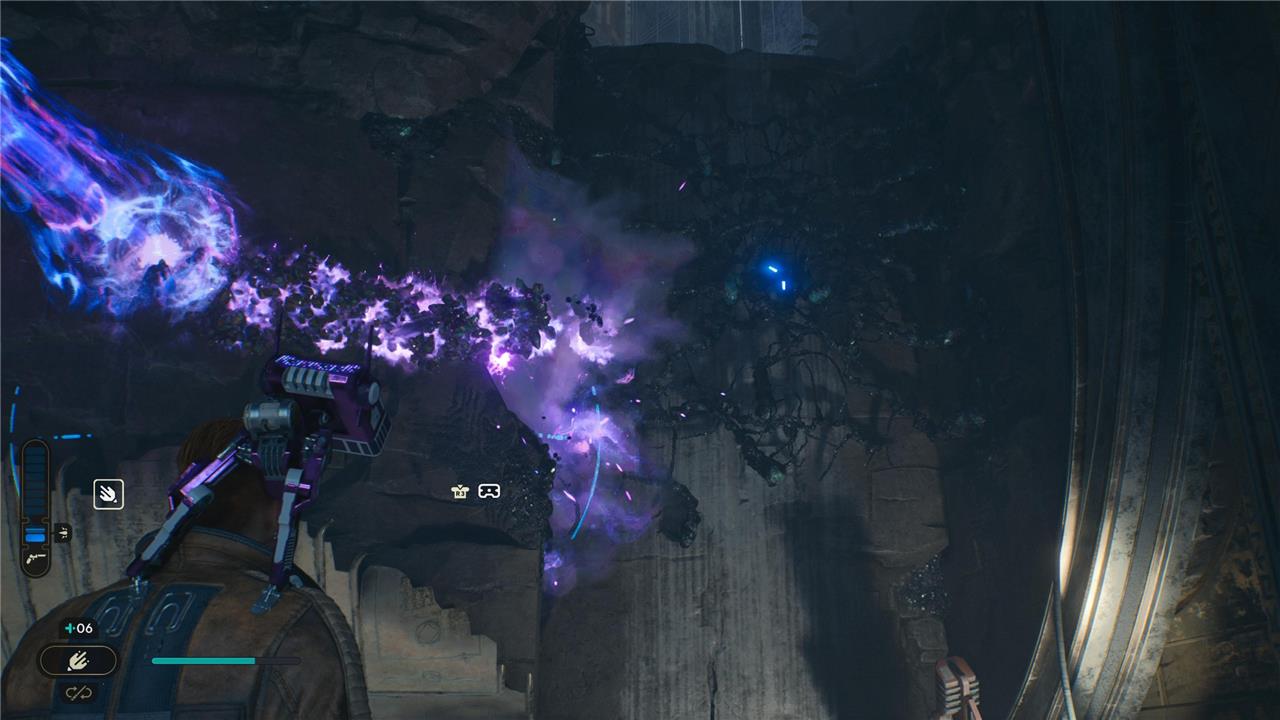
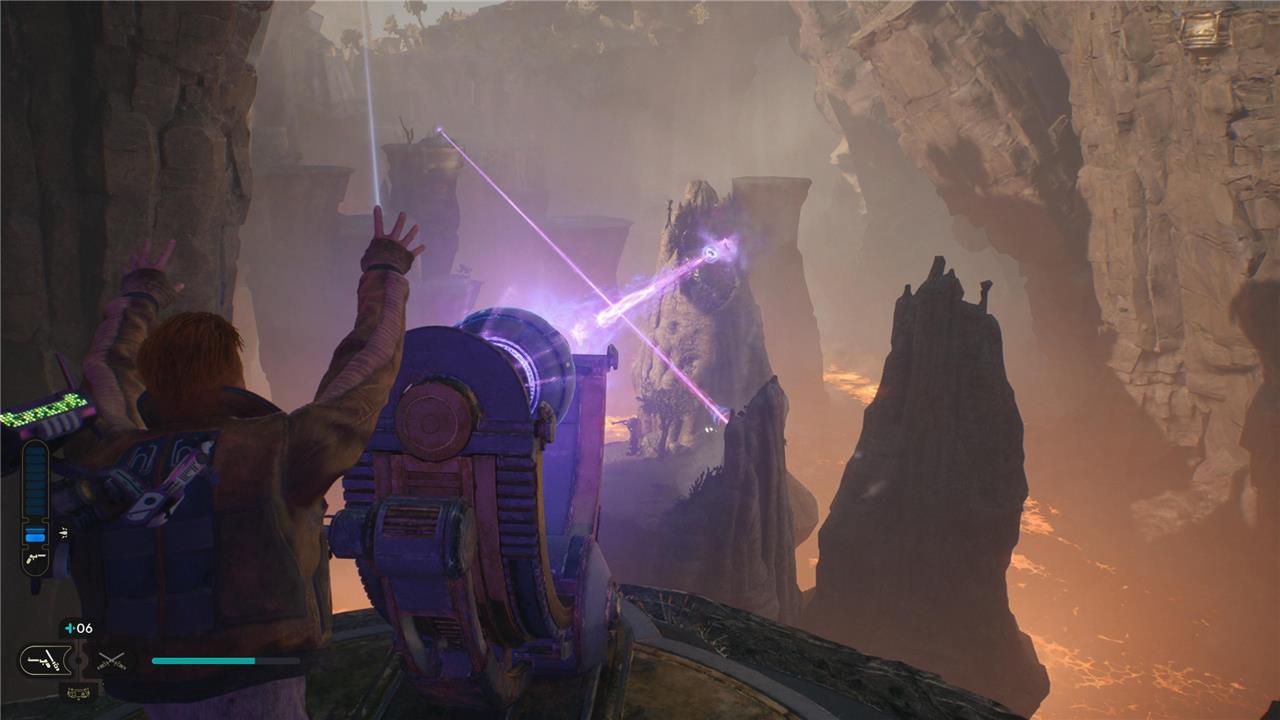
As a final step, aim the new laser across the chasm and hold it steady, blasting into the dark purple rock on the spire halfway across the chasm. For visual reference, just copy this:

This will create an updraft. Ride the glider bird creature (formally called a relter) to get to the second part of the Devastated Settlement orb puzzle.
Devastated Settlement orb puzzle part two solution
After dragging the orb from the main chamber through the magnetic barrier, use Force Push to position it at the receiver near the lift. Activate the Koboh Tuner Beam to channel the energy toward the crystal growth blocking the upper area. Once the path clears, climb to the next platform and guide another orb into place to redirect the beam again. This sequence clears the debris near the zipline and completes the second phase of the Devastated Settlement puzzle.
The second part of Koboh’s Devastated Settlement orb puzzle is far and away the most complicated. Defeat the two gorocco. (Our tip: confuse one of them and have it attack the other.) Shatter the cracked wall with the Force, then use Force Pull to grab the orb from the laser beam.
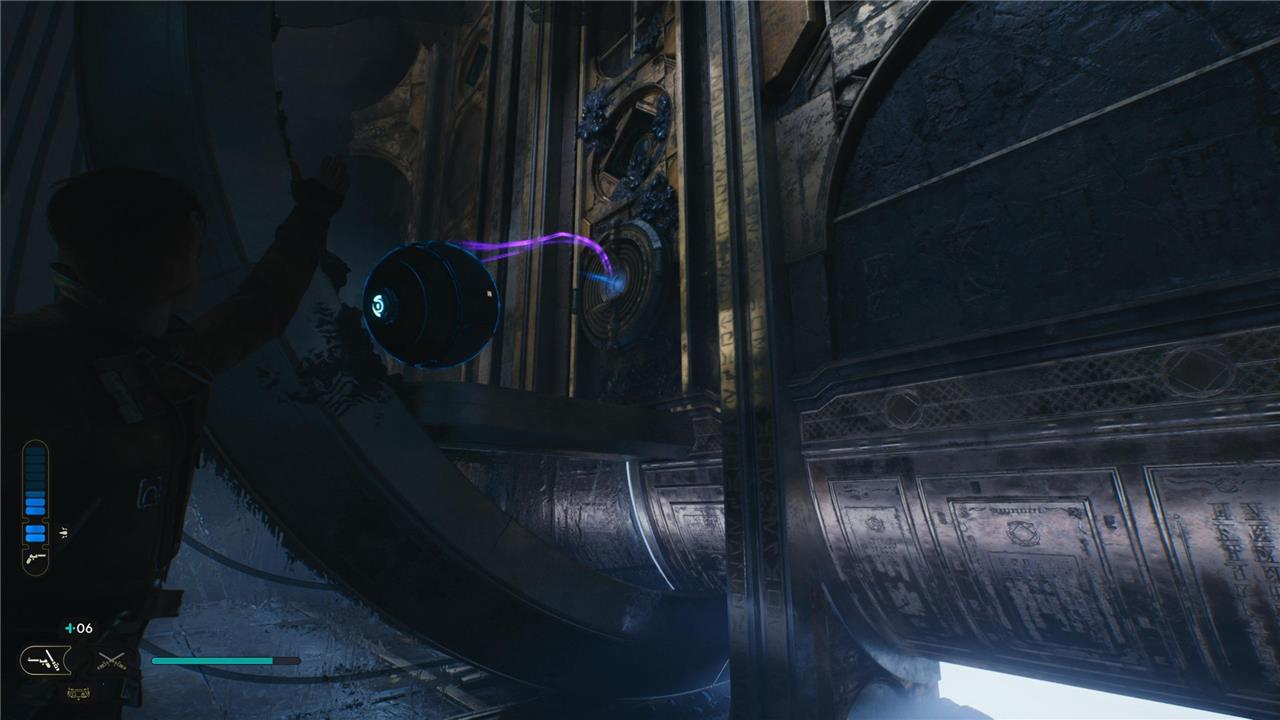
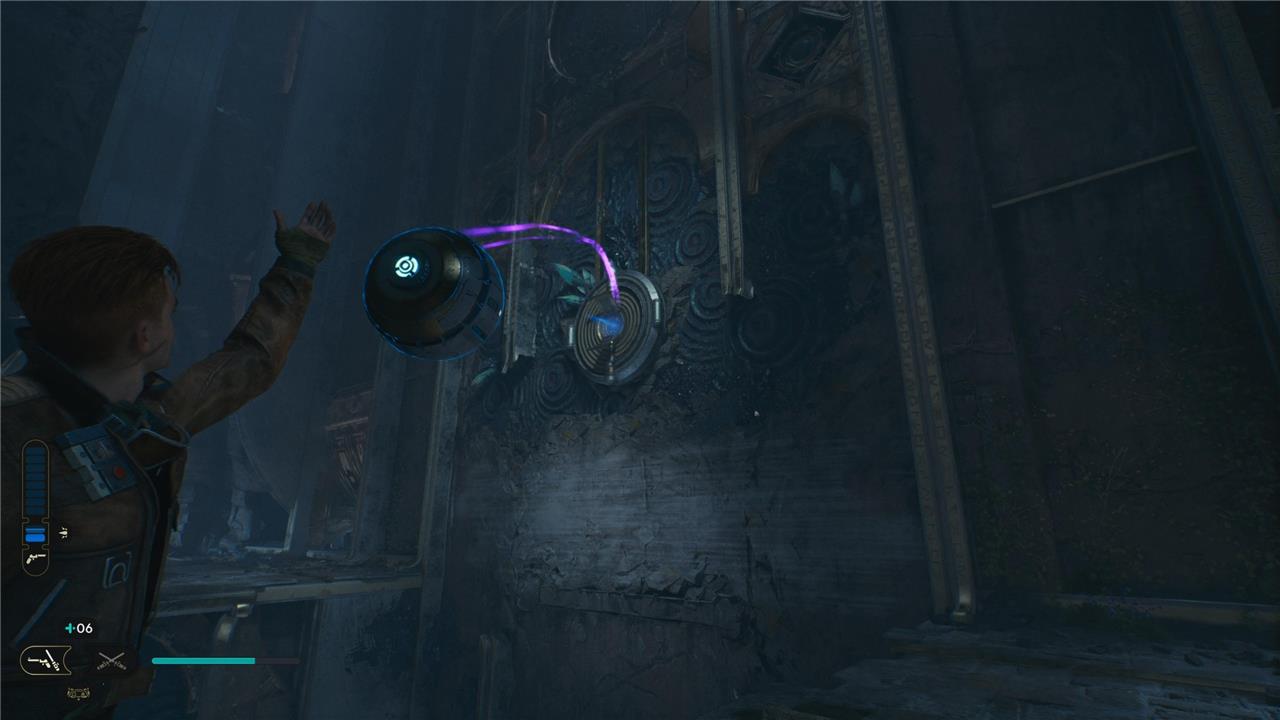
Toss that orb into the socket revealed by the cracked wall.
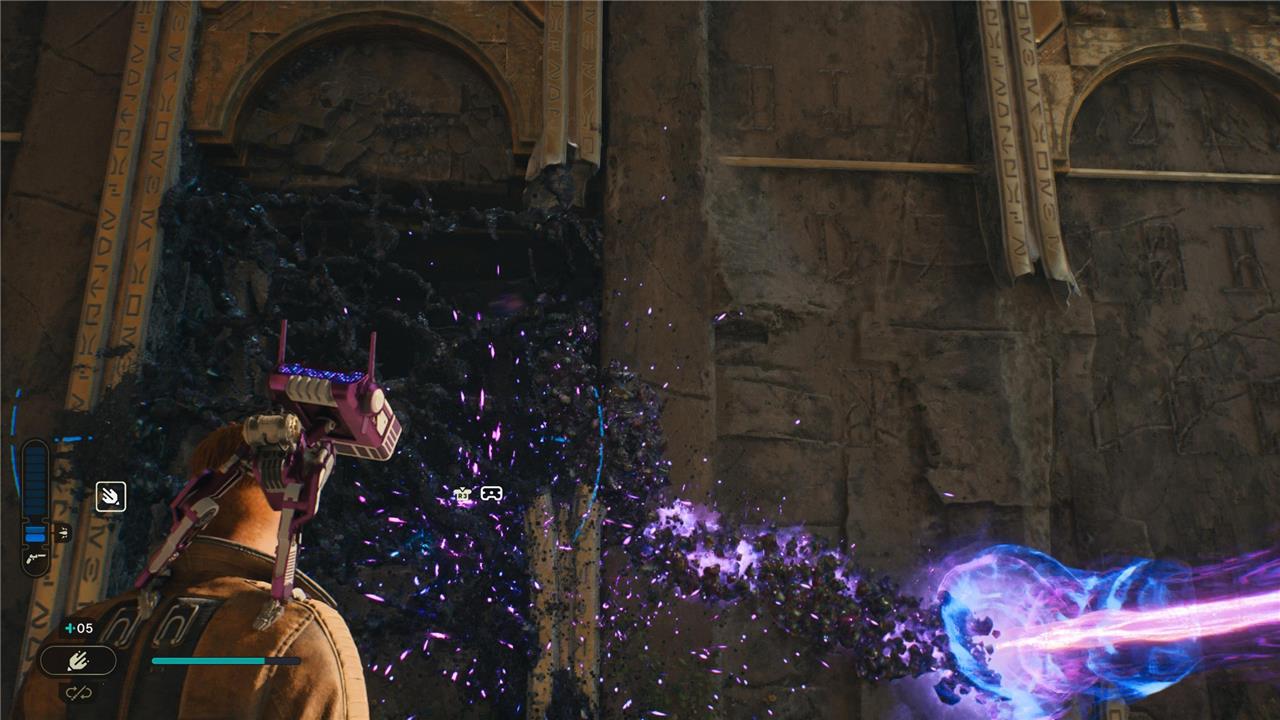
This will reveal a ledge. Scale it. In the next room, you’ll get the Koboh Grinder upgrade for BD-1, which lets the little guy spray Koboh Matter (which you’ll learn is the name for that dark bramble stuff), allowing you to extend the reach of Koboh Tuner Beams. Head back into the first room, grab the orb, and toss it back to the Koboh Tuner you originally obtained it from. (See two photos up.) Use BD-1’s new ability to connect Koboh Matter to the mass of matter bramble on the left, then do the same to connect it to the mass of matter on the right.

Scale the wall that’s revealed. You’ll find a Force echo and a Force essence. Grab the orb from the Koboh Tuner, then toss it into the socket on the wall.
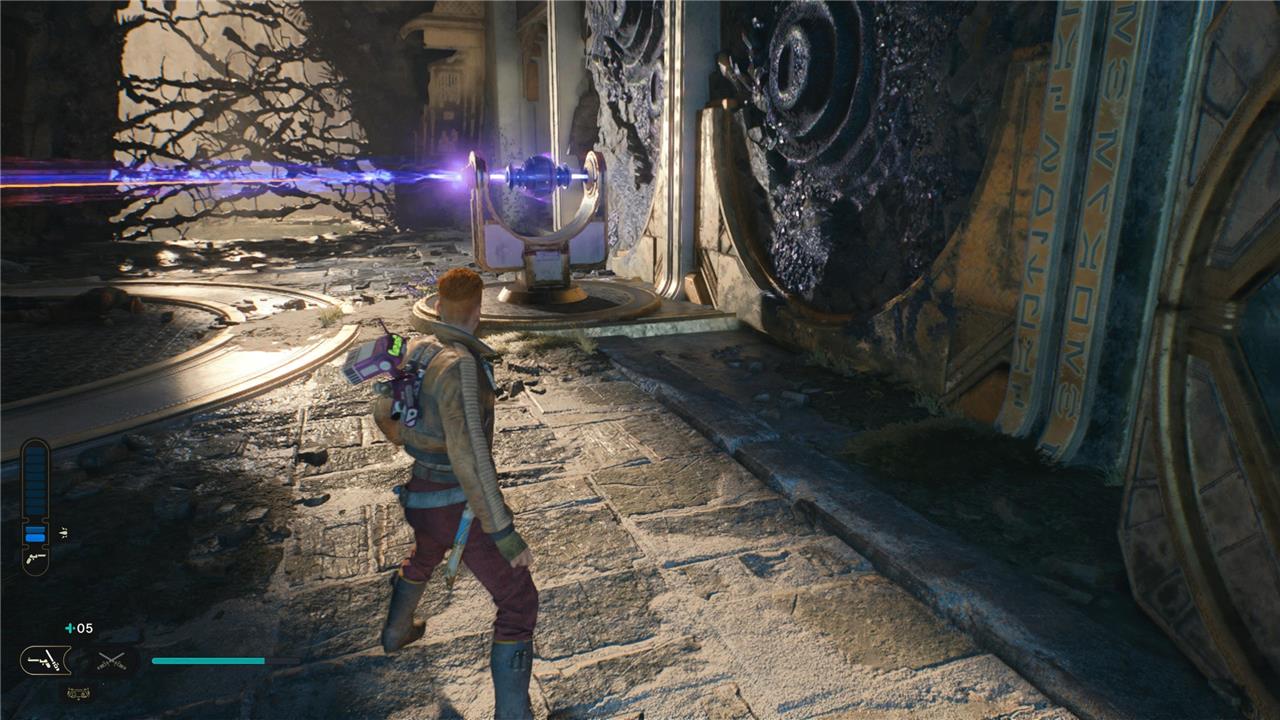
Wall run across the chasm, grab the orb, walk back outside, and put it in the Koboh Tuner. Then aim it at the spire in the center of the lava chasm. Copy the screenshot for reference:
Ride the relter into the updraft and across the chasm.
Devastated Settlement orb puzzle part three solution
Use the tuner beam to activate the first orb from the high platform overlooking the settlement ruins. Swing across the gap with your grapple to reach the second orb, powering it while avoiding patrolling enemies below. Position the beam to hit the third orb through the narrow rock archway, then dash to the final pedestal as the platform rises, securing the orb in place.
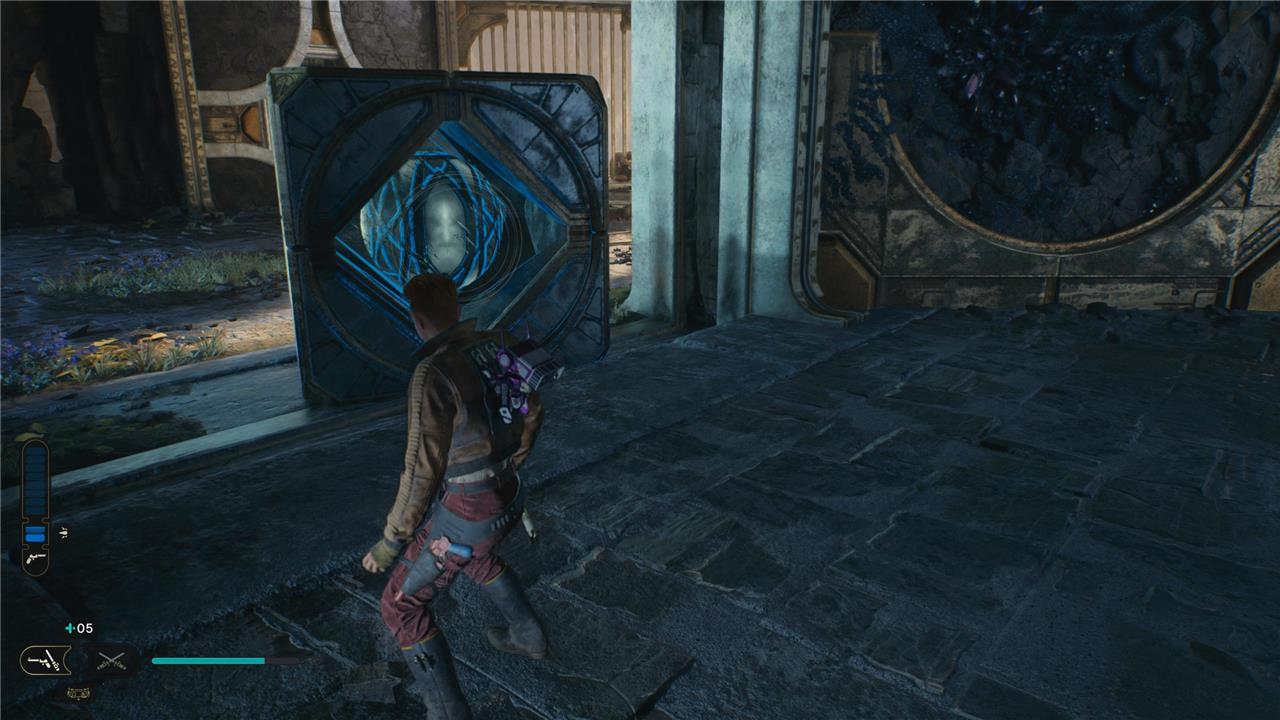
The third part of the Devastated Settlement puzzle poses a catch-22. The orb you need powers a door to the room containing said orb. Removing the orb closes the door, locking it in there. You can leave by shimmying through a crack in the wall, but you can’t bring the orb with you. The solution is to Force Pull the giant box so it’s in position to prop the door open, like so:
Grab the orb, return to the first room, and drop it in the Koboh Tuner.
Look left, and use BD-1’s Koboh Grinder to spray Koboh Matter to the mass over the gap in the wall. You’ll find a Force essence (which gives you the Precision perk) and a Force echo.
Jump back down, then drop the block in front of the beam. Then use the Koboh Grinder to spray matter all the way to the giant globule covering the front of the room. This will allow you to carry the orb to the final Koboh Tuner. You know the drill: Aim the laser at the spire in the center. Here’s the screenshot:
Devastated Settlement Relter boost after orb puzzle
The “Relter boost” is the updraft you create by melting Koboh Matter with the orb-powered beam; once it’s active, you must fly the Relter through that updraft to reach the next platform.
How to use each Relter boost
-
After the first orb puzzle: Aim the outside beam at the purple Koboh Matter on the spire in the chasm to spawn an updraft; jump to the Relter below and glide straight into the rising air, then drift to the next shelf with droids and the second ruins entrance.
-
After the second orb puzzle: Put the orb in the second outside coupler, burn the next Koboh Matter “barricade” to open another crater of hot air, then grab the nearby Relter and ride this boosted draft up to the higher ruins with the third/orb-shrine entrance.
-
After the third orb puzzle: Move the final orb to the last outside coupler and melt the high purple rock/barricade across the gap to make a strong vent; take the Relter beside this coupler, hit that vent, and use the extra height to reach the very top ledge with the new Meditation Point/Grand Courtyard door.
If you tell me which vent you’ve opened (first, second, or third) and what you see from the Relter’s starting perch, I can give exact movement directions (when to climb, when to dive, and which way to turn in mid-glide).
How to defeat B1 Droids on the platform after Relter boost
Those B1s on the platform are actually one of the easier fights there; the trick is to use their blaster fire and your crowd-control so they never get to surround you.
As you land on the platform
-
Land with block held so you immediately deflect their first shots; a single well-timed parry will one-shot a B1 by reflecting its bolt back.
-
Close the distance on one side instead of running into the middle; keep both droids in front of you so you’re not being shot from the back while swinging.
Quick and safe ways to kill them
-
Use Force Push to knock them straight off the edge or stagger them, then finish with a couple of saber swings.
-
If there are loose rocks or debris nearby, grab them with Force Pull and throw them at the droids for big damage without spending stamina on blocks.
-
If you like parries, stand at mid-range, hold block, and tap parry as bolts arrive; each reflected bolt usually kills a B1 outright, letting you clear the group very fast.
If you’re getting deleted before you can react, tell me your current stance (single, double, dual, blaster, crossguard) and difficulty, and I can give a stance-specific mini-routine for that exact spot.