A storm brews over the village as Leon pushes deeper into enemy territory – the path through the Lake, Town Hall, and Fish Farm hides more than grotesque creatures. Every corner tests your aim, your nerves, and your sense of direction as secrets surface beneath the water’s murky calm.
Our Resident Evil 4 remake Chapter 3 walkthrough will make sure you don’t miss any items and survive from the beginning of the chapter through the Town Hall, Quarry, Lake, Shooting Range, and Fish Farm to the end of Chapter 2.
Throughout this walkthrough, we’re not going to mention every item that anyone (or anything) you shoot drops – if you kill something, look for a loot drop.
Also, there’s a little randomness to the contents of crates based on your inventory and weapons, so you probably won’t find the exact same things listed below. The crates and barrels themselves will always be in the same locations, though. And all other items – keys, collectibles, and resources not found in crates – should be the same.
Head for the church (still) // Town Hall // Village Square
After dealing with the threats near the Lake, your next goal is to reach the church-but the route is still blocked. Head toward the Town Hall and check the locked cabinet inside for useful items before moving back through the Village Square. Expect more enemy patrols along the way, as the area is now repopulated with Ganados. Conserve ammunition, make use of tripwires and explosives, and watch for new enemy types appearing along familiar paths.
You’ll come to in the bedroom. Grab anything you hadn’t yet, and then go out the front door.
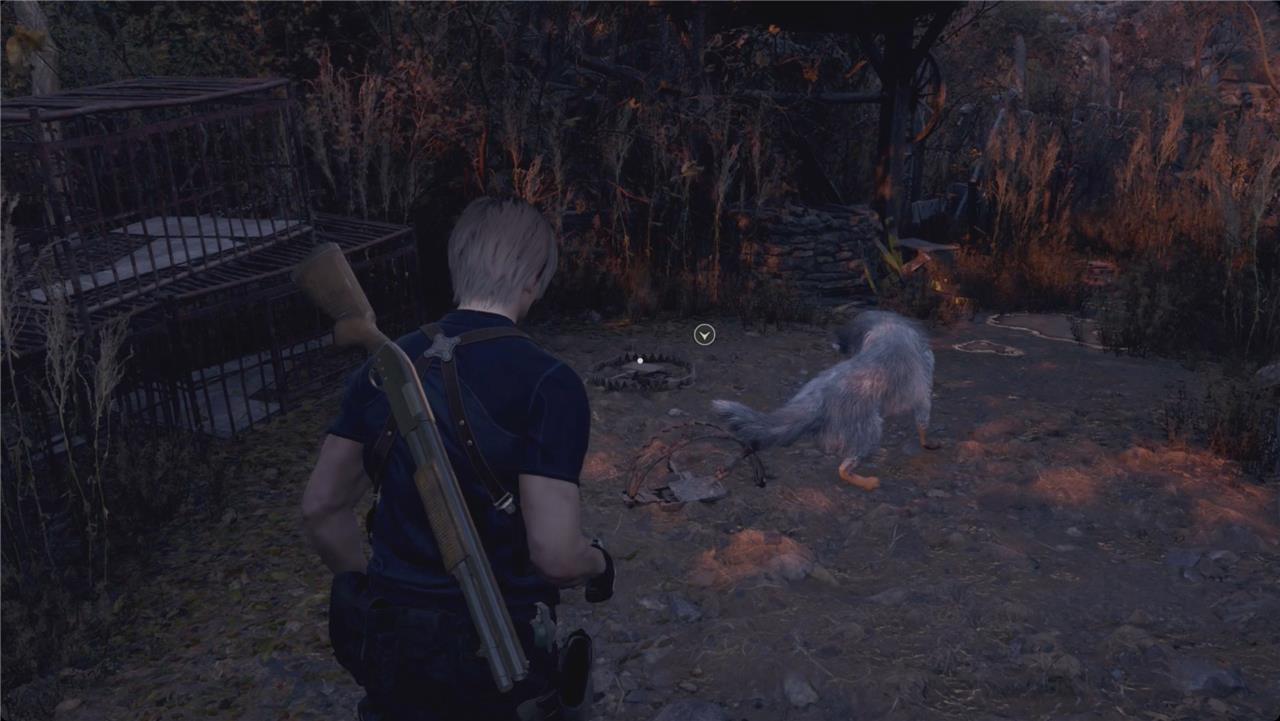
When you exit, you’ll hear a dog whining. Take a right and follow the house back along the side. Free the wolf from the trap – this good deed will get paid back in a bit.
Use the Insignia Key on the gate, and follow the path into a tunnel. Check the shack on your right for a crate with pesetas.
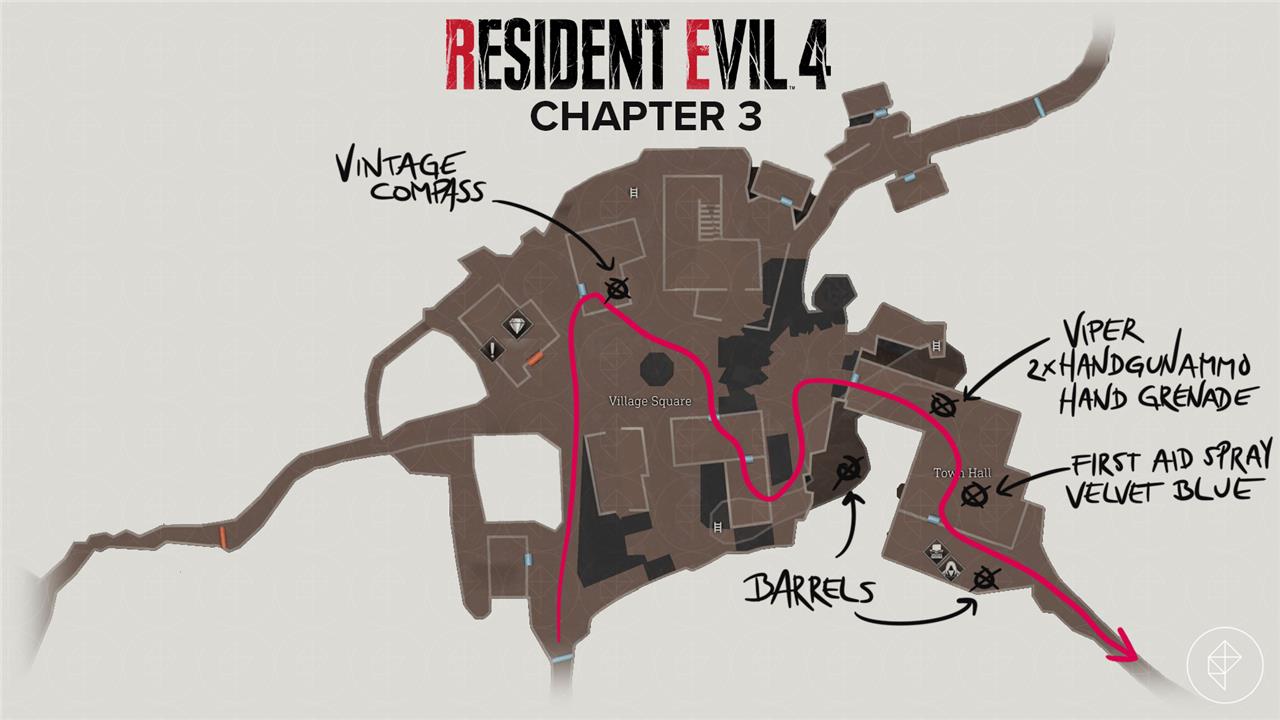
Follow the tunnel to the end, and unlock the gate you come to. This will lead us back to the Village Square. Keep going straight and cross the square. The house just to the right on the far side has a locked drawer we found earlier. Duck inside and open it with a small key for a Vintage Compass.
Back outside, head toward the Town Hall (we thought this was a church at first) on the east end of the square. After the stone tower blows up, you’ll get attacked by a few creepy wolf-things.
Walk up to the rubble blocking your path, and turn right. Head into the house there, and disarm the tripwire inside. In the back room, you’ll run into a couple locals. Deal with them, and then vault through the window. Take a left to return to the square.
Before you go into the Town Hall, head around to the left side – you picked up a green herb here back in Chapter 1. Stealth kill the old woman, and then head toward the back. Climb down the ladder into the sewer.
At the dogleg, smash the four barrels for some pesetas and resources (S). The other end of the tunnel leads back into the Village Square, so turn around and head to the front of the Town Hall.
Use the Insignia Key on the Door with Insignia and enter the Town Hall.

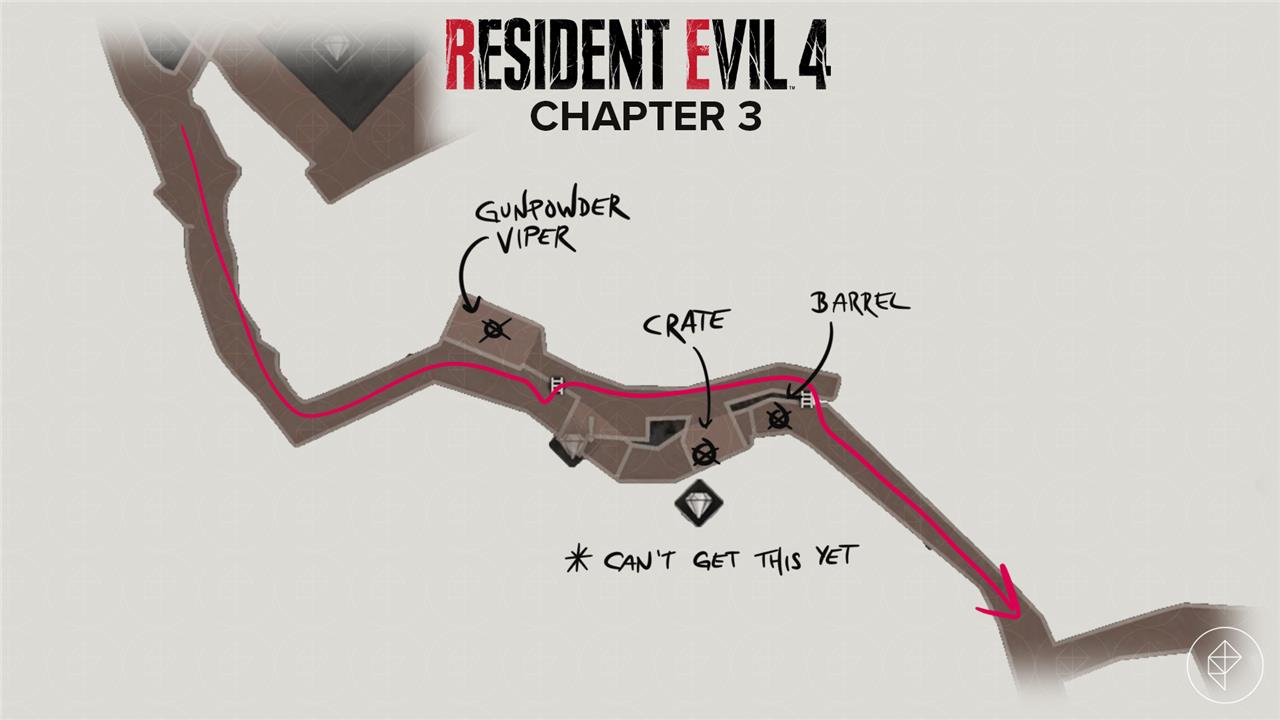
Smash the crate on the shelves to your left to find a viper. Kill it and collect the body.
Open the cabinet for some handgun ammo and then smash the crate on the right for a hand grenade.
In the main room, stick to the left and open the cabinet for more handgun ammo.
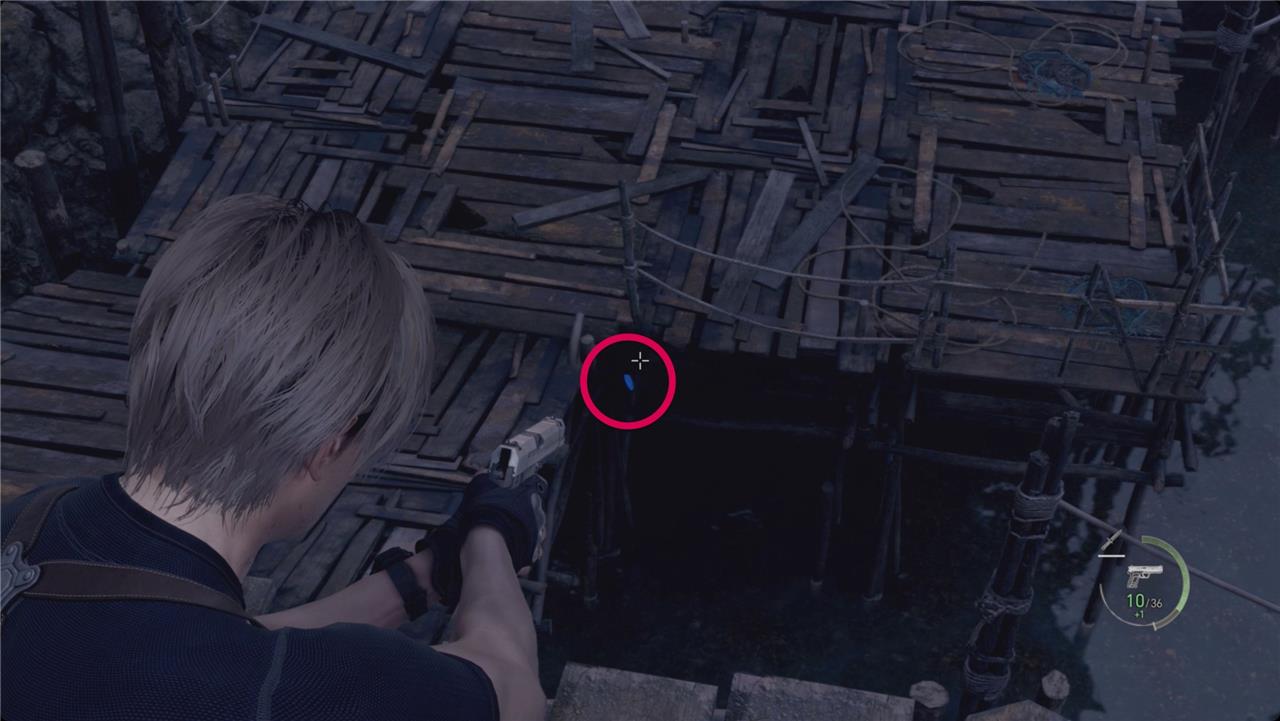
Head into the room on the right. Check the end of the table for the Iluminados 4:9 file and open the case on the other side for some First Aid Spray. Look above the table for another lantern hanging from the rafters. Shoot it down for a Velvet Blue.
Open the drawer to the left of the table for shotgun shells.
Push through the door. Smash the barrel to the right for some pesetas, and then read the Merchant Tip: The Prudent Choice file on the end of the table. To the left of the typewriter and merchant, you’ll find two more barrels with handgun ammo and more pesetas.
On the wall opposite the merchant, grab the Viper Hunter Blue Note Request – we’ll get to this in a second.
Merchant
The Merchant makes his first appearance near the lake, offering new weapons, upgrades, and items in exchange for pesetas or spinels. His shop becomes a key stop between major encounters, letting players trade treasures they’ve collected for gear improvements. At this stage, he introduces the trading system and requests that you bring him Blue Medallions from the nearby area for special rewards.
At the merchant, sell the Pearl Pendant, Velvet Blue, and Vintage Compass. You can also sell the first Viper for your Blue Note Request, too.
The merchant is selling a TMP submachine gun now. If you’re into that, feel free to pick it up; we skipped it for now. We also held onto (most of) our gemstones – they’ll be worth more when we find more treasures to slot them into.
Pick up the Recipe: Flash Grenade if you can afford it. Repair your Combat Knife and tune up anything you’d like.
Hit the typewriter to save, and then head out along the path to the east.
Find a way into the Church
After defeating the enemies around the gate near the church, head back to the Town Hall and use the Insignia Key you obtained earlier to access the locked door. Follow the path through the forest while staying alert for hidden enemies and traps. Once you reach the courtyard, clear the area and examine the church’s perimeter for possible entrances. You’ll find the main door sealed, so check the nearby windows and side paths to spot clues for what’s required to open it later.
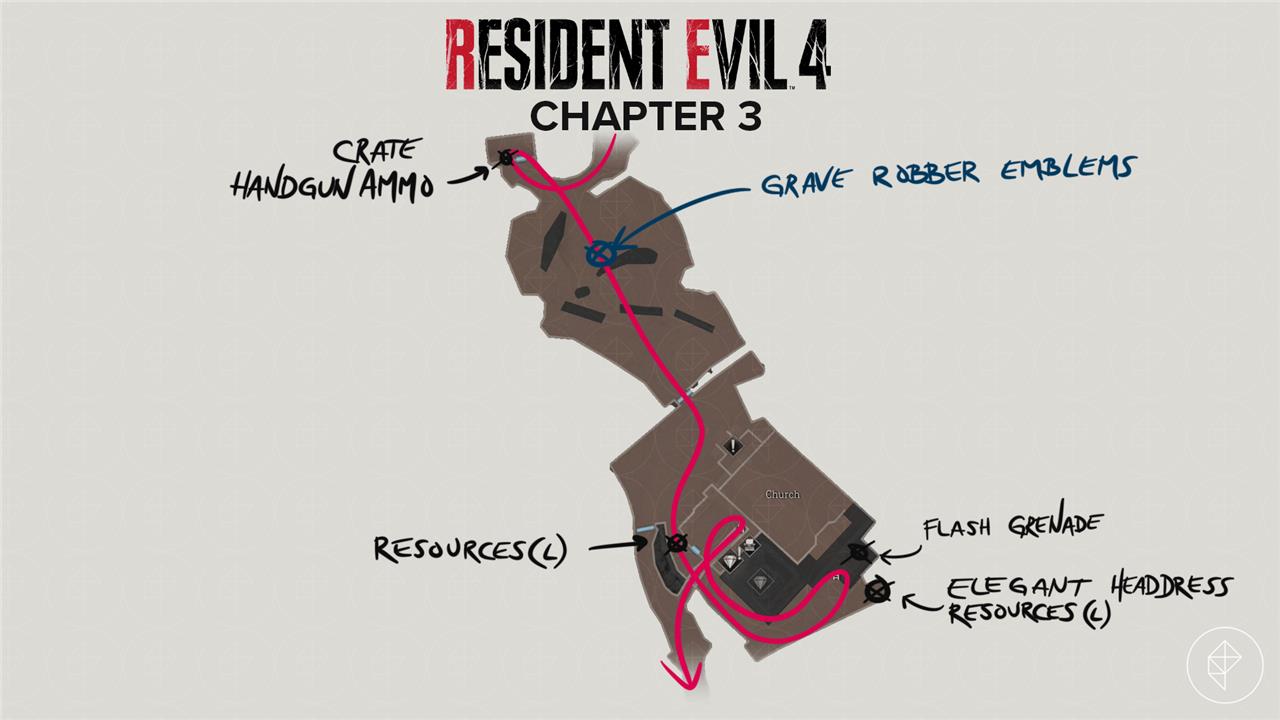
When you reach the graveyard, stick to the right to find a shack. Smash the crate out front for some pesetas. Step inside and handle the local. Grab the handgun ammo from the ladder in the corner.
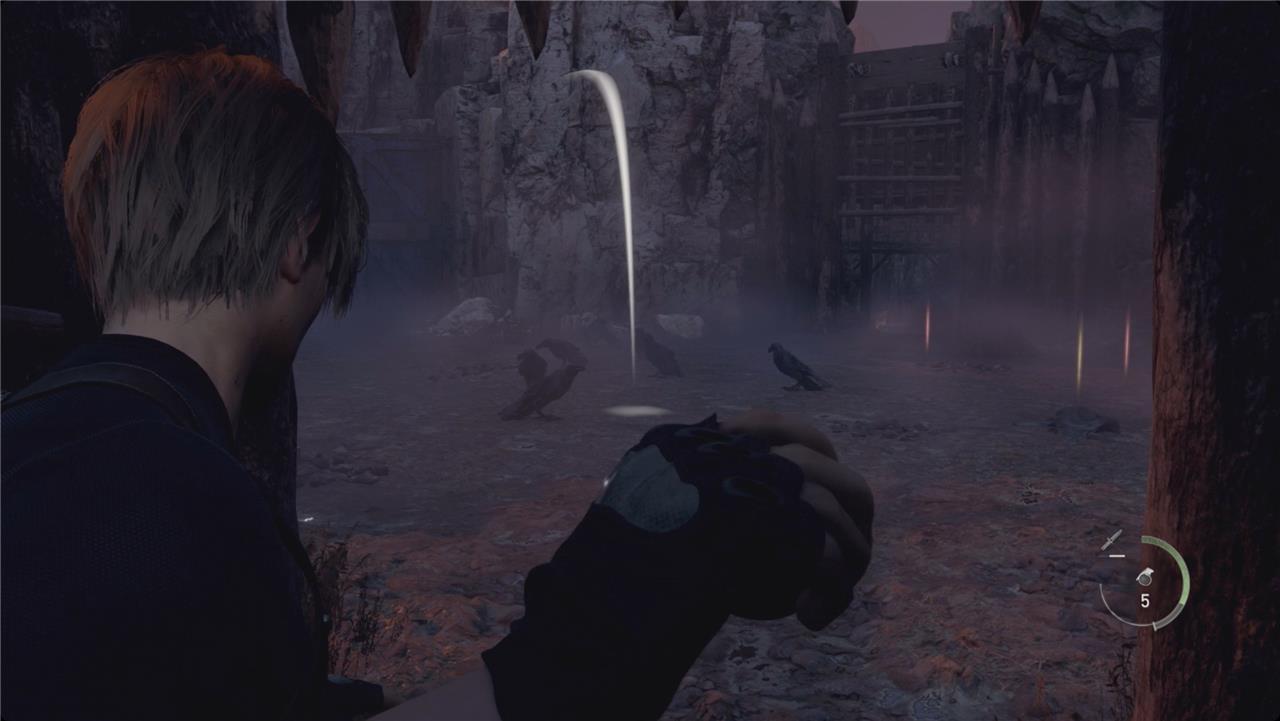
Back in the graveyard, deal with the gravedigger. Take out any crows you see for some extra pesetas – use the Bolt Thrower so you can collect your bolts afterward and not waste ammo.
Push through the gate. and you’ll finally reach the Church – only to discover the front door is locked for video game reasons.
Head to the right side of the church for a crate with resources (L). Skip that door on your left for now, and continue to the back.
At the back of the church, open the chest for an Elegant Headdress treasure, pick up the resources (L), and read the Grave Robber Blue Note Request. Before you leave, climb the ladder to find a flash grenade.
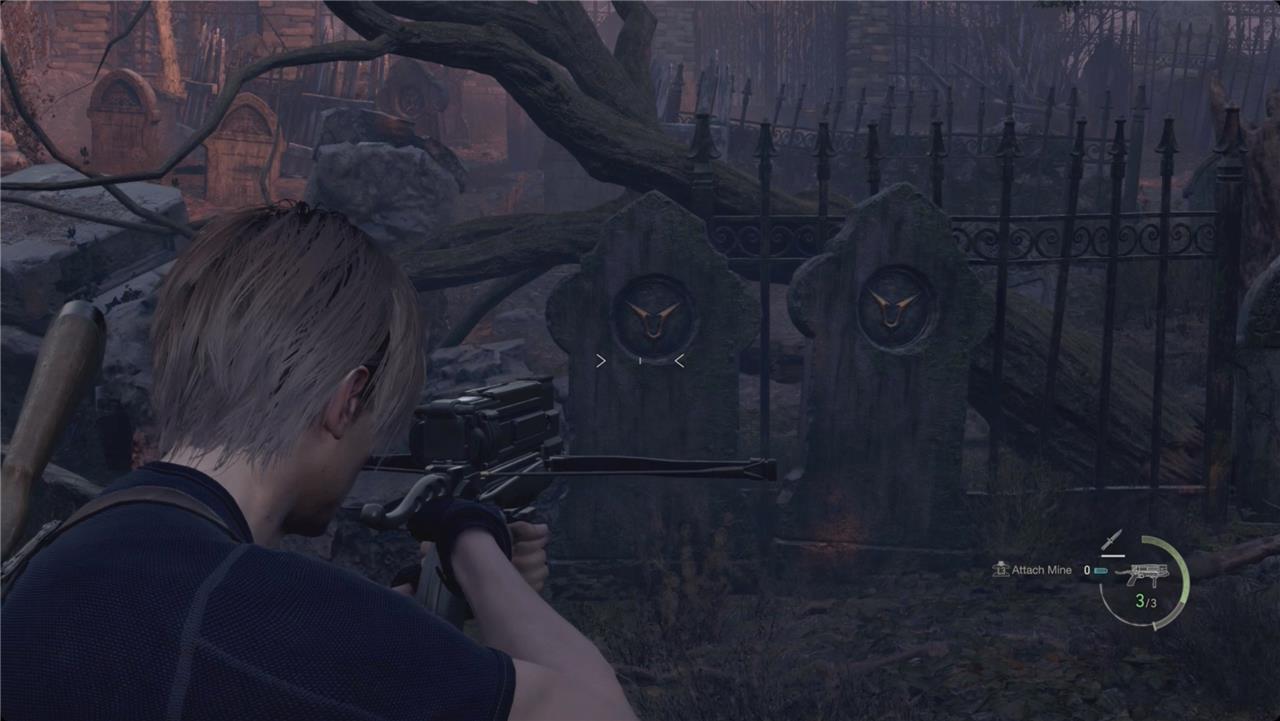
Head back down to the graveyard. Near the bottom of the hill, look for two gravestones next to each other. They will both have a stylized U-shaped emblem. Shoot them both to finish the Request.
Go back to the right side of the church and take the first door on your left. Grab the Lakeside Map file from the wall and the Photo of Ashley file from the table. There’s a locked drawer in the corner we can’t do anything with yet, so visit the typewriter to save.
Cross the Lake
After clearing the area near the boat, use the key from the Fish Farm to start the engine and cross the lake. Watch out for debris and unfamiliar ripples in the water-danger lurks beneath the surface. Once you reach the far dock, search the small huts for supplies before focusing on your main objective. The next section challenges your aim, so stock up on ammo and healing items before moving forward.
Drop through the trapdoor to proceed. Follow the tunnel out, and take a right to go unlock the gate back to the churchyard.
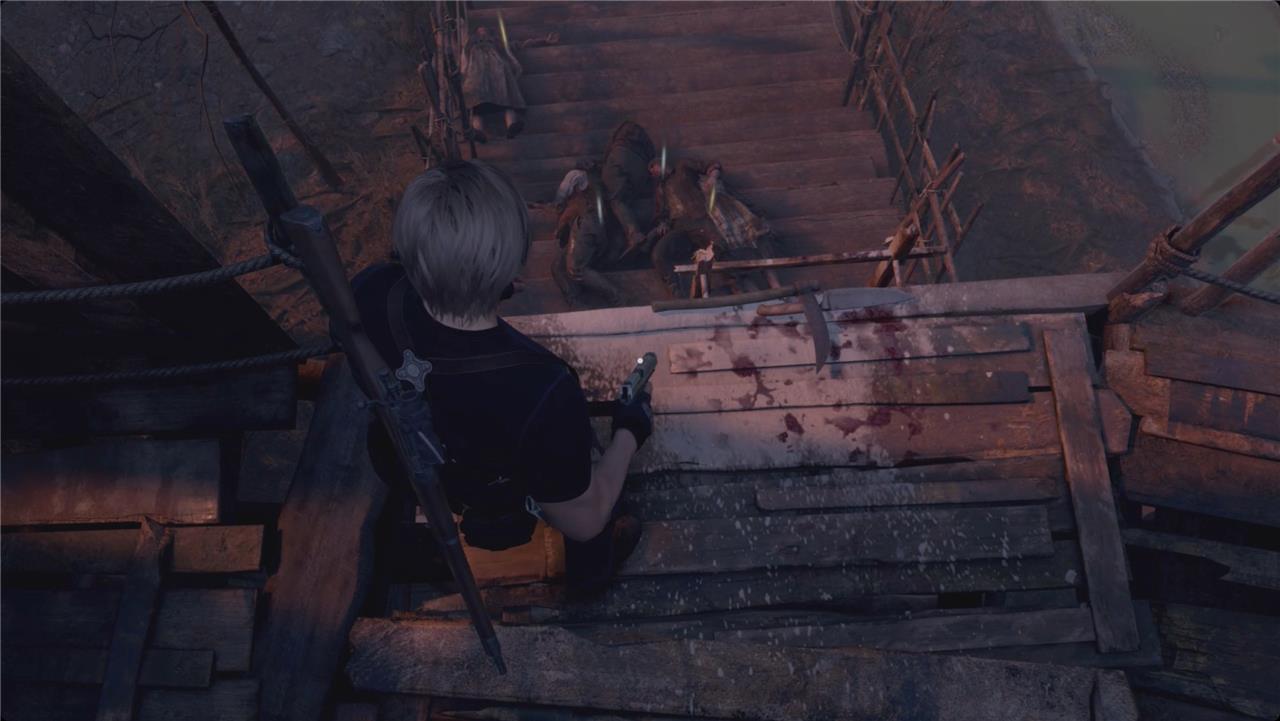
Follow the path south and across the bridge. You’ll get jumped by a few locals when you round the corner.
In the first shack on the left, open the drawer for some gunpowder and smash the crate for a Viper.
Just past that shack, smash the barrel for some pesetas. Use the ladder to climb up to the roof. Smash the crate on the left for a hand grenade.
Turn around and follow the walkway. Watch on your right for another crate with some pesetas. There’s a treasure hanging from a pole next to you, but we’ll have to come back for it. At the end, drop down the ladder and deal with the villagers. There’s a barrel to your right with some more pesetas.
Quarry
The quarry area connects several key paths leading toward the lake and the Fish Farm. Here, players can find useful resources and a merchant ready to trade or upgrade weapons before the next major section. Keep an eye on the cliffs for treasures hidden in bird nests and crates. Wolves sometimes roam nearby, so proceed carefully and conserve ammunition for tougher fights ahead.
Continue to the left and into the tunnel. Walk past the first branch on your left and into the dead end. Smash the barrel for some gunpowder.
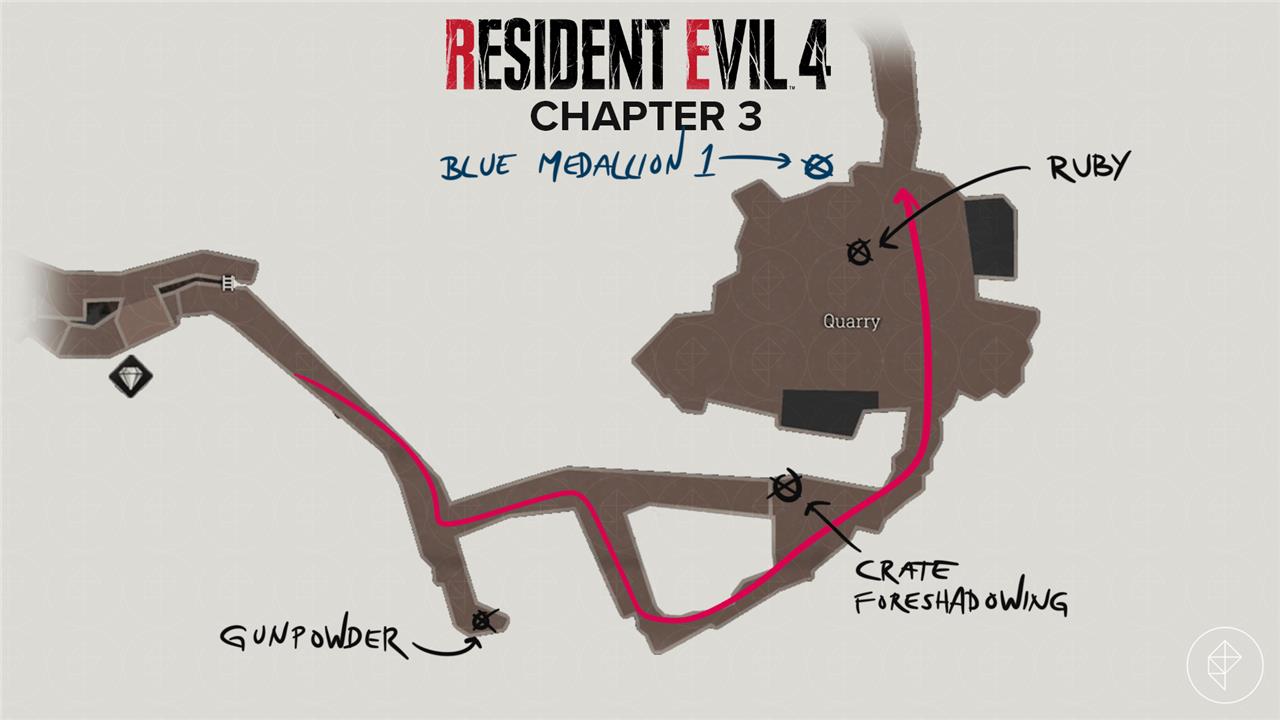
Backtrack to the turn, and deal with the trip wire. Take the first right. Outside of the tunnel, turn left and smash the crate for some shotgun shells and pesetas. Just to the right of that crate, examine the axe for some foreshadowing, and then grab the Destroy the Blue Medallions 2 Blue Note Request.
Continue along and grab the handgun ammo as you pass and deal with the dogs that rush you. There a a bunch of crows (a murder of them) to shoot for cash and various loot – enough of them that a hand grenade is not out of the question.
Cut to the left and look for a crate around the corner with some more pesetas.
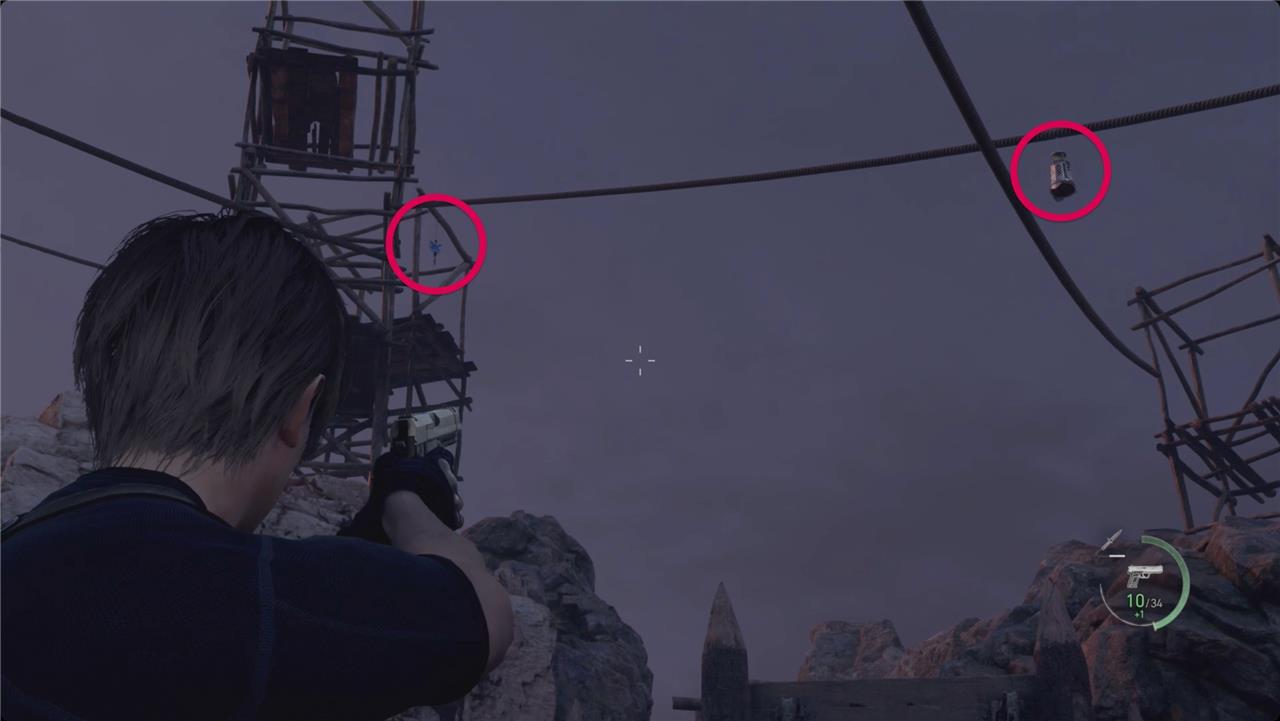
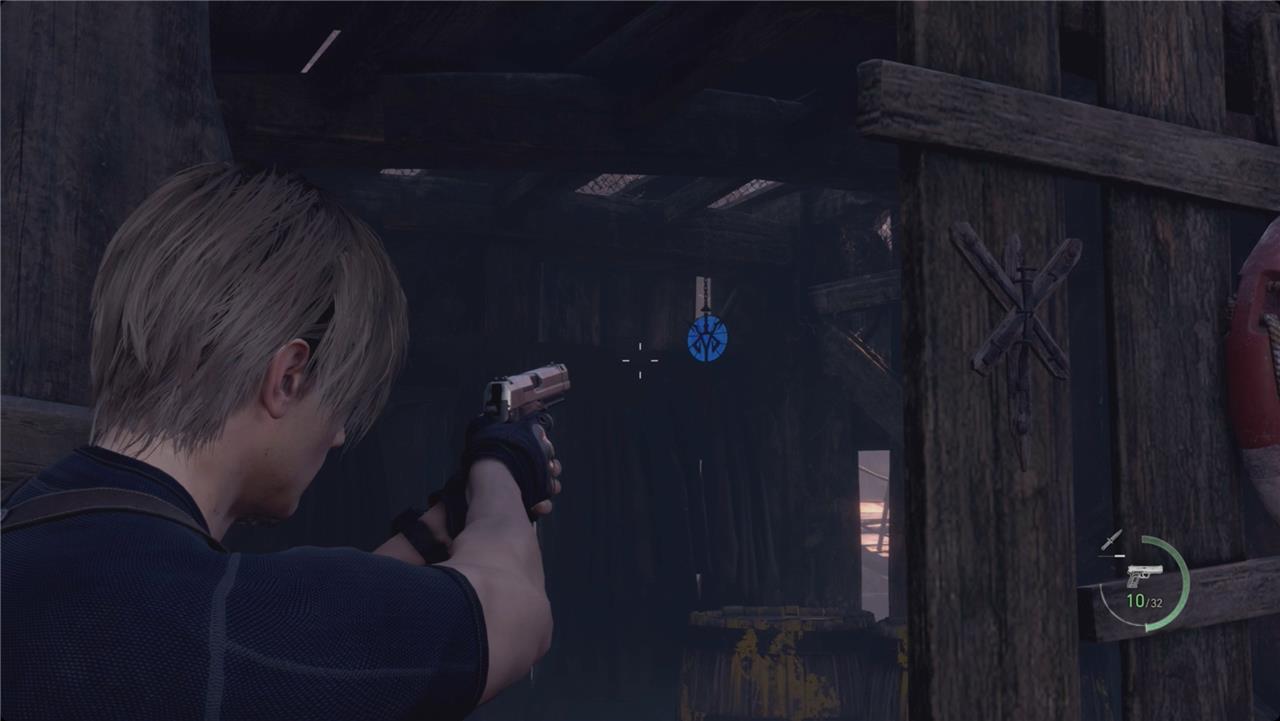
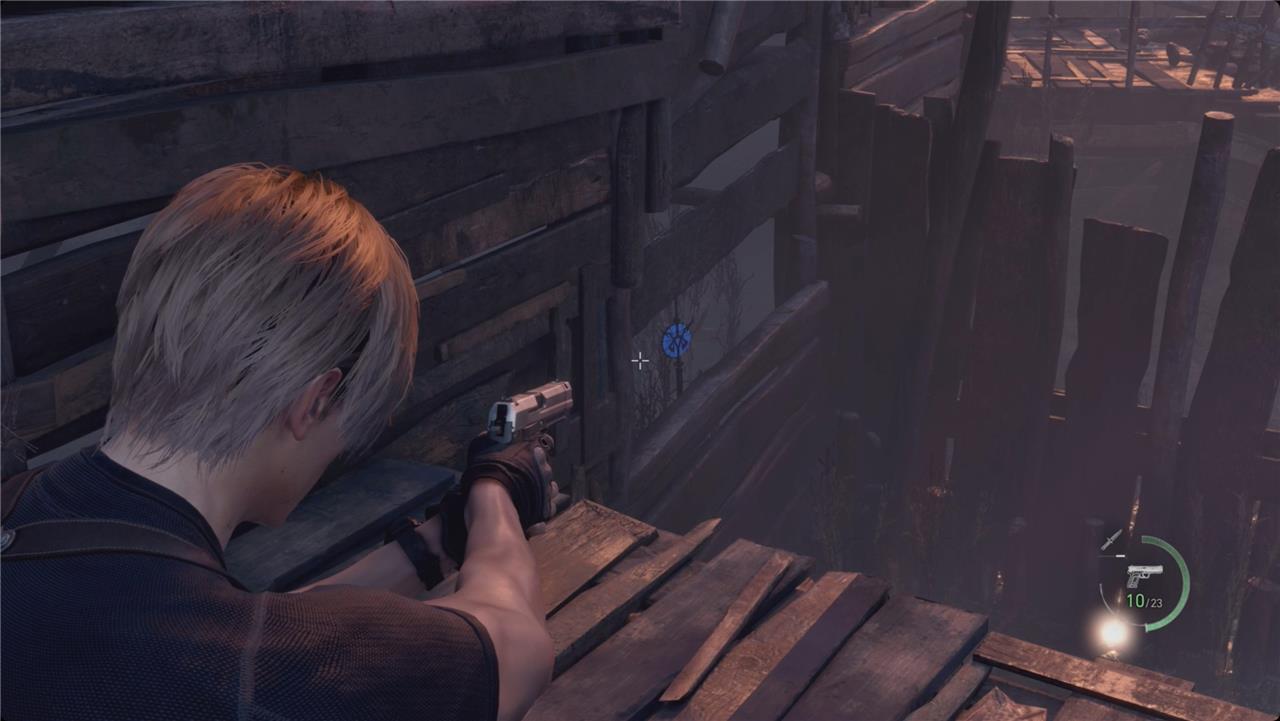
Just before the gate out of the area, look up. There’s a lantern hanging from a rope above you. Shoot it down for a ruby. Turn a little left to spot the Blue Medallion 1 of 5 hanging from a platform.
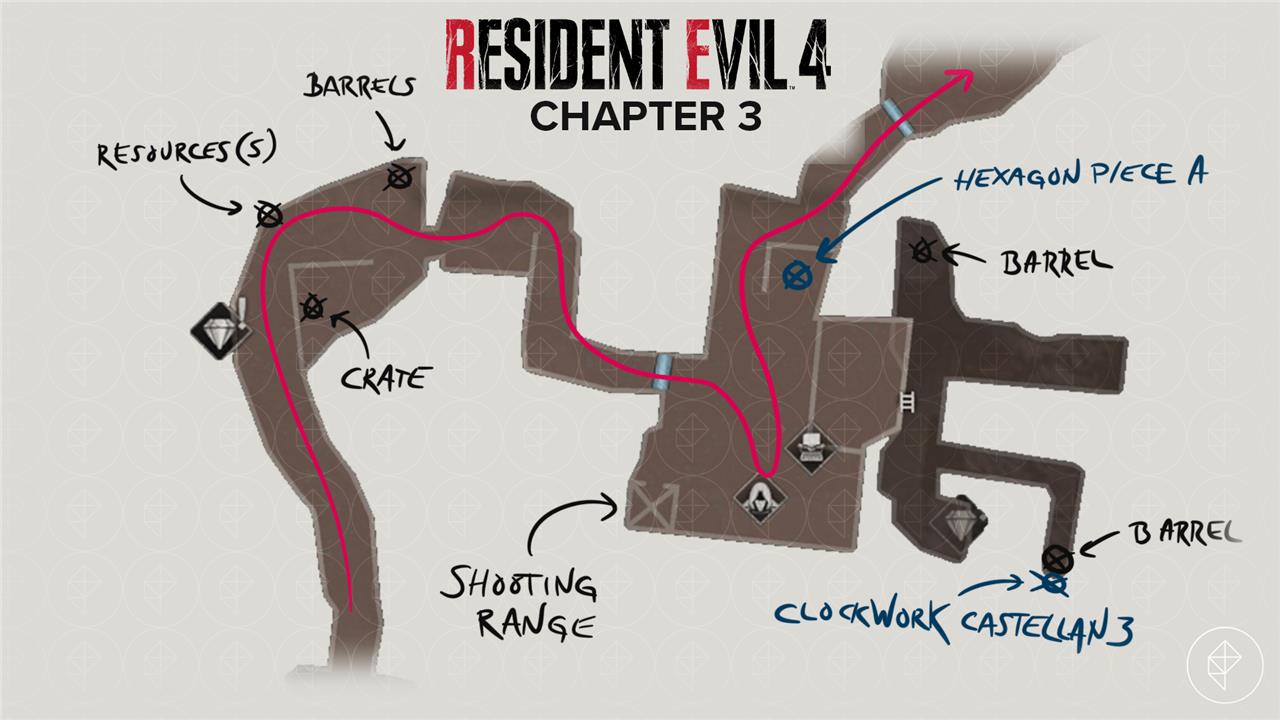
Head through the open gate and down the path. You’ll spot a Wayshrine on your left, but we can’t do anything with those yet. A few steps past that, grab the resources (S) on your left.
Keep following the path through the dogleg and smash the two barrels there for some pesetas and a resources (L). Take a right and loop back to find a crate with some pesetas.
Continue inside and down the stairs to find a safe room. To the left, open the chest to find Hexagon Piece A.
Past the typewriter, drop off the ladder and take a left to find a barrel with handgun ammo. To the right, there’s a locked drawer. Instead, take the first left and follow it to the end for another barrel with some pesetas.
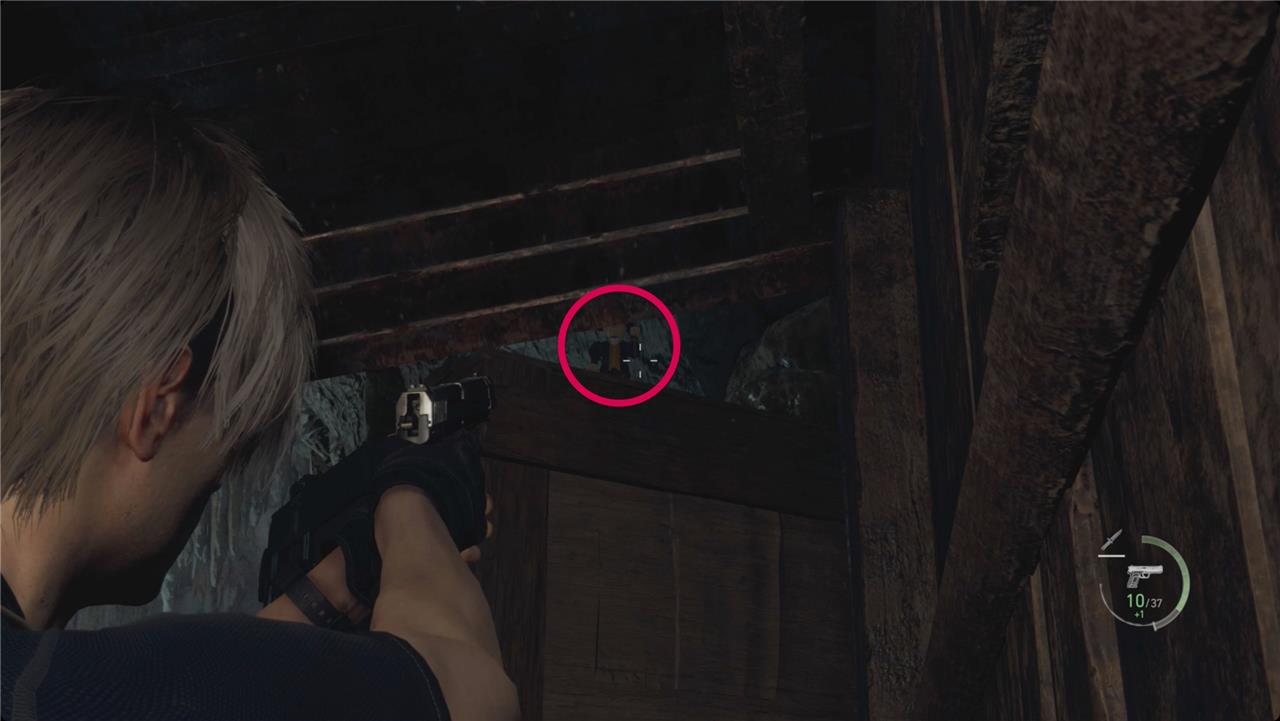
Facing that barrel, look at the top of the crates behind it to spot the Clockwork Castellan 3 of 16.
Head back up top.
Hit the typewriter and then grab the Merchant Tip: Get Cash Back! file. Visit the merchant. You’ve got one Blue Note Request to turn in for 2 spinels, and that Elegant Headdress is worth 7,000 pesetas. You should also have one more Viper to turn in.
Shooting Range
The Shooting Range becomes available after reaching the Merchant near the lake. Inside, you can test your accuracy with various weapons in timed challenges that award tokens based on performance. These tokens can be exchanged in the vending machine for charms, which provide useful bonuses when attached to your attaché case. Focus on precision, use rifles for distant targets, and aim for skull icons to boost your score.
To the right of the merchant, take the elevator down(?) to the Shooting Range. Grab the Target Practice Rules file. Head downstairs and hit the bell when you’re ready.
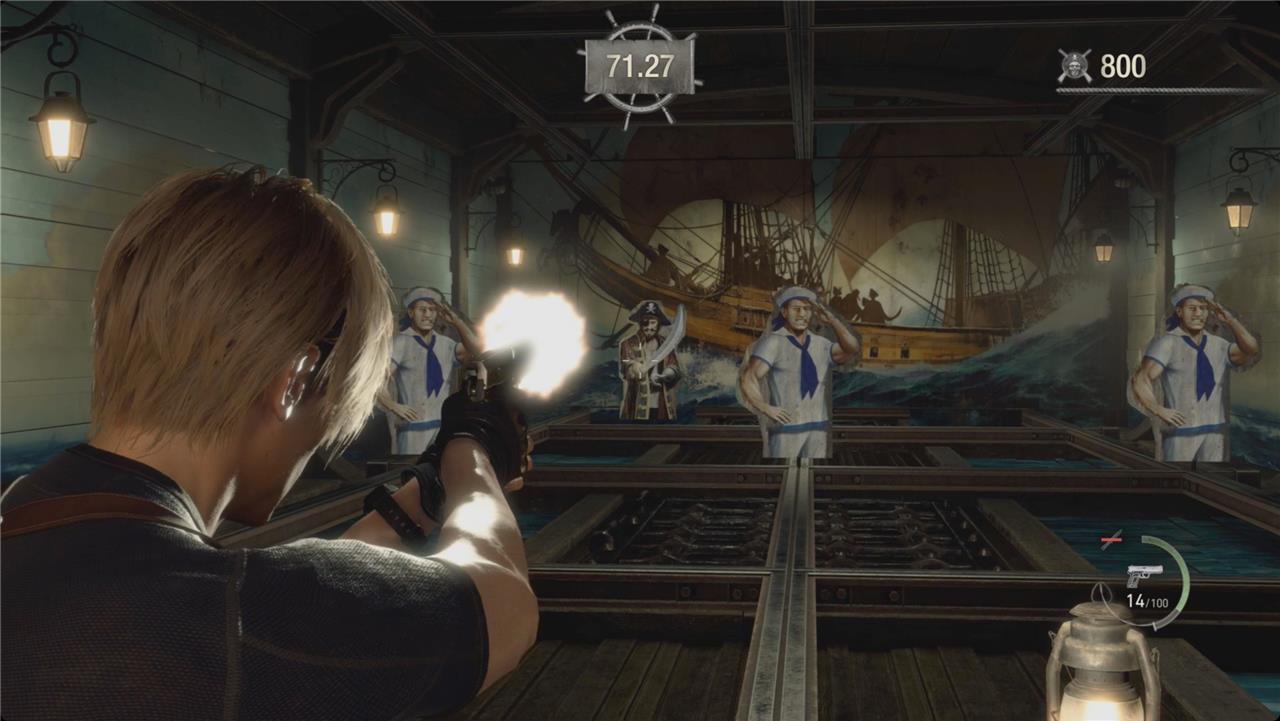
Take your time and make your shots count – don’t get rushed and start firing blindly. And, if you do, just try again. Keep an eye out for anyone holding dynamite – shooting that’ll clear the board – but it won’t come up more than once. And also watch for skull medallions on some of the pirates. Shooting those will earn you some extra points – and if (it’s a big if) you can clear every skull medallion, you’ll get an extra bonus.
Spend a bit of time practicing and learning the patterns. You should earn a few Silver Tokens pretty quickly. A bit of dedicated work will get you (at least) three Gold Tokens as well. Cash them in at the gatchapon machine for new Charms for your Case. You can equip up to three Charms at once when you visit a typewriter.
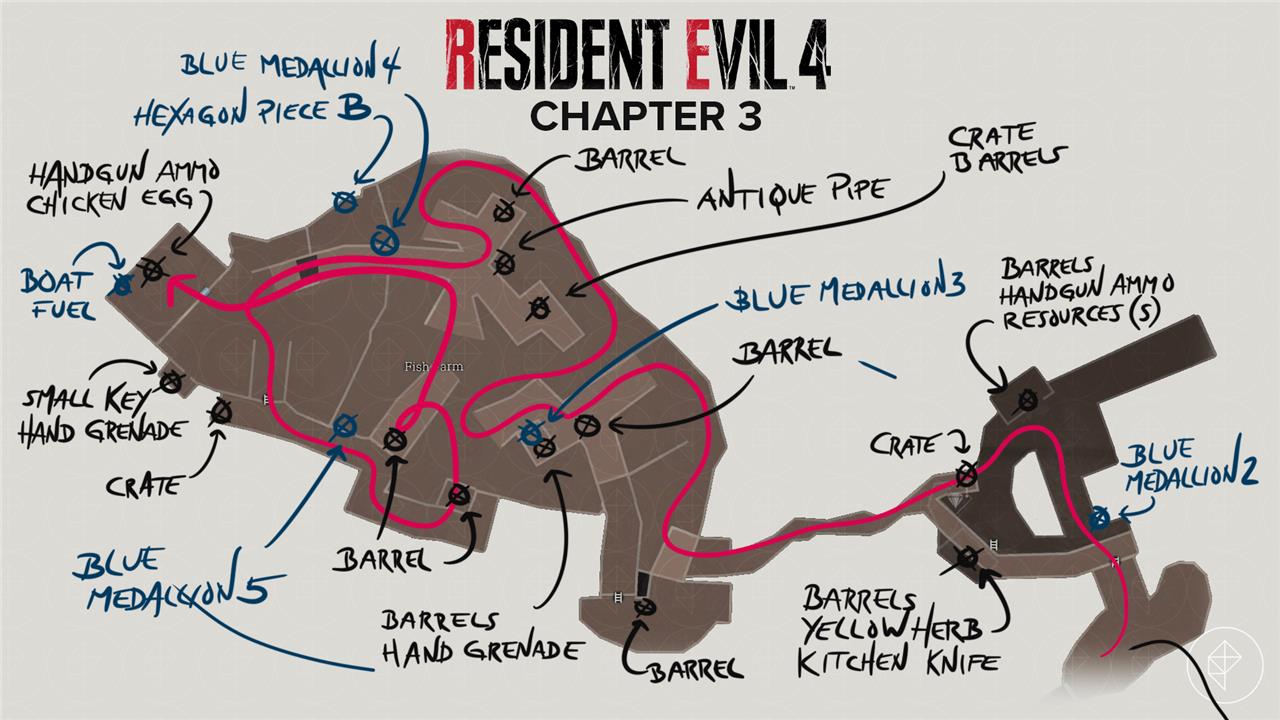
Fish Farm
The Fish Farm is a flooded area filled with narrow walkways, hostile villagers, and hidden items. To progress, you need to collect the fuel for the boat while fending off enemies that attack from multiple angles. Keep an eye out for hanging treasures and crates scattered around the platforms, as they often contain valuable resources. Watch your step in the water-enemies can grab Leon if you linger too long, making quick movement and awareness key to survival.
From the typewriter and merchant, turn around, head up the stairs, and push through the doors. Head to the right for a binocular vista and some more foreshadowing.
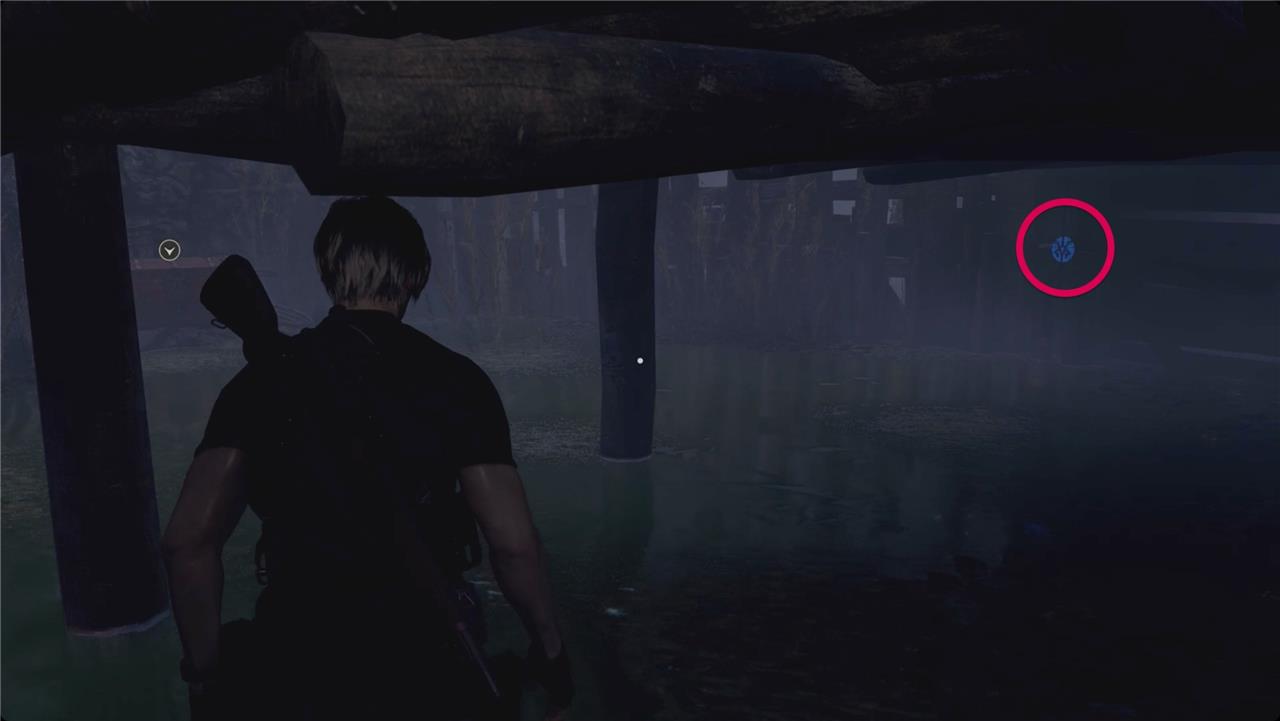
Back on the left, drop down one level. Take a step to the right, and look under the dock for Blue Medallion 2.
Follow the walkway to the left. Grab the When Low on Boat Fuel file and smash the crate for some gunpowder. Turn right and drop off the walkway.
Smash the barrels for some pesetas and a Velvet Blue. Duck into the shack and open the cabinets for some handgun ammo and resources (S).
Do not go to the end of the dock to shoot at fish. You will die.
Instead, exit the shack and turn right. You’ll find the Stone Pedestal there. Go ahead and place Hexagon Piece A, but we’ll need to find a few more before it opens.
Check the shack to the left for two barrels with pesetas and handgun ammo, a yellow herb, and a drawer with a kitchen knife. Climb the ladder to the roof, take a right, and head into the tunnel.
On the other side, you’ll immediately crash through the walkway. Wade to the right and you’ll meet another bull’s head-wearing Brute and a handful of villagers.
After they’re dealt with, take the ramp up out of the water. Smash the barrel for some gunpowder, and walk forward into the shack. There’s the Blue Medallion 3 inside, along with a hand grenade and barrels containing pesetas and rifle ammo.
Outside, take a left. and head down the ramp into the water. Head right, and go all the way to the wall of the Fish Farm. You’ll get attacked by another wave of locals.
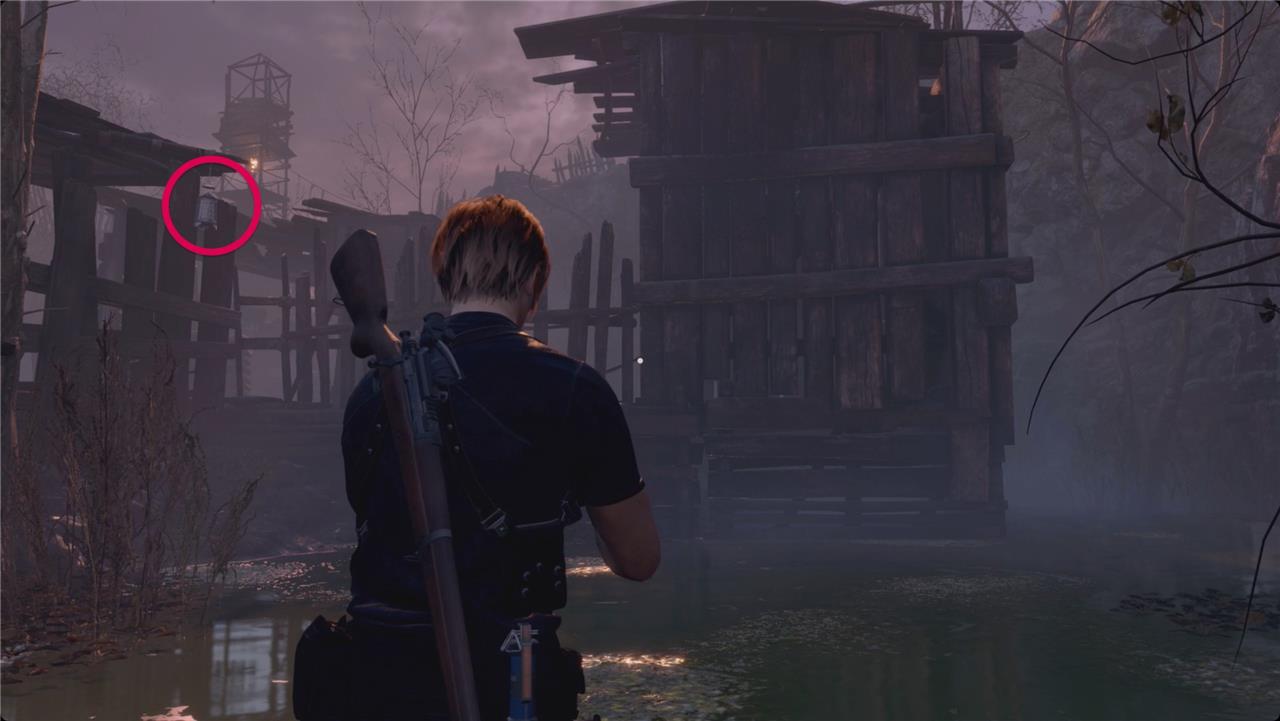
When you come to the narrow gap between the rock wall on your right and the building on the left, look to the left for a lantern hanging just above head level. Shoot it down for an Antique Pipe. Follow the wall northwest.
Keep an eye in the water for any Vipers. We found one at the north end of the Fish Farm. That should be the last you need for the Blue Note Request. You might also spot some Black Bass swimming around. Both Vipers and Bass can heal you in a pinch.
Loop to the left and head up the ramp. To the left, smash the barrel for some handgun ammo. At the T-intersection, take a left and disarm the tripwire. Smash the crate for some resources (L) and then continue around to a barrel with a Velvet Blue and some resources (S).
Backtrack to the T-intersection and go to the right. Just past the sandbags, disarm the tripwire. Drop off the dock to the left and cross under where you just were. Under the dock, look to the left for Blue Medallion 4. Open the chest ahead of you for Hexagon Piece B.
Cross back under the dock and go up the muddy slope. Take a left, go up the ramp, and then up the ladder.
Turn right for a crate with shotgun shells. Turn to the left and follow the walkway. There’ll be another wave of locals at this point, but they’ll show up below you. Use the ladder you just climbed as a choke point.
Follow the walkway through the dogleg and drop down off the two ledges at the end. You’ll drop next to a barrel with some pesetas and Velvet Blue.
Slash down into the water, and climb the ramp in front of you to another barrel with a red herb. Look down and to the right for Blue Medallion 5 – which completes that Blue Note Request.
Head all the way to the northwest end of the Fish Farm. Before you head into the large building, take a left into the little shed for a drawer with a Small Key inside and a crate with a hand grenade.

Shoot the padlock off the door of the large building and head inside. Smash the crate for some handgun ammo and grab the boat fuel. There’s also an inexplicable chicken egg on the fish-gutting table.
Backtrack all the way to the shack where we found Blue Medallion 3. Take a left, and follow that walkway to a ladder and climb up. Smash the barrel for some pesetas. This is overlooking the tunnel out of the Fish Farm.
Merchant (again)
You’ll encounter the Merchant again near the path leading down to the Lake. Take this chance to trade any Spinels you’ve collected and stock up on ammunition or healing items before heading further into the area. His shop now includes new upgrades for your weapons and additional trade items, so check his inventory carefully to prepare for what’s ahead.
You’re pretty close, so backtrack to the merchant and typewriter. You’ll turn in the Blue Medallion Request, and you can sell any Vipers you have to complete another. That should give you enough spinels for either the Punisher handgun or the Laser Sight (for either the SG-09 R or the Punisher).
Sell the Antique Pipe and any Velvet Blue you have.
Hit the typewriter, and then head back down to the docks.
Defeat the lake monster
After Leon restores power to the boat, he can set out across the lake to face the monstrous Del Lago. Use the harpoons scattered on the vessel to attack the creature as it surfaces, steering carefully to avoid debris and sudden lunges. Watch for cues that reveal its direction and time your throws between its dives. Once enough damage is dealt, the beast will thrash violently before sinking beneath the water, allowing Leon to continue deeper into the region beyond the lake.
Head down to where we told you not to shoot the fish. Still don’t shoot the fish.
Instead, turn right and use the boat fuel on the, unsurprisingly, boat engine. Hop in and watch the cutscene. It goes super well.
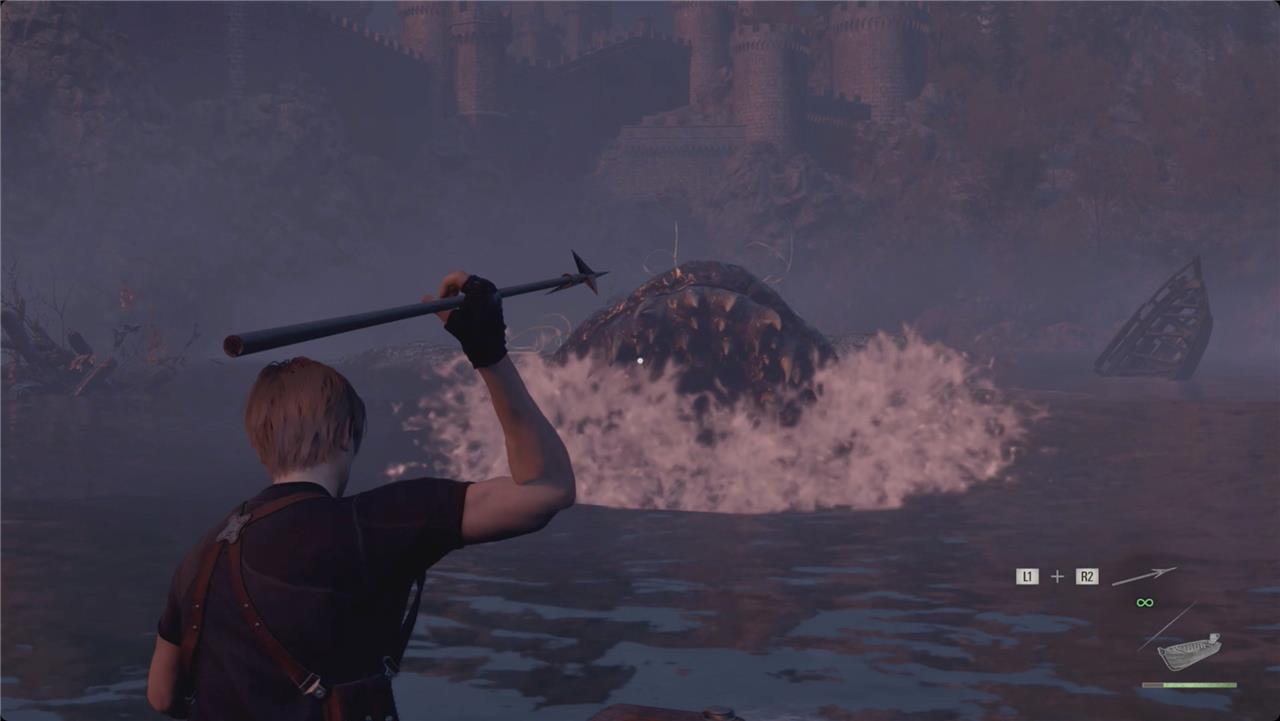
There’s not a lot of nuance to the fight that follows. Just keep hurling harpoons into the lake monster and swerving around in your boat until it’s dead.
How to defeat Del Lago boss in Chapter 3
Defeating Del Lago, the lake monster boss in Resident Evil 4 Remake’s Chapter 3, requires precise harpoon use from the boat and careful maneuvering to protect the boat’s health bar.
Core Strategy
Fuel the boat at the dock after the Fish Farm, then launch into the lake where Del Lago attacks automatically. Use only unlimited harpoons-no guns or items affect your health, but the boat’s meter must not deplete or Leon drowns.
Aim ahead at its back or body while it drags you, releasing the aim button between throws for faster firing; about 23-25 hits total on Standard, more on higher difficulties.
Steer constantly left or right to dodge floating debris and surprise lunges, following Del Lago’s path to stay close without crashing.
Key Attacks to Counter
When Del Lago charges head-on with mouth open, harpoon directly into it for massive damage and to prevent boat ramming-listen for roars and spin the camera if it submerges.
If it leaps from underwater, evade sideways quickly; a successful mouth hit here stops follow-ups and earns the Harpoon Hurler trophy on first kill.
In later phases, it drags faster-prioritize mouth shots during charges (1-2 per cycle) and spam back harpoons while avoiding obstacles.
Pro Tips
Let go of aim post-throw to reset quickly, and mash prompts during rare bites to escape QTEs. On Professional, limit obstacle hits to two max by predicting patterns and sticking to Del Lago’s side of hazards.
The fight ends post-cutscene; backtrack the lake afterward for loot like treasures.
Del Lago tips for Professional difficulty
Defeating Del Lago on Professional difficulty in Resident Evil 4 Remake demands pixel-perfect boat control, predictive dodging, and relentless harpooning, as the boat can only take two obstacle hits total before failing. Prioritize mouth shots during charges for huge damage while always steering hard left or right to evade leaps.
Movement Mastery
Follow Del Lago’s exact path around debris by watching its swerves ahead-mimic them precisely to avoid collisions, which deal massive boat damage on Pro.
Constantly hold the analog stick fully left or right (alternate based on its dive direction) with harpoon raised; this auto-dodges jumps and keeps you positioned for shots.
Release aim immediately after each throw to reset and fire faster-aim 19-31 harpoons total, focusing body/back spam between attacks.
Attack Counters
Land the first harpoon in its open mouth during head-on charges (listen for roars); a miss often kills you from full health, so predict via camera spin if it submerges.
For belly-flop leaps, steer opposite its dive side preemptively-no direct reaction possible, but side-strafing prevents QTEs and flops.
In final fast-drag phase, ignore tail (weak damage) and prioritize underbelly/mouth while weaving obstacles; mash QTEs if rarely bit.
Elite Tips
Practice at 60 FPS for smoother aiming; hold/release right mouse (or equivalent) rapidly for quicker harpoon charges if struggling with rhythm.
No damage runs emphasize “follow the leader” with zero straight-line sailing-observe patterns over attempts for muscle memory.