A strange hum fills the air as your visor flickers to life-Atomic Heart’s scanner sees more than the human eye ever could. Learn how to read its signals, reveal hidden threats, and turn uncertainty into precision.
How to use the scanner in the Atomic Heart tutorial
In the Atomic Heart tutorial, press the scanner key-default Tab on PC-to activate it and highlight interactable objects, enemies, and resources with color-coded outlines. Aim at targets to reveal details like weak points or item descriptions in the HUD. Scan while moving to tag multiple items at once, building your map awareness. Practice on tutorial crates and bots to master quick activation under pressure, setting up smoother gameplay ahead.
To use the scanner in Atomic Heart, just double-tap R1 on PlayStation (or RB on Xbox), then keep holding R1 / RB after the second press.
The written directions (“Hold R1 R1” on PlayStation) read like the sort of tip where you’re supposed to press two different buttons, and the NPC – who exists solely to justify the tutorial within the game’s tenuous fiction – tells you something to effect of “holding both of your hands up.”
Given the general bugginess of Atomic Heart, no one would blame you for assuming the text instruction is in error, or for repeatedly trying to hold down L1 and R1 at the same time instead – one shoulder button for each hand. (This writer is guilty as charged.)
How to find items with Atomic Heart’s scanner
Activate the scanner by double-tapping and holding RB/R1 on controllers or Left Alt on PC to highlight nearby objects. Blue markers point to loot in containers or defeated foes, allowing collection of missed resources. Scan regularly during exploration to spot these items through walls and gather them quickly.
Atomic Heart‘s scanner works a lot like most scanners work from most games: It helps you analyze your surroundings. When scanning, objects will show up highlighted in overlays of various colors, which the game does not explain:
- Blue indicates chests, drawers, and other containers that have resources you can loot.
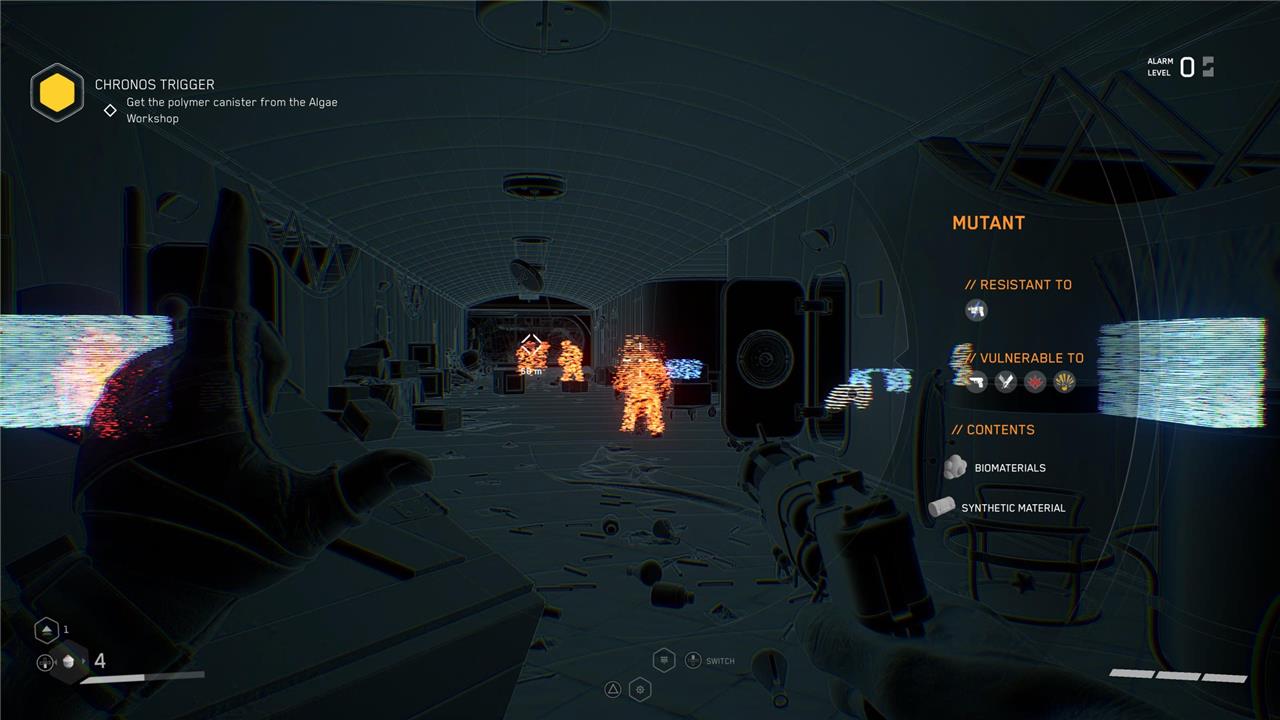
- Orange indicates enemies. If you hold the scanner over a specific enemy, you’ll be able to see a list of their resistances and weaknesses, plus a rundown of the loot they’ll drop when defeated. Note that using the scanner doesn’t pause time entirely; you’re still susceptible to attacks.
- White indicates objects you can interact with – save stations, elevator call buttons, that sort of thing.
- Purple indicates story-essential items. For the most part, Atomic Heart is pretty generous with its waypointing, but in some rare cases, you have to do the work yourself. For instance, during the “Made in the USSR” mission, you have to find the “voice, the symbol, and the sprout of the Motherland.” Activating the scanner will highlight the three items – a radio, a hammer, and a plant – you need to progress. They’re all in the same room.
What does the scanner reveal about enemies
In Atomic Heart, the scanner reveals key combat details about enemies when you hold it on a red-highlighted target through walls or directly.
Enemy Scan Details
Scanning a specific enemy displays its name, vulnerabilities (e.g., weak points or damage types like fire or electricity), resistances, and potential loot drops like polymers or crafting materials. This intel helps you choose optimal weapons or abilities, such as exploiting a robot’s shock weakness with your Shok polymer.
Practical Use
Enemies stay highlighted in scan mode for quick reference, even through cover, aiding stealth or boss prep in Mundfish’s levels. Drops shown are probabilistic, so scan repeatedly to confirm reliable resources post-fight.
How to unlock advanced scanner features for enemies
In Atomic Heart, the scanner’s enemy features are available from the start with no unlockable advanced modes. Holding the scan (double-tap then hold R1/RB or Left Alt) on a red-highlighted enemy immediately reveals its name, vulnerabilities (e.g., weak to fire or shock), resistances, and loot drops like polymers.
Scanning Basics Recap
Basic scanning suffices for all enemy intel-no upgrades, perks, or progression system expands it further in Mundfish’s game. Use it to spot weak points through walls for combat optimization.
Tips for Best Results
Scan during stealth or from cover to analyze without alerting foes; repeat on the same type for consistent drop confirmation, as loot is probabilistic. This covers all scanner enemy data throughout the campaign.