Dive into Destiny 2’s Warlord’s Ruin dungeon and uncover the secrets of the elusive Ahamkara Bones-10 hidden collectibles scattered behind locked doors that require multiple runs and quest progression to access. Each bone not only brings you closer to completing the “In the Shadow of the Mountain” quest but also reveals rich lore and rewards, including the coveted Buried Bloodline exotic catalyst. Prepare to navigate traps, solve puzzles, and backtrack through the dungeon as you hunt down every bone in this thrilling questline.
In this Destiny 2 guide, we’ll go over how to find all of the sets of bones so you can complete the “In the Shadow of the Mountain” quest and the “Heed the Whispers, O Vengeance Mine” triumph, and boost the drop rate for your Buried Bloodlines Exotic sidearm.
If you’re having any trouble getting to the locations described herein, check out our guide on how to complete the Warlord’s Ruin dungeon in Destiny 2.
’In the Shadow of the Mountain’ quest steps
The “In the Shadow of the Mountain” quest in Destiny 2’s Warlord’s Ruin dungeon involves multiple steps centered around collecting Ahamkara Bones and other quest items. Players must first complete the dungeon to unlock the quest, then collect a corrupted Ahamkara Bone and gather Dark Ether Tinctures by defeating glowing Screeb enemies. The core challenge is finding and restoring the Bones of Hefnd, which are hidden behind dispel doors of increasing levels throughout the dungeon. The quest requires several runs because bones are locked behind level 1, 2, and 3 dispel doors, which open only as the quest progresses or if a fireteam member has advanced further. Players must also collect Blighted Wishing Glass from bosses and return all items to Hefnd’s Cairn and Ikora to complete the quest.
Unlike previous dungeons, where you can get all of the collectibles in one run, the collectibles in Warlord’s Ruin must be collected across three different runs. Once you beat the dungeon for the first time, you’ll receive the “In the Shadow of the Mountain” quest, which will require you to get 30 Dark Ether Tinctures, 3 Blighted Wishing Glass, and four Ahamkara Bones.
How to get Dark Ether Tinctures in Destiny 2
You get Dark Ether Tinctures by killing special Screeb-like enemies called Thieving Wretches, which will spawn in three locations:
- The first is on the bridge before the first encounter.
- The second is found in the maze after defeating the first boss.
- The third is found on the mountain side after defeating the second boss.
These enemies can respawn, so you can farm them to get enough Dark Ether Tinctures.
How to get Blighted Wishing Glass in Destiny 2
You get one Blighted Wishing Glass per encounter completion from the loot chest. Once you complete that quest step, you’ll have to collect the next 3 bones and more Dark Ether Tinctures and Blighted Wishing Glass. Once you complete that step, you’ll have to do it again until you collect all ten bones.
Ahamkara Bones 1 location
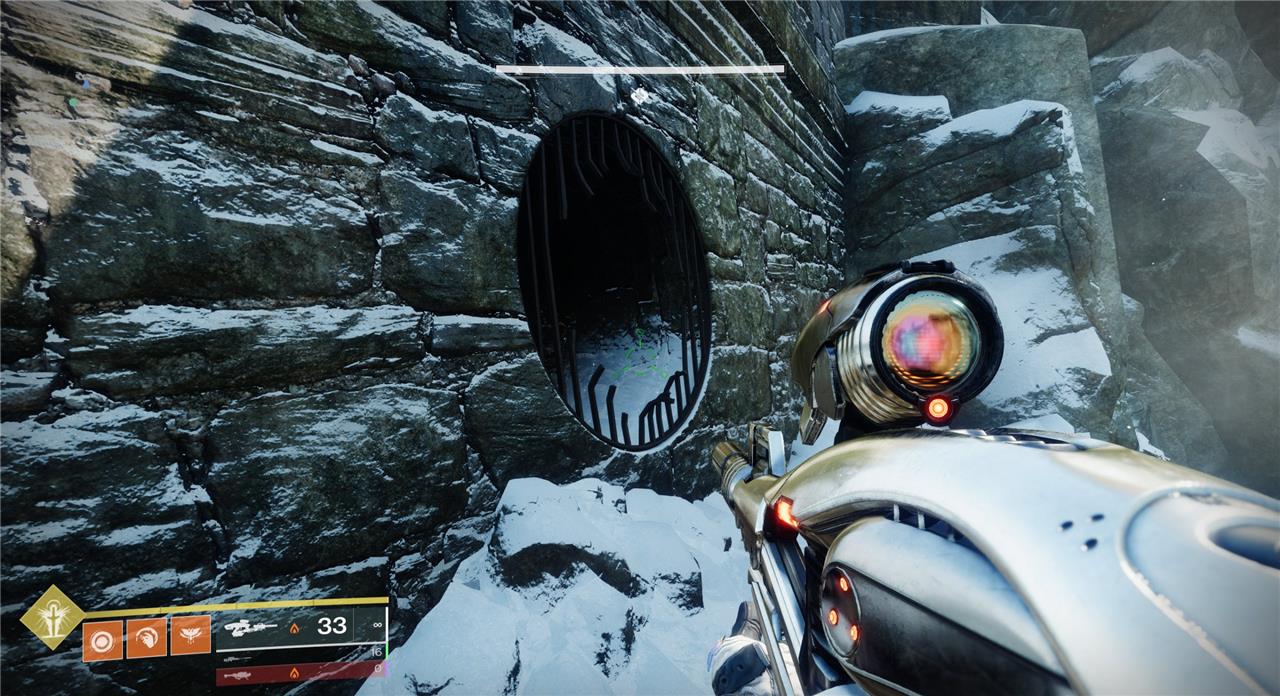
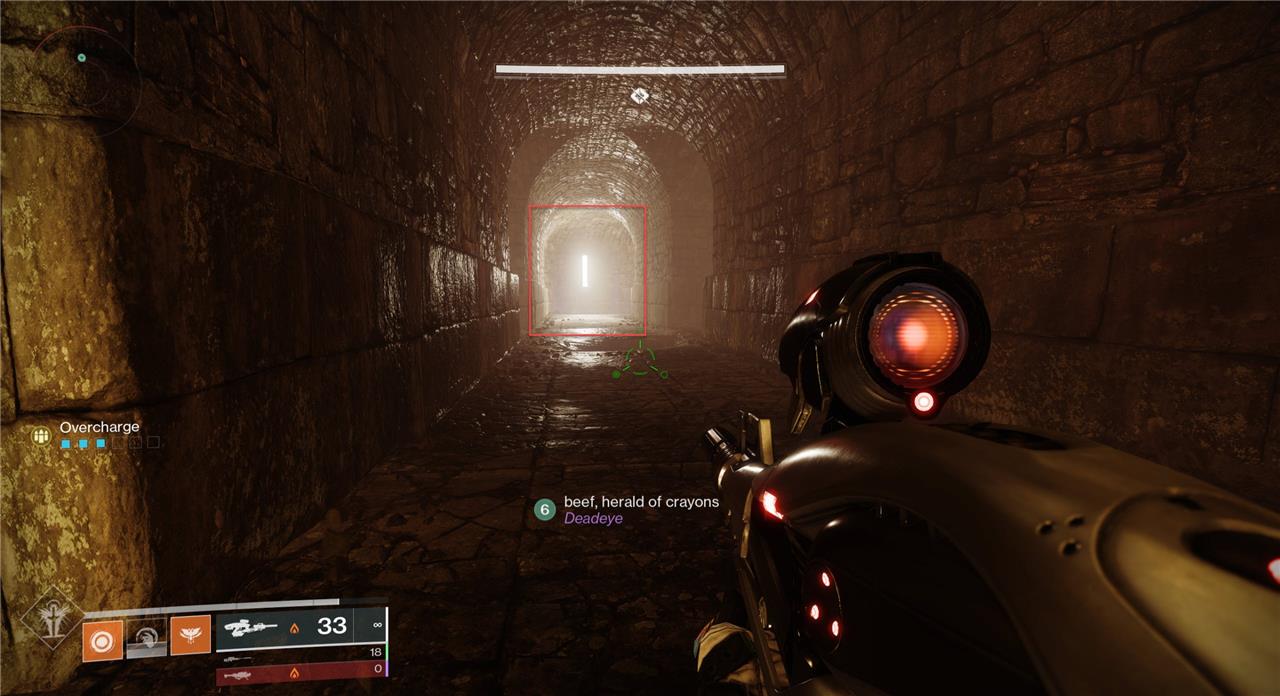
The first Ahamkara Bone in Destiny 2’s Warlord’s Ruin dungeon is located just before the first boss encounter with Rathil, Broken Knight of Fikrul. After crossing the rope bridge guarded by Scorn enemies and entering the fort, look straight ahead for a set of stairs leading down to a locked door requiring a Tier 1 dispel. Behind this door, you will find the first Ahamkara Bone, marking the beginning of your collectible quest in the dungeon.
Across the bridge inside the first fort, before an arresting Knight assails you.
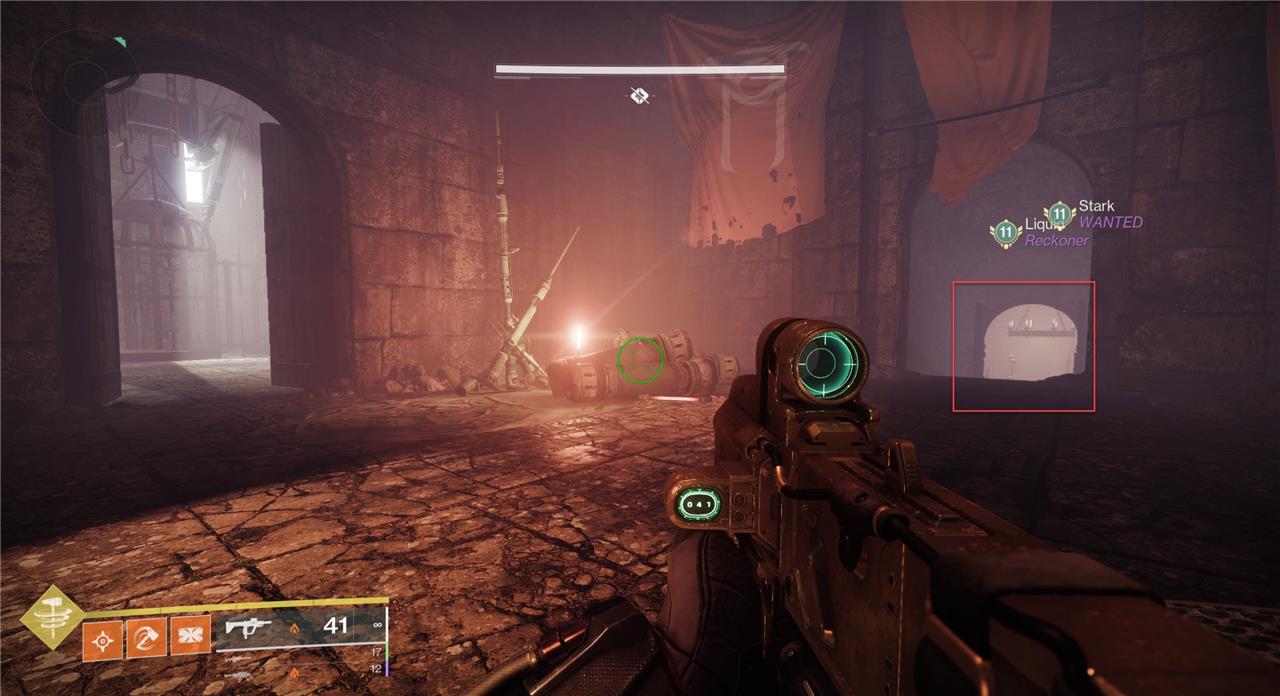
The first set of Ahamkara Bones is found directly before the first boss. Once you enter the fort, continue forward. You’ll see a door where you must remove a corruption level one. Directly behind this door is the first set of bones.
Ahamkara Bones 2 location
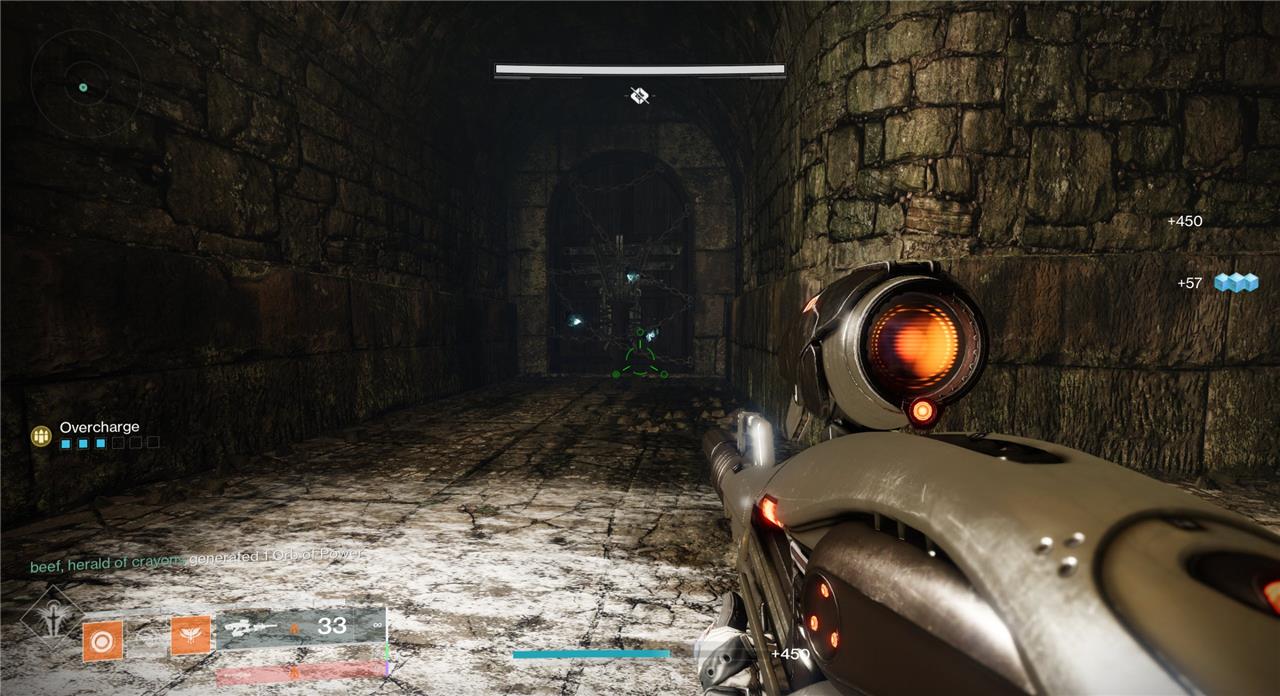
After escaping the prison in the Warlord’s Ruin dungeon, proceed forward and jump through the ceiling into an orangely lit area. Walk ahead until you find a door on your right blocked by Corruption Level One. Dispel the corruption to unlock the door and collect the second set of Ahamkara Bones there.
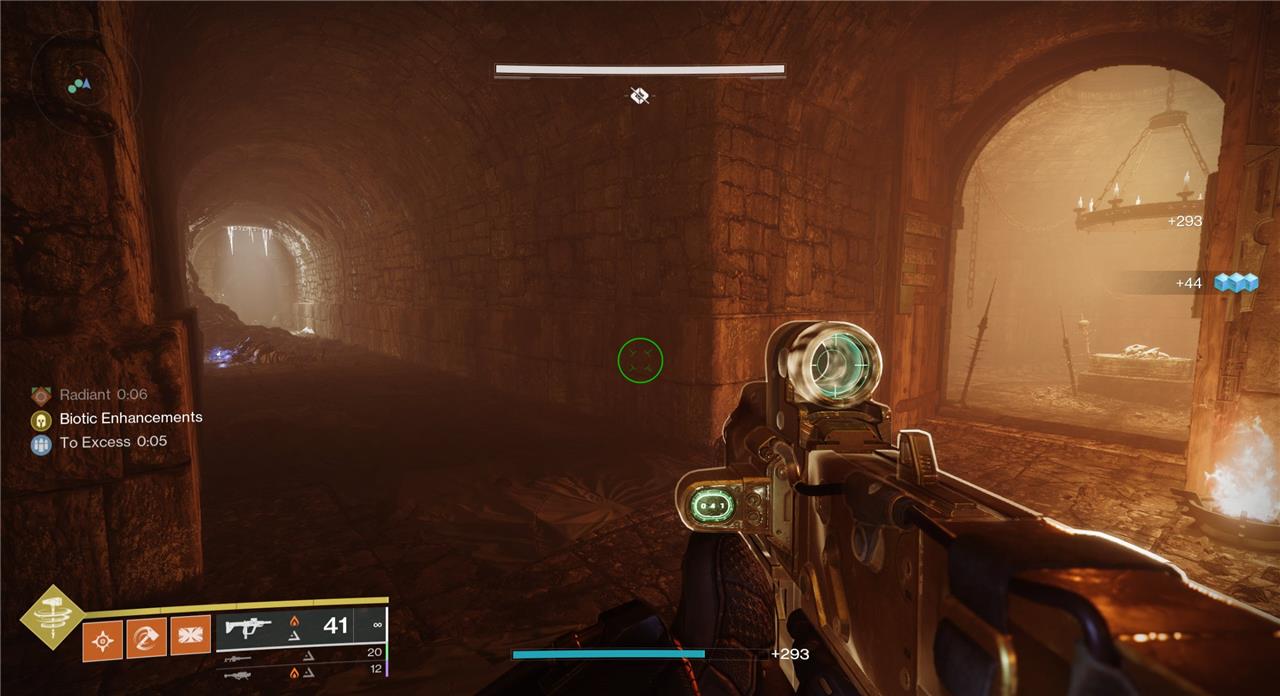
Across from imprisonment, after ascending through the ceiling.
After you escape the prison, continue forward until you jump through the ceiling into an orangely lit area. Walk forward, and the door blocked by corruption level one will be on your right. Remove the corruption and collect the second set of Ahamkara Bones.
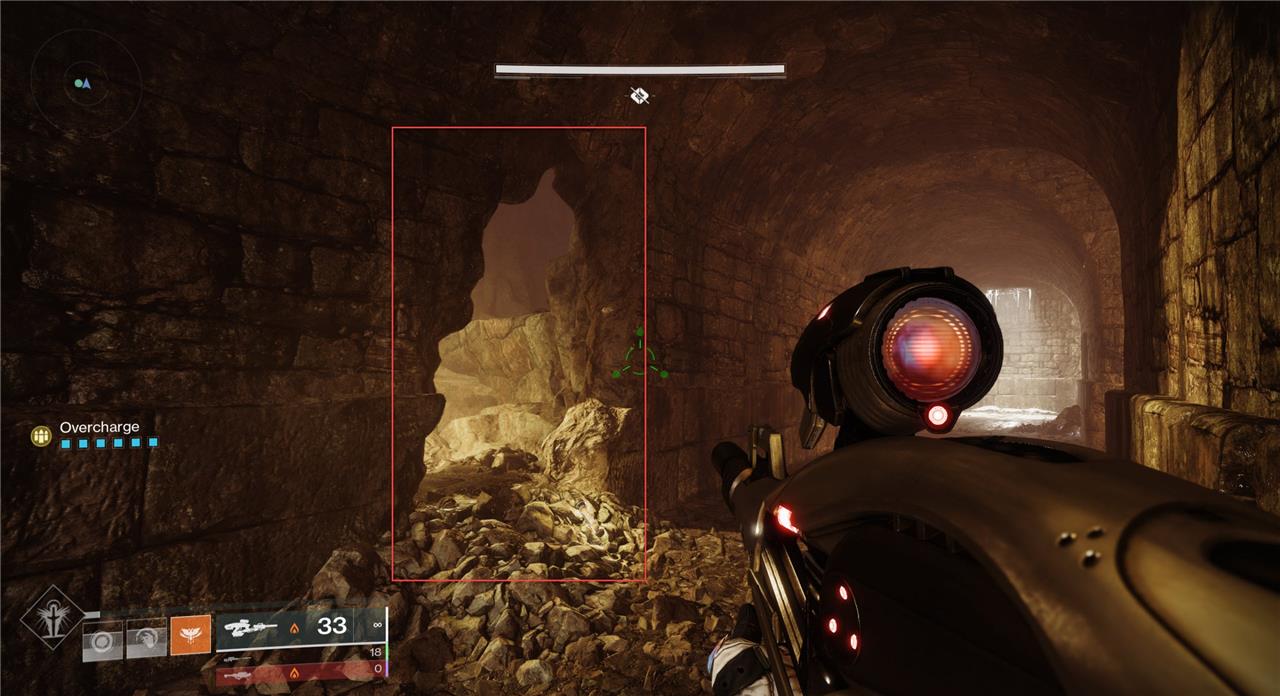
Ahamkara Bones 3 location
The Ahamkara Bones in Destiny 2’s Warlord’s Ruin dungeon are collectible quest items needed to progress the “In the Shadow of the Mountain” quest. There are 10 bones scattered throughout the dungeon, but they cannot all be collected in a single run. The bones are divided into three groups, each corresponding to different dispel door levels (Level 1, 2, and 3), which unlock as you advance through the quest and gain specific buffs. The first bone appears at the end of the initial dungeon run near the final chest, while the next bones are found behind dispel doors that require progressing through the dungeon multiple times or with different characters to backtrack and access them. This design requires players to complete several runs to gather all bones, unlocking lore and quest progression along the way.
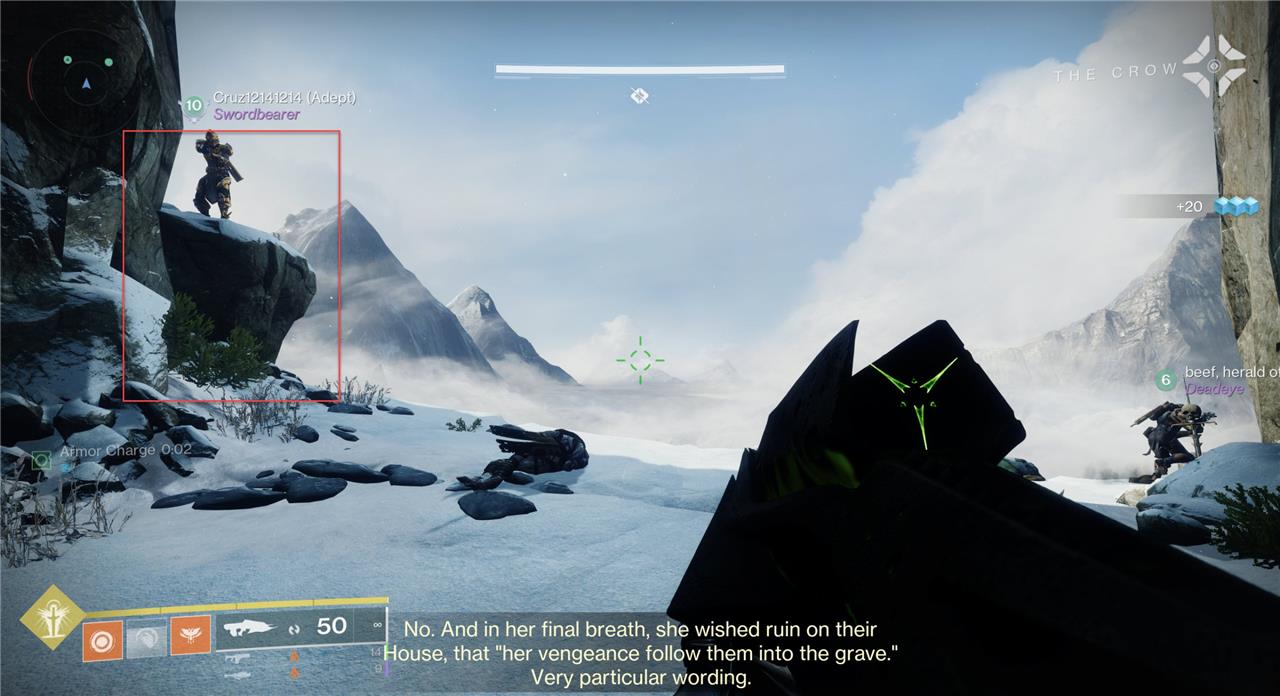
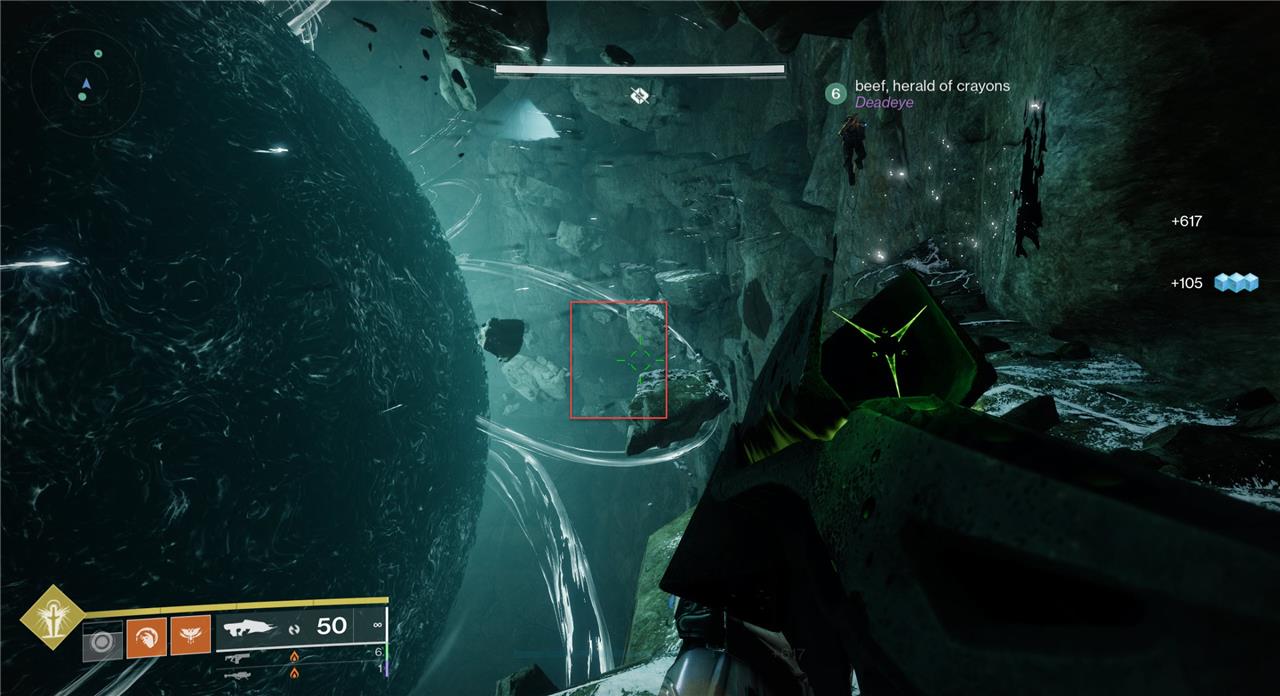
At the top of the summit, face back from the cliff and find shelter.
After the second encounter, make your way until you reach the outside again and see this view. Continue to the left, and instead of jumping down to the left to make your way to the room with the large Taken orb, continue straight.
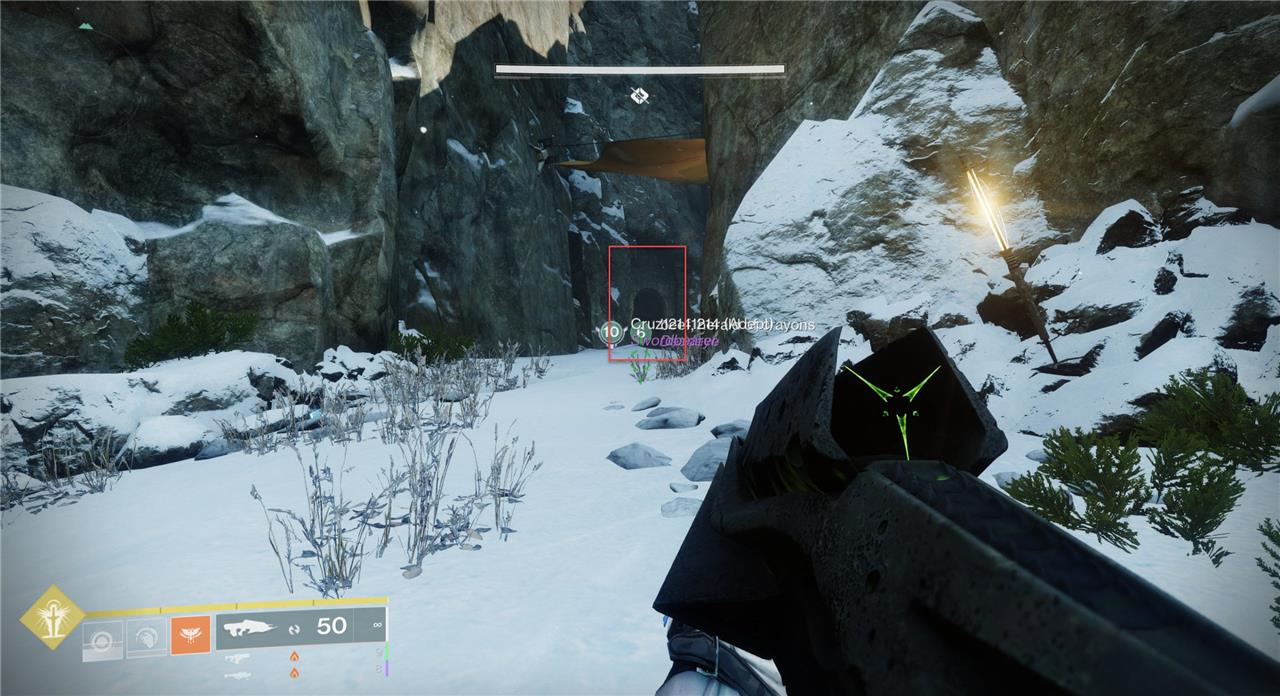
Climb up until you see a small hallway in the left wall of the mountain. The third corruption level one door will be in the small hallway, and behind that door will be the third set of Ahamkara Bones.
Ahamkara Bones 4 location
After breaking out of the prison in Warlord’s Ruin, proceed until you reach a hole in the wall to continue. From there, take a right where you must jump over a stacked spike trap, then turn left. The fourth Ahamkara Bone is located just in front of you behind a Corruption Level 2 door, which requires the corresponding dispel ability to access during the dungeon quest progression.
In the snowfallen maze, through the broken wall, seek the banner of Kings.
After you break out of the prison, make your way through until you reach a hole in the wall that you must walk through to progress.
Make a right (where you’ll have to jump over a stacked spike trap), then a left. The corruption level two door will be directly in front of you.
Remove the corruption and collect the fourth set of Ahamkara Bones.
Ahamkara Bones 5 location
The fifth Ahamkara Bone in Destiny 2’s Warlord’s Ruin dungeon can be found after crossing into the Tempest area through the portcullis at the sewer’s mouth. This bone is located before the second encounter in the dungeon, requiring players to navigate carefully through this section to collect it. Collecting this bone is part of the quest progression that unlocks the ability to dispel certain doors within the dungeon, enabling further exploration and access to additional bones.
Cross into the Tempest, through the portcullis, at the sewer’s mouth.
Before the second encounter, get to the doorway where you find the first secret chest.
Turn to the right and follow the snowy path until you reach a sewer entrance. Right through the sewer grate is the next corruption level two door. Remove the corruption and collect the fifth set of Ahamkara Bones.
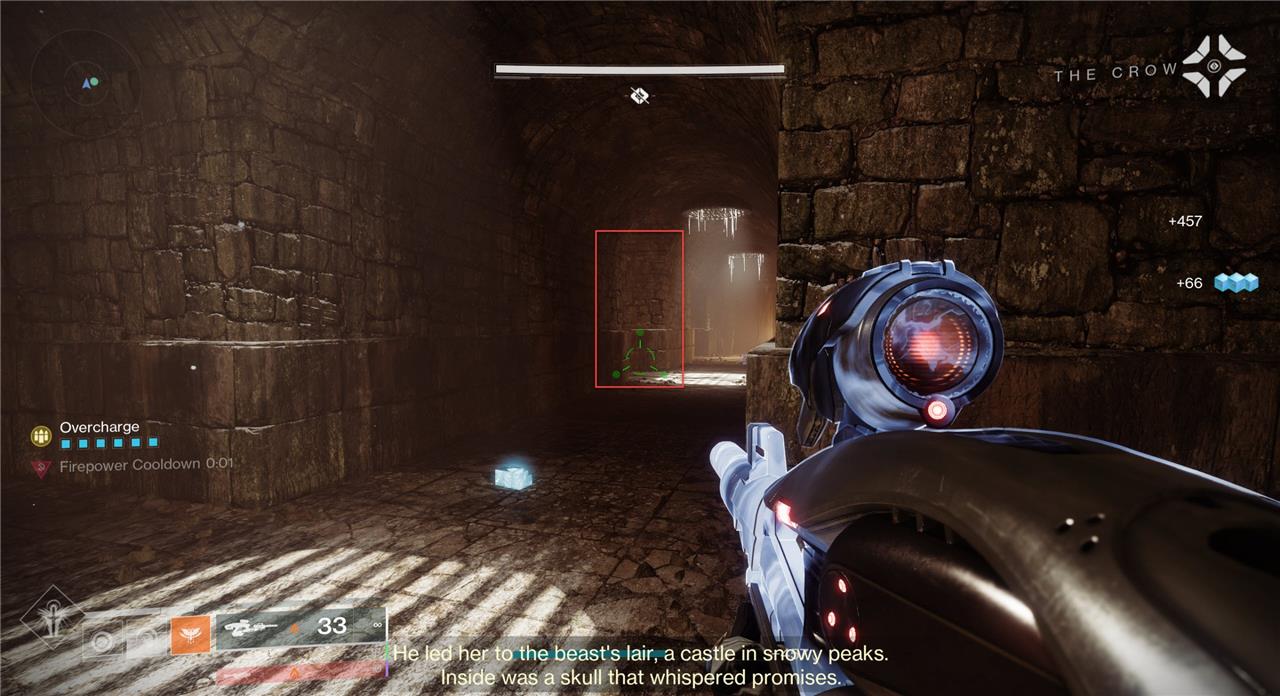
Ahamkara Bones 6 location
The sixth Ahamkara Bone in Destiny 2’s Warlord’s Ruin dungeon is located in the ruins just before the second encounter. Players can find it after exiting the maze area in Kingsbane Rampart, making it accessible as they progress through the dungeon’s early stages.
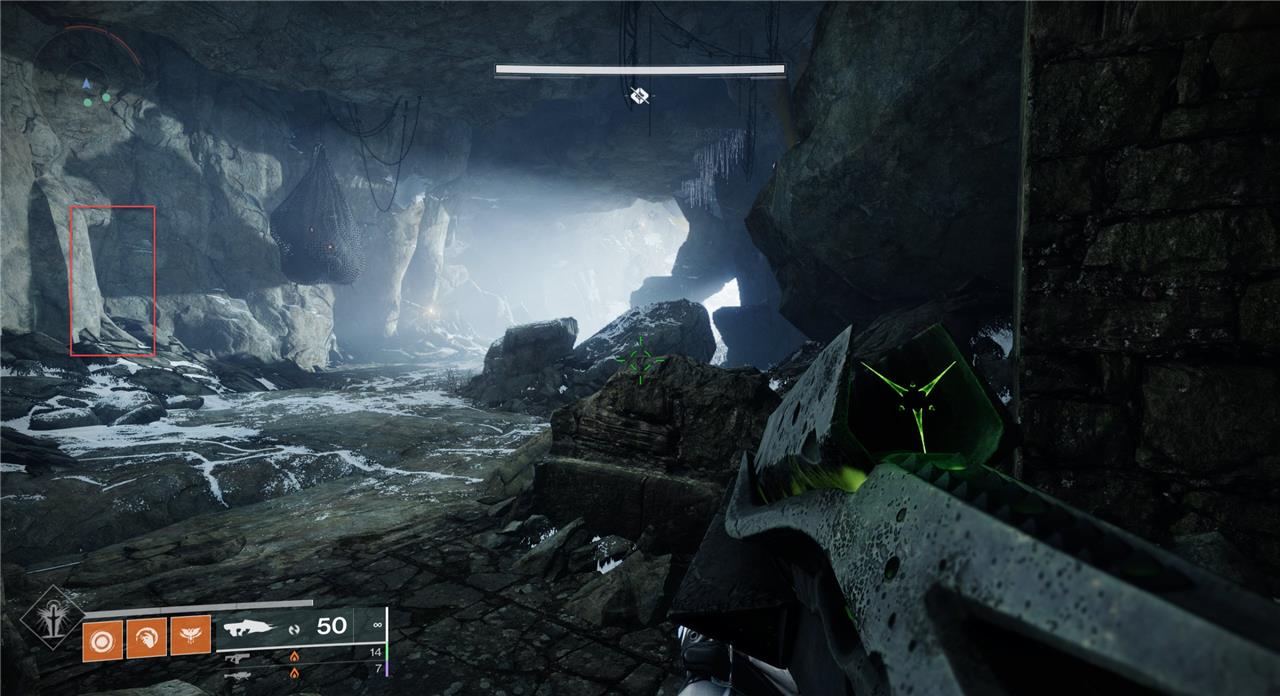
At summits base, find shelter off the beaten path. Too far, and the Taken will descend upon you.
After defeating the second boss, progress forward until you reach a group of enemies as you start to head outside. It’ll look like the area pictured above.
After you defeat the enemies, head into the cubby pictured above. There is where you’ll find the corruption level 2 door and the sixth set of Ahamkara Bones.
Ahamkara Bones 7 location
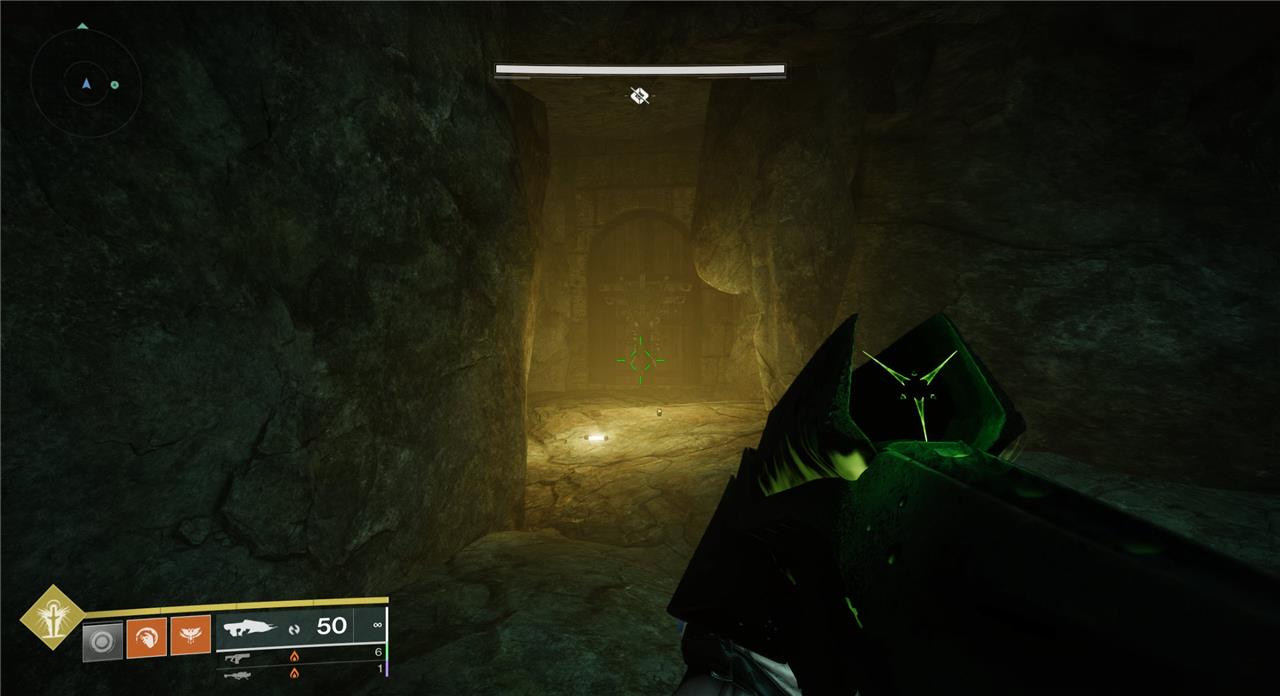
The seventh Ahamkara Bone in Destiny 2’s Warlord’s Ruin dungeon is found by jumping up through a hole, exiting the circle room, and taking the left path. Head down to the end of the hall and dispel the corruption level three door to collect this bone. It is located behind a Tier 1 door and is relatively close to the sixth bone, situated in a sneaky stone corridor on the left side of the pathway leading further up the mountain. This bone is part of the quest progression requiring dispelling magic to access certain doors within the dungeon.
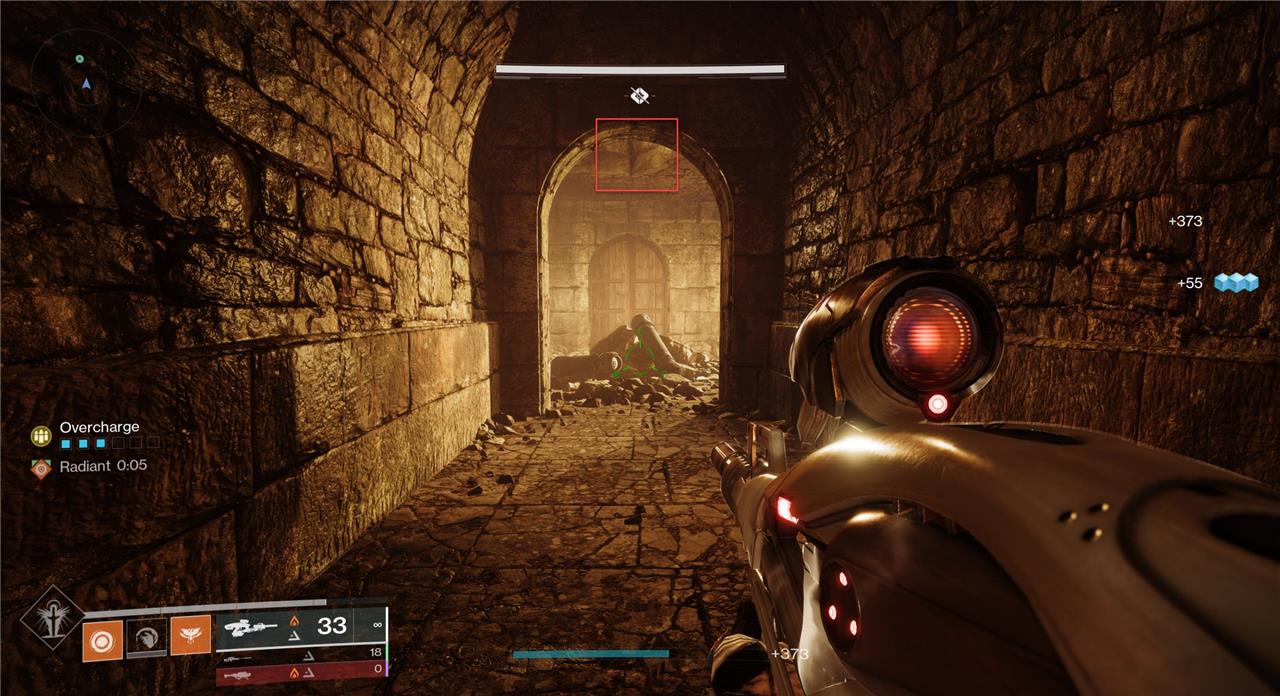
Within the maze, stride panning a pitfall, light calls through the window.
After the prison section, get to the point where you see a pile of barrels below the hole that you must jump up through.
Jump up through the hole, exit the circle room, and take the left.
Head down to the end of the hall and dispel the corruption level three door to collect the seventh set of Ahamkara Bones.
Ahamkara Bones 8 location
In Destiny 2’s Warlord’s Ruin dungeon, the eighth Ahamkara Bone is located near the large floating Taken orb inside the mountain. After navigating through debris and defeating Scorn snipers, you will reach an icy area. Instead of continuing upwards, look down to find a path of broken rocks leading to a hidden pathway below. Jump down and dispel the Tier 3 magic door to collect the eighth Ahamkara Bone.
The Taken roil at cave’s bottom sends you to scurry over boulders into a ruined alcove.
Once you get to the room with the large Taken Blight, make your way through until you can look up and see the end. Below will be a platform that you’ll have to jump down to.
Once you jump down, dispel the corruption level three door and collect the eighth set of Ahamkara Bones.
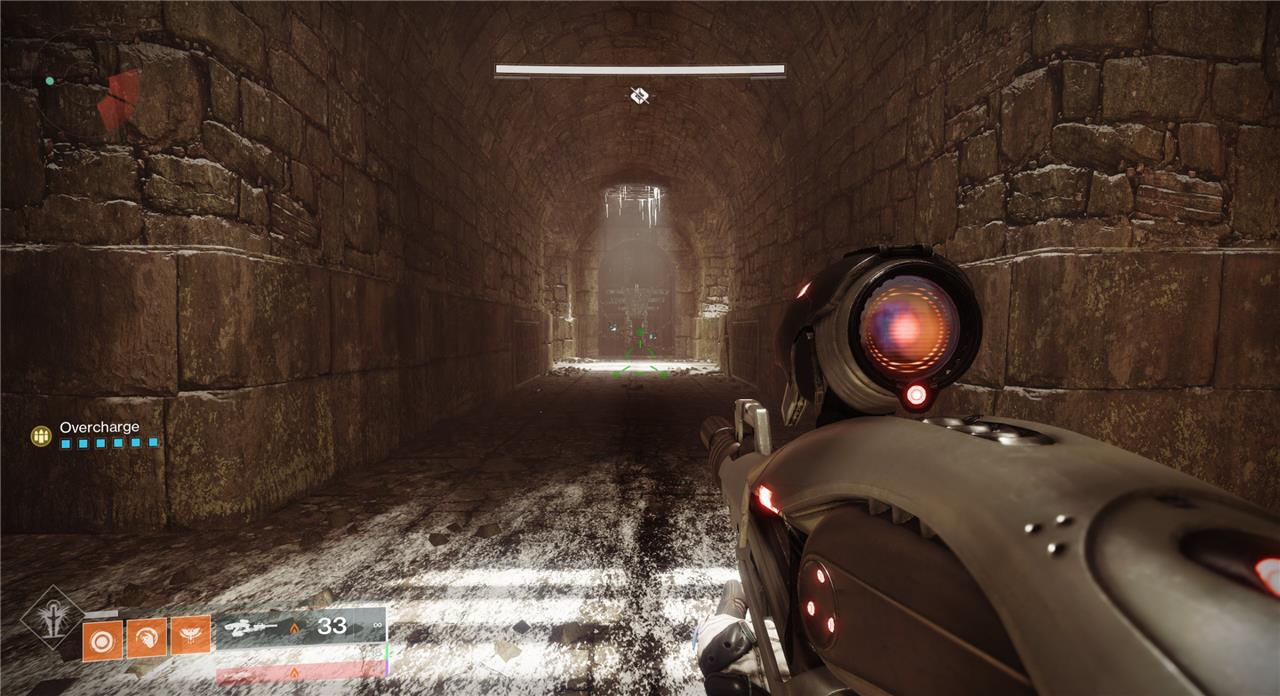
Ahamkara Bones 9 location
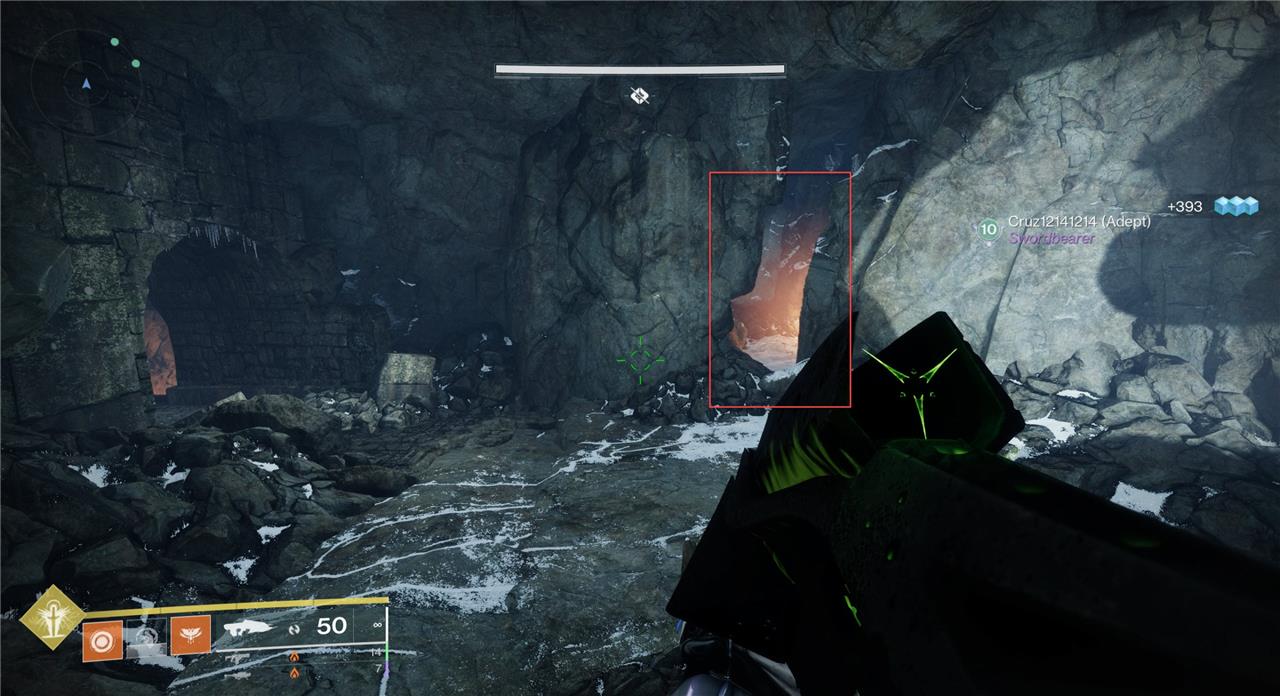
The ninth Ahamkara Bone in Destiny 2’s Warlord’s Ruin dungeon is located near a smaller Taken orb surrounded by broken mountain debris. After passing the large Taken orb, head towards this area and look for a hidden passage directly across from the entrance to this location. This passage leads to the final Tier 3 locked door, behind which the ninth Bone of Hefnd can be found. This bone is part of the Tier 3 set, requiring progression in the quest “In the Shadow of the Mountain” to dispel the magic blocking the door and collect it.
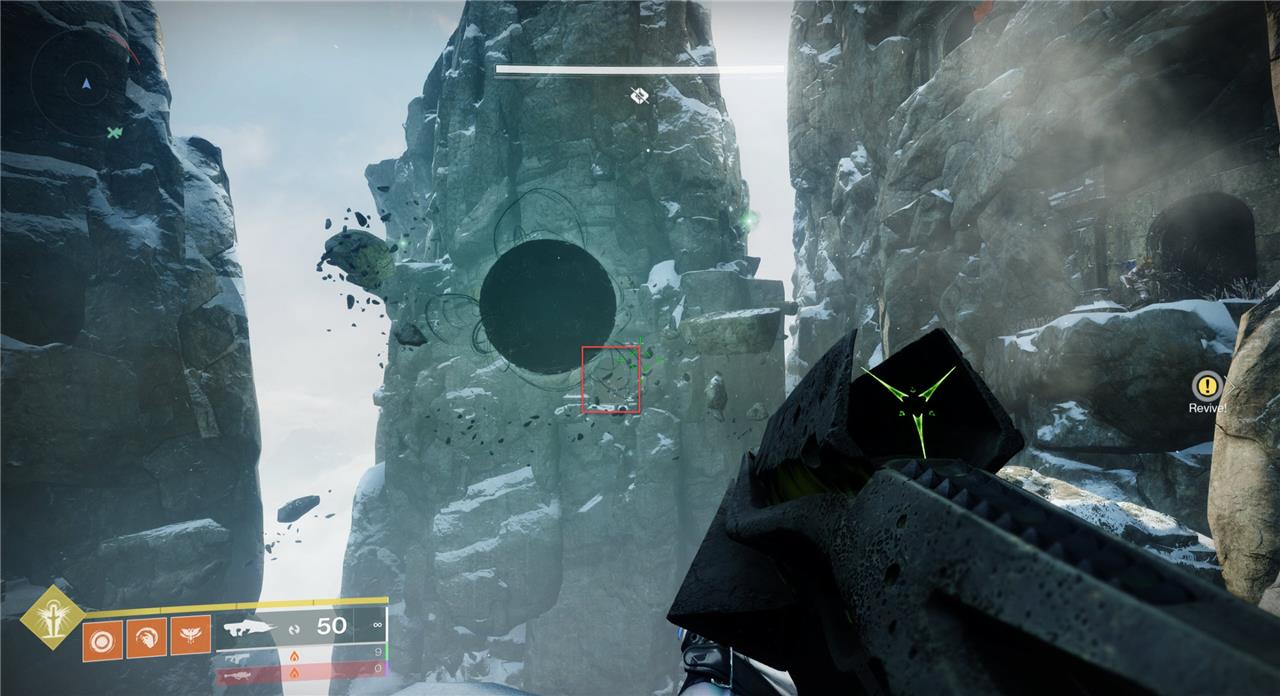
Within a tunnel on the broken cliffs, brace the Taken storm.
After the Taken Blight room, there will be a section where you’ll have to jump around a smaller Taken Blight. Make your way to the room highlighted in the image above. The final level three corruption door is in that hallway; dispel it and collect the ninth set of Ahamkara Bones.
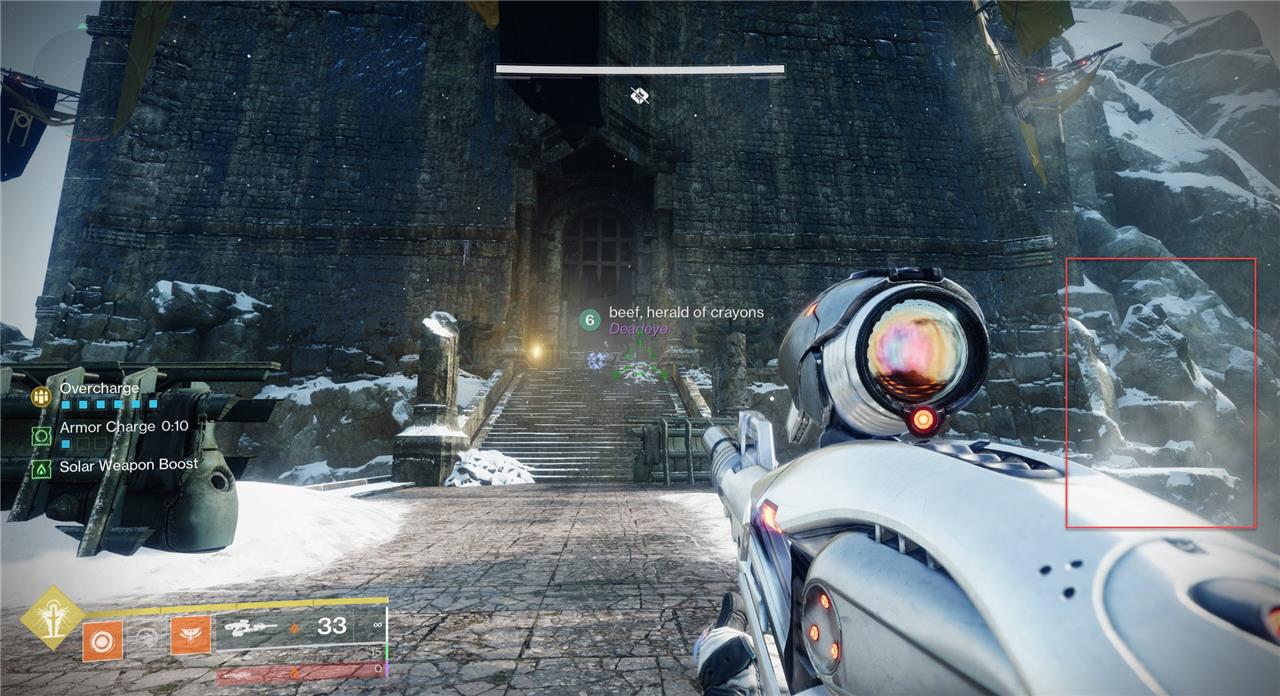
Ahamkara Bones 10 location
The 10th Ahamkara Bone in Destiny 2’s Warlord’s Ruin dungeon is found after defeating the final boss, Hefnd’s Vengeance. This bone is unique as it is not locked behind any dispel doors like the others. You can locate it directly to the left of the final loot chest on the top of the tower where you collect your rewards. This makes it the first bone most Guardians will collect, marking the completion of the Ahamkara Bones questline tied to the dungeon.
What hidden lore secrets do the Ahamkara Bones reveal about Destiny 2’s Warlord’s Ruin
The Ahamkara Bones in Destiny 2’s Warlord’s Ruin dungeon unveil a rich and tragic lore centered on the ancient wish-granting dragons known as Ahamkara, particularly one named Naim, who formed a bond with the warlord Heend. The story reveals the Great Hunt, a city-led purge to destroy Ahamkara due to the dangerous nature of their wish magic, which led to Naim’s demise at the hands of the House of Kings. Before dying, Naim cursed the invaders with a Last Wish of Vengeance, which fueled the corruption and rise of the Scorn within the castle. The bones also hint at the lingering power and danger of Ahamkara, as their remnants still radiate potent energy and can influence the Taken, suggesting that the threat of these wish dragons-and the consequences of their magic-persist beyond death. Collecting the bones allows players to piece together this haunting tale of friendship, betrayal, and vengeance that shaped the dungeon’s dark history.
What does the lore of the Ahamkara Bones reveal about their connection to the Taken and Scorn
The lore of the Ahamkara Bones reveals a deep and complex connection between the Ahamkara, the Taken, and the Scorn. The Ahamkara are ancient wish-granting dragons whose magic and remains continue to influence the world long after their deaths. Some Ahamkara, like Riven of a Thousand Voices, were Taken-corrupted and transformed by the Darkness-linking the species directly to the Taken’s sinister influence.
In the Warlord’s Ruin dungeon, the bones of the Ahamkara Hefnd are central to the rise of a cult of Scorn, undead Fallen twisted by Darkness-tainted Ether. The last wish of the Warlord Naeem, granted by Hefnd’s dying breath, cursed the House of Kings and fueled the corruption that transformed them into Scorn. These Scorn began to worship the Ahamkara bones, placing them in shrines and using them to empower Chieftain Totems, blending the lingering Ahamkara magic with the undead Scorn culture.
Furthermore, the Scorn themselves owe their existence to Taken Ahamkara magic, as the original Scorn leader Fikrul was resurrected and empowered through a wish granted by Riven, a Taken Ahamkara. This intertwines the Ahamkara’s wish magic with the creation and spread of the Scorn horde, showing that the Ahamkara’s power is a key factor in both the Taken’s and Scorn’s dark evolution.
Thus, the Ahamkara Bones lore highlights how the remnants of Ahamkara magic continue to corrupt and shape the Fallen and Taken, binding these factions through ancient curses, wish magic, and undead resurrection.