Early growth in Anno 117: Pax Romana depends on every tile, road, and building placement. A smart city layout balances housing, production chains, and logistics-turning scarce resources into steady prosperity before your empire’s expansion truly begins.
How to get the best early city layout in Anno 117: Pax Romana
Position three woodcutters in a forest away from the trading post, connect them with a straight road, and place two sawmills nearby to process logs quickly. Build four 2×4 residential blocks in a square with road access to every house, adding a market on one side and a fishing hut by the coast for population growth. Expand with hemp farms in a 6×12 grid near oats, plus sheep, porridge stands, and tunic shops to support 600 residents while keeping production chains compact.
First, place three woodcutters in a forest area, but make sure they’re a fair distance away from your trading post, or your town center will quickly expand into the forest. Drag a straight road between the woodcutters and the trading post, then place two sawmills on that road, as close to the woodcutters as possible. Despite the similarity in processing times, it’ll take quite long for the logs to reach the cutters, hence the third woodcutter building.
Now it’s time to build houses. The city layout in this example uses 2×4 residential blocks, but you can also use 2×3 or 2×5 – just don’t make them much smaller or larger than that, as this might mess up your infrastructure. Also, avoid 3×3 residential blocks as the house in the middle wouldn’t be connected to a road (unless you leave out the center house, which looks quite nice but is less efficient).
Place four 2×4 residential blocks in one large square formation, and be sure to connect every house to a road. Meanwhile, to gain both population and income, place a fishing hut on the shoreline. Your fledgling town, including the woodcutters and sawmills on the outskirts, should look something like this:

On the right side of the upper right residential block, as marked with a star, place a market. It’ll have just enough range to cover every residential building. If you have enough timber, you can fill the residential block below the market with more houses.
This is a good moment to add the porridge production line to your town. Very important; the porridge stand doesn’t have an area effect, so there’s no need to place it in the city center. Place a 16×6 oat field (if you care about rectangular shapes) on the outskirts of the island and drop the porridge stand right next door for quick production.
Once you’ve unlocked the “fashion” buildings, pick the hemp farm and place it anywhere you like, but away from your residential area – next to the oat field would be a good option. If you use a 6×12 format for the hemp field, you’ll get a nice rectangular form to fit into the grid. Your spinner (which does have an area effect) can move into the same grid as the market.
Although it isn’t required to unlock residential tier 2, you can add a 3×12 sheep farm next to the oat field and hemp farm, then place the pileus felter next to the spinner for a double fashion bonus.
Be sure to place a warehouse next to your agricultural buildings. Remember: The resources can be moved into a nearby warehouse, and production buildings in the city center can take those resources for their nearest warehouse. Resources and products don’t need to be close to form a functioning production line.
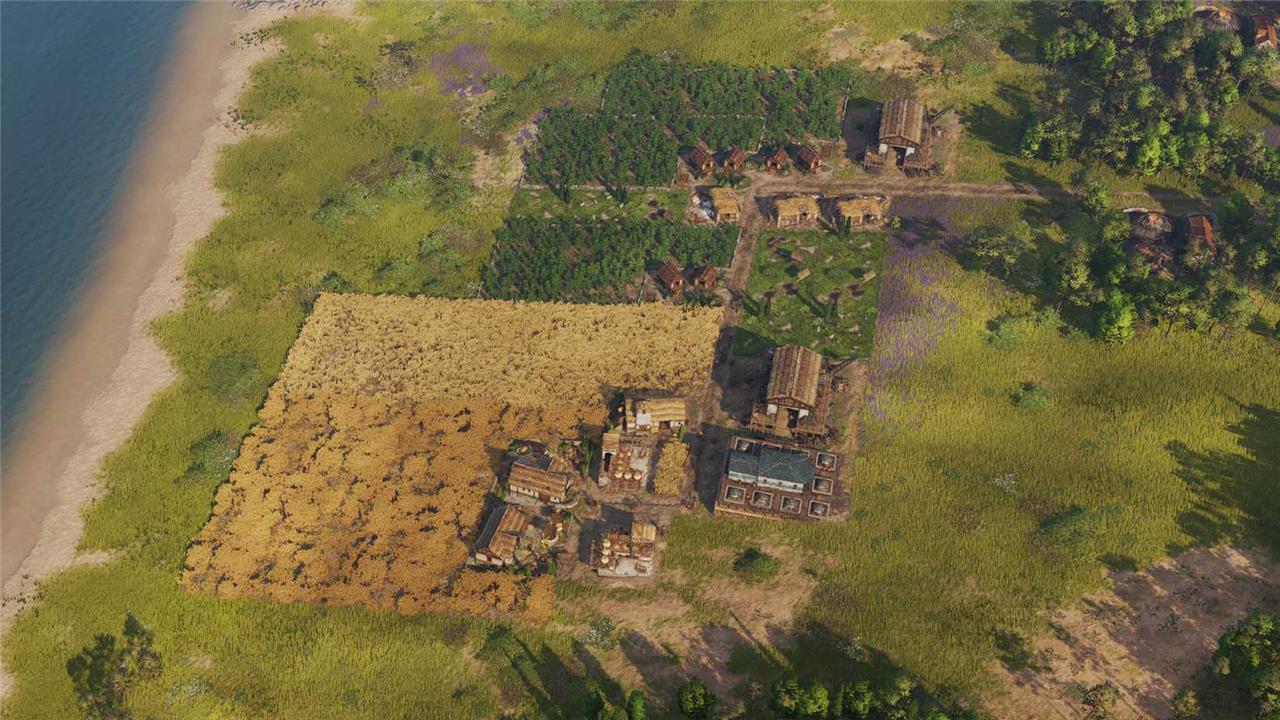
An agricultural setup to support an early tier 2 town should look something like the picture above. This agricultural layout contains the following:
- Two oat farms with two porridge stands next door.
- Three hemp farms to support three tunic shops.
- Three sheep farms to support four pileus shops (remaining sheep may be sold for now).
- One wheat farm to supply one bakery.
- One garum works. Placing garum in the agricultural layout rather than the city layout is a deliberate choice to avoid the happiness reduction.
This layout should be enough to supply a town of roughly 600 residents. Be sure to place some additional fishing huts, one scomber’s shack, and one salt pond in your harbor to supply enough sardines and garum resources.
As you (slowly!) set up the agricultural layout, increase your population alongside it. Divide your time evenly (add a residential quarter, add a new production line, then add a new residential quarter again) to ensure you don’t end up without enough workforce or goods.
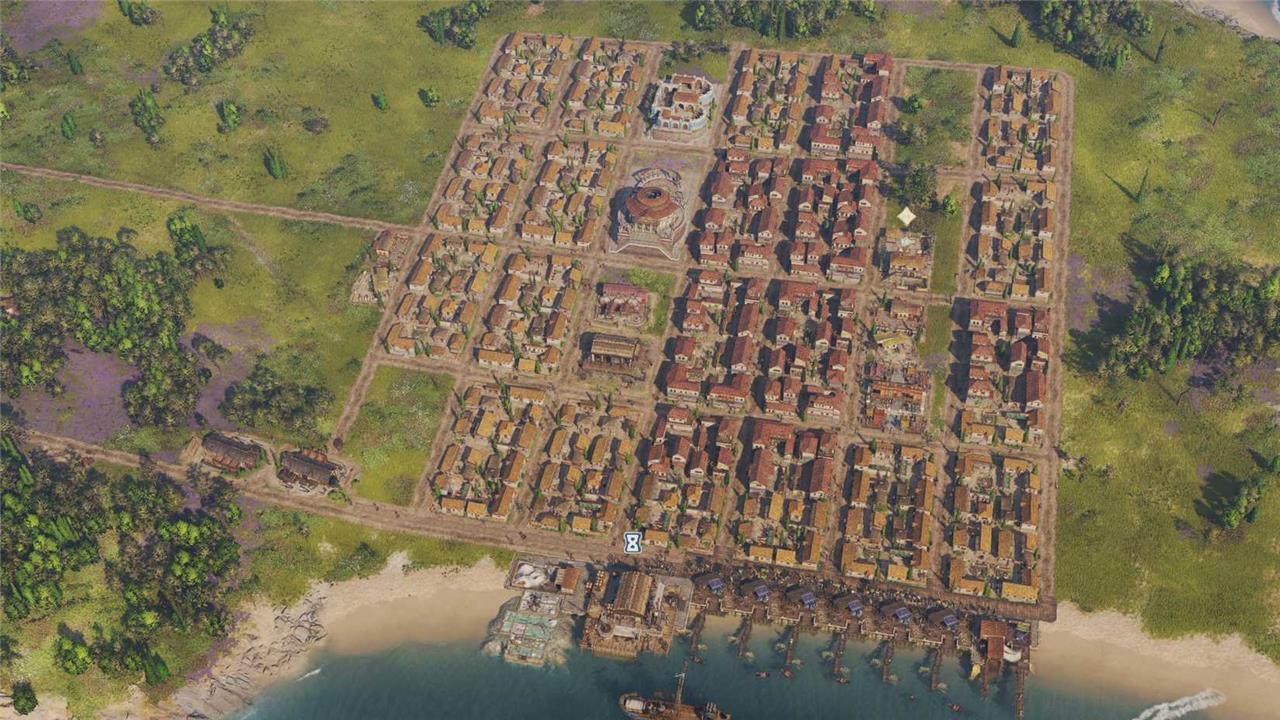
To save enough room for area effect buildings, expand the quarter with the market into a vertical straight line full of similar production and service buildings. On the horizontal grid, stick to this pattern: two residential blocks, one service block, two residential blocks, etc. Be sure to upgrade the most central residences first, as they’ll need more services. The blocks on the outside can remain tier 1. This picture illustrates what this Anno 117tier 2 city layout should look like:
So what about the city’s industrial layout? This is relatively simple: Find two river slots to place one clay pit and one grain mill – preferably as close as possible so they can share one warehouse between them.
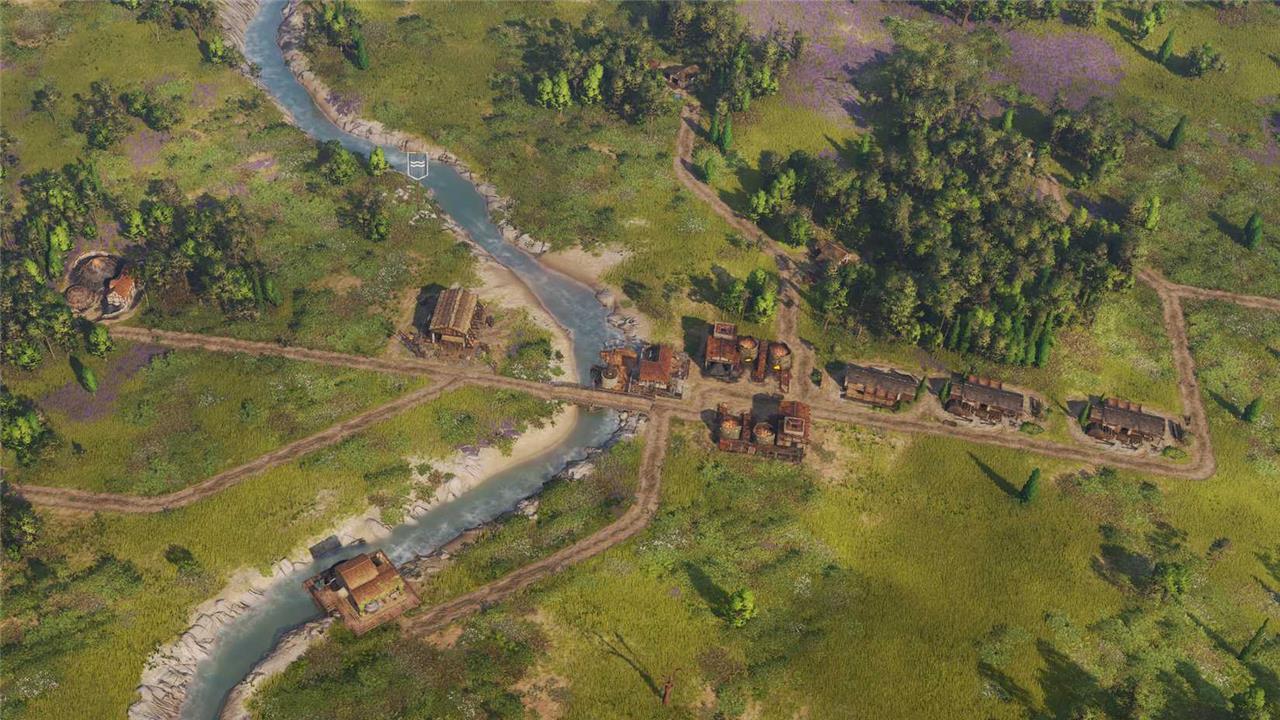
Add two tilers next to the clay pit and one charcoal burner in a forest nearby. While you’re at it, place two or three more woodcutters and sawmills and you should meet timber demands for an early tier 2 town in Anno 117.
Which 2×4 or 2×5 housing blocks perform best early game
In Anno 117: Pax Romana, 2×4 housing blocks outperform 2×5 blocks in early game for their superior service coverage and efficiency.
Why 2×4 Excels
The 2×4 layout allows a single central market to fully cover all eight houses when arranged in a square with four blocks, minimizing dead zones. Side streets in 2×4 enable easy access for additional services like wells or taverns without overextending road networks. Larger 2×5 blocks risk uneven coverage, especially in compact starts near forests or coasts.
When to Use 2×5
Opt for 2×5 if prioritizing raw housing density over perfect services, such as rapid population booms before tier 2 needs. However, they demand extra markets or careful road placement, complicating early resource optimization. Stick to 2×4 for Latium starts to hit 100+ residents fastest.
Which maps favor 2×4 over 2×5 layouts early game
Compact Latium starts in Anno 117: Pax Romana favor 2×4 housing blocks over 2×5 early game due to terrain constraints like dense forests and coastlines.
Ideal Map Types
Latium maps with tight forest clusters and coastal access prioritize 2×4 for their side-road flexibility, allowing snug fits around trees without chopping excessively. 2×5 works better on open plains maps like those in Hispania sessions, where density trumps coverage.
Terrain Factors
Forested or marshy edges on starter islands demand 2×4’s square footprint for market overlap and diagonal road tweaks near obstacles. Avoid 2×5 on irregular shores, as they create coverage gaps requiring extra services.