In Arc Raiders, a muted beacon hums as you shoulder the unknown-one foothold at a time.
‘A First Foothold’ quest walkthrough in Arc Raiders
To begin “A First Foothold,” head to the marked location on your map after picking up the quest from the board. Clear out the initial raiders patrolling the area, then loot the supply crates for basic resources and ammo. Repair the outpost barricades using gathered metal scraps by interacting with the damaged sections. Activate the generator inside the main building to power defenses, which triggers a short enemy wave-prioritize headshots on rushers. Once the area stabilizes, speak to the contact NPC to claim your reward and unlock base upgrades.
Prior to making your trek around Blue Gate, you should know you don’t have to complete all four objectives in one run or in a specific order. All four objectives are spread out across the map, so we recommend completing them when you spawn nearby.
However, if you have a full squad of three, you can finish the quest in no time if you split up the work. With how quests work in Arc Raiders, everyone in your party will earn credit as long as someone finishes the objective. So, if you want to finish the quest as fast as possible, you can send out each squadmate on a solo mission to complete one of the tasks. For the remaining task, everyone can head over after they finish their objective, but, ideally, the closest party member would complete it. As this can be quite a risky mission, we recommend coming in with a loadout that you don’t really care for or even a free one.
Below, we’ve listed where you can find all four objectives and how to complete them.
Stabilize the observation deck near the Ridgeline
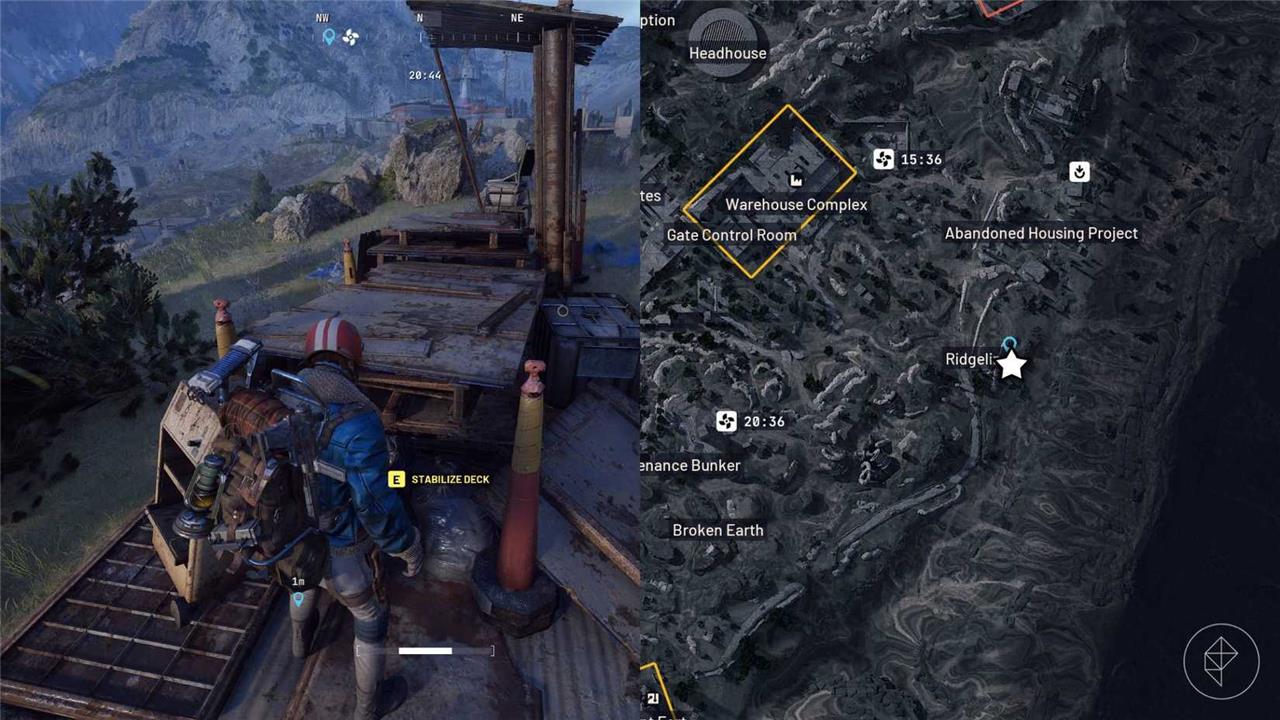
The observation deck can be found on the far east side of the map, and the best way to find it is to place a marker at the end of the “e” in “Ridgeline” on the map overlay. This will take you to a small shelter with some metal panels to interact with.
Enable the comms terminal near the Olive Grove
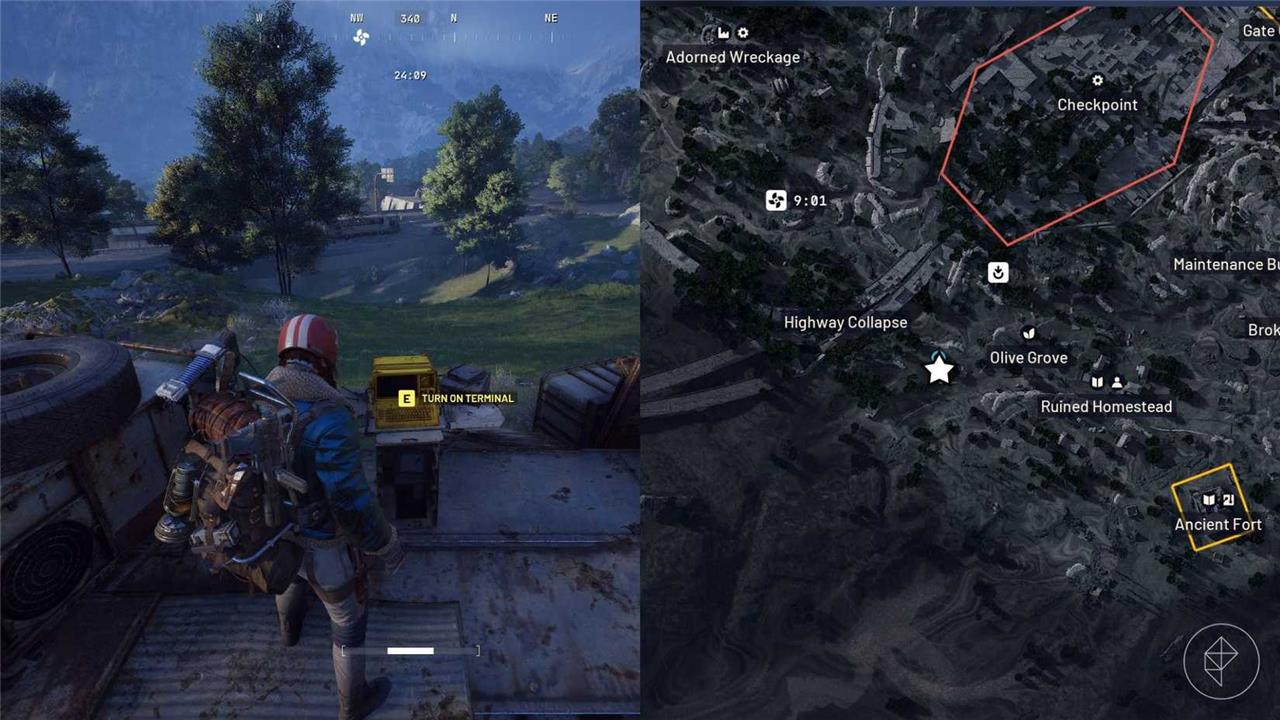
Between Olive Grove and Highway Collapse, you can find a yellow computer terminal overlooking the highway down the hill. Watch out for other players here though, as Olive Grove is a hotspot for folks trying to train up Scrappy.
Rotate the satellite dishes on the Church Roof north of the Data Vault
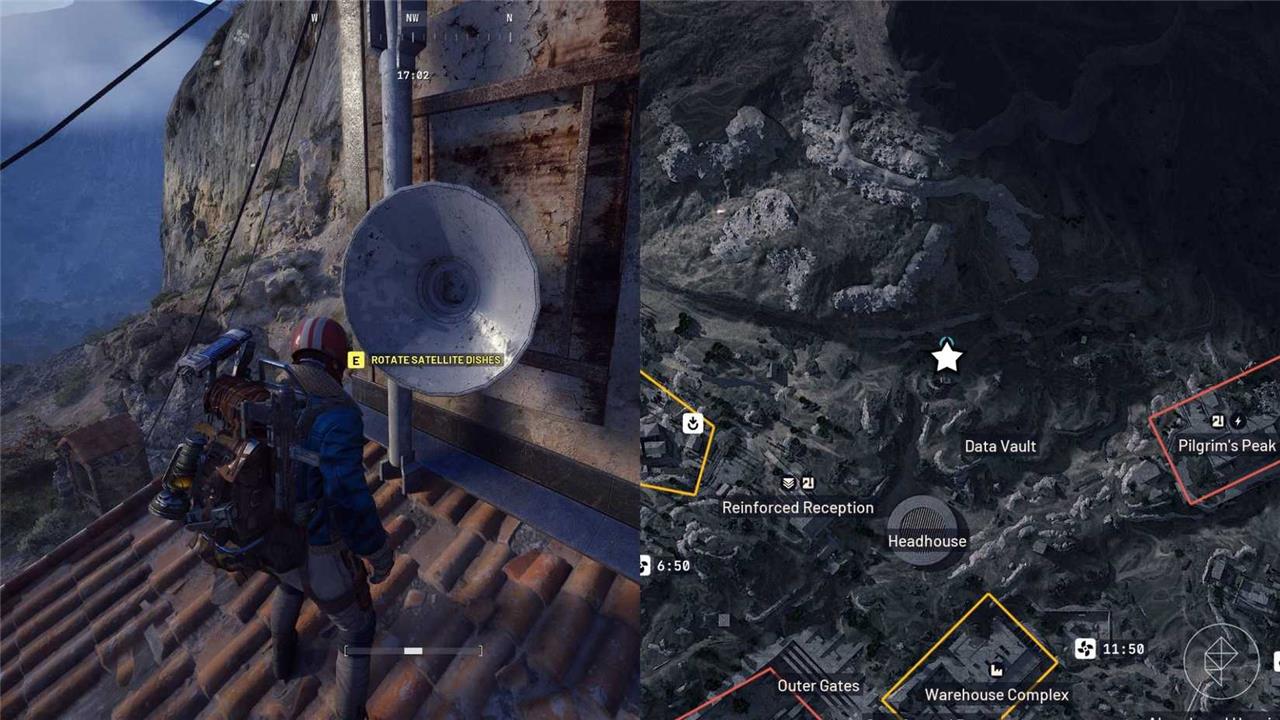
North-west of the Data Vault and directly west of Pilgrim’s Peak, you’ll find a small decrepit building with some crates and scaffolding you can ascend round the back. Climb to the top and interact with the satellite dishes to complete this one, then get off the roof before you get sniped.
Nail down the roof plates on the Raider structure near Trapper’s Glade
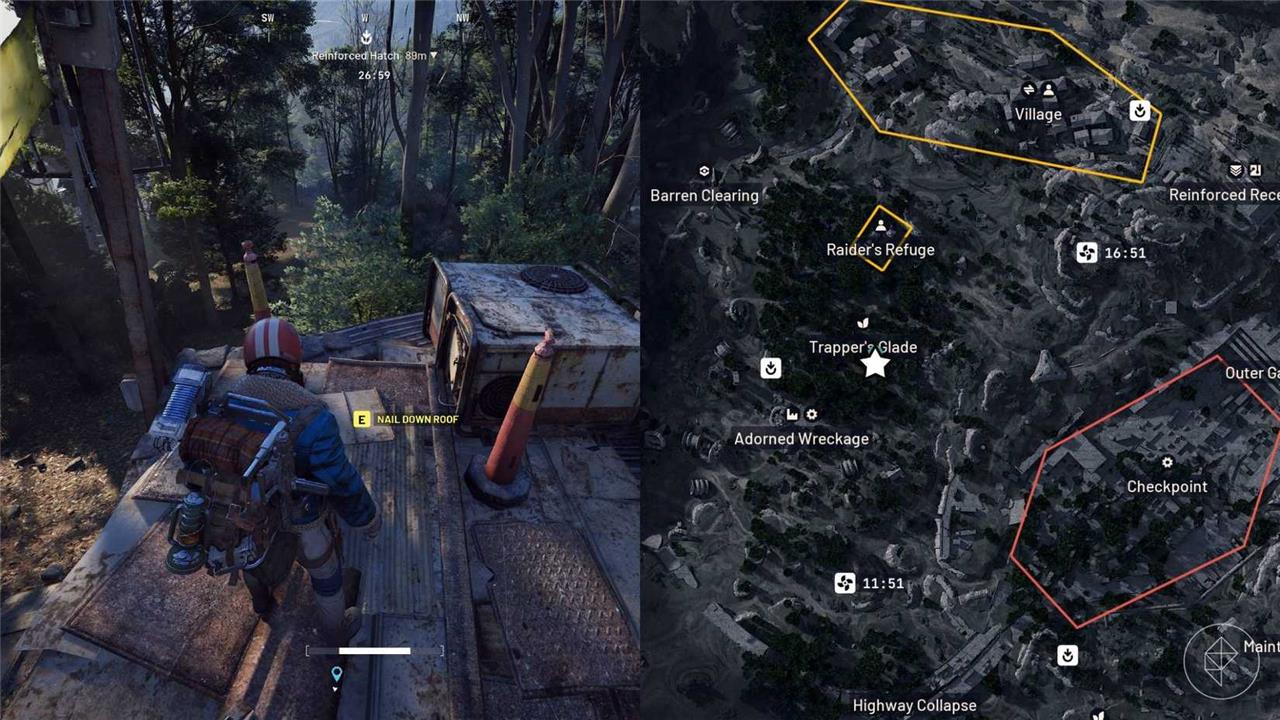
This objective is just below the “Trapper’s Glade” text on the map, in the forest. Again, you’re looking for a small shack, and some dislodged sheet metal on the roof to fix. This is near where players can spawn, and it’s in the middle of a cluster of named landmarks though, so watch out for other raiders.
Best route to finish all four objectives fast
Finishing all four “A First Foothold” objectives in one run mostly comes down to doing a clean clockwise or counter-clockwise loop around Blue Gate, while avoiding the heavy mid-map fighting. The most consistent “fast” route is to start from your spawn, pick the closest of the four corners, then commit to a full ring around the map edge instead of cutting through the center.
General routing rules
-
Hug the outer ring: Treat the quest as a perimeter run-stay on the outer roads and ridgelines, only cutting inward briefly to hit each objective building.
-
Do not backtrack: Always move toward the next corner; if you pass near an objective early, take it immediately instead of “saving” it.
-
Fight only when forced: Your time loss usually comes from getting stuck in big ARC fights mid-map, so prioritize stealthy movement and sprinting between cover over looting or extended fighting.
If you spawn north or east
From a northern or eastern spawn, the fastest consistent loop is:
-
Church dish (north) → Ridgeline deck (east) → Trapper’s Glade roof (west) → Olive Grove terminal (south).
-
Pathing tips:
-
From spawn, go straight for whichever of church or Ridgeline is closer on your map edge, then follow the ridge south or north to link them without dropping into the central valley.
-
After Ridgeline, move west using the upper treeline to reach Trapper’s Glade, then drop south through cover to Olive Grove, hugging rocks/trees rather than open roads.
-
If you spawn south or west
From a southern or western spawn, flip the loop:
-
Olive Grove terminal (south) → Trapper’s Glade roof (west) → Church dish (north) → Ridgeline deck (east).
-
Pathing tips:
-
From Olive Grove, climb toward the higher wooded ridge that leads into Trapper’s Glade rather than going through any big central encampments.
-
From Trapper’s Glade, stay on the west/north-west edge up toward the church, then cut across the northern edge to Ridgeline as your last stop before extracting or returning.
-
Speed and safety tricks
-
Take the highest ground you reasonably can; playing along ridges lets you spot ARC patrols first and detour before they see you.
-
If your team wipes after doing 1-3 objectives, do not feel forced to redo the route; the quest tracks each objective permanently, so next run just start from the nearest remaining one and finish the loop from there.
-
Use light, mobility-focused gear (high stamina, grenades, mid-range weapon) so you can sprint past trouble rather than committing to every fight.
If you describe your usual spawn side (north/east/south/west landmark you see most often), a step-by-step line using that exact starting point can be laid out.
Which objective should I start with for fastest completion
Start with whichever objective is closest to your spawn, then run a full loop around the map edge from there; this is fastest on average because spawn points vary and backtracking wastes the most time. A fixed “always start at X” rule is actually slower overall, since it often forces you to cross the dangerous middle of Blue Gate twice just to reach your first objective.
If you want a simple default when distance is roughly equal, prioritize the church satellite dish first, because from that high-ground corner it is easy to rotate along the northern ridge to Ridgeline, then continue your loop to the remaining two objectives without cutting through central hot zones.