Dive back into Destiny 2’s intense “Zero Hour” mission on Legend difficulty, where hidden switches hold the key to unlocking powerful new perks for the Outbreak Perfected exotic pulse rifle. Mastering the precise locations and timing of these elusive switches is essential to completing the “Outbreak Refined” quests and upgrading your weapon to its full potential. Whether on PC, PlayStation, or Xbox, this guide reveals exactly where to find and activate the crucial switch pairs that will elevate your gameplay.
“Outbreak Refined” is a bonus quest in Destiny 2’s reprised “Zero Hour” mission, which will allow you to unlock new perks for you to further customize your Outbreak Perfected Exotic Pulse rifle. To get these new perks, you’ll need to flip some hidden switches in the legend version of the mission each week. You can pick up “Outbreak Refined” from Ada-1 after you’ve completed “Zero Hour” for her once before.
In this Destiny 2 guide, we’ll walk you through how to complete the legend version of “Zero Hour” and finish the “Outbreak Refined” quest. If you need to upgrade the Intrinsic perk for Outbreak Perfected and pick up the new Vimana Junker Exotic ship, check out our guide on the “Zero Hour” vault puzzle.
How to complete ’Zero Hour’ on legend
To complete “Zero Hour” on Legend difficulty in Destiny 2, start by entering the mission and progressing through the initial combat and puzzle sections, keeping in mind you have only about 20 minutes to finish. After navigating the first rooms, head to the back corner and drop into the vent where you will find the first lever to activate. Continue moving through the mission, using movement abilities like grapples to speed up traversal over falling platforms and tricky jumps. In the large pit room, clear all enemies and activate the second set of switches found on scaffolding and near air conditioners, which are crucial for progressing the Outbreak Refined quest. After toggling these switches, proceed through the mission’s altered Legend path, defeating enemies and avoiding environmental hazards until you reach the incinerator room. Completing the mission on Legend unlocks new perks for the Outbreak Perfected weapon and advances the Outbreak Refined questline.
Before I tell you where to find the switches, first you need to know how to complete “Zero Hour” on legend. Unlike “The Whisper” mission, the route you’ll take in “Zero Hour” changes based on the difficulty, so you’ll need to learn a partially different path if you want to complete this quest.
Start up “Zero Hour” on legend mode and get ready to run. While the normal version of this mission gives you 40 minutes, on legend you only get 20, and have to fight against more difficult combatants.
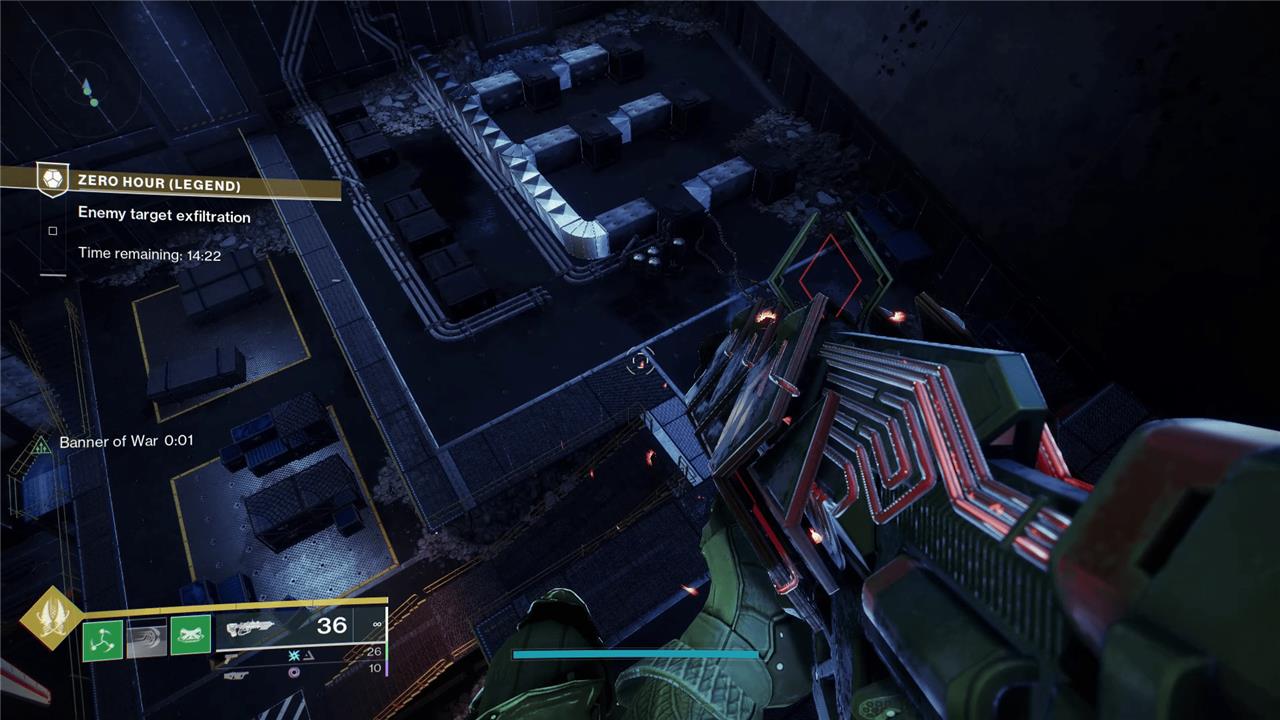
The first part of the mission plays out the same on both legend and normal, so proceed through the quest until you’ve killed all the Fallen, dropped down the elevator, and reached the room where you normally jump down to the ship on the bottom left. But this time, do not jump down. Instead, turn right.
You’ll see a group of air vents shaped like an E on the room. Run over to it and make your way to the top right vent. On the back side of the vent, you’ll see an open pathway. Take it.
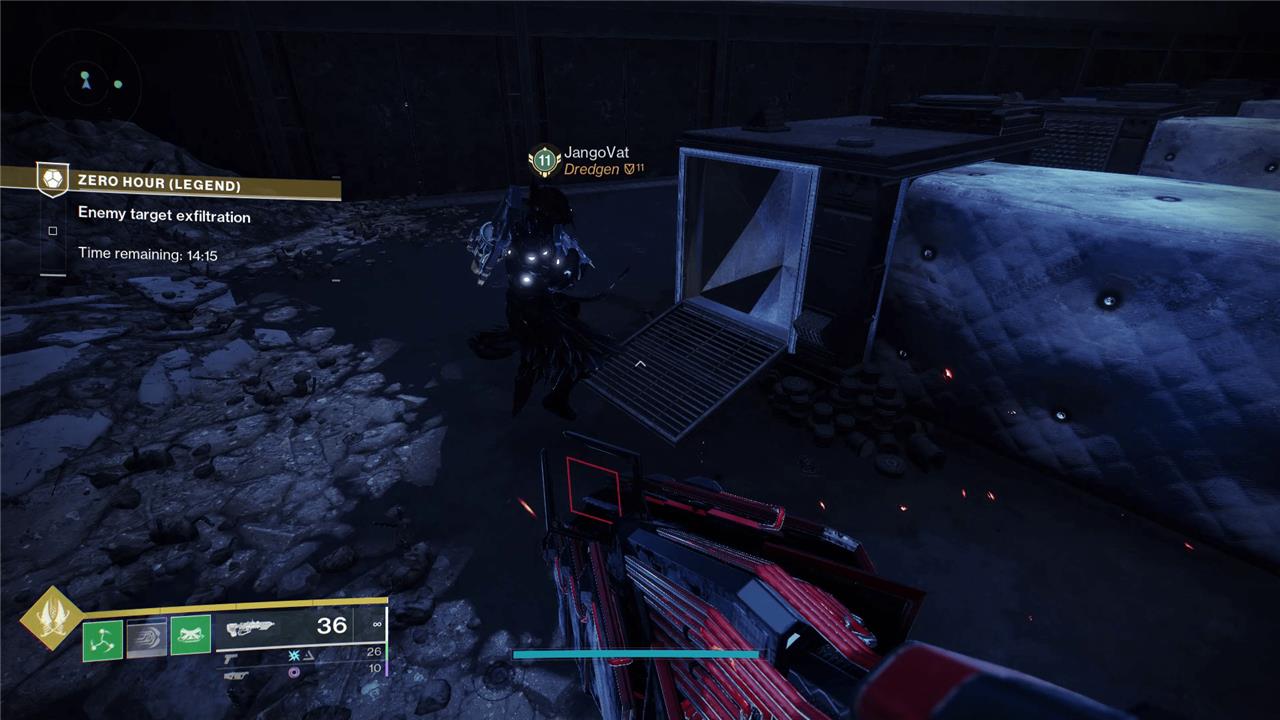
When you land, run forward and break the vent cover near the blue boxes. Go inside. Take a right and drop down the hole. Then go forward and drop down again.
You’ll now find yourself on a big, concrete lid, in a room with four other lids, numbered one through four. Ignore them for now and drop down to your left, into the watery drain. There’s a hole toward the bottom that will lead you to a platform. Stand on it and turn around to face where you jumped from. Go into the little pathway here.
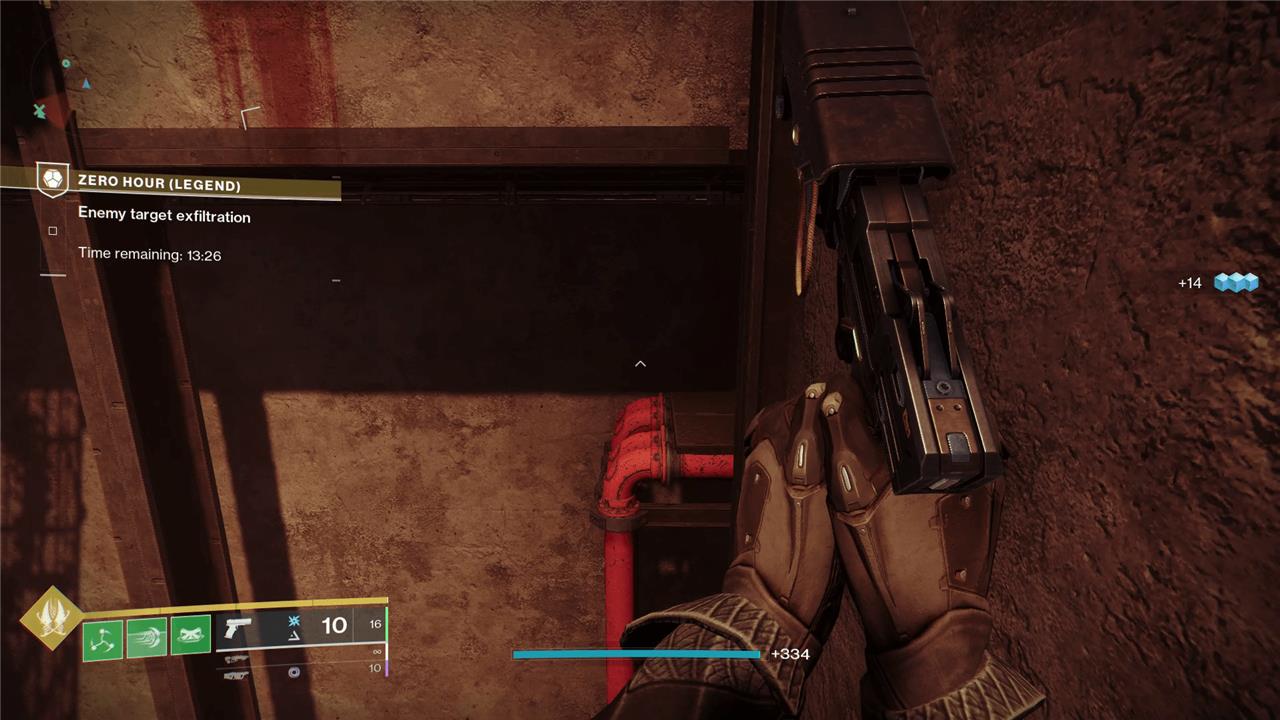
Now you’ll be in a bit of a pipe maze, and there are switches on the wall for you to throw. These switches correspond to the concrete lids. The lid you need to open is three, and you’ll find the switch for it in the back left of this maze. Run forward, jump up to the scaffolding on your left, and then jump down to the left again, so you land diagonally from where you entered this area. Go down the path and flip the switch.
Return to the concrete lids and climb on top of number three – don’t go in it. Use the lid as a jumping point to climb up the drain. At the top, take a left and head into the open vent on top of the boxes. Follow the path until you get to a big pit. Carefully jump into the cubbies here and kill the Fallen in your way. Jump from doorway to doorway until you can exit on the left side of the room, near the Captain. (If you throw the switch here, you’ll make this room much easier for your friends.)
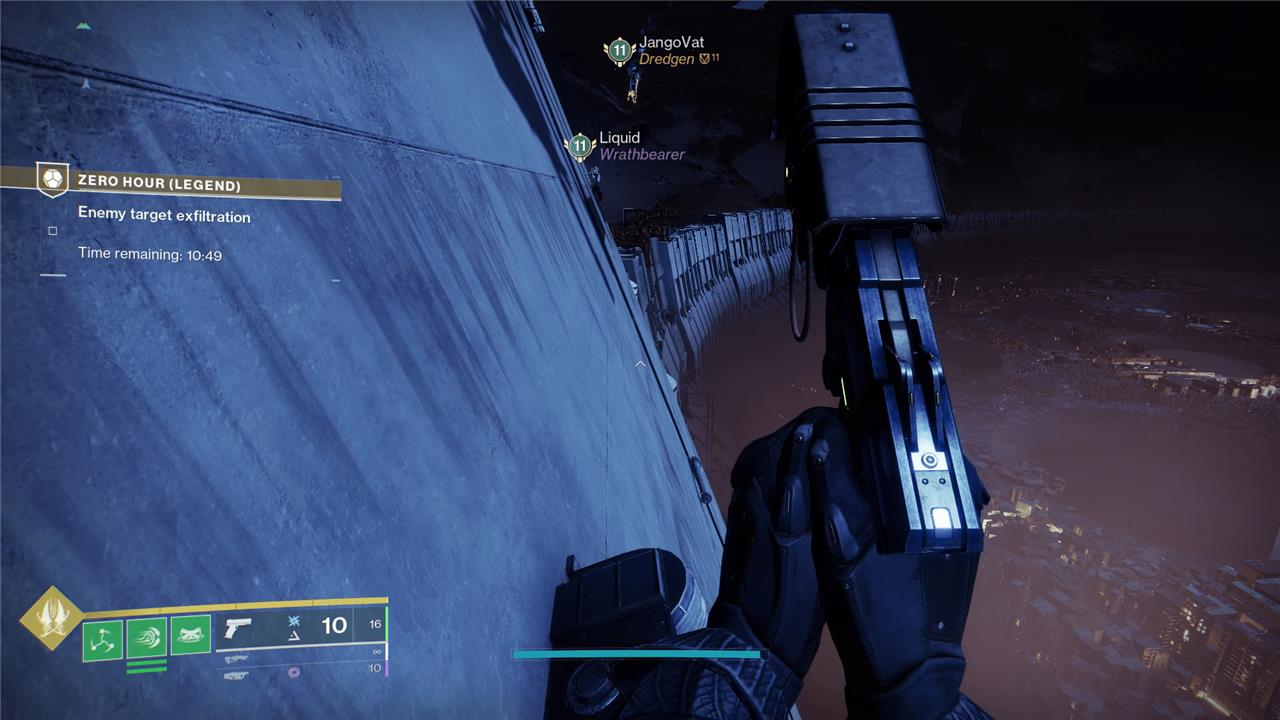
Follow the path until you reach outside the Tower. Take a left and look for the very small footholds along the wall. Climb the pipes and be careful of the small metal platforms, as they’ll collapse after a few seconds of standing on them. Round the corner of the Tower and keep going. Climb up to the open vent and be careful of the exploding shanks inside.
Take a right and slide down the chute. Make sure to jump at the end so you don’t fall into the pit. From here, jump into the pipe room on your right and then climb the pipes up to a landing. From there, look left and shoot out the vent. You’ll now be in the fan room, which is where the points converge.
Follow the normal route here until you reach the Cryptarch’s vault. Now you’ll need to know the secret vault path to stop yourself from being incinerated. Like on normal difficulty, this path changes every day, and is based on the burn for the mission (which you can check by opening your Ghost).
Check out the images below (courtesy of the Destiny 2 Lost Sectors X account and their clan) to find the legend route.
Arc path
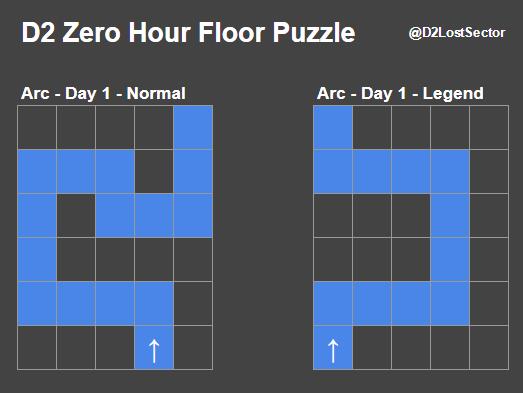
When the burn is Arc, you’ll start on the farthest left tile.
Void path
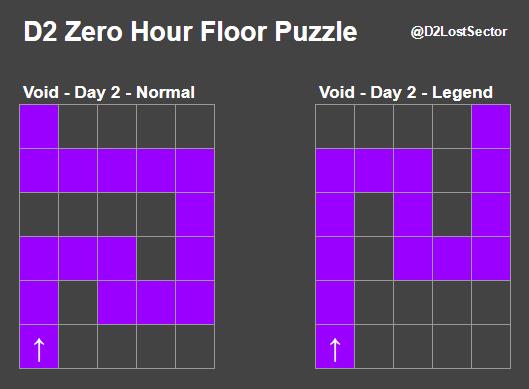
When the burn is Void, you’ll also start on the farthest left tile.
Solar path
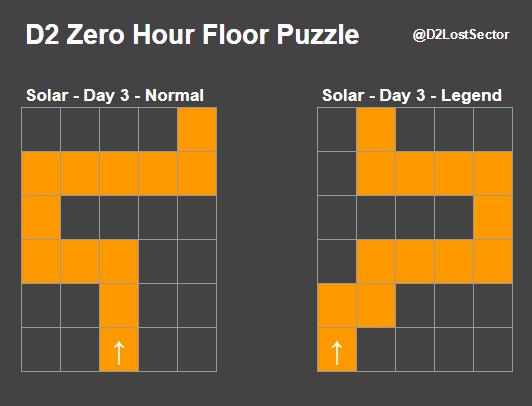
When the burn is Solar, you’ll start on the farthest left tile.
Once you’re through the maze, go take on the mission’s final boss to complete the legend version of “Zero Hour.”
Where to find the ’Outbreak Refined 1’ switches
To find the ’Outbreak Refined 1’ switches in Destiny 2, you need to play the “Zero Hour” mission on Legend difficulty. The first pair of switches is located after the initial combat and jumping sections, near the red pipes and silos area. One switch is found near two Fallen captains in a circular room, and the other is located up a vented path behind a hatch that opens when the first switch is activated. You must flip both switches within a 30-second window to progress in the quest. Successfully activating these switches on Legend difficulty is essential to unlock new perks for the Outbreak Perfected exotic weapon.
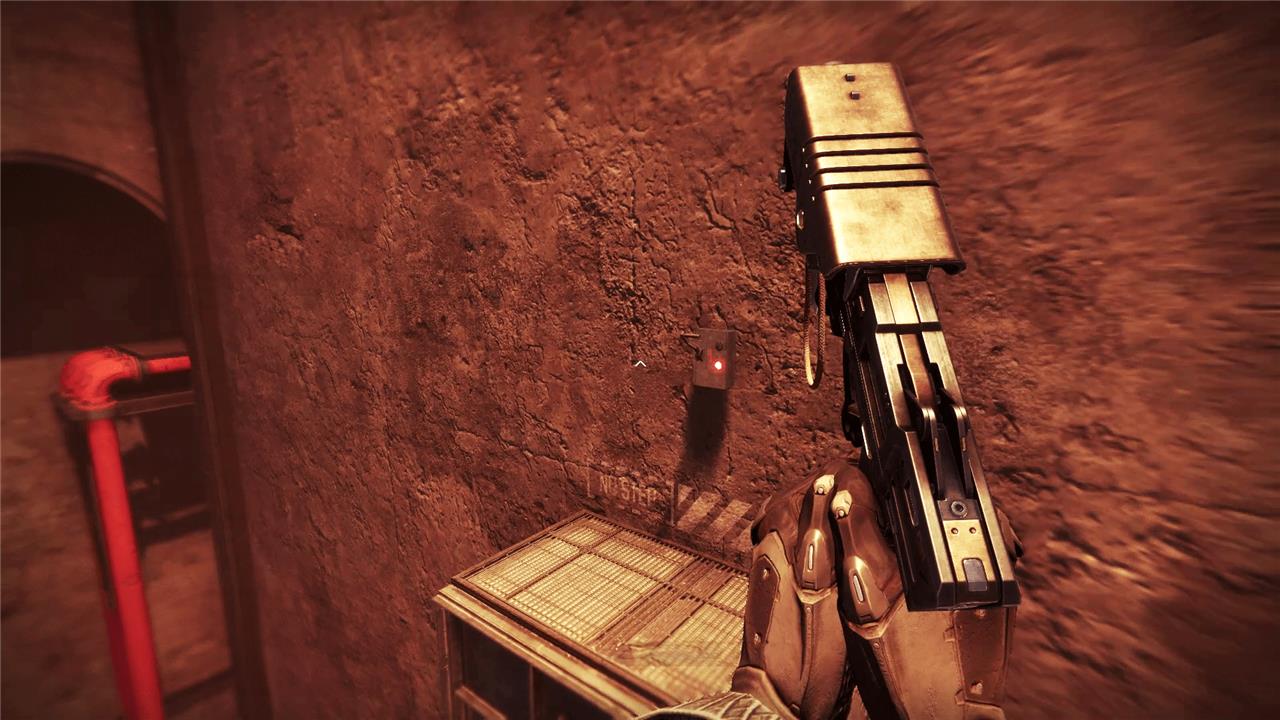
Once you know your way through legend “Zero Hour,” finding these hidden switches is fairly simple.
After you’ve killed enough Fallen with Outbreak Perfected to advance the “Outbreak Refined 1” quest, head into legend “Zero Hour” and make your way to the concrete lids – the ones labeled one through four. Flip the three switch like normal. But this time, on your way back, stop by the scaffolding in the center of the pipe maze. On the sides of the room, you’ll see what looks like two big air conditioners. Above one of them, you’ll see a switch. Flip it and you’ll get a countdown on your screen that says “Catalyst Switch Primed” and then a short countdown.
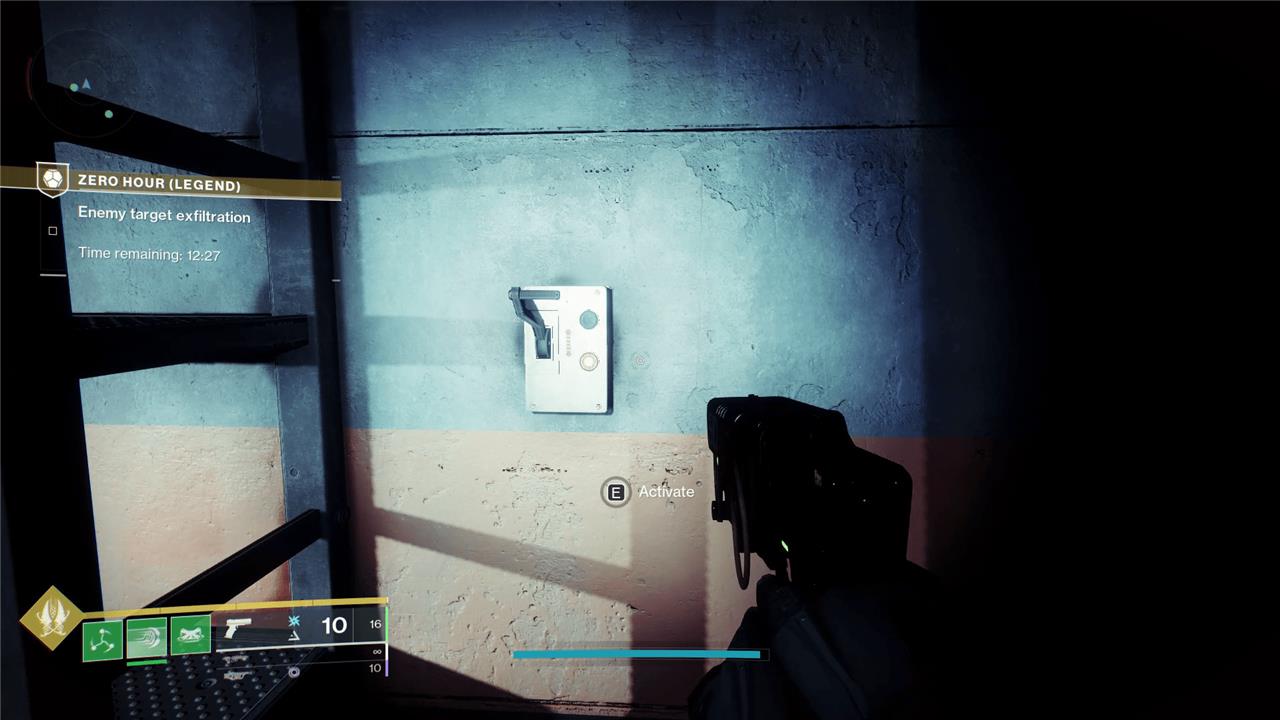
Run as fast as you can up to the number three lid and climb all the way to the top. Go through the doorway and turn left. Next to the shelf, you’ll see a switch on the wall. Flip it before your timer hits zero and you’ll finish this part of the quest. If the timer is a little too quick for you, have no fear, as you can do this route backward as well, and it’s actually a bit easier. Simply throw the switch next to the shelf, jump down the hole, and make your way back to the air conditioner switch.
Once you’ve successfully thrown the switches, you need to complete “Zero Hour” on legend. If you’ve already wasted too much time on the switches, you can restart the mission and you’ll stay on the same step – no need to do the switch puzzle again.
When you finish the mission on legend, you’ll be able to take the quest back to Ada-1, who will give you the Rapid Hit perk that you can now use to customize your Outbreak Perfected.
Where to find the ’Outbreak Refined 2’ switches
To find the ’Outbreak Refined 2’ switches in Destiny 2, you need to enter the Legend difficulty version of the “Zero Hour” mission. After passing the first lever and entering the large pit room, clear out all the Fallen enemies and activate the second set of switches located there. Then, head to a small cubbyhole down and to the right from the mission entrance; on the right wall inside this cubby, you’ll find another lever to flip. Activating these switches within the time limit is key to progressing in the Outbreak Refined II quest and upgrading your Outbreak Perfected weapon.
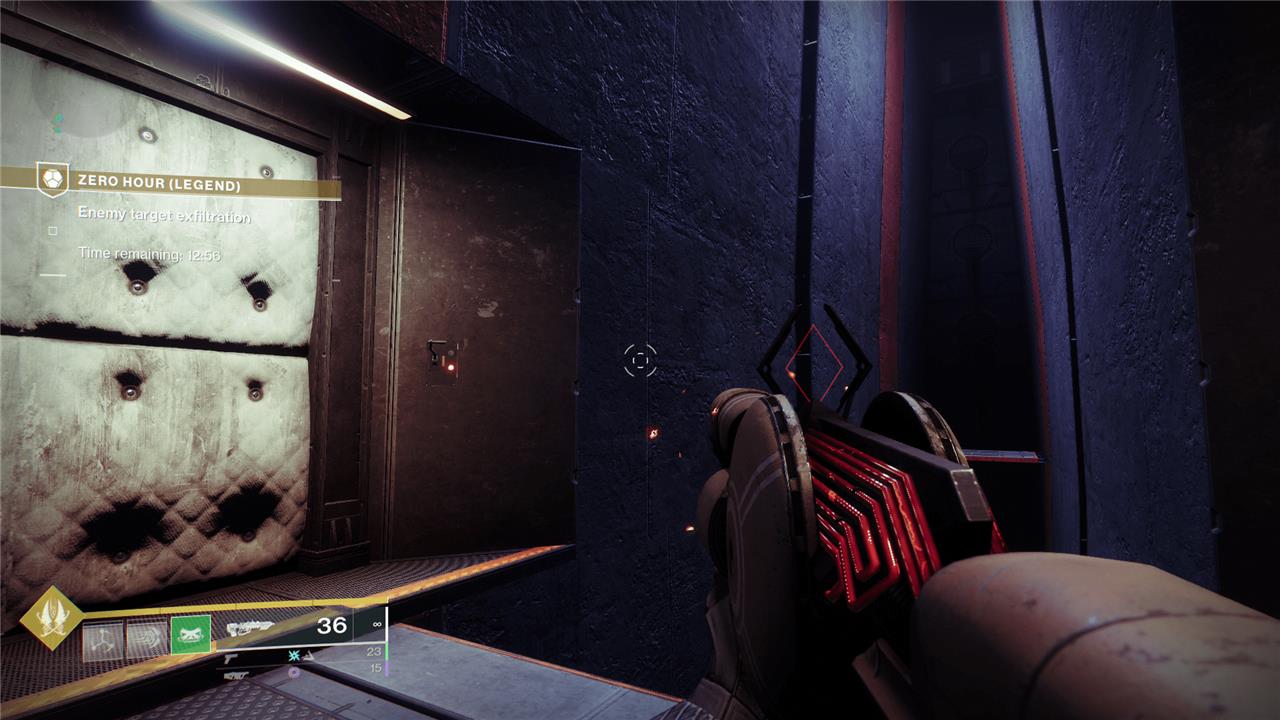
Kill enemies to collect SIVA clusters with Outbreak Perfected for “Outbreak Refined II,” then head into “Zero Hour” on Legend.
In the room directly after the first lever – the big pit room – you’ll find the second lever set. This pairing is far less stressful than the first, so clear out all the Fallen in the room and throw the switch at the end to make your life a little easier.
Head back to the first little cubby in the room, directly down and to the right from where you entered the mission. You’ll see a lever on the wall on the right side of the cubby. Throw it and then run toward the exit of this room, like you’re proceeding with the mission normally.
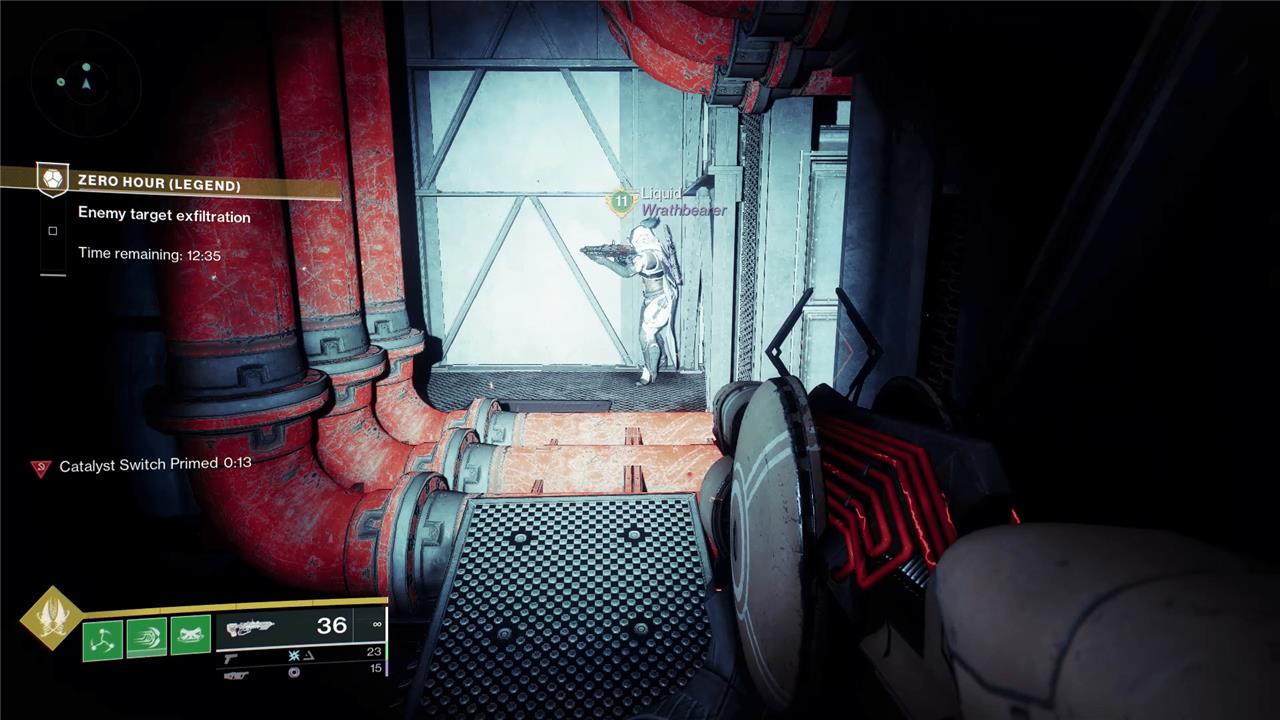
Continue along the path and through the vent. When you drop down, you’ll see some red pipes, which will lead you to the outside of the Tower and the rest of the mission. But do not follow these pipes just yet. Instead, walk over the pipe and turn left. The switch is on the wall. (The Hunter in the image above is aiming at it).
Throw the switch and you’ll complete this step of the quest. Once again, you’ll need to complete the mission on Legend to get your bonus perk. But once you do – and return to Ada-1 – you’ll get the Rewind Rounds perk, which is very powerful in PvE.
Where to find the ’Outbreak Refined 3’ switches
To find the ’Outbreak Refined 3’ switches in Destiny 2’s Zero Hour mission on Legend difficulty, after following the usual path through the labyrinth, instead of jumping left as before, head right to locate the first switch on the wall section. Then proceed left as normal to the final drain area, where you’ll find a series of small pipes stacked three high. Jump to the top of these pipes to reach the second switch. Activating both switches within the time limit will prime the Catalyst Switch, allowing you to complete this step of the Outbreak Refined III quest efficiently.
This step of the quest has a brief kill requirement ahead of it, like all the others. But this time you need to launch into The Devil’s Lair Strike, which you can find on the Cosmodrome. Once you’re done with that, head into “Zero Hour” on Legend as usual.
Continue through the mission until you pass the first and second switch sections in this guide. Almost immediately after the second set of switches, you’ll come across the third.
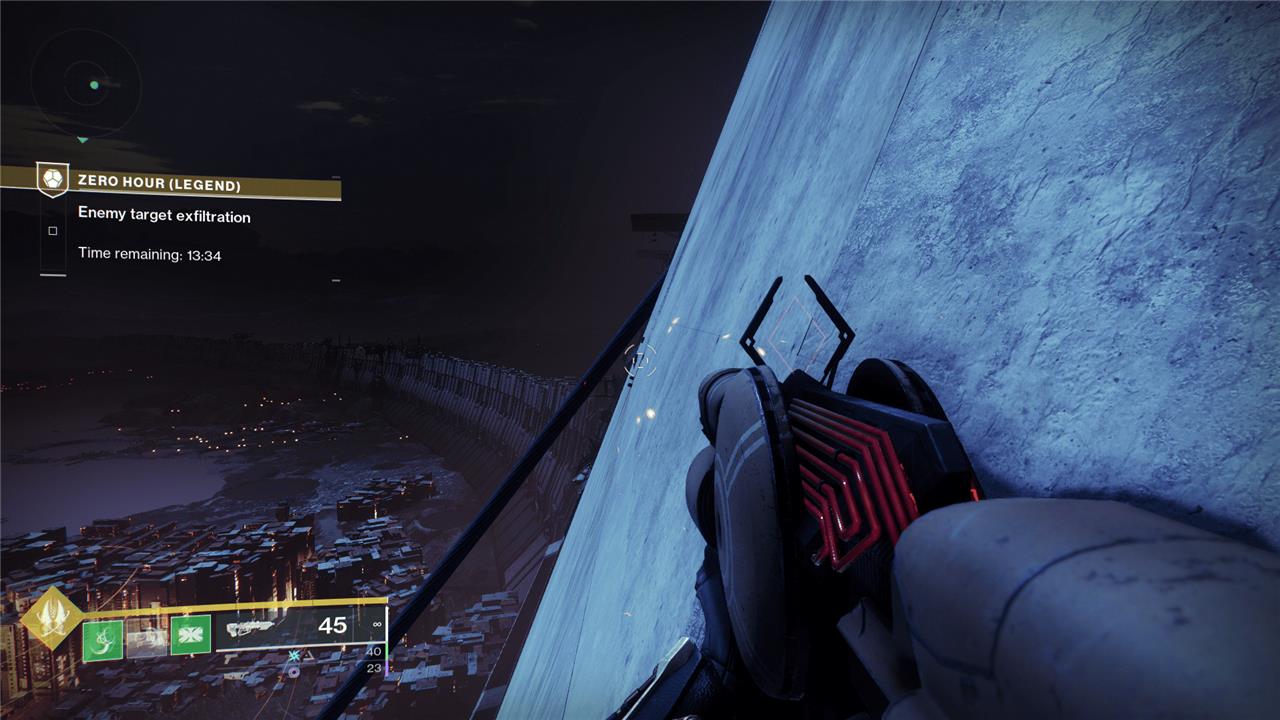
Once you head outside, on the wall of the Tower, you’ll be on the lip of a little drain. Look to your right and you’ll see a thin platform next to a wall switch. This is your starting point.
Jump to your right and flip the switch to start the timer.
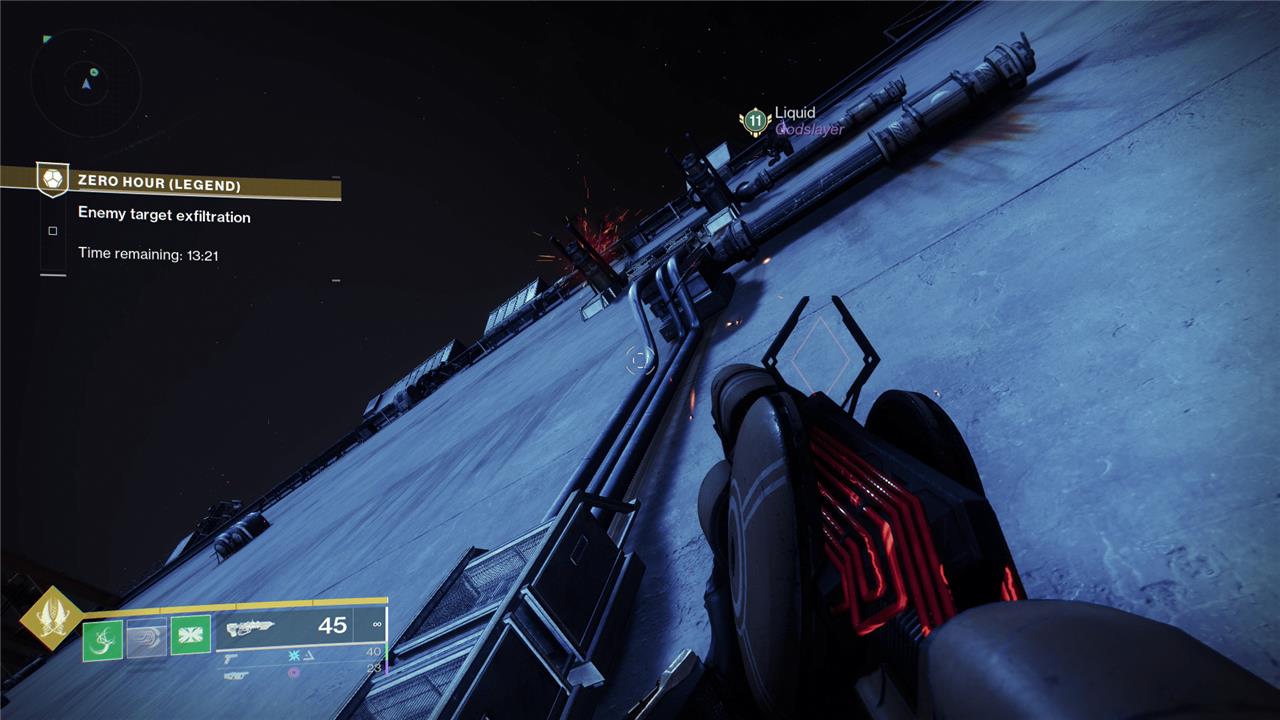
Once you’ve flipped it, turn around and jump across the wall in the direction you’re supposed to go to progress the mission. About halfway, you’ll find a collection of pipes stacked on top of each other with minor jumps between. Climb up these pipes.
If you’ve rounded the corner or jumped onto the broken pip that’s all alone on the wall, you’ve gone too far.
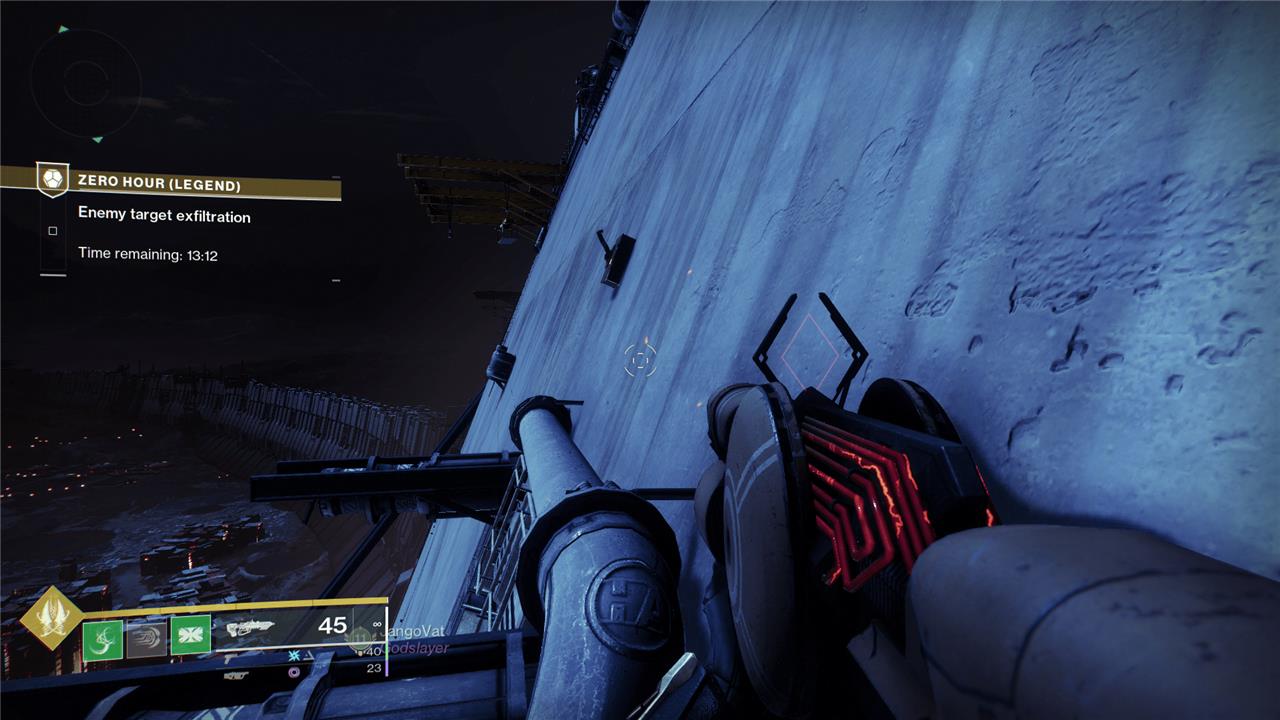
At the top of the stack of pipes, you’ll find the second switch on the wall. Flip it in time and you’ll complete the final Outbreak Refined quest and unlock the Headseeker Exotic Perk for your Outbreak Perfected.
Where exactly are the switches hidden in Destiny 2’s ‘Zero Hour’ on Legend difficulty
In Destiny 2’s Legend difficulty version of the “Zero Hour” mission for the “Outbreak Refined” quest, the switches are found in three distinct pairs, each requiring precise navigation and timing:
-
First Pair of Switches: These are located early in the mission, right after the initial combat sections and near the start of the jumping puzzles. You will find them in a nook area after dropping down and turning left, near concrete lids that you interact with during the quest.
-
Second Pair of Switches: These are situated in a storeroom area accessible via an alternate route through the Covert Passage. After entering the vents under a dropship, head towards ventilation shafts shaped like a capital “E.” The switches are on ledges around red pipes-one on a small ledge in a corner and the other on the opposite side of the area. Activating these triggers a “Catalyst Switch Primed” countdown.
-
Final Pair of Switches: After activating the second pair, you must quickly reach the third set before the timer expires. This involves climbing up to the top of the number three silo door, entering a doorway, and turning left to find a switch on the wall next to a shelf. If the timer is too short, you can complete this sequence in reverse order, starting from the switch near the shelf and moving back to the air conditioner switch above the scaffolding in the pipe maze center.
Completing all three pairs of switches in one run is possible and essential for progressing the Outbreak Refined quest. If you fail or run out of time, restarting the mission will keep you on the same quest step without needing to redo the switch puzzle.
Are the switch locations different in the Legend difficulty compared to normal
Yes, the switch locations in Destiny 2’s “Zero Hour” mission differ between Legend and normal difficulty, primarily because the route changes daily based on the mission’s burn and the Legend difficulty introduces a new path with additional challenges. On Legend difficulty, instead of the normal route, you take a different path involving air vents shaped like an “E,” concrete lids, and a pipe maze with scaffolding where the switches are placed differently compared to normal mode. The switches still come in pairs and must be activated within a countdown timer, but their exact positions and the sequence to reach them are unique to Legend difficulty. This altered layout requires players to navigate through new areas such as the vent system and silo doors, making the switch hunt more complex than on normal difficulty.
