Hidden deep in the Rabella Wetlands Sky region, the Eshos Shrine tests your precision and patience with its clever “Airway” puzzle. This guide walks you through every step to solve it, reach the hidden chests, and claim your well-earned Light of Blessing.
When you’re done, our shrine locations page or interactive Hyrule map can direct you toward something else to do.
Eshos Shrine location
Eshos Shrine sits on the western edge of Thyphlo Ruins in the Great Sky Island region. Coordinates mark it at (0453, -0385, 1947), north of the ruins’ main floating mass amid the clouds. From the Upland Zorana Skyview Tower, glide southwest toward the ruins, then drop to the shrine’s glowing green entrance on a lower ledge. Look for it near Recall-activated platforms that reveal the path during low visibility.
You’ll find the Eshos Shrine in Tears of the Kingdom‘s West Necluda region, southeast of the region’s Dueling Peaks. The coordinates are (1564, -1945, 0157).
Eshos Shrine walkthrough
Eshos Shrine challenges players with a mix of precise timing and smart use of Zonai devices. Activate the launchers to move between platforms and reach higher areas, watching the rhythm of moving parts carefully to avoid falling. Use Recall to manipulate moving platforms and adjust their positions, then glide to the final section. At the end, use a well-timed jump or launcher boost to access the altar and claim the Light of Blessing.
The Eshos Shrine is all about using Link’s shield, part of Tears of the Kingdom‘s “Combat Training” trials. If you don’t have any shields for whatever reason, don’t panic – the shrine’s got some for you.
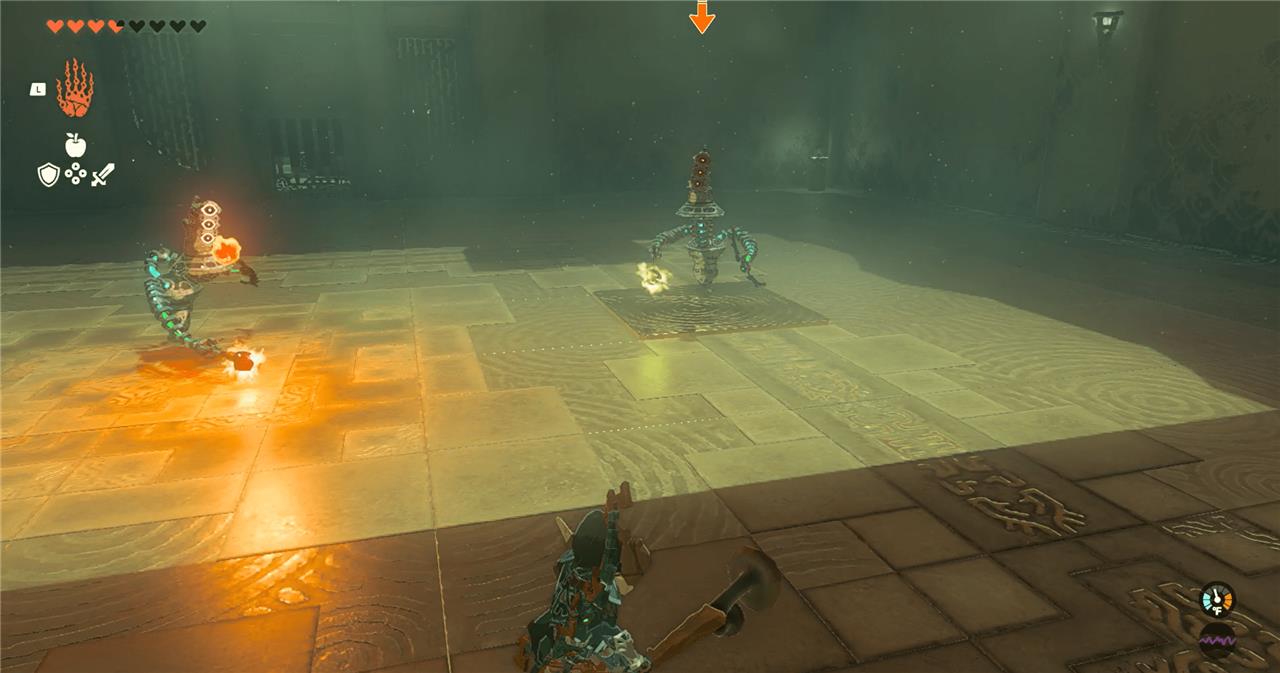
1. Head down the steps and into the main chamber. Get close enough to the Construct in the middle of the room and it’ll evolve and prepare for an attack.
2. The screen will prompt you to deflect projectiles from the Construct, noting that other attacks won’t work. It’ll send a projectile, and you’ll deflect it.
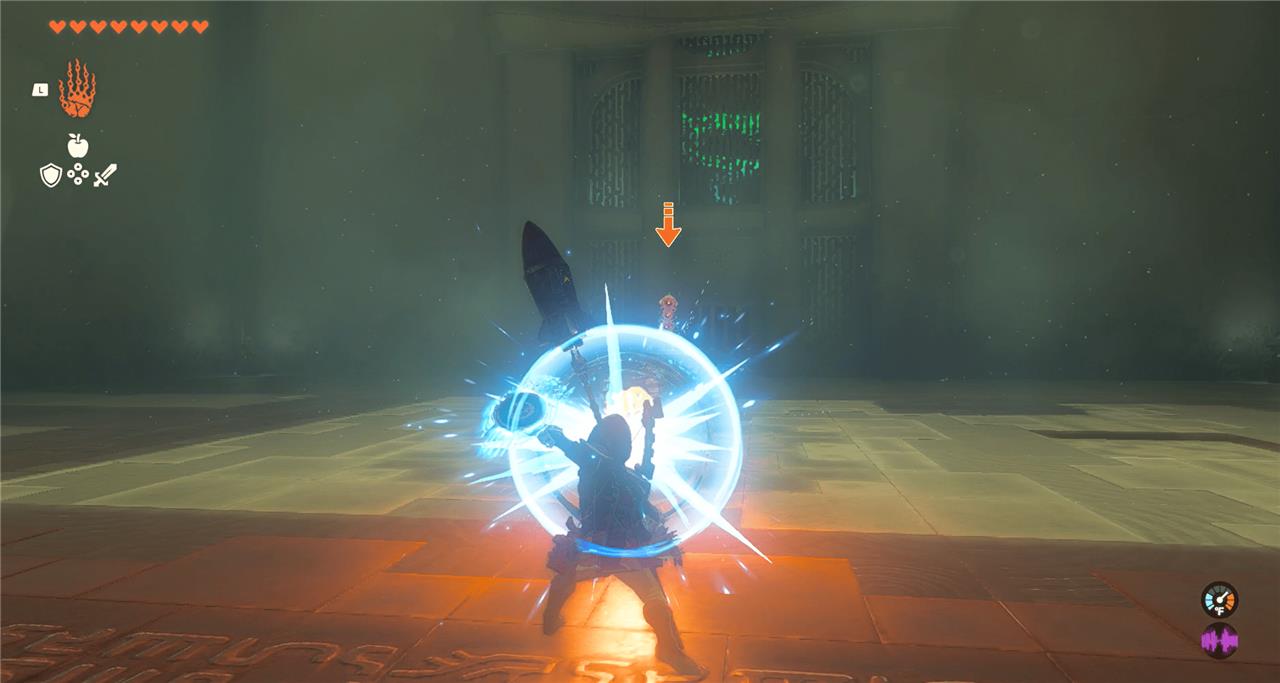
3. After your first deflect, a second Construct will appear, and you’ll have to deflect projectiles from both. The trick is that they’re both different elemental projectiles, so you’ll use different shields for each. We used a spiked Boko shield for the yellow projectile and a Zonaite shield for the red projectile. The shrine provides a rusty shield and a wooden shield, which follow the same properties – i.e., use the wooden shield for the yellow projectile (red is fire!), and the metal for the red projectile.
What are the best shield techniques learned in Eshos Shrine
The key shield techniques Eshos Shrine teaches (and that are worth mastering for general play) are:
1. Perfect guard (projectile parry)
-
Hold ZL to raise your shield, then tap A at the moment a projectile is about to hit you to perform a perfect guard.
-
This reflects the projectile straight back at the enemy, often one-shotting basic Constructs and many other foes that rely on ranged attacks.
Tip: Practice on slow fireballs first (like in the shrine) so you can learn the timing window, then apply it to faster attacks such as beams or magic shots.
2. Matching shield material to element
-
Use a metal or Zonai shield to reflect fire projectiles so your wooden shields don’t ignite and break.
-
Use a wooden (non-metal) shield for electric projectiles so you don’t get shocked and drop your gear.
Example: In the shrine, you parry the fire Construct with a metal shield, then swap to a wooden shield to safely reflect electricity from the second Construct.
3. Reading attacks and positioning
-
Line up directly in front of the shooter before raising your shield so the reflected projectile reliably tracks back to them.
-
Watch the enemy’s “tell” (staff glow, arm raise, sound cue) to anticipate when to press A, instead of staring only at the projectile.
4. Applying shrine lessons in the overworld
-
Use perfect guards to reflect elemental shots, Guardian-style lasers, and Gleeok beams, saving arrows and weapon durability.
-
Carry at least one good metal shield and one wooden shield so you can quickly swap depending on whether you’re facing fire or electricity.
If you tell me what enemies you’re struggling with (e.g., Lynels, Gleeoks, Wizrobes), I can give you specific shield-parry examples using these techniques.
What shield types are best for different enemy attacks outside shrines
Outside shrines, think about shields in terms of material first, then raw defense. Here’s a quick matchup guide for Tears of the Kingdom, using the same logic Eshos Shrine teaches.
Elemental attacks
-
Fire attacks (fire arrows, fire keese, flamethrowers): Prefer non-wood shields (metal or Zonai) so they don’t ignite, and use them for perfect guards to send fire back.
-
Electric attacks (electric Lizalfos, electric keese, lightning weapons): Prefer wooden shields so you don’t get shocked or disarmed; avoid holding a metal shield during lightning storms.
-
Ice attacks (ice breath, ice arrows): Any high-defense shield works; the main danger is freezing, so prioritize dodging or perfect guarding rather than just face-tanking.
Physical melee and arrows
-
Normal melee hits (Bokoblins, Moblins, basic Constructs): Use whatever has the highest defense and durability; knight-/royal-tier, Zora, Radiant, or Zonaite shields are ideal.
-
Arrow spam (archer camps, Yiga): Broad, durable shields are best; even mid-tier wooden or Boko-type shields are fine as “arrow catchers” you don’t mind breaking.
Strong/enraged enemies
-
Lynels, big bosses, and high-tier Constructs: Use your highest-defense shield (Hylian, Royal Guard, Savage Lynel, Mighty Zonaite, etc.) and rely on perfect guards or flurry rush instead of blocking raw hits.
-
Beam-style or big wind-up attacks (Gleeoks, late-game bosses): Any strong shield can work if you perfect guard; higher defense just gives you more room for error if you mistime or have to block.
Environmental hazards
-
Thunderstorms: Unequip or avoid metal shields unless you absolutely need them; keep a decent wooden shield ready as your “storm loadout.”
-
Fire zones (Depths with gloom fire, flamethrower devices): Favor metal or Zonai shields entirely to avoid constant burning.
If you tell me which enemies are giving you the most trouble (name + region), I can suggest a specific shield “loadout” and technique for that situation.