Cal Kestis’ fight continues, tougher and more open than before. New powers, hidden paths, and surprises test every decision you make. Before you ignite your saber, here are twelve things that might just change the way you play.
Star Wars Jedi: Survivor is as dense as beskar steel. As Cal Kestis – a padawan who survived Order 66 and then became BFFs with the cutest droid in Star Wars canon – you travel across the galaxy to swing a laser sword and perform a bunch of high-wire space parkour. If you played the predecessor, 2019’s Star Wars Jedi: Fallen Order, its trappings may feel familiar. You’ll just find more: more droids to fight, more planets to explore, and of course, more walls to run on. Here are 12 things you should know before starting.
It’s worth brushing up on the story
The first game, Star Wars Jedi: Fallen Order, sets up Cal Kestis’s fight against the Empire years after Revenge of the Sith. It covers his escape from Inquisitors, alliances with Cere and Greez, and battles across planets like Bogano and Kashyyyk. Survivor picks up five years later, so knowing those events, characters, and skill mechanics smooths your path ahead. Replay it or check recaps to avoid confusion on story beats and controls.
Star Wars Jedi: Survivor‘s story takes place five years after the events of Star Wars Jedi: Fallen Order. The sequel technically has a recap of the first game, but that recap is heavy on the vibes, and light on the actual plot details. (Pop quiz: Who’s Jaro Tapal?) Before you start, take time to familiarize yourself with the story and timeline of Star Wars Jedi: Fallen Order. It’ll make following Survivor‘s plot much easier.
Navigation assist – and other tips for finding your way
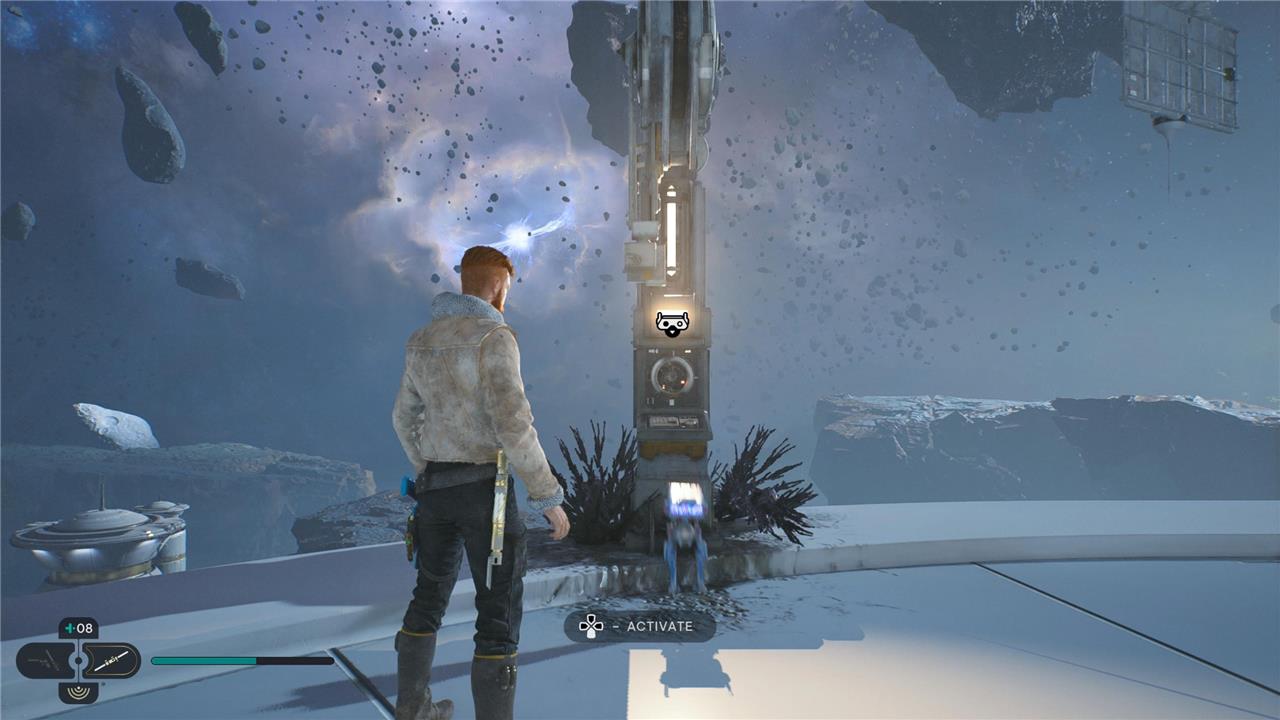
Your map and compass are useful, but the real trick lies in learning the terrain. Use meditation points as anchors to reorient yourself and fast travel between key areas once you’ve found them. Don’t ignore environmental cues-distinct landmarks, unusual rock formations, or local wildlife often hint at hidden routes and short cuts. The Force sense ability can also highlight interactive elements or secrets you might miss at first glance, saving you from wandering in circles later.
Star Wars Jedi: Survivor is first and foremost an exploration game. As such, you may spend a good amount of your play time trying to figure out where to go between objectives. Navigation assist – a setting that adds an icon showing to the mini-map you where you to go and can be toggled in the gameplay menu – will go a long way toward pointing you in the right direction.
There are other methods for figuring out your place in the galaxy. Parsing the map reveals more hints than you might expect; green doorways and yellow brackets indicate pathways you can currently pass, while red objects mean you don’t have the necessary upgrade yet. You also might spot a pathway in the architectural rendering that you otherwise missed.
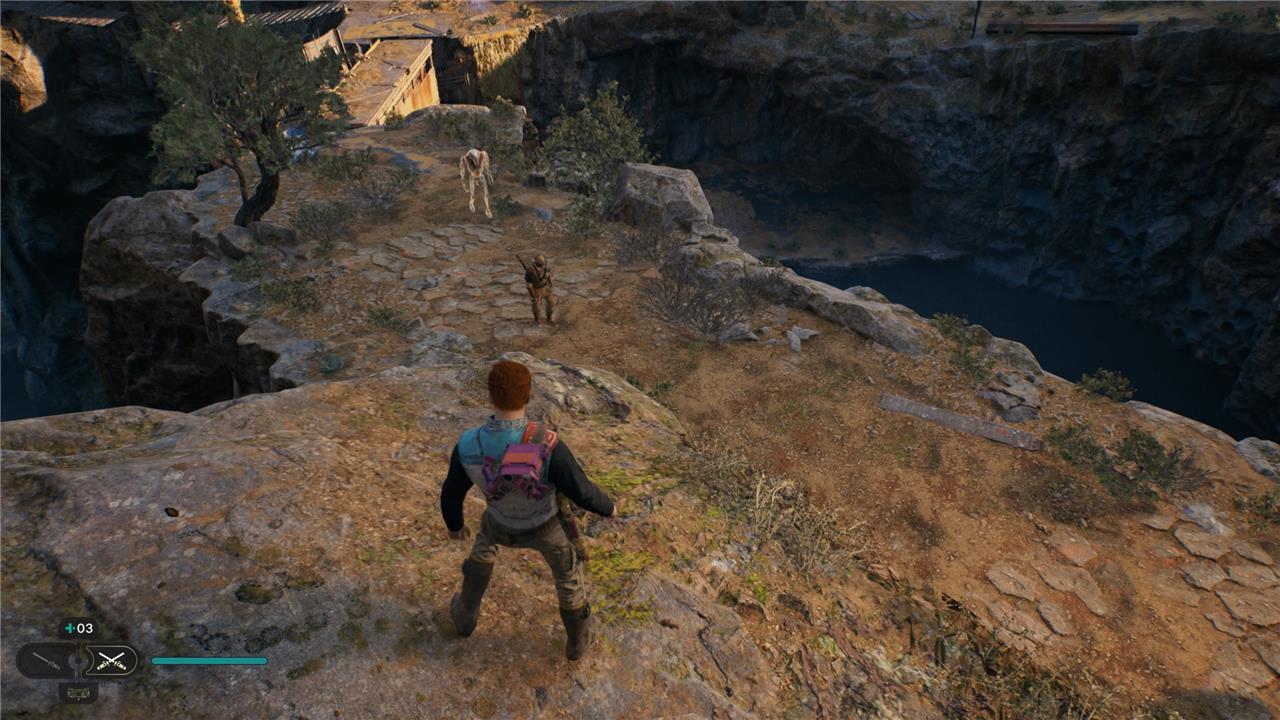
Pay close attention to your environment as well. White ledges are the start of climbing routes. Many pathways are tucked behind barely perceptible cracks in walls. (Yes, Jedi: Survivor does the shimmy-load-screen thing.) Most of all, keep an eye out for walls with rivets or scratches; you can usually use them to wall run to a new area.
Always double-jump into wall runs
Master wall runs demand precise timing: jump, quick boost, then two consecutive wall jumps to extend your momentum and reach higher ledges.
Wall running is a key traversal technique in Star Wars Jedi: Survivor. Pro tip: Double-jumping into a wall run will give you more height at the start, thus giving you more height when you end the wall run as well. This will help you clear some of the longer gaps in the early game. (You eventually get a midair dash ability that makes wall running a breeze.)
Turn off fall damage, and mess with other settings
You can switch off fall damage entirely if you prefer a smoother experience, letting you take bigger leaps without fear of restarting from checkpoints. The settings menu also includes options to tweak combat difficulty, navigation assists, and hint frequency, so you can tailor the adventure to your comfort level. Adjusting these can make exploration more relaxed or more demanding, depending on how you want to play.
Star Wars Jedi: Survivor features a deep array of accessibility settings. The first one you should turn off? Disable Fall Damage, under the gameplay submenu.
Getting rid of fall damage doesn’t make you invulnerable to receiving damage from height, a fact AELGAMES has confirmed through much testing. (Sorry, Cal!) It makes it so when you fall into an abyss during a platforming challenge, you respawn nearby without losing health. There are a ton of tough platforming gauntlets in Jedi: Survivor. You will fall. A lot. Ensuring you don’t lose health each time will save you many, many headaches – including the one where you lose a bunch of health because it took you five tries to cross a chasm, and then die from an errant blaster shot when you reach the other side.
There are other settings you should try as well. Arachnophobia Safe Mode in the gameplay submenu makes spider-like enemies look less like spiders. Dialogue Line Skipping allows you to fast-forward dialogue lines in rote interactions, like conversations with shopkeepers or quest-givers. And if you’re looking to tone down the gorier bits, you can deactivate Human Dismemberment in the accessibility submenu.
Lean on your allies
Allies make a big difference in Jedi: Survivor. Companions like Bode or Merrin can turn a tough fight around with their unique abilities, so use their help whenever it’s available. Outside of combat, they can assist with puzzles or traversal, opening new paths and shortcuts. Building trust with them doesn’t just make the story richer-it also brings practical advantages during exploration and battle.

Some story missions pair you up with one of various allies (left unspecified for spoilers). Activating the special ability of whoever’s accompanying you (R1 square on PlayStation) stuns enemies, giving you some breathing room to either heal or dish out damage. It’s tied to a cooldown, but that cooldown is vanishingly brief. Cal was largely a lone wolf in Jedi: Fallen Order, so it’s easy to forget he’s not always alone in Survivor. Don’t forget to use ally abilities liberally!
Your lightsaber is great at blocking
Your lightsaber isn’t just for attacking-it’s one of the most reliable defensive tools you have. Perfect timing lets you deflect blaster bolts back at enemies or break an opponent’s guard during melee combat. Learning each enemy’s attack rhythm helps you block and parry more consistently, saving your health and force energy. Some heavy strikes can’t be blocked, so watch for visual cues and dodge instead to stay alive during tougher fights.
As with all soulslikes, parries are indeed an effective defensive move in Jedi: Survivor, but don’t sleep on blocking. As long as you still have block meter remaining (that’s the white one in the bottom-center of the screen), you’ll be able to automatically block most attacks. It’s when your enemy starts to glow red that you should be careful. Those attacks are unblockable. Dodging works. Sometimes, though, you’ll get more distance between a foe by double-jumping out of the way.
And at being a flashlight
Cal can use his lightsaber as a flashlight, which helps explore darker areas like caves or unlit corridors. It automatically turns on when entering dimly lit spaces and switches off once there’s adequate light again. While it doesn’t reveal hidden secrets or interact with puzzles, it makes navigation smoother and helps spot environmental details that could be missed otherwise.
In dark spaces, BD-1 will turn on a small headlamp, but it has a limited field in front of the droid. Pulling out your lightsaber does a far better job at illuminating everything in close proximity. This, by the way, is one reason you should always rock with the dual wield lightsaber stance: You’ll get twice as much flashlight power.
Keep an eye out for shortcuts
Shortcuts are scattered across planets and can save you a lot of time once discovered. Keep an eye out for areas that loop back to earlier zones-like doors that can be opened from one side or zip lines that become usable after certain upgrades. These connections make backtracking smoother and often hide valuable collectibles nearby. Exploring carefully and revisiting previous locations after gaining new abilities can reveal paths you missed on your first pass.
There’s another way to mitigate backtracking in Star Wars Jedi: Survivor – look out for shortcuts. Nine times out of ten, shortcuts are zip wires you that connect a subregion you’re currently in with a subregion you were just in, like, five minutes ago. They’re invaluable for returning to meditation spots to restore your health (and save) before forging onward.
Also: When you’re on a zip wire, you can press triangle/Y to switch directions, in case you decide you no longer want to head back.
Rejoice, you can fast travel in Jedi: Survivor
Fast travel is back, making exploration smoother than before. You can use Meditation Points to instantly move between discovered locations, which saves a lot of backtracking across large areas. This feature becomes available after progressing a bit into the story, and it’s a huge help for revisiting side paths, collecting missed items, or completing bounty and upgrade quests without retracing every step manually.
One of the biggest criticisms of Star Wars Jedi: Fallen Order was that you couldn’t fast travel. Backtracking was a genuine pain in the ass. So it’s good that Respawn corrected course in Star Wars Jedi: Survivor. Yes, you can fast travel – but only on the planet you’re currently on.
There are other limitations: You can only do it while you’re at a meditation spot, and you can only travel to previously unlocked meditation spots. All the more reason to interact with every one you see.; Note too that there are some story-gated instances where you can’t fast travel. (You’ll know so when the option to fast travel at meditation spots is grayed out.)
You’ll come back to that planet later
Prepare to revisit that distant world later, when your wings are ready for lift-off and the scavenged memories pull you back toward its orbit.
Jedi: Survivor prevents your progress by partitioning out your traversal upgrades, meaning you’ll end up doubling back through each planet to cover ground you weren’t able to reach before. You won’t be able to get everything on your first visit to each planet; if you want to explore, you’ll have to come back later once you’ve unlocked more abilities.
That said, thoroughly exploring each planet to the extent you can before moving onto the next story objective is always worth the time. You can find essences that increase your health or Force meters, or grant you a free skill point. You can find chests containing cosmetics for Cal and BD-1’s casing – or, in rare cases, a stim canister that increases the number of times you can heal in a row. Various types of local currency are strewn around each planet, and can be exchanged at vendors for cosmetics. Databanks and Force echoes, meanwhile, fill in lore through brief journal entries.
If you don’t wanna miss a thing, consult our guides for finding all of the important stuff during your first trips through Coruscant and Koboh.
Save your skill points
Skills carry over from Fallen Order, so pick your favorites before the new game begins. Focus on Force powers and lightsaber stances that match your playstyle, like pushing enemies or pulling them in for combos. You can respec later with a pricey perk, but why drain credits early? Stick with what works and adapt as you progress through the planets.
Star Wars Jedi: Survivor features eight skill trees to dump skill points in. Beyond Cal’s basic stats – health and Force powers – you’ll end the tutorial with three different lightsaber stances, each with its own tree. You’ll soon get two more, including one that lets you rock a blaster. Mid-game Force abilities (which we won’t spoil here) open up the possibilities even more. If you’re not entirely sold on burning precious skill points on upgrades you’re not enamored with, you won’t regret saving them for later.
You can regain lost XP in Jedi: Survivor
If you fall in battle in Star Wars Jedi: Survivor, you don’t lose all progress permanently. The XP you drop stays with the enemy or spot that defeated you, and reclaiming it is as simple as returning to that location and landing a hit. Doing so restores your lost experience and replenishes your health, giving you another chance to advance without a major setback.
Accrue enough XP in Star Wars Jedi: Survivor, and you’ll earn a skill point. Once you’ve earned a skill point, you can’t lose it. That said, you can lose all of the XP you’ve earned progressing you to your next skill point.
Every time an enemy kills you, you’ll lose all of your banked XP. If you want it back, you’ll need to locate the enemy who killed you – usually exactly in the room you died in. You’ll see them glowing gold. Simply touching that enemy with a single attack will restore all of your lost XP. (You can easily cheese this from a distance with a blaster shot or lightsaber throw.)
It works a little bit differently in boss fights. The enemy won’t glow gold. Instead, you’ll see a golden pillar of light in the spot you died. Running into that will restore your lost XP – and in some cases, at least for optional bosses like Koboh’s rancor, you’ll then be able to turn tail and run out of the chamber entirely, with your XP intact. Nowhere in the Jedi code does it say you have to be brave!
Best skill tree upgrades to prioritize early
For early-game Star Wars Jedi: Survivor, focus on staying alive and making traversal and basic combat smoother rather than flashy damage skills.
1. Survival tree (top priority)
Put your first points into Survival on the main skill grid. Early picks to grab first:
-
Max health increase (basic HP upgrades).
-
Improved stim healing amount.
-
Any passive damage reduction or “last longer at low health” type nodes.
These make every encounter and mistake less punishing.
2. Lightsaber fundamentals
Next, improve your default stance rather than rushing into fancy moves:
-
Basic combo extensions (more hits in your light-attack chain).
-
Block stamina / guard meter improvements so you can block and parry more safely.
-
Early “deflect more blaster bolts / wider deflect angle” type upgrades.
These help versus both melee and ranged enemies and pay off in every fight.
3. Force and crowd control
Once you’re a bit sturdier:
-
Cheaper Force cost or increased Force meter.
-
Stronger single-target pull / push or small-area crowd-control upgrades.
-
Any node that lets you control or stagger groups more reliably.
This makes mixed enemy groups and aggressive melee foes much easier.
4. Mobility / exploration
Sprinkle in mobility once you feel comfortable in combat:
-
Focus/Force recovery on successful parries or kills.
-
Climbing, dashing, or stamina-like quality-of-life nodes that clearly help platforming.
These don’t directly boost damage but speed up exploration and reduce fall-related frustration.
5. General rule of thumb
If you’re unsure where to spend a point early:
-
Take health and stim upgrades.
-
Then take block/parry and basic combo upgrades.
-
Only then chase big-damage special moves or niche stance-specific skills.
Best Force powers to unlock after early upgrades
After securing survival basics like health and stims, prioritize Force powers that enhance crowd control and sustainability in Star Wars Jedi: Survivor. These mid-early unlocks shine against groups and bosses once you’re past the first few planets.
Top Force Priorities
-
Greater Force Attunement: Boosts your maximum Force meter, letting you spam powers more often without running dry. Essential for chaining pulls and slows.
-
Greater Hold: Extends Slow duration, giving you breathing room to parry or reposition in chaotic fights. Pairs perfectly with survival upgrades.
-
Channeled Energy: Regains Force by hitting blocking enemies or finishing kills-turns defense into offense and keeps your meter topped up endlessly.
Crowd Control Standouts
-
Howling Push: Upgrades basic Push to hit harder over a wider area, staggering groups or knocking foes off ledges. Game-changer for mob clears.
-
Mass Slam: Lifts and smashes multiple enemies at once; follow with lightsaber swings for easy kills. Unlocks after basic Pull.
Pull Enhancements
-
Wrenching Pull: Area-of-effect Pull that yanks weaker enemies together for a single big attack. Great for clumping before a Slam or Dual Blade spin.
Stick to the Force tree’s left/middle paths first, as they build on each other efficiently. These keep exploration fluid and combat forgiving without needing stance swaps yet.