Broodfeast surfaces from the shadows, a web of whispers guiding you through Hollow Knight’s most treacherous kitchens.
‘Broodfeast’ quest location in Hollow Knight: Silksong
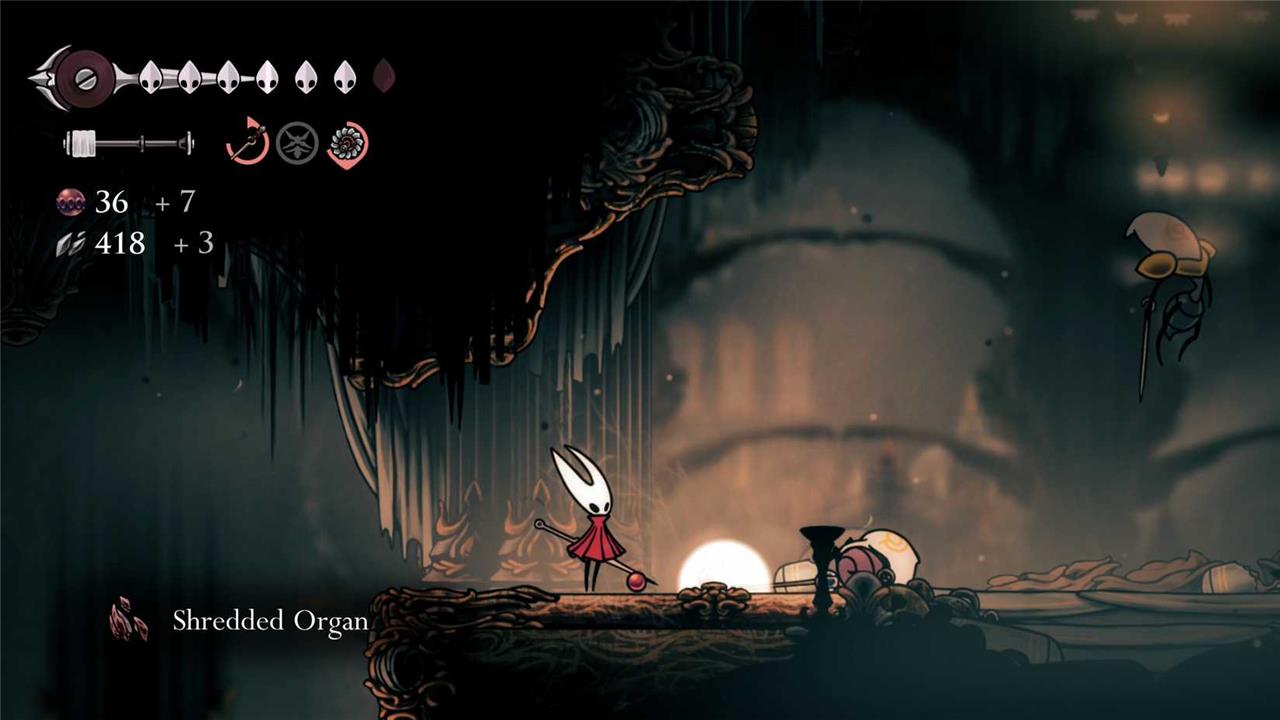
The Broodfeast quest location is found in a dim, web-woven chamber within the Queen’s Gardens, where a rickety wooden bridge leads you over a slow, churning pool.
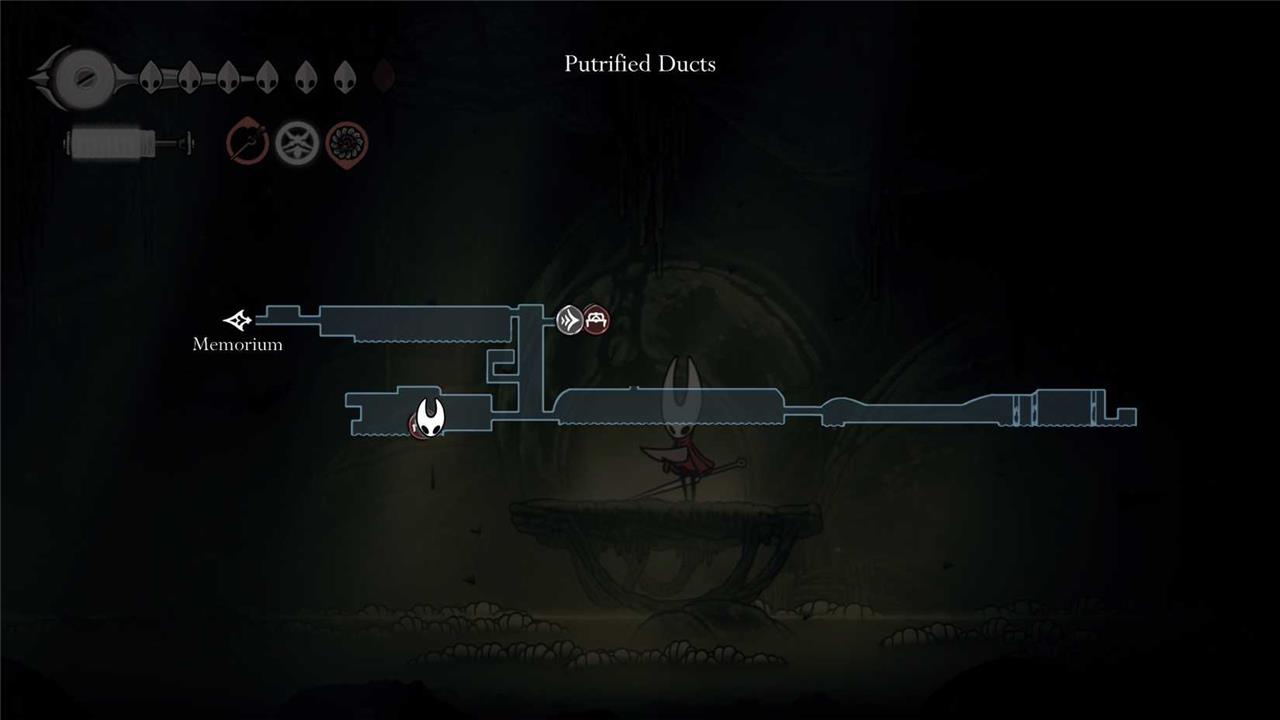
You’ll start the “Broodfeast” quest in the Putrified Ducts, the region in Pharloom’s upper right corner. You won’t have the tools necessary to reach and survive this area for a while, as the Clawline and Faydown cloak are essential for reaching it.
When you do have the means to explore the Putrified Ducts, the easiest way to reach the “Broodfeast” quest location takes you through Memorium, onto the roof of the Citadel, and into the Ducts via the upper left entrance. Activate the Bellway station for an easier exit, and rest at the bench to make this your respawn point should anything go wrong. You can also come up from the Bilehaven bench, but having easy access to the Bellway station makes this route more convenient for what comes next. If you’re struggling with either, head over to our Putrified Ducts guide for more details on how to reach this area.
Carefully drop down the vertical passage until you reach the very bottom. Take a left, smash the breakable walls, and enter the next room. There’s a hut in the middle of it, and inside is a massive bug called Huntress. Speak to her. In exchange for not killing you, Huntress asks you to bring her some food for her hungry, growing brood of monster children – seared organs, shredded organs, and skewered organs. A lot of them.
‘Broodfeast’ walkthrough in Hollow Knight: Silksong
Head to the Putrified Ducts in the southwest to speak with the Huntress near a bench and accept her request for 15 seared organs from Flintslate kills, 35 shredded organs from Cogwork Wheel strikes, and 10 skewered organs from Sting Shard traps. Acquire Flintslate in Deep Docks with a simple key, farm weaker enemies there for seared drops, then use Cogwork Wheel on tougher foes and Sting Shard on groups for the rest. Return all organs to the Huntress to claim the Ironclaw tool reward.
Silksong is happy to let you guess at how to collect these organs and provides no tips. You can defeat any living enemy (everything that isn’t a mechanical construct) to get them, but pilgrims are the easiest types to target. You need specific tools to ensure they drop a specific type of organ, though, and while you don’t have to exclusively use the tool to damage the enemy, the tool does need to strike the final blow.
The easiest way to do this without having to guess at how many hits an enemy has left before death and without spending too many shards on replenishing tools is to just farm weak foes in an early-game area. It also helps if you’ve upgraded your tool pouch at least twice, since each upgrade enhances how much damage your tools do.
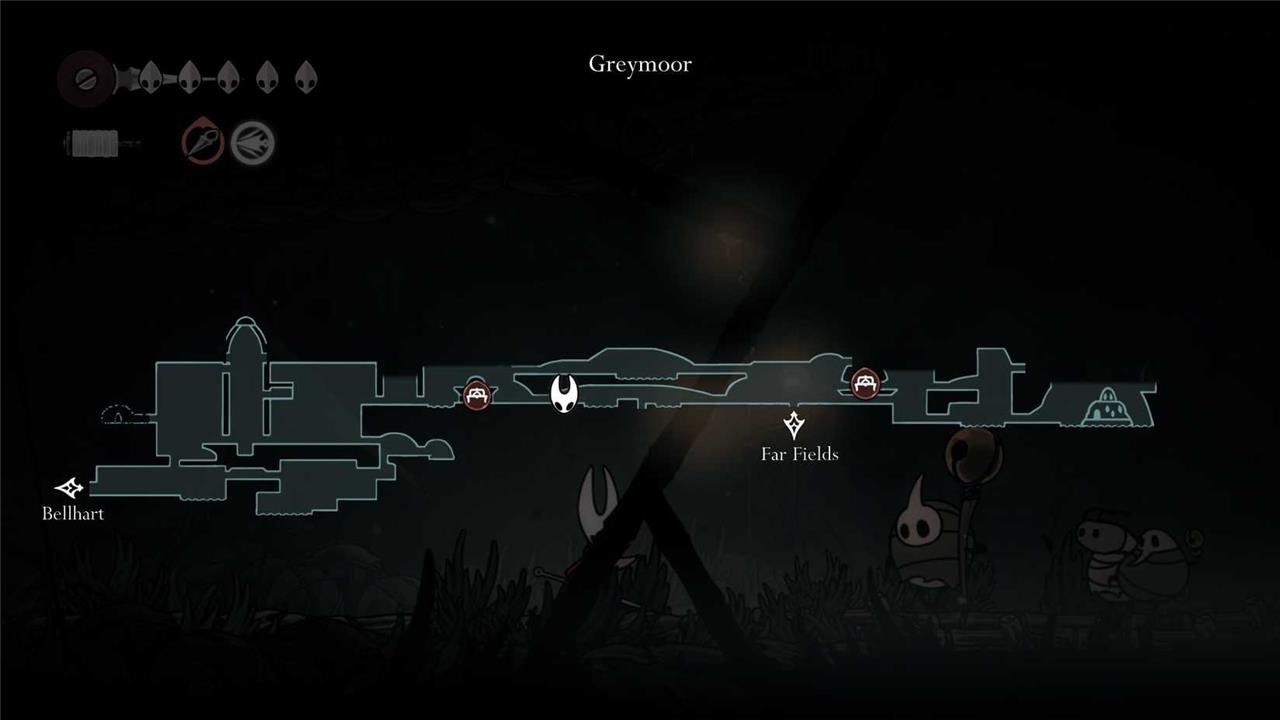
One of the most convenient locations to farm “Broodfeast” organs is to the right of Greymoor’s Halfway House, the spot shown above that we recommended for rosary farming as well. The passage between the house and the entrance to Greymoor has six pilgrims in it and is near a bench for quick respawns and tool replenishment. You can harvest what you need in maybe a dozen runs or fewer this way, while getting some rosary beads and enough shells to offset your tool use in the process.
How to get seared organs for ‘Broodfeast’
As the name suggests, you need fire to do the searing, and you have three tools that can cause a blaze. One is the Pimpillo bomb, which we outlined how to get in our Sandcarver guide. It’s a much easier tool to obtain than the other choices, but you also need to be fairly precise (and sometimes a bit lucky) when using it, since the bomb bounces before exploding. If you’re in the Greymoor area we recommend for this quest, though, it’s comparatively easy to catch at least two pilgrims in a blast, regardless of how well-aimed your throw is, just because of how the enemies are grouped here.
Another tool is the Wispfire Lantern which is dropped by the Father of the Flame in the Wisp Thicket. It’ll use your silk to spawn a fire wisp that will seek out nearby enemies. You won’t have to do any of the work, but it might take a bit longer than the other options because it doesn’t do a lot of damage.
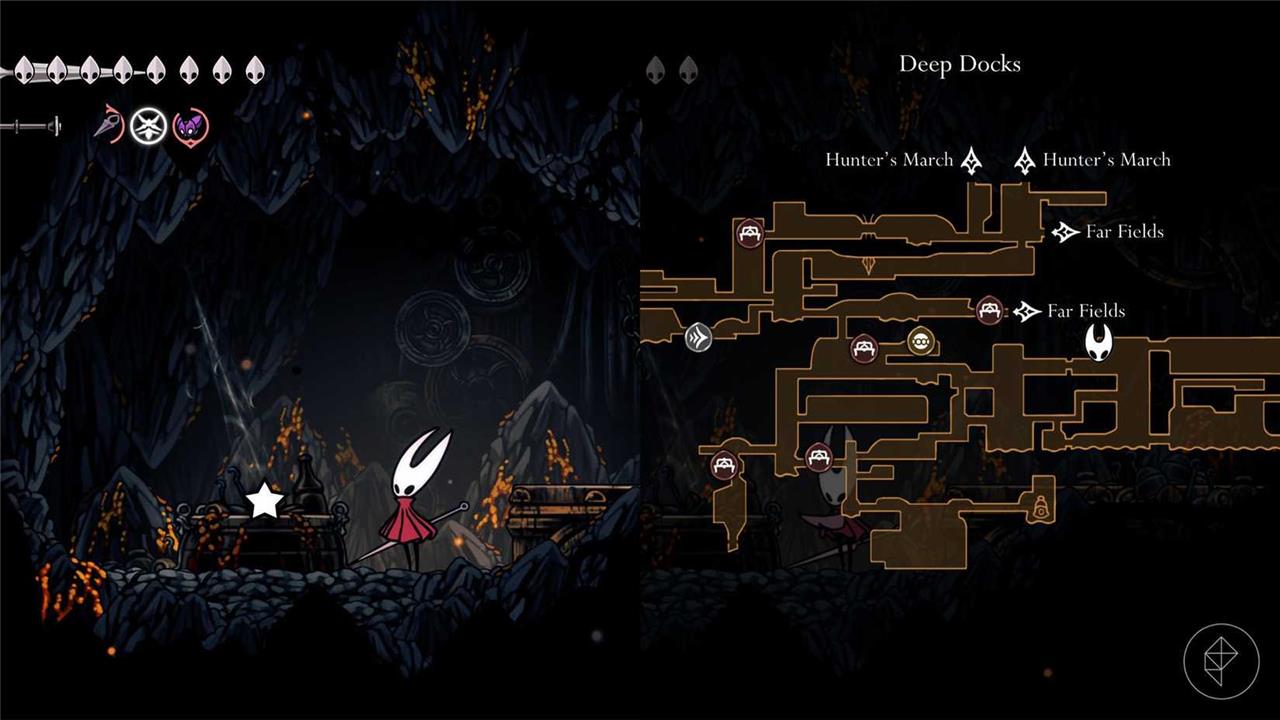
The last option is rather more complicated, but it does let you target multiple enemies with one use of the tool. It involves using the Flintslate tool, which temporarily imbues your needle with fire. The challenge comes from acquiring the Flintslate tool. The hassle-free route to the tool is using a simple key to unlock the simple padlock in Deep Docks, and carefully proceeding through the next two rooms to get it. If you’ve used the three close-at-hand simple keys already and aren’t keen on going to the Sands of Karak just for this quest, you can take a detour via a secret entrance to the Deep Docks from the bottom of Far Fields and a trek through lava and a lot of dangerous enemies.
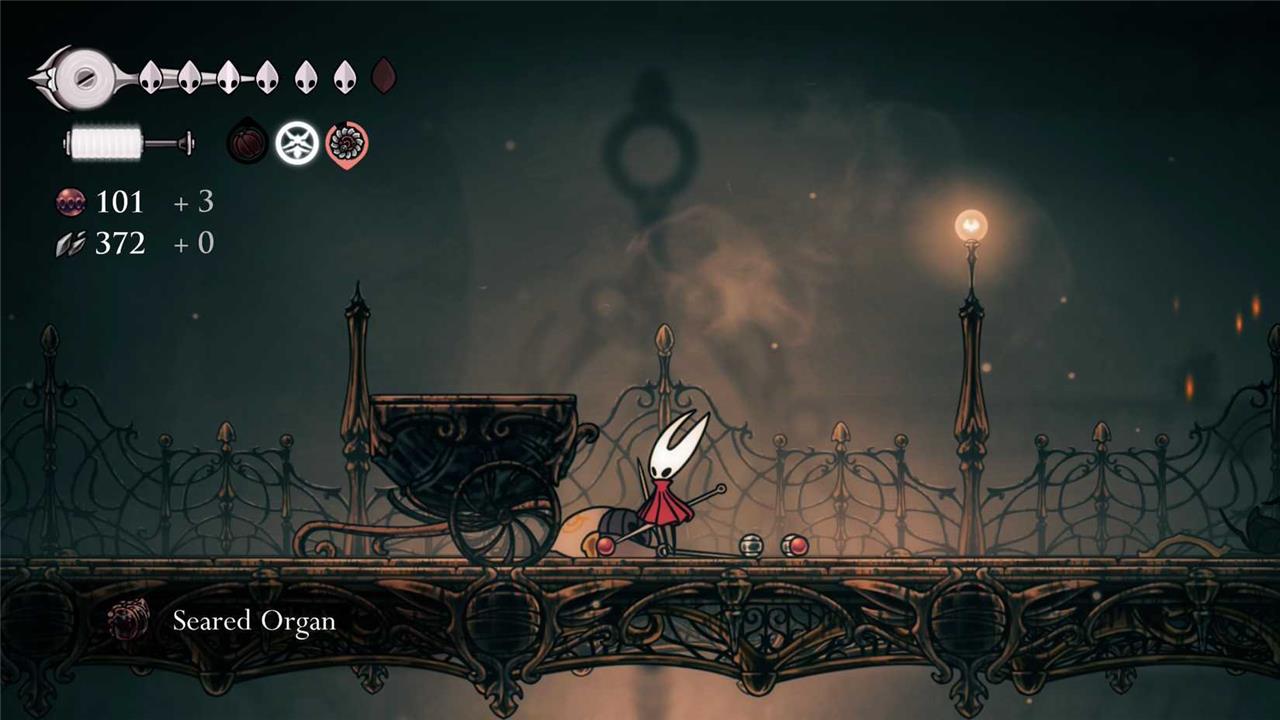
Whatever your method, you need 15 seared organs for this quest.
How to get shredded organs for ‘Broodfeast’
The easiest way to get shredded organs is to use the Cogwork Wheel tool, which you can purchase from the Twelfth Architect in the Underworks for 360 rosary beads and one chunk of Craftmetal. The wheel absolutely demolishes weak enemies and gives you multiple stacks of shredded organs, which is handy, seeing as you need 35 of them.
If you have the Architect’s Crest, you can get shredded organs just by equipping the crest and defeating enemies with it. Your basic attack with this one is a rapidly rotating screw that acts in a manner similar to the wheel, but you also need to own several tools before you can purchase the key that takes you to the Architect’s Crest. If you don’t have many, just stick to the Cogwheel.
How to get skewered organs for ‘Broodfeast’

The Longpin and Sting Shard tools give you skewered organs when you defeat an enemy using either of them. You can purchase Sting Shard from the Forge Daughter in Deep Docks, and the Longpin is hidden behind a wasp nest in Shellwood, just above the lower entrance to Bellhart.
The Longpin is the easier, more reliable tool to use for harvesting skewered organs. While the Sting Shard deals more damage, it’s also easy for enemies to avoid it or trigger it early, sending its spines flying out harmlessly. The Longpin is less of a hassle to aim, and it pierces enemies to damage the ones behind them, meaning it takes fewer tool uses to get what you need.
Huntress demands 10 skewered organs for “Broodfeast.”
‘Broodfeast’ rewards
Completing the “Broodfeast” quest grants Hornet several valuable rewards tied to both resources and lore. Players receive a large cache of Silk and Rosaries, along with a unique charm fragment linked to broodkin abilities. Finishing the task also opens access to the Broodmother’s hidden chamber, where a new dialogue sequence reveals more about the brood’s corrupted lineage. These rewards not only strengthen Hornet’s combat potential but also provide deeper insight into Pharloom’s twisted ecology.
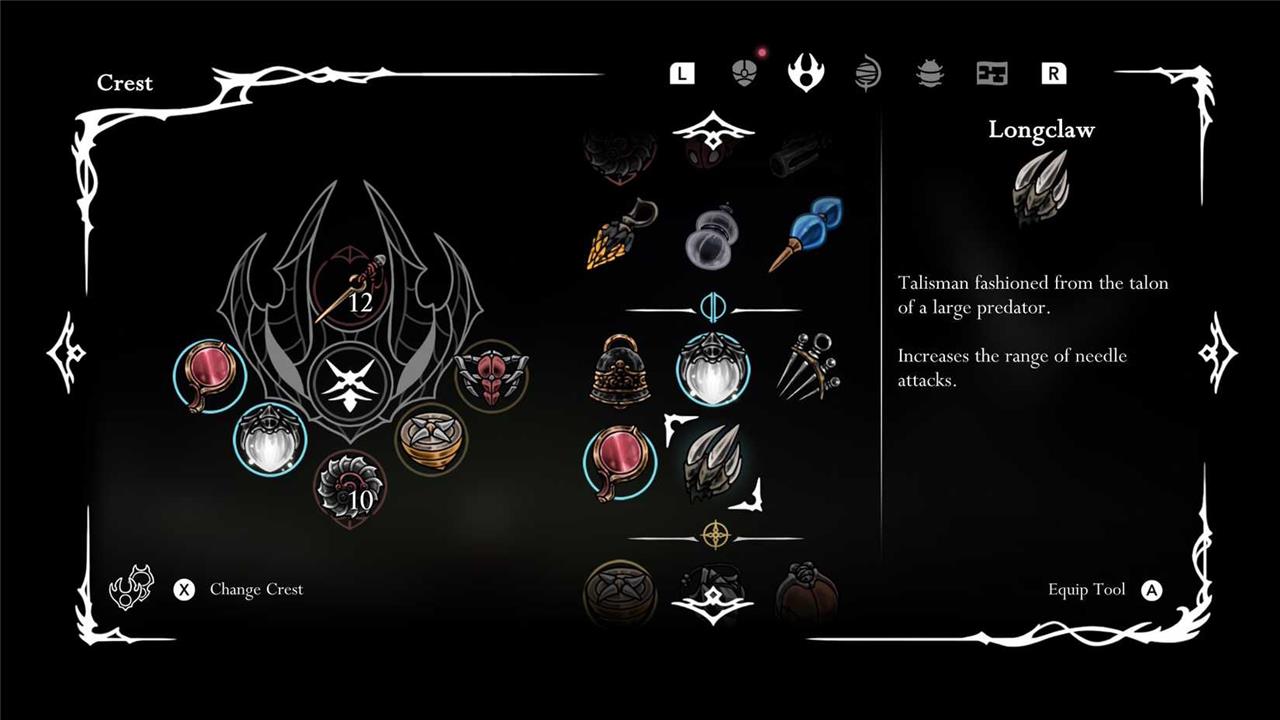
All this hassle is worth it in the end. Once you bring the pile of guts back to Huntress, she gives you the Longclaw blue tool. Equipping this extends the reach of your needle, basically like the Longnail from Hollow Knight.
Where to find Flintslate Cogwork Wheel and Sting Shard
Flintslate Location
Flintslate is found in the Deep Docks area, specifically in a small nook at the top of the rightmost vertical shaft. Access this after progressing through the main shaft and using wall-breaking abilities or exploration paths from areas like Far Fields or Bilehaven.
Cogwork Wheel Location
Purchase the Cogwork Wheel from the Twelfth Architect in the Underworks for 360 Rosary beads and 1 Craftmetal. Unlock the Architect’s location by navigating Underworks’ corridors, often requiring Clawline ability obtained earlier in Coral Chambers or similar zones.
Sting Shard Location
Craft the Sting Shard at the Forge Daughter in Deep Docks for 140 Rosaries (some sources note 1 Craftmetal). This early-game tool sets throwable traps and becomes available after reaching the Forge Daughter via standard progression.
Where is the Twelfth Architect located in Underworks
Twelfth Architect Location
The Twelfth Architect resides in the Underworks area, near a bench and The Cauldron section. Access requires the Clawline ability (harpoon/grapple skill) obtained earlier, typically from Coral Chambers or similar zones.
Path from Key Areas
Start from the Citadel’s Songclave to grab the White Key, then use it on the elevator west of Choral Chambers to descend into Whiteward. Navigate left through breakable walls, fiery coal pits, and fan sections until entering Underworks; hit levers to progress rightward to a bench.
Reaching the Shop
From the Underworks bench, Clawline up to the grapple point above and right, then strike the lever on the ledge to enter her room. She sells tools like Cogwork Wheel (360 Rosaries + 1 Craftmetal) and Architect’s Key (110 Rosaries, needs 25 tools total).