Hidden beneath the shattered tracks of the abandoned mine in Hyrule Ridge, Jinodok Shrine asks you to rebuild a broken railway using Zonai devices, then ride your improvised cart through a clever physics puzzle that can easily strand you midair if you misjudge a single piece.
When you’re done, our shrine locations page and interactive Hyrule map can direct you toward something else to do.
Jinodok Shrine location
Jinodok Shrine sits on a raised plateau in the North Necluda region of Hyrule, southeast of Kakariko Village and west of Popla Foothills Skyview Tower. Paraglide from the tower after launching skyward, or climb the steep slopes from the nearby path marked by a shrine icon on your map. Coordinates place it at (0093, -3693, 0094), visible against the rocky cliffs once you approach from the south.
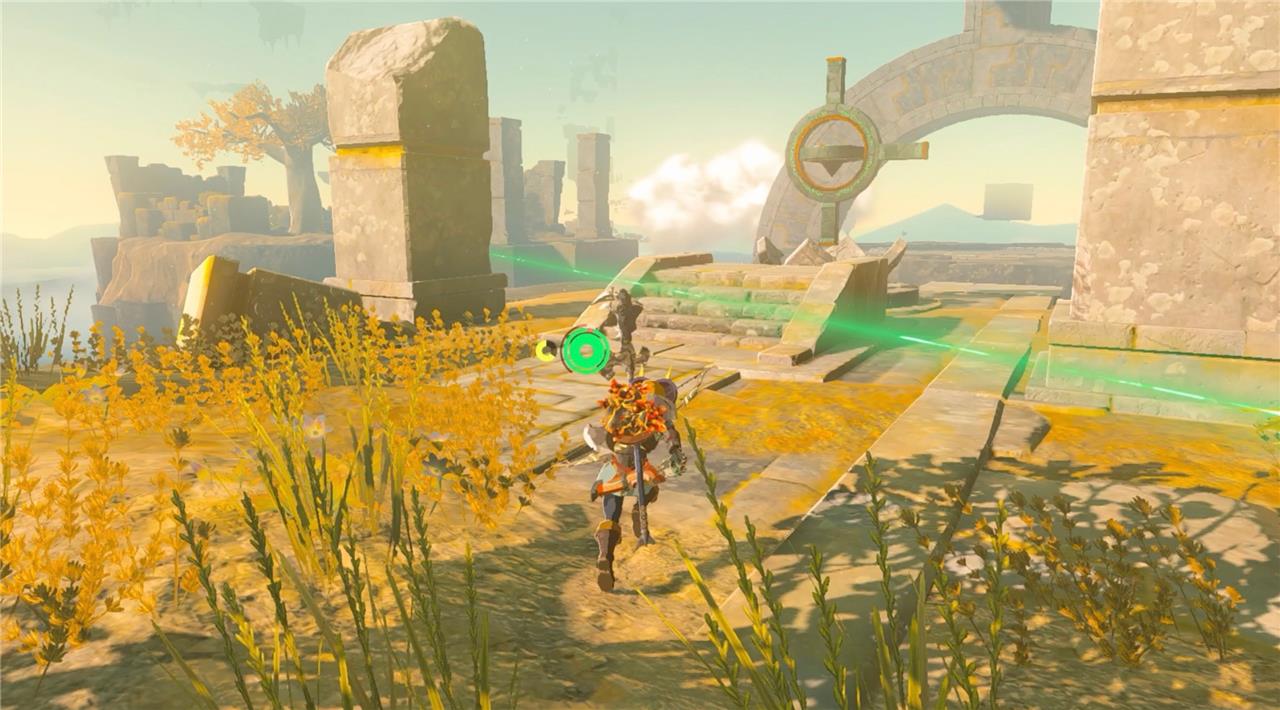
The Jinodok Shrine is found within the Central Hyrule Sky region at the South Hyrule Sky Archipelago. The exact coordinates are (-1257, -1487, 1008). It’s a Rauru’s Blessing puzzle, which means the puzzle is outside of the shrine – you’ll need to move a crystal to open the shrine itself.
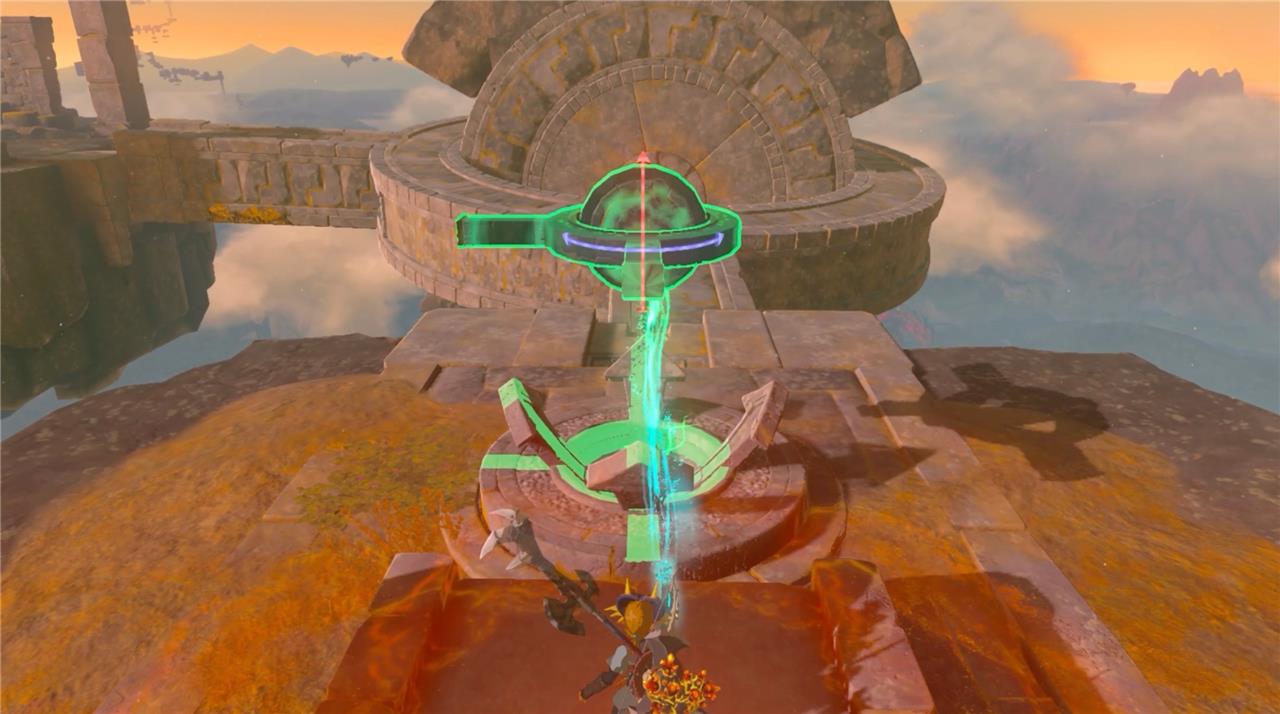
Jinodok Shrine walkthrough
Jinodok Shrine challenges players with a balance-themed puzzle that tests precision and timing. Begin by placing metal balls on the scale platforms to align their weight correctly and open the gate ahead. Use Ultrahand to move the objects carefully between platforms, adjusting their position until the bridge lowers. Inside the next area, apply the same principle with larger objects to equalize both sides and reach the treasure chest. After that, place the final orb on the pedestal to reveal the exit and claim your Light of Blessing.
The Jinodok shrine puzzle starts after you launch yourself to the South Hyrule Sky Archipelago from Hyrule Field Skyview Tower. You’ll need to either upgrade your stamina or have Tulin to reach the island – one stamina wheel won’t cut it! Once you’ve located the shrine, follow these steps.
1. Walk to the left of the shrine to find a rotating Zonai switch that controls a massive stone bridge. Use Ultrahand to rotate the switch 180 degrees to the right on the X axis, then 180 degrees up on the Y axis. The ledge should click into place on the platform across from you and reveal a chest on a rope.
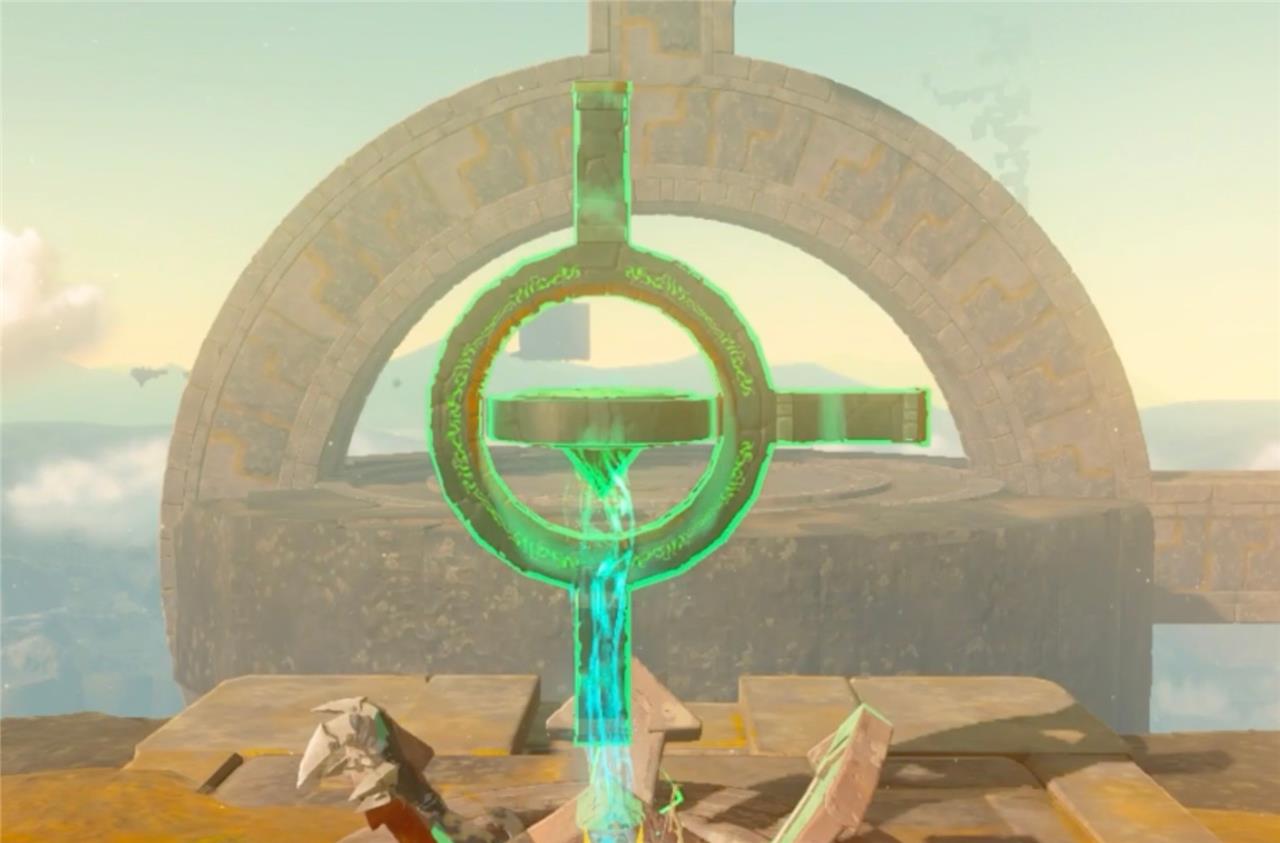

2. Continue to use Ultrahand to spin the switch 90 degrees to the right on the X axis to bring the chest over to you.
3. Use an arrow to snap the vine entangled around the chest. Open the chest to reveal an Old Map. The map reveals treasure in a section of the Depths: The Great Abandoned Central Mine.
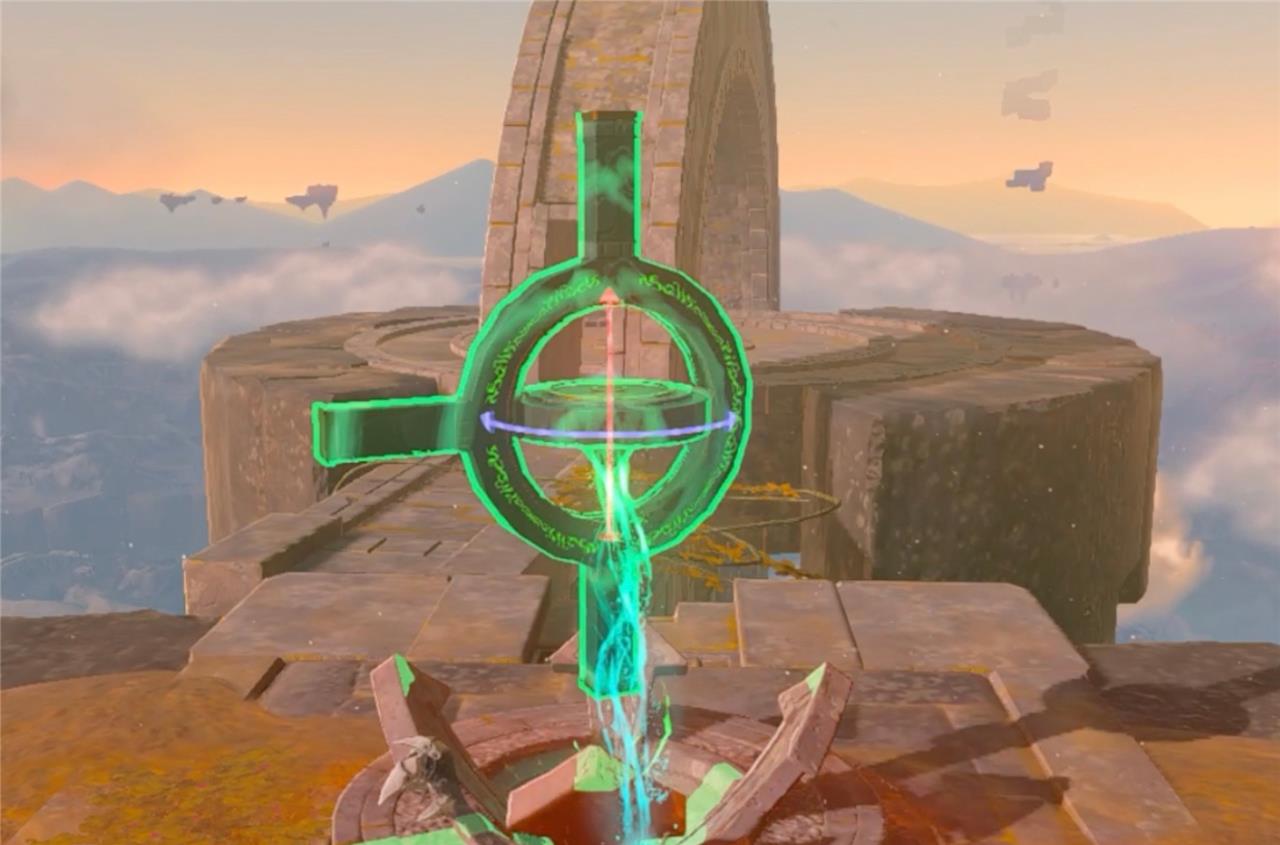
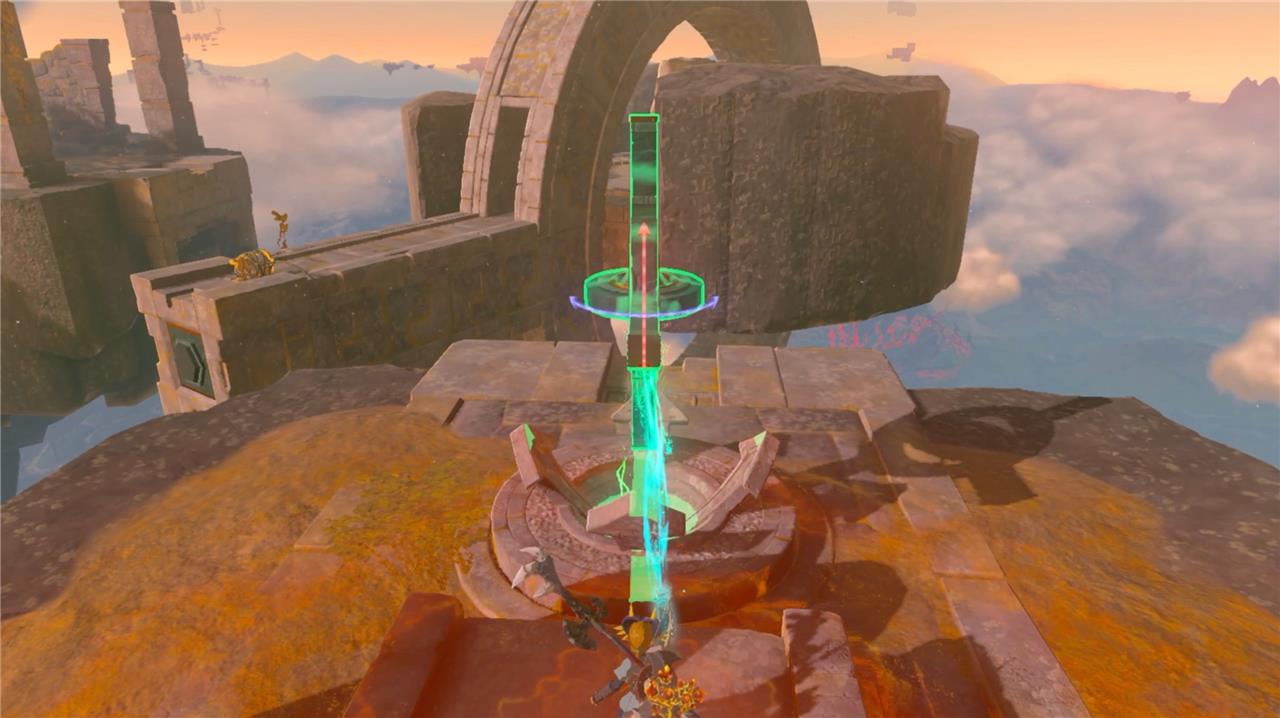
4. Return to the switch and once again use Ultrahand to manipulate the bridge. Turn the switch 90 degrees to the left on the X axis, then 90 degrees up on the Y axis so that there’s a clear path to the other island.
Best route to reach South Hyrule Sky Archipelago from Hyrule Field Skyview Tower
From Hyrule Field Skyview Tower, the most efficient route is to launch straight up, glide to the nearest small island to the south-southeast, then use the Zonai platform and rockets on that island to chain your way deeper into the South Hyrule Sky Archipelago.
Basic glide route
-
After activating Hyrule Field Skyview Tower, launch and immediately turn your camera south-southeast; aim for the closest sky island with two small ponds, just south of the tower’s position.
-
Use one full stamina wheel (plus a bit of food or elixir if needed) to glide there; using Tulin’s gust or a stamina elixir makes this first jump very safe.
Using the rocket platform
-
On the first island, look for a stone platform and nearby rockets; attach two rockets to the platform with Ultrahand, climb aboard, and activate them to gain extra height toward the next southeastern island.
-
Glide from the peak of that rocket boost to the next island in the chain, repeating the process (re-attaching rockets to another platform) to reach the main curve of the South Hyrule Sky Archipelago where Jinodok Shrine and the Flux Construct II are located.
Tips to make it easier
-
Go at daytime and clear weather so you can clearly see the curved line of islands running south and then west from just below the tower’s position on the map.
-
Bring extra stamina food, a few spare rockets/fans in Zonai capsules, and turn on your map view of the Central Hyrule Sky so you can adjust mid-glide if you overshoot or undershoot an island.
Optimal paraglider path and wind boosts from Hyrule Field Skyview Tower
From Hyrule Field Skyview Tower, the optimal paraglider path uses your full vertical launch, a gentle south-southeast glide, and Tulin’s gusts or stamina support to chain to the nearest “fairy launch pad” island and then into the South Hyrule Sky Archipelago. The key is to glide in short, efficient segments, using wind boosts primarily to gain horizontal distance right after each height gain, rather than holding the paraglider for too long in one stretch.
Launch setup and first glide
-
After activating the tower, orient the camera south-southeast before stepping on the launch pad so you’re already facing the archipelago arc when you’re shot upward.
-
Once at maximum height, immediately open the paraglider, angle slightly down toward the closest visible sky island in that direction, and trigger a single Tulin gust early to lock in good forward speed while you still have plenty of altitude.
Chaining wind boosts efficiently
-
Use Tulin’s ability in bursts: one gust right after launch, then wait until your glide angle flattens and speed drops before using another, rather than spamming them back-to-back.
-
If you see you will just barely miss an island, dip the camera a bit (steepen the glide) and then use a gust to convert that extra drop into extra horizontal distance while watching your stamina.
Managing stamina and fall height
-
Enter glides with at least one full stamina wheel and carry one or two Energizing foods or elixirs so you can refill mid-air if a gap ends up slightly longer than expected.
-
Any time you are clearly going to overshoot your target, cancel the paraglider briefly to fall and then reopen above the island; this saves stamina and reduces time spent in slow, shallow gliding.