Hidden deep within the Faron region, Jiukoum Shrine challenges players to master balance and momentum. This guide reveals its precise location and explains how to solve every puzzle, from the first swinging platform to the final glide to the exit.
When you’re done, our shrine locations page or interactive Hyrule map can direct you toward something else to do.
Jiukoum Shrine location
Jiukoum Shrine is located in the Faron region, northwest of the Popla Foothills Skyview Tower. You can find it in a small clearing near the river, southeast of Dracozu Lake. The shrine sits at coordinates roughly (-2324, -0536, 0147). Gliding from the nearby tower or climbing through the cliffs surrounding the lake are the easiest ways to reach it.
The Jiukoum Shrine is located in the Popla Foothills area of Faron, tucked in a rocky area. You’ll find it at these coordinates: (0867, -2280, 0141).
Jiukoum Shrine ‘Built for Rails’ walkthrough
Jiukoum Shrine, titled “Built for Rails,” challenges players to solve rail-based puzzles using motion and magnetism. Begin by attaching a platform or hook to the rail, then use Ultrahand to guide objects and create stable paths across gaps. Some rails require carefully adjusting angles to maintain balance while moving. The goal is to transport the crystal to its pedestal by combining rail pieces and managing momentum. This shrine rewards steady timing and smart construction with a clear demonstration of physics-based mechanics.
The “Built for Rails“trial within the Jiukoum Shrine is about movement – specifically about movement on rails. Primarily using the Ultrahand ability, you’ll have to use platforms to navigate a complex system of rails in the shrine.
1. You’ll see the first rails when you walk into the first room. On the left side, there are two platforms. Attach these together side by side, taking care that they line up perfectly. You’ll know you did this right when a rail appears on top.
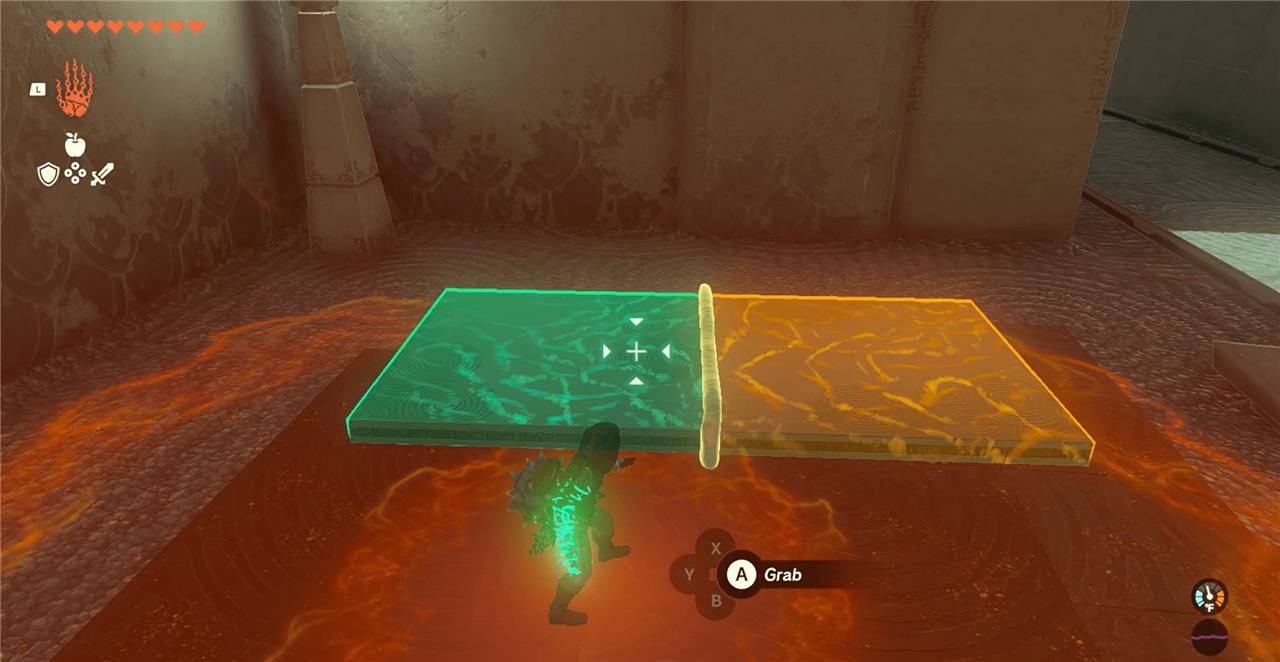
2. Place your new platform on the rails, ideally between the walls so you get a good fit. Hop on and ride the rails to the next room.
3. The next room leads into the complex set of rails, but first, grab the treasure chest on a ledge, tucked away in a nook on the left side of the room. You’ve got five platforms total, including the two you combined to get into this room. Ultrahand four of these together (two combined together on the bottom, with two together for the ramp) to create a ramp up to the treasure chest, like so:
4. Climb the ramp, jump off of it, and use your glider to reach the chest, which contains sticky elixir. Head back down into the main room – you may have to remove the ramp to do so.
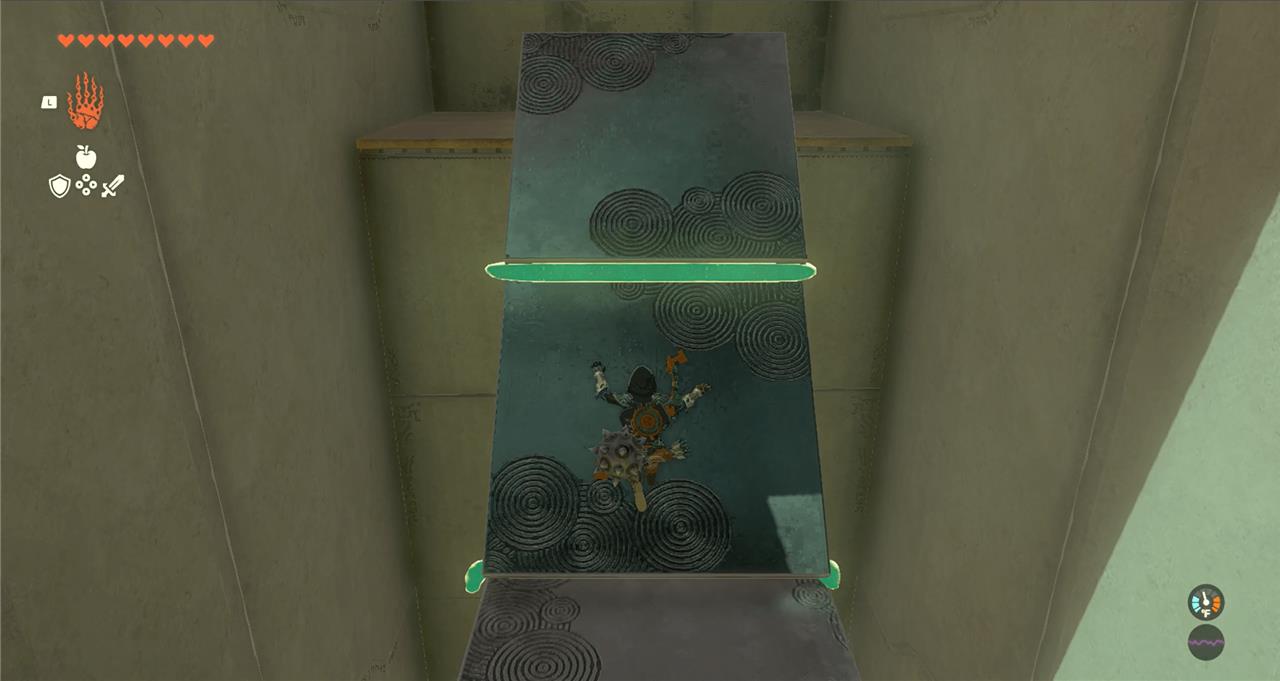
5. Now, you’ll create a platform to ride the rails. As with all things Tears of the Kingdom, there are likely a few ways to do this, but here’s how we pulled it off. Grab two small platforms and the long platform that’s already on the rails. Ultrahand them together to create a T shape, with one small platform at the bottom, like so:
6. It’s the vertical piece between the rails that’s the most important; you need it to keep things stable, or else it’ll be too unwieldy to ride. Hop on and follow the rails to the next platform.
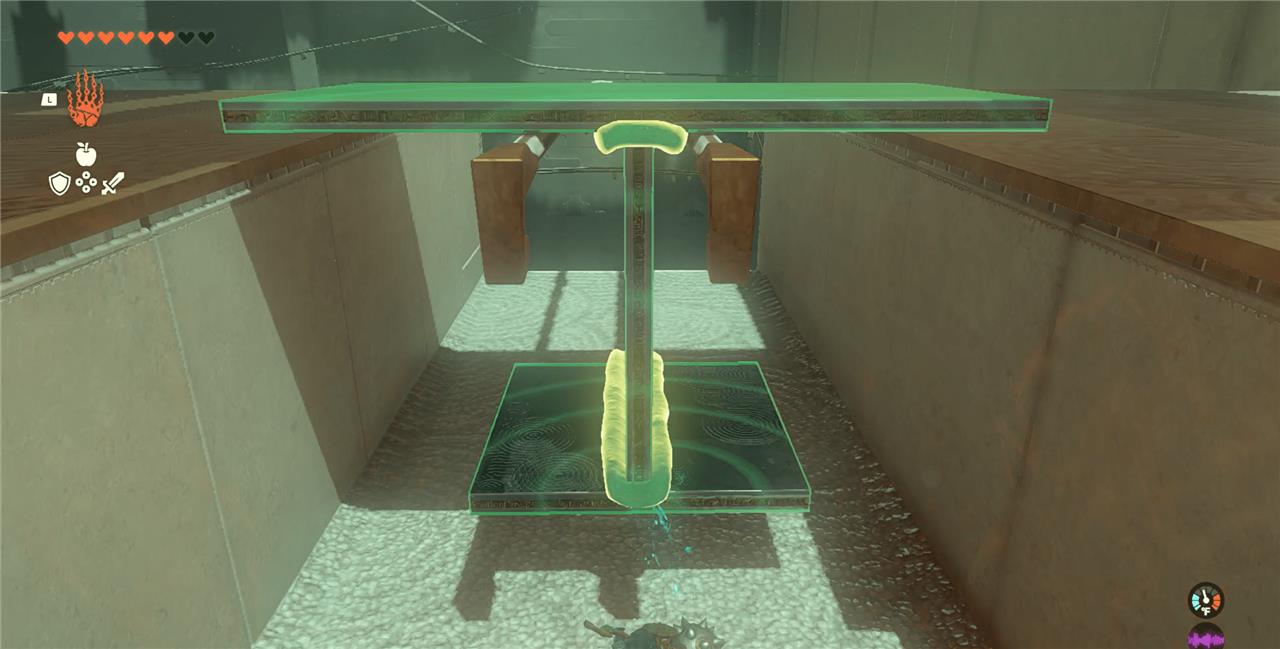
7. Head up the stairs, where you’ll see four separate platforms and three fans. (Platforms on the left, fans on the right.) The rail system here is a little more complex, and is also partly uphill. Take the long platform and place it onto the rails. Fuse two small platforms vertically on the ends, so they fit through the gaps between the rails. Fuse one more directly in the middle, so the platform is supported when it switches from two rails to just one.
8. Turn the newly constructed platform around so the vertical platforms fit in the small gaps between the rails – this ensures it stays on the rails. Take two fans and place them on those vertical slabs. Put the third in the middle on the long slab on top, and another short slab right beneath it, like so:
How to get Sticky Elixir chest in Jiukoum Shrine
Sticky Elixir Chest Location
The Sticky Elixir chest in Jiukoum Shrine (“Built for Rails”) sits on a raised ledge in a nook on the left wall of the second chamber, across a short rail section and small gap.
Access Steps
After riding the initial two-slab platform down the first rails, spot three nearby metal slabs in the lower area. Use Ultrahand to connect them end-to-end into a long bridge aligned parallel to the short rails, then attach one additional slab at an angle to the far end as a ramp leading up to the ledge.
Walk or climb the ramp to reach and open the chest, which contains Sticky Elixir for enhanced adhesion effects. Dismantle the structure afterward to reuse slabs for the shrine’s final rail section.
How to complete Jiukoum Shrine rail puzzles
Jiukoum Shrine’s rail puzzles require building stable platforms with Ultrahand to slide along low-friction tracks. Complete all three sections sequentially to reach the altar.
First Rail Puzzle
Grab the two metal slabs to the left of the entrance rails and attach them side-by-side into a long rectangle spanning both tracks. Balance it on the rails, hop on top, and ride it forward to the next chamber.
Second Rail Puzzle (with Chest)
In the new area, quickly grab the sliding long slab off the main rails using Ultrahand. Build a ramp by aligning a long slab parallel to the short side rails leading to the chest ledge, then attach a square slab at the end as an incline-climb it to grab the Sticky Elixir chest before dismantling for later use.
Third Rail Puzzle
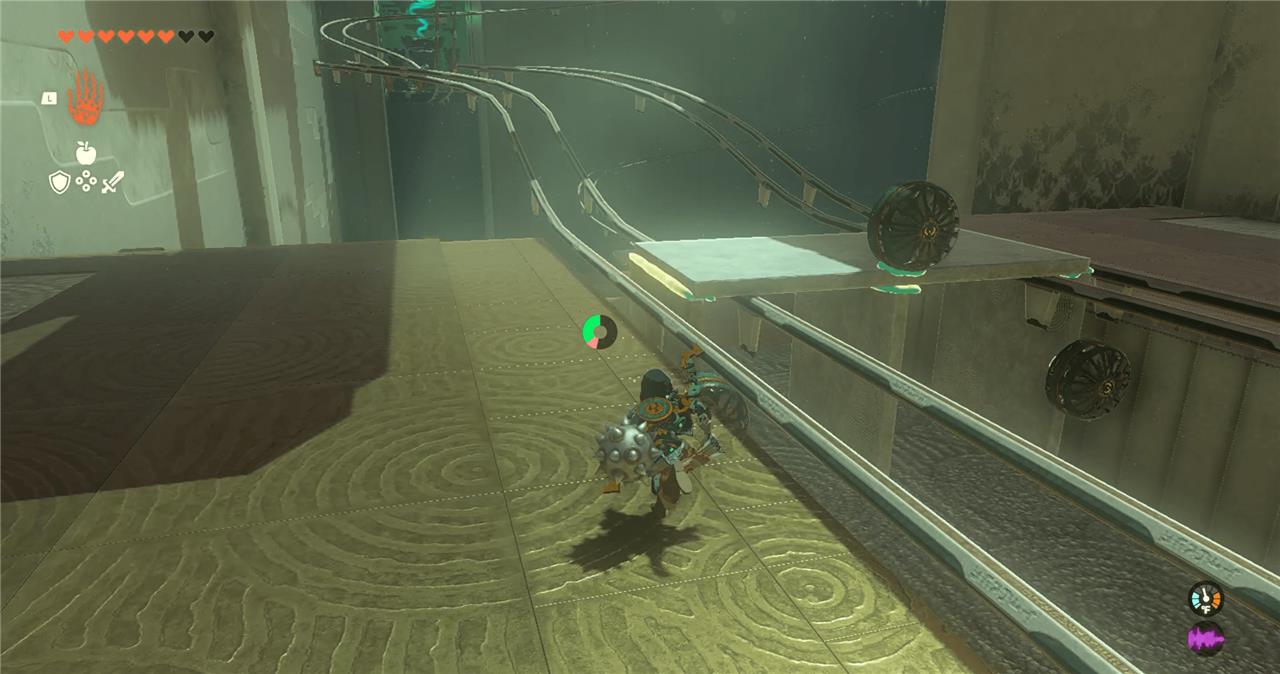
Form a T-shaped cart: attach one or two square slabs vertically partway down a long slab as legs for stability on curving dual rails. For the final uphill section with fans, build an M-shape-place a long slab flat, stand three squares vertically on its sides and center to fit rail gaps, add fans (blades backward) on top (two on edges, one centered), and activate while riding to the exit.