Hidden deep within the Lanayru Wetlands, the Joju-u-u Shrine challenges players with shifting platforms and precise timing. This guide shows the exact location and reveals how to solve every step of its clever puzzle to claim the Light of Blessing.
Joju-u-u Shrine location
Joju-u-u Shrine is located in the East Necluda region, near the village of Hateno. You can find it slightly north of the Hateno Ancient Tech Lab, on a grassy hill overlooking the sea. The easiest way to reach it is by gliding from a nearby high point or using the Hateno Village Skyview Tower to scout its position on your map. The shrine’s coordinates are roughly 3345, -2120, 0100, making it easy to track on your Purah Pad.
The Joju-u-u Shrine is found within the West Necluda region, by the Lakeside Stables, at the coordinates (1516, -3576, 0142). This region is very rainy, and there are often thunderstorms – so don’t wear metal here!
Joju-u-u Shrine ‘Building Bridges’ walkthrough
The Joju-u-u Shrine, titled “Building Bridges,” challenges players to connect platforms using Ultrahand to move objects and reach new areas. Begin by attaching nearby planks or metal beams to create stable walkways across gaps. Each chamber increases the difficulty with varied materials and angles, testing your precision and creativity. The final section requires assembling a sturdy bridge to transport a ball to its slot, triggering the way forward. Completing these steps reveals the chest and the Light of Blessing reward.
“Building Bridges” is, as you may have guessed, about building bridges to solve puzzles. You’ll basically be using Ultrahand to connect bridges.
1. The first bridge is not broken, so you can cross it easily.
2. The next bridge is broken – the broken edge is laying in the pit below. Use Ultrahand to connect the last panel to the panel on the opposite end. Cross over.
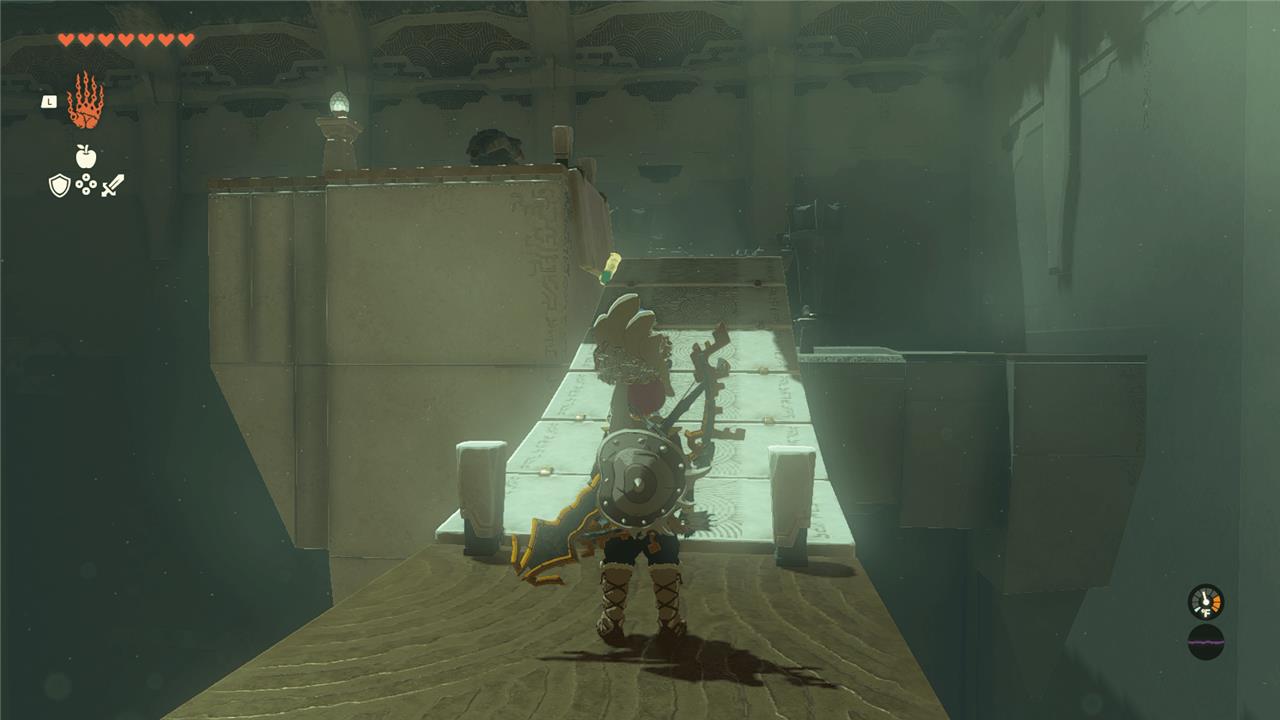
3. Similarly, this bridge is broken, but you can’t just connect the last panel. Instead, grab the third panel and attach it to the post at the opposite end, creating a taut bridge. Use the ladder to climb back up the first platform and cross the bridge.
4. In roughly the middle of the bridge, jump over to the next platform.
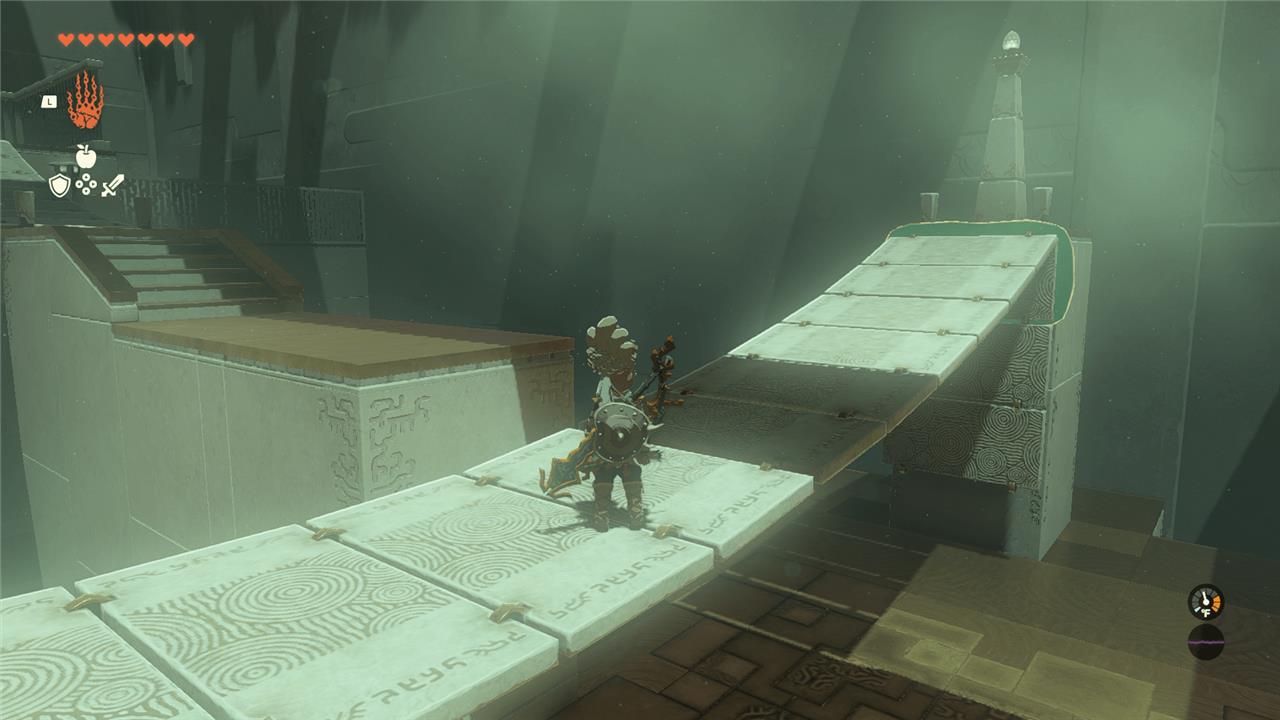
5. The next broken bridge doesn’t have a post to connect it to, but there is a vertical post to toss it over. You need to attach the box in the area to the last panel of the bridge, then toss it over the vertical post. The weight of the box will keep the bridge from falling down.
6. Head back to the platform and climb up, then use the bridge to access the next platform.
7. The next bridge isn’t broken, but roughly halfway through, there’s another platform to the side with a chest. Pull up the middle of the bridge and attach it to the panel at the platform to raise the middle of the bridge. Then use the raised bridge to access the chest, which holds a large Zonaite.
How to reach Joju-u-u Shrine from Lakeside Stable faster
Joju-u-u Shrine sits directly atop a cliff immediately southwest of Lakeside Stable, making it the stable’s primary fast-travel point once unlocked.
Fastest Ground Route
Head behind the stable near the well to find a path with fallen debris and climbable surfaces. Ascend these rocky outcrops and broken pillars steadily upward; the shrine becomes visible high on the cliff face.
Optimal Gliding Path
Launch from Rabella Wetlands Skyview Tower and glide southwest toward the forest below, landing near Lakeside Stable at coordinates (1541, -3523, 0072); the shrine looms above at (1516, -3576, 0142). Alternatively, fast-travel to Popla Foothills Skyview Tower, glide south to Highland Stable, then trek east.
Tips for Speed
This area often sees rain, so prioritize non-metal gear to avoid lightning strikes during the climb. The shrine’s elevated position ensures visibility from afar once close to the stable.
Best gliding route from Lakeside Stable to Joju-u-u Shrine
Joju-u-u Shrine perches high on the cliff directly above Lakeside Stable, so the best gliding route requires gaining elevation first since the stable itself sits at ground level.
Optimal Gliding Approach
Launch from Rabella Wetlands Skyview Tower by fast-traveling there, then activate it to rocket upward and glide southwest toward Lakeside Stable. Aim for the stable’s location at roughly (1541, -3523, 0072), keeping stamina topped up with food if needed during the descent.
Landing and Final Glide
Touch down near the stable, spot the glowing shrine entrance on the cliff face above (coordinates 1516, -3576, 0142), and climb a short rocky path or use Ascend on ledges for height. From this vantage, deploy your paraglider for a quick downward glide right to the shrine door, visible straight ahead.
Speed Tips
Avoid rain-slicked climbs by gliding during clear weather; if low on stamina, attach a nearby balloon or fan construct mid-air for extra lift. This route takes under two minutes post-tower launch.