Hidden high above the Gerudo Highlands, the Mayachideg Shrine tests patience and precision with its Proving Grounds challenge. Stripped of your equipment, you’ll rely on quick thinking and smart weapon use to outlast a wave of Constructs and claim a worthy reward.
Our guide will help you find the Mayachideg Shrine location, solve its puzzles, and collect the chest – and its reward! – and Light of Blessing. Like other “Proving Grounds” shrines, the Mayachideg Shrine and its “Proving Grounds: The Hunt” challenge is all about combat.
When you’re done, our shrine locations page or interactive Hyrule map can direct you toward something else to do.
Mayachideg Shrine location
Mayachideg Shrine is found in the depths of the Akkala region, sitting within the Akkala Highlands northeast of Death Mountain. Its exact coordinates are around (3734, 1562, 0088), near the north end of the Cephla Lake area. The shrine is visible on a rocky plateau that can be reached by gliding from Ulri Mountain Skyview Tower or by climbing from the nearby cliffs. Be prepared for cold weather in this zone and bring warming gear or elixirs before making your way there.
You’ll find the Mayachideg Shrine in the Eldin Canyon region, very close to the South Akkala Stable. (That makes the shrine a handy spot for fast travel to the stable!) The exact coordinates are (3061, 1823, 0216).
Mayachideg Shrine walkthrough
The Mayachideg Shrine features a Proving Grounds challenge that strips away your gear, forcing you to rely on scavenged weapons and careful tactics. Defeat the Constructs using items found within the arena, such as bows, spears, and Zonai devices, to activate the terminal. Keep an eye on elevated platforms and explosive barrels to gain an advantage in combat. Once all enemies are defeated, the exit opens, rewarding you with a chest and a Light of Blessing.
Mayachideg Shrine is a “Proving Grounds” shrine, specifically called “The Hunt.” You’ll fight Constructs, but you’ll have more than just primitive weapons. Zonai devices are available throughout to make some fun fighting devices.
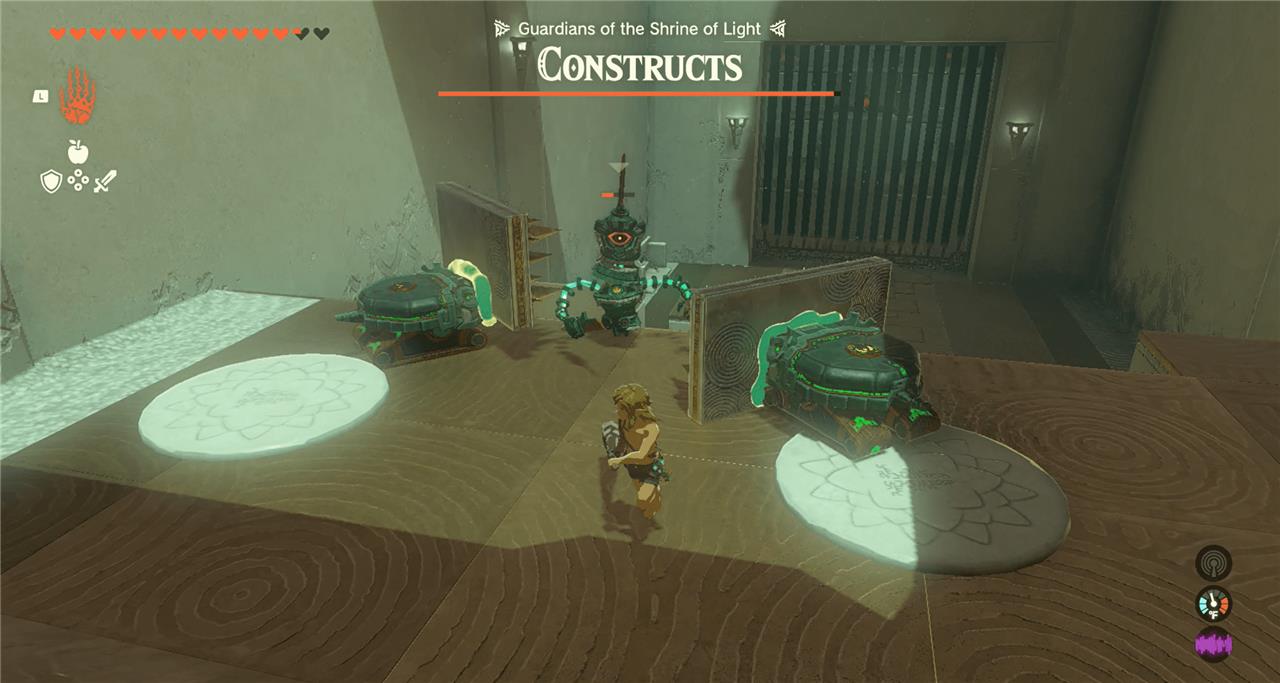
1. Head straight into the shrine. There’s a thick stick on the left. Straight ahead, at the end of the room by the gate, you’ll see a Construct. But first, you’ll come across two Zonai devices. These target enemies, but without anything pointy at the end, they aren’t super helpful.
2. Further down the slope, there are two spiky panels. Glue these on each respective Zonai device with Ultrahand.

3. Bait the Construct back up toward the Zonai devices then turn them on by hitting ’em. They’ll move and start poking the Construct.
4. The gate will open into a room with significantly more Constructs – six of them. Make sure to pick up the loot that’s been dropped, and the other weapons by the gate.
5. Take your spiky devices with you, using Ultrahand to place them in the next room, right before the large ramp leading up to the enemies. Hit the spike devices to turn them on, then let them get to work.
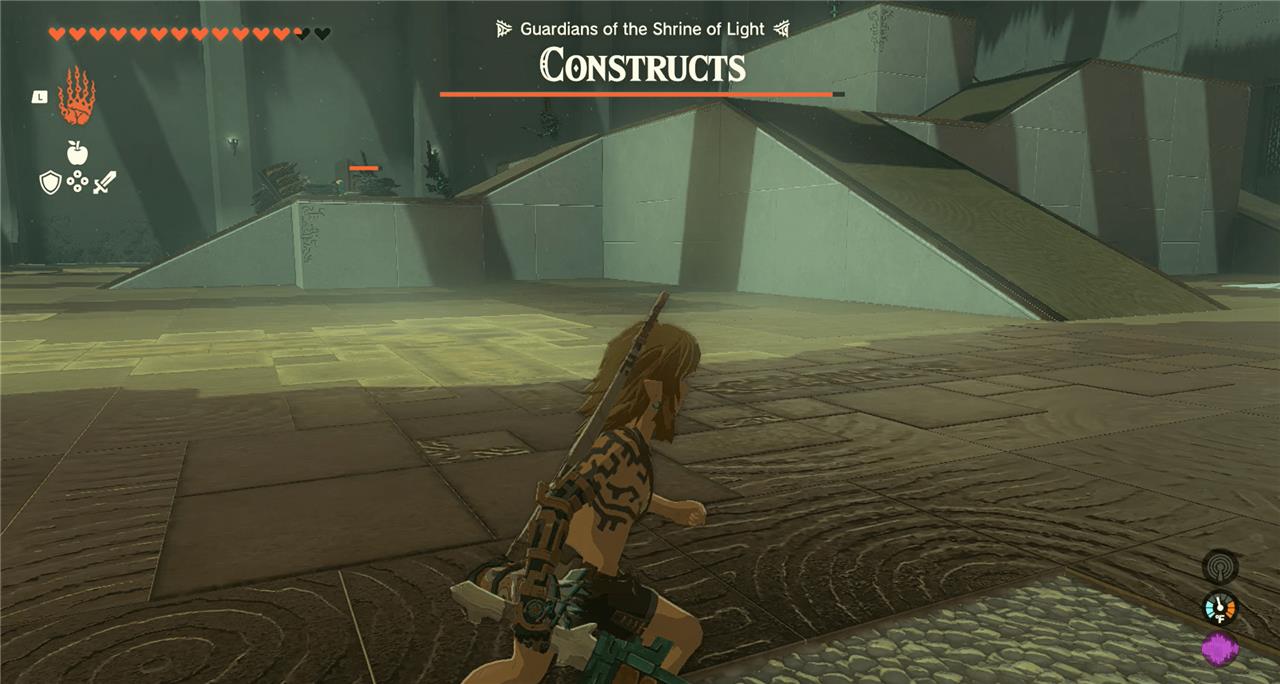
6. While the Constructs are busy fighting the devices, take a wide right and head up the right-side ramp.
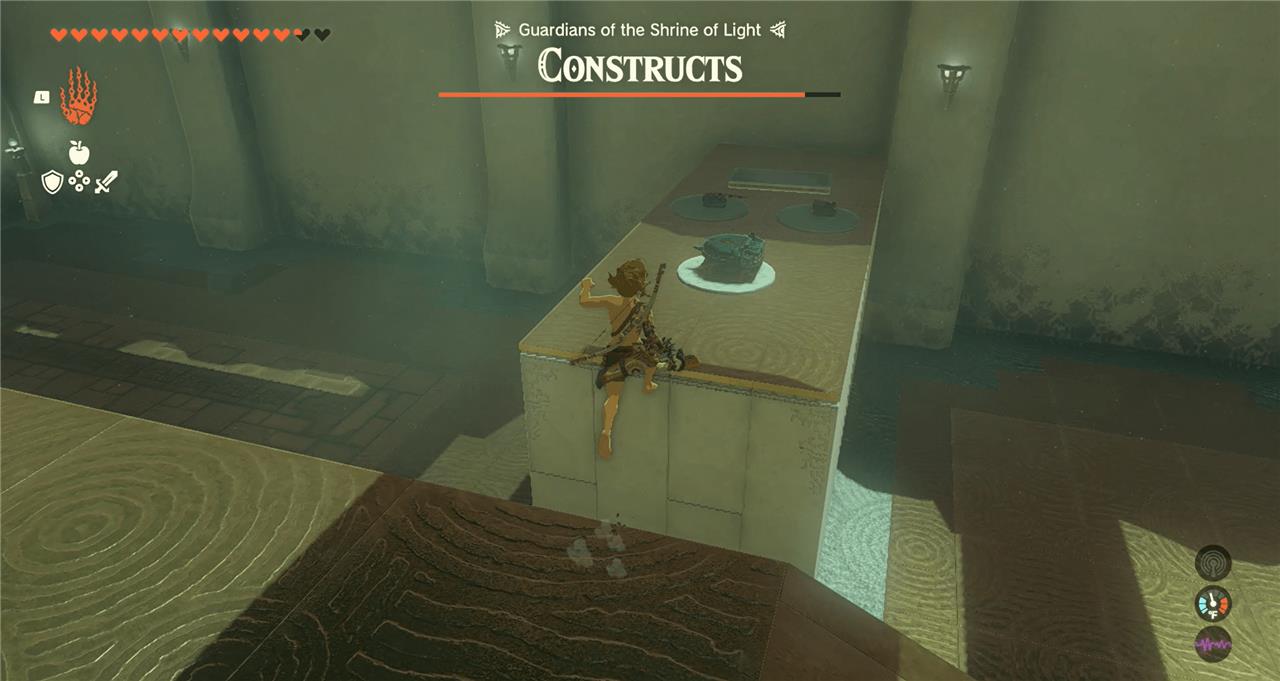
7. Take the first right. You’ll see a platform with a gap, and several items on the platform. Jump over using your glider.
8. Glue the stone slab to the Zonai device using Ultrahand, just like you did with the spikes. Do the same with the shock Zonai devices, sticking them to the front of the slab. The Constructs may have started to notice you, so just be careful to dodge their arrows.
9. Use Ultrahand to move the device to the platform the Constructs are on.
10. Use an arrow to turn the device on. It’ll start seeking out Constructs to electrify.
11. Glide down and head up the back ramp. There’s another Zonai honing device and a laser emitter. Put them together and send it off once again. There may be Constructs up here, so you may have to dispatch them before setting things up.
12. There’s another set of Zonai devices on what is now your right-side wall, if you’re facing the gate you came in from. Set that up again and have it get to work. (This one spits fire.) At the very top of the structure, there’s a cannon that you can turn on and hold, then aim at Constructs yourself. Be careful of shooting while you’re close to enemies – you will get hurt!
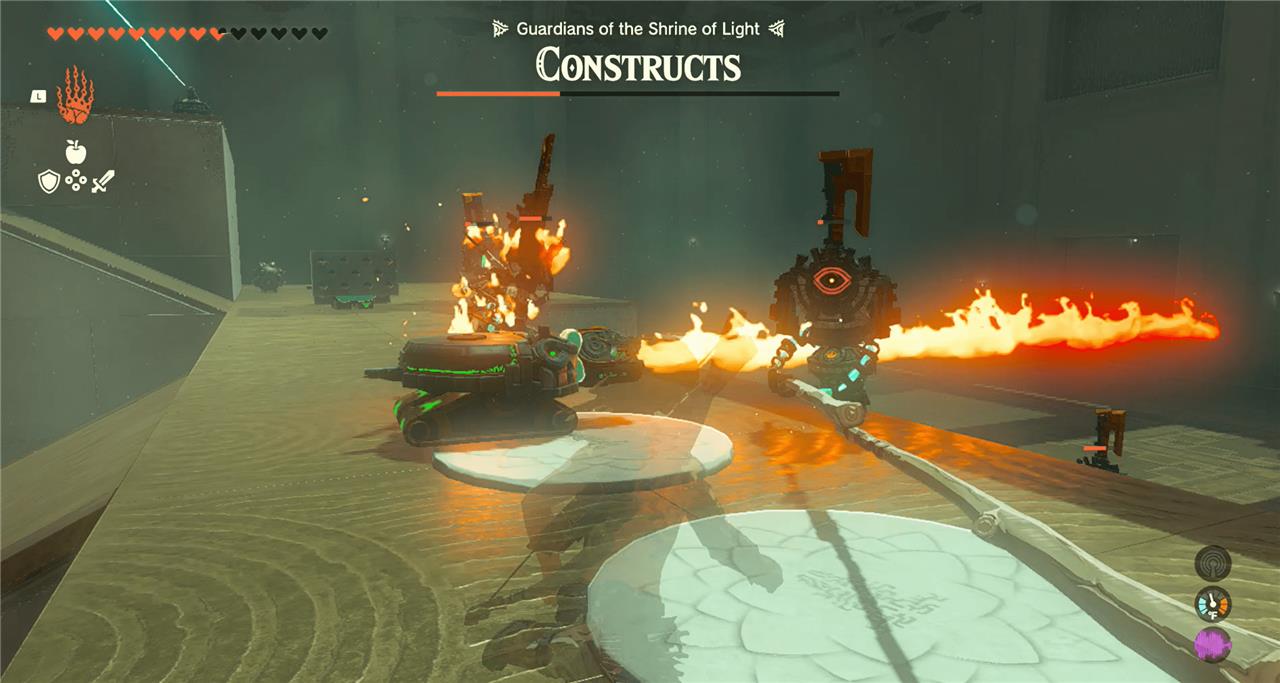
13. Fight the Constructs if they try to disturb your work. You can help out if you want, but the devices will do most of the work. There are two spiky balls you could Fuse to a weapon located in the middle of the room, which would be helpful in a fight. Occasionally you may have to reposition your auto-killing machines.
14. Once all the Constructs are killed, you’ll get your gear back. The gate at the back of the room will open.
Best weapons to bring for Mayachideg Shrine fight
Mayachideg Shrine strips all equipped weapons, armor, and items upon entry, making any gear you bring irrelevant during the Proving Grounds: The Hunt challenge.
Link must rely solely on shrine-provided items like a Wooden Stick, Spiked Panels, Homing Carts, Zonai Cannons, Emitters, and a Bow to defeat the Soldier Constructs.
Strategic Fusions
Fuse Spiked Panels or Balls to the Wooden Stick for melee damage against the initial Construct, or attach them to arrows for ranged eye shots to stun groups.
Combine Zonai devices (e.g., Cannon on a stick or Flame-Emitter with Homing Cart) to create distractions and auto-target enemies without needing personal weapons.
Gear Recovery
All original equipment returns automatically after defeating all Constructs and claiming the Captain III Spear chest, so no pre-shrine weapons affect the outcome or rewards.
Which Zonai devices are most useful in Mayachideg Shrine
Homing Carts and Cannons stand out as the most useful Zonai devices in Mayachideg Shrine for their auto-targeting and crowd-control capabilities against the Soldier Constructs.
Emitters (Flame, Shock, Frost, Beam) enhance these by adding elemental or laser damage when fused to Carts, creating deadly homing weapons that stun, burn, or zap groups without direct combat.
Device Locations
-
Homing Carts (multiple): Entry ramp, middle tier right/rear, lower tier center-activate to swarm and distract enemies.
-
Zonai Cannon: Top tier center-rotate to bombard Constructs or fuse to a stick for a melee cannon club.
-
Emitters: Middle tiers (Flame left, Shock/Frost right, Beam rear)-pair with Carts via Ultrahand for homing attacks.
Top Strategies
Fuse Shock Emitter to a Homing Cart on the upper platform, Ultrahand it toward the high Construct, then drop more Cart-Emitter combos (Flame or Beam) from above to clear the rest safely.
Aim the Cannon manually at clustered foes or let enhanced Carts handle most work, minimizing personal risk on the multi-tiered arena.