High above Hyrule’s frozen skies, the Wind Temple awaits-an ancient airship sealed in blizzards, filled with puzzles, Gust powers, and hidden dangers. Here’s how to master every mechanism and bring calm to the storm.
You’ll be tasked with turning five (not four, like some of the other temples) of the gears to open the hatch on the ship. Tulin will be there to help, providing gusts of wind for the mechanisms to open.
Below, we walk through how to turn the five locks, and how to take down its boss, Colgera. While we list the turbine locks in a numbered order below, you do not have to do them in any specific order.
How to prepare for the Wind Temple dungeon
Stock up on cold-resistant armor and meals before setting out, as the harsh winds and frigid temperatures can quickly drain your health. Make sure to bring plenty of arrows, as airborne battles and ranged switches are common inside. Fuse weapons with materials that enhance attack power or elemental effects to handle enemies faster. Upgrading your stamina wheel also helps, since you’ll spend a lot of time gliding and climbing in windy areas. Finally, complete Tulin’s quest beforehand so you can use his gust ability, which is key to reaching several sections of the dungeon.
Before you start solving the lock puzzles in the Wind Temple, make sure you have some woodandflint on-hand, as you’ll need to melt large chunks of ice to get some optional loot.
You also need cold resistance potions and/or armor, as it’ll be quite cold outside of the temple. (The indoor parts of the temple are not cold, so you don’t need to worry about staying cold resistant while you solve the indoor parts of the puzzle.)
How to get to the Wind Temple
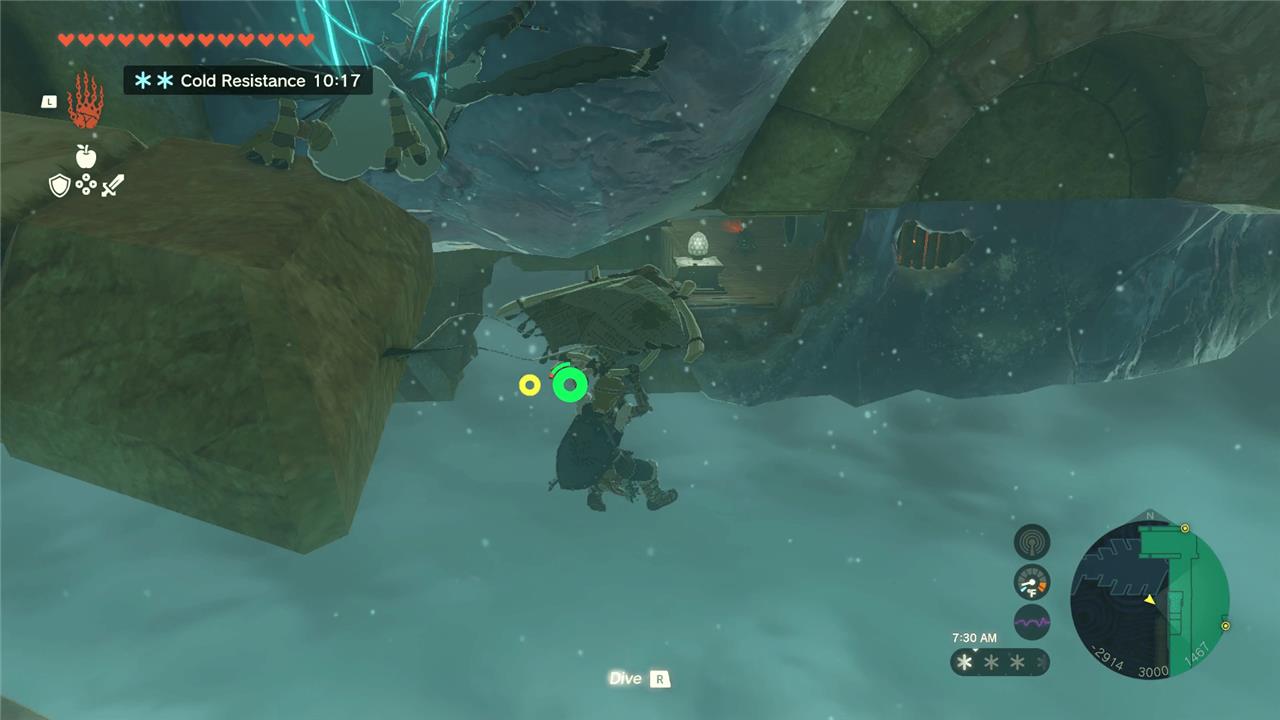
Head north from the main entrance to the Great Sky Island’s floating islands. Glide toward the marked tower in the distance, using updrafts from the wind currents to gain height. Activate the nearby device with a Zonaite construct if one appears, then paraglide across the gap to the temple’s outer platform. Enter through the large wind-carved door, watching for gusts that push you off course.
You’ll probably be here already if you’ve been following our walkthroughs, but you’ll get to the Wind Temple just by following the broken ruins that are part of Rising Chain Island. Tulin will help you easily glide from piece to piece until you get to the eye of the storm, which you’ll dive into.
Wind Temple chests
The Wind Temple holds several chests with valuable items. One sits on the upper platform near the entrance; use Ascend to reach it after activating the first turbine. Another hides behind breakable debris in the main chamber-smash the rocks with a bomb or fusion tool. A third chest appears on the rotating fan section once you align the blades properly. The final one drops from the boss arena ceiling after defeating Colgera, containing a powerful bow. Grab them all during your ascent to maximize rewards.
- Soldier III blade
- Opal
- Sapphire
- Zonaite shield
- 10 arrows
- Ruby
- Captain II reaper
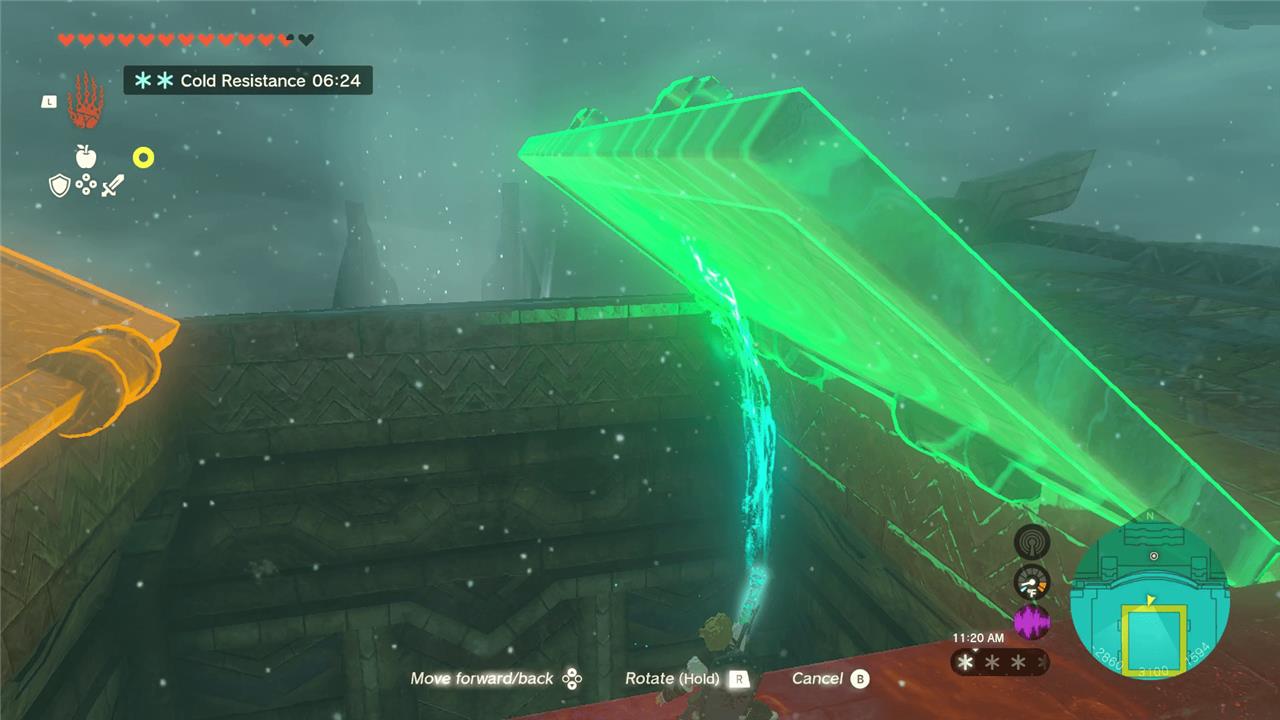
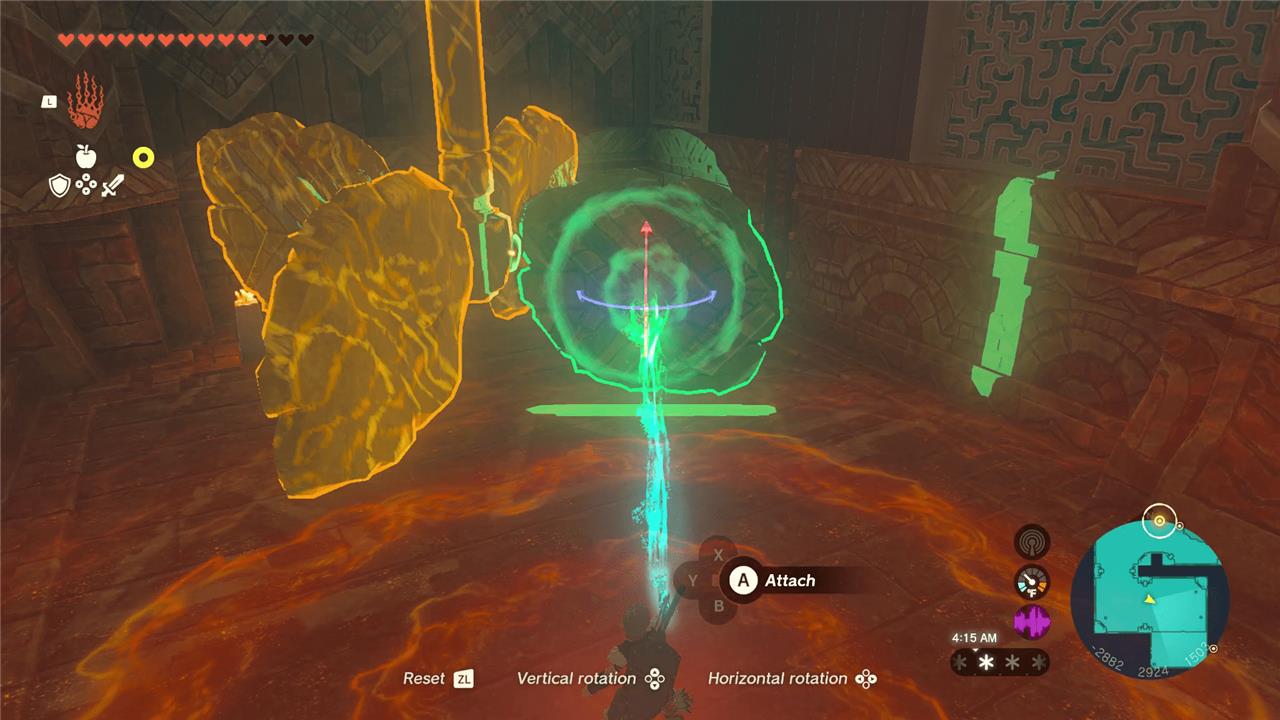
Activating the first turbine lock
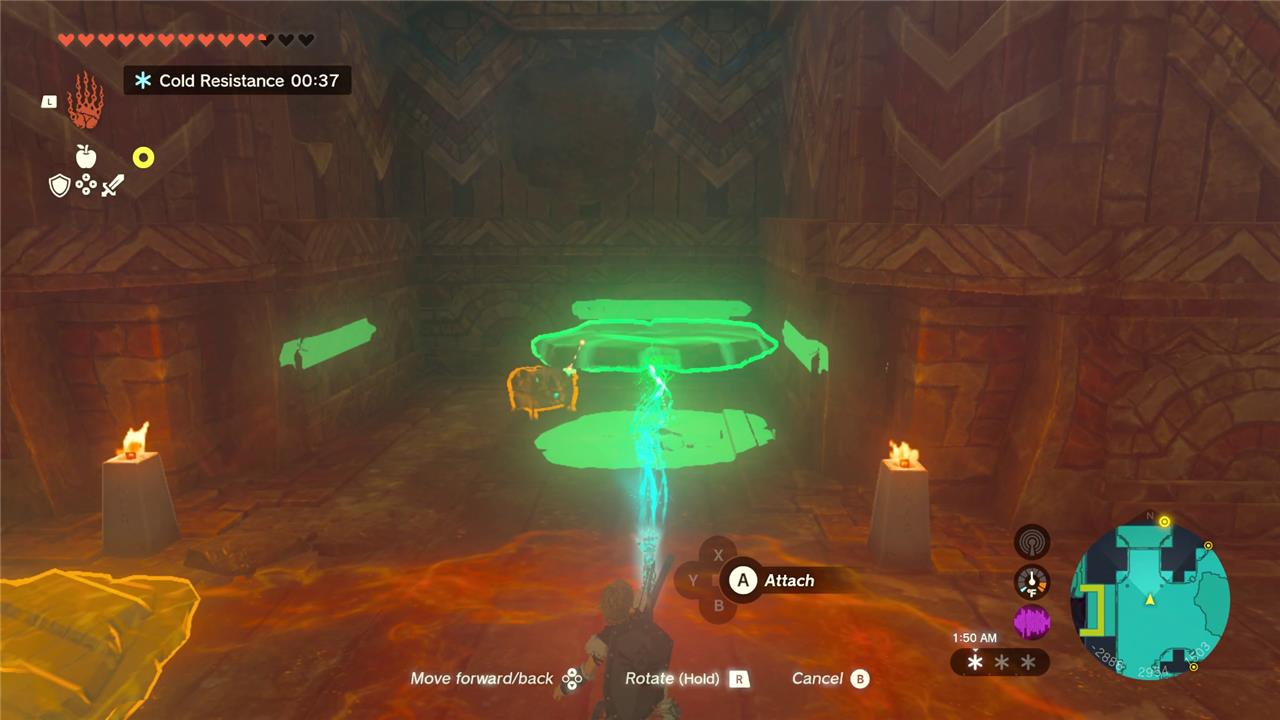
Use Ultrahand to pick up the loose metal slab nearby and slot it into the gap on the floor mechanism. Attach it firmly to the rotating cog with Ultrahand so it aligns with the lock’s pattern. A short cutscene plays as the first turbine engages, powering up the central fan blades and clearing the path ahead.
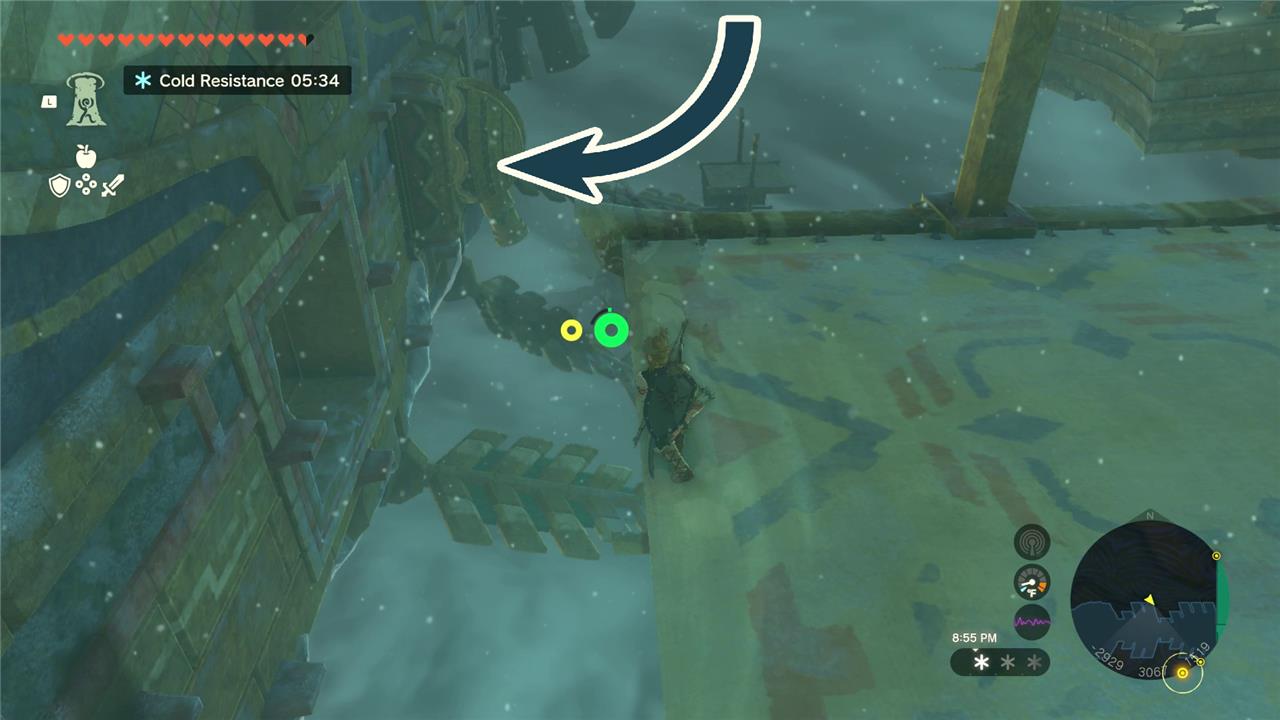
Using the big wind current in the middle of the ship, glide up and to the north, landing on the tallest part of the ship.
Use Ultrahand on the doors to open them, and drop in, dodging the red lasers below. Because there’s a huge fan at the bottom of this structure, you’ll need to carefully open and close your glider to dodge the lasers, while making sure not to take fall damage.
This room has two ledges. The north ledge has the turbine that you need Tulin to hit with wind to make a gear turn and the southern ledge has a chest with a Soldier III blade inside.
Ride the current up and head back to the central area of the ship.
Activating the second turbine lock
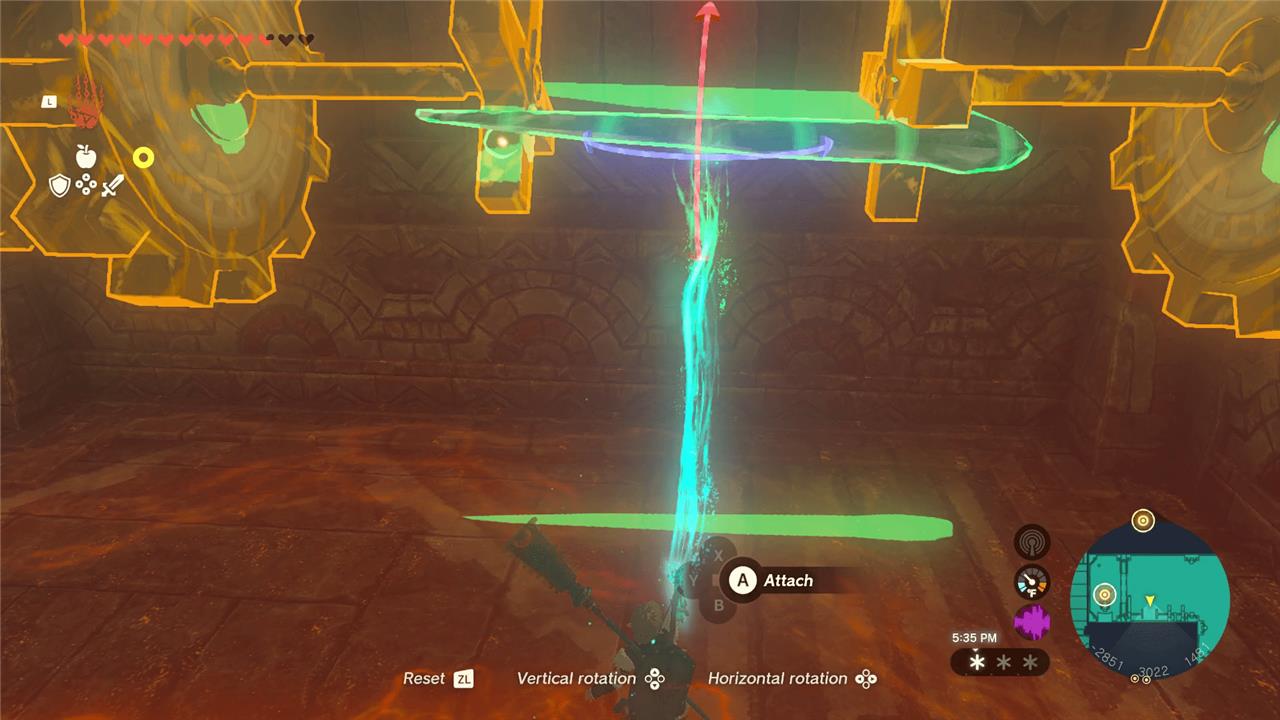
Head to the second turbine mechanism and glide down to the lower platform. Strike the rusted fan blades with a weapon fused to a rocket or use Recall on the nearby moving block to spin the turbine. Once it activates, a wind current rises, letting you ascend to the lock above. Attach a fan or wing to your shield or build a device to reach it safely. Insert the key to release the second lock.
Head north from the center of the ship to see two locked rooms. Use Ultrahand to pull the lever, opening the door to the western room. Take out the construct inside to get a chest with an opal inside.
Across this room to the east is another door with a lever, though the lever is broken. Use Ultrahand to fuse a nearby icicle to the broken lever, like so:
Open the door using the now-functional lever to get access to another turbine lock. Use Tulin’s gust on it and return to the central area.
Activating the third turbine lock
Head to the control room above the third turbine and strike the large gear with a fused weapon to spin it clockwise. This releases the lock mechanism, halting the turbine’s wild rotation. Glide down to the newly exposed platform, then use your shield or Ascend ability to reach the upper ledge where the final switch awaits. Flip it to fully secure the turbine and progress deeper into the temple.
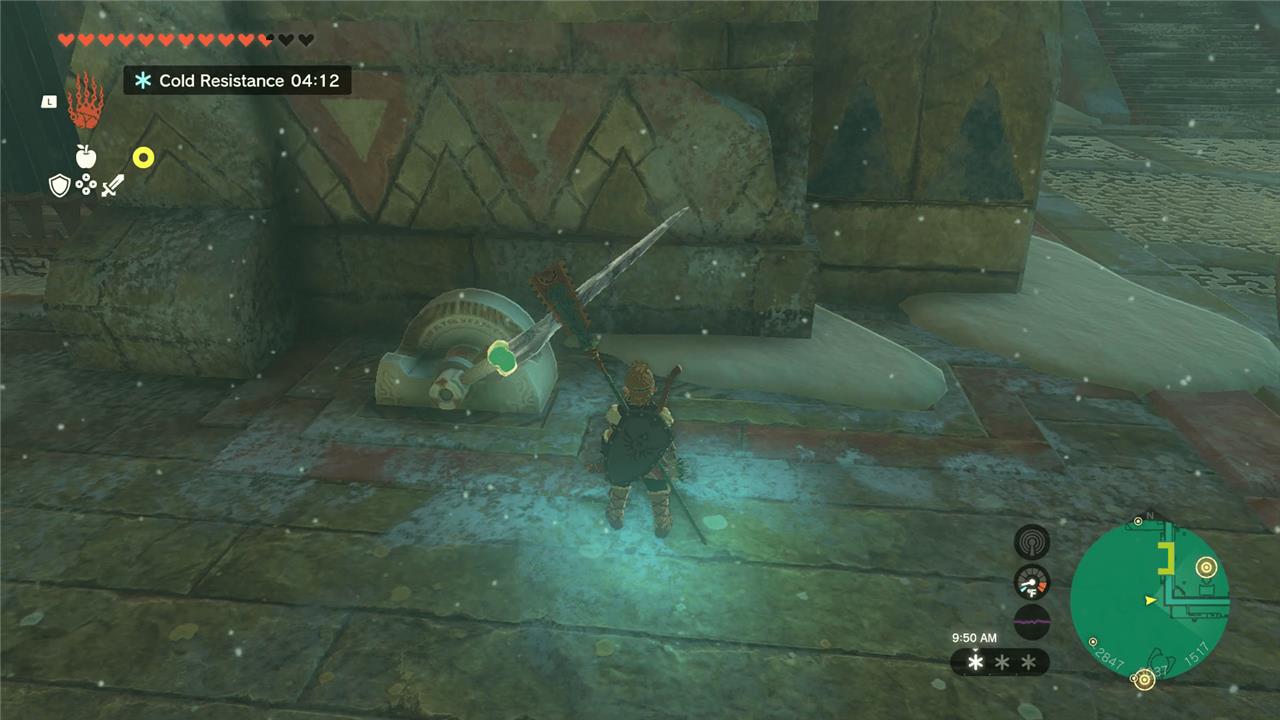
Jump off the east side of the ship, gliding down to the platforms and trampoline boats around. Note that there is a cannon on the side of the ship that will aim and fire at you, so make sure to dodge its shots.
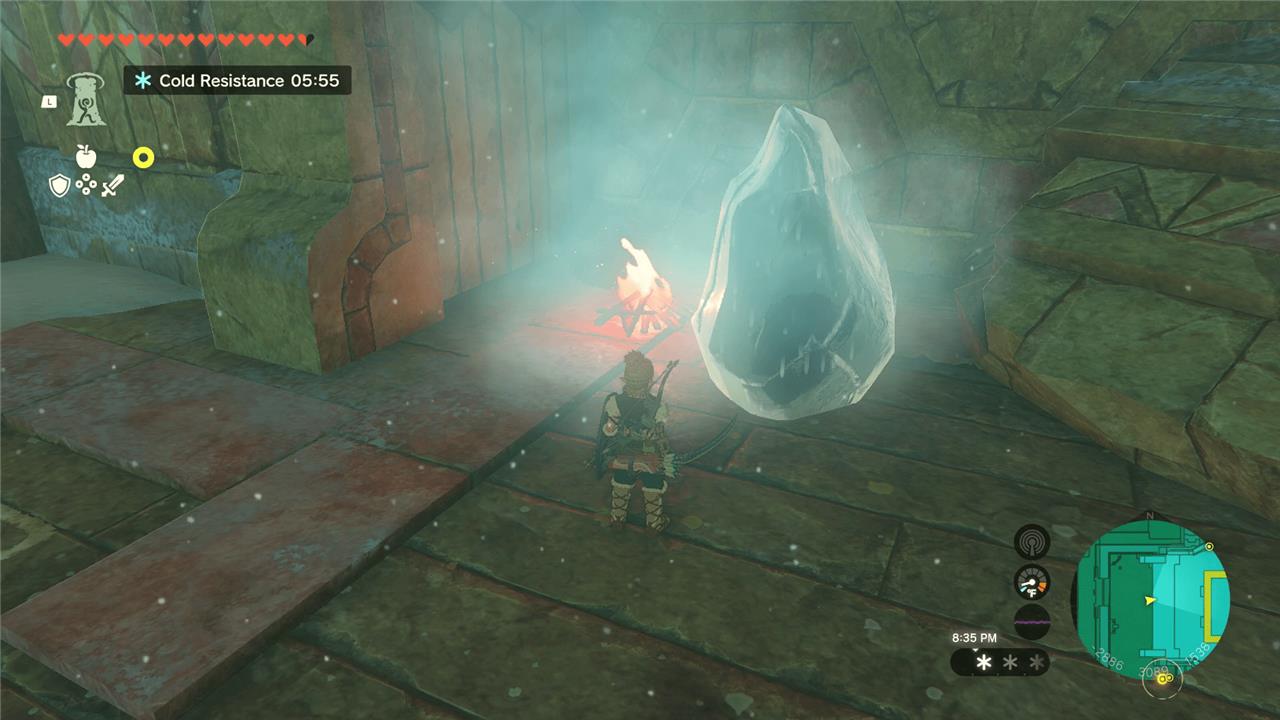
Look for a door blocked off with icicles. We cleared away the icicles using a red Chuchu jelly, but you can use bomb arrows, or whatever explosive attachments you may have to clear it away.
Right away, you’ll see a chest locked away far behind some bars on your left. Connect the icicles on the ceiling together with Ultrahand to create a long stick to attach and grab the chest with. Bring the chest back through the hole for a sapphire.
Turn around and take out the Keese. Use Recall on the wheel to reverse it, allowing you to get on the other side. Fight the Construct and use Ultrahand on the lever to open the door, but don’t leave the room yet.
Shoot an icicle off the ceiling with an arrow and attach it to the turning gears on the wall like so:
This will open the gate on the side, allowing you access to the third turbine lock. Turn it on and head back to the main area of the ship.
Extra Wind Temple chest locations
In the Wind Temple, extra chests hide in the rotating fan rooms on the upper levels. Shoot the eye-like switches to halt the fans and reveal hidden alcoves behind them. One chest sits in the northwest room after aligning the platforms, containing arrows. Another appears in the central chamber by gliding from the broken railings to a ledge with a Zonaite. Check the southern fan area post-Simulacrum fight for a final chest with a Large Zonaite.
Using a trampoline off the east side of the ship or the wind current in the center, leap up here to get to Wind Temple 1F (you can also manually climb up, if you want):

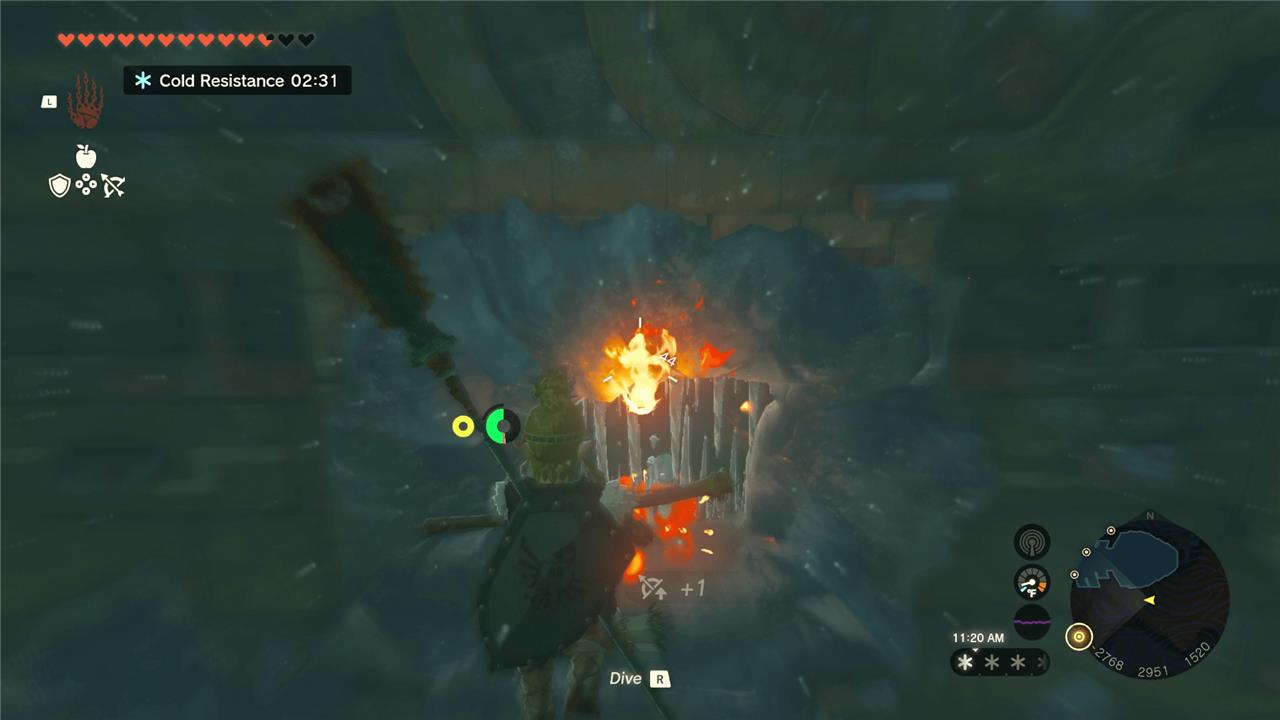
Defeat the Construct and jump on the ice until it breaks. Build a campfire (dropping wood and flint and then hitting it with a metal weapon) next to the ice block inside. Use Ultrahand to flip the lever and get a Zonaite shield from the chest.
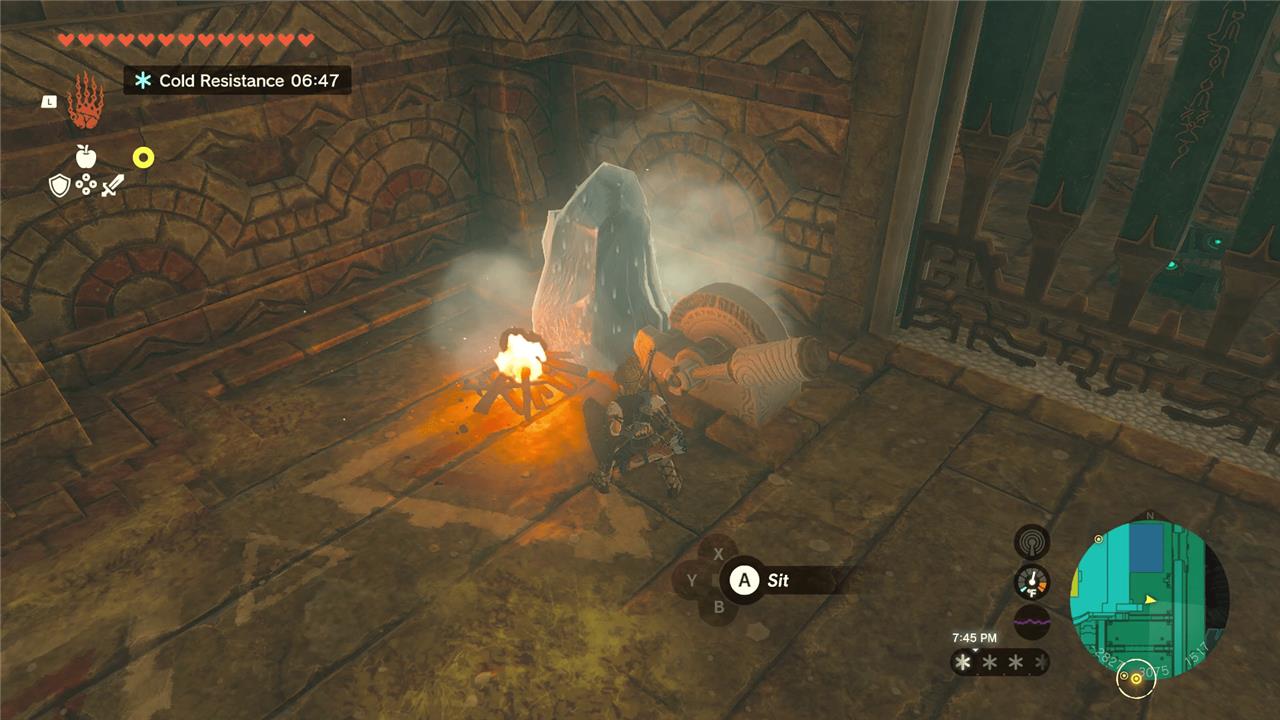
Ascend back up and run around the outside of 1F to the west side. Build another campfire by this ice block to get 10 arrows:
Activating the fourth turbine lock
Use Tulin’s gust ability to glide across the gap to the fourth turbine area, then melt the ice covering the mechanism with a fire source such as a Fire Fruit or Flame Emitter. Once the ice is cleared, interact with the control panel to activate the lock. A short cutscene will show the turbine powering up, confirming that the fourth mechanism is now active and the final step toward restoring the temple’s main system is complete.
Jump off the west side of the ship and head into this hole:
Defeat the Construct on the left and avoid the red lasers by jumping and crouching to get a chest with a ruby.
Turn around and head to the right of the entrance you came into this room from, defeating the two Keese. Melt the ice block with a campfire (as mentioned in the above optional chest section), to get a Zonai time bomb capsule and a portable pot capsule.
Use Tulin’s wind to jump across the icy gap and use Ultrahand on the lever to open the door outside on the right. Keep venturing in more to the left, taking out the long-necked construct. Once it’s dead, Ascend up.
Continue on and pick up the two stone slabs in the northern part of the room to get a chest with a Captain II reaper inside:
Head to the southern part of this room to see a windmill missing its blades. Ultrahand the four stone slabs on this floor to create a functional windmill like so:
Once it’s put together, use Tulin’s wind gust to open the gate and climb through.
Keep climbing up, take out the construct above, and use Tulin’s wind on the turbine lock. Head back to the main area once you’re done.
Activating the fifth turbine lock
After clearing the previous locks, glide across to the final turbine chamber on the southwest side of the temple. Watch for wind gusts that can knock you off course and use Tulin’s gust ability to stay airborne. Once inside, defeat the Construct guarding the lever, then strike it to set the mechanism in motion. The turbine will spin up, and a short cutscene will confirm the fifth lock has been activated, bringing you one step closer to powering the main generator.
The last lock is just chilling under the ship. Glide down from the east side, and you’ll notice a small platform with some lanterns to land on:
Fight the Construct, activate the turbine with Tulin and head back up.
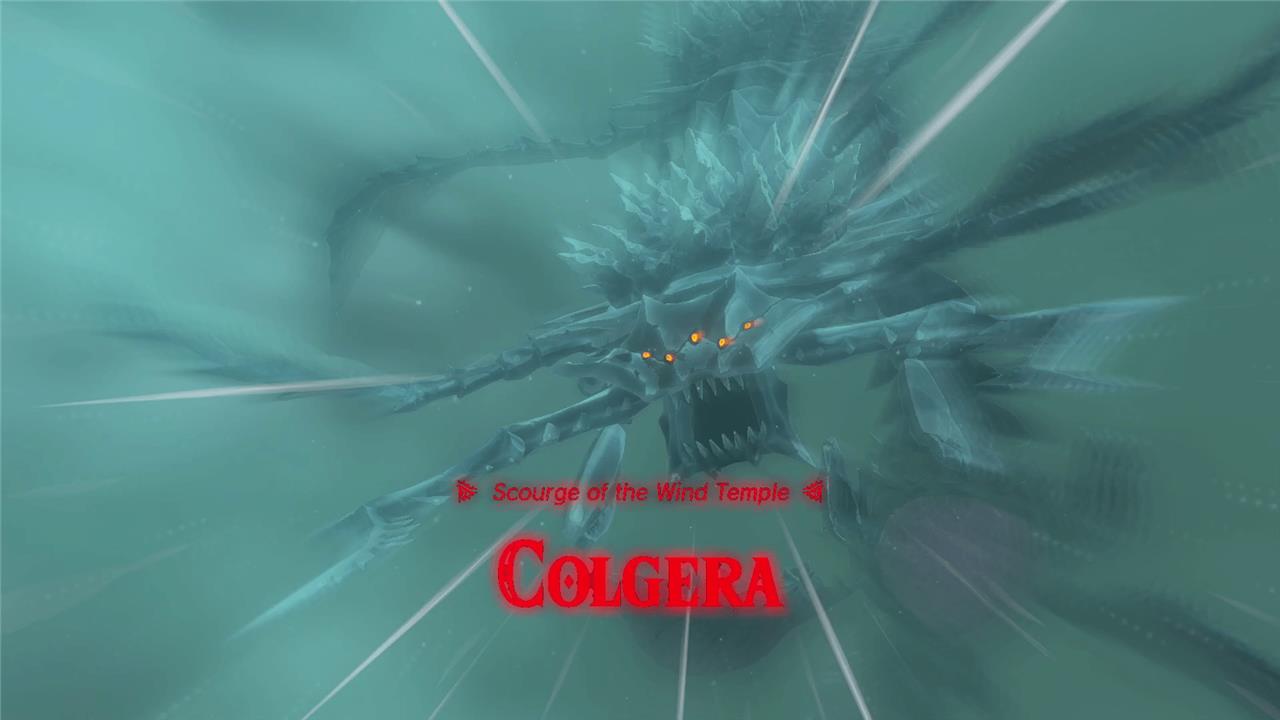
How to beat Colgera, The Wind Temple boss
Colgera attacks with icy projectiles and powerful dives, so keep moving and use Tulin’s gust ability to avoid getting hit. Target the ice armor on its body, break it with arrows or melee attacks, and strike the exposed weak points. During the airborne phase, glide to stay aligned with Colgera and use the gust to close the distance quickly. After destroying all ice coverings, finish it off with swift strikes before it regenerates its defenses.
Before you start this boss fight, make sure you have lots of arrows on hand. We also recommend having over a dozen or so Aerocuda wings, as they are immensely helpful throughout the fight. Make sure you have enough cold resistance to last, as it will be very cold throughout your fight. You’ll also want to (as usual) make sure you have food to restore your health if things start to go wrong.
You’ll spend all of this boss fight in the air, firing arrows, which is why we recommend you have a ton. Luckily, as you draw your bow, time will slow down, allowing you to take accurate shots – while your stamina drains. When you stop gliding, you’ll regain large amounts of stamina at a time, so you can stay in the air throughout the whole fight.
Once you’re ready to take on the boss, interact with the altar at the center of the ship.
Colgera has several ice plates on its underside, which you’ll want to break open with arrows. Once they’re broken open, you can hit its weak point under the ice. Using Aerocuda wings fused to your arrows makes them fly straighter, allowing you to easily hit the ice and weak points.
Colgera will fly in and out of portals, and you will take damage if it collides with you, so make sure to pan your camera around to look for where it may come from. Tulin will also shout things like, “Below you!” to help out.
After a bit, Colgera will fire the spikes on its top side, so you’ll have to glide and dodge them. You can use Tulin’s wind gust to help you dodge these spikes. Once the spikes are done, this will leave its top side open for more ice-breaking arrows.
Once the spikes are off its top side, you can actually press R to dive-bomb straight through the ice. This is great for preserving your arrow supply, but if you’re looking to get this fight done quickly, you’ll just want to use arrows rather than wait for it to expose its vulnerable parts.

After you destroy all three segments, Colgera will disappear and reappear for its second phase. The second phase is largely the same, but Colgera will now summon annoying tornados that you’ll need to avoid.
Once again, fire at the ice on Colgera’s underbelly to expose its weak points, and then hit the weak points. Using a 14-damage bow, we were able to break the ice in one shot when our arrow was combined with an Aerocuda wing. If you’re quick with your aim, you can fire off two consecutive shots to break the ice and then immediately hit the weak point.
Repeat this for each of Colgera’s segments and it’ll be defeated in no time.
Once the boss is down, grab the Heart Container that lands in front of you, interact with the altar, and watch the cutscene that plays out.
You’ll now be able to use Tulin’s abilities around the map wherever you are, giving you a nice horizontal boost when gliding. The snowstorm that plagued the Hebra mountains is also gone now, so you can freely explore without it getting in your way.
How to defeat Colgera boss in Wind Temple
Colgera looks scary but it’s a very pattern-based fight: stay under it, break the ice plates, then hit the glowing cores.
Preparation and basics
-
Equip at least one level of cold resistance (Snowquill armor or food) so you don’t lose hearts over time in the arena.
-
Bring plenty of arrows; fusing Aerocuda wings or Keese eyes makes long shots much easier, but isn’t required.
-
Remember that drawing your bow while in the air slows time, giving you lots of chances to line up weak-spot shots.
Phase 1: Break the underside plates
Goal: Destroy the three ice “discs” along Colgera’s body from below.
-
Positioning
-
Drop down until you are below Colgera, then open the paraglider so you’re gliding under its body, not above its back.
-
From underneath, you’ll see round ice plates; these cover the purple weak points.
-
-
Attacking
-
While gliding under a plate, press ZR to aim your bow; bullet time starts, giving you several seconds to shoot.
-
First arrow breaks the outer ice; another arrow (or two, depending on bow damage) hits the exposed purple core and counts as real damage.
-
Repeat for all three segments; you can often get 2-3 hits in one slow-motion window if your stamina allows.
-
-
Dodging attacks
-
When Colgera dives at you from below, quickly dive straight down for a second to get out of its path, then glide again.
-
Avoid touching the body or portals; just keep a bit of horizontal distance while staying under it.
-
Phase 2: Spikes and tornadoes
After you break all three weak spots once, Colgera regrows the ice and adds more attacks, but the win condition is the same: break the three plates again.
-
Ice spike barrage
-
Colgera creates tall ice spikes from its back/upward side; these shoot toward you.
-
Glide sideways or slightly change altitude to slip between them; using Tulin’s gust helps you dash away faster.
-
-
Tornadoes and charge attacks
-
Tornadoes start appearing around the arena; if you drift near one, use Tulin’s gust to push yourself away or dive to drop below it.
-
When Colgera appears directly below you and rockets upward, tap R to dive briefly and move laterally out of its path, then open your glider again.
-
-
Fast kill options
-
You can still shoot arrows at the plates like in phase 1; bomb-flower arrows or high-damage bows break the ice very quickly.
-
A very safe method is: drop well below Colgera, glide into position under one plate, go into bullet time, and fire 2-3 arrows to break ice and hit the core before it leaves range.
-
Arrow-saving dive method (optional)
If you’re low on arrows, you can dive-attack the plates instead.
-
Wait until Colgera is passing above and a plate is exposed; then aim yourself under it and press R to dive.
-
As you hit the ice plate, you’ll smash through it and damage the weak point, similar to using arrows, but this is riskier and requires precise timing.
Keep repeating the same pattern-stay under Colgera, break the three plates twice-while avoiding tornadoes and charges, and the fight will end with the cutscene and your reward (Tulin’s Vow and a Heart Container).
If you tell me what’s killing you most (tornadoes, lining up shots, or running out of stamina), I can give a very specific micro-strategy for that problem.
What rewards do you get after beating Colgera
After beating Colgera in the Wind Temple (the Rito region main dungeon), you get a few key rewards:
-
A permanent Heart Container appears right after the fight, increasing your maximum hearts by one.
-
You receive Tulin’s Vow, which lets you summon Tulin as a sage companion in the overworld and use his gust ability any time.
-
The main Rito regional quest is cleared, the blizzard over Rito Village ends, and you’re returned to the village after a story cutscene.
Later, if you fight Colgera’s rematch version in the Depths, it can drop a Colgera Jaw (fusable monster part) and guard a chest with a Huge Crystallized Charge for Energy Cell upgrades.