Hidden deep beneath the Gerudo Desert sands, the Usazum Shrine challenges players with a clever test of balance and precision. Here’s where to find this elusive shrine and how to solve every puzzle waiting inside.
Usazum Shrine location
Usazum Shrine is located in the southern part of the Usazum region, tucked between rocky ledges and a small stream. Access requires solving a simple platforming puzzle to reach the shrine entrance, where a series of ancient mechanisms awaits.
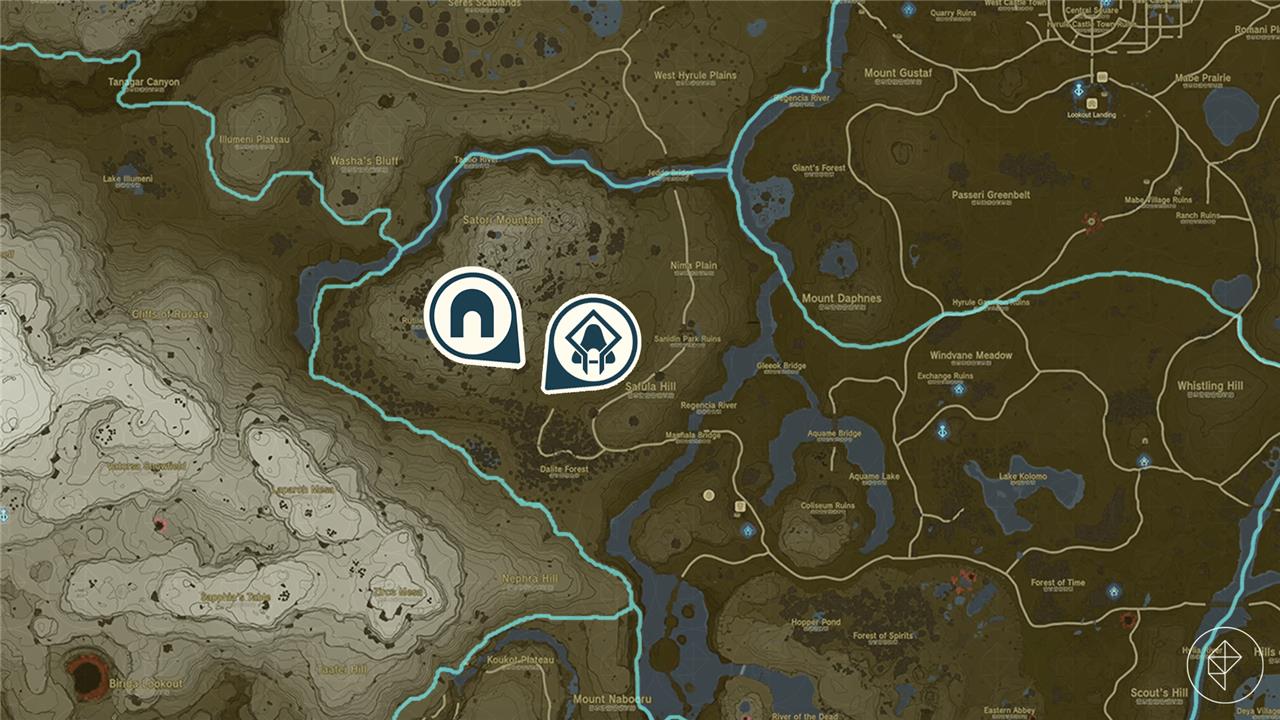
Usazum Shrine is found within the Hyrule Ridge region. It’s exact location is (-2140, -0873, 0093).
It’s basically straight west from the Hyrule Field Skyview Tower, but it’s a long glide to get there. If you’ve unlocked Jinodok Shrine in the Central Hyrule Sky, it’s a bit closer.
To open the shrine, you’ll need to retrieve a crystal from a nearby cave and complete ‘The Satori Mountain Crystal’ shrine quest.
The Satori Mountain Crystal shrine quest walkthrough
The Satori Mountain Crystal shrine quest walkthrough
Head for the field to the south of Satori Mountain just north of an area called the Dalite Forest. There’s a cave at the base of the mountain, so watch a Blupee that’ll lead you inside.
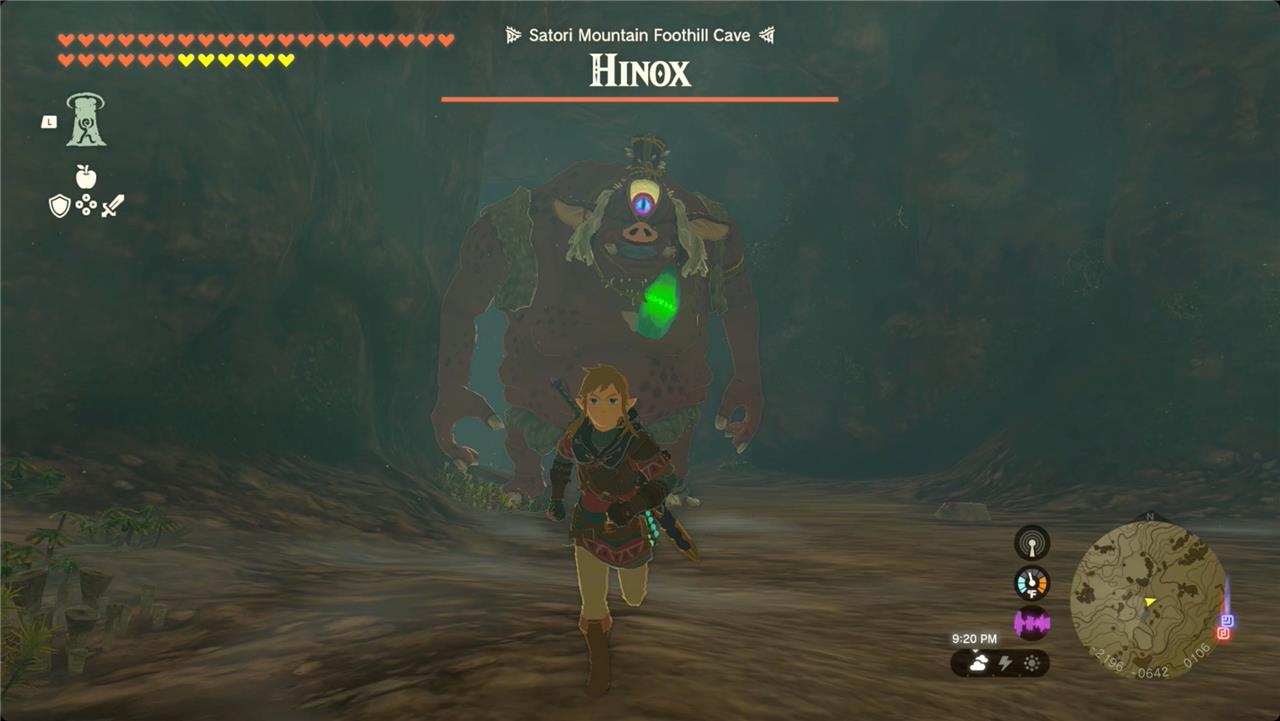
The inside of Satori Mountain Foothill Cave is a large ring (with a room high on the northeastern wall where you’ll find the cave’s Bubbulfrog). You’ll find a Hinox patrolling the ring clockwise with the Usazum Shrine crystal around its neck.
The Hinox’s left leg is armored, so focus on its eye and its right leg to defeat it quickly. When it’s down, grab the crystal and carry it back outside to the shrine.
Usazum Shrine walkthrough
Inside the Usazum Shrine, you’ll face a series of puzzles that test your ability to manipulate light and mirrors. Use the mirrors to redirect beams toward specific targets, activating the mechanisms that open new paths. Precision and timing are key, as some puzzles require moving platforms or adjusting angles while the light travels. Collect the available treasure chest before heading to the altar to complete the shrine and earn your Light of Blessing.
How to find the Hinox guarding the Usazum Shrine crystal
Finding the Hinox
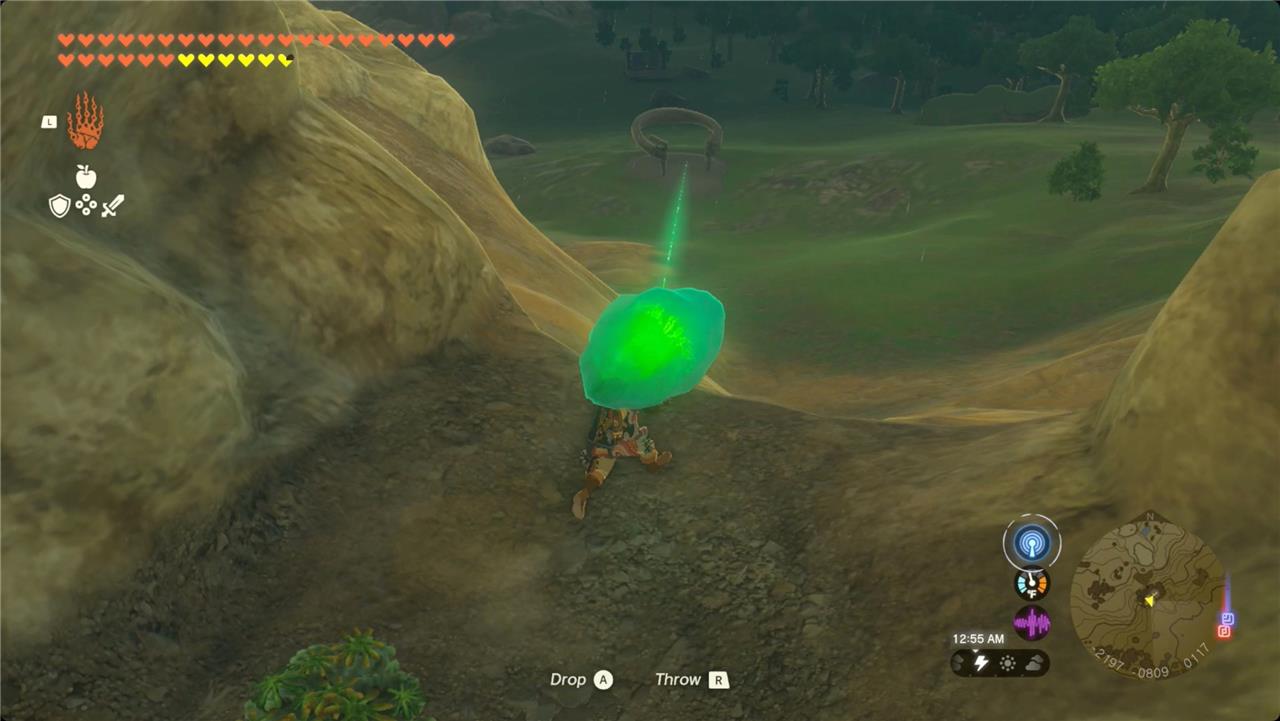
The Hinox guards the Usazum Shrine crystal inside the Satori Mountain Foothill Cave, located at coordinates (-2197, -0814, 0116), just northwest of the shrine itself at (-2139, -0874, 0093). Follow the green beam of light from the inactive Usazum Shrine entrance, which leads directly into this nearby cave at the base of Satori Mountain, north of Dalite Forest. A Blupee often appears near the cave mouth to guide you inside.
Inside the Cave
The cave forms a large circular chamber where the Hinox patrols clockwise around the perimeter, wearing the glowing crystal as a necklace-causing the light beam to bob and move. Ground shakes signal its approach as you enter; stay on the outer path to spot it quickly. A central rock pillar divides the space, with a climbable hole midway up for safe vantage points, and a Bubbulfrog hides in a northeastern alcove.
Defeating the Hinox
Target its eye with arrows to stun it repeatedly, exposing vulnerabilities-its left leg has armor, so prioritize the right leg and eye. Bomb Flowers on arrows deal heavy damage; after enough stuns, it may shield its eye, so climb the central pillar for melee attacks or drop from above. Once defeated, grab the dropped crystal, exit the cave, and carry it back to the shrine pedestal to activate the entrance.
Best strategy to stun a Hinox quickly
Usazum Shrine’s Hinox follows the standard strategy for quick stuns in Zelda: Tears of the Kingdom. Shoot arrows directly into its large eye from medium range-about a 5-second sprint away-to reliably stagger it every few seconds.
Positioning Tips
Maintain distance so the Hinox lumbers slowly toward you, exposing its eye clearly; too close limits your aim height, while too far delays your melee follow-ups. If it shields the eye with a hand, back up further until it drops the guard, then fire again-Bomb Flowers attached to arrows amplify damage for faster stuns.
Follow-Up Attacks
Once stunned and toppled, rush in with a fast one-handed weapon (20+ damage ideal) targeting its legs or underbelly for maximum hits before it recovers. Repeat the eye-shot cycle; in the cave’s confined space, use the central pillar for cover or high-ground drops to avoid its grabs.