Running Diablo 4 on the Steam Deck isn’t as straightforward as installing it from Steam, but with the right setup through Battle.net and a few tweaks, you can bring Sanctuary to your handheld without compromise.
The thing is, for PC, Diablo 4 is on Battle.net only, not Steam, so it isn’t natively supported by the Steam Deck. However, it is possible to get the game running (and running well) with a little effort. The whole process takes roughly 30 minutes, depending on your experience with the Deck’s desktop mode. No matter your familiarity, this guide will show you how to play the game on your Deck.
<
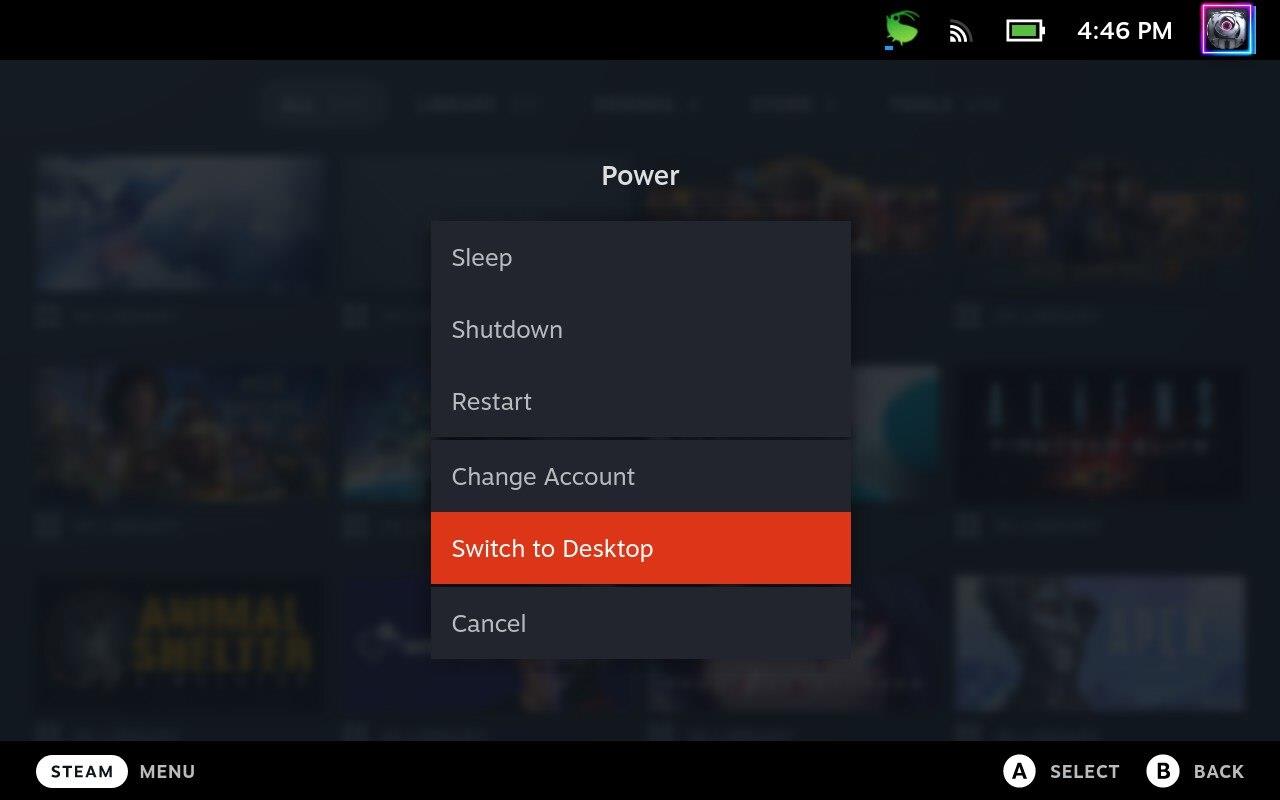
First, with your Steam Deck on, head into desktop mode by pressing the physical Steam button. In the pop-up window, select the power option, and then select “Switch to Desktop.”
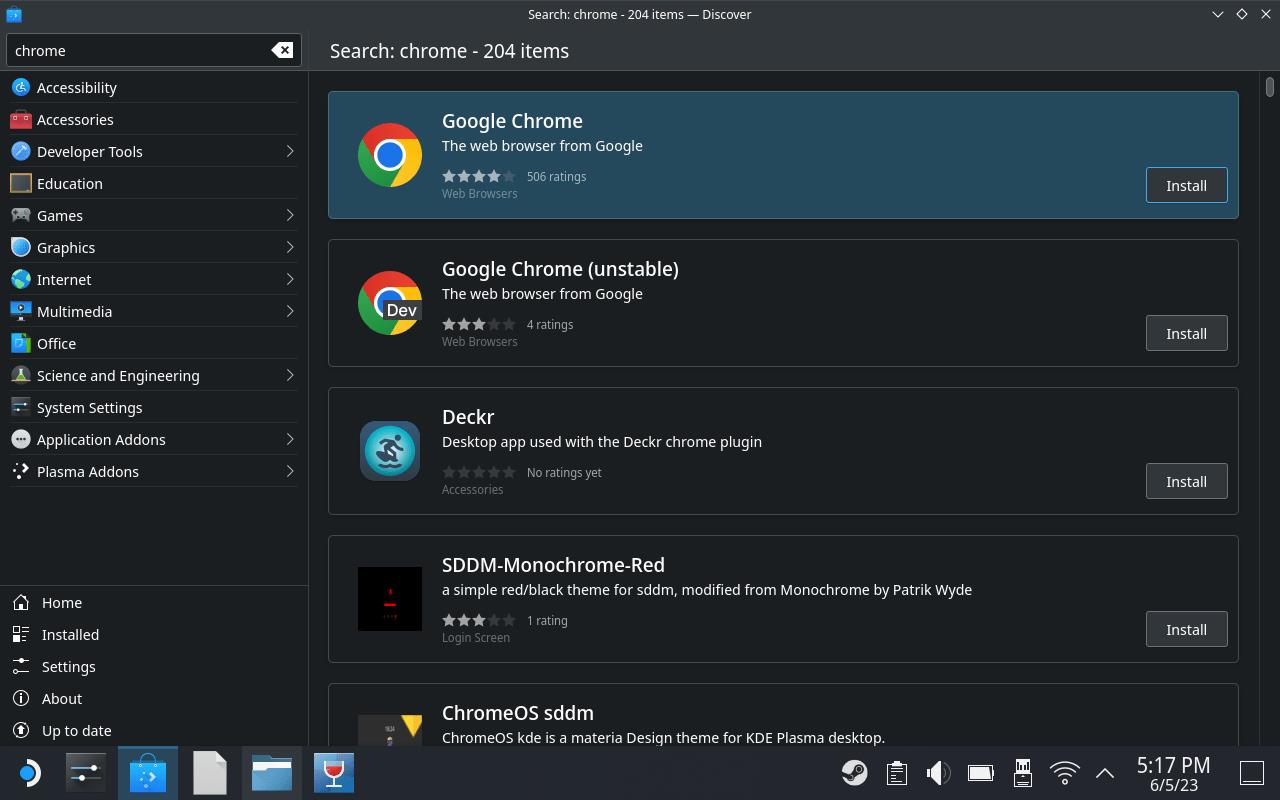
You’ll need a web browser for this, so in case you don’t have one, head to Discover (the little shopping bag icon) on the taskbar, and search for Chrome (or your browser of choice) in the top left corner. If you don’t have a Bluetooth keyboard paired with your Steam Deck, you can summon the on-screen keyboard by pressing the Steam and X buttons at the same time.
<
Once a browser is installed, open it and search for Battle.net. Click on the first option, then there will be an option to download the game launcher right at the top of the that page.
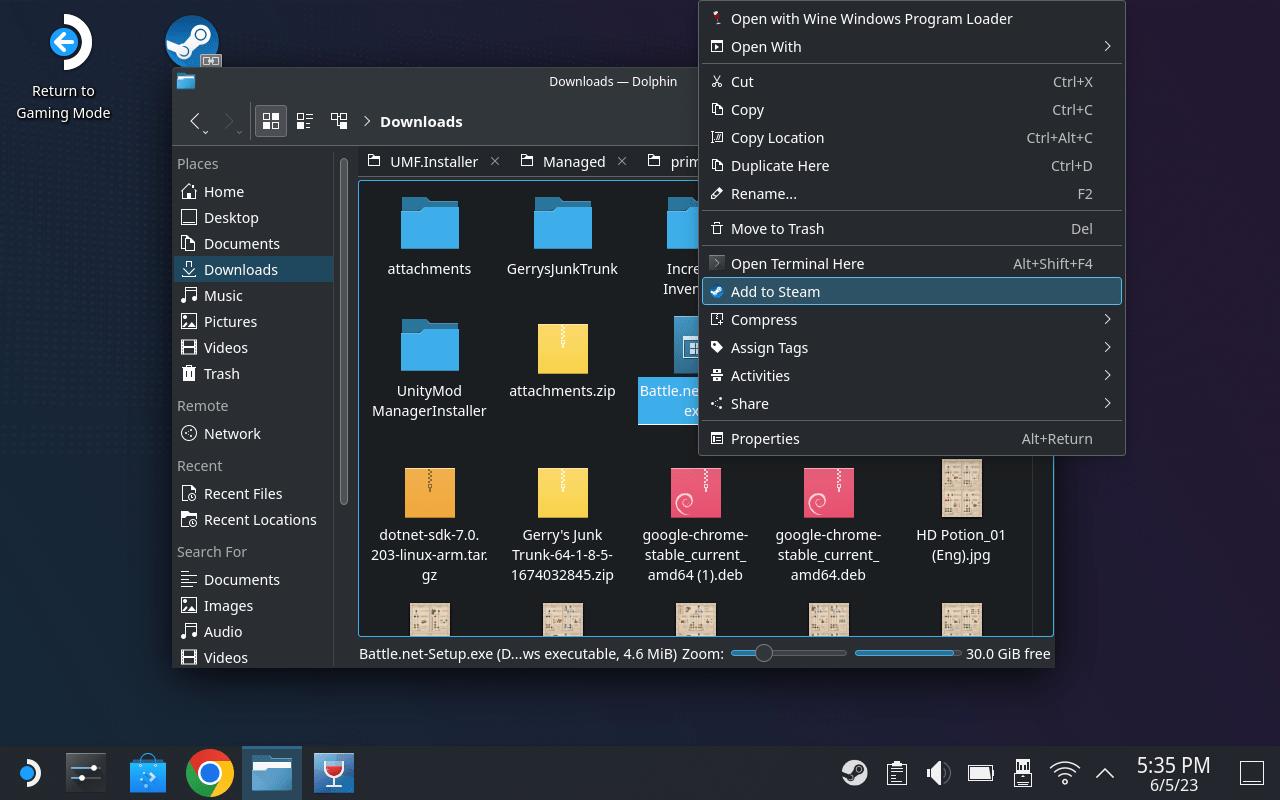
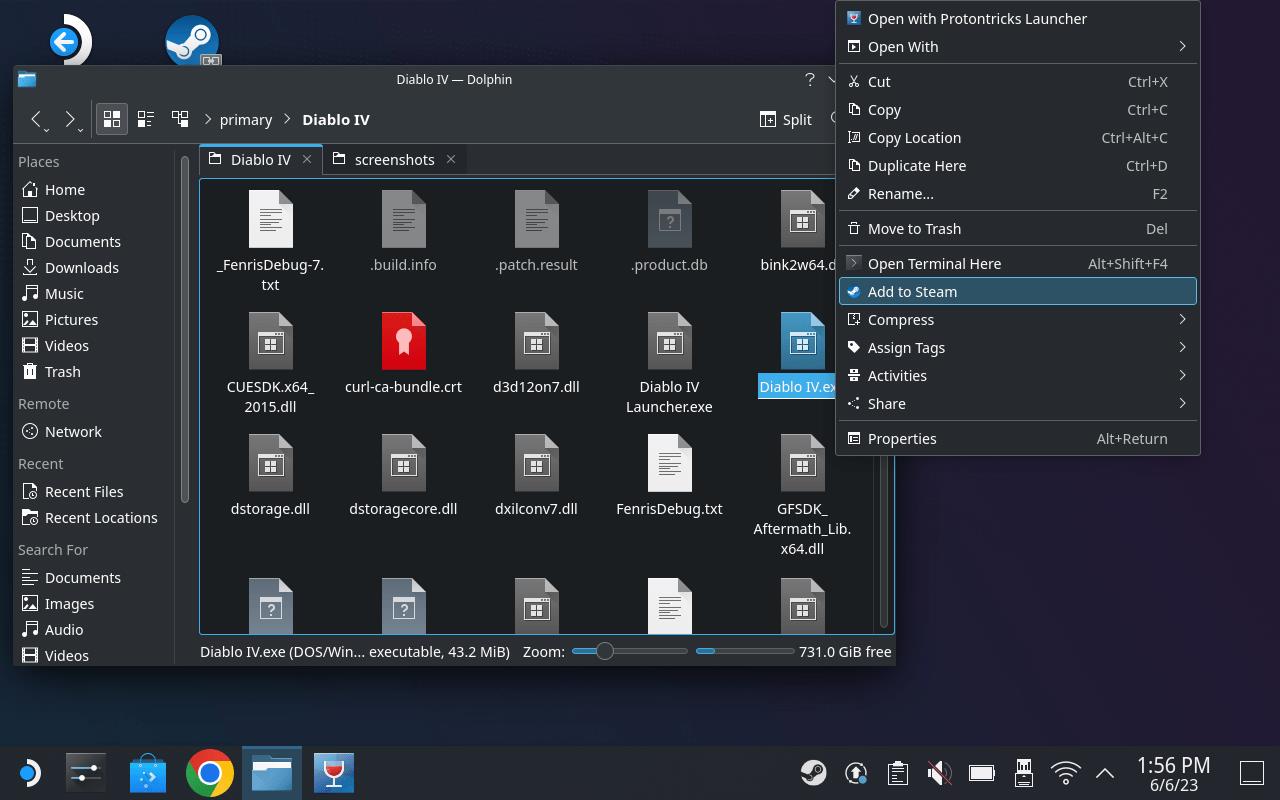
After the file has been downloaded, open your downloads folder by clicking the file explorer (the folder icon on the taskbar called Dolphin). If you have a mouse connected, right click the file “Battle.net-Setup.exe,” or pull the left trigger that mimics the right click action. Then, in the drop-down menu, click the option that says “Add to Steam.” You may see a pop-up from Steam that asks you to add a non-Steam game. If so, simply tap “Browse” on the lower left corner, then select the installer in your downloads folder.
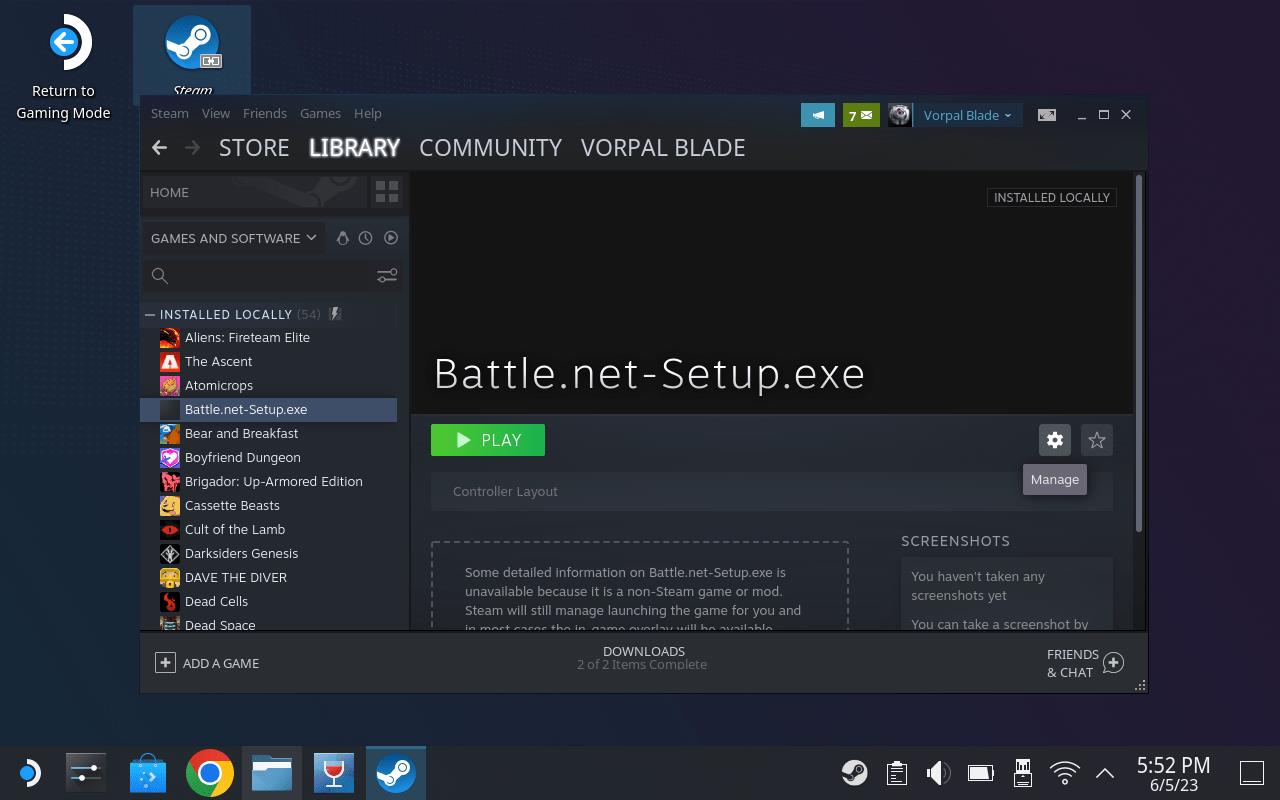
We’re not done yet. After that, open Steam on your desktop (an icon should be there by default). When Steam launches, you should see the name of the Battle.net installer file that you just downloaded along the left side within the “Library” view. Click once to select it, then move your cursor over to the gear-shaped icon on the right (hovering over it shows the word “Manage”). Click it, then navigate go down to “Properties.”
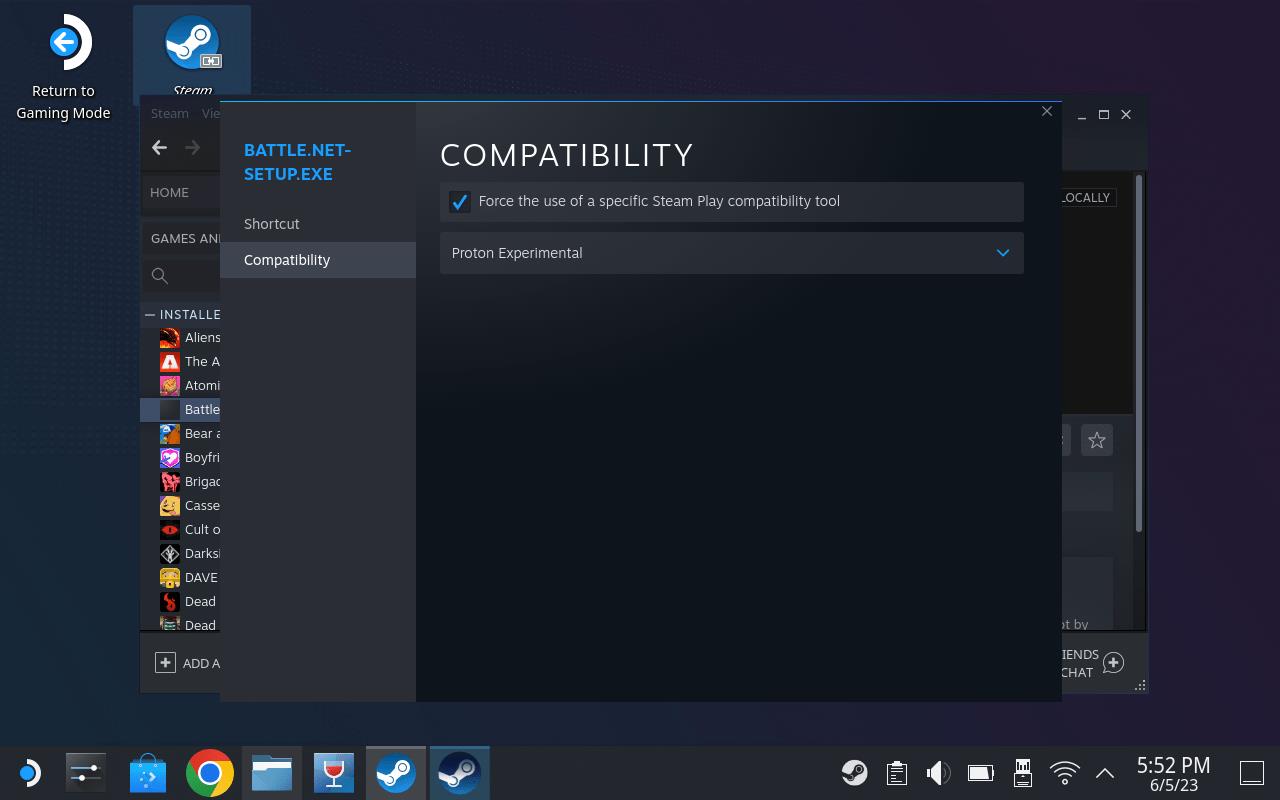
In Properties, you’ll see two options: “Shortcut” and “Compatibility.” Under Compatibility, you’ll find an option that says “Force the use of a specific Steam Play compatibility tool.” Check the box, and you’ll be provided a drop-down button containing a list of different Proton builds. Select “Proton Experimental,” close the settings menu, and then run the installer.
Run through the Battle.net installation as you would on your desktop. By default, the installation will happen on your onboard storage, but alternatively, you can store the app and your games on a microSD card by changing the save destination. On my Steam Deck, it’s nested within the “Z” directory. After clicking into that, expand the “run” folder, then the “media” folder. Lastly, you’ll click the name attached to your microSD card. In our case it’s “mmcblk0p1.” If you mess up at this stage, simply delete the installer from your Steam library, and start the process over.
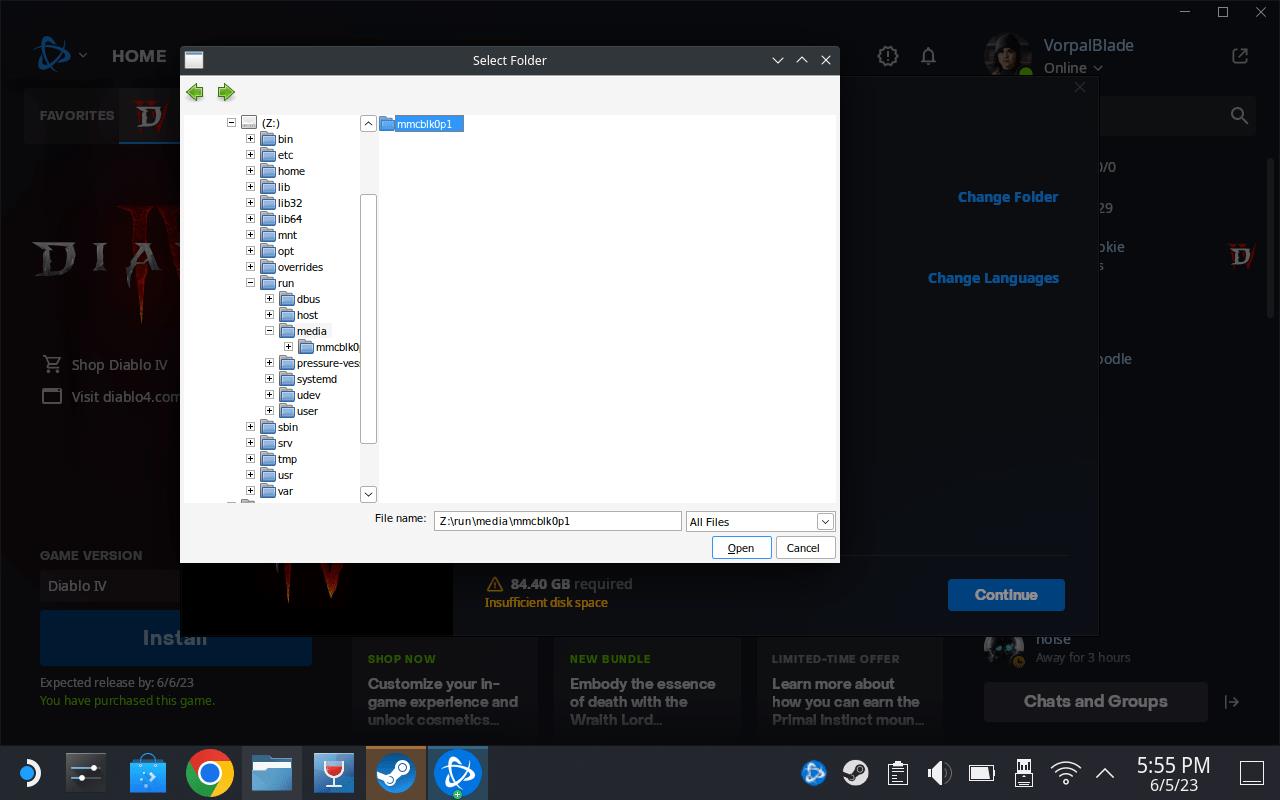
Once the installation is complete, you’ll be prompted to enter your login credentials, after which you can follow the prompts to install Diablo 4 as you would on your desktop PC. If your Steam Deck’s SSD doesn’t have enough free space, you can change the installation location of the game to your removable storage using the same process as before.
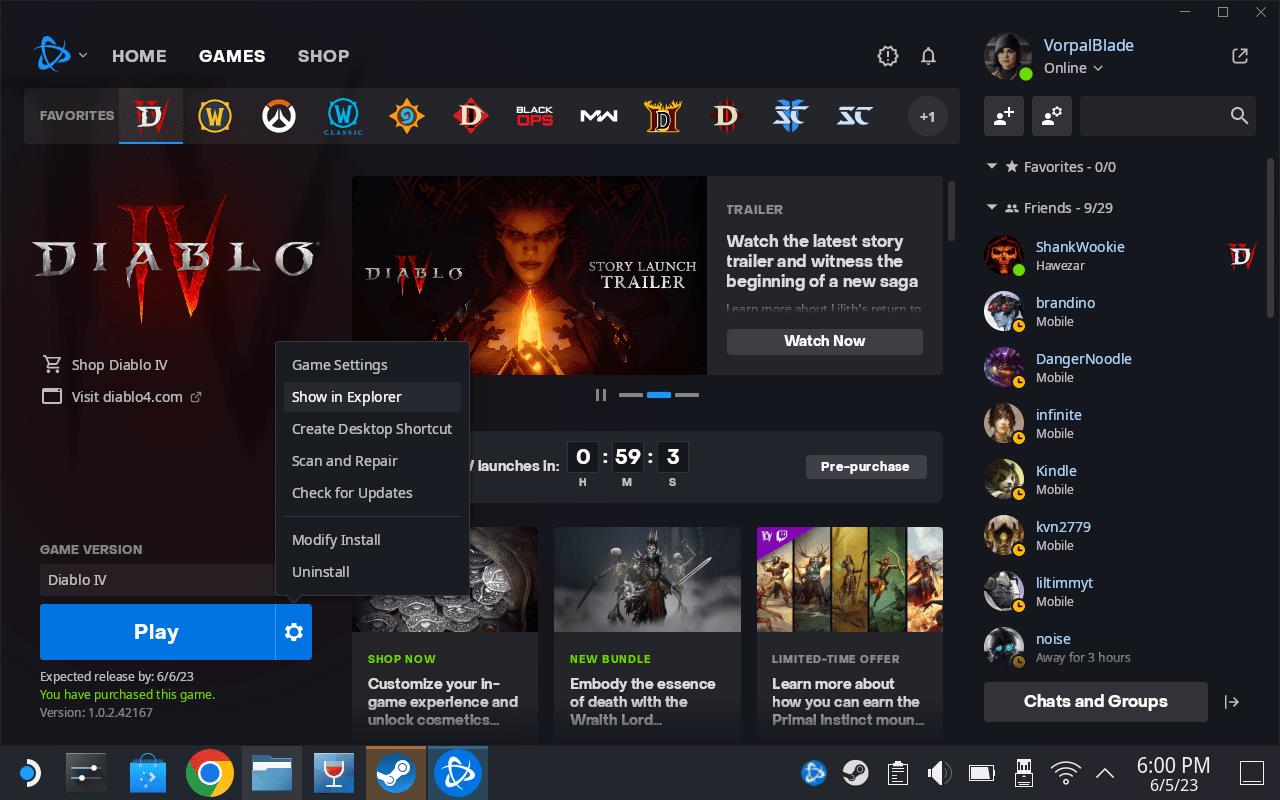
Almost done. With Diablo 4 installed in Battle.net, click the settings icon next to the blue “Play” button, then select “Show in Explorer.” This will open a small window that contains the game’s files. Copy the destination directory by highlighting the text in the bar, right clicking it, and selecting “copy” (in our case, it’s Z:runmediammcblk0p1Diablo 4), then go to your desktop.
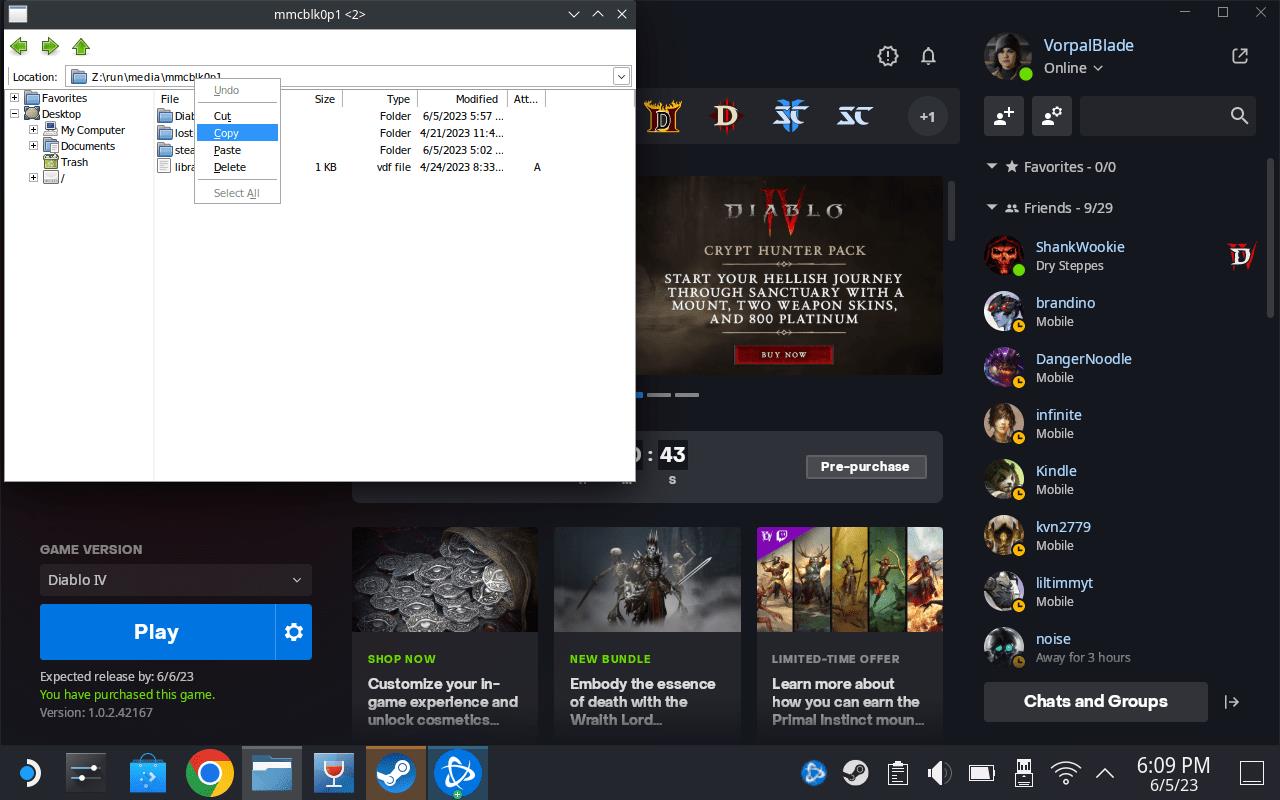
Open the file explorer we used earlier (the folder icon in the taskbar called Dolphin), then paste the destination into the bar at the top of the file explorer to quickly find where Diablo 4 is installed. Open the Diablo 4 folder, scroll down a little, and you should see a file called “Diablo IV.exe,” right-click on it (or, again, as an alternative, you can tap the left trigger), and select “Add to Steam,” just like we did with the Battle.net installer.
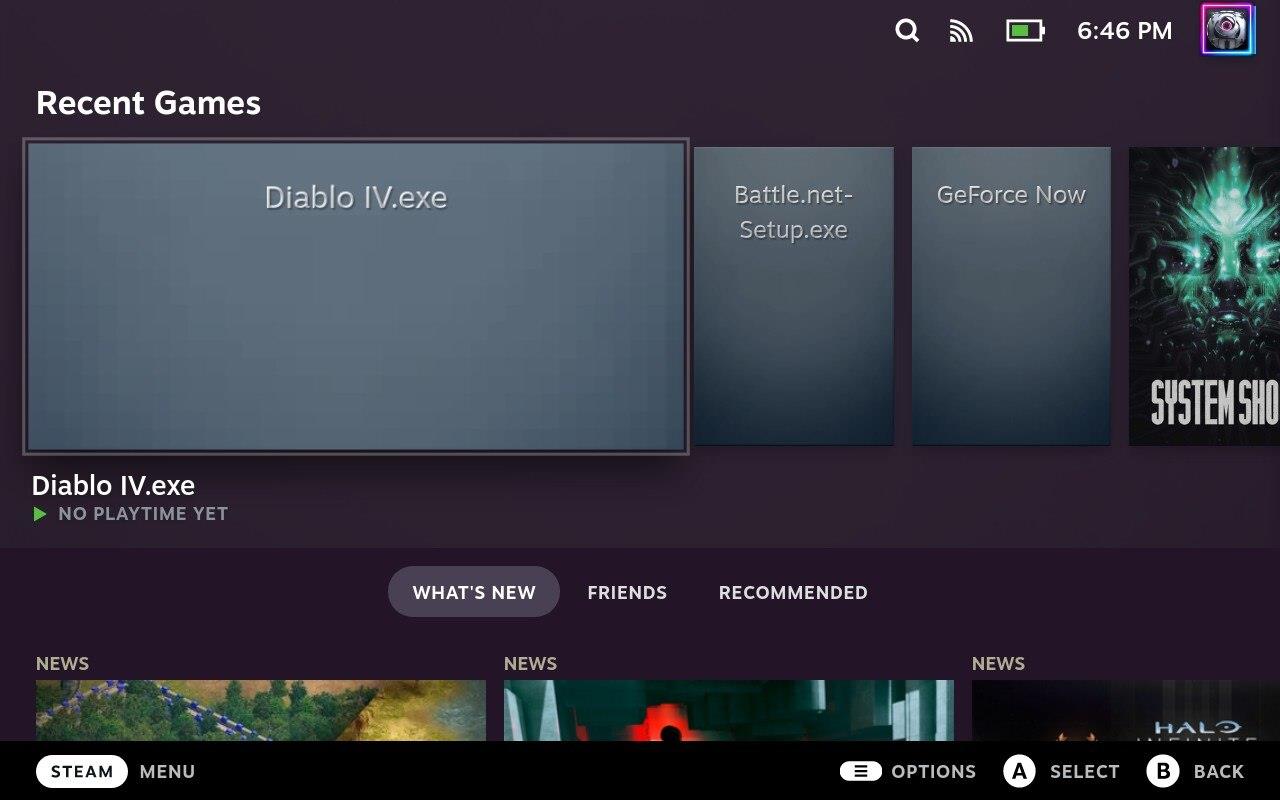
Now, head back over to the Steam app, and you’ll find that file (Diablo IV.exe) in your library. Like before, you’ll want to change the compatibility to “Proton Experimental” using the same steps we outlined earlier for the Battle.net installer.
Launch the application in Steam, and you’ll be taken through the steps of installing and logging into Battle.net again. Don’t worry – you didn’t mess up. Once you finish that process, it should automatically detect your installation of Diablo 4.

With all that done, press play, and it’ll launch Diablo 4. For future sessions, you can launch the game from the Steam Deck’s default view, called “gaming mode.” Just select “Play” once you’ve logged into Battle.net.
While the framerate can dip and stutter occasionally, the Steam Deck handles Diablo 4 pretty well. Currently, the biggest issue I’ve encountered is with using suspend mode on the Steam Deck. Powering off the Steam Deck for over a minute will disconnect you from the Diablo 4 servers, and I haven’t found a way to reconnect without exiting the game altogether.
Best graphics settings for Diablo 4 on Steam Deck
Diablo 4 runs smoothly on Steam Deck at 40-60 FPS with optimized graphics settings prioritizing performance over visuals.
Performance Preset
Use the Medium graphics preset as a base for stable framerates around 45 FPS, limiting in-game FPS to 45 and enabling AMD FSR 2 on Quality. Set Texture Quality to Medium, Shadow Quality to Low, and Particle Quality to Low to minimize dips during combat. Disable VSync, Screen Space Reflections, and Distortion for better responsiveness.
Visual Enhancement Option
For better looks at the cost of battery life, switch to High preset with FSR 2 Quality and FPS cap at 60, targeting 40-60 FPS in open areas. Keep Anisotropic Filtering at 8x-16x and Anti-Aliasing on Medium, but drop Geometric Complexity to Medium. OLED users should enable HDR for richer colors.
Battery Tips
Cap FPS at 30-45 on medium/low settings to extend playtime to 2-3 hours. Turn off FSR entirely for sharper images if accepting 40-50 FPS on Medium preset without upscaling.
Best battery life settings for Diablo 4 on Steam Deck
Diablo 4 on Steam Deck achieves the longest battery life with low-power settings that prioritize efficiency over high framerates.
Optimal In-Game Settings
Set graphics preset to Low or Medium, disable FSR entirely for clarity, and cap FPS at 30-40 in-game. Turn off Distortion, VSync, Screen Space Reflections, and high Shadow/Particle Quality to keep power draw under 15-20W. This yields 2.5-3 hours of playtime, avoiding heavy areas like towns that spike wattage to 25W.
Steam Deck Overlay Adjustments
Limit TDP to 10-12W, frame limit to 30 FPS, and refresh rate to 60Hz via the quick access menu. Enable half-rate shading if available and set GPU clock to medium for sustained 30 FPS without dips. These tweaks reduce heat to 60-70°C while maintaining playable performance.
Play Session Tips
Stick to dungeons and open world over hubs to minimize particle effects and player density. For OLED models, disable HDR to save extra power, targeting 2-3 hours total. Expect variance based on Season content, but these hold steady across LCD/OLED.