Hidden deep in the Gerudo Desert, the Kudanisar Shrine challenges players with shifting sands, scorching heat, and clever physics puzzles. This guide breaks down how to reach its remote location and solve every step of the “Power of Motion” trial inside.
If you haven’t completed the “Riju of the Gerudo Town” main quest line, you may have an even more difficult time of reaching this shrine, as the surrounding areas will be covered in a massive sandstorm. We recommend that you complete that segment of the main story first, so you’ll have an easier time spotting the shrine and exploring the region.
When you’re done, our shrine locations page or interactive Hyrule map can direct you toward something else to do.
Kudanisar Shrine location
Kudanisar Shrine is located in the Gerudo Desert region, southwest of Gerudo Town. You can find it near the Mayatat Shrine and close to the edge of the Palu Wasteland. The easiest way to reach it is by following the road leading south from Gerudo Town, then heading toward the sandy cliffs. Keep an eye out for the shrine’s glow among the dunes, as it can be partially obscured by sandstorms in the area.
The Kudanisar Shrine is found within the Gerudo Desert region. The exact coordinates are (-4168, -2144, 0050). This shrine can be a little difficult to reach as it’s surrounded by drifting sands and powerful Soldier Constructs.
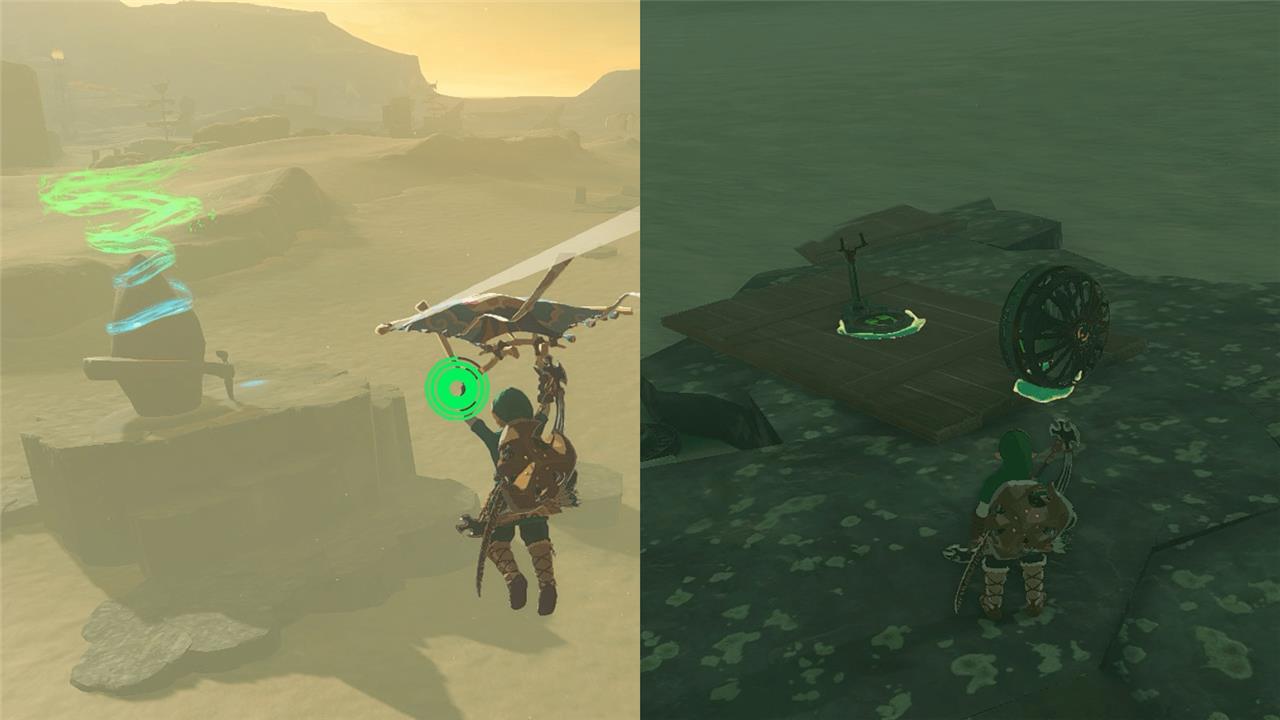
There are a few methods of reaching the shrine: gliding or creating a sled vehicle. To reach the Kudanisar Shrine by gliding, travel to the Gerudo Highlands Skyview Tower, and glide over to the shrine’s entrance. If you’d like to create a powered sled, there are a lot of wooden planks to the north and to the south of the shrine. Attach a fan and a steering stick to the wooden plank, and steer it towards the shrine’s platform.
Kudanisar Shrine walkthrough
Kudanisar Shrine focuses on using wind currents to reach higher platforms and access the exit. Begin by jumping into the main chamber and using your paraglider to catch the strong updrafts. Adjust your glider path to collect the chest on the nearby ledge before gliding toward the final platform. Land near the altar and interact with the sigil to complete the shrine challenge.
The Kudanisar Shrine tests your ability to traverse drifting sands with wooden planks and empowered sleds.
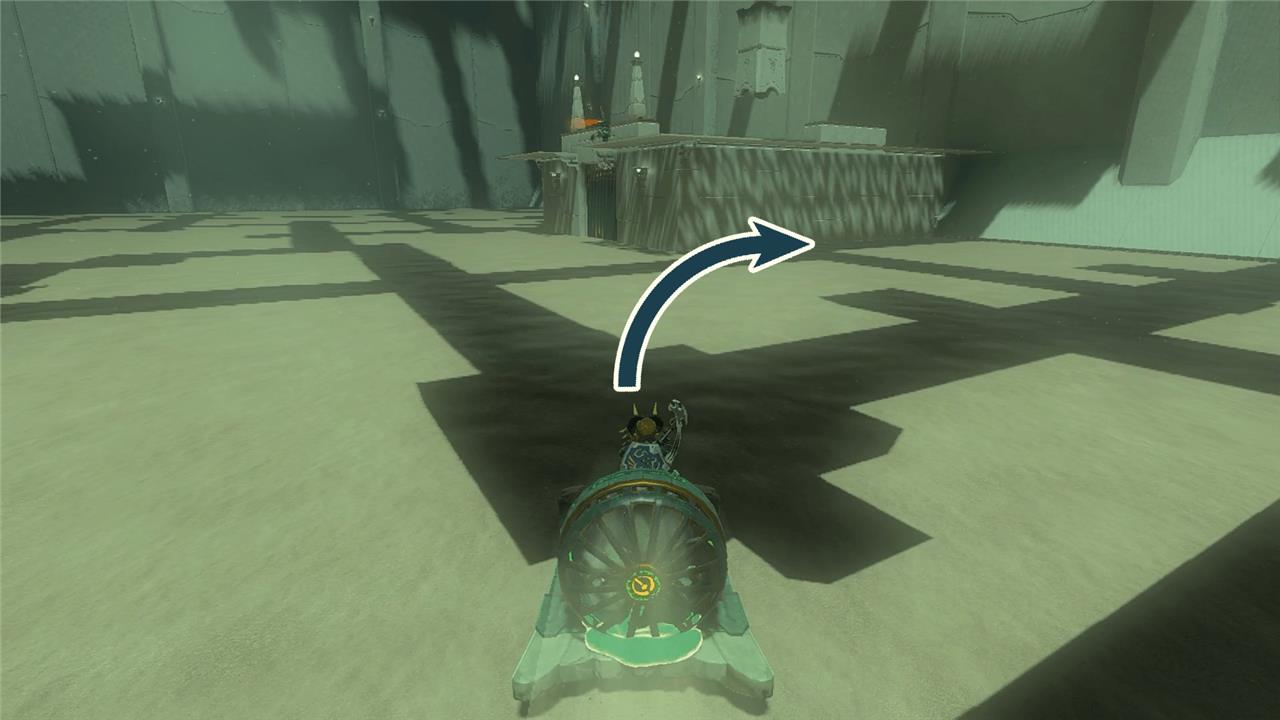
1. Proceed down the stairs to find wooden planks floating down the sand.
2. Hop across the wooden planks to the next platform. If you don’t make it on top of the wooden planks, continue as far as you can to either the next wooden plank or the other platform.
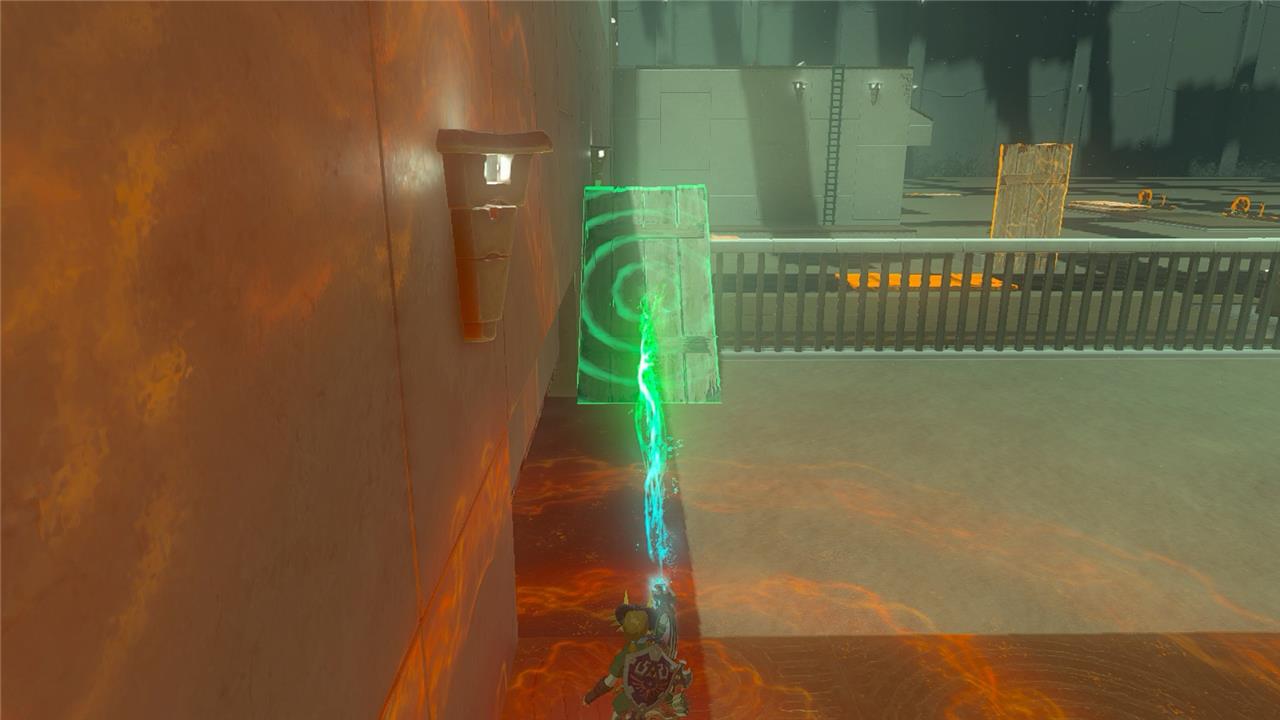
3. Grab one of the drifting wooden planks with Ultrahand, and lean it against the fence ahead of you. It will drift with the sand, but it’ll get stopped by the wall.
4. Take a running leap over to the wooden ramp, and use the ramp to climb over the wall.
5. Defeat the Construct hiding behind the wooden plank.
6. Make your way across the drifting sand to the ladder ahead of you by jumping to the wooden planks.
7. Climb up the ladder and step on the square orange button to launch a small ball across the room.
8. Face the direction that the ball was sent to find a staircase that leads down to the drifting sand.
9. Glide over to the two Zonai sled contraptions, and drive one of them over to the cube platform with a Construct on top of it to the right.
10. Park your vehicle on the same side as the flat wooden plank and grab the upright wooden plank with Ultrahand.
11. Lean the wooden plank onto the platform where the Construct is standing to create a ramp, and make your way onto the platform.
12. Defeat the Construct, and open the chest to find a hasty elixir.
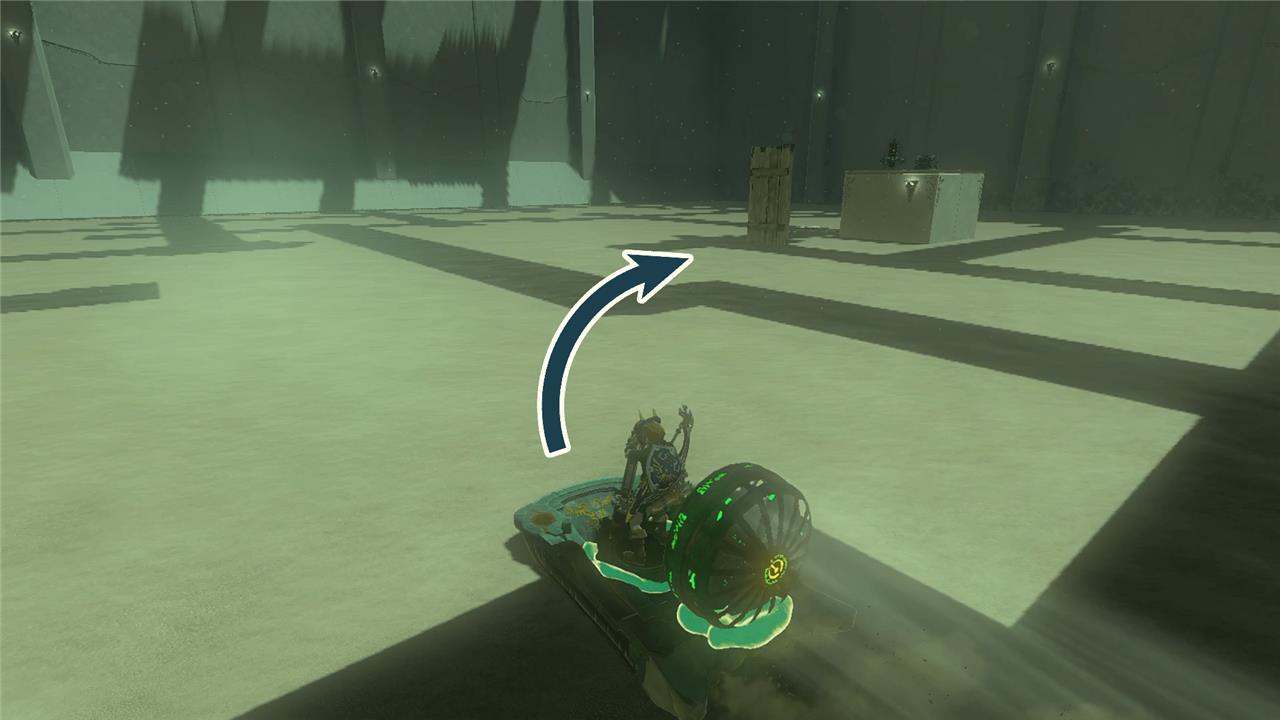
13. Hop back onto your vehicle, which may need to be readjusted to point towards the platform where the ball was sent.
14. Drive your vehicle underneath the see-through platforms, and use Ascend to reach the higher floor.
15. Defeat the two Constructs, and make your way to the lower level to find two Zonai sled contraptions, a button, and the ball, which is conveniently blocked by a gate.
16. Attach the ball to the front of one of the Zonai sled contraptions, and then step onto the button to open the gate.
17. Use Ultrahand to move the sled onto the sand, and take control of the vehicle.
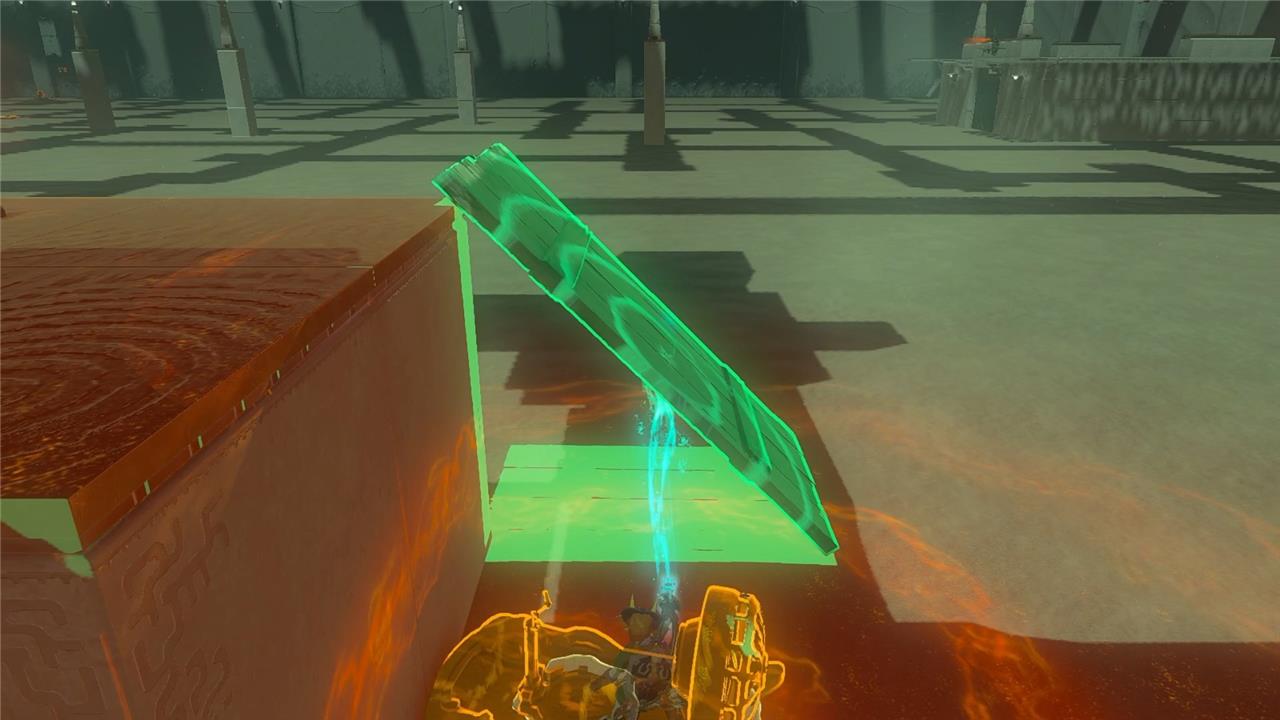
18. Drive the vehicle back to where you got the first sled to find two wooden planks laying flat on the ground and one wooden plank upright in the sand.
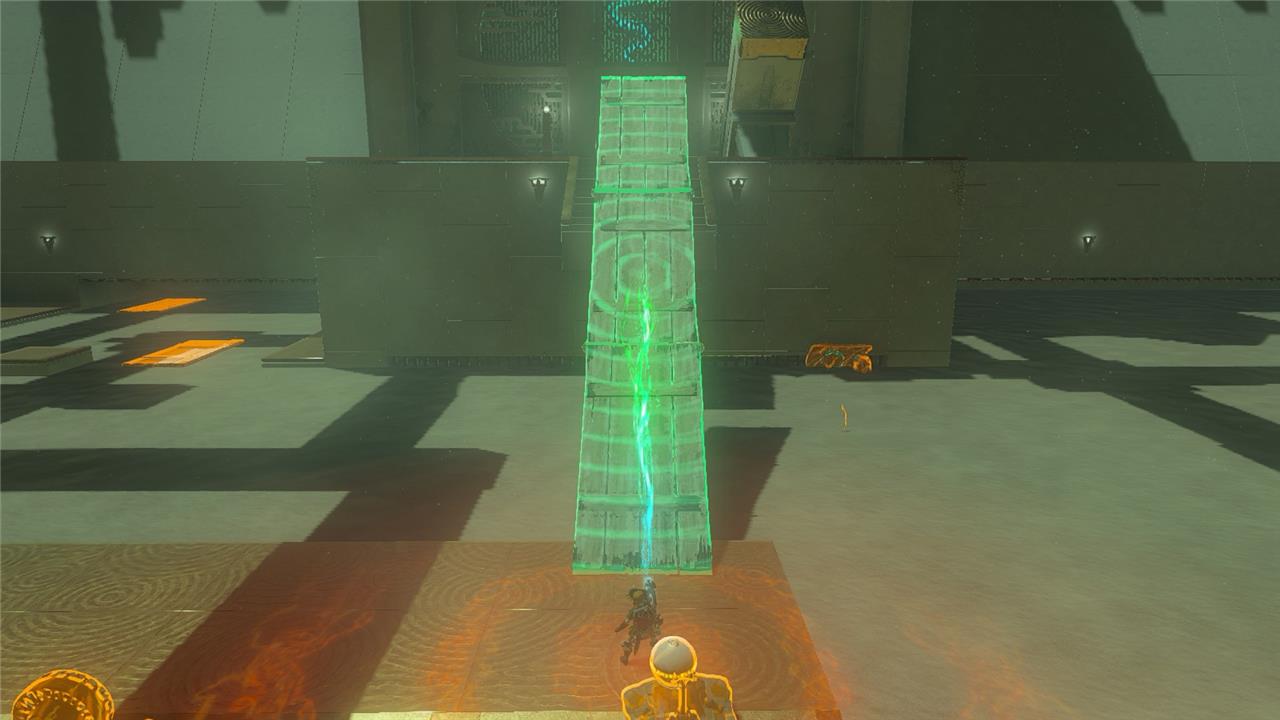
19. Attach the three wooden planks together lengthwise to create a bridge that will cover the gap between the stairs and the platform.
20. Detach the ball from your vehicle, and place it into the bowl switch at the top of the stairs to unlock the exit.
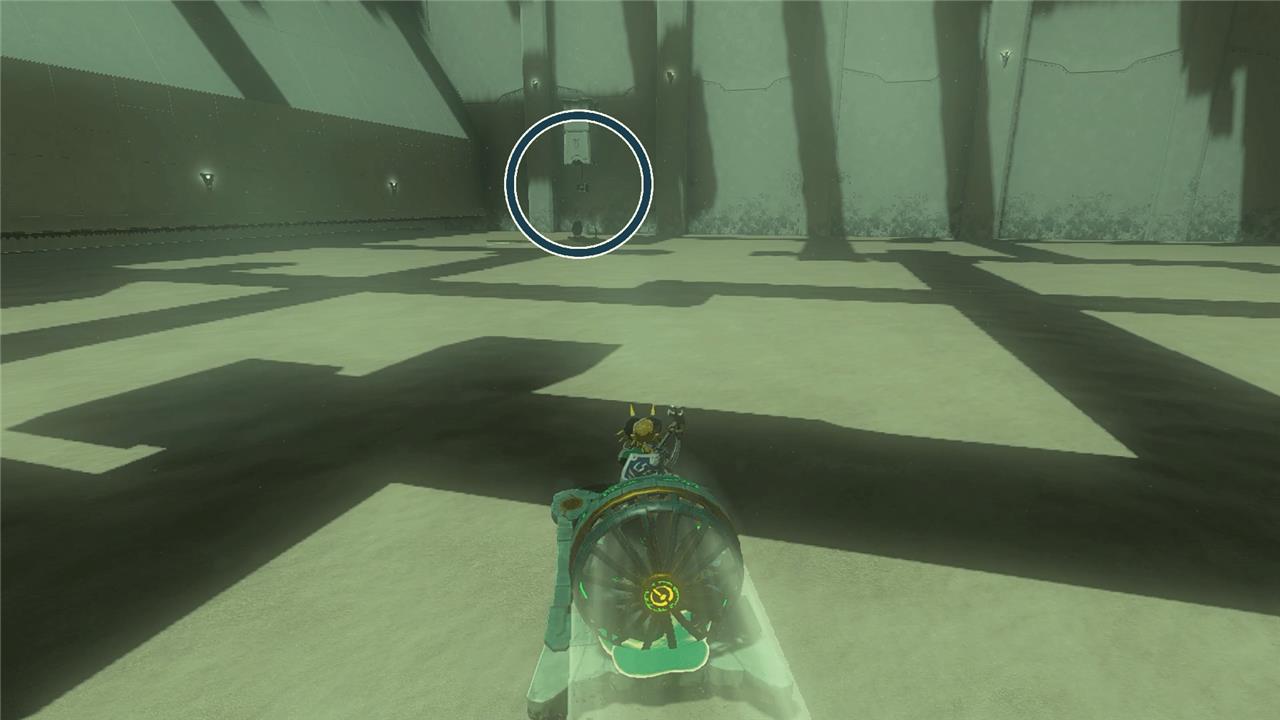
21. Return back to your vehicle at the bottom of the bridge, and turn to the left to spot a chest hanging by a rope in the distance.
22. Adjust your vehicle to point in the direction of the hanging chest, and drive over to the lone platform in the sand.
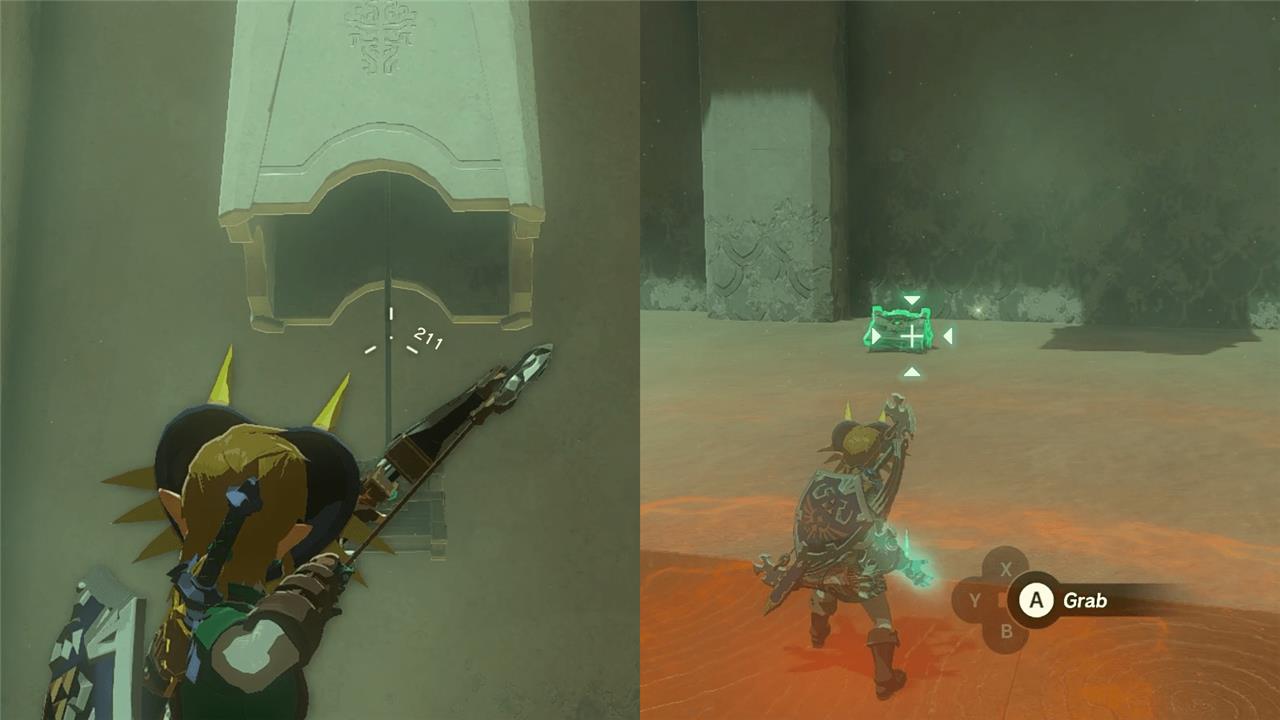
23. Shoot the rope with an arrow, and quickly switch to Ultrahand to grab the drifting chest.
Best route from Gerudo Highlands Skyview Tower to the shrine
Gerudo Highlands Skyview Tower Activation
Activate the Gerudo Highlands Skyview Tower first by entering from below using Ascend after building a raft from nearby Zonai planks to cross the waterfall cave. This unlocks the map for precise navigation.
Optimal Route to Kudanisar Shrine
Launch from the tower and paraglide southwest toward the Gerudo Desert, aiming for coordinates (-4167, -2143, 0064) at Karusa Valley’s entrance. Follow the valley’s cliffs to skirt quicksand pits, landing directly on the shrine’s elevated stone platform.
Travel Tips
Stamina management is key-use elixirs if needed for extended gliding. Avoid deep sand by hopping between rock pillars or using nearby ruins for footing upon descent.
Fastest flight path to Starview Island from the tower
Gerudo Highlands Skyview Tower Launch
Launch from Gerudo Highlands Skyview Tower and immediately glide northeast toward the North Gerudo Sky Archipelago. Spot the first small island with a water pool and a movable platform equipped with two rockets, around coordinates (-3664, -0852, 1965).
Rocket-Assisted Flight Path
Clear the guarding Construct, mount the platform, attach one rocket vertically to the center (fins down) and ignite it to rocket upward near the massive Starview Island sphere. Then attach the second rocket at a 45-degree angle toward the sphere, fire it to curve the platform closer, and paraglide or low-gravity jump to the sphere’s top entrance on the far side.
Final Approach Tips
Exploit the low-gravity environment for extended glides between islands; use updrafts from illuminated mirrors if available. Diagonal gliding conserves stamina while ascending faster to the central hub.