Hidden deep beneath Hyrule’s surface, the Anedamimik Shrine challenges players with a clever mix of motion puzzles and strategic thinking. This guide explains how to reach its exact location and master each step to claim your well-earned Light of Blessing.
The shrine is below ground in a cave system, and you’ll need to drain the pool of water it’s standing in to be able to access it.
When you’re done, our shrine locations page or interactive Hyrule map can direct you toward something else to do.
Anedamimik Shrine location
Anedamimik Shrine is situated in the East Necluda region, southwest of Hateno Village and near Walnot Mountain. The exact coordinates are roughly (4532, -2164, 0010). To reach it, follow the winding path from the Hateno Ancient Tech Lab toward the cliffs overlooking the sea. The shrine sits in a snowy area, so wearing cold-resistant gear or consuming warming meals helps you traverse the frosty terrain safely.
Anedamimik Shrine is in the East Necluda region of Hyrule, on the south coast above Deepback Bay. It’s located inside the Deepback Bay Cave; the entrance to the cave is right on the beach, and the shrine is just inside. The exact coordinate of the shrine are (4231, -2178, -0012).
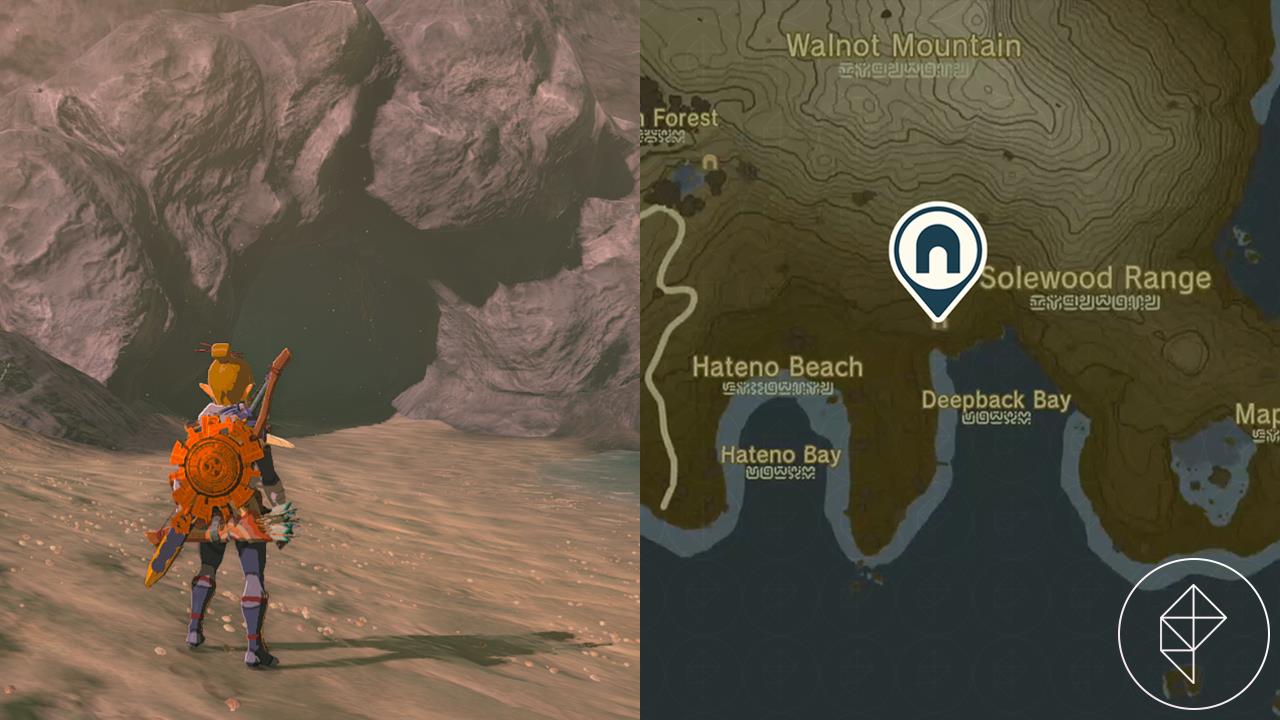
There are a couple of Horriblins to defeat before you reach the shrine, which is standing in a pool of water. The water surrounding the shrine needs to be drained before you can enter. Descend into the cavern below, defeat the Like Like on the ceiling, and you’ll see a cluster of cracked rocks in the ceiling. Blow these up these with a bomb flower attached to an arrow, and the water will drain out. Use Ascend to bring you right back up the the shrine and go in.
Anedamimik Shrine walkthrough
The Anedamimik Shrine features a physics-based puzzle focused on timing and balance. Use the moving platforms and zonai devices to reach higher sections and activate switches. Carefully observe the motion of each element to cross gaps safely. After manipulating the mechanisms correctly, you can reach the final chamber and collect the Light of Blessing as your reward.
As the quest name “A Retraced Path” suggests, Anedamimik Shine is all about using Recall to send a giant ball back where it came from. You’ll need to use Ascend to grab the chest here, too.
1. On entering, note the assembly on the wall to your right: a chute that drops a big metal ball, a bowl switch attached vertically next to the chute, and a platform bearing a chest. Hitting the switch pillar in front of you slides this whole assembly backwards and forwards.
2. Hit the switch once, sliding the wall assembly toward the back of the shrine. This brings the platform with the chest over the shrine floor. Run over to it and use Ascend to reach the chest and claim a large Zonai charge.
3. Head back to the switch and hit it again to return the wall assembly to its original position, with the ball dropping out of the chute and rolling across the room in front of you.
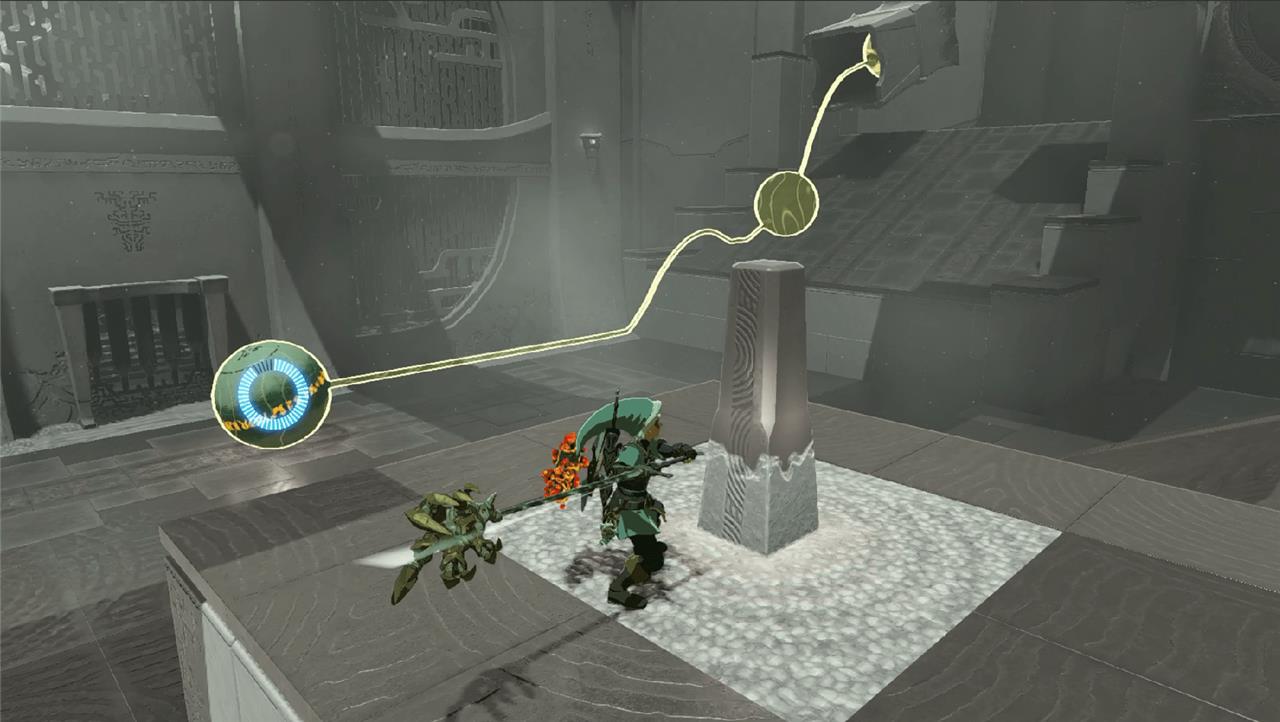
4. Cast Recall on the ball as it’s rolling across the floor to send it back towards the chute.
5. Hit the switch immediately after casting recall to move the wall assembly forward, so the bowl switch is where the chute was. The ball will follow its trajectory backwards to fit neatly into the socket.
Anedamimik Shrine full puzzle solutions
Anedamimik Shrine features the “A Retraced Path” puzzle, which requires precise timing with Recall and a sliding wall mechanism to guide a metal sphere into a target bowl.
Access Puzzle
Enter Deepback Bay Cave southeast of Hateno Village at coordinates 4206, -2291, 0000. Defeat Horriblins and a Like Like below the flooded shrine chamber, then shoot Bomb Flowers at cracked ceiling rocks to drain the water. Use Ascend to clip through the floor back to the entrance at 4233, -2175, -0012.
Chest Reward
Inside the shrine, hit the central orange switch to slide the right wall assembly backward, aligning a platform under the chest. Quickly Ascend onto it to claim a Large Zonai Charge, then hit the switch again to reset.
Main Puzzle Solution
Stand by the switch as a metal sphere dispenses from the chute and rolls toward you. Cast Recall on the sphere to reverse its path, then immediately hit the switch to advance the wall-placing the bowl target in the sphere’s reversed trajectory. The sphere enters the bowl, opening the gate; rush through before Recall ends. Interact with the altar for your Light of Blessing.
Deepback Bay Cavern exact coordinates
Deepback Bay Cave (also called Deepback Bay Cavern) entrance sits on the beach southeast of Hateno Village in East Necluda, with the most precise coordinates listed as 4203, -2295, 0000 or nearby 4208, -2276, 0001.
Internal Key Points
The Anedamimik Shrine lies deeper inside at 4231, -2178, -0012 (or slight variants like 4233, -2175, -0012), within a flooded chamber.
A Bubbulfrog hides behind the shrine at 4264, -2128, -0004, accessible after draining the water by bombing ceiling cracks past a Like Like.
Access Notes
Glide east from Hateno Ancient Tech Lab to spot the cave mouth on Deepback Bay’s western shore; expect Horriblins inside before reaching the waterlogged shrine area.